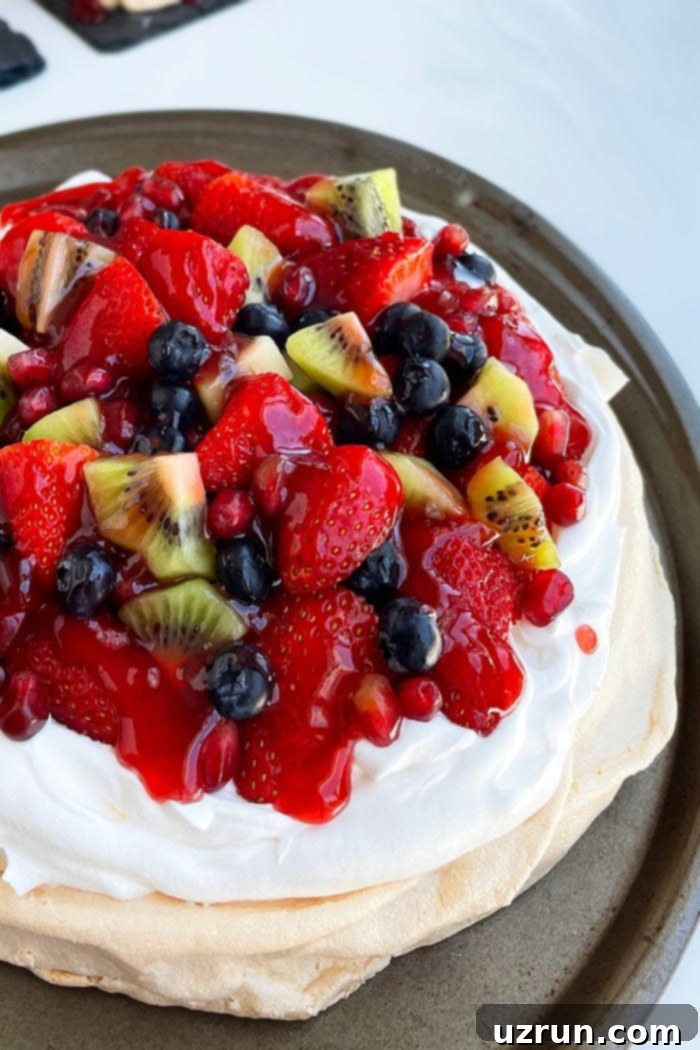
Easy Homemade Pavlova Recipe: Achieve Crispy Perfection & Marshmallow Softness
Unlock the secrets to crafting a show-stopping homemade Pavlova from scratch using just a few simple ingredients. This delightful dessert promises an irresistible contrast: a remarkably light and airy interior that melts in your mouth, perfectly complemented by a delicate, crispy shell. Get ready to impress with this elegant and utterly delicious treat!
If the delicate crunch of meringue and the soft, pillowy texture of marshmallows call to your sweet tooth, then today’s featured dessert is about to become your new obsession! Pavlova masterfully combines the best of both worlds, delivering a dessert that is incredibly light, wonderfully crispy, and exquisitely soft on the inside. The vibrant fruit topping adds the ideal counterpoint, infusing each bite with a bright, juicy, and naturally sweet balance. For more meringue magic, be sure to explore our Easy Meringue Cookies and the classic Lemon Meringue Pie.
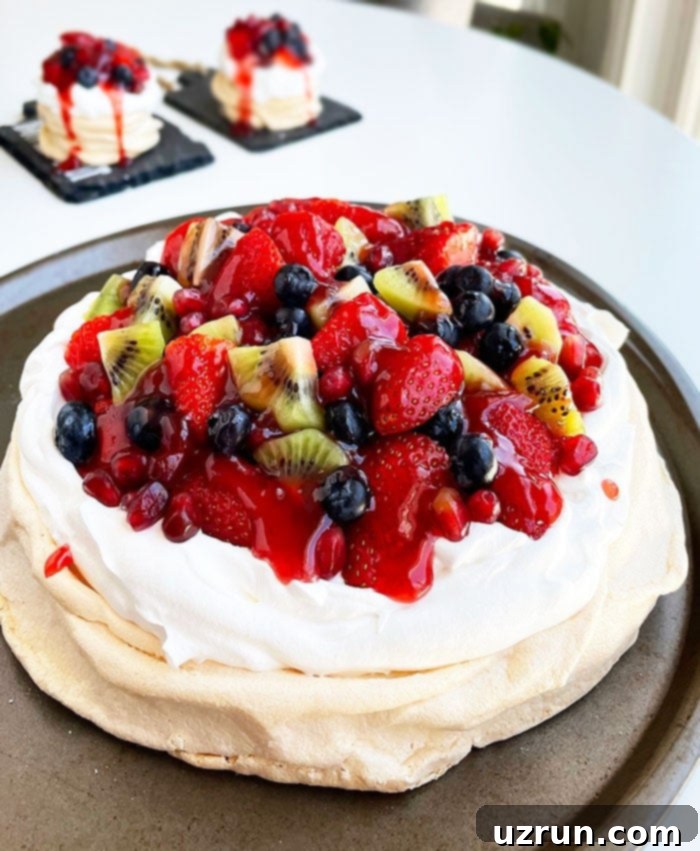
What is Pavlova? A Dessert with a Rich History and Unique Texture
Originating from the culinary traditions of Australia and New Zealand, Pavlova is a dessert celebrated for its spectacular presentation and delightful texture. It’s essentially a meringue-based cake, meticulously crafted by whipping egg whites until they form stiff, glossy peaks, then gently baking them at a low temperature. This slow baking process is crucial, allowing the meringue to dry out and develop its signature characteristics: a beautifully crisp, brittle crust on the outside, and a wonderfully soft, almost marshmallow-like interior. Named in honor of the Russian ballerina Anna Pavlova, this dessert is as graceful and enchanting as its namesake, offering a light, ethereal experience that’s a true joy to behold and devour.
What Is The Difference Between Meringue and Pavlova? Unpacking the Textural Nuances
While both meringue and Pavlova share a common foundation—whipped egg whites and sugar—their final textures set them distinctly apart. Traditional meringues are known for being crisp all the way through, from their delicate exterior to their airy core. They typically shatter upon biting, offering a consistent, dry crunch. Pavlova, however, offers a captivating dichotomy. Its outer shell boasts the characteristic crispness of a classic meringue, providing a satisfying crackle with every forkful. Yet, beneath this fragile crust lies a wonderfully soft, moist, and chewy interior, reminiscent of a cloud or a gourmet marshmallow. This unique contrast is primarily achieved through the addition of cornstarch and a touch of acid (like vinegar or cream of tartar) to the egg white mixture, which helps stabilize the proteins and prevents the meringue from drying out completely in the center during baking. This creates the signature pillowy softness that makes Pavlova so special.
What Are The Three Essential Components of a Perfect Pavlova?
A truly exquisite Pavlova is a symphony of three distinct, yet harmonious, layers that come together to create a balanced and irresistible dessert:
- The Meringue Base: This is the heart of the Pavlova, forming a delicate, airy “cake” with its signature crispy exterior and soft, chewy interior. It’s the canvas upon which the other flavors are built.
- Velvety Whipped Cream: A generous layer of freshly whipped cream adds a luxurious, creamy texture and a subtle richness that perfectly complements the meringue’s sweetness and lightness. It acts as a cooling, smooth blanket over the crisp base.
- Fresh, Vibrant Fruits: The crowning glory of any Pavlova! A colorful assortment of fresh, seasonal fruits provides a burst of juicy freshness, tartness, and natural sweetness. This not only adds visual appeal but also cuts through the richness of the cream and meringue, creating a perfectly balanced flavor profile.
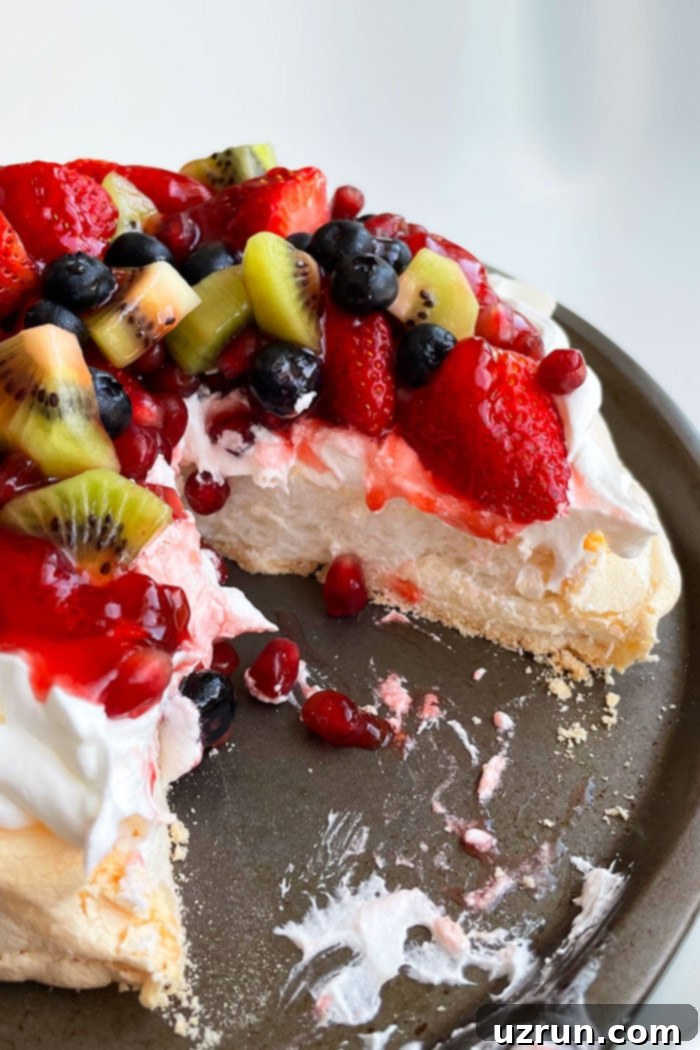
How To Make Easy Pavlova Recipe From Scratch: A Step-by-Step Guide
Creating your own stunning Pavlova at home might seem daunting, but with these clear steps and a little patience, you’ll achieve perfection every time. The key is in the technique and understanding the role of each ingredient.
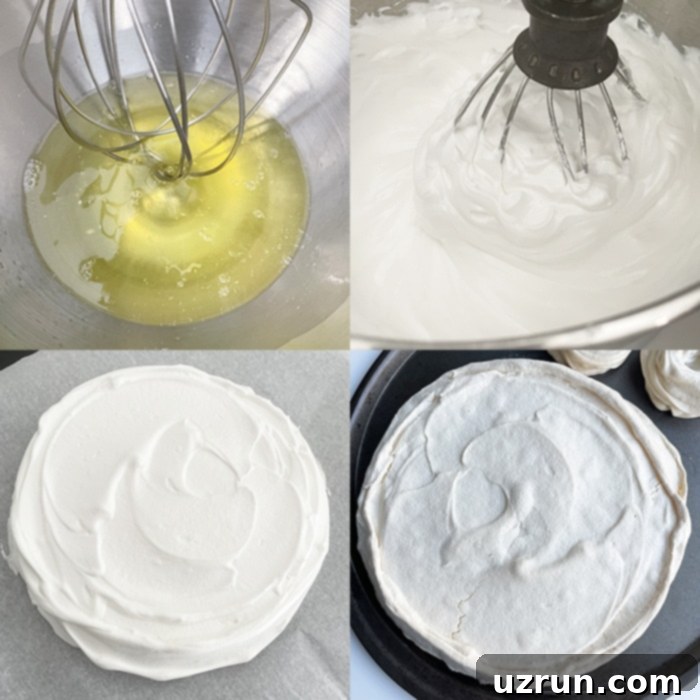
- Prepare Your Egg Whites: Begin by beating room temperature egg whites in a clean, dry bowl. Beat them until they become frothy and hold soft peaks. This initial whipping introduces air, which is essential for the Pavlova’s light structure.
- Gradually Introduce Sugar and Cornstarch: Once soft peaks form, slowly add your superfine sugar, a tablespoon at a time, while continuously beating. The gradual addition allows the sugar to fully dissolve, resulting in a stable, glossy meringue. Follow with the cornstarch, which is crucial for achieving the classic marshmallowy interior.
- Incorporate Vanilla and Vinegar: Mix in the vanilla extract for flavor and vinegar (or cream of tartar) for stability. Continue beating until the mixture is thick, glossy, and forms very stiff peaks. You should be able to hold the bowl upside down without the mixture budging, and when rubbed between two fingers, it should feel smooth, not gritty.
- Shape the Meringue: Gently spread the prepared meringue mixture onto a baking tray lined with parchment paper, forming a circular base. For best results, draw a 9-inch circle on the parchment paper beforehand as a guide. You can create a slight well in the center to hold your toppings later.
- The Crucial Baking Process: Place the tray in a preheated oven, then immediately reduce the temperature to a very low setting. This low and slow baking is vital for drying out the meringue without browning it too quickly. Absolutely resist the urge to open the oven door during this stage!
- Cooling and Drying: Once baked, turn off the oven but do not open the door. Allow the Pavlova to cool completely inside the oven for at least 2-3 hours, or even overnight. This extended cooling and drying period prevents cracking and ensures the desired crispy exterior and soft interior.
- Top and Serve: Just before serving, lavishly top your perfectly cooled Pavlova with fresh homemade whipped cream, a medley of colorful fresh fruits like strawberries, blueberries, and kiwi, and a drizzle of warm strawberry jam for an extra layer of sweetness and shine. Serve immediately to enjoy its peak texture!
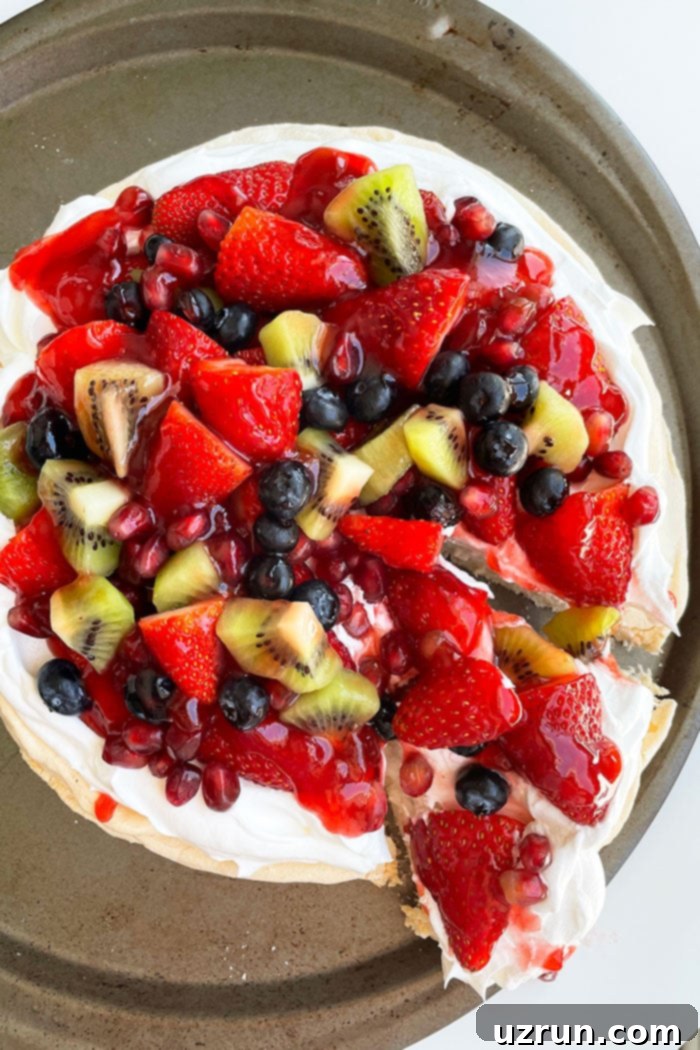
Exciting Pavlova Variations: Get Creative with Flavors and Presentation
While the classic fruit and cream Pavlova is undeniably delicious, this versatile dessert offers a fantastic canvas for culinary creativity. Here are some delightful variations to inspire your next baking adventure:
- Individual Mini Pavlovas: Instead of one large Pavlova, create charming individual desserts by piping smaller circles onto your baking tray. These mini versions are perfect for portion control, elegant entertaining, or simply for a personalized treat.
- Decadent Chocolate Pavlova: Transform your Pavlova into a rich chocolate experience. Gently fold a small amount of unsweetened cocoa powder into your meringue mixture before baking. Once cooled, omit the traditional fruit and instead top with a luscious Chocolate Ganache drizzle, chocolate chips, crumbled Oreo cookies, or even chopped candy bars for an indulgent twist.
- Tangy Lemon Pavlova: For a bright and zesty flavor profile, substitute the whipped cream with a homemade Lemon Curd. The tartness of the lemon beautifully cuts through the sweetness of the meringue, creating a refreshing dessert. Garnish with fresh berries or thin lemon slices.
- Spectacular Layer Cake Pavlova: Elevate your presentation by making a multi-layered Pavlova cake. Prepare two or three separate meringue disks (or carefully slice a larger one) and stack them with layers of whipped cream and fruit in between. This creates a stunning centerpiece that’s surprisingly light.
- Add a Splash of Color: Infuse your Pavlova with vibrant hues! Use gel food coloring (avoid liquid, as it can affect consistency) to tint your meringue mixture. This is a fantastic way to customize your dessert for special occasions or holidays. Imagine festive red and green for Christmas, or spooky white and black for Halloween.
- Experiment with Flavors: The possibilities for flavoring your Pavlova are endless. Beyond vanilla, try extracts like peppermint, almond, coconut, or orange for unique profiles. Spices like cinnamon or cardamom, or even a shot of espresso powder, can add depth. Just remember to pair them with complementary fruit toppings. For instance, a coffee-flavored Pavlova would be exquisite with sliced bananas or chocolate shavings, while a mint Pavlova might pair wonderfully with berries and a hint of lime.

Expert Tips And Techniques for Pavlova Perfection
Mastering Pavlova requires attention to a few key details. These tips and techniques will help you achieve that elusive crispy-on-the-outside, marshmallowy-on-the-inside perfection every single time:
- Proper Drying is Paramount: After baking, the Pavlova needs ample time to dry out completely. If it’s removed from the oven too soon, it will absorb moisture from the air and become soggy, losing its crispness. Many bakers opt to leave it in the turned-off oven overnight to ensure thorough drying and prevent any textural mishaps.
- The Role of Acids (Vinegar/Cream of Tartar): You might wonder why vinegar or cream of tartar is essential. These acidic ingredients act as stabilizers for the egg whites. They help prevent the egg white proteins from collapsing and sticking together too tightly, allowing the meringue to achieve a smooth, stable, and ultimately stiff consistency that holds its shape beautifully during baking.
- Combatting Stickiness and Chewiness: If your meringue cake turns out sticky and overly chewy, it’s likely due to excessive moisture absorption. The sugar in the meringue is hygroscopic, meaning it readily absorbs moisture from the air. This happens when the Pavlova is exposed to ambient air too quickly after baking. The solution, as mentioned, is to turn off the oven heat and leave the Pavlova to cool and dry out slowly within the closed oven.
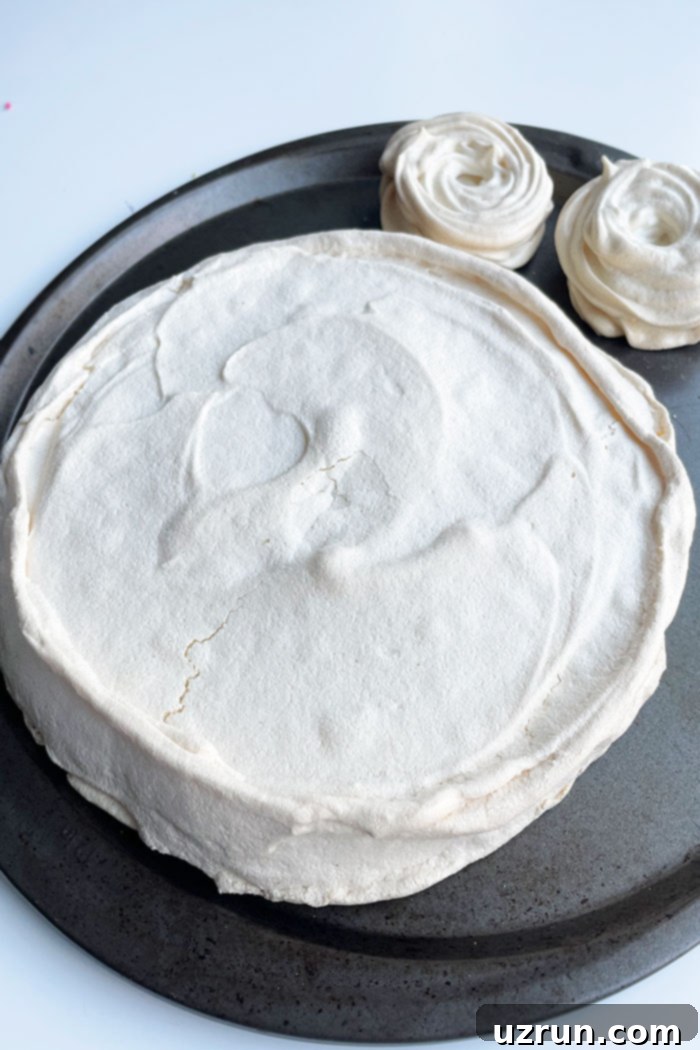
- Preventing Browning: A brown Pavlova indicates that it was either baked at too high a temperature or left in the oven for too long. Pavlova should ideally be a pale cream or off-white color. Always ensure your oven temperature is accurate and set to the recommended low setting for a gentle drying process.
- Why Pavlovas Collapse or Crack: Cracks and collapses are common issues. They typically occur when the Pavlova cools down too rapidly after baking. The sudden temperature change causes the air bubbles within the meringue to contract quickly, leading to structural stress. The remedy is simple: allow it to cool gradually in the turned-off oven with the door closed. Additionally, a too-high oven temperature can cause the air bubbles to expand too quickly, resulting in cracks. Precision with oven temperature is key.
- Testing for Doneness: A properly cooked and dried Pavlova will appear pale and dry to the touch. If you’re unsure, an extra hour of drying in the turned-off oven won’t hurt. When a toothpick or skewer is inserted into the center, it should come out with some sticky, marshmallow-like crumbs, not wet batter.
- Room Temperature Egg Whites are Best: Always use egg whites that have come to room temperature. They whip up faster, achieve greater volume, and form more stable peaks compared to cold egg whites, leading to a lighter, airier meringue.
- Avoid Egg Yolks at All Costs: Even the smallest speck of egg yolk can prevent egg whites from whipping properly into a fluffy, stiff mixture. Ensure your bowl and beaters are impeccably clean and free of any grease or yolk residue.
- The Advantage of Superfine Sugar: Superfine sugar (also known as caster sugar) dissolves more easily and smoothly into the egg whites than regular granulated sugar. This helps create a stable, glossy meringue without a gritty texture. If you don’t have superfine sugar, you can pulse granulated sugar in a food processor for a few seconds until it’s very fine.
- Keep the Oven Door Closed During Cooling: As reiterated, resist the temptation to open the oven door while the Pavlova is cooling. This prevents heat from escaping too quickly and allows the dessert to dry out properly, maintaining its perfect structure and texture.
- Pat Fruits Dry: Before adding your fresh fruit toppings, ensure they are thoroughly washed and patted completely dry. Excess moisture from fruits can seep into the meringue base, causing it to become soggy over time.
- Always Line with Parchment Paper: This step is non-negotiable! Lining your baking tray with parchment paper prevents the delicate meringue from sticking to the pan, making it incredibly easy to remove the finished Pavlova without any breakage.
- Whipping Egg Whites is Critical: This is arguably the most crucial step. The egg whites must be whipped to firm, stiff peaks. Be careful not to under-whip, which results in a weak structure, or over-whip, which can cause the meringue to become dry and crumbly. Stop mixing as soon as those stiff, glossy peaks are achieved!
Storage for Strawberry Pavlova: Best Practices for Freshness
Proper storage is key to enjoying your Pavlova, although it’s best consumed fresh. Here’s what you need to know:
- Make-Ahead Instructions: Yes, you can prepare the meringue base a day or two in advance. The critical point is to store the cooled meringue cake at room temperature in an airtight container, away from any moisture or humidity. Do NOT add the whipped cream or fresh fruit until just before you plan to serve it. This preserves the meringue’s crispness.
- Storing Leftovers: I generally do not recommend storing leftover assembled Pavlova. Once topped with whipped cream and juicy fruits, the meringue base will inevitably begin to absorb moisture, quickly becoming soggy and losing its signature texture. Pavlova is a dessert designed to be enjoyed immediately after assembly to truly appreciate its unique textural integrity. Refrigerating or freezing an assembled Pavlova will also lead to a soggy, undesirable texture. It’s always best to prepare and enjoy this delightful dessert fresh!
More Classic Desserts to Indulge In
If you’ve enjoyed making this beautiful Pavlova, you’ll surely love exploring these other timeless dessert recipes:
- How to Make Perfect Nougat
- How to Make Chocolate Fudge (3 Ingredients)
- How to Make Chocolate Bark
- How to Make Chocolate Covered Strawberries
- How to Make Flaky Butter Pie Crust
Recipe: Easy Pavlova from Scratch
Easy Pavlova Recipe
Abeer Rizvi
Pin Recipe
Want to Save This Recipe?
Enter your email & I’ll send it to your inbox. Plus, get great new recipes from me every week!
By submitting this form, you consent to receive emails from CakeWhiz
Ingredients
- 5 Egg whites From large eggs, Room temperature
- 1 cup Superfine sugar Pulse granulated sugar in a food processor
- 2 teaspoon Cornstarch
- 1 teaspoon Vanilla extract Use clear extract to prevent discoloration
- 1 teaspoon Vinegar
- 1.5 cups Homemade whipped cream
- 1 cup Strawberries Washed, Diced, Patted dry
- ½ cup Blueberries Washed, Patted dry
- 2 Kiwis Peeled, Diced
- 2 tablespoon Pomegranate seeds Optional
- ½-3/4 cup Strawberry jam Warmed in microwave
Instructions
-
Preheat oven to 350 degrees F.
-
In a large mixing bowl beat the egg whites are foamy and hold soft peaks.
-
Add sugar and cornstarch gradually.
-
Mix in vanilla extract and vinegar until stiff peaks form and mixture is no longer gritty. Test it by rubbing mixture between 2 fingers.
-
Use a spatula to spread mixture into a 9 inch circle on a large round baking tray, lined with parchment paper. I highly recommend drawing out a 9 inch circle on the parchment beforehand to make this step easy.
-
Place tray in oven and immediately reduce the temperature to 240 degrees F.
-
Bake for 90 minutes. Do not open the oven!
-
When the baking time is over, turn off the oven but don’t open it.
-
Let it cool in the oven and dry out further for 2-3 hours or overnight.
-
Spread whipped cream on top.
-
Add all the fruit toppings (strawberries, blueberries, kiwis, pomegranate seeds).
-
Drizzle warm strawberry jam on top.
-
Serve immediately and enjoy!
Notes
- Read all my tips above.
- Storing leftovers is not recommended since the toppings will make the meringue base soggy.
Nutrition
An automated tool is used to calculate the nutritional information. As such, I cannot guarantee the accuracy of the nutritional information provided for any recipe on this site.
