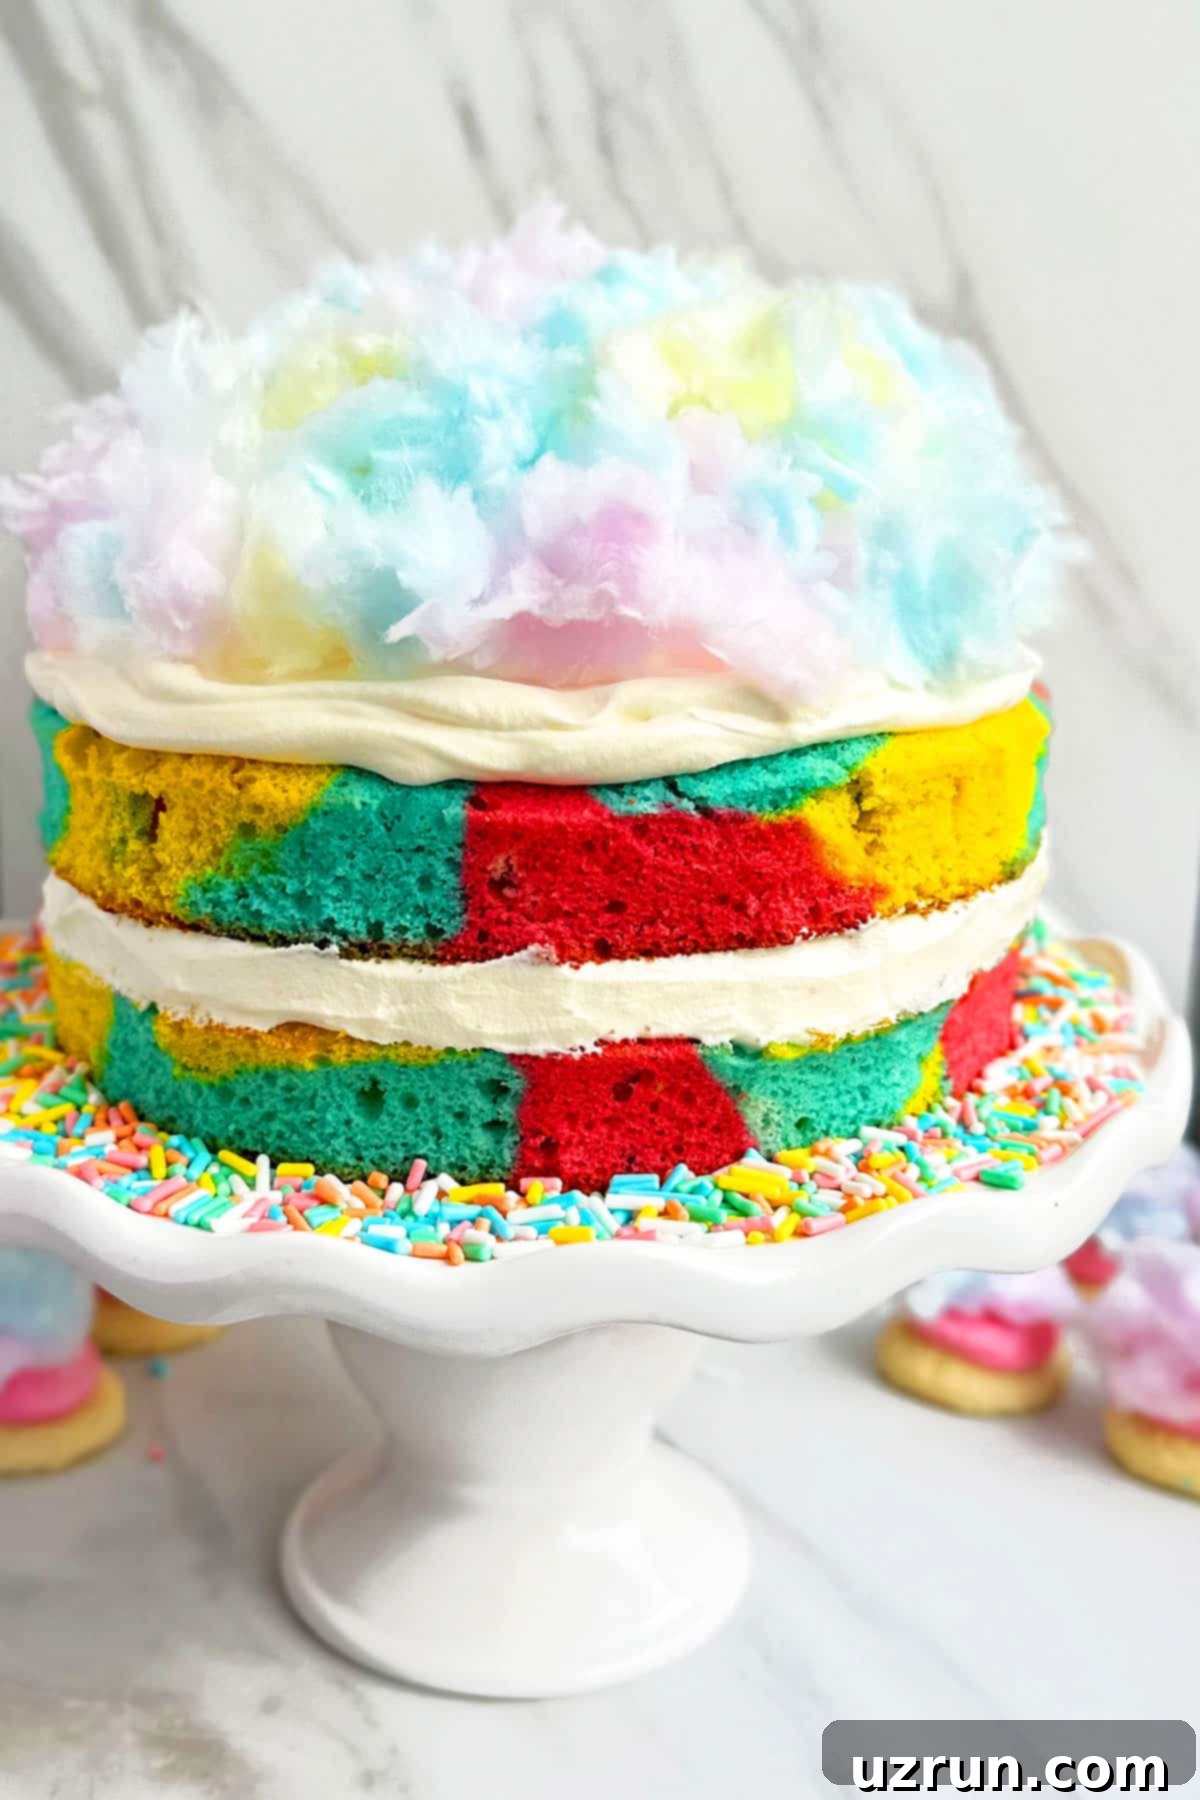
Easy Cotton Candy Cake Recipe: Fluffy, Colorful & Fun with Whipped Cream Frosting
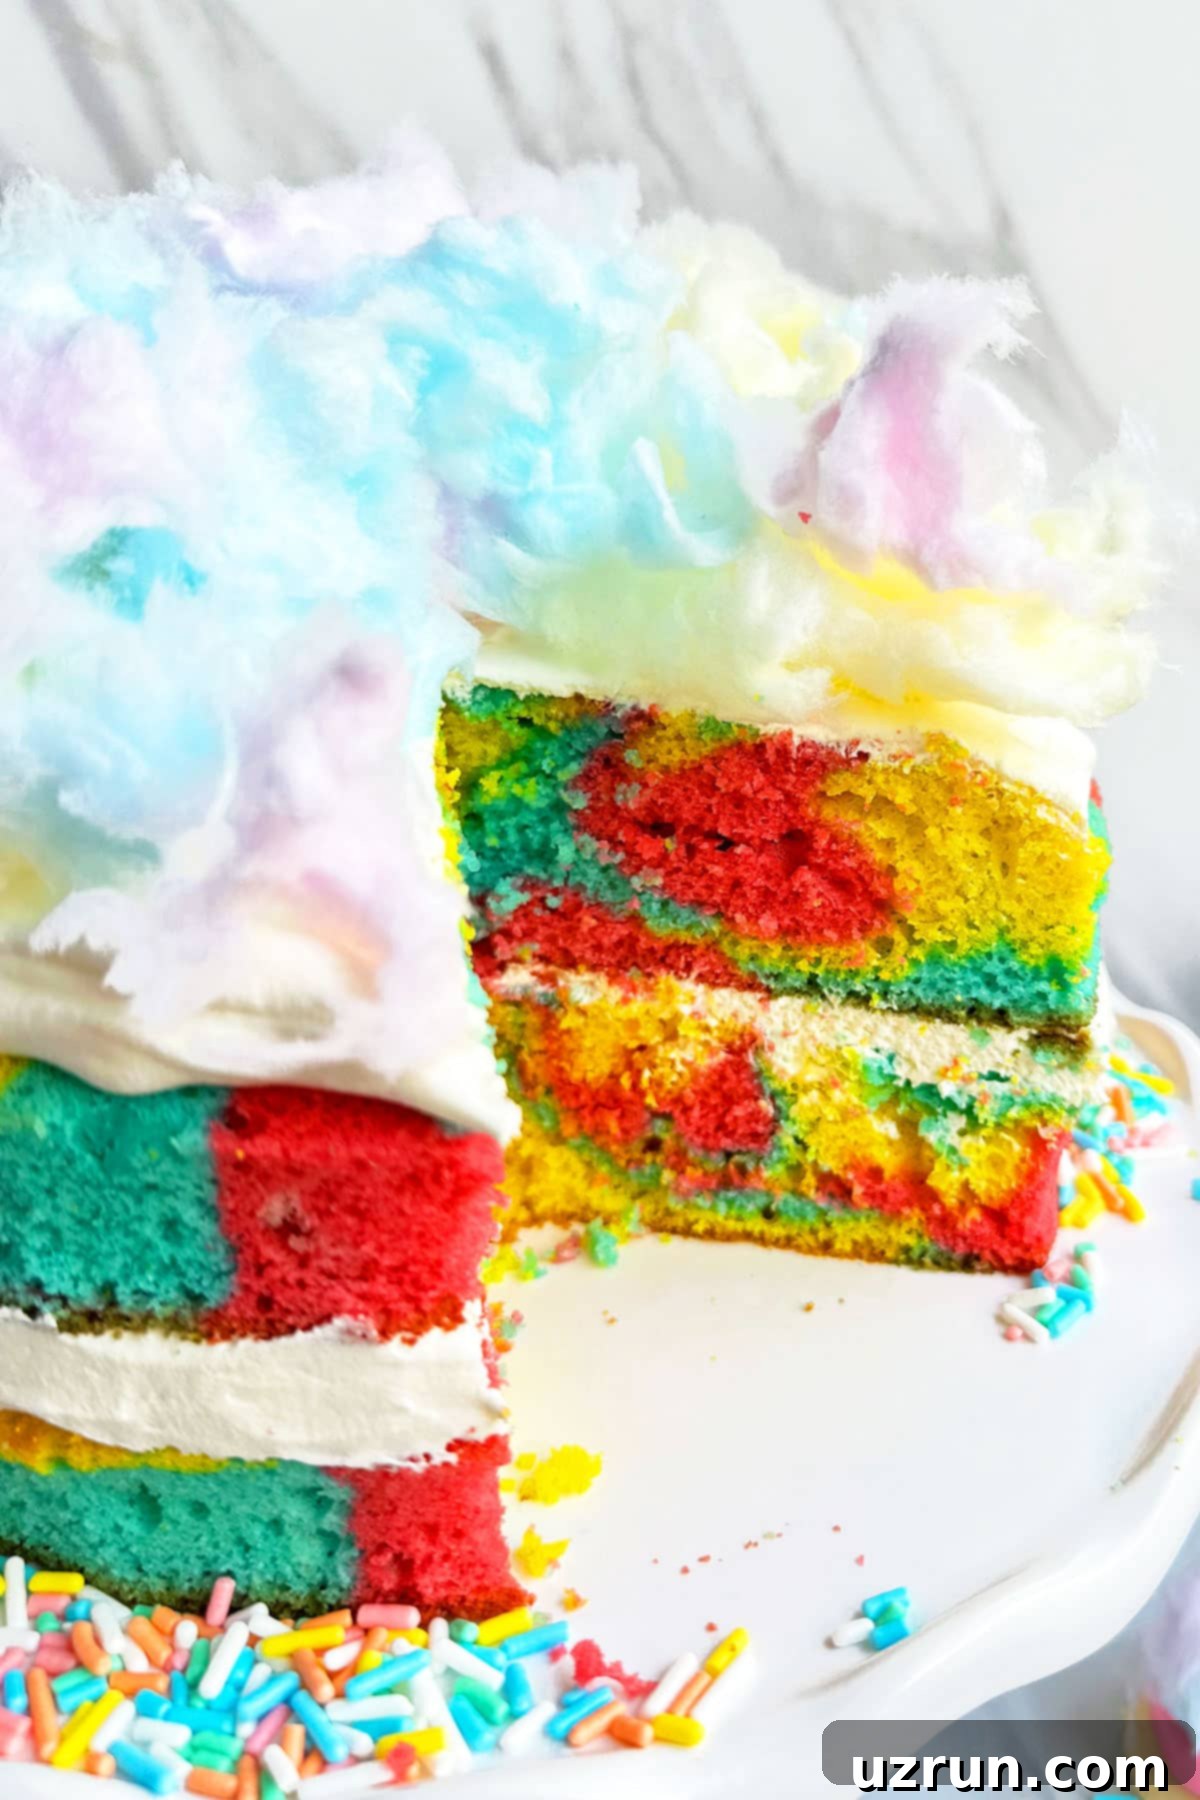
Step right up to a truly magical dessert! This easy cotton candy cake recipe brings all the joy and whimsy of the carnival right into your kitchen. Crafted at home with simple, readily available ingredients, it starts off with a humble yellow cake mix, making it accessible for bakers of all skill levels. This show-stopping layer cake is generously filled with light and airy whipped cream frosting, then lavishly decorated with a cloud of colorful rainbow cotton candy, promising a delightful treat that’s as enchanting to look at as it is to eat.
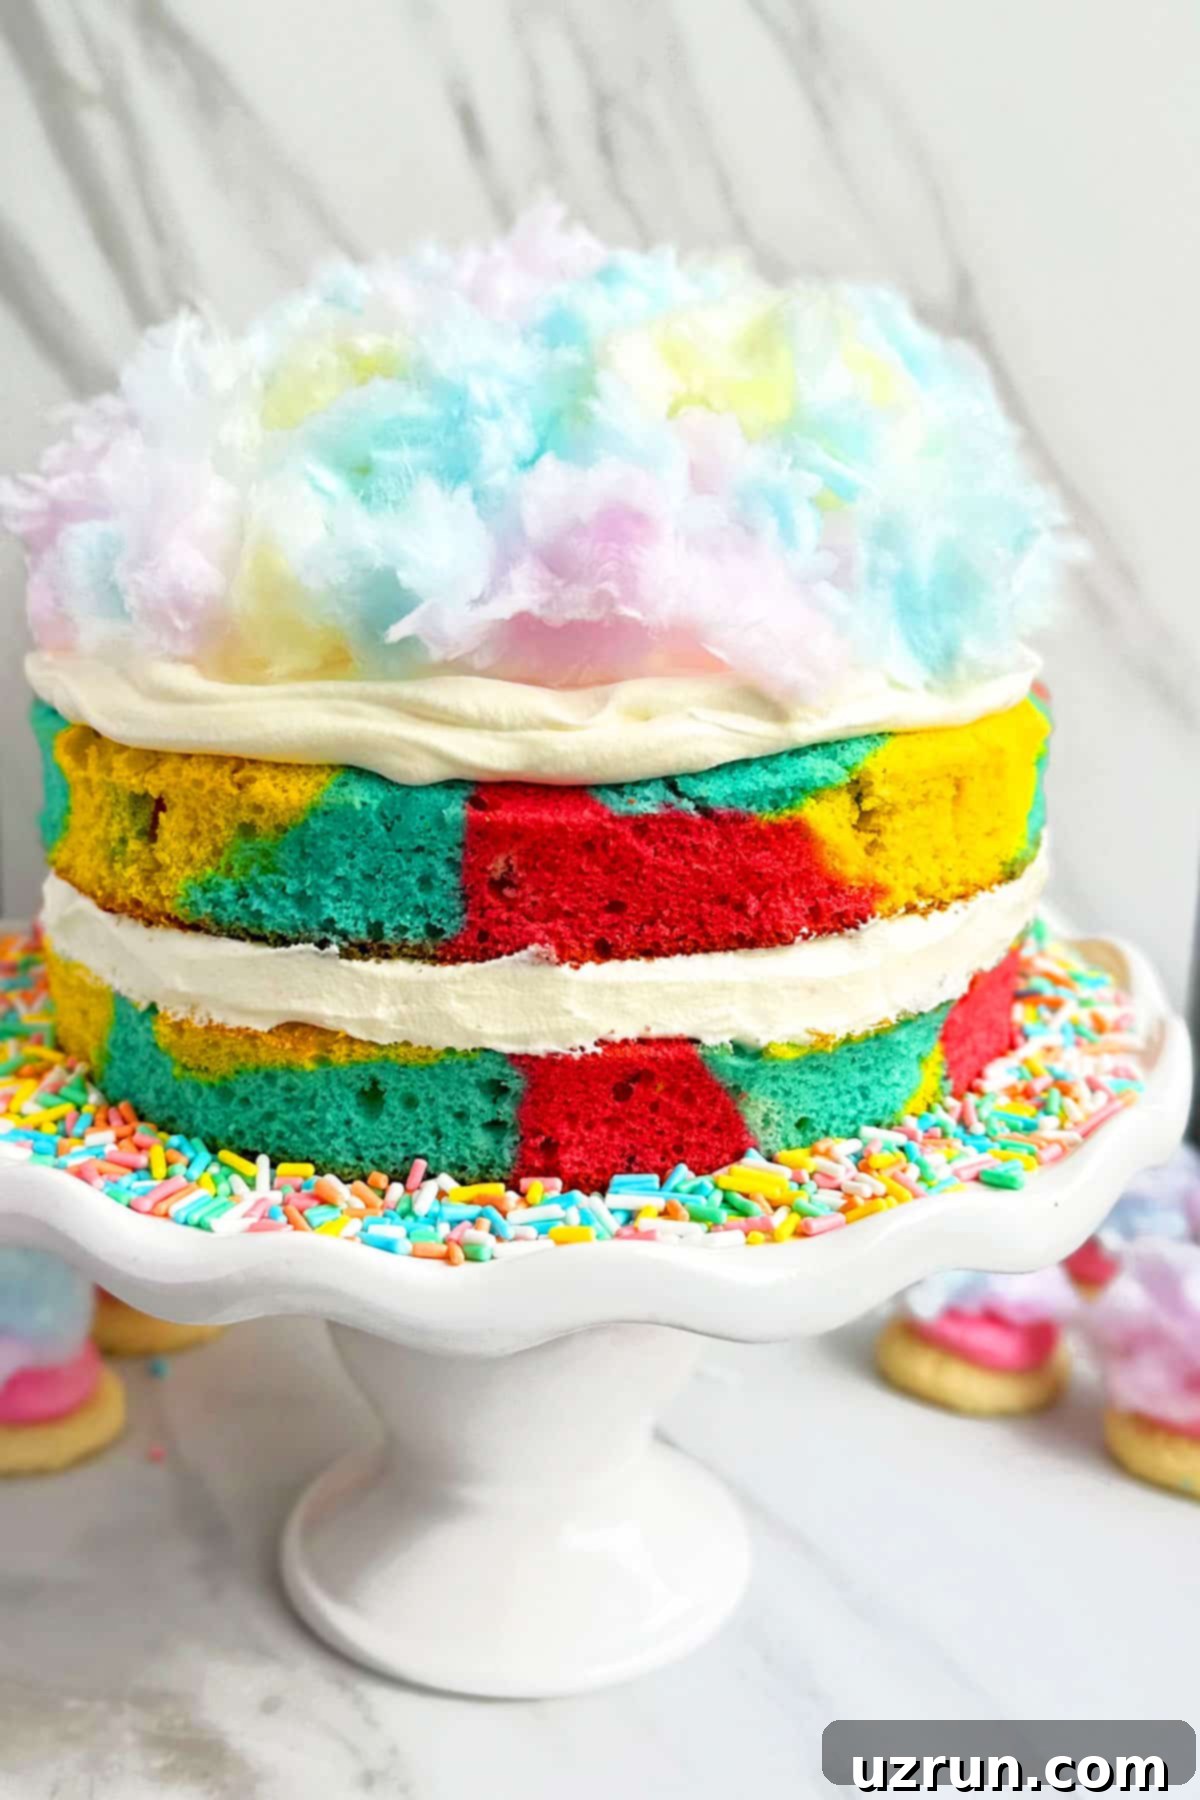
Growing up, some of my fondest memories involve the sheer excitement of visiting carnivals. The bustling crowds, the thrilling rides, and, of course, the irresistible aroma of sweet treats filling the air. As a kid, nothing quite captured that spirit like a cloud of cotton candy – its vibrant colors, unique melt-in-your-mouth texture, and playful appearance instantly spelled fun and excitement. Now, as an adult, I still adore the carnival, but the experience is even sweeter sharing it with my own child, whose eyes light up at the sight of those fluffy, sugary clouds.
That cherished memory sparked a creative quest in my kitchen: how could I translate that ephemeral joy of cotton candy into a beautiful, lasting dessert? This culinary adventure led to some truly delightful creations, including these whimsical Cotton Candy Cookies and these adorable Cotton Candy Cupcakes. And today, I’m thrilled to share the crown jewel of that inspiration: this spectacular Cotton Candy Layer Cake. For more playful baking ideas, especially when involving little helpers, you might also love this Easy Candy Cake with Halloween Leftovers, these festive Leftover Halloween Candy Cookies, and my tried-and-true Best Birthday Cake. These recipes are all fantastic ways to transform simple candies into “Wow!”-worthy desserts that will leave everyone smiling.
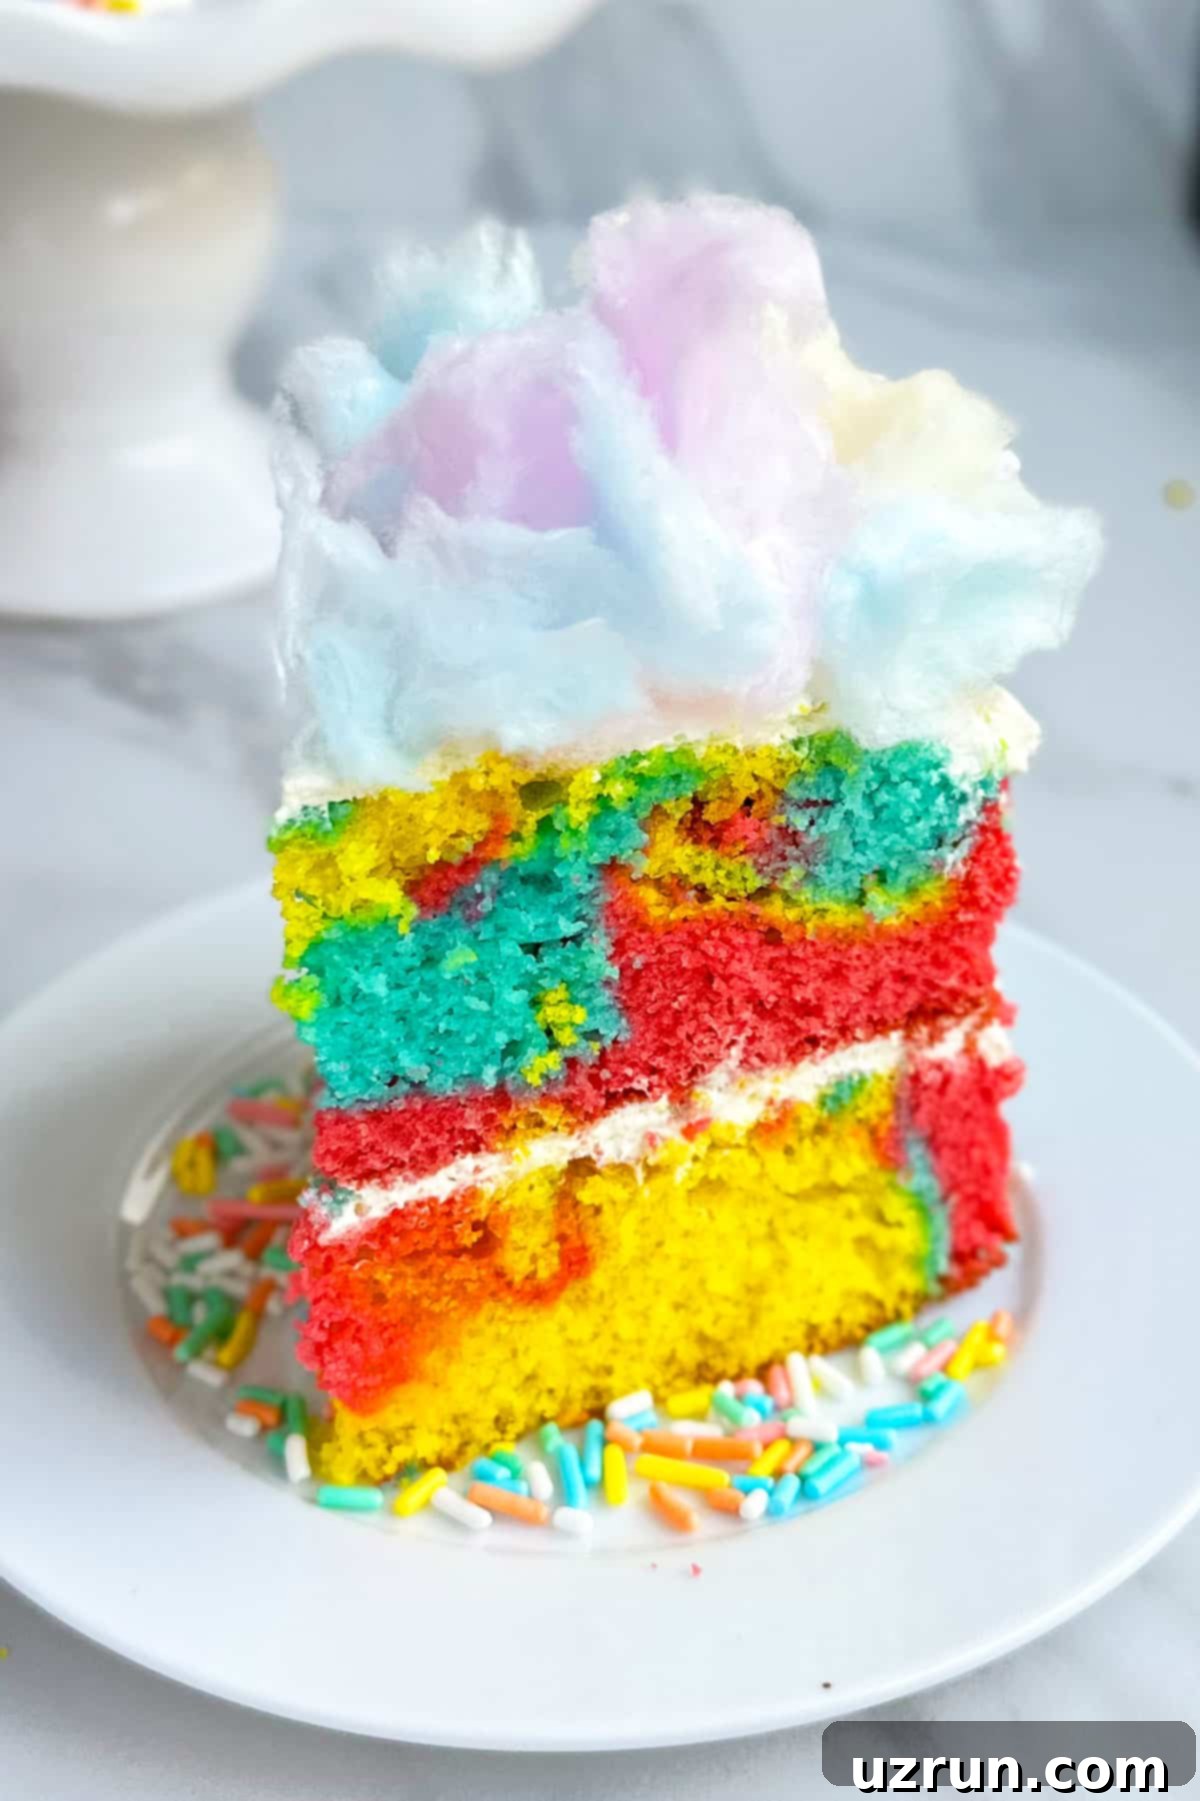
What makes this cotton candy cake truly special is its incredible balance of convenience and homemade charm. Starting with a yellow cake mix streamlines the baking process without compromising on flavor or texture. The whipped cream frosting provides a delicate, creamy counterpoint to the sweetness of the cotton candy, and the vibrant colors bring an undeniable festive touch. It’s the perfect centerpiece for birthday parties, celebrations, or simply to add a burst of color and fun to an ordinary day.
Why You’ll Love This Easy Cotton Candy Cake
- Effortless & Accessible: Built on a convenient cake mix base, this recipe takes the intimidation out of baking a multi-layered, decorated cake.
- Visually Stunning: The vibrant, swirled cake layers and fluffy cotton candy decoration make this cake an absolute showstopper. It’s truly Instagram-worthy!
- Deliciously Balanced: The light, creamy whipped frosting perfectly complements the sweet and airy cotton candy, creating a delightful flavor and texture contrast.
- Customizable Fun: Endless possibilities for variations in cake flavors, frosting, and additional decorations mean you can tailor it to any occasion or preference.
- Perfect for Celebrations: Whether it’s a birthday, baby shower, or just a weekend treat, this cake brings a sense of wonder and festivity to any gathering.
Key Ingredients for Your Cotton Candy Masterpiece
Crafting this delightful cotton candy cake requires a few essential ingredients, each playing a crucial role in its overall success. Here’s a closer look at what you’ll need and why:
- Eggs: Use large, room-temperature eggs. Eggs act as a binder and add richness to the cake batter. Bringing them to room temperature helps them incorporate more easily and evenly into the batter, leading to a smoother, more consistent cake texture.
- Milk: Whole milk is highly recommended for a creamier, richer batter and a more moist cake. If whole milk isn’t available, 2% milk can be used, but avoid skim milk as it lacks the fat content needed for optimal flavor and texture. Ensure your milk is also at room temperature for better emulsification with other ingredients.
- Butter: Always opt for unsalted butter in sweet baked goods. This gives you complete control over the salt content in your recipe. Melted butter contributes to the moistness and tender crumb of the cake.
- Yellow Cake Mix: This is our secret weapon for an easy and quick start! Using a high-quality yellow cake mix simplifies the baking process immensely without sacrificing flavor. It’s the foundation for our colorful layers.
- Gel Food Coloring: This is critical for achieving those vibrant, distinct layers. You will need yellow, turquoise, and pink gel food coloring. Gel colors are far superior to liquid food coloring because they are highly concentrated, producing more intense and vivid hues without adding excess liquid that could alter the batter consistency.
- Whipped Cream: A light and fluffy whipped cream frosting is the perfect pairing. It provides a delicate sweetness and a cooling contrast to the cake and cotton candy. Its white color also serves as a beautiful backdrop, making the vibrant cake layers and cotton candy truly pop.
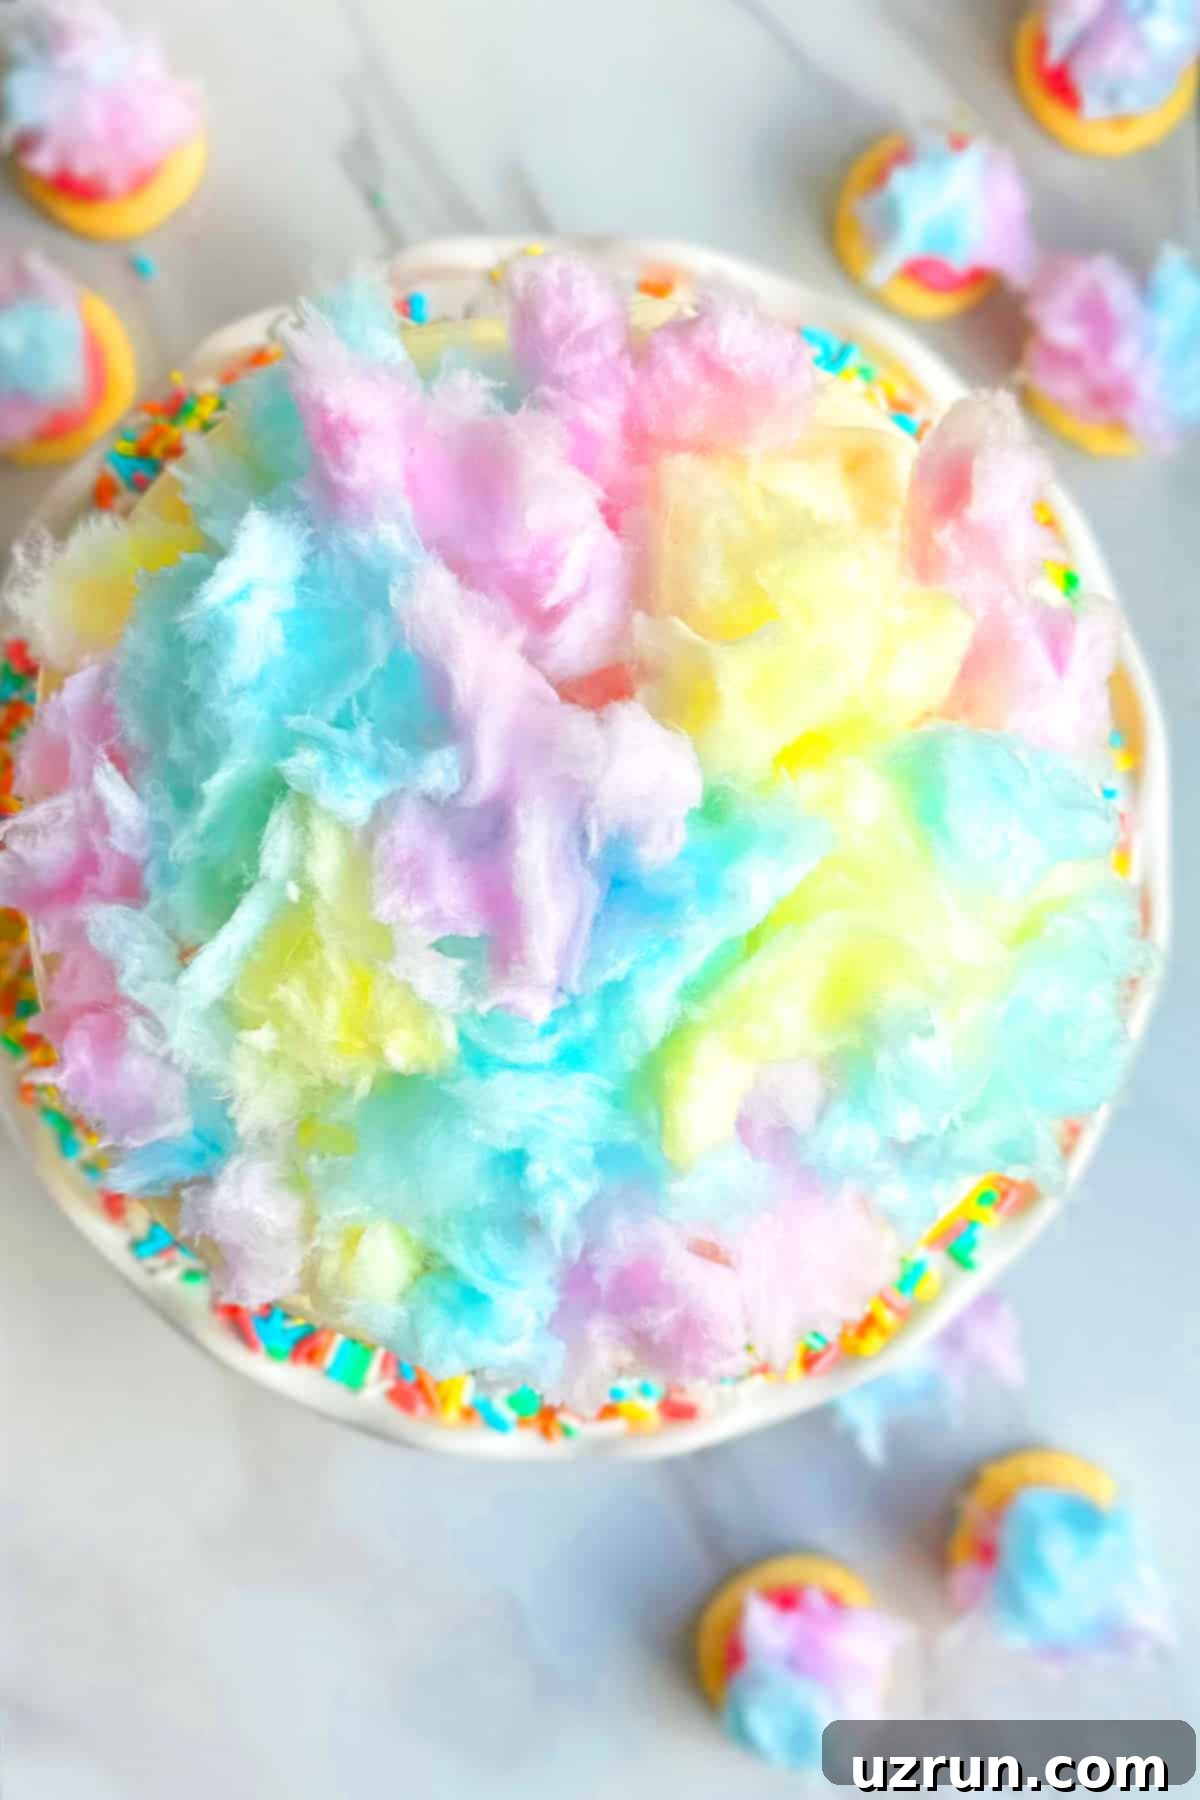
- Cotton Candy: The star of the show! You’ll want to gather cotton candy in pink, yellow, and blue (or any combination of bright colors you prefer). Its ethereal, fluffy texture is what gives this cake its signature carnival charm.
- Sprinkles: These always add a fun, festive touch and a delightful bit of crunch. Choose rainbow sprinkles or colors that complement your cotton candy for extra visual appeal around the base of the cake.
Creative Variations to Make It Your Own
While the classic cotton candy cake is a showstopper on its own, don’t be afraid to experiment with these variations to truly personalize your creation:
- Try other cake flavors: The key to successful coloring is a pale base. Consider white, lemon, Cherry Chip, Funfetti, Butter Pecan, or Butter Golden cake mixes. If you prefer baking from scratch, my Best Vanilla Cake Recipe is an excellent choice as it provides a perfect blank canvas for vibrant colors.
- Add other sweet decorations: Beyond the fluffy cotton candy, enhance your cake with edible pearls for elegance, Nerds for a tangy crunch, mini marshmallows for extra softness, mini gummy bears for chewiness, mini chocolate chips for a classic touch, mini Starbursts for fruity bursts, or coconut flakes for tropical flair.
- Use a different frosting flavor: While whipped cream is ideal for its lightness, other frostings can add a new dimension. Explore Funfetti Frosting for added celebratory sprinkles, Marshmallow Frosting for extra fluffiness and a sweet, chewy texture, White Chocolate Frosting for a rich, creamy taste, or a classic American Buttercream for stability and a buttery finish. For a chocolate lover’s twist, try Chocolate Ganache Frosting, Chocolate Buttercream, or Chocolate Cream Cheese Frosting, though note these might visually overpower the cotton candy.
- Try other cotton candy flavors: The world of cotton candy is vast! Explore different flavors beyond the classic vanilla, such as grape, cherry, lime, or even gourmet options. Each will bring a unique taste and often a corresponding color, enhancing the cake’s profile.
- Add extracts to your cake batter: Infuse your cake with additional flavor by adding a teaspoon of almond, peppermint, lemon, coconut, or raspberry extract to the batter before dividing and coloring. This adds an extra layer of complexity to the taste.
- Ice the entire cake: I opted for a rustic Naked Cake design, showcasing the beautiful colored layers. However, you can easily frost the entire cake for a more traditional look.
- Add more cake layers: For an extra-tall, dramatic cake, make another batch of this recipe to create a double barrel layer cake. Remember to use dowels or structural supports between layers for stability.
- Pastel version: If you prefer a softer aesthetic, use less gel food coloring to achieve delicate pastel shades in your cake layers.
- Decorate with handcrafted elements: Elevate the elegance by adorning your cake with homemade Fondant Flowers, charming Easy Fondant Bows, or delicate Wafer Paper Flowers.
- Fill the center of the cake: Create a fun “piñata” effect! After baking, carefully hollow out a portion of the center of one cake layer and fill it with sprinkles, edible pearls, or small candies like Nerds. When cut, these will spill out, providing a delightful surprise. Get more tips from this post on How to Make a Piñata Cake.
How to Make Easy Cotton Candy Cake with Cake Mix: A Step-by-Step Guide
Creating this stunning cotton candy cake is simpler than you might think, especially with the help of a good cake mix. Follow these steps for a perfectly colorful and delicious result:
- Prepare the Batter: In a large mixing bowl, combine the room-temperature eggs, milk, and melted butter. Whisk until smooth and well-incorporated. Then, gradually stir in the yellow cake mix until it’s just combined. Be careful not to overmix; a few small lumps are perfectly fine and help keep the cake tender.
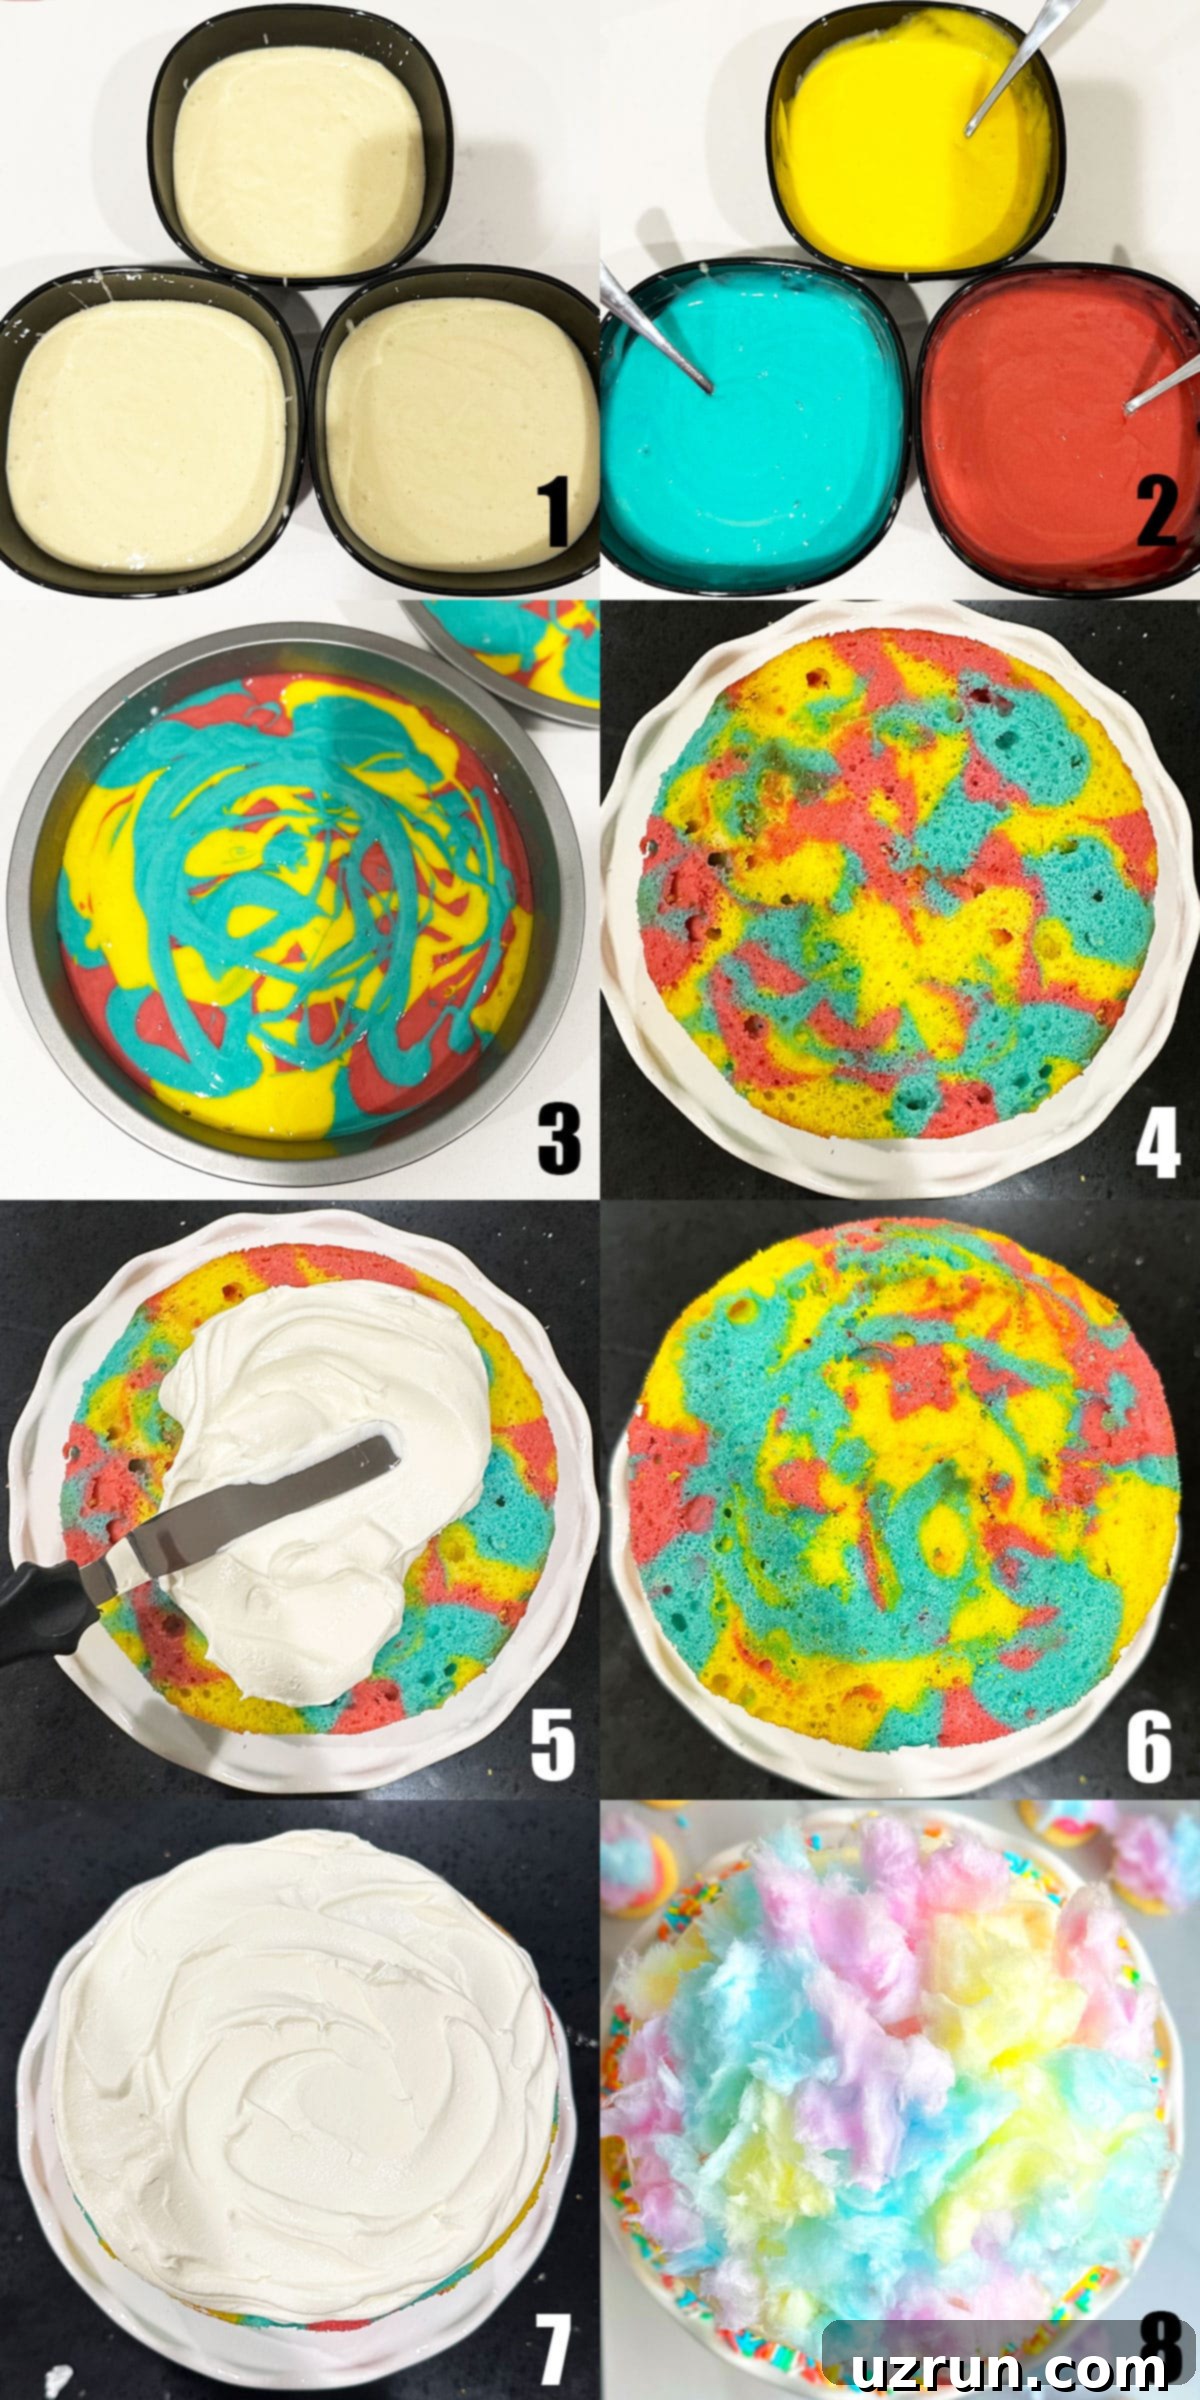
- Divide the Batter: Carefully divide the prepared cake batter into three separate bowls of roughly equal amounts. This ensures even coloring for each distinct layer. (Refer to Image 1 for visual guidance).
- Add Food Colorings: Add one color of gel food coloring to each bowl – yellow in the first, turquoise in the second, and pink in the third. Gently mix each bowl until the color is evenly distributed and vibrant. Take care not to overmix, as this can develop the gluten too much. (Refer to Image 2).
- Spoon and Swirl: Grease and flour two 8×2 inch cake pans. Then, spoon generous dollops of each colored batter randomly into the prepared pans. Once all the batter is in, use a toothpick or a skewer to gently swirl the colors together, creating a beautiful marbled effect without fully blending them. (Refer to Image 3).
- Bake and Cool: Bake the cakes in a preheated oven at 350°F (175°C) for approximately 30-40 minutes, or until a toothpick inserted into the center comes out clean. Once baked, remove from the oven and allow the cakes to cool in their pans for about 10-15 minutes before inverting them onto a wire rack to cool completely to room temperature. This is crucial before frosting to prevent melting. While the cakes are cooling, prepare your whipped cream frosting.
- Trim the Cakes: Once completely cool, use a serrated knife to carefully trim any domed tops from your cake layers, creating flat, even surfaces. This step ensures your layers stack neatly and your cake looks professional. Place the first trimmed cake layer onto your chosen cake stand or serving plate. (Refer to Image 4).
- Frost the First Layer: Spread a generous amount of your prepared whipped cream frosting evenly over the top of the first cake layer using an offset spatula. (Refer to Image 5).
- Stack and Frost the Second Layer: Carefully place the second cake layer directly on top of the first, gently pressing down to secure it. Then, spread another layer of whipped cream frosting over the top of this second layer. For a “naked cake” effect, you can leave the sides unfrosted, or apply a thin layer of frosting for a rustic look. (Refer to Images 6 and 7).
- Decorate with Cotton Candy and Sprinkles: This is the magical part! Just before serving, gently arrange pieces of colorful cotton candy on top of the whipped cream. The frosting will act as a natural adhesive. Finally, toss some festive sprinkles around the base of the cake for an extra touch of sparkle and fun. (Refer to Image 8). Enjoy your spectacular homemade cotton candy cake!
Expert Tips for a Perfect Cotton Candy Cake
Achieving a picture-perfect and delicious cotton candy cake is all about a few key details. Keep these tips in mind for the best results:
- Timing is Everything for Cotton Candy: Do NOT add the cotton candy until just moments prior to serving. Cotton candy is extremely sensitive to moisture and will dissolve quickly when exposed to the humidity from frosting or even the air, leaving you with a sticky, melted mess instead of fluffy clouds.
- Choose Gel Food Coloring: Always opt for gel food coloring over liquid food coloring. Gel colors are highly concentrated, providing vibrant and intense hues with just a small amount, which helps prevent thinning your cake batter. Liquid colors often require more volume to achieve similar vibrancy, potentially making your batter too runny.
- Cotton Candy Adhesion: Rest assured, the cotton candy will naturally stick to the whipped cream frosting. There’s no need for any special edible glue or additional adhesive; the slight moisture on the frosting’s surface is enough.
- Keep Hands Dry: When handling cotton candy, ensure your hands are completely dry. Moisture from your hands can cause the delicate sugar strands to dissolve or become hard and sticky, making it difficult to work with.
- Gentle Mixing for Colors: When swirling the different colored batters together in the pan, be gentle and don’t overmix. Excessive stirring will blend the colors too much, resulting in a muddy, brownish hue rather than distinct, magical swirls. A few gentle passes with a toothpick are all you need.
- Store Cotton Candy Properly: Keep your cotton candy sealed in its original container or an airtight bag until you are ready to decorate and serve. This will protect it from humidity, keeping it fresh, fluffy, and preventing it from dissolving or hardening prematurely.
- Separate Bowls for Frosting Colors: If you decide to color your frosting (though for this recipe, a white frosting is recommended to highlight the cake and cotton candy), always use separate bowls for each color. Trying to save on dishwashing by mixing colors in one bowl will lead to unintended blends and dull, mixed hues.
- Ensure Cakes Are Fully Cooled: This cannot be stressed enough! Wait until your cake layers are completely cooled to room temperature before attempting to frost and decorate them. Attempting to frost a warm cake will lead to melted frosting and a sliding, messy disaster.
- Use Full-Fat Ingredients: For the best flavor, moistness, and luxurious texture, use full-fat ingredients such as whole milk and unsalted butter. These contribute significantly to the cake’s overall richness and mouthfeel.
- Room Temperature Ingredients: Always ensure your eggs, milk, and butter are at room temperature. This allows them to emulsify and combine more smoothly and fluidly with the dry ingredients, resulting in a more uniform batter and a finer, more tender cake crumb.
Storage Best Practices for Your Cotton Candy Cake
Proper storage is essential to keep your cotton candy cake fresh and delicious, especially given its delicate components:
- Room Temperature: Due to the dairy in the whipped cream frosting and the cotton candy’s sensitivity to moisture, I do not recommend leaving this cake at room temperature for more than 2-3 hours. The cotton candy will start to dissolve or harden, and the frosting could spoil.
- Refrigerate: Any leftovers should be stored promptly in a sealed, airtight container in the refrigerator. It will stay fresh for up to 3 days. To enjoy, let it sit at room temperature for 15-20 minutes before serving for optimal texture.
- Freeze: For longer storage, you can freeze leftovers for up to 1 month. Place slices or the entire cake (without cotton candy) in an airtight, freezer-safe container, wrapping individual pieces in plastic wrap first for extra protection. When ready to serve, thaw the cake in the refrigerator overnight, then decorate with fresh cotton candy just before serving as per the instructions above.
- Make Ahead: This cake is fantastic for making ahead, with one crucial modification: leave off the cotton candy until the very last minute. You can bake, cool, trim, and frost the entire cake up to 3 days in advance, storing it in a sealed container in the fridge. Alternatively, you can freeze the frosted (but cotton candy-free) cake for up to 1 month. When the event arrives, thaw (if frozen), bring to desired serving temperature, and then add the fresh, fluffy cotton candy right before presenting it.
Recipe FAQs
For vibrant and true colors, always use gel food coloring. Liquid food coloring is less potent and can thin your batter. To color, first divide your prepared cake batter into separate bowls (one for each color you desire). Add a small amount of gel food coloring to each bowl and mix gently until the color is evenly distributed. Then, spoon these distinct colors randomly into your cake pan and use a toothpick to create a gentle swirl pattern.
Cotton candy is incredibly delicate and highly susceptible to moisture. It will dissolve quickly if exposed to humidity, whether from the air, a warm cake, or the moisture content of your frosting. The most common reason for dissolution is adding it too far in advance of serving or placing it on a cake that hasn’t fully cooled. Always wait until just before presentation to add the cotton candy to your cake.
Decorating with cotton candy is fun and simple! First, ensure your hands are completely dry to prevent stickiness. Take small, fluffy pieces of cotton candy and gently press them onto the frosted areas of your cake. The frosting will act as a natural adhesive. Remember to do this only just before serving to maintain its light, airy texture and prevent it from dissolving.
Cotton candy hardens and becomes crunchy when it absorbs moisture from the air. If left exposed to ambient humidity for too long, the sugar strands will draw in water, causing them to crystallize and lose their characteristic fluffy texture. To prevent this, always store cotton candy in an airtight container until you’re ready to use it, and avoid leaving it out uncovered.
More Festive Candy-Inspired Desserts
If you loved this playful cotton candy cake, you’ll surely enjoy exploring these other delightful candy-themed dessert recipes:
- Easy Kit Kat Cake (With Strawberries)
- Christmas Fudge (Candy Cane Fudge)
- Peppermint Cake (Candy Cane Cake)
- Halloween Treat Bags (Candy Goodie Bags)
- Chocolate M&M Cookies (With Cake Mix)
Recipe Card
Easy Cotton Candy Cake (With Cake Mix)
Abeer Rizvi
Pin Recipe
Want to Save This Recipe?
Enter your email & I’ll send it to your inbox. Plus, get great new recipes from me every week!
By submitting this form, you consent to receive emails from CakeWhiz
Ingredients
- 3 Eggs Large, Room temperature
- 1 cup Milk Whole or 2%, Room temperature
- ½ cup Butter Unsalted, Melted
- 1 Yellow cake mix
- Gel food coloring Yellow, turquoise and pink
- 2.5 cups Whipped cream
- 2 cups Cotton candy Pink, yellow and blue
- 2 tablespoon Sprinkles
Instructions
-
In a large mixing bowl, add eggs, milk butter and mix until smooth.
-
Add yellow cake mix and mix until just combined.
-
Divide this batter into three separate bowls.
-
Add yellow food coloring in one bowl and mix until color is evenly distributed.
-
Add turquoise food coloring in the second bowl and mix until color is evenly distributed.
-
Add pink coloring in the third bowl and mix until color is evenly distributed.
-
Spoon the batter randomly from three bowls into two greased and floured cake pans (Dimensions: 8×2 each).
-
Use a toothpick to swirl the different colors of batter.
-
Bake at 350 degrees F for about 30-40 minutes or until an inserted toothpick in the center comes out clean.
-
Allow the cakes to cool fully to room temperature.
-
While the cakes were baking and cooling, prepare the whipped cream.
-
Trim the sides and dome of the cake, using a serrated knife.
-
Place one cake on a cake stand.
-
Spread whipped cream on top of the cake evenly with a spatula.
-
Place the other cake on top of the icing and press gently to secure properly.
-
Spread more whipped cream on top of the cake with a spatula.
-
Prior to serving, place colorful cotton candy on top of the icing. The whipped cream on top of the cake will work like glue.
-
Toss some sprinkles around the base of the cake. Enjoy.
Notes
- Do not over mix cake batter. A few lumps are perfectly fine.
- Yellow and white cake mix both work well but you can also make my Best Vanilla Cake From Scratch.
- I like a cool rustic cake design and did not ice the sides of the cake but you can easily do that with a spatula.
- Don’t add the cotton candy on top of the cake until just prior to serving because the moisture of the icing can dissolve the cotton candy and make a sticky mess.
- For pastel colored cakes, use less food coloring in the cake batter.
- Leftovers can be stored in a sealed container in the fridge for up to 3 days.
- Read additional tips and variations above.
Nutrition
An automated tool is used to calculate the nutritional information. As such, I cannot guarantee the accuracy of the nutritional information provided for any recipe on this site.
We hope this easy cotton candy cake recipe brings as much joy to your home as it does to ours. It’s more than just a dessert; it’s an edible celebration of fun, color, and nostalgic sweetness. Whether you’re baking for a special occasion or simply to brighten a day, this cake is guaranteed to be a hit. Happy baking!
