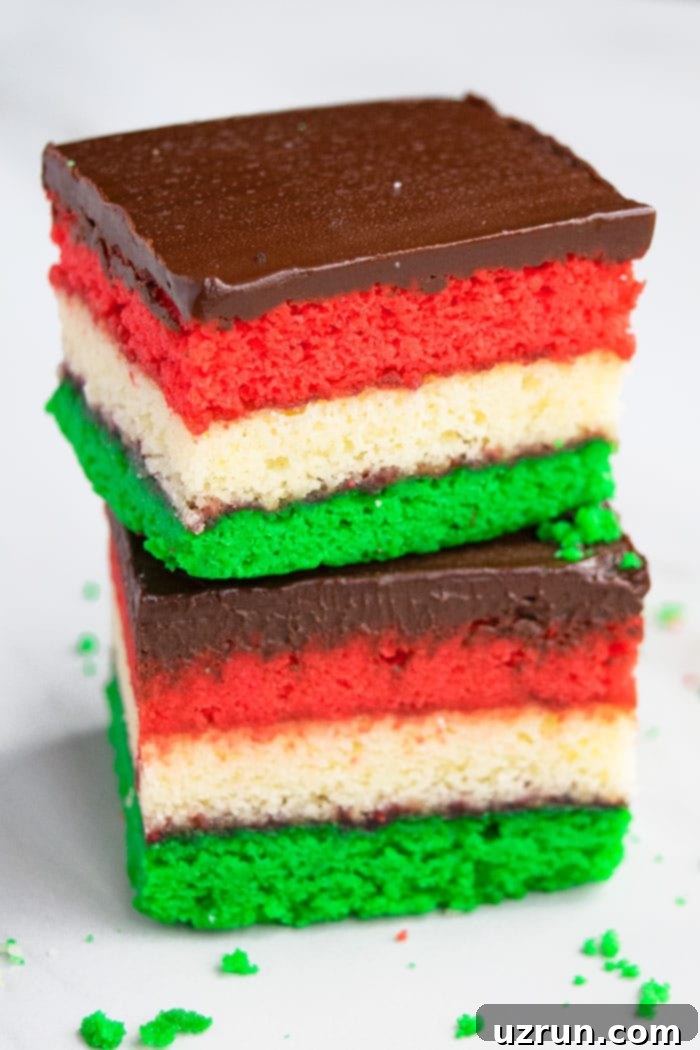
The Ultimate Guide to Homemade Italian Rainbow Cookies: A Classic Almond Delight
Step into the delightful world of classic Italian Rainbow Cookies, a beloved treat that brings a burst of color and flavor to any occasion. These exquisite cookies, often called Venetian Cookies or Neapolitan Cookies, are a labor of love, homemade with simple ingredients but crafted with care. Featuring vibrant, cake-like layers of almond cookie, sweet and tangy raspberry jam, and a decadent chocolate topping, they are truly a feast for both the eyes and the palate. While the recipe involves multiple steps, the rich almond flavor, tender texture, and striking presentation make every moment in the kitchen entirely worthwhile.
Italy is renowned for its incredible array of classic, old-fashioned desserts, each telling a story of tradition and culinary artistry. Among these cherished recipes, today’s vibrant Italian Rainbow Cookies stand out. What makes them particularly special is not just their delicious taste, but their symbolic appearance. The distinct red, white, and green layers proudly represent the colors of the Italian flag, making them a popular and festive addition to holiday platters, especially during Christmas, and a standout for any celebration. These beautiful layered almond cookies are a fantastic centerpiece that will impress your guests and bring a touch of Italian-American charm to your dessert table. They also make a perfect addition to any collection of Easy Rainbow Desserts.
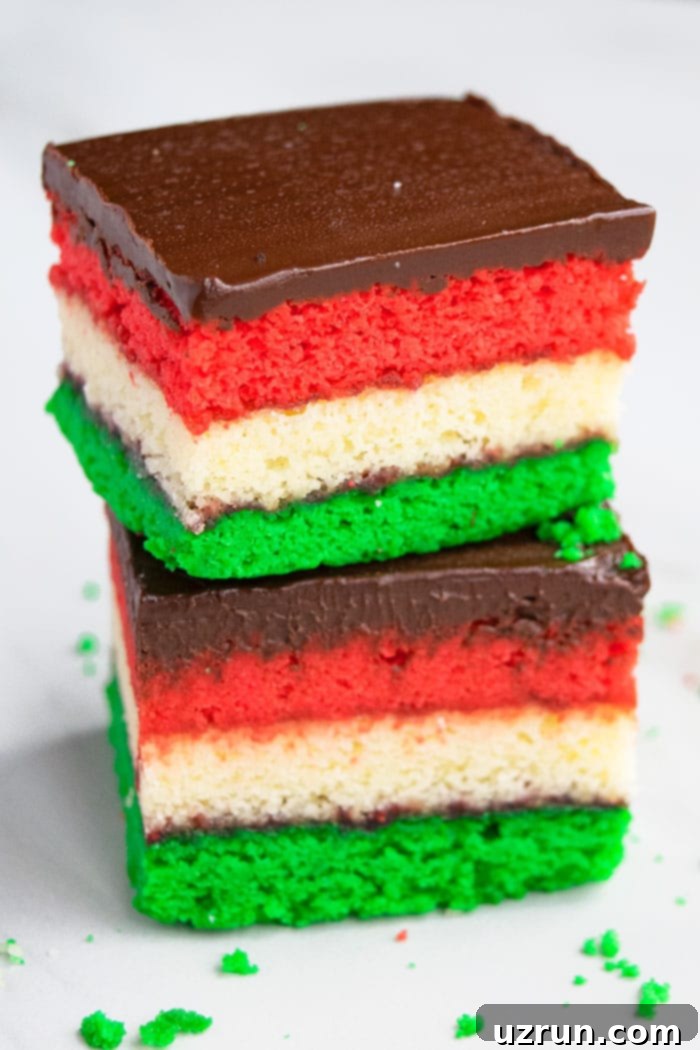
What Are Italian Rainbow Cookies? A Deeper Dive into Neapolitan & Venetian Delights
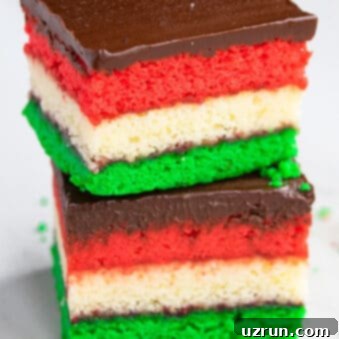
Italian Rainbow Cookies are much more than just a pretty dessert; they are a cultural icon, particularly within Italian-American communities. Also affectionately known as Neapolitans, Venetians, or simply Italian Flag Cookies, these treats are distinctive for their moist, cake-like texture and their signature tri-colored layers. Traditionally, these layers are colored red, white (or natural light yellow), and green, mimicking the colors of the Italian flag. Each vibrant layer is delicately separated by a thin spread of fruit jam, most commonly raspberry, and the entire confection is crowned with a smooth, rich layer of melted chocolate.
Interestingly, despite their strong Italian association, these cookies did not, surprisingly, originate in Italy itself. Historical research suggests that this beloved recipe first emerged from Italian immigrant communities in the United States. During the late 19th and early 20th centuries, as Italian immigrants settled in America, they adapted their culinary traditions, creating new dishes and desserts that blended old-world flavors with new-world resources. The Rainbow Cookie quickly gained popularity in these vibrant Italian-American neighborhoods, becoming a staple in bakeries and homes, especially around holidays like Christmas and Easter. They are a beautiful testament to the enduring culinary legacy and adaptability of immigrant cultures.
Why Make Homemade Italian Rainbow Cookies?
While readily available in many Italian bakeries, there’s nothing quite like the satisfaction and superior taste of homemade Italian Rainbow Cookies. Baking them from scratch allows for complete control over the quality of ingredients, ensuring the freshest flavors and a truly authentic experience. Beyond the taste, the process itself is a rewarding culinary journey. From carefully coloring each layer to artfully assembling them, baking these cookies is a joyous activity that can be shared with family and friends. The aroma of almond baking in your kitchen is simply unparalleled, and the pride of presenting these beautiful, colorful cookies, knowing you made them yourself, is immense. It’s an opportunity to connect with tradition, create lasting memories, and, of course, indulge in a genuinely special treat.
How to Make Italian Rainbow Cookies Recipe from Scratch: A Step-by-Step Guide
Crafting these iconic layered cookies is a delightful process that, while requiring a bit of patience, is surprisingly straightforward when broken down. Here’s a detailed look at each step to ensure your homemade Italian Rainbow Cookies turn out perfectly vibrant and delicious.
- Prepare the Base Mixture: In a large mixing bowl, combine granulated sugar, almond paste, and softened unsalted butter. Beat them together until the mixture is incredibly smooth, light, and creamy, with no lumps of almond paste remaining. This step is crucial for the cookie’s texture and flavor. Don’t forget to scrape down the sides of the bowl frequently to ensure everything is thoroughly incorporated.
- Incorporate Egg Yolks: Next, add the separated egg yolks to the creamed mixture. Continue mixing until they are fully combined, yielding a smooth and uniform batter. The egg yolks contribute richness and help bind the cookie layers.
- Add Liquids for Flavor: Pour in the milk (whole or 2%) and almond extract. Mix until these wet ingredients are fully integrated, ensuring the almond flavor is evenly distributed throughout the batter. The almond extract is key to the distinctive taste of these cookies.
- Gently Fold in Flour: Gradually add the all-purpose flour to the wet mixture. Mix only until the flour is just combined. Overmixing at this stage can develop the gluten too much, leading to tough cookies. We want them tender and cake-like!
- Whip Egg Whites Separately: In a separate, impeccably clean mixing bowl, add the egg whites. Whip them vigorously until they form stiff peaks. This means when you lift the whisk, the peaks of egg white stand firm and tall. This step is vital for the lightness and delicate texture of the cookie layers.
- Gently Fold Egg Whites into Batter: Carefully and gently fold the whipped egg whites into the main cookie mixture. Use a spatula and a light, upward motion to combine them without deflating the air you’ve just whipped in. This keeps the batter airy and cake-like.
- Divide and Color Batter: Divide the unified batter into three separate bowls as evenly as possible.
- Color the Batter: To two of the bowls, add your chosen food coloring. For the traditional Italian flag colors, mix red food coloring into one bowl and green food coloring into another. Leave the third bowl uncolored (this will be the white/natural layer). Use liquid food coloring or, for more vibrant and concentrated hues, gel colors are highly recommended.
- Spread and Bake: Spread each colored batter thinly and evenly into three separate (9×13 inch) baking pans, each lined with parchment paper. Ensure the layers are as uniform in thickness as possible. Bake them in a preheated oven at 325 degrees F for 10 to 12 minutes. Remember to rotate the pans halfway through baking to ensure even cooking.
- Cool Completely: Once baked, remove the cookies from the oven and allow them to cool completely in their pans on a wire rack. This is crucial for easy handling and assembly.
- Assemble the Layers: Once cooled, carefully remove the parchment papers from each cookie layer. Place the green cookie layer on a large tray or cutting board. Spread a generous, even layer of raspberry jam over it. Gently place the uncolored (white/natural) cookie layer on top of the jam. Spread another layer of raspberry jam over this. Finally, place the red/pink cookie layer on top.
- Compress and Chill: To ensure the layers adhere well and the cookies set, gently press the layers together. Cover this “cake sandwich” with plastic wrap (saran wrap) and weigh it down with heavy, flat materials like cutting boards or heavy plates. Chill the entire assembly in the refrigerator overnight (at least 12 hours). This firming process is essential for clean cuts.
- Finish with Chocolate and Serve: The next day, remove the chilled cookie block from the fridge and unwrap it. Spread the melted semisweet chocolate evenly over the top layer. If desired, use a decorating comb to create an attractive pattern. Chill again for about 30 minutes, or until the chocolate has fully set. Finally, use a very sharp, serrated knife to cut the large block into small, neat square slices (approx. 2×2 inches). Enjoy your magnificent homemade Italian Rainbow Cookies!
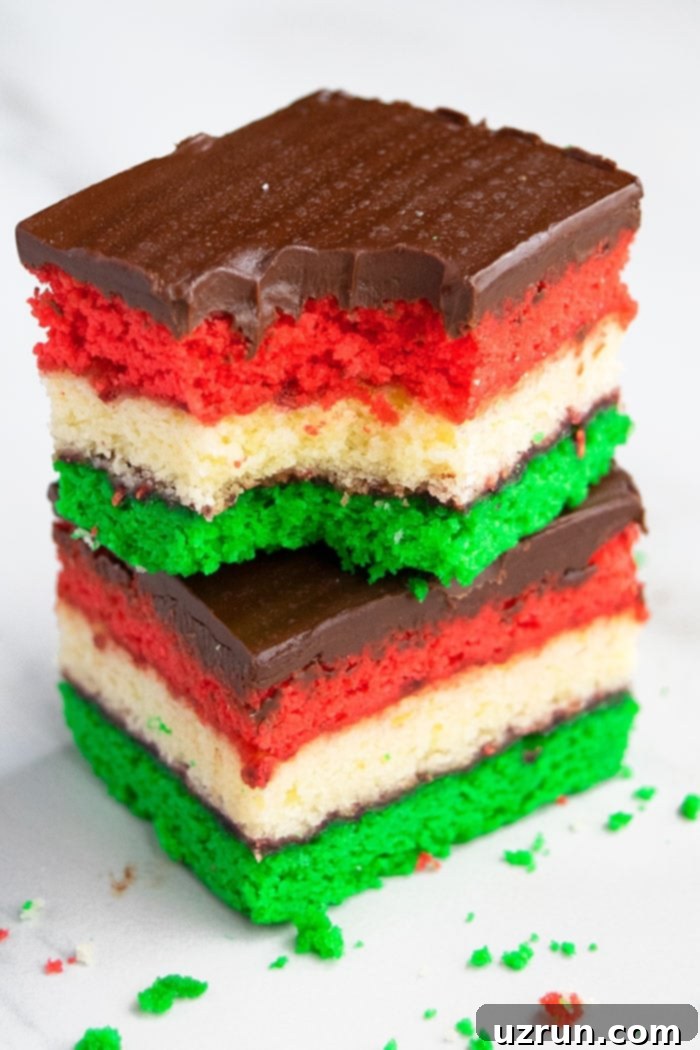
Delicious Variations for Neapolitans or Venetian Cookies
While the classic Italian Rainbow Cookie recipe is perfect as is, there’s always room for creative twists to suit your personal preferences or different occasions. Experimenting with variations can add a new dimension to these already delightful treats. Here are some ideas:
- Explore Different Jams and Fillings: Raspberry jam is traditional, but feel free to branch out! Try orange marmalade for a citrusy tang, Homemade Strawberry Jam for a sweeter profile, or a vibrant mixed berry jam. You can also use thicker fruit pie fillings like Raspberry Pie Filling or Blueberry Pie Filling for an even richer layer. Just ensure the filling isn’t too runny.
- Add a Nutty Crunch: Before the melted chocolate topping sets, sprinkle roughly chopped nuts over it. Almonds are a natural fit, but pecans, walnuts, or pistachios can add different textures and flavors. This adds a lovely crunch that contrasts with the soft cookie.
- Festive Sprinkles: For birthdays or themed parties, toss some colorful sprinkles over the melted chocolate before it hardens. This instantly makes the cookies more playful and appealing to children.
- Experiment with Colors: While red, white, and green are iconic, don’t feel limited! For other holidays or events, you can use any combination of colors. Think pastels for spring, orange and black for Halloween, or even rainbow colors for a truly whimsical look.
- Change the Chocolate Flavor: The recipe typically calls for semisweet chocolate, which provides a balanced sweetness. However, you can opt for milk chocolate for a sweeter, creamier top, dark chocolate for a more intense and less sweet finish, or even white chocolate for a different aesthetic and flavor profile.
- Yellow Middle Layer: Some traditional recipes feature a yellow middle layer instead of an uncolored one. Simply add yellow food coloring to the third bowl of batter if you prefer this variation. It brightens the overall look.
- Alternate Extracts: While almond extract is the soul of these cookies, its flavor can be quite strong for some. Consider replacing part of the almond extract with vanilla extract for a softer, more universally appealing taste. Other extracts like orange, lemon, or even a hint of rum extract could also be interesting for a sophisticated twist.
- Luxurious Ganache Topping: Instead of simple melted chocolate, elevate your cookies with a velvety smooth ganache. A rich Easy Chocolate Ganache will make the topping extra decadent and glossy, adding another layer of indulgence.
Essential Tips and Techniques for Perfect Italian Flag Cookies
Achieving those perfectly distinct layers and delightful almond flavor in your Italian Rainbow Cookies requires a few key techniques and considerations. Heed these expert tips to ensure your baking experience is smooth and your cookies are a triumph:
- Gel Food Coloring vs. Liquid Food Coloring: For truly vibrant and deep colors, gel food coloring is your best bet. It’s highly concentrated, meaning you’ll need only a small amount to achieve intense hues without significantly altering the batter consistency. Liquid food coloring, on the other hand, is much weaker and requires more volume, which can thin out your batter and potentially affect the cookie’s texture.
- Weight Down the Cookie Layers: This step is non-negotiable! Using heavy, flat objects (like cutting boards, heavy books wrapped in plastic, or additional baking pans) to weight down the assembled cookie layers helps to compress them evenly. This compression is crucial for creating neat, straight layers and preventing the cookies from separating when sliced. It also helps the jam adhere better.
- Dealing with Browned Edges: Don’t fret if the edges of your cookie layers brown slightly during baking. These can be easily and neatly trimmed off with a sharp serrated knife before you begin the assembly process. This ensures every slice of your finished cookie looks pristine.
- The Importance of Whipped Egg Whites: Whipping egg whites to stiff peaks is paramount for giving these cookies their characteristic light, cake-like texture. Ensure your mixing bowl and whisk attachment are absolutely squeaky clean and free of any grease. Even a tiny bit of fat can prevent the egg whites from whipping up properly.
- Gentle Folding is Key: Once your egg whites are beautifully whipped, be incredibly gentle when folding them into the rest of the cookie batter. Use a light hand and a folding motion (cutting down the middle and scooping up from the bottom) to incorporate them without deflating their air. If you mix too vigorously, the air bubbles will collapse, resulting in a denser, less tender cookie.
- Efficient Egg Separation: Separating egg yolks from whites can sometimes be tricky. There are many techniques, but one highly effective method is using the suction from an empty plastic water bottle. Gently squeeze the bottle, position its opening over the yolk, release the squeeze to suck up the yolk, then squeeze again to release it into another bowl. This keeps the whites completely free of yolk, which is essential for proper whipping.
- Sourcing Almond Paste: Almond paste is a key ingredient and gives these cookies their distinctive flavor. It’s typically easy to find in the baking aisle of most well-stocked grocery stores or can be conveniently ordered online. Ensure you’re purchasing almond paste, not marzipan (see next tip).
- Always Use Unsalted Butter: Stick to unsalted butter in this recipe. This allows you to control the overall saltiness of the cookies, preventing them from becoming overly savory or salty.
- Almond Paste vs. Marzipan: Know the Difference: This is a critical distinction! While both are made from almonds, almond paste and marzipan are NOT interchangeable in this recipe. Almond paste is coarser in texture, less sweet, and primarily used as a baking ingredient to infuse a strong almond flavor. Marzipan, on the other hand, is much smoother, sweeter, and typically used for decorative purposes like molding into shapes or covering cakes, similar to fondant. Using marzipan will drastically change the texture and sweetness of your cookies.
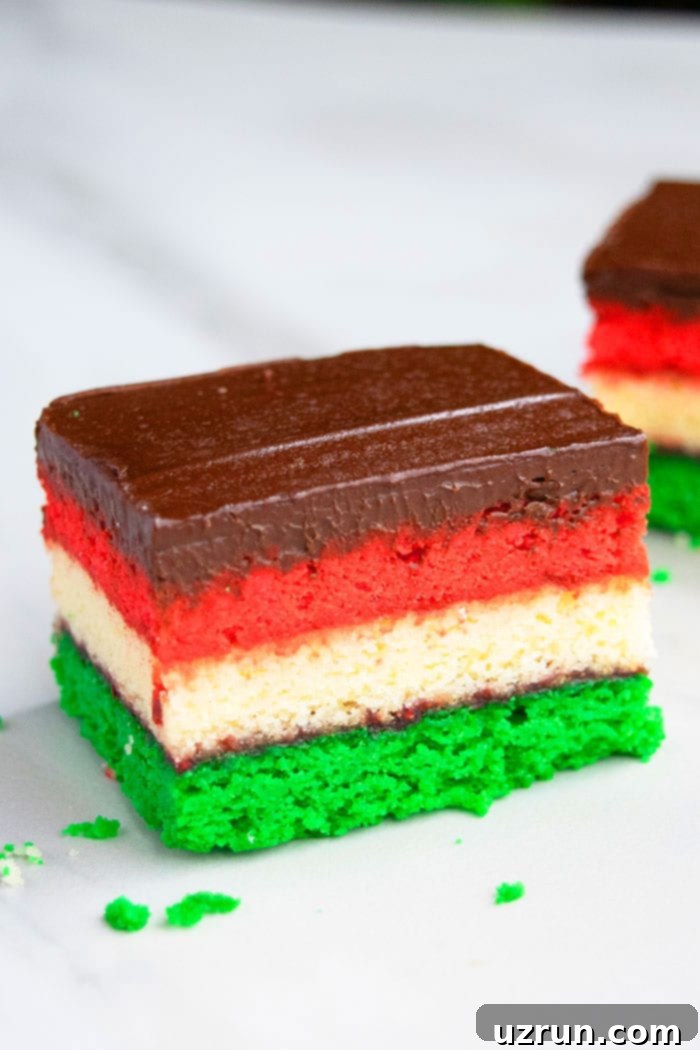
Storage and Freezing Instructions
Proper storage is essential to maintain the freshness and delightful texture of your Italian Rainbow Cookies. Because of their jam layers and chocolate topping, they require a bit more care than typical cookies.
- Refrigerate: Once completely set, these cookies store beautifully in the refrigerator. Place them in an airtight container, separating layers with parchment paper if stacking, to prevent them from drying out or absorbing other flavors. They will stay fresh and delicious for up to 3 days. For best flavor, allow them to come to room temperature for about 15-20 minutes before serving.
- Freeze: Italian Rainbow Cookies are excellent candidates for freezing, making them a perfect make-ahead treat for future occasions. Arrange the cut cookies in a single layer on a baking sheet and freeze until firm (about 1-2 hours). Once firm, transfer them to an airtight freezer-safe container or freezer bag. They can be stored for up to 1 month. To enjoy, simply thaw them in the refrigerator overnight or at room temperature for a few hours. Freezing is a great way to ensure you always have these beautiful cookies on hand!
More Rainbow Desserts to Brighten Your Day
If you love the vibrant appeal of Italian Rainbow Cookies, you’re sure to enjoy these other colorful dessert ideas:
- Rainbow Cereal Balls
- Easy Rainbow Cake (With Cake Mix)
- Rainbow Fruit Loops Marshmallow Bars
- Rainbow Cupcakes (With Cake Mix)
- Rainbow Sprinkle Cake
Recipe
Italian Rainbow Cookies (Italian flag cookies, Venetians, Neapolitans)
Abeer Rizvi
Pin Recipe
Want to Save This Recipe?
Enter your email & I’ll send it to your inbox. Plus, get great new recipes from me every week!
By submitting this form, you consent to receive emails from CakeWhiz
Ingredients
- 1 cup Granulated sugar
- 1 package Almond paste 8 oz. package
- 1.5 cups Butter Unsalted, Room temperature
- 4 Eggs Large, Separated
- ¼ cup Milk Whole or 2%
- 1.5 teaspoon Almond extract
- 2 cups All-purpose flour
- Red food coloring
- Green food coloring
- ½ cup Raspberry jam
- ¾ cup Chocolate chips Semisweet, Melted
Instructions
-
In a large mixing bowl, add sugar, almond paste, butter and mix until smooth and creamy with no lumps. Be sure to scrape down the sides of the bowl.
-
Add egg yolks and mix until smooth.
-
Mix in milk and almond extract until combined.
-
Add flour gradually and mix until just combined. Keep aside.
-
In a separate mixing bowl, add egg whites and whip until they form stiff peaks.
-
Add these whipped egg whites into the flour mixture and mix until just combined.
-
Divide batter into 3 bowls.
-
Mix red food coloring into the first bowl of batter until evenly colored.
-
Then, mix in green food coloring to the second bowl of batter until evenly colored.
-
Leave the third bowl as is and don’t add any food coloring.
-
Spread each color of batter into 3 separate pans (Dimensions: 9 x 13), lined with parchment paper.
-
Bake at 325 degrees F for 10 to 12 minutes. Be sure to rotate the pans halfway trhough baking.
-
Allow the cookies to cool completely.
-
Remove parchment papers.
-
Spread jam on top of the green layer.
-
Place the undyed layer on top.
-
Then, spread jam on top again.
-
Finally, place the pink layer on top.
-
Gently press the layers together.
-
Cover this cake sandwich with plastic wrap (saran wrap).
-
Weigh down the layers with heavy plates and chill in the fridge overnight.
-
Remove the plastic wrap and spread melted chocolate on top of the cake.
-
Use a decorating comb to create a pattern, if you like.
-
Chill in fridge for about 30 minutes until chocolate sets.
-
Use a sharp knife to cut small square slices (2 inch x 2 inch). Enjoy!
Notes
- Read all my tips above.
- Leftovers can be stored in a sealed container in the fridge for up to 3 days.
Nutrition
An automated tool is used to calculate the nutritional information. As such, I cannot guarantee the accuracy of the nutritional information provided for any recipe on this site.
