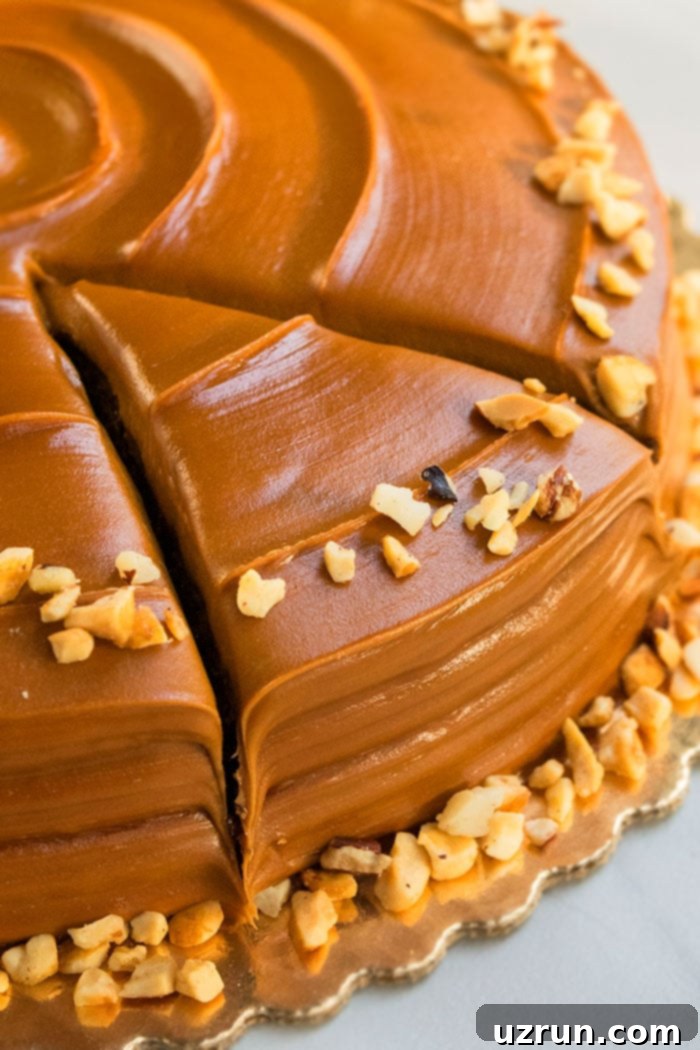
The Best Easy Homemade Chocolate Caramel Cake Recipe: Moist & Rich with Velvety Icing
Indulge in a timeless classic with this incredible **homemade chocolate caramel cake recipe**. This isn’t just any cake; it’s a testament to simple ingredients coming together to create something truly spectacular. Imagine a **soft, incredibly moist chocolate cake**, baked from scratch, perfectly complemented by a luscious, **velvety caramel icing**. It’s the kind of dessert that evokes warm memories and creates new ones, proving that the best treats are often those made with a little love and patience.
The magic of this cake lies in the exquisite balance of flavors. The deep, rich notes of the chocolate cake provide a perfect counterpoint to the sweet, buttery depth of the homemade caramel icing. Each bite offers a harmonious blend that tantalizes the taste buds without being overly sweet. This classic combination makes it a perennial favorite for gatherings, celebrations, or simply as a comforting treat.
It’s important to note that while this recipe features a delightful caramel topping, it is distinctly different from a traditional Southern caramel cake. Southern caramel cakes typically consist of a vanilla-based cake, also adorned with a rich caramel icing. Our version embraces the beloved pairing of chocolate and caramel, creating a unique and equally irresistible experience that stands proudly on its own.
Crafting the Perfect Caramel Icing/Frosting/Filling
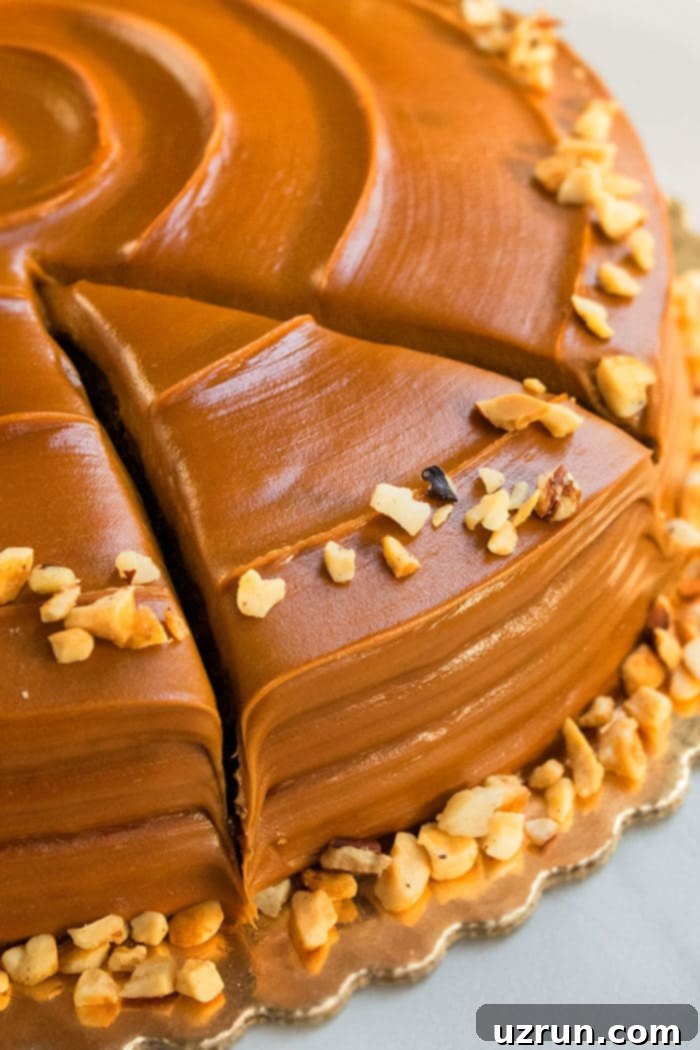
The heart of this **chocolate caramel cake** truly lies in its exquisite homemade caramel icing. While it might seem daunting, creating this rich, golden topping is a process that rewards patience and attention. It typically takes about 1.5 to 2 hours of gentle simmering and stirring to achieve that perfect, deep caramel flavor and silky-smooth consistency. This isn’t a step to rush; hurried cooking can lead to burnt sugar, an undesirable grainy texture, or an underdeveloped flavor.
To ensure success and to monitor your caramel’s progress precisely, especially if you’re new to making caramel from scratch, we highly recommend using a **candy thermometer**. This simple tool takes the guesswork out of the process. Your caramel is ready to be removed from the heat when it reaches approximately 240 degrees Fahrenheit (115 degrees Celsius). This temperature corresponds to the “soft ball” stage, meaning a small drop of caramel will form a soft, pliable ball when dropped into cold water. This ensures your icing will be perfectly thick and spreadable once it cools, avoiding a runny or overly hard result.
Remember to stir frequently to prevent sticking and burning at the bottom of the pan. The color will gradually deepen from a pale cream to a beautiful golden brown, indicating the sugar is caramelizing and developing its signature complex flavor. This careful cooking process guarantees a truly exceptional caramel that perfectly complements the rich chocolate cake.
Step-by-Step: How to Make This Decadent Chocolate Caramel Cake
Crafting this **easy chocolate caramel cake** is a rewarding experience, broken down into a few manageable steps. Follow these instructions for a perfect dessert every time:
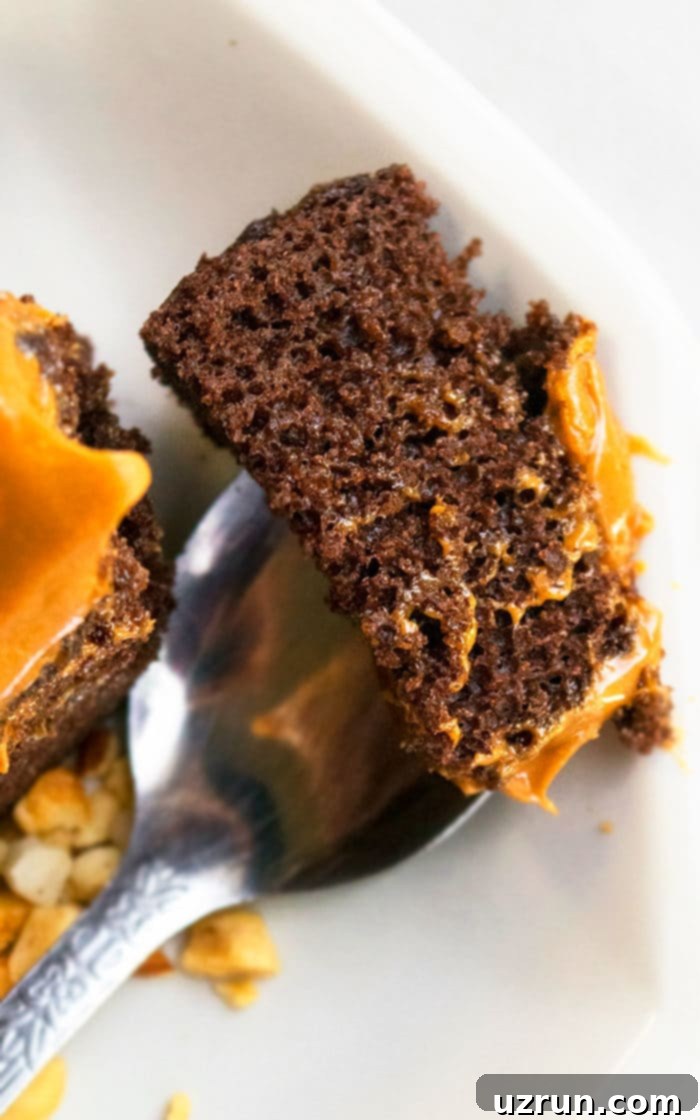
- Bake the Moist Chocolate Cake: The foundation of our dessert is a rich and **moist chocolate cake**. Begin by combining your wet ingredients (eggs, buttermilk, oil, vanilla) in one bowl and your dry ingredients (flour, sugar, cocoa powder, baking soda, baking powder) in another. Gradually incorporate the dry into the wet, alternating with hot water, mixing just until combined to ensure a tender crumb. Pour this luxurious batter into your prepared cake pan and bake until a toothpick inserted into the center comes out clean. This careful baking ensures a cake that’s soft, fluffy, and full of deep chocolate flavor.
- Allow the Cake to Cool Completely: Patience is key here! Once your chocolate cake is baked, it’s crucial to let it cool down entirely on a wire rack. Attempting to frost a warm cake will only lead to a melted, messy caramel disaster. A thoroughly cooled cake provides a firm base for your luscious caramel icing, ensuring it sets beautifully and maintains its structure.
- Prepare the Homemade Caramel Frosting: While your cake is cooling, embark on the delightful journey of making the caramel icing. In a nonstick saucepan, combine butter, evaporated milk, and granulated sugar. Bring this mixture to a gentle simmer, stirring constantly, then reduce the heat to low. This is where the magic happens – slow-cook the mixture for 1.5-2 hours, stirring frequently, until it transforms into a thick, golden-brown, velvety caramel. Don’t forget to use a candy thermometer to hit that perfect 240°F (soft ball) stage.
- Cool and Thicken the Caramel Icing: Once your caramel has reached the desired temperature and color, remove it from the heat and stir in the vanilla extract. It’s essential to let the caramel cool down for about 30-40 minutes at room temperature. During this time, it will continue to thicken significantly, achieving that ideal spreadable consistency for frosting your cake. You want it warm enough to pour and spread, but cool enough to hold its shape.
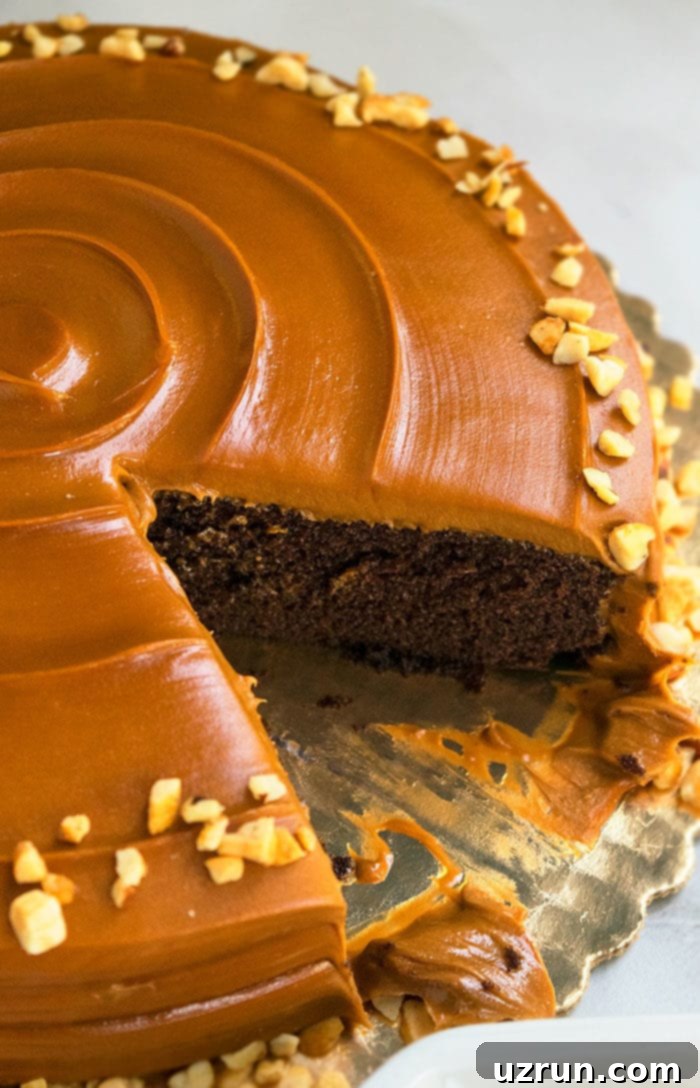
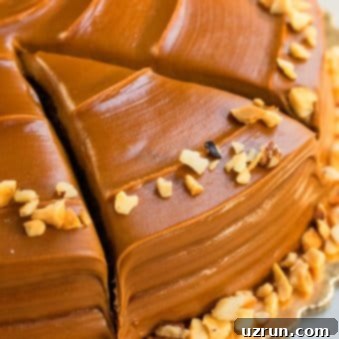
- Assemble and Decorate the Cake: With your chocolate cake fully cooled and your caramel icing perfectly thickened, it’s time for the grand finale. Gently pour the warm, thick caramel over the top of your cake. Use an offset spatula or the back of a spoon to spread it evenly and create beautiful swirls or drips down the sides. For an extra touch of elegance and flavor, consider sprinkling chopped nuts or mini chocolate chips around the top and base of the cake. Slice, serve, and savor this homemade masterpiece!
Storage and Freezing Tips for Your Chocolate Caramel Cake
Proper storage is essential to maintain the freshness and deliciousness of your **chocolate caramel cake**. Given the moist nature of the cake and the dairy-rich caramel icing, I highly recommend refrigerating the cake to prevent it from spoiling. When stored correctly in an airtight container in the refrigerator, your cake will last significantly longer, typically for 3-5 days, while retaining its wonderful flavor and texture. Bringing it back to room temperature for about 30 minutes before serving can enhance its softness and the caramel’s lusciousness.
When it comes to freezing, you can definitely extend the life of your chocolate cake, but with a slight modification. The baked chocolate cake layers can be wrapped tightly in plastic wrap, then aluminum foil, and stored in sealed freezer bags for up to 2-3 months. This is an excellent way to prepare components ahead of time. However, the homemade caramel icing is a different story. Due to its unique composition and the potential for sugar crystallization or separation, **caramel icing generally does not thaw well**. It can become grainy or separate upon thawing, losing its desirable smooth texture. Therefore, it’s best to prepare the caramel icing fresh when you are ready to assemble and serve the cake.
If you plan to freeze the cake layers, ensure they are completely cooled before wrapping. Thaw frozen cake layers in the refrigerator overnight, then bring them to room temperature before icing and serving. This method allows you to enjoy freshly iced cake even when you’ve prepped components in advance.
Troubleshooting: How Do You Thicken Caramel Icing?
Achieving the perfect consistency for your **homemade caramel icing** is crucial for a beautifully presented and delicious cake. If you find your caramel icing is too thin after simmering, the simplest solution is to **cook it for a bit longer** over low heat, stirring continuously. As the water evaporates, the sugar concentration increases, leading to a thicker syrup. Keep a close eye on it to prevent burning, and continue to test with your candy thermometer if you have one, aiming for that 240°F (soft ball) mark.
It’s also important to remember that caramel thickens significantly as it cools down to room temperature. Many bakers worry their caramel is too thin when it’s still warm, but a proper resting period will often yield the desired consistency. Pouring it warm over the cake allows it to spread, but it will firm up as it cools, giving you those beautiful, defined drips and a stable topping.
Conversely, if your caramel becomes too thick or hard upon cooling, you can gently reheat it over very low heat with a tablespoon or two of heavy cream or milk, stirring until it reaches a pourable consistency. The key is gentle heat and gradual addition of liquid to avoid altering the flavor or texture too much. Always aim for a balance – thick enough to coat, but fluid enough to spread beautifully.

Delicious Variations to Customize Your Caramel Cake
While this classic **chocolate caramel cake** is perfect as is, there are many ways to get creative and tailor it to your taste or occasion:
- Salted Caramel Cake Recipe: Elevate the flavor profile by introducing a delightful hint of salt. Simply add a generous pinch of flaky sea salt or a ¼ to ½ teaspoon of fine sea salt to your caramel icing during the final stages of cooking, just before removing it from the heat. The salt beautifully cuts through the sweetness, enhancing the overall caramel experience with a sophisticated sweet and salty contrast.
- Caramel Poke Cake: For a fun and moist variation, transform this into a **caramel poke cake**. Bake the chocolate cake in a rectangular 13×9 inch pan as per the recipe. Once completely cooled, use the handle of a wooden spoon or a bubble tea straw to poke holes all over the cake. Then, generously pour warm caramel sauce (this recipe’s icing, or a store-bought caramel sauce for convenience) over the entire surface, allowing it to seep into the holes. Top with your favorite Chocolate Buttercream Frosting or a classic American Buttercream Frosting for an extra layer of decadence.
- Caramel Pound Cake: If you adore the dense, rich texture of pound cake, consider pairing it with this caramel. Bake a delicious Buttermilk Pound Cake (From Scratch), a decadent Cream Cheese Pound Cake, or a classic Sour Cream Pound Cake. Once cooled, drizzle the homemade caramel sauce generously over the top, letting it cascade down the sides. The intense caramel flavor beautifully complements the buttery richness of the pound cake.
- Add Toffee Bits: For an irresistible crunch and added flavor, sprinkle **toffee bits** (store-bought or homemade) on top of your prepared chocolate caramel cake. Not only do they add a wonderful textural contrast, but their buttery, slightly bitter notes also perfectly enhance the caramel and chocolate, making your cake look even more appealing.
- Add Chocolate Chips: Double down on the chocolate goodness by sprinkling mini chocolate chips over the still-wet caramel icing. This adds another layer of chocolate flavor and creates a beautiful, inviting texture on top of the cake. It’s a simple yet effective way to decorate and boost the chocolate factor.
- Nutty Crunch: Beyond just garnishing, consider incorporating chopped pecans or walnuts into the chocolate cake batter for added texture and a nutty flavor that pairs wonderfully with caramel.
- Chocolate Ganache Drizzle: For the ultimate chocolate lover, once the caramel icing has set, drizzle a thin layer of chocolate ganache over the top. The combination of rich chocolate ganache, luscious caramel, and moist chocolate cake is simply divine.
Essential Tips and Techniques for Caramel Cake Success
Mastering this **chocolate caramel cake** recipe is made easier with these key tips and techniques:
- Achieving Perfect Caramel Consistency: If your homemade caramel icing appears too thin after cooking, simply return it to low heat and continue simmering for a little longer, stirring constantly. It will thicken considerably as it cools, so don’t be alarmed if it seems a bit thin while warm. Conversely, if your caramel becomes too thick or seizes up, you can easily rescue it by warming it gently over very low heat and whisking in a tablespoon or two of heavy cream until it reaches your desired pourable consistency.
- Use a Nonstick Saucepan: This might seem like a small detail, but using a **nonstick saucepan** for making your caramel icing is crucial. Caramel can be prone to sticking and burning, especially during its long simmering process. A nonstick surface helps prevent these issues, making stirring easier and cleanup a breeze, ultimately leading to a smoother, burn-free caramel.
- Opt for Unsalted Ingredients: Whenever possible, use unsalted butter in both your cake and your caramel icing. This gives you complete control over the saltiness of your dessert. By adding salt separately (especially for a salted caramel variation), you can perfectly balance the flavors and prevent the cake from becoming overly salty, ensuring a harmonious taste profile.
- Don’t Overmix the Cake Batter: For a tender and moist chocolate cake, mix the wet and dry ingredients just until combined. Overmixing develops the gluten in the flour, resulting in a dense, tough cake. A few lumps are perfectly fine!
- Cool the Cake Completely: As mentioned, this step cannot be overstated. A warm cake will melt your caramel icing, leading to a messy, unattractive finish. Ensure the cake is cool to the touch throughout before attempting to frost.
- Quality Ingredients Matter: While simple, the quality of your ingredients makes a difference. Use good quality cocoa powder for a rich chocolate flavor and fresh butter for the best caramel taste.
- Serve at Room Temperature: While storing your cake in the fridge is best for longevity, bringing it out about 30 minutes before serving allows the cake to soften and the caramel to become perfectly pliable and luscious, enhancing the overall enjoyment.
Explore Other Caramel Desserts
If you’re a fan of the rich, buttery goodness of caramel, you’ll love exploring these other delightful treats:
- Caramel Pecan Sticky Buns
- Easy Caramel Apple Pie
- Chocolate Caramel Apples
- Caramel Snickerdoodle Cookies
- Homemade Caramel Sauce
- Salted Caramel Chocolate Chip Cookies
- Mocha Caramel Truffles
Other Classic Cake Recipes to Try
If you enjoyed baking this **chocolate caramel cake**, you might also love these other timeless cake recipes:
- Moist Carrot Cake with Cream Cheese Frosting
- Best Vanilla Cake
- Easy Black Forest Cake (With Cake Mix)
- Angel Food Cake
- Moist Red Velvet Cake
Recipe
Chocolate Caramel Cake
Abeer Rizvi
Pin Recipe
Want to Save This Recipe?
Enter your email & I’ll send it to your inbox. Plus, get great new recipes from me every week!
By submitting this form, you consent to receive emails from CakeWhiz
Ingredients
Caramel Icing or Frosting
- 1.5 cups Butter Unsalted
- 2 cans Evaporated milk 12 oz. each
- 2 cups Granulated sugar
- 2 teaspoon Vanilla extract
Chocolate Cake
- 2 cups Granulated sugar
- 1 ¾ cups All-purpose flour
- ¾ cup Cocoa powder
- 1.5 teaspoon Baking powder
- 1.5 teaspoon Baking soda
- 2 Eggs Large
- 1 cup Buttermilk
- ½ cup Oil
- 1 tablespoon Vanilla extract
- 1 cup Water Boiling hot
Instructions
-
In a large mixing bowl, add eggs, milk, oil, vanilla extract and mix until smooth. Keep aside.
In another mixing bowl, whisk together sugar, flour, cocoa, baking powder, baking soda.
Dump the dry mixture into the wet mixture, alternating with the hot water and mix until just combined.
Pour batter in a greased/floured round cake pan (Dimensions: 9×3).
Bake at 350 degrees for 40-45 minutes or until an inserted toothpick in the center comes out clean.
Allow the cake to cool down completely.
Icing
-
While the cake is baking and cooling, prepare the icing: In a nonstick saucepan, add butter, evaporated milk, and sugar and cook over medium heat until everything has fully melted.
-
Reduce heat to “Low,” stirring often for the next 1.5-2 hours, ensuring it doesn’t burn and it thickened and darkened to a golden brown color.
It’s ready when it can coat the back of your spoon.
-
Remove from heat and add in vanilla extract.
-
Let it cool for 30-40 minutes and allow it to thicken even further.
-
Pour this on top of the cooled cake and use a spatula to spread it out and make swirls on top.
-
Sprinkle some chopped nuts around the top and bottom of the cake. Enjoy!
Nutrition
An automated tool is used to calculate the nutritional information. As such, I cannot guarantee the accuracy of the nutritional information provided for any recipe on this site.
Until next time, tata my lovelies!
