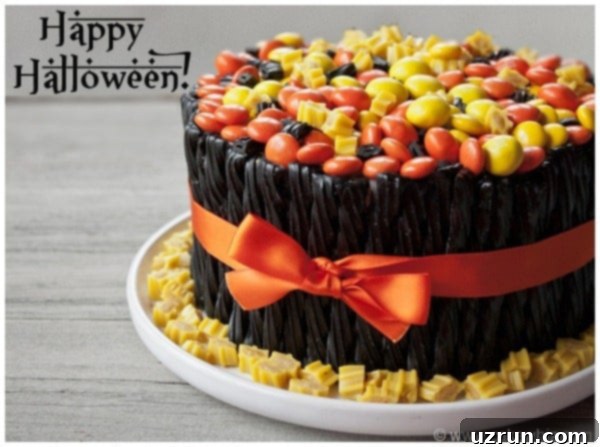
Spooktacularly Simple: The Ultimate Easy Halloween Twizzler Cake Recipe
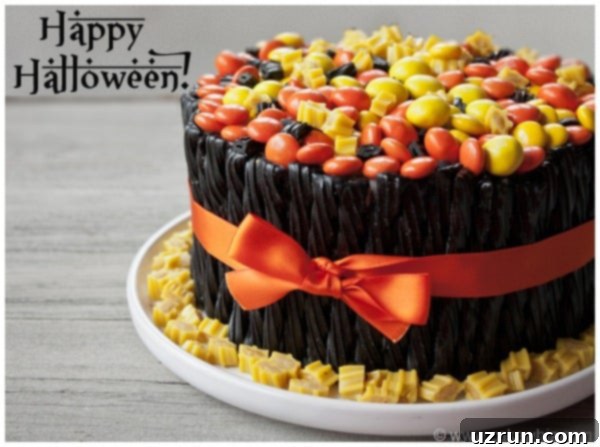
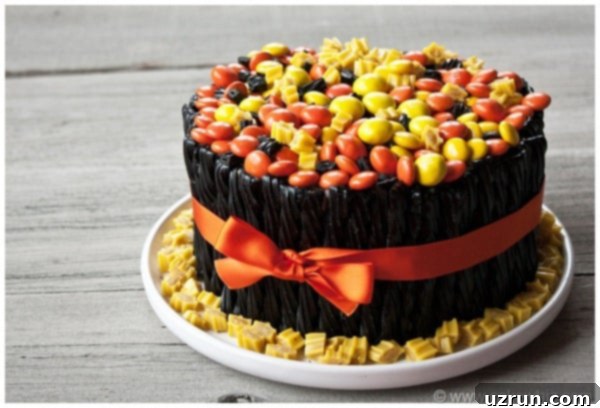
Are you ready to embrace the playful spirit of Halloween? As someone who cherishes the magic of this holiday – from the costumes to the delightful array of candies – I believe that a truly festive celebration isn’t complete without a show-stopping dessert. And what could be more fun than a cake that’s as easy to make as it is enchanting to behold? Our Easy Halloween Twizzler Cake is a homemade marvel, featuring a rich chocolate base beautifully frosted and adorned with a vibrant medley of orange, yellow, and black candies, with black Twizzlers creating a striking perimeter. It’s the perfect treat to satisfy your inner child and delight every guest at your Halloween gathering!
This cake is a celebration of all things sweet and spooky, designed for bakers of all skill levels. Forget complicated techniques or hours spent in the kitchen; this recipe focuses on simple ingredients and straightforward steps to create a truly impressive result. Just like our popular Easy Christmas Cake and the delightful Kit Kat Cake {With Strawberries}, this Halloween masterpiece utilizes the charm of candy decorations to transform a simple cake into an edible work of art. Get ready to dive into a world of chocolate, frosting, and festive Halloween fun!
Crafting Your Easy Halloween Cake: A Step-by-Step Guide
Creating this eye-catching Halloween cake is much simpler than it looks. With a few key steps and some creative candy placement, you’ll have a dessert that’s both delicious and delightfully spooky. Here’s a detailed breakdown of how to assemble your Twizzler cake from scratch, ensuring a perfectly decorated treat for your Halloween festivities.
- Bake and Cool the Cakes: Begin by baking your favorite chocolate cake layers. Ensure they are completely cooled before you start frosting. This is a crucial step; attempting to frost warm cakes will lead to melted frosting and a messy result. While your cakes are cooling, you can prepare your chocolate buttercream frosting, ensuring it’s ready when you are.
- Level and Prepare: Once the cakes are cool, use a serrated knife to carefully level the tops, removing any domes. This creates a flat surface, essential for a stable and evenly decorated cake. Place your first leveled cake layer onto your chosen serving dish or cake stand.
- Assemble and Frost: Evenly spread a generous layer of your delicious chocolate buttercream icing over the first cake layer. Carefully place the second cake layer on top, aligning it perfectly and gently pressing down to secure it. Now, it’s time to ice the entire cake – top and sides – with a smooth, even layer of frosting. Don’t worry about perfection; the Twizzlers will hide most of the sides!
- Adorn with Black Twizzlers: This is where the Halloween magic truly begins! Take your black Twizzlers and measure them against the height of your frosted cake. You will likely need to trim them to size using kitchen scissors for a neat, uniform look. Carefully press the trimmed Twizzlers around the entire perimeter of the cake, sticking them firmly into the frosting. Work your way around until the sides are completely covered.
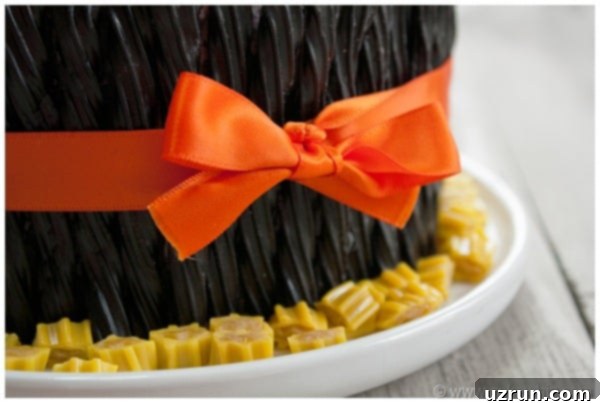
- Secure with a Ribbon: To ensure your Twizzlers stay perfectly in place and don’t slip, wrap a festive, bright orange ribbon snugly around the base of the cake, tying it into a bow or securing it with a small knot. This not only adds a decorative touch but also provides structural support for the candies.
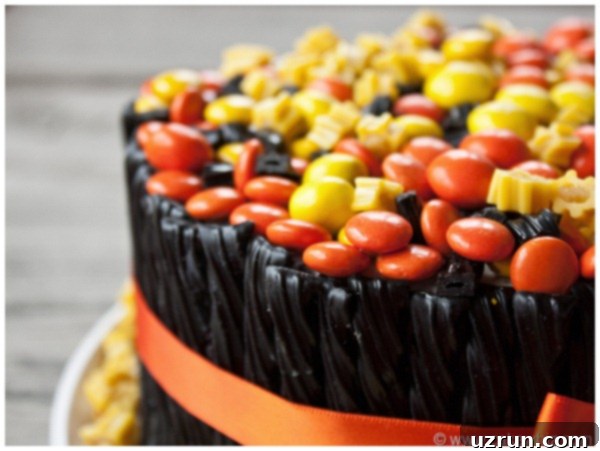
- Top with Halloween Candies: Now for the fun part – decorating the top! Scatter a vibrant mix of yellow and orange M&M candies over the entire top surface of the cake. For an extra touch, chop up any leftover black or yellow Twizzler pieces and sprinkle them amongst the M&Ms.
- Final Flourish at the Base: Complete the look by tossing a few more yellow Twizzler bits or matching candies around the base of the cake on your serving dish. This adds extra color and ties the whole spooky theme together beautifully. Now, stand back and admire your magnificent creation before digging in!
Creative Variations for a Spooktacular Cake
While our classic Easy Halloween Twizzler Cake is fantastic, there are endless ways to customize it to your taste and holiday theme. Don’t be afraid to experiment with different flavors, fillings, and decorations to make your spooky treat truly unique!
Explore Other Cake Flavors: The beauty of this recipe is its versatility. While chocolate provides a wonderful dark base for Halloween, you can easily swap it for other delicious options. Consider using a lively Funfetti/Confetti Cake {From Scratch}, perhaps dyed with Halloween-appropriate colors like orange or purple. For a more traditional but still festive look, a vibrant Easy Rainbow Cake {With Cake Mix} could be adapted using only black, orange, and purple layers. A classic Best Vanilla Cake Recipe {From Scratch} offers a blank canvas, while a dramatic Best Red Velvet Cake {From Scratch} with its deep crimson hue would be perfect for a vampiric or gothic Halloween theme.
Incorporate Delicious Cake Fillings: Elevate your cake experience by adding a delightful filling between the layers. Fruity fillings can provide a wonderful contrast to the chocolate cake and sweet candies. Imagine a tangy Raspberry Pie Filling, a sweet Strawberry Pie Filling, or a rich Cherry Pie Filling creating a delightful surprise with every slice. Ensure your filling isn’t too runny, or it might escape the cake layers.
Switch Up Your Frosting Flavors: The chocolate buttercream is a classic, but don’t limit yourself! A glossy Chocolate Ganache {2 Ingredients} could offer a smoother, richer coating. For a tangier twist, a Chocolate Cream Cheese Frosting adds depth, while a Healthy Coconut Cream Chocolate Frosting could provide a lighter, dairy-free alternative with a hint of tropical flavor.
Get Creative with Candy Toppings: This cake is all about the candy! Feel free to use a variety of your favorite Halloween candies. Small chocolates, gummy worms, candy corn, or even cut-up candy bars can add texture and visual interest. Just be mindful of the weight of the candies to prevent the cake from imploding. Lighter candies are generally best spread across the top, while lollipops or candy skewers can be gently stuck into the cake for height.
Experiment with Different Halloween Color Schemes: While orange, yellow, and black are classic Halloween hues, consider other spooky combinations. Green and purple candies can create a Frankenstein or witchy vibe, while red and yellow might evoke fiery demons or autumn leaves. Choose a ribbon color that perfectly complements your chosen candy palette for a cohesive look.
Expert Tips and Techniques for Your Halloween Birthday Cake
Achieving a perfectly spooky and stable Halloween Twizzler Cake is easy with a few insider tips. These techniques will help ensure your cake looks fantastic and holds up beautifully for your celebration.
- Add Black Candles for Birthdays: If this festive cake is marking a Halloween birthday, enhance the celebratory mood with elegant black candles. They perfectly complement the dark Twizzler border and add a touch of gothic sophistication to the overall design.
- Opt for a Dark Colored Frosting: This is a crucial tip! Avoid using white or light-colored frosting for the base layer, especially if you’re using black licorice Twizzlers. Black licorice can sometimes leave faint black stains, which will be much more noticeable against a light frosting. A dark chocolate or even black-tinted frosting will beautifully camouflage any minor imperfections or bleeding, ensuring a clean and professional look.
- Don’t Skip the Ribbon: The decorative ribbon isn’t just for looks; it serves a vital functional purpose. It acts as a gentle embrace, holding the Twizzlers firmly against the frosted sides of the cake. Without this support, the candies might slip or fall, especially as the cake settles or if it’s moved. Choose a ribbon color that pops, like a bright orange or deep purple, for extra visual appeal.
- Pre-Trim Your Twizzlers: For a seamless and professional finish, it’s much easier to trim your Twizzlers to the exact height of your cake before you start sticking them on. Measure the height of your frosted cake and cut the Twizzlers consistently. This prevents uneven edges and makes the decorating process much smoother and quicker.
- Level Your Cake Layers: A flat, level cake is the foundation for a successful decorated cake. If your cake layers have domes, trim them off. This ensures that the top layer of candies has a perfectly flat surface to rest on. Unlevel cakes can cause candies to slide off or create an uneven, leaning appearance, making your beautiful decorations less stable.
- Chill for Stability: After frosting and adding the Twizzlers, consider chilling the cake for 15-20 minutes. This helps the frosting firm up, securing the Twizzlers even more before you add the top candies, ensuring everything stays put.
- Use Quality Ingredients: A delicious cake starts with good ingredients. Whether you’re baking from scratch or using a mix, ensure your ingredients are fresh. A rich chocolate cake and creamy buttercream will make your Halloween creation taste as good as it looks.
Storing Your Delightful Halloween Cake
Proper storage is key to keeping your Halloween Twizzler Cake fresh and delicious, especially with all those wonderful candies. Here’s how to best store your masterpiece to enjoy it for days after your celebration.
Refrigerate for Freshness: Your decorated cake can be stored in a sealed airtight container in the refrigerator for up to 3 days. This will keep the cake moist and the frosting stable. However, please be aware that the candies, particularly the Twizzlers and M&Ms, may become slightly sticky or develop a slight sheen due to the moisture and humidity in the refrigerator. This is a common occurrence with candy-decorated cakes and typically does not affect the taste, just a minor change in texture.
Freezing for Longer Storage: If you’re looking to prepare components in advance or save leftovers for a much later treat, both the unfrosted cake layers and the buttercream frosting can be frozen separately. Store them in airtight containers or tightly wrapped in plastic wrap and aluminum foil for up to 1 month. When you’re ready to assemble your cake, simply thaw the cake layers and frosting to room temperature. The cake layers will thaw quicker at room temperature or overnight in the refrigerator, while frosting should be gently re-whipped after thawing to regain its smooth consistency. Once thawed, follow the assembly and decorating instructions provided in the recipe card below.
More Spooky & Fun Halloween Cake Ideas
If you’re looking for more Halloween inspiration after mastering this Twizzler cake, we have plenty of other creative and easy cake ideas to make your holiday extra special. Each of these recipes is designed for maximum impact with minimal fuss!
- Easy Spider Cake (Spider Web Cake): Create an eerie yet adorable spider-web themed cake, often featuring chocolate Oreo spiders crawling across a web of frosting. Perfect for adding a creepy-crawly touch to your dessert table.
- Easy Candy Cake (With Halloween Leftovers): Have too much leftover Halloween candy? This cake is the perfect solution! Simply frost a cake and pile on all your favorite trick-or-treat spoils for a decadent, candy-loaded masterpiece.
- Easy Mummy Cake: A classic Halloween favorite, this cake transforms a simple frosted cake into a cute mummy using strips of frosting or fondant for bandages and candy eyeballs for a playful stare.
- Easy Eyeball Cake: Creep out your guests with this surprisingly simple eyeball cake! Often made with white frosting and edible googly eyes or gel for the irises, it’s gruesomely good.
- Easy Candy Corn Cake: Capture the iconic colors of Halloween with a cake layered and frosted to resemble a giant candy corn. It’s a vibrant and recognizable treat that’s always a hit.
- Easy Monster Cake: Let your imagination run wild with a goofy or ghoulish monster cake! Use brightly colored frosting, candy eyeballs, and various candies to create a unique, one-of-a-kind monster friend.
With this Easy Halloween Twizzler Cake, you’re not just baking a dessert; you’re creating a memorable centerpiece for your holiday celebration. It’s a testament to the joy of simple, homemade treats that bring smiles and a touch of spooky fun to everyone. Happy Halloween baking!
Recipe
Easy Halloween Cake (Twizzler Cake)
Abeer Rizvi
Pin Recipe
Want to Save This Recipe?
Enter your email & I’ll send it to your inbox. Plus, get great new recipes from me every week!
By submitting this form, you consent to receive emails from CakeWhiz
Ingredients
- 2 Chocolate Cake Round, Dimensions: 8×2 each
- 3 cups Chocolate buttercream icing
- 15-20 Twizzlers Black
- 1 cup M&M candies Yellow and orange
Instructions
-
Bake the cakes and allow them to cool completely.
-
While the cakes are baking and cooling, prepare the frosting.
-
Trim the domes off the cakes, if any, to ensure they are levelled.
-
Place one cake on a serving dish.
-
Spread icing on top.
-
Place the other cake on top and press gently to secure it into place.
-
Ice the entire cake smoothly in frosting.
-
Start sticking black Twizzlers all around the sides of the cake. I had to cut Twizzlers in half with scissors to match the height of the cake. You may need to do that too.
-
Wrap a bright orange ribbon around the cake to hold Twizzlers in place. Without this ribbon, some of the Twizzlers were falling over.
-
Spread yellow and orange candies on top of the cake. I also cut up some leftover yellow and black Twizzlers into little pieces and tossed those on top.
-
Toss some more yellow Twizzler bits around the base. Enjoy!
Notes
- Read all my tips above for additional guidance on baking and decorating.
- Leftovers can be stored in a sealed airtight container in the fridge for up to 3 days. Please note that candies may become sticky from the moisture in the refrigerator, but this typically does not affect taste.
Nutrition
An automated tool is used to calculate the nutritional information. As such, I cannot guarantee the accuracy of the nutritional information provided for any recipe on this site.
