Spooktacularly Simple DIY Halloween Treat Bags: Easy Candy Glove Favors Kids Love!
Halloween is all about fun, costumes, and of course, treats! While classic goodie bags are always a hit, why not elevate your Halloween handout game with something truly unique and incredibly simple? These DIY Halloween treat bags, made from ordinary gloves and filled with colorful candies, are a fantastic way to delight kids and add a creative touch to your spooky festivities.
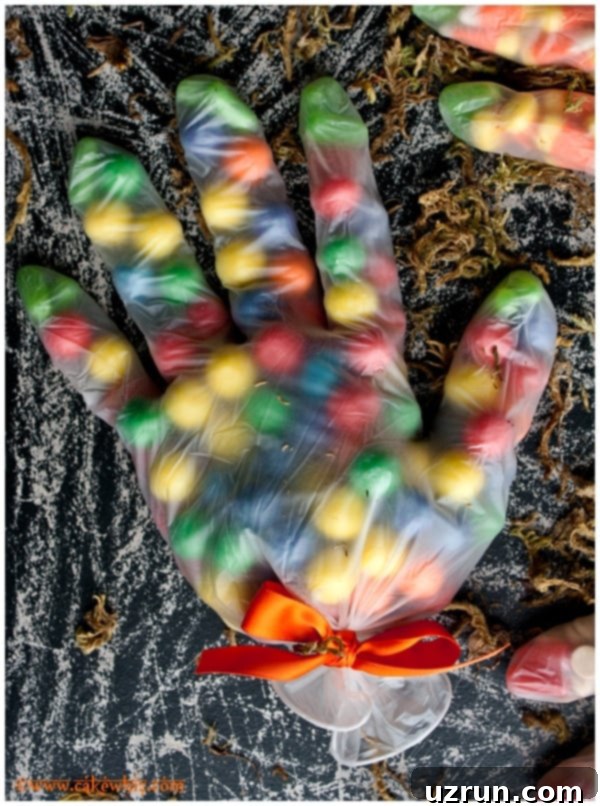
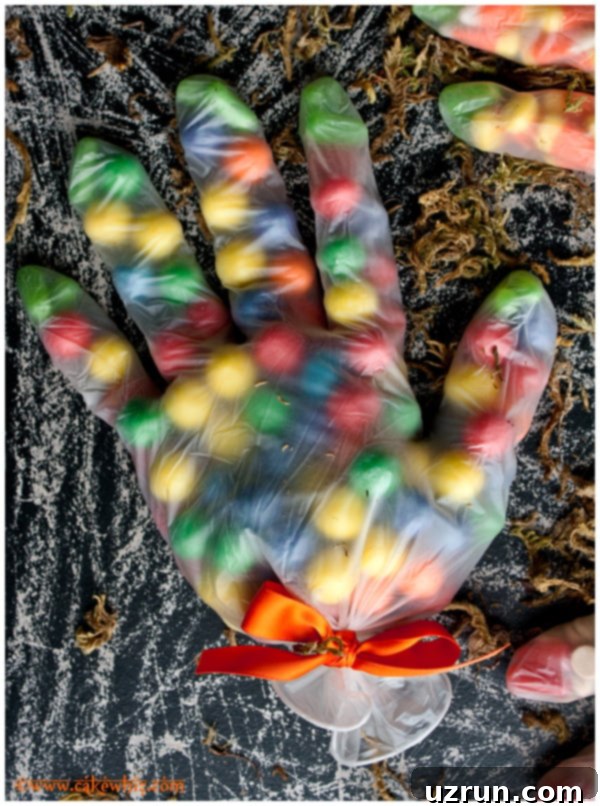
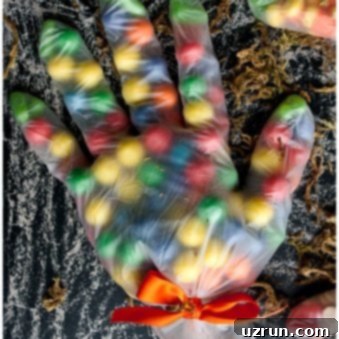
I still vividly remember one year when I was trick-or-treating as a child; one of our neighbors handed out these ingenious glove treat bags. I thought it was the coolest thing ever! Their gloves were clear, but I’ve found that using semi-transparent gloves, like those readily available at drugstores, makes the vibrant candies inside pop even more. Imagine the delight on a child’s face when they receive a “hand” full of treats! I’ve filled mine with a mix of colorful gumballs, classic candy corns, rich peanut butter chips, and chewy Mike and Ike candies, creating a visually appealing and delicious assortment.
These adorable and super easy glove goodie bags are perfect for any Halloween occasion. Whether you’re hosting a Kids Halloween Party, preparing for a school event, or simply looking for a memorable way to hand out treats to trick-or-treaters, these candy-filled gloves are sure to be a showstopper. They combine the thrill of Halloween with a touch of homemade charm, making them excellent party favors that guests will talk about long after the spooky night is over. Plus, they are incredibly customizable, allowing you to tailor them to any theme or dietary preference.
Why Choose Glove Halloween Treat Bags?
These unique goodie bags offer several advantages over traditional treat bags:
- Unforgettable & Fun: Kids are instantly captivated by the novelty of receiving a “hand” filled with treats. It’s a memorable and interactive way to distribute candy.
- Easy to Make: With just two main steps, these bags are incredibly simple to assemble, making them perfect for last-minute preparations or involving children in the crafting process.
- Highly Customizable: From the type of candy to the ribbon used, you have endless options to personalize each bag, catering to different tastes, allergies, or party themes.
- Hygienic: Each treat is individually enclosed within the glove, offering a more hygienic option for handouts, especially if you’re concerned about multiple hands reaching into a communal bowl.
- Cost-Effective: Gloves are inexpensive, and you can buy bulk candy or small toys to fill them, making this a budget-friendly option for large parties or many trick-or-treaters.
Getting Started: What You’ll Need
Creating these festive Halloween treat bags requires minimal supplies, most of which you probably have or can easily find:
- Non-Latex Gloves: This is crucial! Ensure they are food-safe and free of powder. Semi-transparent or clear gloves work best to showcase the colorful contents.
- Assorted Candies or Small Treats: Think small, colorful, and varied! Gumballs, candy corns, small chocolates, M&Ms, Skittles, Mike and Ikes, and peanut butter chips are great starting points.
- Ribbon, Twist Ties, or Washi Tape: For securing the opening of the glove. Orange, black, purple, or green ribbons are perfect for Halloween.
- Optional Embellishments: Spider rings, googly eyes, small stickers, or mini toys to add extra flair.
How To Make Easy Halloween Treat Bags
Making these candy glove goodie bags is incredibly straightforward. Here’s your simple step-by-step guide:
- Open Non-Latex Glove: Gently open the non-latex glove, ensuring it’s clean and ready for filling. It’s often easiest to start by pushing a few candies into the very tips of the fingers first. This helps to define the “fingers” of your treat bag.
- Fill with Candy of Your Choice: Begin filling the glove with your chosen candies. As you add more, gently push the treats into each finger section until they are adequately filled. Don’t overpack them, as you’ll need room to tie the glove securely.
- Tie Up the Glove: Once filled to your desired level, gather the opening of the glove and tie it securely with a festive ribbon, a twist tie, or even a piece of decorative Washi tape. Make sure it’s tight enough so no candies can escape.
- Repeat and Get Creative: Continue making as many glove bags as you need. Feel free to experiment with different candy combinations and decorative ties for a varied and exciting assortment!
Creative Variations for Your Halloween Candy Bags
The beauty of these glove treat bags lies in their versatility. Here are some fun ideas to inspire your creations:
Gumball Bags:
For a vibrant and playful look, fill your gloves with an assortment of colorful gumballs. The round shapes perfectly fill the fingers, creating a delightful, bubbly effect that kids adore. You can even try to sort them by color for a rainbow hand!
Peanut Butter Chocolate Chip Bags with “Fingernails”:
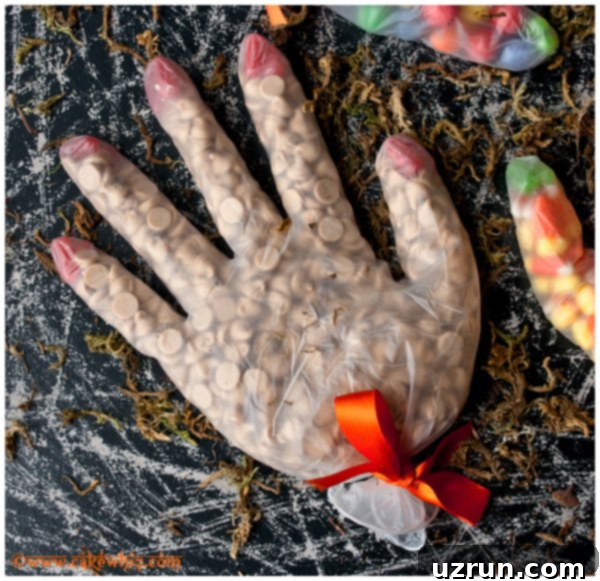
To create a spooky or fun “fingernail” effect, start by placing a single red or white candy (like an M&M, Skittle, or small jelly bean) into the very tip of each finger section. Once the “fingernails” are in place, fill the rest of the glove with delicious peanut butter chocolate chips for a rich and satisfying treat. This clever trick adds an extra layer of detail that makes these goodie bags truly special.
Candy Corn Bags with Green Tips:
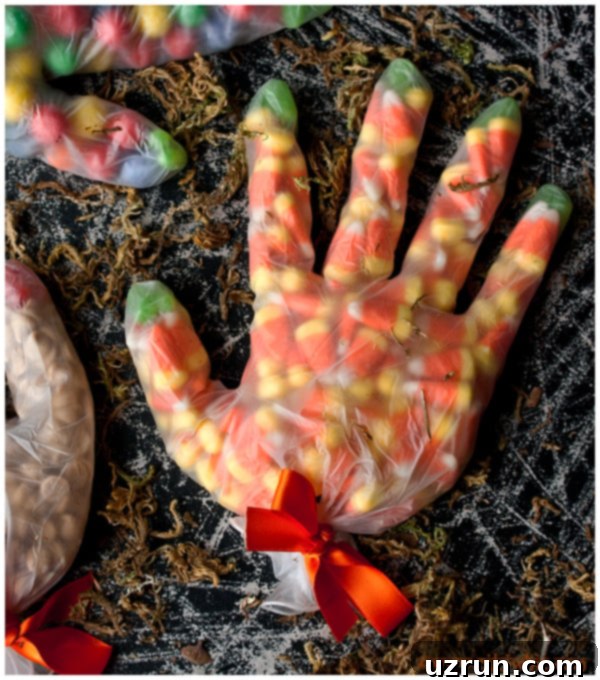
Embrace the classic Halloween colors! Begin by placing a small green candy (e.g., green M&Ms, green jelly beans) into each finger tip. Then, fill the remainder of the glove with cheerful candy corns. The green “tips” with the orange and white candy corn create a fantastic, festive look that captures the spirit of the season.
Add a Spider Ring (or other small toy):
For an extra spooky surprise, slip a plastic spider ring onto one of the glove’s fingers before tying it off. This adds a fun, non-edible element that kids can wear immediately. Other small toys like vampire teeth, glow sticks, mini bouncy balls, or temporary tattoos can also be added for a similar effect.
Mini Individually Wrapped Candies Assortment:
Make every kid’s Halloween dream come true by filling the gloves with a variety of mini individually wrapped candies. Small chocolates, fruit chews, and miniature candy bars fit perfectly. Candies like Twix, Smarties, or M&Ms (fun-size packs or loose) fit nicely into the fingers of the gloves, offering a diverse selection of treats in one fun package.
Popcorn Bags:
For a delightful salty-sweet twist, fill your glove bags with your favorite variety of popcorn. You can use plain buttered popcorn, cheese popcorn, or for an extra special touch, try my irresistible Caramel Corn recipe. This is a great alternative for those who prefer savory snacks or a mix of both.
Use Non-Edible Items:
Not all treats have to be edible! For a non-candy alternative, fill the gloves with small toys, stickers, mini bubbles, crayons, erasers, small party favors, or even a few shiny coins (play money or real!). This is an excellent option for school parties, children with allergies, or just to offer something different.
Use Non-Candy Snack Items:
Looking for healthier or allergy-friendly options? Fill your gloves with colorful cereal, goldfish crackers, mini cookies, fruit snacks, pretzels, or small bags of dried fruit. The key is to choose items that are small enough to fit into the fingers and won’t easily crush.
Experiment with Different Sized Gloves:
Gloves come in small, medium, and larger sizes. Consider the age group you’re targeting and the size of the items you’re putting inside. Smaller gloves are perfect for younger children and smaller candies, while larger gloves can accommodate bigger treats or small toys.
Essential Tips and Techniques for Perfect Halloween Goodie Bags
To ensure your Halloween treat bags are a success, keep these helpful tips in mind:
- ALWAYS Use Non-Latex Gloves: This is a non-negotiable safety tip. Latex gloves often have a powder coating inside (cornstarch or talc) that can contaminate the candy and cause allergic reactions for those sensitive to latex. Non-latex options like nitrile or vinyl gloves are safer and readily available.
- Get Creative with Tying the Bags: Don’t just stick to plain string! Use metallic twist ties for a festive shimmer, colorful ribbons (satin, grosgrain, or curling ribbon) that match your Halloween theme, or even fun Washi tape to seal the opening. You can tie a bow or simply a tight knot.
- Be Gentle When Filling the Gloves: While gloves are generally durable, some items can be “pokey” or have sharp edges. Gently insert these items, pushing them carefully into the fingers to prevent tearing the glove. Avoid forcing anything that doesn’t fit easily.
- Turn it into a Party Activity: Instead of preparing all the bags yourself, set up a “Build Your Own Treat Hand” station at your Halloween party! Provide a variety of candies, small toys, and different colored gloves and ribbons. Kids will love customizing their own goodie bags to take home as a fun favor.
- Consider Allergy Safety: If you’re handing these out to a wide audience (e.g., trick-or-treaters), consider common allergens. Offer a mix of treats, including some nut-free or individually wrapped options, or clearly label your bags if they contain common allergens.
- Presentation Matters: Arrange your finished treat bags in a large pumpkin bucket, a spooky basket, or hang them from a “spooky tree” using string. A creative display adds to the excitement and makes them even more appealing.
- Batch Prep for Efficiency: If you’re making many bags, set up an assembly line. Have all your gloves open, then different bowls for each type of candy/item, and finally a station for tying. This will make the process much faster and more enjoyable.
Storage of Edible Halloween Party Favors
Proper storage ensures your treats remain fresh and delicious until Halloween night:
- Room Temperature: Most non-chocolate candies and snacks can be safely stored at room temperature. If the items were originally stored at room temperature in their factory packaging, they will generally be fine in the gloves for up to 5 days, provided they are kept in a cool, dry place away from direct sunlight.
- Avoid Heat and Humidity: For best results and to prevent candies from melting or becoming sticky, store your finished treat bags in a cool, dry environment.
- Airtight Containers: If preparing several days in advance, consider placing the filled glove bags inside a larger airtight container or Ziploc bag to maintain freshness and protect them from dust or pests.
More Spooktacular Halloween Desserts You’ll Love
Looking for more Halloween inspiration? Check out these other festive recipes:
- Easy Candy Cake {With Halloween Leftovers}
- Easy Mummy Cake
- Easy Ghost Cookies {No Bake}
- Easy Monster Cookies {Candy Corn Cookies}
- Easy Monster Cupcakes {Halloween Cupcakes}
Recipe
Halloween Treat Bags
Abeer Rizvi
Pin Recipe
Want to Save This Recipe?
Enter your email & I’ll send it to your inbox. Plus, get great new recipes from me every week!
By submitting this form, you consent to receive emails from CakeWhiz
Ingredients
- 1 cup Candy corns
- 1 cup Peanut butter chocolate chips
- 1 cup Gum balls
- 5 pairs Non-latex gloves
- Assorted Ribbons
- Small red or green candies (for fingernails, optional)
Instructions
-
To make delightful gumball bags, gently open a clean non-latex glove. Start by pushing a few gumballs into each finger section until they are visibly filled and rounded. Continue adding gumballs to the palm section until the glove is full but not overly stretched. Once filled, gather the opening and tie it securely with an orange or festive ribbon to prevent any candies from falling out.
-
For spooky peanut butter chip bags with “fingernails,” begin by placing a single small red candy (like a red M&M or jelly bean) into the tip of each finger section of a non-latex glove. Once these “fingernails” are in place, carefully fill the rest of the glove with peanut butter chocolate chips. Ensure the chips are gently distributed to maintain the red candy tips. Tie up the glove securely with an orange ribbon.
-
To create classic candy corn bags, start by placing a small green candy into the tip of each finger section of a non-latex glove. After the green “tips” are set, fill the remainder of the glove with colorful candy corns. Once filled, tie up everything securely with a festive ribbon, such as green or orange.
-
Continue making as many glove treat bags as you desire, using your favorite candies and small treats. Remember to be gentle when filling to avoid tearing the gloves, and always secure them tightly with a festive tie!
Notes
- For best results and safety, always use non-latex, food-grade gloves that are free of powder.
- Consider adding small non-edible treats like spider rings or mini stickers for extra fun.
- Leftovers can be stored at room temperature for up to 5 days in a cool, dry place.
- Get creative with ribbons and ties to match your Halloween theme.
Nutrition
Carbohydrates: 60g
Protein: 2g
Fat: 10g
Saturated Fat: 6g
Trans Fat: 1g
Cholesterol: 6mg
Sodium: 122mg
Fiber: 1g
Sugar: 55g
Vitamin A: 93IU
Vitamin C: 1mg
Calcium: 48mg
Iron: 1mg
An automated tool is used to calculate the nutritional information. As such, I cannot guarantee the accuracy of the nutritional information provided for any recipe on this site.
