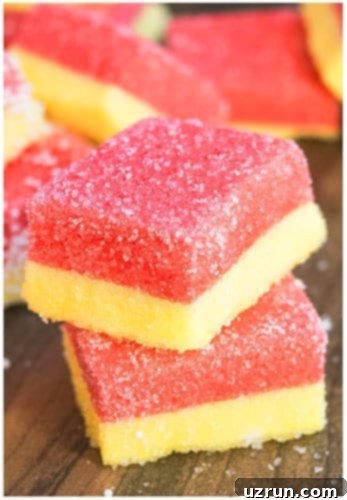
Easy JELL-O Marshmallow Candy Recipe: No-Bake Fun for Kids & Parties
Get ready to whip up a batch of the most delightful, jiggly, and colorful treats your family has ever tasted! This **easy JELL-O marshmallow candy** recipe, often known as JELL-O pinwheels or JELL-O cubes, is a game-changer for anyone looking for a quick, no-bake dessert. With just 4 basic ingredients and about an hour of your time, you can create a vibrant, melt-in-your-mouth confection that’s perfect for kids’ parties, holiday gatherings, or simply a fun afternoon activity.
*This post is proudly sponsored by JELL-O gelatin, allowing me to share this fantastic JELL-O marshmallow candy recipe with all of you. Rest assured, all content and opinions expressed here are entirely my own.*
A Nostalgic Treat Reimagined: The Perfect Marshmallow & Gelatin Blend
I still vividly remember making these JELL-O marshmallow candies for the first time with my mom when I was about ten years old during a long weekend. We made bright red ones, and it was an absolute blast! The magic of this candy lies in its unique texture – it’s an incredible cross between a soft marshmallow and a wiggly gelatin. Imagine the chewiness of a marshmallow combined with the delicate jiggle of gelatin, but without the chalky aftertaste some marshmallows can have.
They are wonderfully soft, incredibly jiggly, and boast a delightful melt-in-your-mouth quality that truly sets them apart. You really have to make them yourself to fully appreciate the delicious sensation I’m trying to describe!
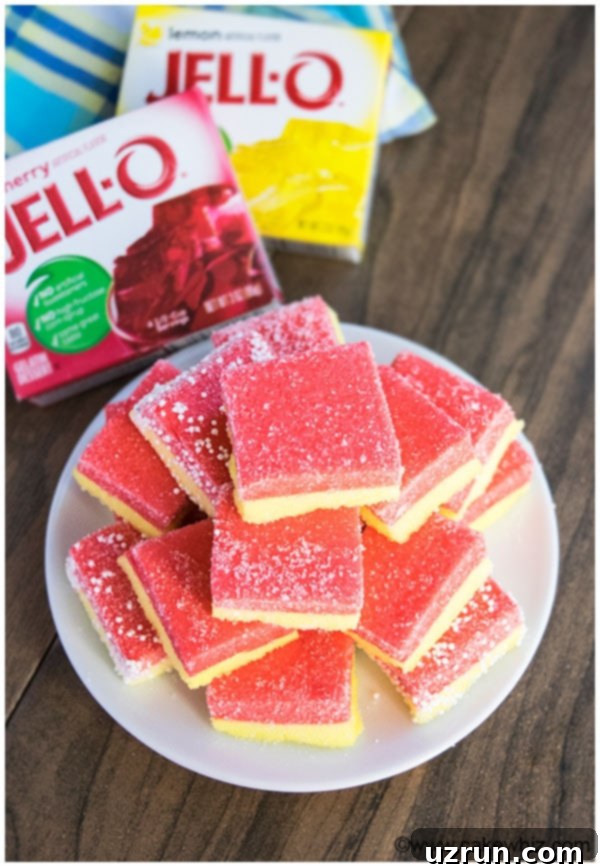
Unleashing Creativity: Single vs. Dual Flavors and Playful Pinwheels
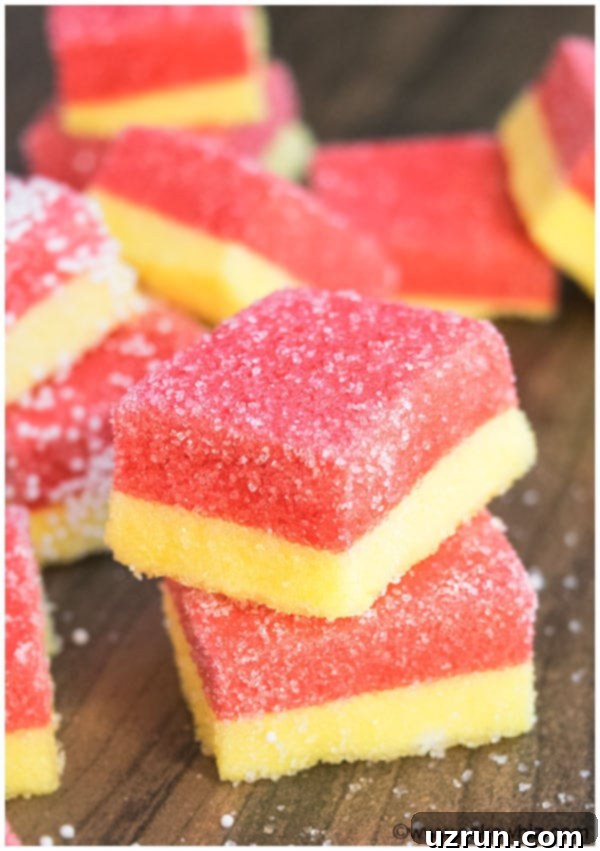
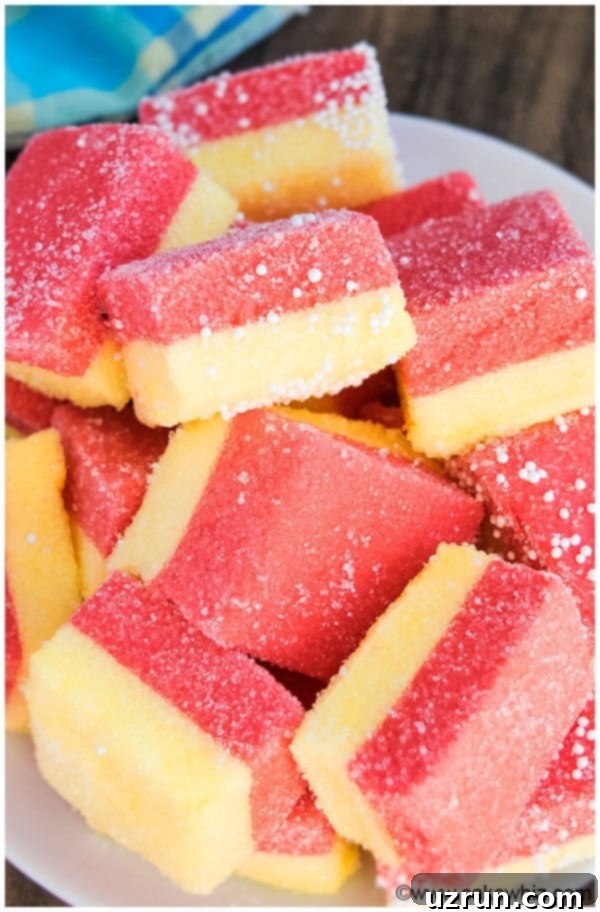
While I’ve typically seen these candies made with a single flavor and color, my son and I decided to experiment during the Thanksgiving holidays. We combined two distinct JELL-O flavors and colors, cutting them into adorable cubes, and the results were absolutely incredible! The burst of two complementary flavors in every bite was a delightful surprise that we both thoroughly enjoyed.
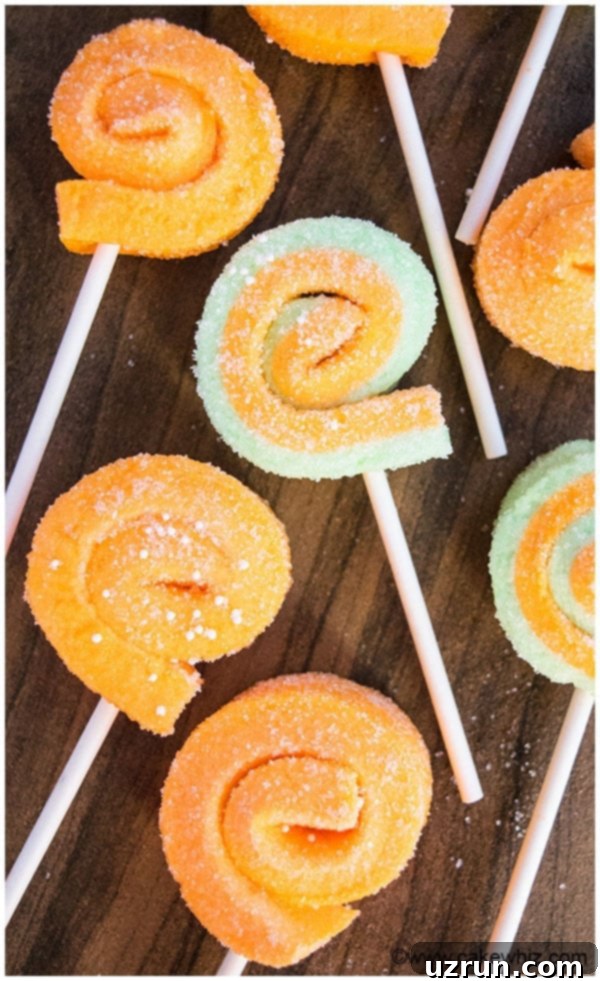
Beyond simple cubes, we also had fun crafting JELL-O pinwheels. Whether made with one flavor for a classic look or two flavors for an exciting twist, these swirled treats add an extra layer of visual appeal and fun to any dessert spread. The vibrant colors and playful shapes make them an instant hit, especially with children.
Why You’ll Love This JELL-O Marshmallow Candy Recipe
There are so many fantastic reasons to fall in love with this JELL-O marshmallow candy recipe:
- Vibrant Colors & Endless Flavors: JELL-O gelatin offers an incredible array of colors and flavors. This means you can customize your candy to match any party theme, holiday, or personal preference. From classic cherry and lime to tropical punch and grape, the possibilities are truly limitless. Mix and match to create stunning visual and taste combinations.
- Effortlessly Easy & No-Bake Fun: This recipe is incredibly simple, requiring only 4 basic ingredients and no oven or stovetop cooking for most of the process. It’s a fantastic entry-level recipe for aspiring young bakers or anyone short on time but big on craving a homemade treat.
- Quick to Make: From start to finish, you can have these delightful candies ready in approximately one hour, including chilling time. This makes them an ideal last-minute dessert or snack.
- Kid-Friendly Activity & Snack: Children absolutely adore making these! The process is safe, engaging, and yields a delicious reward. It’s a perfect way to get kids involved in the kitchen, fostering creativity and a love for homemade treats. They’ll love choosing colors, whisking ingredients, and especially rolling the finished candies in sugar.
- Versatile for Any Occasion: Whether you’re hosting a birthday party, preparing holiday treats, looking for a unique lunchbox snack, or simply want a sweet pick-me-up, these JELL-O marshmallow candies fit the bill. Their customizable nature makes them suitable for any event.
Essential Tips for Perfect JELL-O Marshmallow Candy & Pinwheels
To ensure your JELL-O marshmallow candies turn out perfectly every time, here are some crucial tips to keep in mind:
- Prepare Your Pan: Always make sure to lightly oil your pan before pouring the gelatin-marshmallow mixture. This critical step prevents sticking and makes for easy removal once the candy has set. You can use cooking spray or a neutral oil like vegetable or canola oil.
- Fresh Marshmallows are Key: For the best results, use a fresh bag of mini marshmallows. Older, stale marshmallows tend to be harder and don’t melt as smoothly or evenly, which can lead to a lumpy final product.
- Whisk Thoroughly for Smoothness: After adding the marshmallows and heating, whisk the mixture together very, very well. Your goal is a completely smooth consistency with absolutely no marshmallow lumps. If any lumps remain, they tend to rise to the top during chilling, resulting in an undesirable two-layered candy. Continuous whisking ensures a homogeneous and beautifully blended treat.
- Proper Release Surface: When it’s time to flip over your set marshmallow mixture, line your work surface (table or cookie tray) with foil paper and spray it generously with oil. It’s crucial NOT to use parchment paper or wax paper, as the sticky mixture will adhere to them, creating a frustrating mess. The oiled foil provides a perfect non-stick surface.
- Loosen Edges Before Flipping: Before attempting to invert the set mixture, run a sharp knife carefully around the edges of the pan. This helps to loosen any clinging parts and ensures a clean, easy release without tearing or damaging your candy slab.
- Add Some Sparkle: For an extra touch of fun and visual appeal, roll the finished marshmallow cubes or pinwheels in granulated sugar, sparkling sugar, or even small white sprinkles. This not only adds a lovely shimmer but also provides a pleasant textural contrast.
- Secure Your Pinwheels: If you’re opting for pinwheels, they can sometimes unfurl. To keep them perfectly rolled, gently push a toothpick through the ends of each pinwheel. For birthday parties or easy handling, consider inserting a lollipop stick into the center – it makes them super convenient and extra festive!
- Pan Size for Pinwheels: If you plan to make two-flavored pinwheels, it’s recommended to use a 10×10 inch pan. A smaller pan might make the layers too thick, making them difficult to roll into a neat pinwheel shape. For single-flavor cubes, a 9×9 inch pan is ideal.
- Flavor Harmony for Layers: When using two different JELL-O gelatin flavors, choose ones that complement each other well. Think about classic combinations like strawberry and lime, or orange and cherry.
- Layering Patience: If you’re creating a multi-layered candy (with two or more JELL-O flavors), you must allow each layer to fully set in the fridge before pouring the next. This prevents the mixtures from blending together and ensures distinct, vibrant layers.
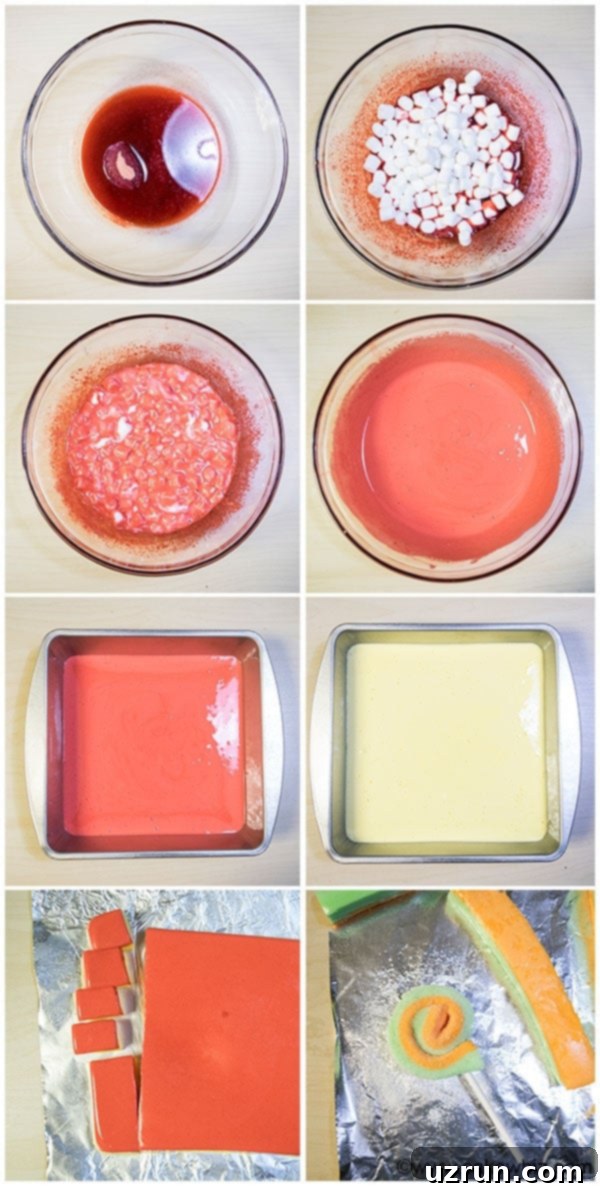
Step-by-Step Guide: How to Make JELL-O Marshmallow Candy Cubes or Pinwheels
Making these delightful treats is incredibly straightforward. Here’s a simplified overview:
Preparing Your Gelatin & Marshmallow Mixture
- Start by combining JELL-O gelatin granules with warm water in a microwave-safe bowl.
- Microwave the mixture for 1-2 minutes, pausing halfway to whisk, until the gelatin granules are completely dissolved and the mixture is clear.
- Add your mini marshmallows to the dissolved gelatin. Microwave again for 1-2 minutes, or until the marshmallows are slightly melted and “poofy.”
- Immediately whisk the entire mixture thoroughly until it’s completely smooth and free of any lumps. This step is crucial for a uniform texture.
Setting and Shaping Your Candy
- Pour the smooth mixture into a lightly oiled square pan (a 9×9 inch pan is ideal for cubes, or a 10×10 for two-flavor pinwheels).
- Chill the pan in the refrigerator for approximately 50 minutes, or until the mixture is fully set and firm to the touch.
- If you’re making a second layer of JELL-O mixture, repeat steps 1-4 with a new batch of ingredients and carefully pour it over the first set layer. Chill for another 50 minutes.
- Once the marshmallow mixture is firm, use a sharp knife to carefully run around the edges of the pan to loosen the candy.
- Invert the pan to release the candy slab onto a cookie tray that has been lined with oiled foil paper.
Finishing Touches: Rolling & Serving
- For cubes, use a sharp, oiled knife to cut the slab into your desired cube size. Oiling the knife blade prevents sticking and ensures clean cuts.
- For pinwheels, cut the slab into 1-inch wide strips. Carefully roll each strip from one end to the other to create a spiral. If desired, push a lollipop stick or toothpick through the center to secure the shape.
- Roll your shaped candies (cubes or pinwheels) in a bowl of granulated sugar, sparkling sugar, or sprinkles until they are fully coated.
- Arrange your beautiful homemade JELL-O marshmallow candies on a serving dish and enjoy!
Variations to Explore
Don’t stop at just cubes and pinwheels! This versatile recipe lends itself to numerous creative variations:
- Cookie Cutters: For themed parties, use small, oiled cookie cutters to cut out fun shapes like stars, hearts, or flowers from the set slab.
- Alternative Coatings: Instead of sugar, try rolling the candies in finely shredded coconut for a tropical twist, or cocoa powder for a richer, chocolatey flavor. Powdered sugar is also an option, though it might absorb moisture over time.
- Triple Layers: Feeling ambitious? Experiment with three different complementary JELL-O flavors, allowing each layer to set completely before adding the next, for a visually stunning and multi-flavored treat.
- Flavor Extracts: A tiny drop of food-grade flavor extract (like vanilla, almond, or peppermint) can be added to the gelatin-marshmallow mixture for an extra flavor boost. Be sure to add it after the marshmallows have melted and before the final whisking.
Storage and Shelf Life
To keep your JELL-O marshmallow candy fresh and delicious, it’s best to store them in an airtight container in the refrigerator. They will maintain their best texture and flavor for up to 2 days. While they might last a little longer, their texture tends to firm up slightly over time, so fresh is always best!
Frequently Asked Questions (FAQs)
Here are answers to some common questions about making JELL-O marshmallow candy:
- Q: Can I use sugar-free JELL-O?
A: Yes, you can absolutely use sugar-free JELL-O gelatin for this recipe. The results should be very similar in texture, though the taste profile will be different due to the artificial sweeteners. - Q: How do I prevent the layers from mixing when making multiple colors?
A: The key is patience! Ensure each layer is completely set and firm to the touch before carefully pouring the next layer on top. This usually takes about 50 minutes in the fridge per layer. - Q: What if my marshmallows don’t melt completely?
A: This usually happens if your marshmallows are old or if the microwave time wasn’t sufficient. Ensure you’re using fresh marshmallows and microwave in short bursts, whisking well after each, until they are fully melted and smooth. Don’t overheat, as this can affect the gelatin. - Q: How long do these candies last?
A: When stored in an airtight container in the refrigerator, these candies are best enjoyed within 2 days for optimal texture and freshness. - Q: Can I make these ahead of time for a party?
A: Yes, you can make them a day or two in advance. Just be sure to store them properly in the fridge. They’re a fantastic make-ahead party treat!
Well, that’s all for today, my lovely readers! I hope you have a fantastic time making these easy, fun, and incredibly delicious JELL-O marshmallow candies. They’re sure to bring smiles to everyone who tries them.
You’ll find a detailed, printable recipe card below, and these step-by-step pictures should make the process even easier to follow!
Recipe
JELL-O Marshmallow Candy
Abeer Rizvi
Pin Recipe
Want to Save This Recipe?
Enter your email & I’ll send it to your inbox. Plus, get great new recipes from me every week!
By submitting this form, you consent to receive emails from CakeWhiz
Ingredients
- 3 oz Jell-O Whatever flavor you like: Orange, Cherry, Raspberry, Lemon, Lime gelatin e.t.c
- ½ cup Water Warm
- 1 ½ cups Marshmallows Mini
- ½ cup Sugar Granulated or Sanding
Instructions
-
In a large microwave-safe bowl, add JELL-O gelatin and water and whisk everything together.
-
Microwave for 1-2 minutes until gelatin is fully dissolved. Be sure to stop halfway to whisk everything together.
-
Add marshmallows and microwave for 1-2 minutes or until they are slightly melted and “poofy.”
-
Whisk mixture together until smooth with no lumps.
-
Pour mixture in a lightly oiled square pan (Dimensions: 9×9).
-
Chill in the fridge for about 50 minutes.
-
If you are adding a second layer of JELL-O mixture, follow steps 1-4 again and add the same amount of ingredients again and pour that mixture on top of this set layer. Chill for another 50 minutes.
-
Once this marshmallow mixture has set, run a sharp knife around the edges.
-
Then, flip it onto a cookie tray, lined with foil paper that’s been sprayed with oil.
-
Use a sharp knife to cut cubes. It helps to spray some oil on the knife blade to prevent it from sticking to the cubes and making a mess.
-
Roll them in a bowl of sugar or sprinkles until fully coated and arrange them on a serving dish.
-
If you are making rolls, cut 1 inch strips instead of cubes and roll them from one end to the other end and push a lollipop stick to hold the shape. Sprinkle some sugar and enjoy!
Notes
- Read all my tips above for the best results!
- If you are using a 9×9 pan, you should get about 18-20 cubes or 18 pinwheels.
- Must be stored in an airtight container in the fridge and it’s good for up to 2 days.
Nutrition
An automated tool is used to calculate the nutritional information. As such, I cannot guarantee the accuracy of the nutritional information provided for any recipe on this site.
Until next time, tata my lovelies!
