Easy Pinata Cake Recipe: Homemade Easter Robin Egg Cake with a Sweet Surprise Filling
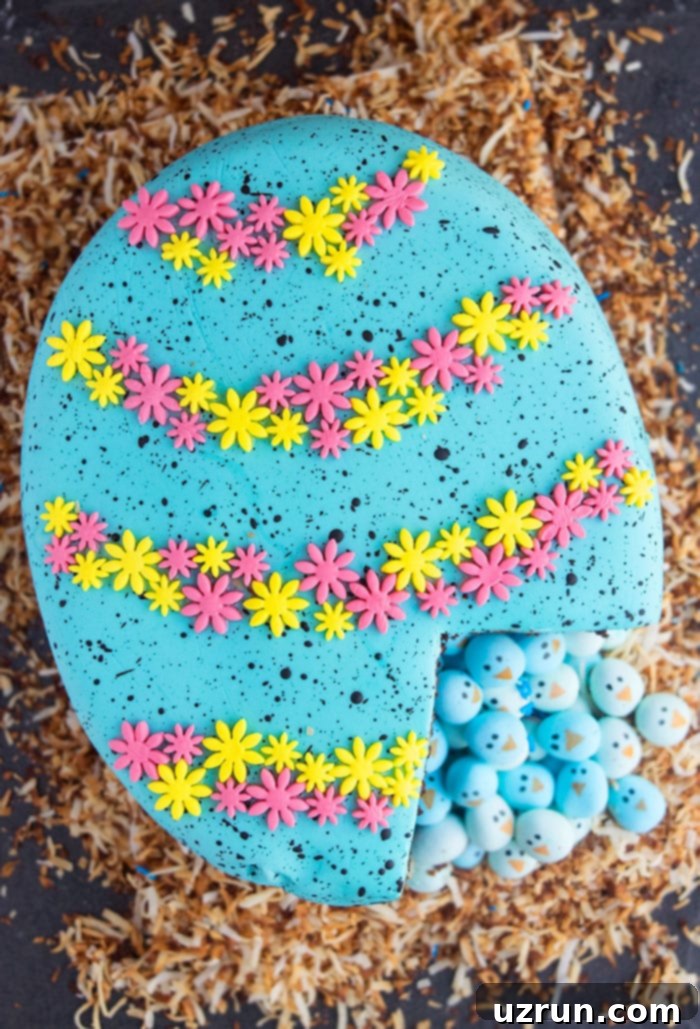
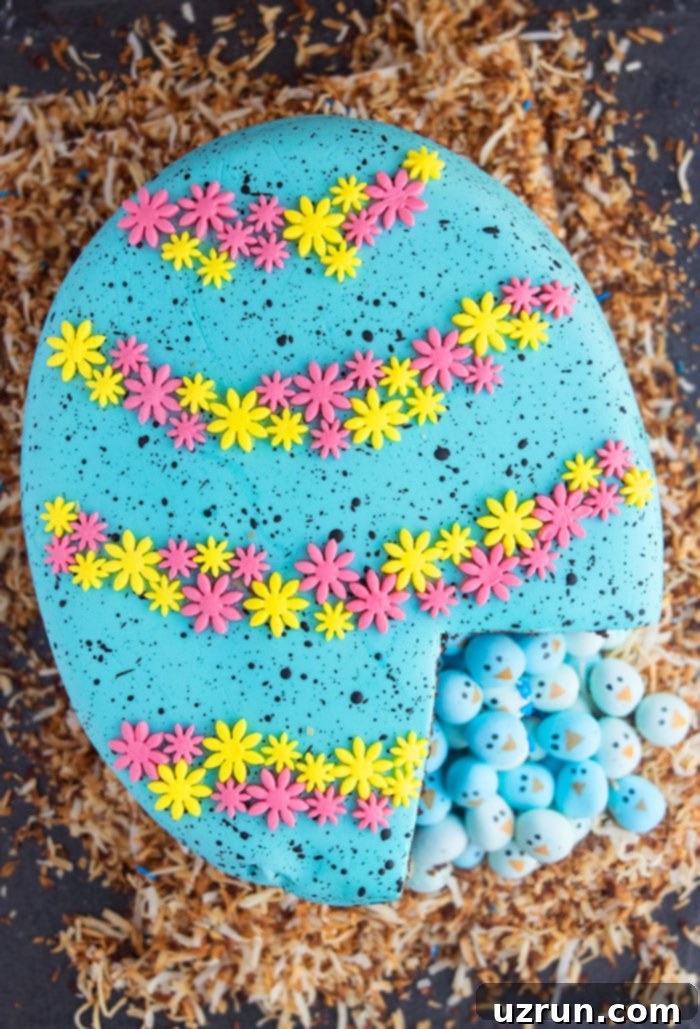
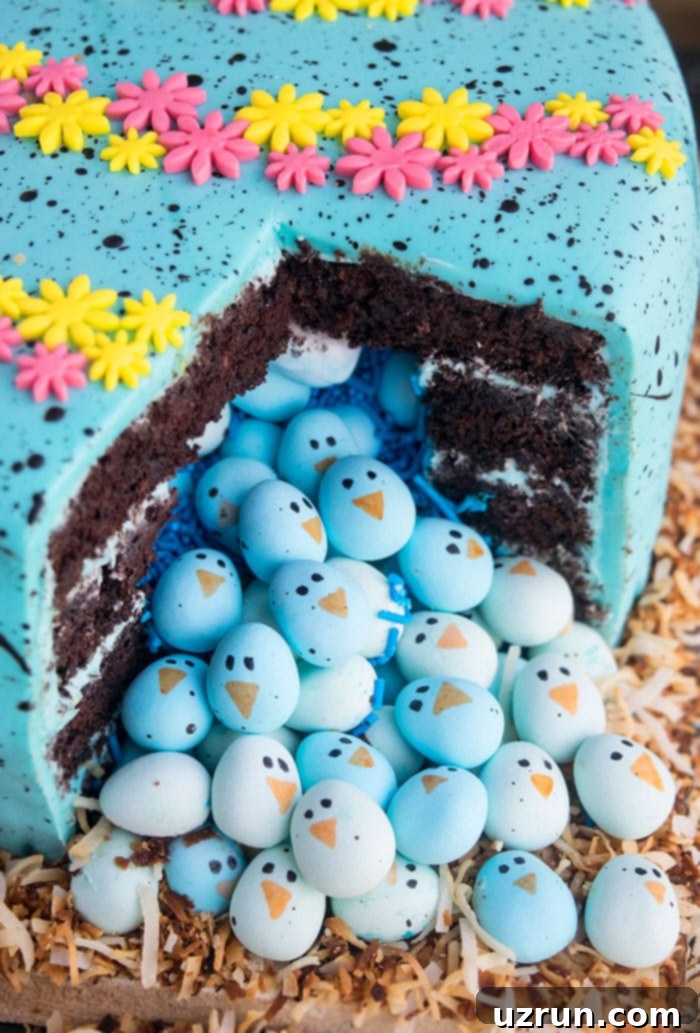
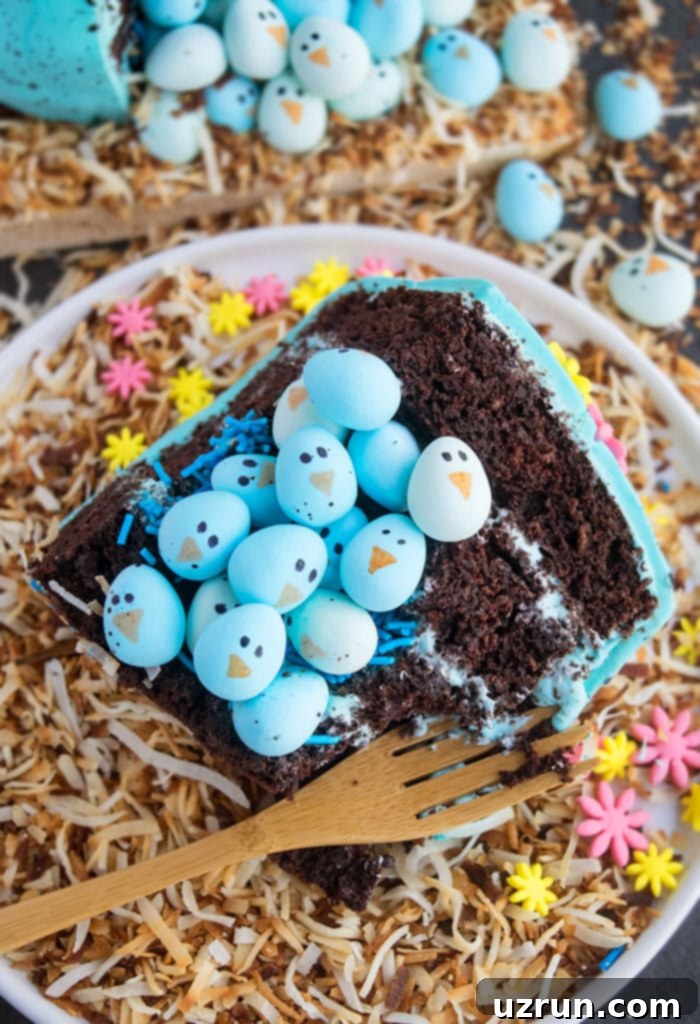
Prepare to delight your guests with this incredible easy pinata cake, a festive masterpiece that doubles as a charming Easter robin egg cake! Imagine slicing into a beautifully speckled cake, only for a shower of adorable robin chick candies and colorful sprinkles to tumble out. It’s a homemade marvel, crafted with simple ingredients, and promises an unforgettable moment of pure joy for any celebration, especially Easter.
*A special thank you to Domino® Sugar for sponsoring today’s post. Their quality sugars are a cornerstone in my kitchen, allowing me to consistently create delicious recipes and share them with you. All opinions expressed are my own.*
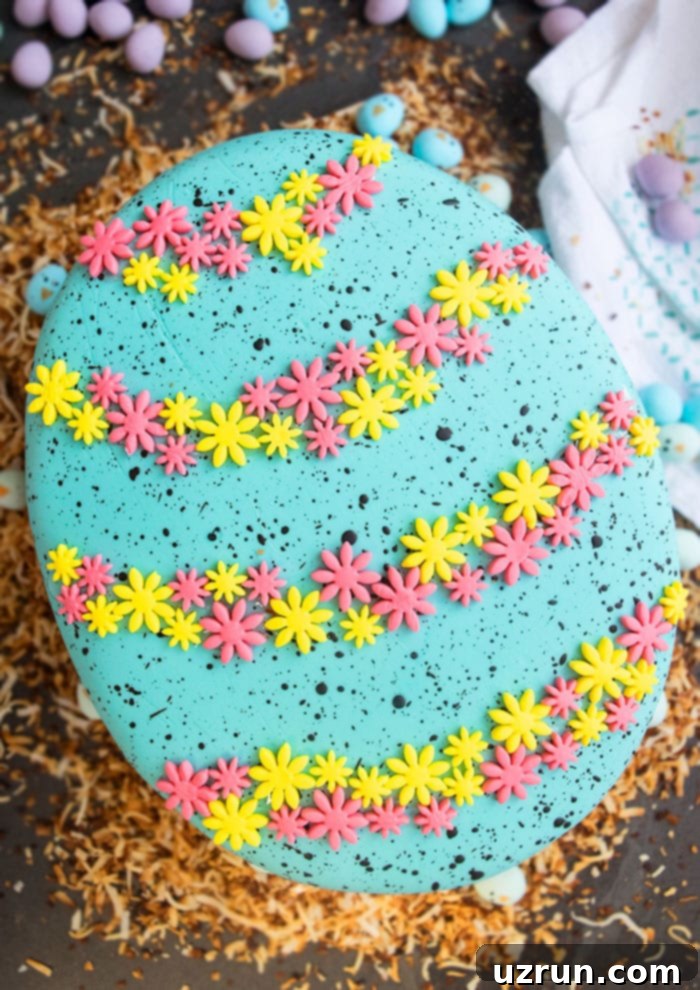
As Easter approaches, my kitchen transforms into a hub of creative baking. This year, I’ve blended some of my absolute favorite dessert concepts with a unique twist to bring you this show-stopping recipe. The idea of a beautifully speckled egg cake, brimming with adorable baby chick candies, felt like the perfect festive innovation. That moment when you cut the first slice and those sweet surprises spill out, just like a real piñata, is truly magical and guarantees gasps of delight! If you’re looking for more delightful Easter treats, be sure to check out my Easter Egg Cake (Easter Nest Cake) and these irresistible Peanut Butter Eggs.
This recipe isn’t just about creating a dessert; it’s about crafting an experience. The anticipation building up to that first slice is immense, and the explosion of color and candy is always a hit, especially with children. It’s an interactive dessert that truly embodies the spirit of celebration, making it an ideal centerpiece for your Easter feast or any spring gathering.
[feast_advanced_jump_to]
Key Ingredients for Your Perfect Pinata Cake
Creating this stunning pinata cake starts with a careful selection of quality ingredients. Here’s a breakdown of what you’ll need and why each component is essential for success:
- Cake: For this recipe, I chose to make a homemade chocolate orange cake. This zesty and rich flavor profile provides a delightful contrast to the sweet filling. You’ll need three layers to create the spacious cavity for your surprise. Feel free to use your favorite cake recipe or even a high-quality box mix if you’re short on time, as long as it bakes into firm layers suitable for stacking and hollowing.
- Frosting: My go-to is classic American buttercream for its creamy texture and ease of use, but you can certainly opt for any frosting flavor that complements your cake. A light blue frosting is ideal for achieving that classic robin egg hue.
- Sprinkles: Choose a variety of colors to add a vibrant explosion to your cake’s interior. Blue sprinkles are particularly fitting to match the robin egg theme.
- Egg Candies: These are the stars of the show! Mini egg-shaped candies, especially in robin egg blue, work best. Using edible markers to draw adorable chick faces on them adds a charming, personalized touch that enhances the “surprise” element.
- Fondant Flowers: These delicate decorations add a touch of spring elegance to the exterior. You can craft them yourself for a truly homemade feel or purchase pre-made fondant flowers from a craft store for convenience.
- Coconut: Toasted coconut provides a wonderful texture and a natural “nest” appearance around the base of the cake, tying the whole Easter theme together beautifully.
How to Make a Delightful Pinata Cake: Your Step-by-Step Guide
Crafting this unique robin egg pinata cake is a rewarding process. Follow these detailed steps to create your edible masterpiece:
- Bake Your Cakes: Begin by baking your chosen cake recipe (I recommend the chocolate orange cake listed in the full recipe card below). Ensure you have three sturdy oval-shaped cake layers. Once baked, allow them to cool completely on a wire rack. This step is crucial to prevent the frosting from melting during assembly.
- Prepare the Hollow Layers: Once the cakes are cool, use an oval template (you can make one from cardboard) to carefully cut out the center of two of your three cake layers. These will form the hollow “pinata” section. Leave one cake layer completely intact for the base and one for the top.
- Start Layering the Base: Place one whole, intact cake layer onto your chosen cake board or serving platter. Secure it with a dollop of frosting beneath it to prevent slipping. Apply a generous layer of your chosen buttercream frosting evenly over this base cake.
- Add the First Hollow Layer: Carefully place one of the hollowed-out cake layers directly on top of the frosted base. Ensure it’s centered. Frost the top surface of this hollow layer, paying attention to the edges that will form the walls of your candy cavity.
- Add the Second Hollow Layer: Place the second hollowed-out cake layer on top of the first hollow layer, aligning it precisely. Frost the top of this layer as well, creating a deeper well for your surprises.
- Fill the Cake with Surprises: Now for the fun part! Fill the central cavity you’ve created with a mix of colorful sprinkles and your charming chick-decorated egg candies. Make sure to distribute them evenly.
- Seal the Pinata: Gently place the final, whole cake layer on top of the filled cavity. Press down lightly to ensure it adheres to the frosting below and seals in all those wonderful surprises.
- Crumb Coat and Chill: Apply a thin layer of buttercream all over the entire cake – top and sides. This is called a “crumb coat” and it traps any loose crumbs. Chill the cake in the refrigerator for about 30-45 minutes. This firms up the crumb coat, making the final frosting and fondant application much easier and smoother.
- Frost and Cover in Fondant: Once chilled, apply a smooth, even layer of your light blue American buttercream over the entire cake. Then, roll out your light blue fondant to an even thickness and carefully drape it over the frosted cake. Smooth out any bumps or air bubbles using a fondant smoother or your hands, working from the top down. Trim any excess fondant around the base with a pizza cutter for a clean finish.
- Create Edible Brown Paint: In a small bowl, whisk together cocoa powder and a little vanilla extract until you achieve a smooth, paint-like consistency. This will be your “speckle” paint.
- Create the Speckled Pattern: Dip a clean paintbrush into your edible brown paint. Gently flick the bristles over the cake to create small, natural-looking speckles, mimicking a robin’s egg. Experiment with distance from the cake; closer flicks create larger splatters, while farther flicks create finer, more realistic speckles. Let the paint dry for a few minutes.
- Add Fondant Flowers: Using a tiny dab of corn syrup or edible glue, attach your small fondant flowers in a graceful, curved pattern across the top of the cake, adding a touch of floral elegance.
- Spread Toasted Coconut: Finally, spread the toasted coconut around the base of the cake to create a charming “nest” effect. Your beautiful and surprising Easter robin egg pinata cake is now complete and ready to impress!
For this recipe, I proudly used Domino’s light brown sugar and granulated sugar. Domino® Sugar has been a trusted brand in my kitchen for many years, and for good reason. Their commitment to quality ensures that my baked goods consistently turn out perfect, adding the right balance of sweetness and texture every single time. It’s a brand I confidently recommend for all your baking needs.
Creative Piñata Cake Filling Ideas for Every Occasion
While robin egg candies are perfect for Easter, the beauty of a piñata cake lies in its versatility. You can customize the hidden treasure to suit any theme or preference. Here are some more delightful ideas for filling your surprise cake:
- Sprinkles: A classic choice! Use a single color for a monochromatic surprise or a rainbow mix for an explosion of joy.
- Jelly Beans: These colorful, chewy candies come in countless flavors and add a fun texture.
- Chocolate Chips: A simple yet universally loved option. Milk chocolate, dark chocolate, or white chocolate chips all work wonderfully.
- Mini Chocolate Candies: Think M&Ms, Reese’s Pieces, or other small, colorful chocolate treats.
- Colorful Cereal: For a less sugary option or a breakfast-themed surprise, vibrant cereals like Fruity Pebbles or Trix can be a fun, unexpected choice.
- Small Cookies or Biscuits: Miniature cookies, like Nilla Wafers or mini Oreos, can add a delightful crunch.
- Fresh Berries: For a lighter, fresher surprise, small, firm berries like blueberries or raspberries can work. However, avoid sliced berries as they might release too much juice and make the cake soggy. Ensure they are completely dry before adding them.
- Gummy Candies: Gummy bears, worms, or other fun shapes can add a chewy, fruity element.
Exciting Variations to Customize Your Pinata Cake
This robin egg piñata cake is incredibly adaptable, allowing you to tailor it for different occasions and tastes. Here are some fantastic variations to inspire your next baking project:
- Gender Reveal Cake: Transform this delightful dessert into an unforgettable gender reveal. Fill the hollow center with either blue or pink egg candies (or sprinkles!) to announce the exciting news. Easter often brings families together, making it a stylish and memorable way to share your big announcement with loved ones. Imagine the collective gasp as the hidden color is revealed!
- Rainbow Cake: For a truly spectacular visual, color each cake layer a different shade of the rainbow. When sliced, the vibrant layers combined with a colorful candy filling (think rainbow sprinkles and candies) will create an awe-inspiring, kaleidoscopic effect. It’s perfect for birthdays or any joyous celebration.
- Theme-Specific Decorations: You don’t have to stick to fondant flowers. Get creative with other decorations! Use different candies, various sprinkles, or unique frosting techniques to add color and variety. For instance, you could pipe small frosting flowers, create intricate patterns, or add edible glitter. If time is a constraint, remember that store-bought decorations are always a fantastic alternative to homemade ones.
- Different Cake Flavors: While chocolate orange is divine, feel free to use your family’s favorite cake flavor. Imagine this surprise filled cake made with a Vanilla Cake, a rich Red Velvet Cake, or even a classic lemon or funfetti cake. The possibilities are endless!
- Adjust Zest Amounts: The recipe calls for a mix of orange, lemon, and lime zest, which provides a lovely citrusy aroma and flavor. You can adjust the amounts to suit your personal preference. If you prefer a more subtle citrus note, reduce the quantity, or if you love a bright, zesty kick, add a little extra! Alternatively, for a simple yet delicious chocolate cake, you can omit the zests entirely.
- The “Egg Look” Without the Surprise: Perhaps you adore the beautiful robin egg design but don’t necessarily want a surprise filling. No problem! To create a cake in the shape and colors of a robin egg without the hollow center, simply bake all four cake layers as solid ovals. Then, press them together with frosting, stack, and decorate as per the instructions, skipping the hollowing steps. You still get the stunning aesthetic without the candy cascade.
Expert Tips and Techniques for Pinata Cake Perfection
Achieving a flawless and delicious pinata cake is easier with a few insider tips and techniques:
- Edible Markers are Your Friend: These fun tools are perfect for adding details like chick faces to your egg candies. You can find them readily at craft stores like Michaels, Hobby Lobby, or even online retailers like Amazon. They are inexpensive and incredibly enjoyable to use! For the best results, use edible markers on candies with a matte surface rather than a glossy one, as the color adheres better and prevents smudging.
- Cool Cakes Completely: This cannot be stressed enough! Before you even think about frosting or assembling your cake, ensure all layers are entirely cool to the touch. Warm cakes will melt your frosting, leading to a messy, unstable cake. Patience here will save you a lot of frustration.
- Plan Your Cake Layers: You’ll need a total of four oval cakes, each approximately 1.5 inches thick, for this recipe. You have a couple of options: you can bake one large oval cake and then carefully slice it into four even layers, or you can bake four individual oval cakes in separate pans. Choose whichever method you are most comfortable with.
- Hollowing the Layers: Out of the four cakes, two will need to be hollowed out to create the “pinata” cavity. To do this accurately, create an oval template from sturdy cardboard (the same size as your cake layers). Place the template on top of the two middle cake layers and use a sharp, thin knife to carefully cut out the center, leaving a border of about an inch or so.
- Avoid Flour Substitutions: While it might be tempting to use whole wheat flour for a healthier twist, I strongly advise against replacing all-purpose flour. Whole wheat flour has a different gluten structure and will significantly alter the cake’s texture, making it denser and potentially dry.
- Stick to Oil, Not Butter: The recipe calls for oil because it contributes to a very moist and tender cake. Substituting butter for oil will likely result in a much denser cake, which isn’t ideal for the light and fluffy texture we’re aiming for.
- Thin Batter is Normal: Don’t be alarmed if your cake batter appears quite thin. For this specific recipe, that’s exactly how it’s supposed to be! This thin consistency helps create a wonderfully moist and tender crumb once baked, so there’s no need to worry or try to thicken it.
Storing Your Fondant-Decorated Piñata Cake
Proper storage is key to keeping your beautiful piñata cake fresh and delicious:
- Room Temperature: If your cake does not contain perishable fillings (like fresh cream or custard), a fondant-decorated cake can be stored at cool room temperature for 8-10 hours. Ensure it is kept away from direct sunlight, moisture, and high humidity, which can affect the fondant’s texture and appearance.
- Refrigerator: For longer storage, place the cake in an airtight container in the refrigerator for up to 3 days. Be aware that fondant decorations might become slightly sticky due to condensation when moving the cake from the cold fridge to warmer room temperature. Allowing it to come to room temperature slowly can minimize this effect.
- Freezer (Unfrosted Components): If you want to prepare ahead, you can freeze the unfrosted cake layers and the buttercream frosting separately in sealed containers for up to 1 month. When you’re ready to assemble and decorate, thaw the cake layers and frosting to room temperature before proceeding with the assembly and decorating instructions. This is a great time-saving tip for busy bakers!
Recipe FAQs: Your Piñata Cake Questions Answered
No, these are two different types of surprise cakes. A hammer cake (often called a smash cake or geometric chocolate heart/shell) is typically made from a hollow chocolate shell that you break open with a small hammer to reveal candies, mini desserts, or even a small cake inside. A piñata cake, on the other hand, is made entirely of cake layers with a hollow center, and you simply slice into it with a knife to uncover the hidden candies and treats within. There is no external chocolate shell to break.
A piñata cake is a delightful dessert where a cavity is created within the cake layers and then filled with a surprise collection of candies, sprinkles, or other small treats. The hidden treasure is only revealed when the cake is sliced, creating a fun, interactive, and visually exciting moment for guests. It’s especially popular for birthdays, holidays like Easter, and gender reveals due to its element of surprise and celebration.
More Festive Easter Cake Ideas
If you’re still in the mood for more delightful Easter baking, here are some other fantastic recipes to inspire you:
- Charming Easter Bunny Cake
- Easy Peeps Cake (A Fun Easter Treat)
- Simple Lamb Cake (Made with Fluffy Marshmallows)
- Moist Carrot Cake (Adorned with Cream Cheese Frosting)
- Festive Easter Bunny Cake Topper Ideas
Recipe Card: Pinata Cake (Robin Egg Cake)
Pinata Cake (Robin Egg Cake)
Abeer Rizvi
Pin Recipe
Want to Save This Recipe?
Enter your email & I’ll send it to your inbox. Plus, get great new recipes from me every week!
By submitting this form, you consent to receive emails from CakeWhiz
Ingredients
Chocolate Citrus Cake
- 2 Large Eggs
- ½ cup Vegetable Oil
- 1 teaspoon Vanilla Extract
- 1 cup Whole Milk
- 1 cup Strong Brewed Coffee
- 1.5 teaspoon Orange Zest
- 1 teaspoon Lemon Zest
- 1 teaspoon Lime Zest
- 2 cups All-Purpose Flour
- 1 cup Domino® Light Brown Sugar
- 1 cup Domino® Granulated Sugar
- ¾ cup Unsweetened Cocoa Powder
- 1.5 teaspoon Baking Powder
- 2 teaspoon Baking Soda
Decoration & Filling
- 4 cups Light Blue American Buttercream Frosting
- 1 cup Blue Sprinkles
- 2 cups Mini Blue Egg Candies
- Edible Markers Black and Orange (for chick faces)
- Light Blue Fondant
- 1 tablespoon Cocoa Powder
- 2 tablespoon Vanilla Extract (for edible paint)
- 3 tablespoon Corn Syrup (for adhering flowers)
- 50 Small Fondant Flowers (homemade or store-bought)
- 3 cups Toasted Coconut
Instructions
Chocolate Citrus Cake Baking
-
In a large mixing bowl, combine the wet ingredients: eggs, oil, vanilla extract, milk, strong brewed coffee, orange zest, lemon zest, and lime zest. Whisk everything together until well combined and smooth.
-
To the wet mixture, gradually add the dry ingredients: all-purpose flour, Domino® light brown sugar, Domino® granulated sugar, unsweetened cocoa powder, baking powder, and baking soda. Mix until just combined, being careful not to overmix, which can lead to a tough cake. The batter will be thin, which is perfectly normal.
-
Divide the batter evenly into 2 greased and floured oval cake pans (approximately 8×3 inches). If you only have round pans, you can use two 8-inch round pans and cut them into oval shapes after baking and cooling.
-
Bake in a preheated oven at 350°F (175°C) for about 40 minutes, or until a wooden skewer or toothpick inserted into the center of the cakes comes out clean.
-
Once baked, remove the cakes from the oven and let them cool in their pans for about 10-15 minutes before inverting them onto a wire rack. Allow these cake layers to cool down completely to room temperature before proceeding with assembly. This is crucial for a stable cake structure.
Assembling Your Pinata Cake
-
Once all cake layers have fully cooled, carefully slice each of your two baked cakes horizontally in half, resulting in four oval cake layers, each about 1.5 inches thick. Use an oval cardboard template (the same size as your cakes) to cut out the centers of two of these four oval cakes, creating a hollow ring. Leave the other two cake layers intact for the top and bottom.
-
Place one full (intact) oval cake layer on your chosen cake board or serving platter. Secure it with a small amount of buttercream underneath. Evenly frost the top surface of this cake layer with your light blue American buttercream. You can frost the entire top or just the edges, as the center will be covered.
-
Carefully place one of the hollowed-out cake layers directly on top of the frosted base layer, aligning it precisely. Apply a layer of buttercream over the top surface of this hollow cake.
-
Place the second hollow cake layer on top of the frosting, again ensuring perfect alignment. Frost the top of this layer with buttercream. You have now created a deep well in the center of your cake.
-
Generously fill the center cavity of the cake with about half of the blue sprinkles, spreading them out evenly across the bottom of the well.
-
Using black and orange edible markers, draw cute little eyes and tiny beaks on your mini blue egg candies, transforming them into adorable robin chicks.
-
Add these decorated mini robin egg candies into the center of the cake, nestling them among the sprinkles.
-
Pour in the remaining blue sprinkles to fill the cavity completely, ensuring the candies are nicely tucked away for a truly exciting reveal.
-
Place the final, whole oval cake layer on top of the filled cavity. Gently press down to secure everything in place and ensure a level surface.
-
Apply a thin layer (crumb coat) of blue buttercream over the entire cake (top and sides) to seal in any loose crumbs. Chill the cake in the refrigerator for at least 45 minutes to allow the crumb coat to firm up. This makes the next step of covering with fondant much easier and yields a smoother finish.
-
Once the cake is chilled, roll out your light blue fondant on a lightly powdered sugar or cornstarch surface to an even thickness. Carefully lift and drape the fondant over the entire cake. Use a fondant smoother or your hands to gently smooth out the fondant, working from the top down and around the sides, removing any air bubbles or wrinkles.
-
Using a pizza cutter or a sharp knife, trim off any excess fondant around the base of the cake for a neat and professional finish.
-
In a small bowl, mix together the 1 tablespoon of cocoa powder and 2 tablespoons of vanilla extract. Stir well until the cocoa powder is fully dissolved and you have a smooth, paint-like consistency. This is your edible brown speckle paint.
-
Dip a clean, food-safe paintbrush into your “chocolate paint.” Hold the paintbrush a few inches away from the cake and gently flick the bristles all over the fondant-covered cake. Continue flicking until the cake is adorned with a beautiful speckled pattern, mimicking a robin’s egg. Let this edible paint dry for a few minutes.
Tip: For a finer, more realistic splatter, hold the paintbrush farther away from the cake. If you flick too close, the splatters will be larger and more concentrated. -
Using a tiny dab of corn syrup or edible glue, attach your small fondant flowers in a graceful, curved pattern across the top of the cake. This adds a delicate and charming touch.
-
Finally, spread the toasted coconut generously around the base of the cake, creating a lovely, edible nest effect. Your magnificent Pinata Cake (Robin Egg Cake) is now complete and ready to be enjoyed!
Video Tutorial
Notes for Success
- Remember to read all the detailed tips and techniques provided above for the best results! These insights will help you avoid common pitfalls and ensure your cake turns out perfectly.
- Leftovers of this beautifully decorated cake can be stored in an airtight container in the fridge for up to 3 days. While fondant can become slightly sticky in humid conditions (like after refrigeration), the taste will remain delightful.
Nutrition Information
An automated tool is used to calculate the nutritional information. As such, I cannot guarantee the accuracy of the nutritional information provided for any recipe on this site.
