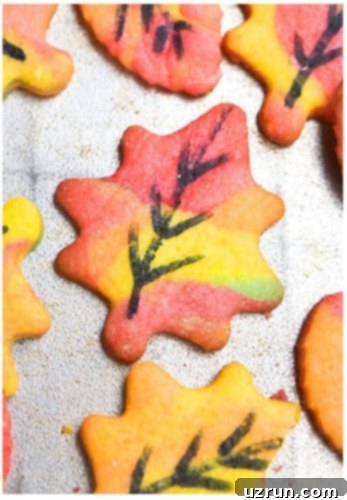
Easy & Delicious Fall Leaf Cookies: Your Ultimate Guide to Homemade Autumn Treats
Embrace the vibrant colors and cozy flavors of autumn with these delightful Fall Leaf Cookies! Crafted from scratch using simple ingredients, these decorated cut-out autumn cookies are not just a treat for the taste buds but also a feast for the eyes. They are absolutely perfect for any fall gathering, whether it’s a casual get-together, a school bake sale, or the grand finale of your Thanksgiving celebration.
Making these enchanting leaf-shaped cookies has been a long-held desire for many home bakers, often inspired by charming magazine spreads or festive autumn displays. Now, with Fall officially here, there’s no better time to bring this vision to life! What makes this recipe truly special is its incredible simplicity. You don’t need elaborate decorating skills or specialty ingredients like Marshmallow Fondant. All you require is some vibrantly colored cookie dough and a reliable black edible marker to add those delicate, realistic details. For another fun, edible leaf idea, especially if you’re a chocolate lover, consider making these stunning Chocolate Leaves {With Mint}, perfect for garnishing your next autumn cakes or cupcakes.
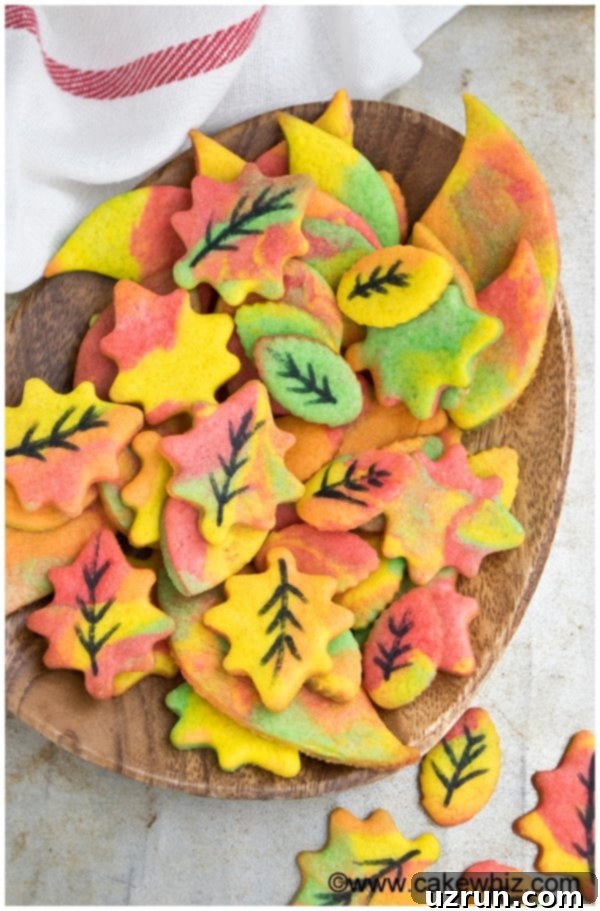
Imagine a platter filled with these beautifully marbled cookies, each one a mini masterpiece reflecting the changing leaves outside your window. Their vibrant hues of red, yellow, orange, and green are sure to bring a smile to anyone’s face. Beyond their stunning appearance, these cookies offer a tender, buttery sweetness that perfectly captures the essence of the season. They’re not just desserts; they’re edible decorations that add a touch of autumn magic to any table. So, roll up your sleeves, gather your ingredients, and let’s dive into creating these irresistible fall treats!
Table of contents
- How to make Fall cookies from scratch?
- Creative Variations for Autumn Sugar Cookies
- Essential Tips and Techniques for Perfect Autumn Cookies
- Storage Tips for Your Cut-Out Leaf Cookies
- More Delicious Fall & Autumn Desserts
How to Make Easy Fall Leaf Cookies from Scratch?
Creating these beautiful autumn leaf cookies is a rewarding process that begins with a classic sugar cookie dough. The magic truly happens when you incorporate vibrant fall colors and achieve that characteristic marbled effect. Follow these straightforward steps to bake a batch of homemade treats that look as good as they taste.
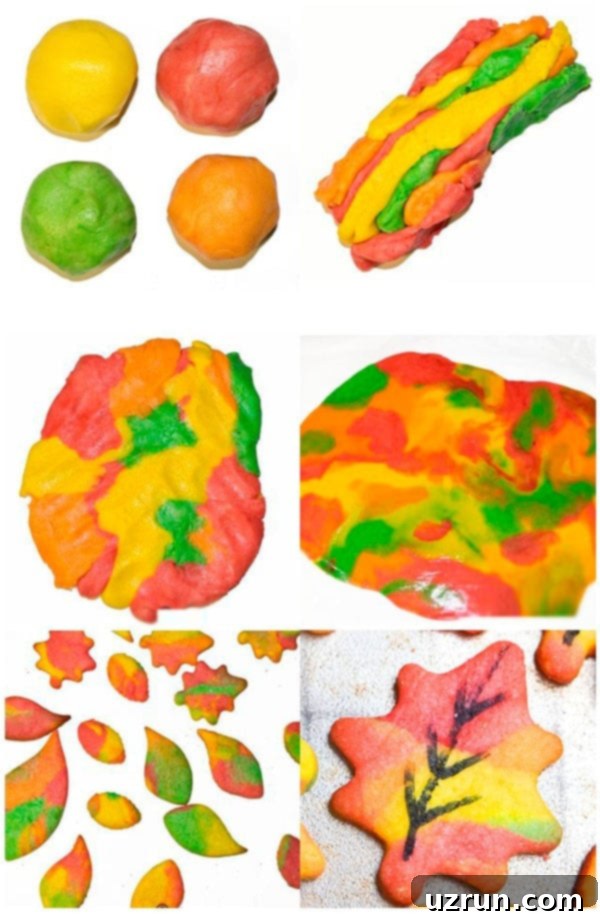
- Prepare Sugar Cookie Dough: Start with your favorite sturdy sugar cookie dough recipe – one that holds its shape well when baked. Once prepared, divide the dough into four equal portions. This allows for individual coloring and easier handling. For best results, ensure your dough is chilled, as cold dough is much easier to work with and helps prevent spreading during baking.
- Tint Each Portion: Using high-quality gel food coloring, tint each of the four dough portions. Assign red, yellow, green, and orange colors to each ball. Gel colors are highly recommended over liquid food coloring because they provide intense hues without altering the dough’s consistency too much. Knead the color thoroughly into each portion until the color is uniform and vibrant.
- Marble Dough for a Natural Look: This is where the artistic fun begins! Break off small, irregular pieces from each of your colored dough balls. Gently stick these colorful pieces together, forming a random, mosaic-like mass. Avoid over-kneading at this stage; the goal is a marbled appearance, not a blended single color. You’re aiming for swirls of autumn hues, mimicking the natural patterns found in falling leaves.
- Flatten Dough: Place your marbled dough creation between two sheets of parchment paper or wax paper. Using a rolling pin, gently and evenly flatten the dough to about 1/4 inch thickness. Rolling between paper prevents sticking to your rolling pin and ensures a uniform thickness, which is key for even baking.
- Cut Dough Using Leaf Cutters: Now for the iconic leaf shapes! Use various leaf cookie cutters to cut out your autumn shapes from the flattened dough. Don’t be afraid to use different sizes and styles to create a diverse collection of leaves. Place the cut-out shapes carefully onto a baking sheet lined with parchment paper.
- Bake, Then Cool: Bake your cookies in a preheated oven according to your sugar cookie recipe’s instructions, typically until the edges are lightly golden. Be careful not to overbake, as this can lead to dry, tough cookies and dull the vibrant colors. Once baked, transfer the cookies to a wire rack to cool completely. Cooling is crucial before decorating to prevent any edible marker from smudging.
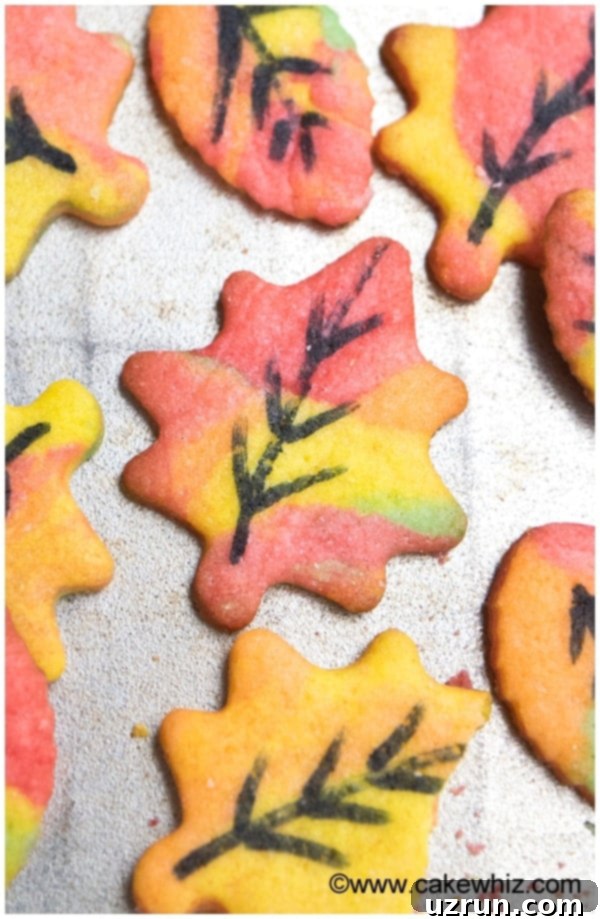
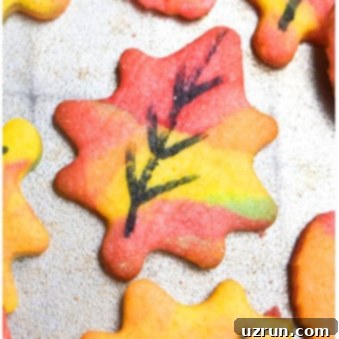
- Add Details with Black Edible Marker: Once the cookies are entirely cool, unleash your creativity! Use a fine-tipped black edible marker to draw delicate veins and outlines on each leaf cookie. This simple step adds incredible realism and charm, transforming your colorful cookies into miniature works of autumn art. Enjoy your beautifully decorated, homemade fall treats!
Creative Variations for Autumn Sugar Cookies
While the classic marbled leaf design is captivating, these fall sugar cookies offer a fantastic canvas for endless creativity. Here are some delightful variations to make each batch uniquely yours, catering to different tastes and occasions:
- Explore Different Color Combinations: Don’t limit yourself to just autumn colors. These cut-out cookies can adapt to any season! For a fresh springtime feel, use shades of green and light pink for budding leaves. You can also create single-colored leaves – a vibrant yellow for a sunny disposition, a deep red for a dramatic touch, or a rich orange for a pumpkin patch theme.
- Infuse with Your Choice of Spices: Elevate the taste of your autumn cookies by incorporating warm, seasonal spices directly into the dough. My personal favorite for this time of year is a generous dash of pumpkin spice, which perfectly complements the fall theme. Other excellent choices include apple pie spice for a fruity, aromatic twist, or simply cinnamon for a universally loved cozy flavor. These spices add depth and a comforting aroma that truly enhances the autumnal experience.
- Experiment with Flavorful Extracts: Beyond classic vanilla, various extracts can dramatically alter the cookie’s flavor profile. Consider almond extract for a delicate, nutty note, maple extract to deepen the fall essence, or caramel extract for a rich, buttery sweetness. A touch of rum or bourbon extract can also add a sophisticated warmth, especially for adult gatherings.
- Add Citrus Zests for Brightness: For a refreshing counterpoint to the rich, warm flavors, incorporate finely grated citrus zests. Lemon zest can brighten the dough, while orange zest enhances the autumnal color palette and adds a lovely fragrant note. Lime zest offers a zesty tang that provides an unexpected, delightful burst of flavor.
- Incorporate Finely Chopped Dried Fruits: For added texture and natural sweetness, mix in finely chopped dried fruits. Apples, cranberries, and apricots not only contribute to the autumn theme but also add chewy bits of flavor. Ensure they are very finely chopped to maintain the dough’s integrity and allow for clean cuts with the cookie cutters.
- Introduce Coconut: Finely shredded coconut, mixed into the dough, provides a wonderful chewiness and a subtle tropical sweetness that pairs surprisingly well with fall spices. It adds an interesting textural element that makes these cookies even more unique.
- Utilize Other Cut-Out Cookie Bases: While a classic sugar cookie is ideal, don’t hesitate to experiment with other cut-out cookie recipes. Imagine these beautiful leaf designs crafted from Pistachio Cookies {Cut Out} for a subtle green hue and nutty flavor, or Easy Gingersnap Cookies {Cut Outs} for a spicier, more robust autumn treat. Each dough brings its own unique character to the leaf shape.
- Decorate with More Elaborate Details: If you enjoy more intricate decorating, consider using Royal Icing or Glace Icing instead of just an edible marker. Royal icing allows for detailed piping, outlining, and flooding, creating a smooth, professional finish. Glace icing offers a softer, slightly more translucent sheen. These options let you add more complex patterns, shimmering effects, or even personalized messages.
- Explore Other Shapes of Leaf Cutters: The market is brimming with an incredible variety of leaf cutters these days. From broad maple leaves to delicate oak leaves, intricate fern fronds, or even stylized modern leaf designs, using an assortment of shapes will make your cookie platter even more visually appealing and diverse.
Essential Tips and Techniques for Perfect Autumn Cookies
Achieving perfectly baked and beautifully decorated autumn cookies requires a few insider tricks. These tips and techniques will help you navigate common baking challenges and ensure your leaf cookies turn out flawless every time, from dough preparation to the final decorative touches.
- Edible Paint vs. Edible Markers for Leaf Details/Veins: While an edible marker is incredibly convenient and ideal for beginners, you can also use black edible paint and a fine paintbrush to create leaf details and veins. Edible paint allows for more artistic control and varying line thickness. However, for sheer ease and quick application, especially for delicate lines, fine-tip edible markers are undoubtedly the superior choice. Choose the tool that best suits your comfort level and desired level of detail.
- Roll Dough Between Two Sheets of Wax Paper or Parchment Paper: This simple technique is a game-changer! Rolling dough directly on a floured surface can make it tough and absorb too much extra flour. By rolling your dough between two sheets of wax paper or parchment paper, you prevent it from sticking to your rolling pin and countertop. This also helps achieve a consistently even thickness, which is crucial for uniform baking and crisp edges. It also makes transferring cut-out shapes much easier.
- Do Not Overbake Cookies: This is perhaps one of the most critical tips for sugar cookies, especially those with vibrant colors. Overbaking can quickly turn your tender cookies dry and hard. Moreover, the edges will become dark brown or even burn, which would completely ruin the beautiful, vibrant color and overall appearance of your autumn leaves. Bake just until the edges are very lightly golden and the centers appear set, but still slightly soft. They will continue to set as they cool.
- Use Gel Colors for Tinting Dough: Always opt for gel food coloring when tinting cookie dough. Liquid food coloring can introduce too much moisture into the dough, making it sticky, difficult to handle, and potentially affecting its texture. Gel colors are highly concentrated, meaning you need only a small amount to achieve vivid hues, keeping your dough’s consistency perfect.
- What to Do if the Dough Is Too Sticky? If you find your dough becomes too sticky to roll or cut, don’t panic! Simply wrap it tightly in plastic wrap and chill it in the refrigerator for at least 30 minutes, or up to an hour. Chilling the dough solidifies the fats, making it firmer, less sticky, and much easier to handle.
- Do Not Over Mix the Dough or Knead It Too Much: Overworking cookie dough, whether during initial mixing or when re-rolling scraps, develops the gluten in the flour. This leads to tough, chewy cookies rather than the desired tender, melt-in-your-mouth texture. Mix only until the ingredients are just combined, and handle re-rolled dough gently and minimally.
- Cut Cookies Close Together: To maximize the number of cookies you get from each roll of dough and minimize the need for re-rolling (which can make cookies tough), be sure to use your space efficiently. Place your leaf cutters as close as possible to the previous cut and right up to the edges of the dough.
- Measure Ingredients Correctly: Baking is a science, and precision is key, especially for cut-out cookies where consistency matters. Instead of just eyeballing measurements, use proper measuring cups and spoons, and for flour, ideally use a kitchen scale for accuracy. Incorrect measurements, particularly of flour, can significantly alter the dough’s consistency, making or breaking the success of your cookies by causing them to spread too much or become too dry.
- Ensure Ingredients are at Room Temperature: Unless a recipe specifically states otherwise, ingredients like butter and eggs should be at room temperature. This allows them to cream together more effectively, creating a smoother, more emulsified dough that results in a better texture in the final cookie.
- Chill Cut-Out Shapes Before Baking: After cutting out your leaf shapes and placing them on the baking sheet, a quick 10-15 minute chill in the refrigerator or freezer can work wonders. This extra chilling step helps the cookies maintain their intricate shapes and prevents them from spreading too much in the oven.
- Preheat Your Oven Thoroughly: Always ensure your oven is fully preheated to the correct temperature before putting cookies in. An oven that isn’t hot enough can cause cookies to spread excessively and bake unevenly.
- Allow Cookies to Cool Completely Before Decorating: Patience is a virtue, especially when decorating. Edible markers or icings will melt or smudge if applied to warm cookies. Let your cookies cool completely on a wire rack to room temperature before adding any details.
Storage Tips for Your Cut-Out Leaf Cookies
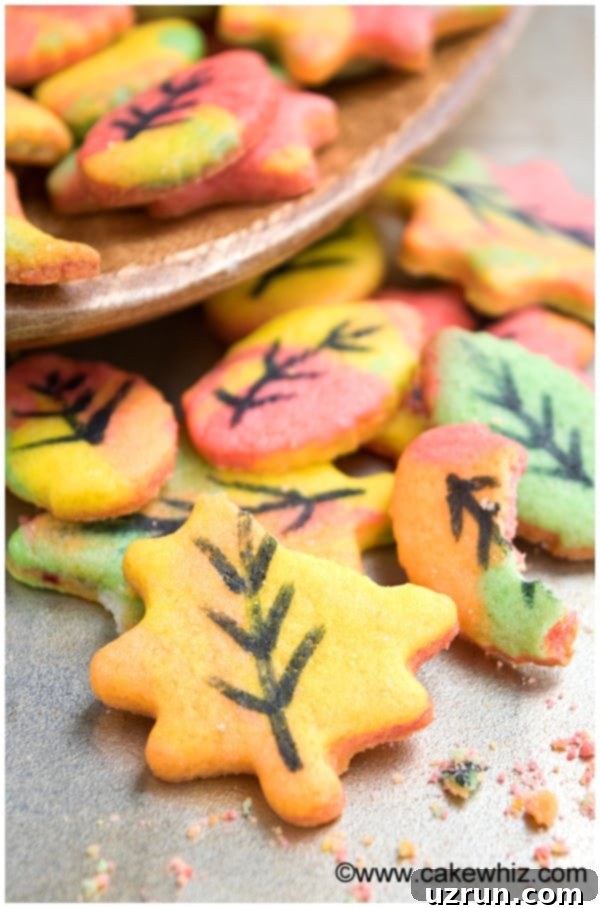
To ensure your delicious fall leaf cookies remain fresh and delightful for as long as possible, proper storage is essential. Here’s how to store them effectively, whether you plan to enjoy them in a few days or save them for later.
- Room Temperature: For short-term storage, place your fully cooled and decorated cookies in an airtight cookie jar or container. Stored at room temperature, they will maintain their freshness and tender texture for up to 3 days. Ensure they are kept away from direct sunlight or heat sources.
- Refrigerate: If you need to extend their shelf life slightly, you can store the cookies in a sealed, airtight container in the refrigerator for up to 1 week. This method is particularly useful if your kitchen tends to be warmer or if your cookies contain ingredients that might spoil faster.
- Freeze: For longer storage, these cut-out leaf cookies freeze beautifully. Arrange them in a single layer on a baking sheet to flash freeze for about 30 minutes, then transfer them to a freezer-safe bag or airtight container, separating layers with parchment paper to prevent sticking. They can be frozen for up to 1 month. When you’re ready to enjoy them, simply thaw them to room temperature. This is a great option for making a large batch ahead of time for holidays or parties.
More Delicious Fall & Autumn Desserts
If these fall leaf cookies have sparked your autumn baking inspiration, you’ll love exploring more seasonal treats. Here are some other fantastic fall and autumn dessert recipes to add to your repertoire, perfect for cozy evenings or festive gatherings:
- Chocolate Tree Cake
- Acorn Cookies
- Chocolate Caramel Apples
- Rustic Fall Tiered Cake
- Ginger Molasses Cookies {Soft & Chewy}
Recipe
Easy Fall Leaf Cookies (Marbled Sugar Cookies)
Abeer Rizvi
Pin Recipe
Want to Save This Recipe?
Enter your email & I’ll send it to your inbox. Plus, get great new recipes from me every week!
By submitting this form, you consent to receive emails from CakeWhiz
Ingredients
- 2 cups Sugar cookie dough
- Gel colorings Red, yellow, orange and green
- Edible marker Black
- Leaf cutters Various sizes and styles
- Wax paper
- Rolling pin
Instructions
-
Prepare your sugar cookie dough. Ensure it’s chilled for easier handling.
-
Divide the chilled dough into 4 equal portions.
-
Use red, yellow, orange, and green gel colorings to tint each dough ball. Knead thoroughly until colors are uniform.
-
Break off small, irregular portions from each of the colored dough balls.
-
Randomly stick these colorful pieces together to form a rough, colorful log shape. Avoid blending them completely to maintain the marbled effect.
-
Use the palm of your hands to gently flatten this colorful dough log into a thick disc.
-
Place this flattened dough on a sheet of wax paper or parchment paper.
-
Place another sheet of wax paper or parchment paper on top of the dough.
-
Use a rolling pin to evenly flatten out the dough to about 1/4 inch thickness between the two sheets of paper.
-
Use various leaf cutters to cut out your desired shapes. Place cut cookies onto a parchment-lined baking sheet. For best results, chill cut-out cookies for 10-15 minutes before baking.
-
Place them on a cookie tray lined with parchment paper.
-
Bake at 350 degrees F (175 C) for 6-8 minutes, or until the edges are lightly golden and the centers are set. Do not overbake to preserve color and tenderness.
-
Once the cookies cool down completely on a wire rack, use a black edible marker to draw delicate details and veins on the leaves. Enjoy your beautiful autumn creations!
Nutrition
An automated tool is used to calculate the nutritional information. As such, I cannot guarantee the accuracy of the nutritional information provided for any recipe on this site.
