Roar into Fun: The Ultimate Guide to Easy Homemade Dinosaur Cookies
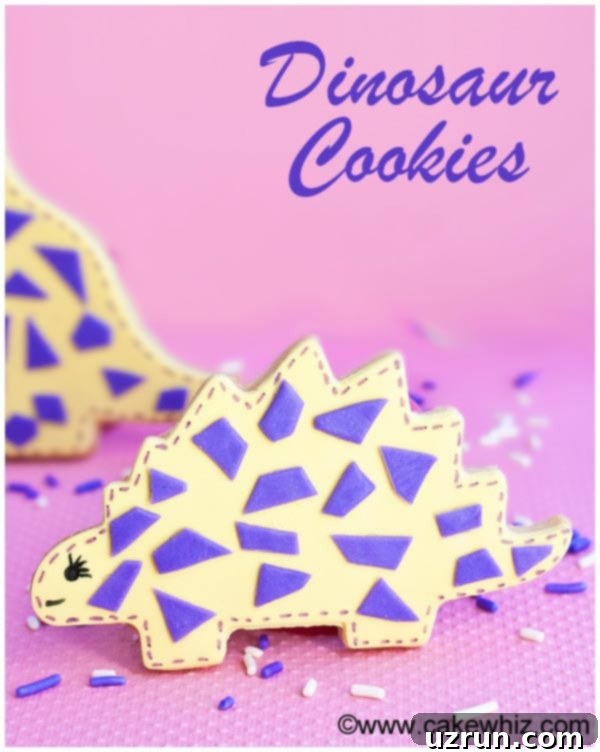
Get ready to embark on a prehistoric baking adventure with this quick and easy dinosaur cookies recipe! Perfect for any dino-themed celebration, these homemade treats are crafted from scratch using simple ingredients and decorated with vibrant fondant and playful edible markers. Whether you’re planning a thrilling birthday party, looking for unique party favors, or simply seeking a fun activity for a rainy afternoon, these charming cut-out sugar cookies are guaranteed to bring smiles to every face.
These delightful cookies are just as simple and enjoyable to make as our popular Pirate Cookies and our charming Easy Flower Cookies. Dive into this guide to create your own edible prehistoric creatures that are as delicious as they are adorable!
Why You’ll Love This Easy Dinosaur Cookie Recipe
- Kid-Friendly Fun: Baking and decorating these cookies is an engaging activity for children, sparking their creativity and imagination.
- Simple Ingredients: You’ll only need a few basic pantry staples to create a batch of these prehistoric treats.
- Stunning Presentation: Fondant offers a smooth, professional finish that’s surprisingly easy to achieve, making your cookies look store-bought.
- Highly Customizable: Experiment with an endless array of colors and flavors to match any party theme or personal preference.
- Perfect for Celebrations: From dinosaur birthday parties to classroom treats, these cookies are a guaranteed hit and make wonderful edible gifts.
- No Advanced Piping Skills Needed: Edible markers allow for precise details without the need for intricate icing techniques.
How to Make Dinosaur Cookies from Scratch: A Step-by-Step Guide
Creating these adorable dinosaur cookies is a straightforward process that breaks down into a few simple steps. With a little patience and creativity, you’ll have a batch of impressive treats ready to share.
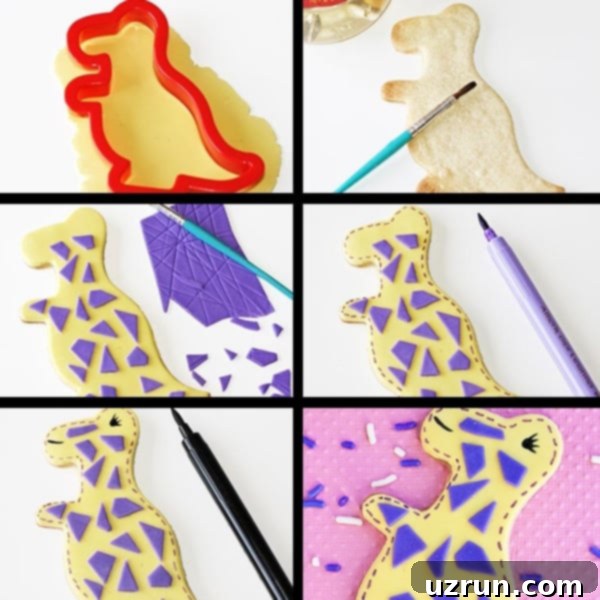
- Bake Dino-Shaped Cookies: Start by preparing your favorite sugar cookie dough. For the best decorating surface, ensure your chosen recipe yields cookies with a flat top. Roll out the dough to an even thickness (about 1/4 inch is ideal) on a lightly floured surface. Use your dinosaur cookie cutters to cut out various shapes. Carefully transfer them to a baking sheet lined with parchment paper. Bake until the edges are lightly golden and the centers are just set, then allow them to cool completely on a wire rack. This cooling step is crucial to prevent your decorations from melting or becoming a sticky mess.
- Prepare and Color Fondant: While your cookies are cooling, prepare your marshmallow fondant. If using store-bought fondant, you can skip this step if you found pre-colored options. Otherwise, divide your white fondant into portions and knead in gel food colors until you achieve your desired vibrant shades. Gel colors are recommended as they provide intense color without altering the fondant’s consistency. Roll out each color of fondant thinly, aiming for a thickness similar to your cookies.
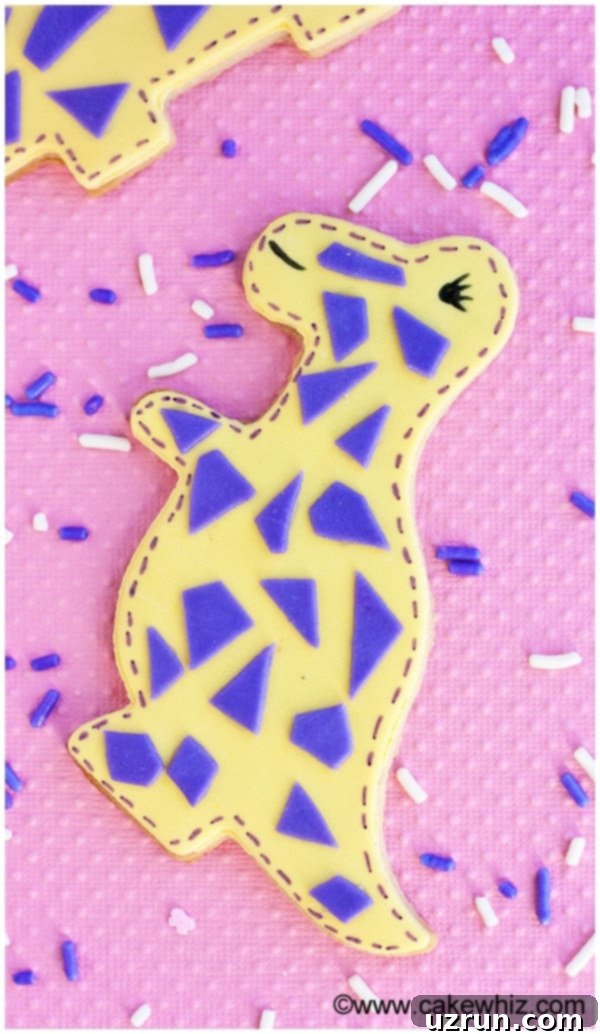
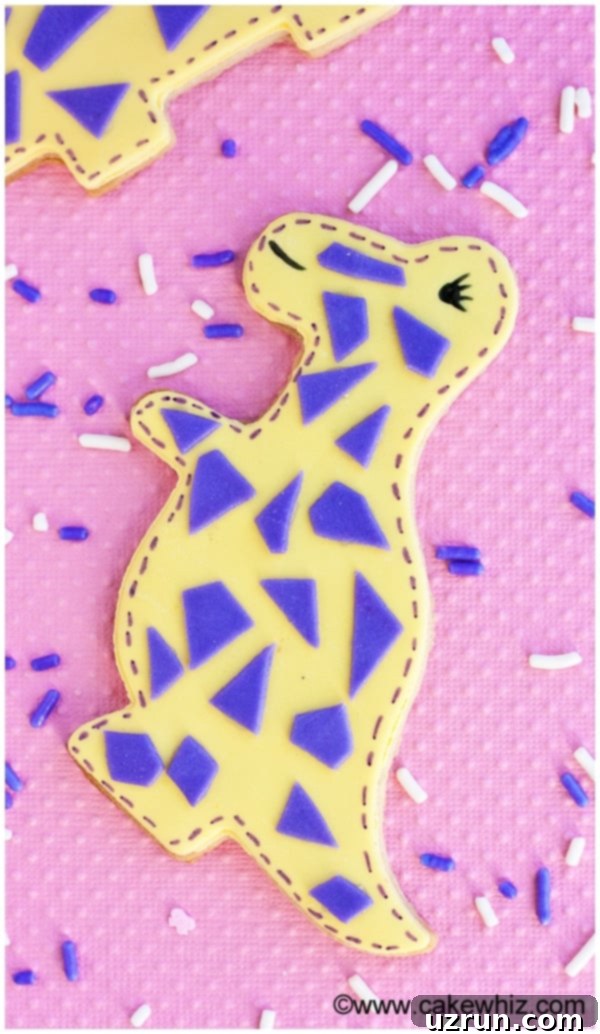
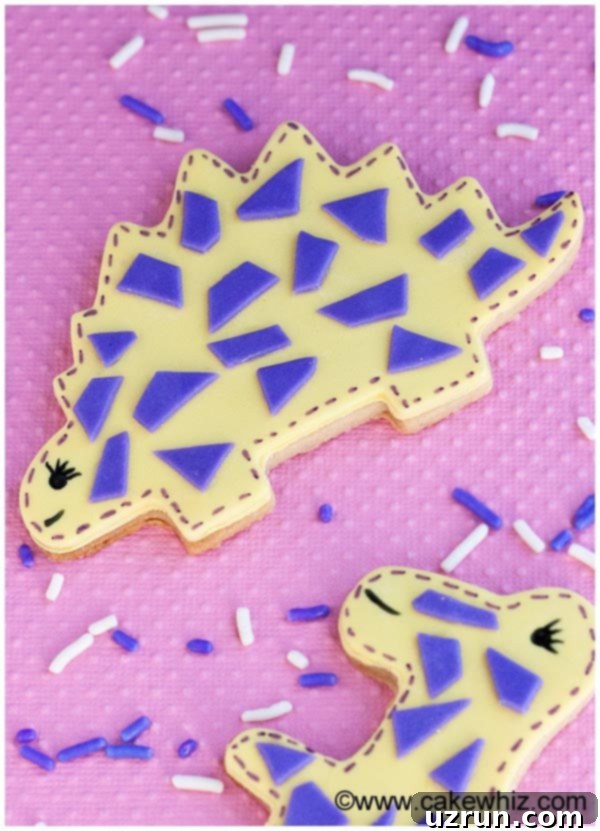
- Decorate with Colored Fondant and Edible Markers: This is where the magic happens! For each cookie, use the same dinosaur cookie cutter to cut a matching shape from your rolled-out fondant. Brush a very thin, even layer of corn syrup onto the cooled cookie – this acts as your edible glue. Carefully place the fondant cut-out on top of the cookie, gently pressing it down to ensure it adheres smoothly and without air bubbles. Then, roll out a contrasting color of fondant and use a pizza cutter or a small knife to cut out random shapes or stripes. Adhere these accent pieces onto the main fondant layer with another dab of corn syrup. Finally, unleash your creativity with edible markers! Use a purple edible marker to draw little hyphens or dashes along the border of your dino cookie, adding texture and definition. A black edible marker can be used to draw playful eyes and a mouth, bringing your prehistoric pals to life. And just like that, your easy dinosaur cookies are ready to enjoy!
Essential Tools & Ingredients for Dino Cookies
Key Tools:
- Dinosaur Cookie Cutters: Essential for shaping your cookies and fondant. A variety of shapes adds to the fun!
- Rolling Pin: For evenly rolling out cookie dough and fondant.
- Baking Sheets & Parchment Paper: For non-stick baking and easy cleanup.
- Wire Cooling Rack: Critical for cooling cookies completely before decorating.
- Small Pastry Brush: For applying a thin layer of corn syrup.
- Pizza Cutter or Small Knife: Useful for cutting fondant accent pieces.
- Edible Markers: Black and various colors for adding details and personality to your dinos.
Main Ingredients:
- Sugar Cookie Dough: A reliable recipe that bakes flat is key. Our recommended Small Batch of Sugar Cookies is perfect.
- Marshmallow Fondant: You can use homemade marshmallow fondant for superior taste, or store-bought for convenience.
- Gel Food Colors: For vibrant fondant hues.
- Corn Syrup: Acts as the edible adhesive for your fondant decorations.
Creative Variations for Your Dinosaur Biscuits
While the classic fondant and edible marker design is delightful, there are many ways to customize your dinosaur cookies to suit your taste or party theme.
- Decorate with Icing: If you’re skilled with a piping bag, consider decorating with Royal Icing or Glace Icing. Both dry hard and can create intricate designs. Royal icing offers more detail and dimension, while glace icing provides a smooth, glossy finish. They require a steady hand, but the results can be stunning.
- Try a Different Color Combination: Don’t limit yourself to yellow and purple! Feel free to get incredibly creative with your color palette. Imagine vibrant rainbow dinos, muted earthy tones for a more realistic look, or colors that perfectly match your party’s theme. Bright greens, blues, oranges, and reds can make for a truly eye-catching platter.
- Flavor Fondant: Elevate the taste by mixing in your favorite extracts into the fondant. Vanilla, almond, lemon, or even a hint of mint can add an unexpected and delicious twist. Just be sure to choose an extract that complements the flavor of your sugar cookies. A little goes a long way, so add sparingly and taste as you go.
- Use Other Cut-Out Cookies: While a classic sugar cookie is ideal, you can certainly experiment with other cookie bases. Try these rich Chocolate Sugar Cookies for a deeper flavor, or these festive Cranberry Orange Shortbread Cookies for a fruity note. The Best Shortbread Cookies (3 Ingredients) also make a fantastic, buttery base. The key is to select a cookie that has a relatively flat surface for optimal decoration. Bumpy or uneven cookie surfaces will make fondant application challenging and result in a less polished look.
- Add Edible Glitter or Sprinkles: Before the corn syrup fully sets, you can lightly dust your fondant with edible glitter for a magical sparkle, or strategically place some small sprinkles to add texture. This is an easy way to add extra flair without much effort.
- Simple Embossing: Instead of intricate cuts, use small texture mats or even a clean, patterned stamp to gently press designs onto the fondant before attaching it to the cookie.
Tips and Techniques for Perfect Dino Cookies
Achieving beautifully decorated dinosaur cookies is easier with a few insider tips and techniques. Pay attention to these details for the best results:
- Homemade Fondant vs. Store-bought Fondant: Both options are viable. Homemade marshmallow fondant offers a superior taste and a lovely soft texture, making it generally more palatable. However, it requires a bit more time and effort to prepare. Store-bought fondant, on the other hand, is incredibly convenient, often available pre-colored, and saves a lot of time. Choose based on your priorities for taste versus convenience.
- Fondant vs. Gum Paste: These are not interchangeable for this type of cookie decoration. Gum paste dries much harder and more brittle than fondant, making it unsuitable for covering cookies meant to be eaten easily. Gum paste is typically used for creating freestanding sugar figures, flowers, or intricate structural elements for cakes, where a firm, dry finish is desired. For cookies, always stick with pliable fondant.
- Control the Use of Corn Syrup: When using corn syrup as an adhesive for your fondant, remember that a tiny amount goes a very long way. Brush a thin, even coat onto the cookie. If you apply too much, it can leak out from under the fondant, creating a sticky, unsightly mess and making the cookies difficult to handle. Less is definitely more here.
- Don’t Decorate Warm Cookies: This is a crucial rule for any decorated cookie. Your baked cookies must be completely cool to the touch before you begin decorating. If the cookies are even slightly warm, the heat will cause the fondant to soften, melt, or become incredibly sticky, leading to a ruined design. Plan ahead and allow ample cooling time.
- Don’t Stack Decorated Cookies: Once your dinosaur cookies are adorned with fondant and edible marker details, avoid stacking them directly on top of each other. The fondant decorations can easily get smudged, dented, or stick together, ruining your hard work. Store them in a single layer or use parchment paper between layers if absolutely necessary, but single-layer storage is always best.
- Rolling Fondant Evenly: To get a consistent look, roll your fondant to an even thickness. Using fondant spacers on your rolling pin can help achieve this perfectly. Lightly dust your work surface and rolling pin with powdered sugar or cornstarch to prevent sticking, but use sparingly.
- Clean Cuts for Fondant: When cutting fondant shapes, press the cookie cutter down firmly and twist slightly to ensure a clean, sharp edge. Remove excess fondant carefully before lifting the cut-out.
- Edible Marker Care: When drawing details, ensure your fondant surface is dry. Apply light, even pressure to avoid indentations or tearing the fondant. Always cap your markers tightly after use to prevent them from drying out.
Storage Solutions for Your Decorated Dinosaur Cookies
Proper storage is essential to keep your beautifully decorated dinosaur cookies fresh and appealing. Fondant-decorated cookies require specific conditions to maintain their quality.
- Room Temperature: This is the recommended method for storing decorated cookies. Place them in a covered cardboard box, away from direct sunlight, heat, and excessive moisture. The cardboard allows for slight air circulation, which helps prevent the fondant from becoming sticky. Stored this way, your cookies will remain fresh for up to 1 week. It is crucial NOT to store them in a sealed airtight container, as the trapped moisture will cause the fondant to become tacky and lose its smooth finish.
- Refrigerate: Refrigeration is generally not recommended for fondant-decorated cookies. The moist environment inside a refrigerator will cause the fondant to absorb moisture, leading to a sticky, gummy texture and potentially dulling the colors.
- Freeze:
- Undecorated Cookies: Un-decorated sugar cookies can be frozen for up to 1 month. Once baked and completely cooled, arrange them in a single layer in an airtight container or freezer bag, with parchment paper between layers if needed. Thaw them at room temperature or in the refrigerator overnight before decorating.
- Decorated Cookies: Unfortunately, decorated cookies with fondant cannot be frozen. Similar to refrigeration, the thawing process introduces moisture that will make the fondant decorations sticky, shiny, and potentially crack or melt. It’s best to decorate these cookies closer to when they will be served.
- Making Ahead: You can bake the sugar cookies several days or even a week in advance and store them undecorated at room temperature in an airtight container. Then, prepare and apply the fondant and edible marker details closer to your event date for the freshest and best-looking results.
Frequently Asked Questions (FAQs)
Can I use a different cookie dough recipe?
Yes, absolutely! While our recommended sugar cookie dough works perfectly, you can use any sturdy cut-out cookie recipe that bakes flat. Ensure the cookies have a smooth, even surface for the best fondant application.
How far in advance can I make these dinosaur cookies?
You can bake the cookies up to a week in advance and store them undecorated in an airtight container at room temperature. For the best results, decorate them with fondant and edible markers 1-2 days before your event. Once decorated, they’re best enjoyed within 5-7 days when stored properly.
What if my fondant is too sticky or too dry?
If your fondant is too sticky, knead in a little powdered sugar or cornstarch until it reaches a manageable consistency. If it’s too dry and cracking, knead in a tiny amount of vegetable shortening or a drop of water (be careful not to add too much at once) to rehydrate it. Working it with warm hands can also help.
Can I use royal icing instead of fondant?
Yes, you can! Royal icing offers a different look and texture, drying hard with a crisp finish. However, decorating with royal icing typically requires more advanced piping skills to achieve intricate details. If you’re comfortable with piping, it’s a fantastic alternative. Glace icing is also an option for a simpler, smoother flood coat.
Are these cookies suitable for shipping?
Fondant-decorated cookies can be shipped, but careful packaging is key. Wrap each cookie individually in plastic wrap, then place them snugly in an airtight container. Cushion the container within a larger shipping box with plenty of padding to prevent movement and breakage. Ship during cooler months if possible, as heat and humidity can affect fondant.
More Fun Decorated Cookie Recipes
If you loved making these dinosaur cookies, you’ll surely enjoy exploring our other creative and delicious decorated cookie recipes. They’re perfect for various holidays and occasions, offering unique ways to impress your guests or simply enjoy a fun baking project.
- Snowman Cookies (With Oreos)
- Easy Fall Cookies (Leaf Cookies)
- Nutter Butter Penguin Cookies
- Snowflake Cookies
- Easy Oreo Turkey Cookies
Recipe
Easy Dinosaur Cookies
Abeer Rizvi
Pin Recipe
Want to Save This Recipe?
Enter your email & I’ll send it to your inbox. Plus, get great new recipes from me every week!
By submitting this form, you consent to receive emails from CakeWhiz
Ingredients
- 1 batch Sugar cookie dough
- 1 cup Marshmallow fondant Yellow and purple
- 2 tablespoon Corn syrup
Instructions
-
Prepare cookie dough and roll it out.
-
Use dino cutters to cut out shapes.
-
Bake until golden brown along the edges.
-
Remove from oven and allow them to cool completely.
-
Roll out yellow fondant and use a dinosaur cookie cutter to cut out a piece.
-
Brush a thin coating of corn syrup on top of the dino cookie.
-
Stick the yellow fondant piece on top of the cookie and press gently until it sticks into place.
-
Then, roll out purple fondant and use a pizza cutter to cut out small random pieces.
-
Use corn syrup to stick those pieces on top of the yellow fondant.
-
Use a purple edible marker to draw little hyphens or dashes along the border of the dino cookie.
-
Use a black edible marker to draw an eye and a mouth and enjoy!
Notes
- Read all my tips above for best results.
- Leftovers can be stored in a cardboard box at room temperature for up to 1 week. They should not be stored in a sealed airtight container because that makes the fondant sticky.
Nutrition
An automated tool is used to calculate the nutritional information. As such, I cannot guarantee the accuracy of the nutritional information provided for any recipe on this site.
