How to Soften Hard Brown Sugar: Easy Methods to Restore Moisture & Proper Storage Tips
We’ve all been there: reaching for that essential ingredient for your favorite cookie recipe, only to find your brown sugar has transformed into a solid, unyielding brick. It’s a common kitchen frustration that can halt your baking plans right in their tracks. But don’t despair! That rock-hard brown sugar isn’t destined for the trash. In this comprehensive guide, we’ll explore multiple effective methods to easily soften brown sugar, whether you need an immediate fix or a gentler, overnight solution. Plus, we’ll reveal the secrets to proper storage to ensure your brown sugar stays soft and ready for all your culinary adventures.

Many home bakers, myself included, often joke about the two biggest brown sugar dilemmas: either you’re completely out, or it’s as hard as a rock. Good news – I have solutions for both! If you’re out, you can always make your own Homemade Brown Sugar with just two simple ingredients: granulated sugar and molasses. For the other pesky problem of hardened sugar, just keep reading, and you’ll discover a variety of tried-and-true methods that will bring your brown sugar back to life, ensuring your recipes, from Butter Pecan Cookies to classic Chocolate Chip Cookies, turn out perfectly every time.
Why Does Brown Sugar Harden Like Rock? Can I Still Use It?
Brown sugar’s unique texture and flavor come from its molasses content. Unlike white granulated sugar, brown sugar crystals are coated in a thin layer of molasses, which contains natural moisture. This moisture is what gives brown sugar its characteristic soft, clumpy texture. The hardening process occurs when this vital moisture evaporates. When exposed to air, the molasses dries out, causing the sugar crystals to bond together, forming those frustrating hard clumps or solid bricks. It’s essentially the sugar crying out for hydration!
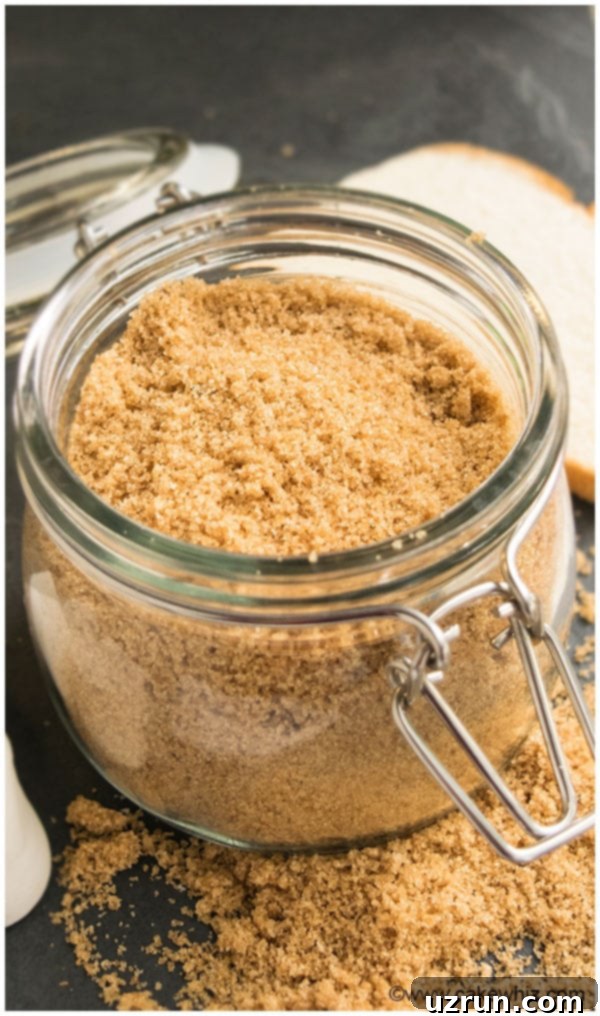
The good news is, even if your brown sugar is rock hard, it’s perfectly safe to use. The hardening is a physical change, not a sign of spoilage. While its texture might make it difficult to measure accurately or incorporate into recipes, the sugar itself is still good. You simply need to reintroduce moisture to restore its soft, pliable consistency. Knowing this, you can confidently proceed with softening it using the methods below, rather than throwing it away.
Quick Methods to Soften Brown Sugar Fast
Microwave Method: The Fastest Fix
When you’re in a pinch and need soft brown sugar right now, the microwave is your best friend. This method is incredibly fast and effective for smaller quantities, making it ideal for immediate baking needs.
How to do it:
- Prepare the Sugar: Place your hardened brown sugar in a microwave-safe bowl. If it’s a very large lump, you can try to break it into smaller pieces first, but it’s not strictly necessary.
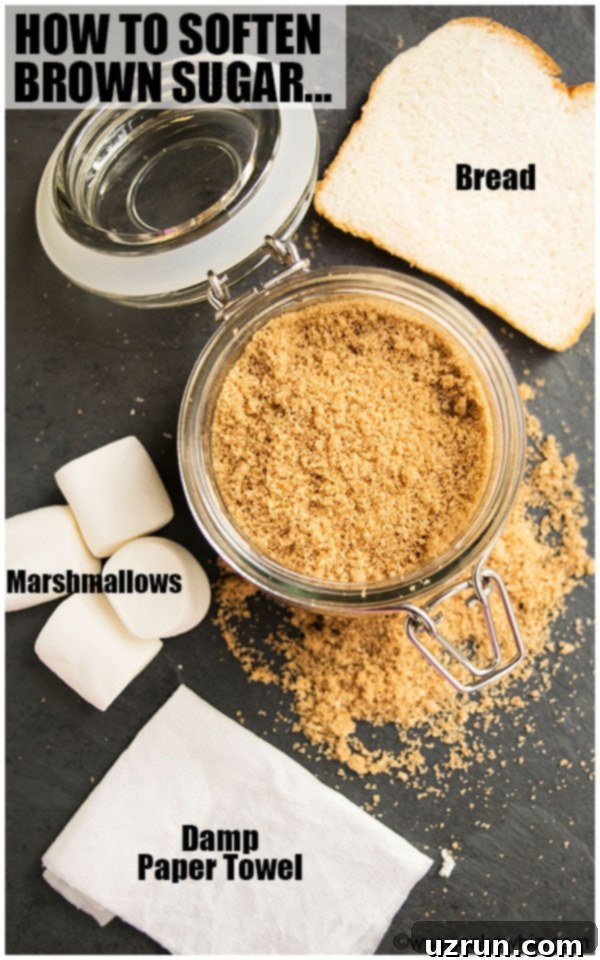
- Add Moisture: Take a paper towel and dampen it slightly – it should be moist, not dripping wet. Place this damp paper towel directly over the brown sugar in the bowl. Alternatively, you can place a small cup of water next to the sugar in the microwave to create a steamy environment.
- Heat in Short Bursts: Microwave the sugar on high for 20-30 seconds. The key here is to heat it in very short intervals.
- Check and Stir: After 20 seconds, carefully remove the bowl (it might be hot!) and check the sugar. Use a fork to gently break it apart. If it’s still hard, re-dampen the paper towel if needed and microwave for another 10-15 seconds.
- Repeat if Necessary: Continue in short bursts, checking frequently, until the sugar has softened to your desired consistency. Be vigilant to avoid overdoing it, as excessive heat can cause the sugar to melt and become a gooey, hardened mess when it cools.
Why it works: The microwave quickly heats the water in the damp paper towel or the cup, creating steam. This steam gets trapped around the sugar, rehydrating the molasses coating and softening the sugar crystals. It’s an instant spa treatment for your brown sugar!
Pros: Unbeatable speed, perfect for last-minute baking.
Cons: Easy to overcook and melt the sugar if not careful; best for smaller amounts.
Oven Method: A Good Alternative for Larger Quantities (with caution)
The oven method can also be used to soften brown sugar, especially if you have a larger quantity that needs rehydrating. However, it requires careful monitoring as sugar can melt very quickly at higher temperatures.
How to do it:
- Preheat Oven: Preheat your oven to a very low temperature, around 250°F (120°C).
- Spread the Sugar: Spread the hardened brown sugar evenly on a baking sheet lined with parchment paper. Break up any large chunks if possible to ensure even heating.
- Heat Carefully: Place the baking sheet in the preheated oven for just a few minutes, typically 1 to 5 minutes.
- Monitor Closely: This is crucial. Watch the sugar very closely. It will soften very quickly. As soon as you see the edges start to glisten or the sugar begins to loosen, remove it from the oven immediately.
- Break Apart: Use a fork to break apart the softened sugar while it’s still warm.
Why it works: The gentle heat of the oven helps to release any residual moisture and re-distribute it, breaking down the bonds between the hardened sugar crystals.
Pros: Can soften larger quantities than the microwave.
Cons: High risk of melting the sugar into a sticky, syrupy mess if left in too long. Not my preferred method due to this risk, but effective if done with extreme care.
Overnight Methods for a Gentle Restoration
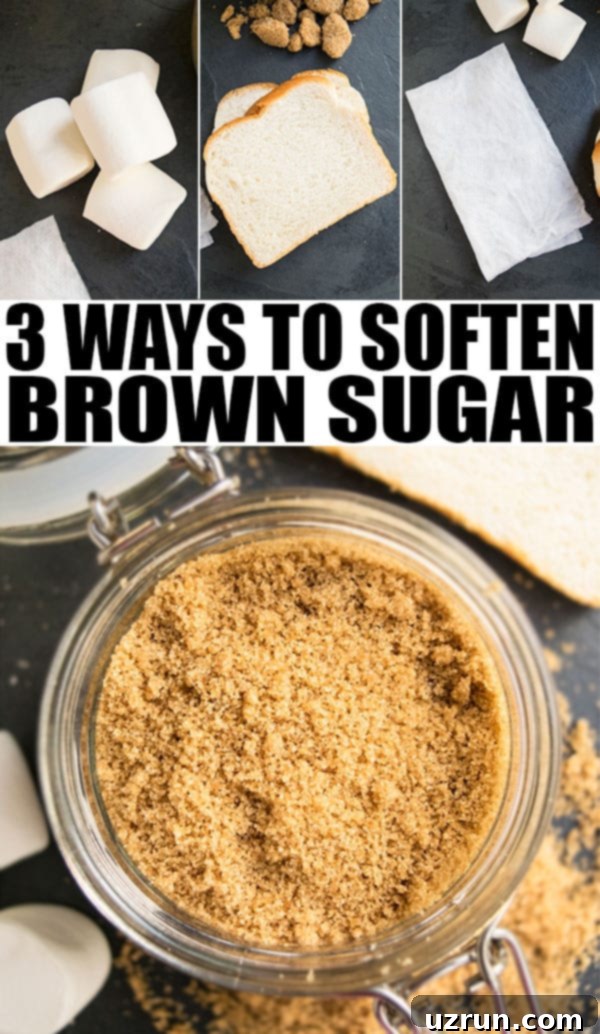
Bread Method: The Classic and Most Recommended Technique
This is arguably the most popular and effective method for softening brown sugar that has hardened. It’s simple, uses common household items, and yields consistently excellent results without the risk of melting.
How to do it:
- Container Prep: Place your hardened brown sugar into an airtight sealed bag or container. This is vital because the method relies on trapping moisture.
- Add Bread: Place a single slice of fresh, plain white bread directly into the container with the brown sugar. Avoid heavily flavored or seeded breads, as their aromas could transfer to the sugar.
- Seal and Wait: Seal the container or bag tightly. Leave it overnight, or for at least 8-12 hours. For extremely hard sugar, it might take up to 24 hours.
- Remove Bread: The next day, you’ll find the bread has become stale and hard, having transferred its moisture to the sugar. Remove the bread immediately once the sugar is soft to prevent mold growth on the bread, which could contaminate the sugar.
Why it works: This method works on the principle of moisture equilibrium. The bread contains more moisture than the hardened brown sugar. Over time, the moisture from the bread naturally migrates to the drier brown sugar, rehydrating the molasses and making the sugar soft and pliable again. The airtight container ensures the moisture stays trapped within the sugar, rather than escaping into the air.
Pros: Very effective, simple, uses common kitchen items, no risk of melting or burning. Often cited as the best way to soften brown sugar that has hardened.
Cons: Requires patience (overnight wait), remember to remove the bread promptly.
Marshmallow Method: A Sweet Alternative to Bread
Similar to the bread method, marshmallows can also be used to transfer moisture to hardened brown sugar. They work on the same principle of moisture exchange, offering a slightly different twist.
How to do it:
- Container Prep: As with the bread method, transfer your hardened brown sugar into an airtight sealed bag or container.
- Add Marshmallows: Place about 7 or 8 large, fresh marshmallows into the container with the brown sugar. Ensure they are not stale themselves, as they need to have moisture to give up.
- Seal and Wait: Seal the container or bag tightly and leave it overnight, or for at least 8-12 hours.
- Remove Marshmallows: The next day, you should notice that the marshmallows have become somewhat stale and hard, indicating they’ve given up their moisture to the sugar. Your brown sugar will be soft once again. Remove the marshmallows once the sugar is soft.
Why it works: Marshmallows are inherently soft and contain a significant amount of moisture (from ingredients like corn syrup and gelatin). When placed in an airtight environment with dry brown sugar, they will gradually release this moisture, rehydrating the sugar crystals.
Note: I feel this method can be a bit trickier than the bread method because the results can vary based on the brand and freshness of marshmallows you use. Some brands, like Jet-Puffed, tend to be softer and have more moisture, yielding better results. Experiment if you have different brands available.
Pros: Can be effective, especially if you have marshmallows on hand and no fresh bread.
Cons: Results can be inconsistent depending on marshmallow brand and freshness; still requires an overnight wait.
Consider Using Terracotta Brown Sugar Savers: The Long-Term Solution
For those who frequently encounter hard brown sugar and are looking for a reusable, long-term solution, terracotta brown sugar savers are an excellent investment. These ingenious little ceramic discs or charming bear shapes are specifically designed to maintain brown sugar’s softness.
How they work: Terracotta is a porous clay material. When soaked in water, it absorbs and retains moisture. When placed with brown sugar in an airtight container, it slowly releases that moisture into the surrounding environment, keeping the sugar consistently soft and preventing it from hardening.
How to use them:
- Soak: Submerge the terracotta piece in clean water for about 15-20 minutes.
- Pat Dry: Remove the terracotta piece from the water and pat it gently with a paper towel to remove any excess surface water. It should be damp, not dripping wet.
- Place in Container: Place the moistened terracotta disc directly on top of or nestled within your brown sugar in an airtight container.
- Maintain: When kept in a sealed container, a single terracotta saver can keep brown sugar soft for up to 3 months. When the sugar starts to show signs of hardening again, simply re-soak the terracotta piece and repeat the process.
Where to buy: You can typically find these special ceramic discs or bears at kitchen supply stores, online retailers (like Amazon), or even in the baking aisle of some larger grocery stores.
Pros: A highly effective, reusable, and low-maintenance long-term solution for keeping brown sugar soft. It actively prevents hardening rather than just fixing it.
Cons: Requires an initial purchase, takes up a small amount of space in your sugar container.

How to Store Brown Sugar Properly to Prevent Hardening
While knowing how to soften brown sugar is invaluable, preventing it from hardening in the first place is even better! Proper storage is key to maintaining that ideal soft, moist texture. Here are the best practices for storing brown sugar:
- Use an Airtight Container Immediately:
The moment you bring a new bag of brown sugar home, transfer all of it into an airtight sealed container. The goal is to minimize its exposure to air, which is the primary cause of moisture evaporation. Good options include:
- Glass Jars with Gasket Lids: These create an excellent seal and allow you to see the sugar.
- Plastic Containers with Rubber Seals: Look for containers specifically designed for dry goods storage, often with clip-lock lids.
- Heavy-Duty Resealable Bags: While better than nothing, dedicated containers offer superior protection.
If your chosen container isn’t perfectly airtight, or if you simply want extra insurance, consider keeping a moistened terracotta brown sugar piece (as described above) in your container. This provides a continuous source of moisture to prevent the sugar from ever becoming hard.
- The Freezer Method: Your Absolute Best Bet for Long-Term Softness!
This is my absolute favorite method for storing brown sugar, ensuring it stays perfectly soft every single time you need it. The cold temperature of the freezer effectively halts moisture evaporation and prevents the sugar crystals from binding together.
How to do it:
- Portion and Seal: Divide your brown sugar into smaller, tightly sealed freezer-safe bags (like heavy-duty Ziploc bags) or small airtight containers. This prevents you from having to thaw a large quantity when you only need a little.
- Freeze: Place the sealed portions in your freezer.
- Thaw and Use: When you need brown sugar for a recipe, remove a small bag or container from the freezer. Allow it to come to room temperature while still in its sealed bag or container. This is crucial because if you open it too soon, condensation can form, potentially making your sugar wet and clumpy.
Why it works: The low temperature of the freezer essentially locks in the moisture content of the molasses, preventing it from evaporating. When it thaws, the sugar returns to its original soft state, without hardening.
Pros: Guarantees soft brown sugar every single time, extends shelf life indefinitely, prevents hardening completely.
Cons: Requires a bit of planning to thaw, takes up freezer space.

With these tried-and-true methods at your disposal, you’ll never have to battle rock-hard brown sugar again. Whether you choose a quick microwave fix, a gentle overnight rehydration, or invest in a terracotta saver for long-term prevention, keeping your brown sugar soft and pliable is easily achievable. More importantly, adopting proper storage techniques, especially the freezer method, will ensure that your brown sugar is always ready for your next baking masterpiece. Happy baking!
More Baking Tips to Elevate Your Skills
Looking to further refine your baking prowess? Check out these other helpful guides for essential techniques and homemade ingredient substitutes:
- Homemade Cake Flour (Substitute)
- How to Frost a Cake Smoothly
- How to Decorate Cupcakes
- How to Pipe Cake Borders (Buttercream)
- How to Color Fondant
