2-Ingredient Watermelon Ice Cream: Easy, Healthy, No-Churn & Vegan Delight!
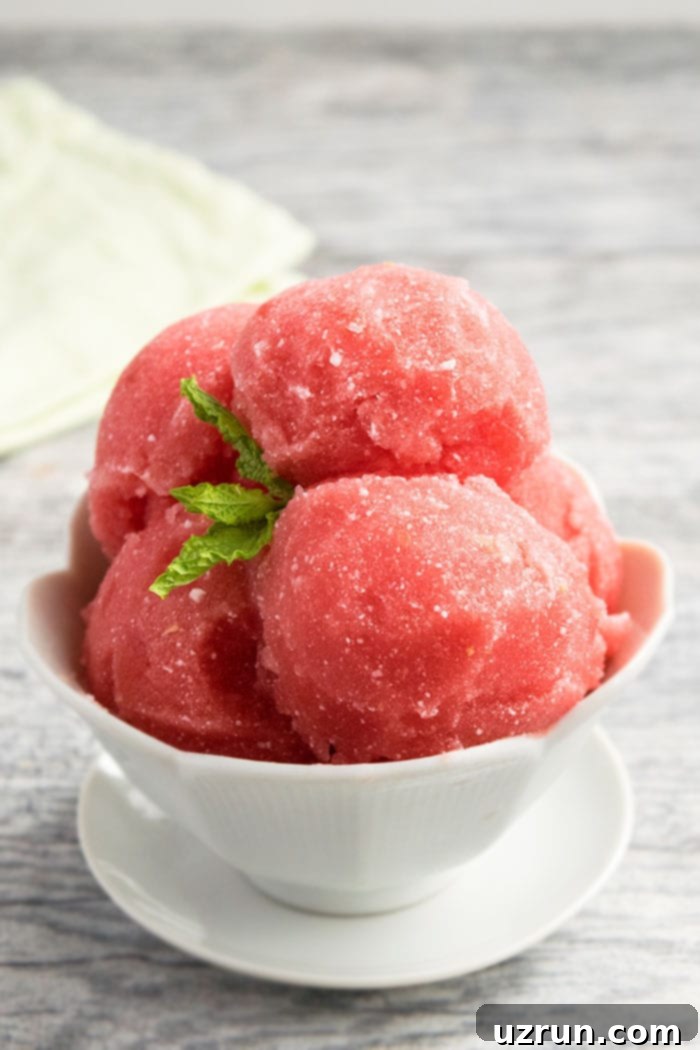
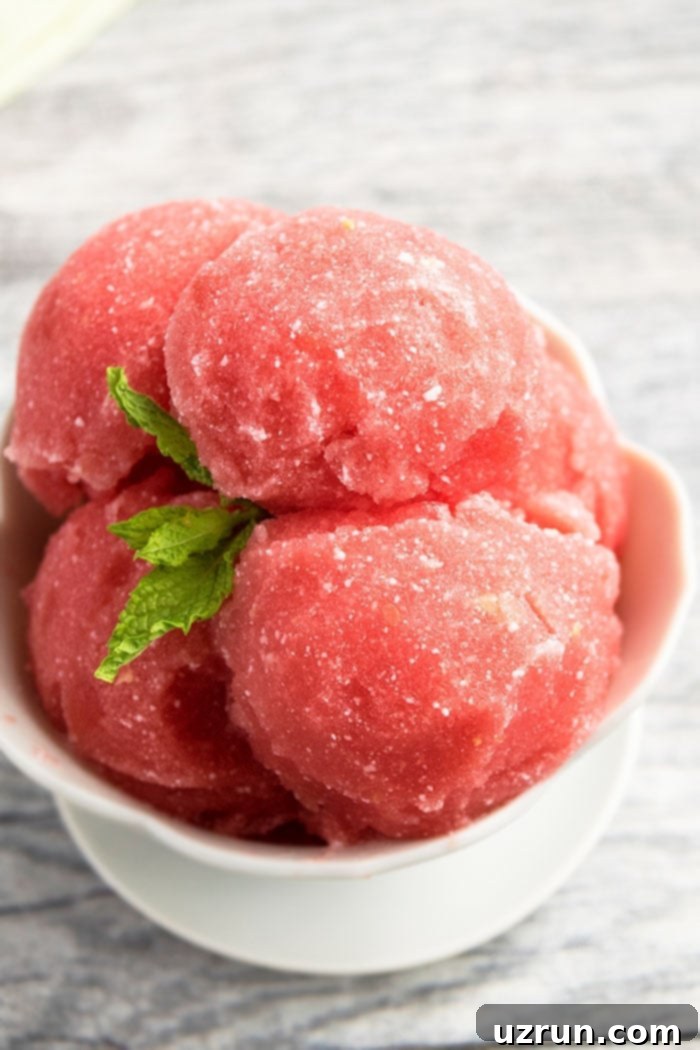
Beat the heat this summer with the ultimate refreshing treat: a delicious, homemade watermelon ice cream that’s unbelievably quick and easy to make! This incredible recipe requires just two simple ingredients and no ice cream maker, making it perfect for anyone looking for a healthy, creamy, and vegan dessert. Whether you’re a seasoned chef or a kitchen novice, you’ll be amazed at how effortlessly you can whip up this vibrant pink delight.
There’s nothing quite like a cool, fruity dessert to chase away the summer sun, and this watermelon ice cream perfectly fits the bill. It’s a delightful, nostalgic treat that my mom used to make for me, bringing back sweet memories of childhood summers. Just like our popular Watermelon Cake and these fun Watermelon Cupcakes (Pull Apart Cupcakes), this ice cream celebrates the iconic summer fruit. The best part? You don’t need fancy equipment. A heavy-duty food processor or a powerful blender is all it takes to achieve that perfectly smooth, luscious texture. This healthy and satisfying dessert is an ideal reward for kids (and adults!) after a long day of outdoor play or a refreshing swim. Get ready to enjoy guilt-free indulgence!

Table of Contents
- Why You’ll Love This Easy Watermelon Ice Cream
- Key Ingredients for Your Homemade Watermelon Ice Cream
- Step-by-Step Guide: How to Make No-Churn Watermelon Ice Cream
- Delicious Variations for Your Healthy Vegan Ice Cream
- Pro Tips and Techniques for Perfect Watermelon Ice Cream
- Storage and Make-Ahead for No-Churn Ice Cream
- Frequently Asked Questions (FAQs) About Watermelon Ice Cream
- More Refreshing Frozen Desserts to Explore
Why You’ll Love This Easy Watermelon Ice Cream
This isn’t just any ice cream; it’s a game-changer for hot weather and busy schedules. Here’s why this 2-ingredient watermelon ice cream will become your new favorite summer dessert:
- Effortlessly Simple: With just two core ingredients, this recipe is incredibly straightforward. No complex steps, no obscure items needed.
- No Ice Cream Maker Required: Ditch the bulky machinery! All you need is a good blender or food processor to achieve a perfectly smooth and creamy texture.
- Naturally Healthy: Watermelon is packed with vitamins, antioxidants, and is low in calories. When combined with full-fat coconut milk (a healthier fat source), this ice cream offers a more wholesome alternative to traditional desserts. It’s naturally sweetened by the fruit itself!
- Creamy & Refreshing: The full-fat coconut milk provides a luxurious creaminess that rivals dairy-based ice creams, while the watermelon delivers a burst of cooling freshness.
- Perfectly Vegan & Dairy-Free: An excellent option for those with dietary restrictions or anyone looking to enjoy a plant-based treat.
- Kid-Friendly Fun: Kids love the vibrant color and sweet taste of watermelon. Involving them in the simple process of making this ice cream can be a fun activity, and they’ll adore the healthy outcome.
- Customizable: While simple, this recipe is a fantastic base for various additions and flavor enhancements, as we’ll explore later.
Key Ingredients for Your Homemade Watermelon Ice Cream
The magic of this recipe lies in its simplicity, requiring just two main components:
- Ripe, Seedless Watermelons: The star of the show! For the best flavor and texture, choose a watermelon that is ripe and ideally seedless. A ripe watermelon will be sweet and juicy, forming the natural sugar base of your ice cream.
Tip for picking a ripe watermelon: Look for a large, yellowish spot (the field spot) on the underside. The larger and more golden this spot, the longer the watermelon ripened on the vine, resulting in a sweeter fruit. It should also feel heavy for its size and produce a hollow sound when tapped. - Full-Fat Canned Coconut Milk: This is crucial for achieving that wonderfully creamy, luxurious texture without any dairy. The high fat content in full-fat coconut milk prevents the ice cream from becoming overly icy. Do NOT use light coconut milk or coconut beverage from a carton, as they are too watery. Ensure you use the thick cream from the top of a well-chilled can.
Alternative: If you’re not vegan or dairy-free, you could experiment with Greek yogurt for a tangy twist or sweetened condensed milk for a richer, sweeter profile, using similar quantities. - Optional Food Coloring (Pink or Red): While watermelon naturally lends a beautiful pink hue, a few drops of red or pink food coloring can enhance its vibrancy, making your ice cream even more visually appealing, especially for special occasions or just for fun.
Step-by-Step Guide: How to Make No-Churn Watermelon Ice Cream
Making this delightful dessert is incredibly simple. Follow these steps for perfect homemade watermelon ice cream:
- Prepare and Freeze Watermelon:
Start by cutting your ripe, seedless watermelon into 1-inch cubes. The smaller the cubes, the faster they will freeze. Arrange the watermelon pieces in a single layer on a baking tray or cookie sheet lined with parchment paper or foil. This prevents them from sticking together and makes blending easier. Place the tray in the freezer for a minimum of 3-4 hours, or until the watermelon cubes are completely solid. Freezing is key here, as it eliminates the need for an ice cream maker and provides that instant cold, creamy texture.
- Blend Ingredients to Perfection:
Once your watermelon is fully frozen, transfer the cubes to a powerful heavy-duty blender or food processor. Add the full-fat canned coconut milk. Begin to pulse the mixture. You’ll likely need to stop and scrape down the sides a few times to ensure everything is evenly blended. Continue pulsing and blending until the mixture is smooth and creamy, resembling a soft-serve consistency. If you prefer a slight texture, with tiny bits of coconut or watermelon, pulse a little less.
- Enhance Color (Optional):
If you desire a deeper pink or red color, add a few drops of red or pink food coloring to the mixture during the blending process. Blend for another few seconds to evenly distribute the color.
- Serve Immediately or Freeze for Firmness:
Your watermelon ice cream is now ready! You can serve it immediately for a delightful soft-serve experience, or transfer it to an airtight container and freeze for another hour or two to achieve a firmer, scoopable ice cream consistency. Either way, it’s absolutely delicious!

Delicious Variations for Your Healthy Vegan Ice Cream
While fantastic on its own, this 2-ingredient watermelon ice cream recipe is a versatile base for culinary creativity. Here are some exciting variations to try:
- Transform into a Frozen Ice Cream Cake: For a show-stopping dessert, prepare the ice cream mixture as directed. Spread it evenly into a round cake pan lined with parchment paper, then chill in the freezer until firm. Once set, remove from the pan, frost with your favorite whipped cream (dairy or coconut-based for vegan), and decorate with fresh watermelon slices or other fruits.
- Create Wholesome Ice Cream Sandwiches: Scoop the freshly made soft-serve ice cream and spread it generously between two of your favorite cookies. Our Soft and Chewy Sugar Cookies would be a perfect match! Freeze the assembled sandwiches until firm for a delightful grab-and-go treat.
- Boost the Color: As mentioned, even though watermelon is naturally pink, adding a few drops of pink or red food coloring can significantly enhance its vibrant hue, making your ice cream even more visually appealing.
- Explore Milk Alternatives: If full-fat coconut milk isn’t your preference, you have options. For a dairy version, Greek yogurt adds a pleasant tanginess and extra protein, or sweetened condensed milk will yield a richer, sweeter ice cream. For other vegan options, ensure they are thick and creamy, like a high-fat oat milk creamer, but adjust quantities carefully.
- Adjust Sweetness Levels: Watermelon’s sweetness varies. If your ice cream isn’t sweet enough for your liking, consider adding a touch of honey (not vegan), maple syrup, agave nectar, or a sugar substitute during the blending process. Start with a small amount and add more to taste.
- Make Refreshing Watermelon Popsicles: For a fun, kid-friendly option, simply pour the prepared ice cream mixture into popsicle molds. Insert popsicle sticks and freeze until completely firm, typically 4-6 hours. These are perfect for little hands!
- Infuse with Flavor Extracts: Elevate the taste with a few drops of your favorite extract. Vanilla extract is a classic enhancer, while mint extract can add a cool, refreshing zing. For an adult twist, a hint of rum extract can be quite delightful.
- Add Decadent Chocolate Chips: For extra sweetness and a touch of indulgence, fold in some mini white chocolate chips or finely shredded white chocolate after blending.
- Create “Watermelon Seeds”: To mimic the look of a real watermelon, mix in some mini semi-sweet chocolate chips (or regular if you prefer larger “seeds”) after the ice cream is blended. The dark chocolate bits will resemble the seeds and add a lovely textural contrast.
- Incorporate Other Fruits: Experiment with fruit combinations! A squeeze of fresh lime juice can brighten the flavor, or you could blend in a few kiwi slices for a pop of green and a different texture. Berries like strawberries or raspberries also pair beautifully with watermelon.
Pro Tips and Techniques for Perfect Watermelon Ice Cream
Achieving the perfect texture and flavor for your homemade watermelon ice cream is easy with these expert tips:
- Allow it to Soften Before Serving: When frozen for an extended period, homemade ice cream can become quite hard. For the best scoopable texture, let your ice cream sit at room temperature for about 10-15 minutes before digging in. This allows it to soften slightly, making it much easier to enjoy.
- Invest in a Strong Blender or Food Processor: The key to a smooth, lump-free ice cream is powerful blending. A heavy-duty blender or food processor is essential to break down the frozen watermelon into a creamy consistency. A less powerful machine might struggle and result in a chunkier texture.
- Always Use Full-Fat Canned Coconut Milk: We can’t stress this enough! Regular coconut milk (like the kind in cartons) or light canned coconut milk contains too much water and not enough fat. This will lead to an icy, rather than creamy, ice cream. The fat content in full-fat canned coconut milk is vital for achieving that rich, smooth consistency. Make sure to chill the can in the refrigerator overnight to allow the cream to separate and solidify at the top.
- Proper Watermelon Freezing Technique: To ensure your watermelon freezes quickly and evenly, cut it into uniform 1-inch cubes. Spreading them in a single layer on a foil-lined baking sheet prevents them from clumping together and ensures they freeze solid in 3-4 hours. If they are in a pile, it will take much longer and might not freeze evenly.
- Troubleshooting Soft-Serve Consistency: If your ice cream mixture doesn’t set into a firm soft-serve, it’s most likely due to insufficient freezing time or a lack of fat. Double-check that your watermelon was frozen solid for at least 3-4 hours and that you used full-fat canned coconut milk. If it’s still too soft, freeze the blended mixture for another 30-60 minutes.
- How to Pick a Ripe Watermelon: As mentioned earlier, a large, yellow field spot indicates ripeness. Also, a dull (not shiny) skin, a deep hollow sound when tapped, and a heavy feel for its size are all good indicators of a sweet, juicy watermelon.
- Pre-Chill Your Serving Bowls: For an extra special touch, chill your serving bowls or glasses in the freezer for about 15 minutes before serving. This helps keep the ice cream colder for longer, especially on a hot day.
Storage and Make-Ahead for No-Churn Ice Cream
Proper storage is essential to maintain the quality and texture of your homemade watermelon ice cream.
- Freezing: Store any leftover ice cream in a sealed, airtight container in the freezer. This is crucial to prevent ice crystals from forming and to keep it fresh. Properly stored, it will maintain its quality for up to 1 month. Beyond that, while still safe to eat, the texture may start to degrade. Remember to let it sit at room temperature for a few minutes before scooping for the best experience.
- Make-Ahead: This recipe is fantastic for preparing in advance. You can make a large batch and store it in the freezer for up to a month, ensuring you always have a healthy and refreshing treat on hand for unexpected guests or sudden cravings.
Frequently Asked Questions (FAQs) About Watermelon Ice Cream
Is this watermelon ice cream truly healthy?
Yes, absolutely! Compared to traditional ice creams loaded with refined sugars and dairy, this version uses natural sweetness from watermelon and healthy fats from full-fat coconut milk. Watermelon is rich in vitamins A and C, and antioxidants, making this a nutritious and guilt-free dessert option.
Can I use fresh (unfrozen) watermelon directly?
No, the watermelon *must* be frozen. Freezing the watermelon is the core “no-churn” technique that eliminates the need for an ice cream maker and provides the necessary coldness and thickness for an ice cream-like consistency. Using fresh watermelon would result in a smoothie or a thin liquid, not ice cream.
What if I don’t like the taste of coconut?
While the full-fat coconut milk provides the best creaminess, its flavor is generally mild, especially when combined with sweet watermelon. If you’re concerned, you can try adding a few drops of vanilla extract or a pinch of salt to balance the flavors. For a non-vegan option, Greek yogurt or heavy cream could be substitutes, but they will change the dietary profile.
How long does it take for the ice cream to freeze solid after blending?
If you prefer a firmer, more scoopable ice cream rather than soft-serve, it will typically take about 1-2 hours in the freezer after blending. However, the exact time can vary depending on your freezer’s temperature and the container you use.
Can I add alcohol to this ice cream?
Yes, for an adult-friendly version, you can add a small amount (1-2 tablespoons) of alcohol, such as vodka, gin, or a fruit liqueur, during the blending process. Be cautious with the quantity, as too much alcohol can prevent the ice cream from freezing properly due to its lower freezing point.
More Refreshing Frozen Desserts You’ll Love
If you’re a fan of cool treats, be sure to check out these other delicious frozen dessert recipes:
- Snow Ice Cream
- Ice Cream Cake
- Ice Cream Sandwich
- Healthy Chocolate Banana Ice Cream
- Homemade Fruit Popsicles
- Chocolate Banana Popsicles
- Coffee Popsicles
Recipe

Watermelon Ice Cream (2 Ingredients)
Abeer Rizvi
Pin Recipe
Want to Save This Recipe?
Enter your email & I’ll send it to your inbox. Plus, get great new recipes from me every week!
By submitting this form, you consent to receive emails from CakeWhiz
Ingredients
- 3 cups Watermelon Cut into 1 inch cubes
- ½ cup Canned coconut milk Or condensed milk
- Red or pink food coloring Optional
Instructions
-
Freeze watermelon slices for 3-4 hours in a cookie tray, lined with foil paper.
-
Add the frozen watermelon slices and coconut milk in a strong blender or food processor and pulse until smooth OR pulse it a little if you like bits of coconut in each bite.
-
Add a few drops of food coloring if you like.
-
Serve immediately for a soft serve ice cream or freeze for another hour to make firm ice cream. Enjoy!
Video
Notes
- Read all my tips above.
- Leftovers can be stored in a sealed container in the freezer for up to 1 month.
Nutrition
An automated tool is used to calculate the nutritional information. As such, I cannot guarantee the accuracy of the nutritional information provided for any recipe on this site.
