Mint Frosting Perfection: Your Ultimate Guide to Easy, Creamy, Homemade Green Buttercream
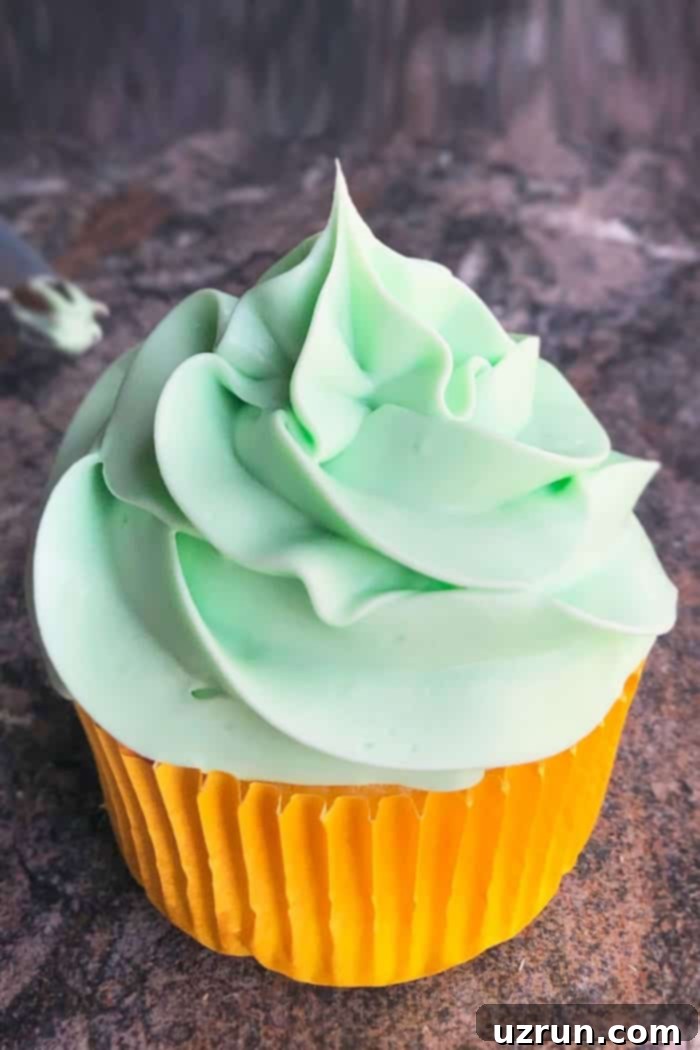
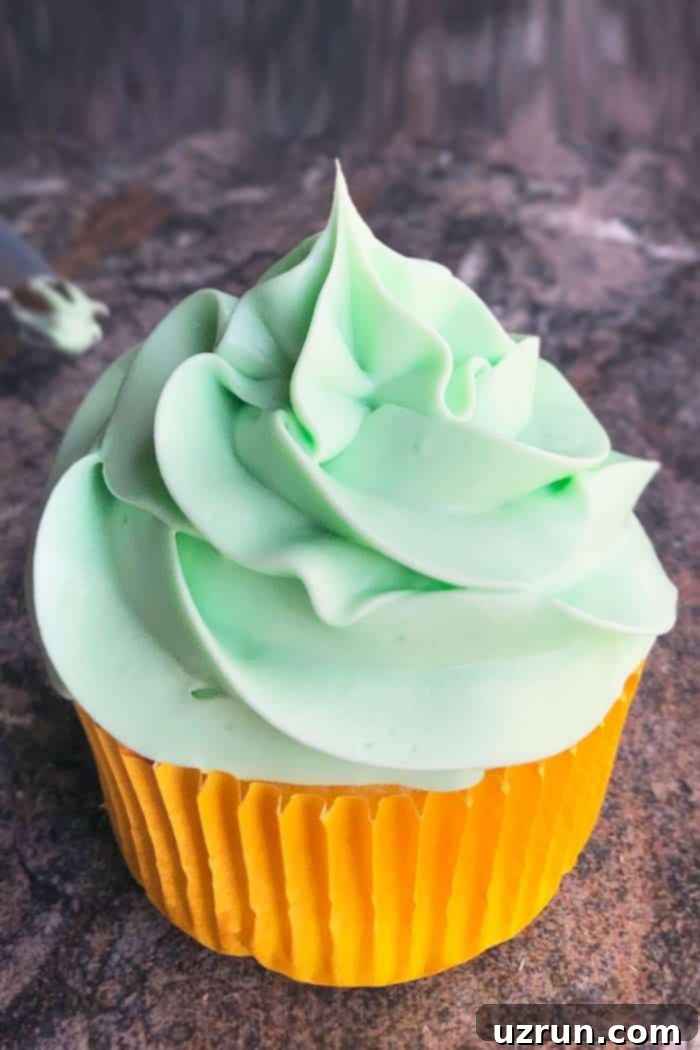
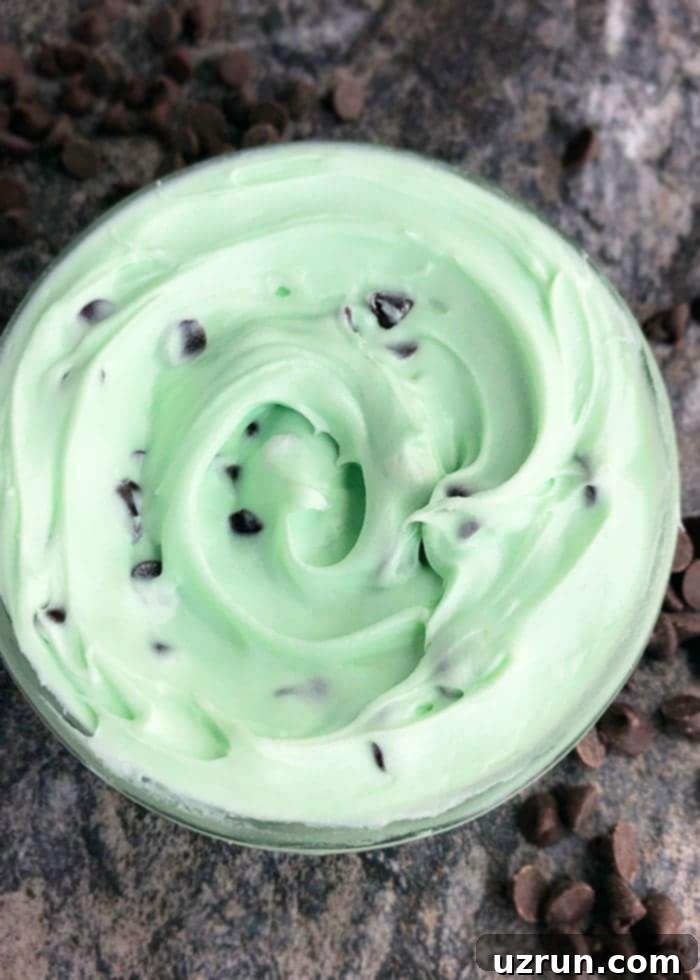
Welcome to the ultimate guide for creating the most delightful and vibrant homemade mint frosting! This recipe is designed to be quick, incredibly easy, and yields a frosting that is rich, creamy, fluffy, and silky smooth. Not only is it delicious, but it’s also wonderfully stable, holding its shape beautifully, making it perfect for spreading, intricate piping, and stunning cake decorating. Flavored with refreshing mint extract and colored with a touch of green food coloring, this frosting is a showstopper for any occasion.
Every baker needs a versatile collection of reliable frosting recipes to elevate their desserts. If you’re looking to expand your repertoire, be sure to explore our extensive Frosting and Fillings category for more delicious ideas.
This vibrant green frosting isn’t just a treat for the taste buds; it’s also visually appealing, making it an excellent choice for festive celebrations. Imagine it adorning your holiday treats for Christmas or adding a festive touch to your St. Patrick’s Day festivities. Its fresh minty flavor and cheerful color are sure to bring smiles to everyone.
How to Make Homemade Mint Frosting: A Step-by-Step Guide
Creating this delicious mint buttercream is surprisingly simple. With just a few basic ingredients and straightforward steps, you’ll have a perfectly smooth and flavorful frosting ready in no time. Follow these detailed instructions for the best results:
- Cream Together Butter and Shortening: In a large mixing bowl, combine your room temperature unsalted butter and shortening. Beat them together using an electric mixer until the mixture is light, fluffy, and thoroughly smooth. This initial creaming step is crucial for achieving a well-aerated and smooth frosting texture. Ensure there are no lumps of butter or shortening remaining.
- Incorporate Mint Extract: Once your butter and shortening mixture is perfectly creamy, add the mint extract. Start with the recommended amount in the recipe card, then mix it in thoroughly until it’s fully combined. You can always adjust the amount later to achieve your desired level of minty flavor.
- Gradually Add Powdered Sugar: This is a key step for a lump-free frosting. Add the powdered sugar gradually, about ½ cup at a time, mixing well after each addition. This prevents the sugar from flying out of the bowl and helps you achieve the perfect consistency. Continue mixing until all the powdered sugar is incorporated and the frosting begins to thicken.
- Adjust Consistency with Milk or Heavy Cream: Your frosting’s texture is important for its application. Begin adding milk or heavy cream, one tablespoon at a time, mixing after each addition. Continue until the frosting reaches a perfectly spreadable or pipeable consistency. It should be soft enough to work with but firm enough to hold its shape. Heavy cream will result in a richer, slightly thicker frosting.
- Mix in Green Food Coloring: To achieve that signature mint green hue, add green gel food coloring. Gel colors are highly concentrated, meaning a small amount goes a long way without thinning out your frosting. Mix until you reach your desired shade of green. For a lighter, pastel mint, use less; for a bolder green, add a bit more.
Perfect Pairings: What Goes Well with Mint Buttercream Frosting?
Mint buttercream frosting is incredibly versatile and pairs wonderfully with a variety of desserts. Its fresh, invigorating flavor complements many different bases. You can spread it effortlessly with a spatula for a rustic look or use various decorator tips to pipe elegant swirls and create fancy cake decorations. Remember, chocolate and mint is an iconic flavor combination, closely followed by vanilla and mint. Keep these delicious pairings in mind when planning your next dessert:
Cakes
- Classic Chocolate Cake: The deep richness of chocolate is beautifully balanced by the cool mint.
- Chocolate Brownie Cake: A dense, fudgy cake base is perfectly complemented by a light minty topping.
- Chocolate Pound Cake: For a more substantial cake, mint frosting adds a refreshing contrast.
- Best Vanilla Cake: A timeless combination, where the subtle vanilla allows the mint to shine.
Cupcakes
- Brownie Cupcakes: Transform ordinary brownie cupcakes into a gourmet treat.
- Best Vanilla Cupcake Recipe: A beloved pairing that’s always a crowd-pleaser.
- Oreo Cupcakes (With Cake Mix): The chocolatey goodness of Oreos and cool mint are a match made in heaven.
Cookies
- White Chocolate Chip Cookies: A delicate pairing where mint adds an unexpected twist.
- Chocolate Whoopie Pies: Use this mint frosting as a creamy, dreamy filling between soft chocolate cookies.
- Easy Sugar Cookies (Soft and Chewy): A simple sugar cookie provides a perfect canvas for the vibrant mint flavor.
Brownies and Bars
- Fudgy Oreo Brownies: Elevate your brownies with a layer of minty goodness.
- Cake Mix Cookie Bars: A quick and easy dessert that becomes extra special with mint frosting.
- Cake Mix Brownies: A convenient way to make delicious brownies, enhanced by the fresh flavor of mint.
Achieving the Perfect Frosting Consistency
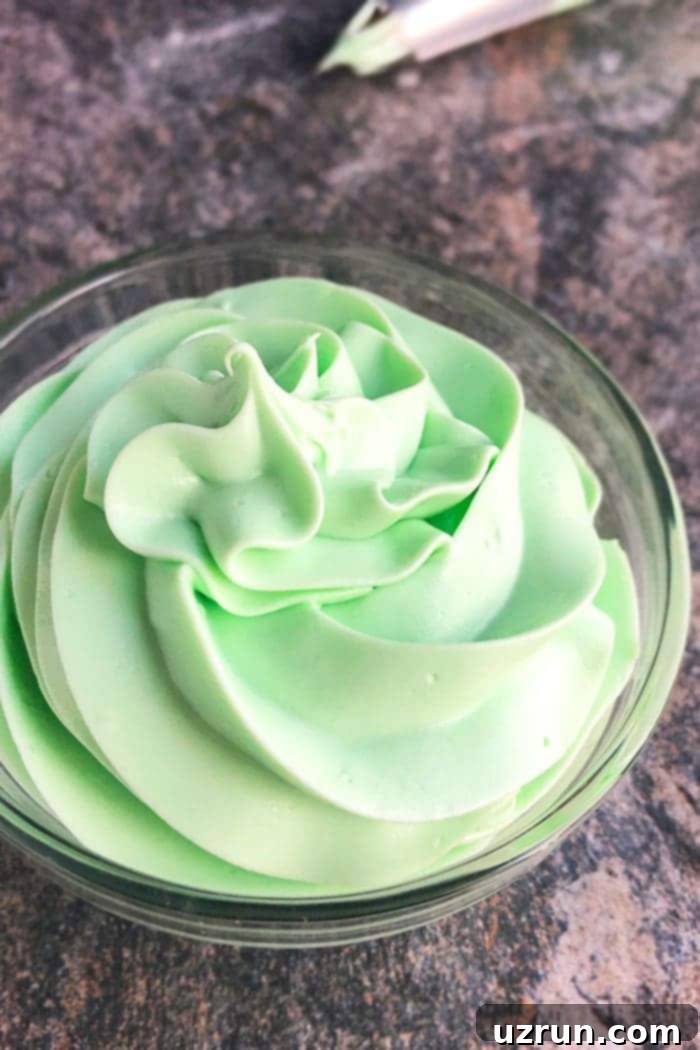
The ideal frosting consistency is key to successful decorating, whether you’re spreading a smooth layer or piping intricate designs. Here’s how to adjust your mint frosting to perfection:
- How to Thicken Frosting: If your frosting feels too thin or runny, the easiest way to thicken it is by gradually mixing in a bit more powdered sugar. Start with a tablespoon at a time and mix well until the desired thickness is achieved. Alternatively, a small amount of cornstarch can also help, but powdered sugar is usually sufficient.
- How to Make Frosting Thinner: If your frosting is too stiff or crumbly, you’ll want to thin it out. Add milk or heavy cream, one teaspoon at a time, mixing thoroughly after each addition. Continue until the frosting is soft and pliable, but still firm enough to hold its shape for piping and spreading without collapsing.
How Much Frosting is Needed for Cakes and Cupcakes?
The amount of frosting you’ll need will vary significantly based on your decorating style and the size of your desserts. This recipe yields a good quantity, but here’s a guide to help you plan:
For cupcakes, if you’re aiming for tall, elegant swirls using a piping bag, this recipe will typically be enough to generously frost about 15 cupcakes. If you’re simply spreading the frosting with a spatula for a more modest topping, you’ll be able to frost approximately 24 cupcakes with this single batch.
When it comes to cakes, this recipe is usually sufficient to frost an 8-inch round cake with two layers, assuming you apply a thin filling between the layers and a thin coating on the outside. However, if you desire a thicker, more decadent filling and a generous outer coating, I highly recommend doubling this recipe. It’s always better to have a little leftover frosting (which can be saved for other desserts!) than to run short mid-decoration.
How to Achieve That Perfect Mint Green Icing Color
That signature, inviting mint green color is achieved effortlessly with the right food coloring. For vibrant and consistent results, we recommend using gel food coloring:
Gel colors are superior because they are highly concentrated, meaning you need only a tiny amount to achieve a rich hue. This is crucial because it allows you to color your frosting without significantly altering its consistency, which liquid food colorings can do. You can either use a direct green gel coloring for simplicity or get creative by mixing a small amount of blue and yellow gel colors to create your desired shade of green. If your frosting accidentally becomes too dark, don’t worry! You can lighten the color by mixing in a small amount of white gel coloring or adding more plain white frosting base if you have it.
Delicious Variations to Customize Your Mint Frosting
While this classic mint frosting is delightful on its own, it also serves as a fantastic base for exciting flavor variations. Get creative and try these delicious twists:
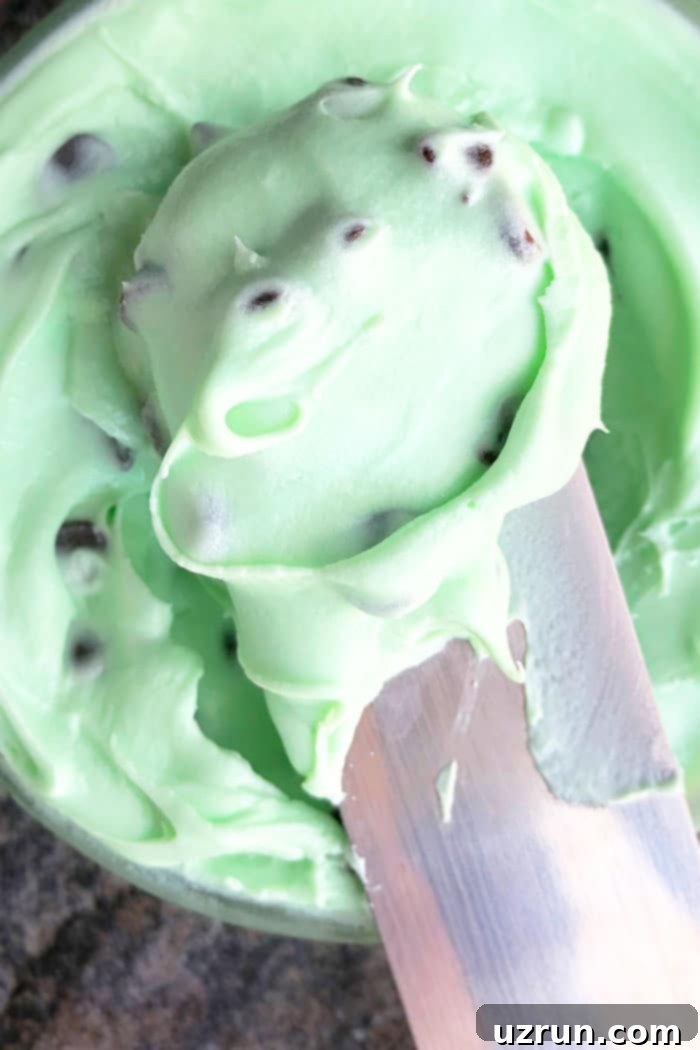
- Chocolate Mint Frosting: Take the classic combination to the next level. Fold in mini chocolate chips for texture, whisk in a tablespoon or two of unsweetened cocoa powder for a subtle chocolate flavor, or sprinkle chocolate shavings on top for an elegant finish.
- Andes Mint Frosting: For a true Andes mint experience, roughly chop up Andes chocolate mint candies and gently fold them into your prepared frosting. The bits of chocolate and mint will add a wonderful crunch and intensify the flavor.
- Fresh Mint Frosting: For an herbaceous touch, finely chop fresh mint leaves. Mix them into the buttercream. Keep in mind that fresh mint’s flavor takes time to infuse, so for a deeper and more pronounced taste, chill the buttercream in the refrigerator overnight before use.
- Mint Cream Cheese Frosting: For a tangy, less sweet frosting, mix in a small amount of softened cream cheese. Start with about ¼ cup of cream cheese (ensure it’s at room temperature and well-softened) and beat it in until fully incorporated. This adds a lovely tanginess that beautifully cuts through the sweetness of a traditional buttercream.
Expert Tips and Techniques for Perfect Mint Frosting
Achieving bakery-quality mint frosting is easy with these insider tips and techniques. Pay attention to these details for the best results every time:
- Make-Ahead Instructions: This frosting is excellent for meal prep! You can easily make it a day in advance. Store it in an airtight container in the refrigerator until you are ready to use it. Before using, let it come to room temperature and then re-whip it for a few minutes to restore its fluffy texture.
- Can You Freeze This Frosting?: Absolutely! This frosting freezes wonderfully, making it perfect for preparing far in advance of an event. Store it in an airtight container for up to 2-3 months. When ready to use, thaw it in the refrigerator overnight, then whip it again with an electric mixer to bring back its original light and fluffy consistency.
- Does This Icing Need to Be Refrigerated?: Yes, due to the presence of dairy (milk or heavy cream) and butter, this buttercream should be stored in the refrigerator in an airtight container. Leaving it at room temperature for too long can cause the dairy to spoil and the frosting to dry out or separate.
- Can You Add Mint Extract to Canned Frosting?: Yes, this is a great hack for a quick mint frosting. Vanilla-flavored canned frosting will work best as its neutral base allows the mint flavor to truly shine. Simply stir in mint extract to taste.
- Use Unsalted Butter: Opt for unsalted butter in this recipe. This gives you complete control over the saltiness of your frosting, preventing it from becoming too salty, especially when combined with other ingredients.
- Don’t Replace Shortening with Butter: Both shortening and butter are intentionally used in this recipe. While butter provides rich flavor, shortening adds crucial stability and firmness, which helps the frosting hold its shape, especially in warmer conditions or for intricate piping. Shortening is firmer than butter at room temperature.
- Milk vs. Heavy Cream: You can use either milk or heavy cream to adjust the frosting’s consistency. Both serve the purpose of thinning the icing. However, heavy cream has a higher fat content, resulting in a richer, slightly creamier, and often more stable frosting. If using milk, whole milk is recommended for its fat content, but 2% will also work fine.
- Chill Frosting Prior to Piping: For the best piping results, I highly recommend chilling your frosting in the refrigerator for about 15-30 minutes before transferring it to a piping bag. This firms it up slightly, making it much easier to pipe and helping it hold its shape beautifully.
- Sift Powdered Sugar: To guarantee the smoothest, most lump-free frosting possible, always sift your powdered sugar before adding it to the mixture. This breaks up any clumps and ensures a truly silky texture.
- All Ingredients at Room Temperature: Ensure your butter and shortening are at room temperature. This allows them to cream together smoothly and incorporate evenly with the other ingredients, preventing a lumpy or separated frosting.
- Adjust Mint Flavor: The amount of mint extract you use is entirely up to your personal preference. For a stronger, more intense mint flavor, add a little more extract gradually. For a milder, more subtle hint of mint, start with less and add more if needed. Always taste as you go!
Explore More Green Desserts
If you’re a fan of green-hued treats or just looking for more refreshing dessert ideas, check out these delightful recipes that also feature a lovely green color or flavor:
- Key Lime Cookies: Zesty and vibrant, these cookies are a burst of citrusy goodness.
- Chocolate Mint Truffles: Rich, decadent, and perfectly portioned, a sophisticated treat.
- Pistachio Cake: A nutty and moist cake with a natural green tint and distinctive flavor.
- Avocado Chocolate Chip Cookies: An unexpected ingredient adds moisture and a subtle green hue to these chewy cookies.
Recipe Card: Easy Mint Frosting
Author: Abeer Rizvi
Summary: Quick, easy mint frosting recipe, homemade with simple ingredients. Creamy, fluffy, stable, holds its shape. Great for spreading, piping, cake decorating.
Prep Time: 10 mins
Total Time: 10 mins
Course: Dessert
Cuisine: American
Servings: 3 Cups
Calories: 1363 kcal
Ingredients
- ½ cup Unsalted Butter, Room temperature
- ½ cup Shortening
- 1.5 teaspoon Mint extract
- 5 cups Powdered sugar (Icing sugar)
- 2-4 tablespoon Milk or Heavy Cream
- Green gel food coloring
Instructions
- In a large mixing bowl, cream together the room temperature unsalted butter and shortening until the mixture is smooth and creamy.
- Add the mint extract and mix until it is fully combined, ensuring the flavor is evenly distributed.
- Gradually add the powdered sugar, approximately ½ cup at a time, mixing thoroughly after each addition until all the sugar is incorporated and the frosting thickens.
- Begin adding milk (or heavy cream), one tablespoon at a time, to thin out the frosting. Continue until it achieves your desired perfect spreadable and pipeable consistency.
- Finally, mix in a few drops of green gel food coloring until your icing reaches a lovely light green shade. Enjoy your perfectly flavored and colored mint frosting!
Nutrition Information (Approximate)
(Please note: Nutritional information is automatically calculated and may vary.)
- Calories: 1363 kcal
- Carbohydrates: 200g
- Protein: 1g
- Fat: 65g
- Saturated Fat: 28g
- Trans Fat: 6g
- Cholesterol: 82mg
- Sodium: 280mg
- Potassium: 29mg
- Sugar: 196g
- Vitamin A: 962 IU
- Calcium: 23mg
- Iron: 1mg
An automated tool is used to calculate the nutritional information. As such, I cannot guarantee the accuracy of the nutritional information provided for any recipe on this site.
Tried this recipe? Leave a comment below or rate and tag @cakewhiz on social media!
I hope this comprehensive guide inspires you to whip up a batch of this amazing mint frosting. Until next time, happy baking, my lovelies!
