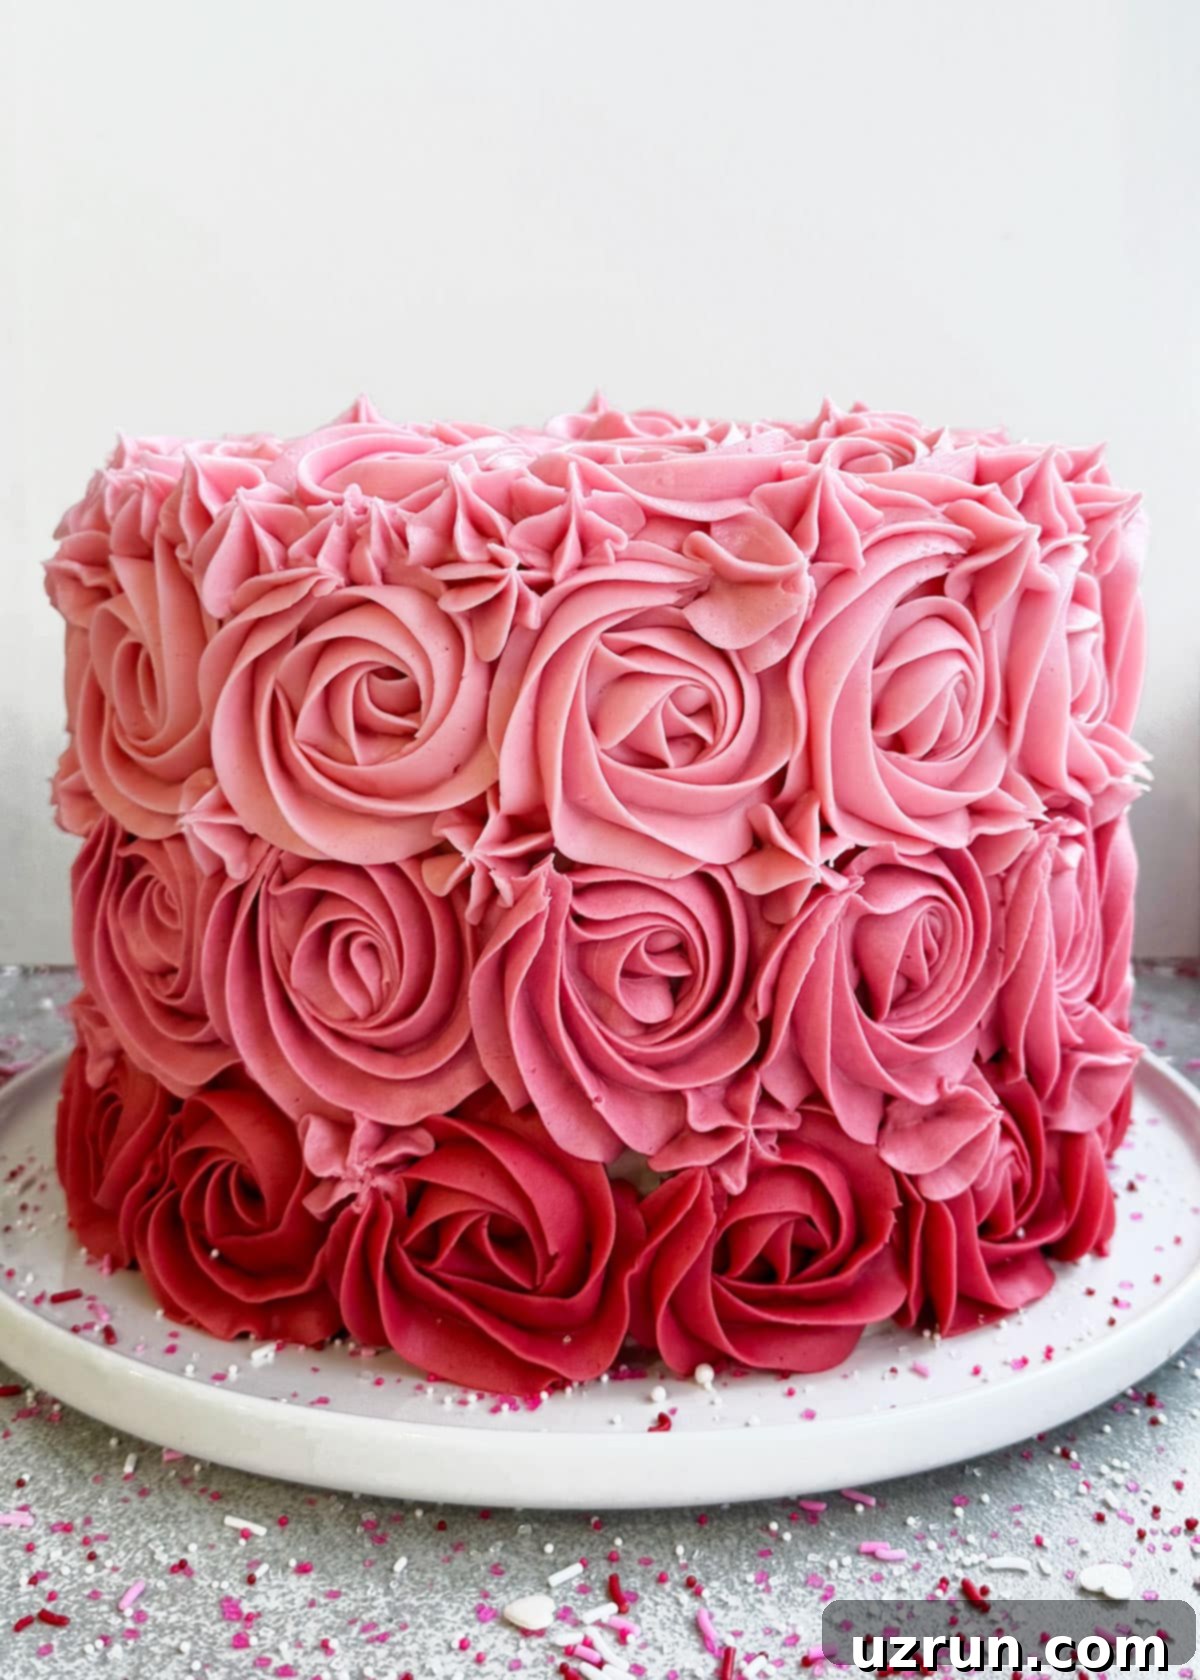
Easy Pink Ombre Mother’s Day Cake with Stunning Buttercream Roses: A Homemade Delight
Celebrate Mother’s Day with an unforgettable homemade treat! This comprehensive guide provides an easy-to-follow recipe and tutorial for creating a show-stopping pink ombre cake, beautifully adorned with delicate buttercream icing roses. Made with simple, wholesome ingredients, this cake is not just a dessert, but a heartfelt expression of love. Beyond the cake, we’ll dive into enchanting party and dessert table details to help you craft a truly memorable celebration for the special mothers in your life.
*A special thank you to Baskin-Robbins and Blog Meets Brand for their generous sponsorship of today’s post. Rest assured, all opinions expressed here are entirely my own and reflect my genuine experience.*
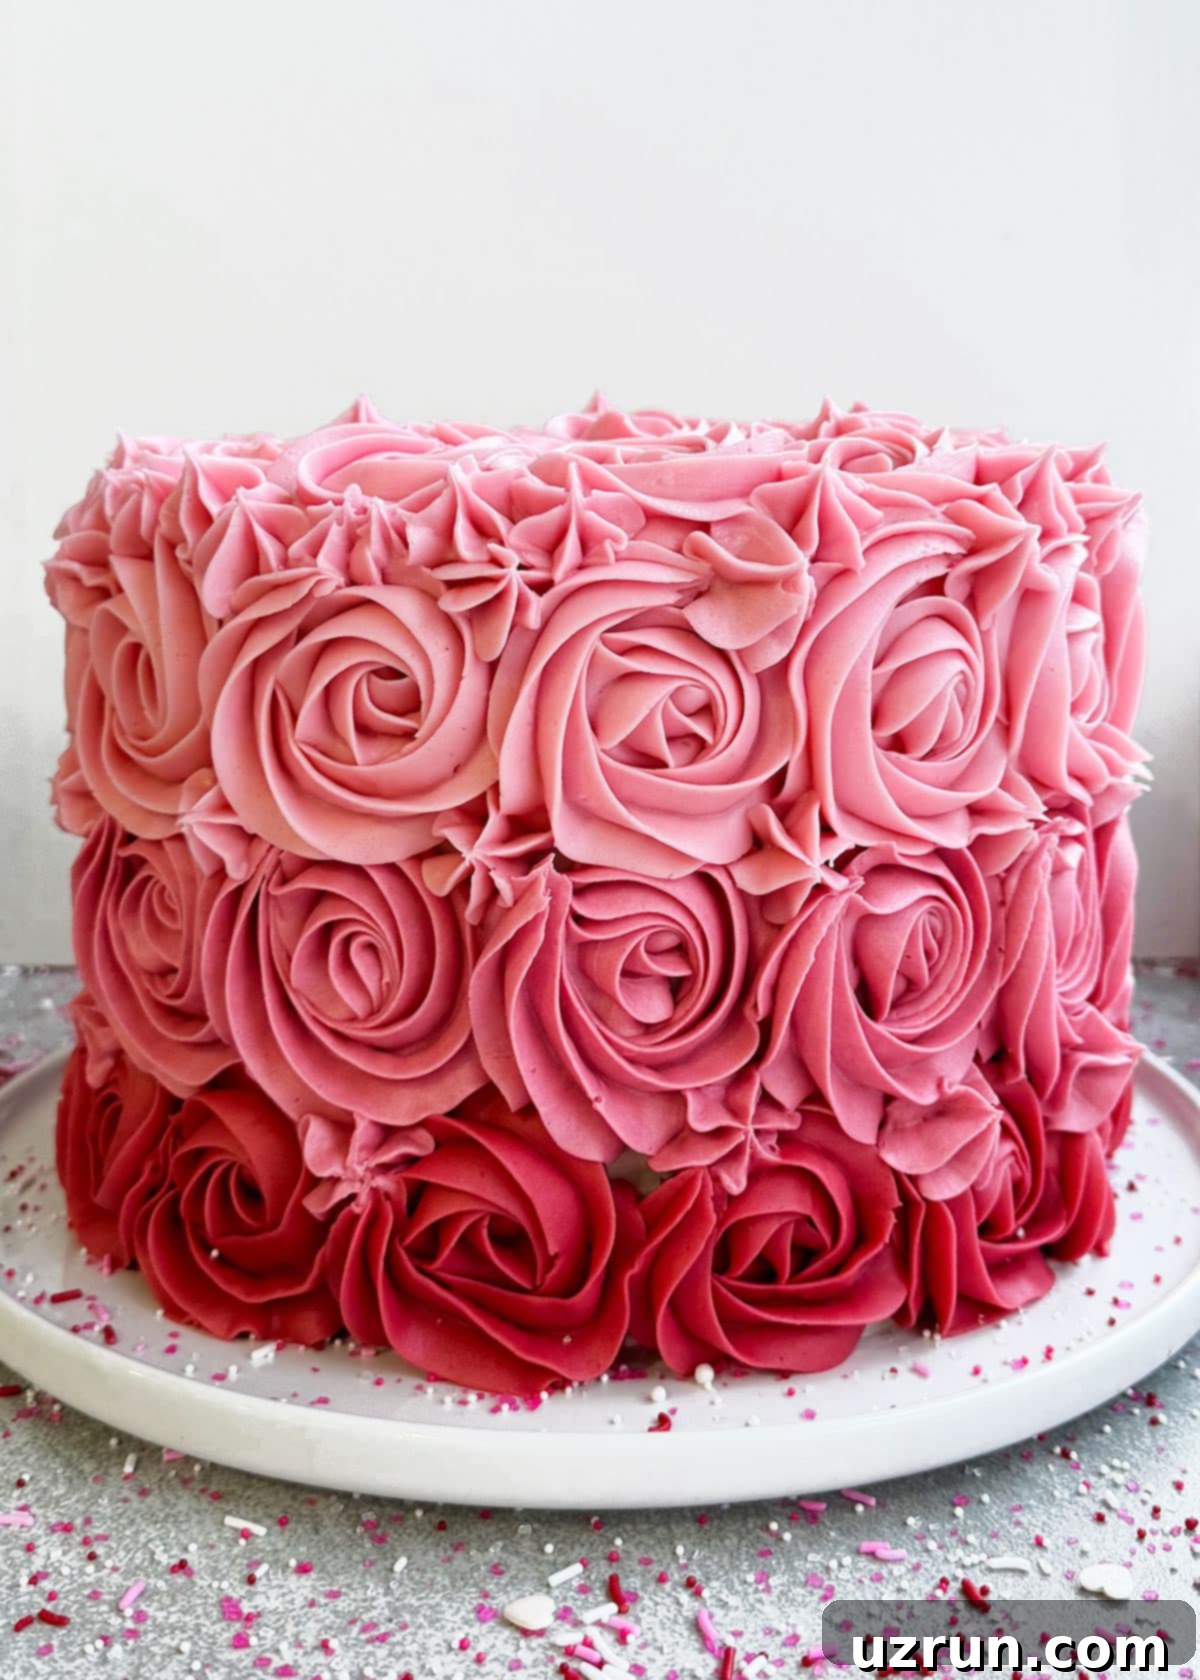
This year, I had the pleasure of hosting the most delightful Mother’s Day celebration for my amazing Mom right in our backyard. It was a day filled with infectious laughter, heartwarming conversations, and the creation of beautiful new memories, all centered around an elegant cake and a lavish spread of desserts. To truly elevate your baking game and find more inspiration for floral-themed treats, don’t forget to explore these other fantastic recipes: Easy Rose Cookies (Piped), Red Rose Cupcakes, Rosette Cake (Buttercream), and Easy Fondant Roses (Ribbon Roses). Each offers unique techniques to bring floral beauty to your dessert table!
Table of Contents
- Key Ingredients for an Easy Mother’s Day Ombre Cake
- Creative Variations for Your Mom’s Special Cake
- How to Craft a Pink Ombre Cake with Buttercream Icing
- Essential Tips and Techniques for Perfect Cake Decorating
- Recipe Frequently Asked Questions
- Proper Storage for Your Decorated Cake
- More Unique Cake Designs for Mother’s Day
- Designing Your Mother’s Day Party Setup
- Delightful Dessert Table Details
- The Star of the Party: Your Mother’s Day Cake
Key Ingredients for an Easy Mother’s Day Ombre Cake
Creating this stunning pink ombre cake starts with a few essential components. High-quality ingredients are the foundation for a delicious and visually appealing dessert:
- Champagne Cakes: For this recipe, we recommend starting with a light and airy champagne cake as your base. Its delicate flavor perfectly complements the sweet buttercream and allows the beautiful pink hues to truly shine. Be sure to follow the linked recipe for optimal results, paying close attention to tips on achieving a moist, fluffy crumb.
- American Buttercream Frosting: This classic frosting is ideal for piping intricate details like roses, as it holds its shape beautifully. You’ll need to prepare a generous batch and divide it into four portions. One portion will remain white for the crumb coat, while the other three will be tinted in varying shades of pink: dark pink, medium pink, and light pink, to create that gorgeous ombre effect.
- Sprinkles: A touch of sprinkles adds a playful and festive finish to your cake. Feel free to get creative with your choice of sprinkles. Pink, white, silver, or even a mix of small hearts can enhance the Mother’s Day theme and add a delightful textural contrast.
Creative Variations for Your Mom’s Special Cake
While the pink ombre and buttercream roses create a truly beautiful cake, don’t hesitate to personalize it further to match your mom’s unique tastes and preferences. Here are some fantastic ideas to inspire you:
- Experiment with Different Extracts: Infuse your cake batter with a variety of flavors beyond vanilla. Consider adding a teaspoon of maple extract for a warm, comforting note, almond extract for a subtle nutty aroma, or even lemon extract for a bright and refreshing tartness that beautifully balances the sweetness of the frosting.
- Incorporate Exciting Cake Add-ins: Boost the texture and flavor of your cake layers by folding in delightful additions to the batter. Crushed Oreo bits add a beloved crunch, finely chopped nuts provide a rich undertone, colorful sprinkles bring extra festivity, or chocolate chips create pockets of gooey deliciousness. Remember to check out my essential tips to prevent these add-ins from sinking to the bottom of your cake pans.
- Explore Alternative Fillings: Instead of using buttercream between each cake layer, introduce a different flavor and texture with a luscious filling. Popular choices include light and airy Whipped Cream or rich Chocolate Whipped Cream. For a fruity burst, try homemade Strawberry Jam, vibrant Raspberry Pie Filling, or the comforting sweetness of Crockpot Apple Butter. If you prefer something decadent, opt for glossy Chocolate Ganache, silky Caramel Sauce, or a classic, creamy Homemade Vanilla Custard.
- Choose a Different Cake Flavor: While champagne cake is lovely, you might want to switch up the base flavor entirely. Classic options include a timeless Vanilla Cake, a rich and indulgent Chocolate Cake, or a vibrant and tangy Red Velvet Cake. Any of these can be beautifully paired with the ombre buttercream.
- Change Up the Color Palette: The ombre effect isn’t limited to pink! Tailor the cake to your mom’s favorite color. Imagine a serene blue ombre cake, a sunny yellow transition, or a majestic purple gradient. Simply adjust the food coloring used in your buttercream to create a personalized masterpiece.
- Add a Special Topper: Elevate the festive look with a charming cake topper. A simple “Mom” sign, like the one featured later in this post, adds a sweet touch. Alternatively, explore other cute and celebratory toppers that stand upright, adding height and visual interest to your beautiful creation.
How to Craft a Pink Ombre Cake with Buttercream Icing
Creating this gorgeous pink ombre cake with piped buttercream roses is a rewarding process. Follow these step-by-step instructions to bring your beautiful Mother’s Day dessert to life:
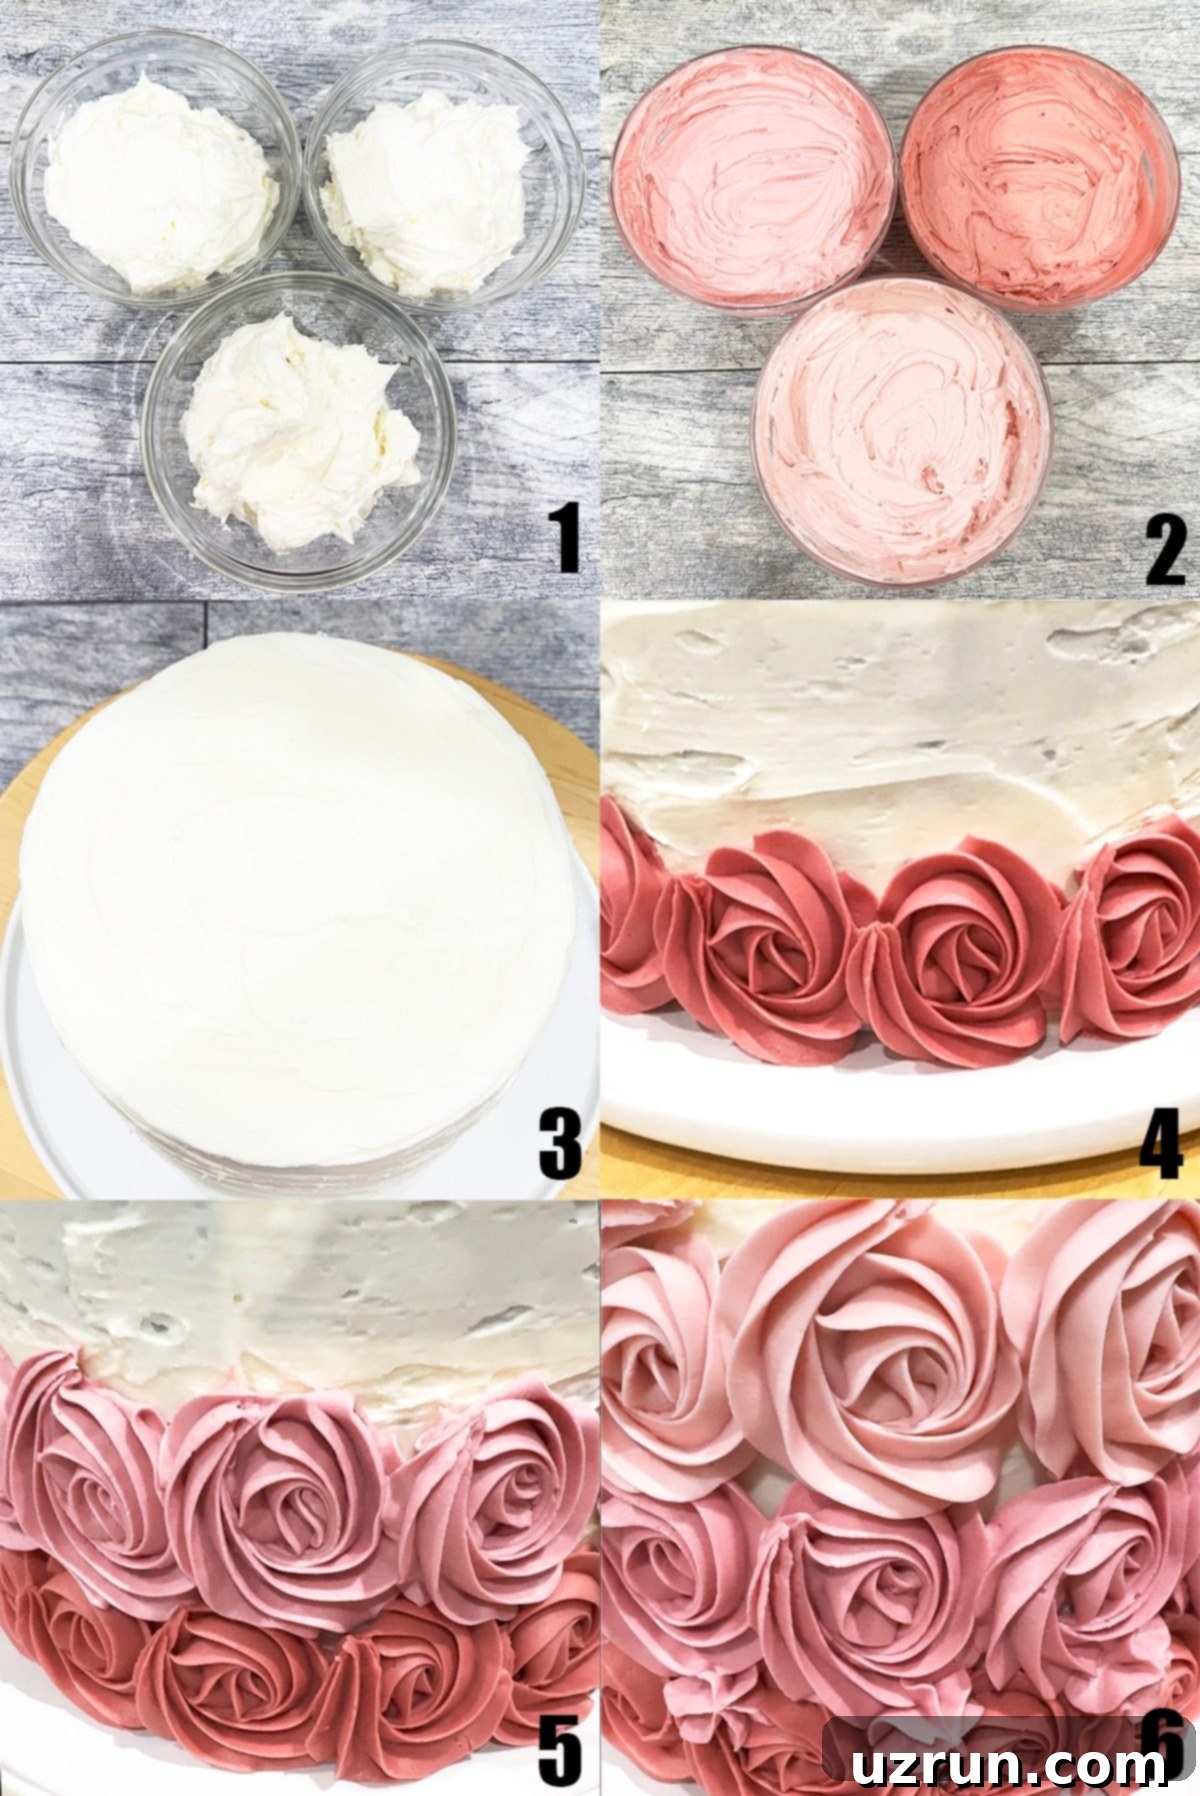
- Prepare Icing: While your cake layers are baking and cooling completely, get a head start by preparing your American buttercream frosting. Ensure it has a medium-firm consistency, perfect for piping. (Image 1)
- Divide and Tint Icing: Divide the prepared buttercream into four separate bowls. Leave one bowl white, as this will be used for your crumb coat and for any subtle white accents. To the remaining three bowls, gradually add pink gel food coloring, creating distinct shades: dark pink, medium pink, and light pink. This gradient is key to the ombre effect. (Image 2)
- Slice Cake Layers: Using a sharp, serrated knife, carefully slice each cooled cake in half horizontally. This will give you four thinner cake layers in total, which are essential for building a tall, elegant cake with multiple filling layers.
- Begin Assembling (Crumb Coat): Place your first cake layer directly onto your cake stand or serving plate. Using an offset spatula, spread a thin, even layer of the white buttercream over the top. This initial layer doesn’t need to be perfect; it’s your “crumb coat” designed to trap any loose crumbs.
- Layer and Frost: Carefully place the second cake layer on top of the first, pressing down gently. Spread another layer of white buttercream over this. Repeat this process with the third and fourth cake layers, frosting each one. Once all layers are stacked and frosted between, apply a thin layer of white buttercream around the entire exterior of the cake, top and sides. This completes your crumb coat. (Image 3)
- Chill the Cake: Place the entire cake in the refrigerator for at least 20-30 minutes. This chilling period is crucial as it allows the crumb coat to firm up, making the final rose piping much easier and preventing crumbs from mixing into your decorative layers.
- Prepare Piping Bags (Dark Pink): While the cake chills, fill a piping bag fitted with Wilton’s Tip 1M (a star tip is ideal for roses) with your dark pink icing. Ensure the icing is at room temperature and has a good, pipeable consistency.
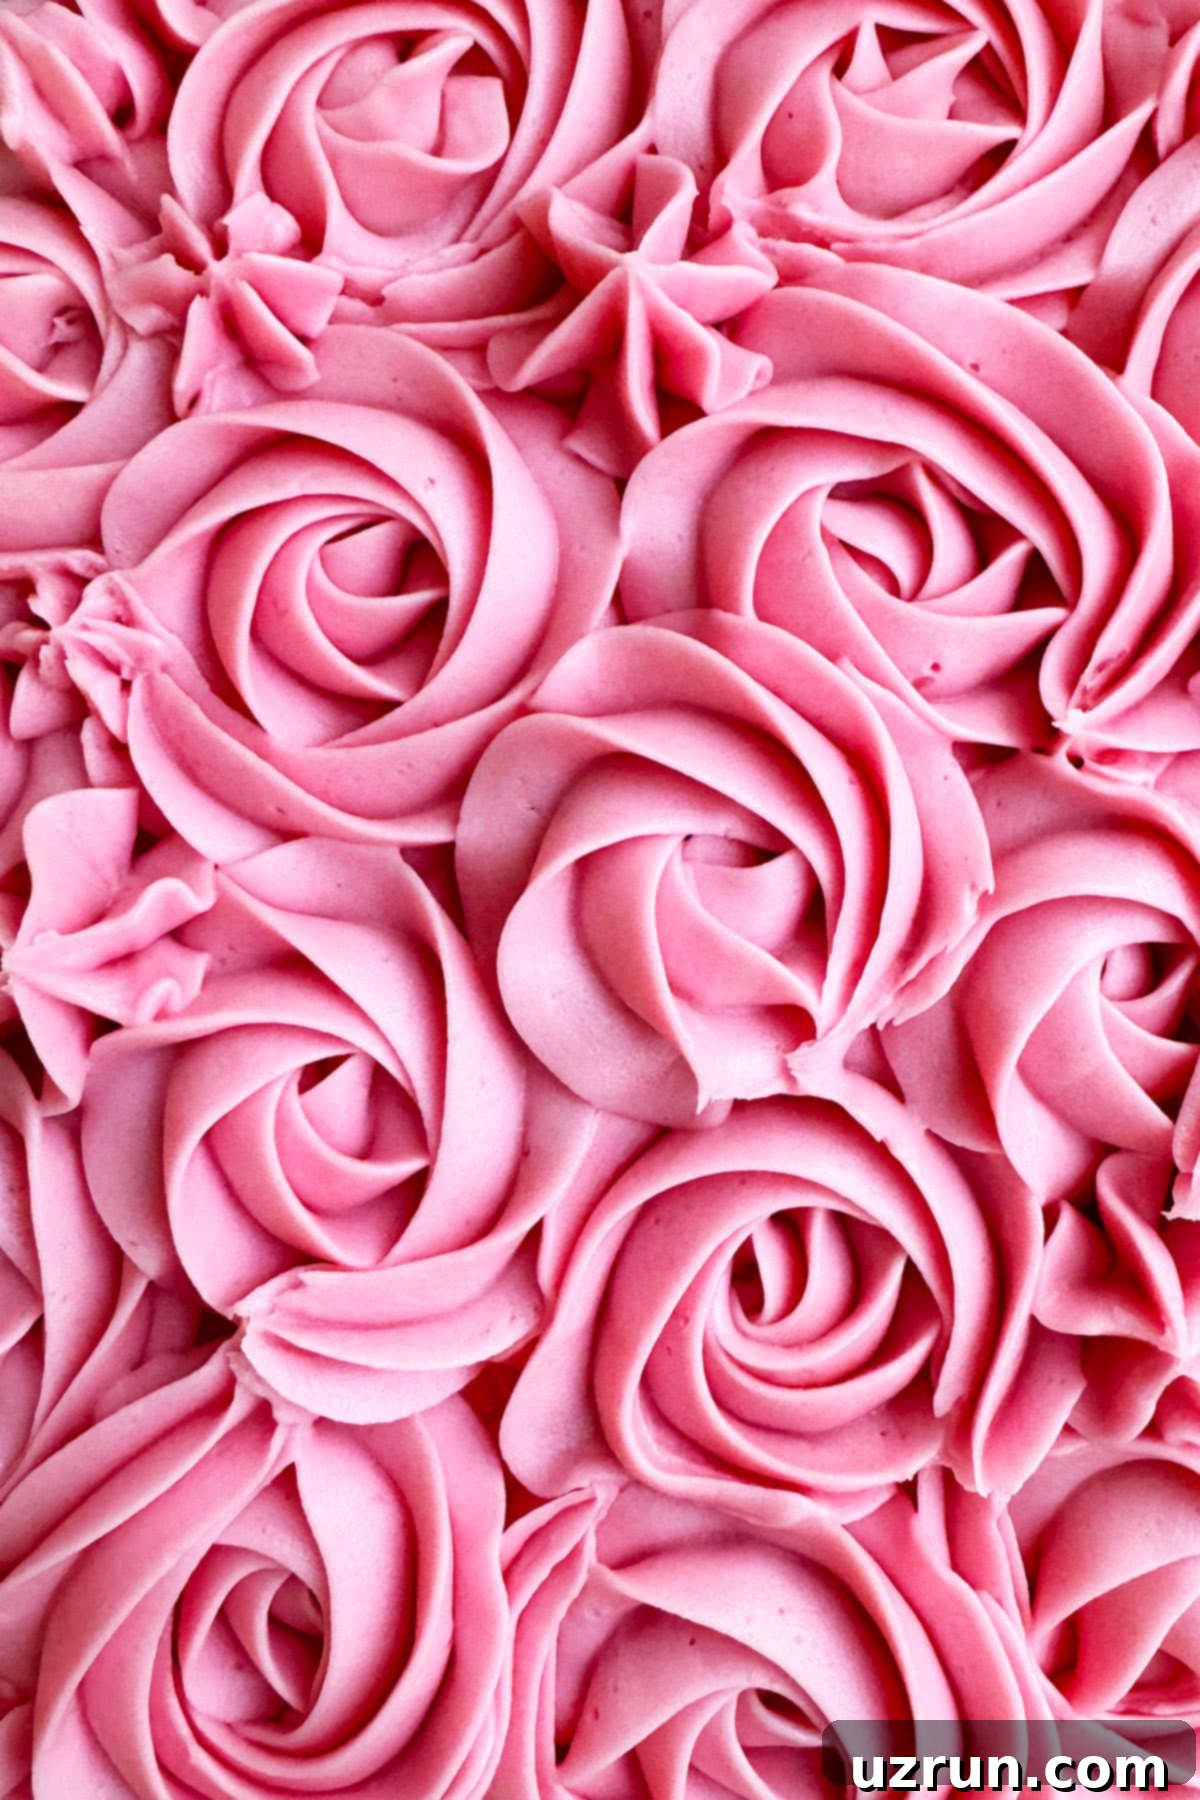
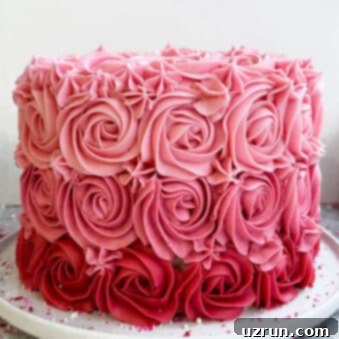
- Pipe Dark Pink Roses (Bottom Layer): Starting from the very bottom edge of the chilled cake, hold your piping bag at a 90-degree angle. Gently squeeze the bag while moving your hand in a continuous clockwise circle to form a piped rose. Work your way across the entire circumference of the bottom of the cake, creating a complete, even row of dark pink roses. (Image 4)
- Pipe Medium Pink Roses (Middle Layer): Fill a new piping bag with the medium pink icing, also fitted with Wilton’s Tip 1M. Pipe a second row of roses directly above the dark pink row, ensuring a slight overlap to create a seamless transition. (Image 5)
- Pipe Light Pink Roses (Upper Side Layer): Next, fill a third piping bag with your light pink icing and Wilton’s Tip 1M. Pipe the third row of roses above the medium pink row, using the same technique. This creates the full ombre effect along the sides of the cake. (Image 6)
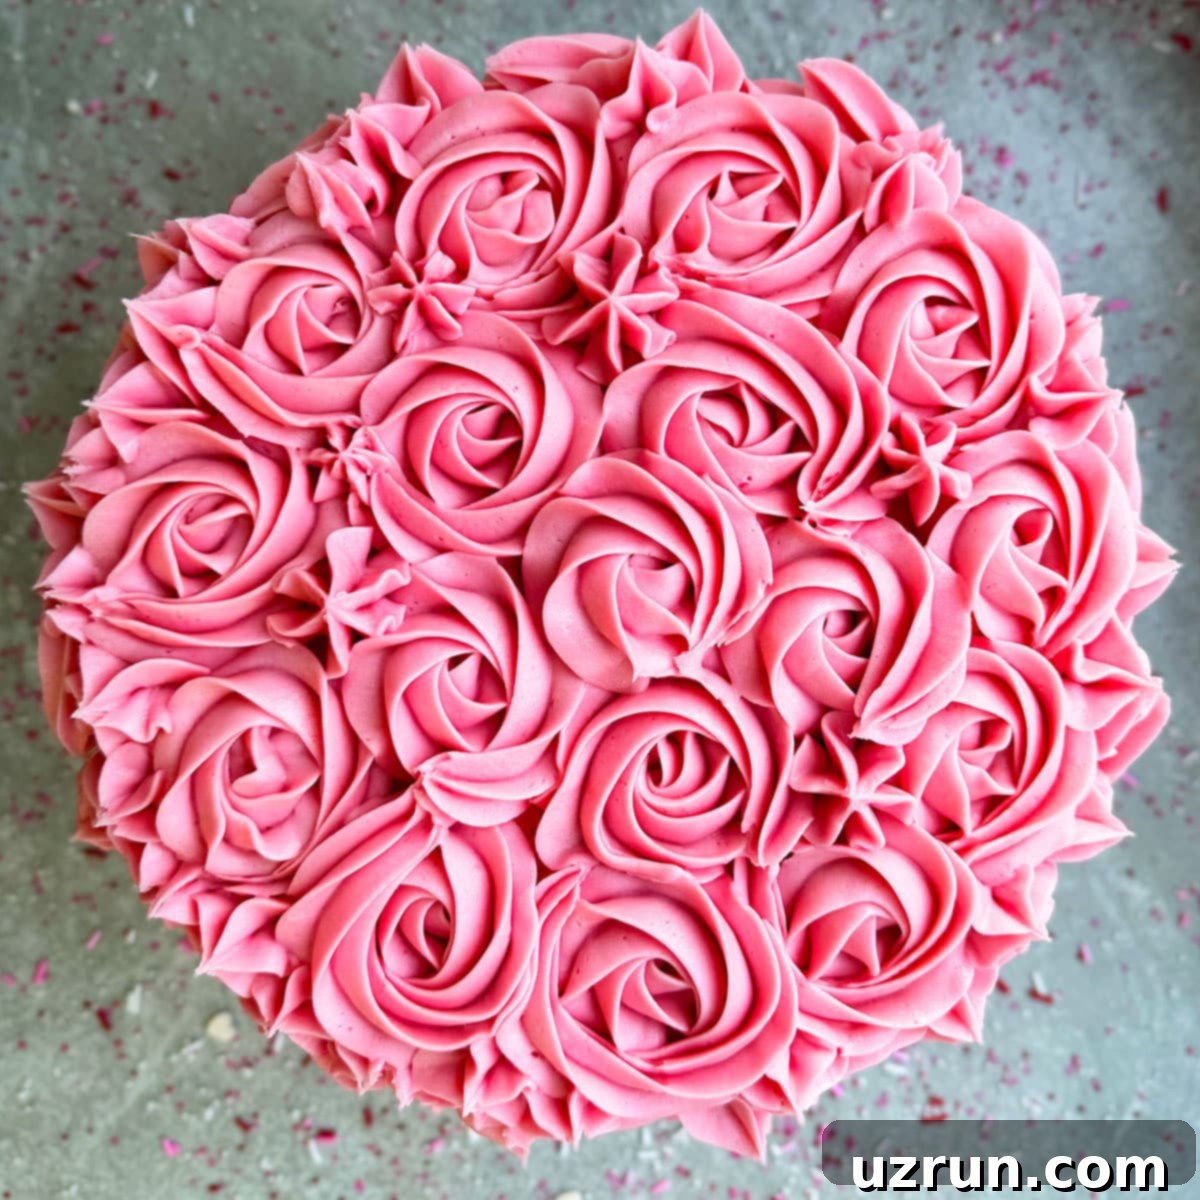
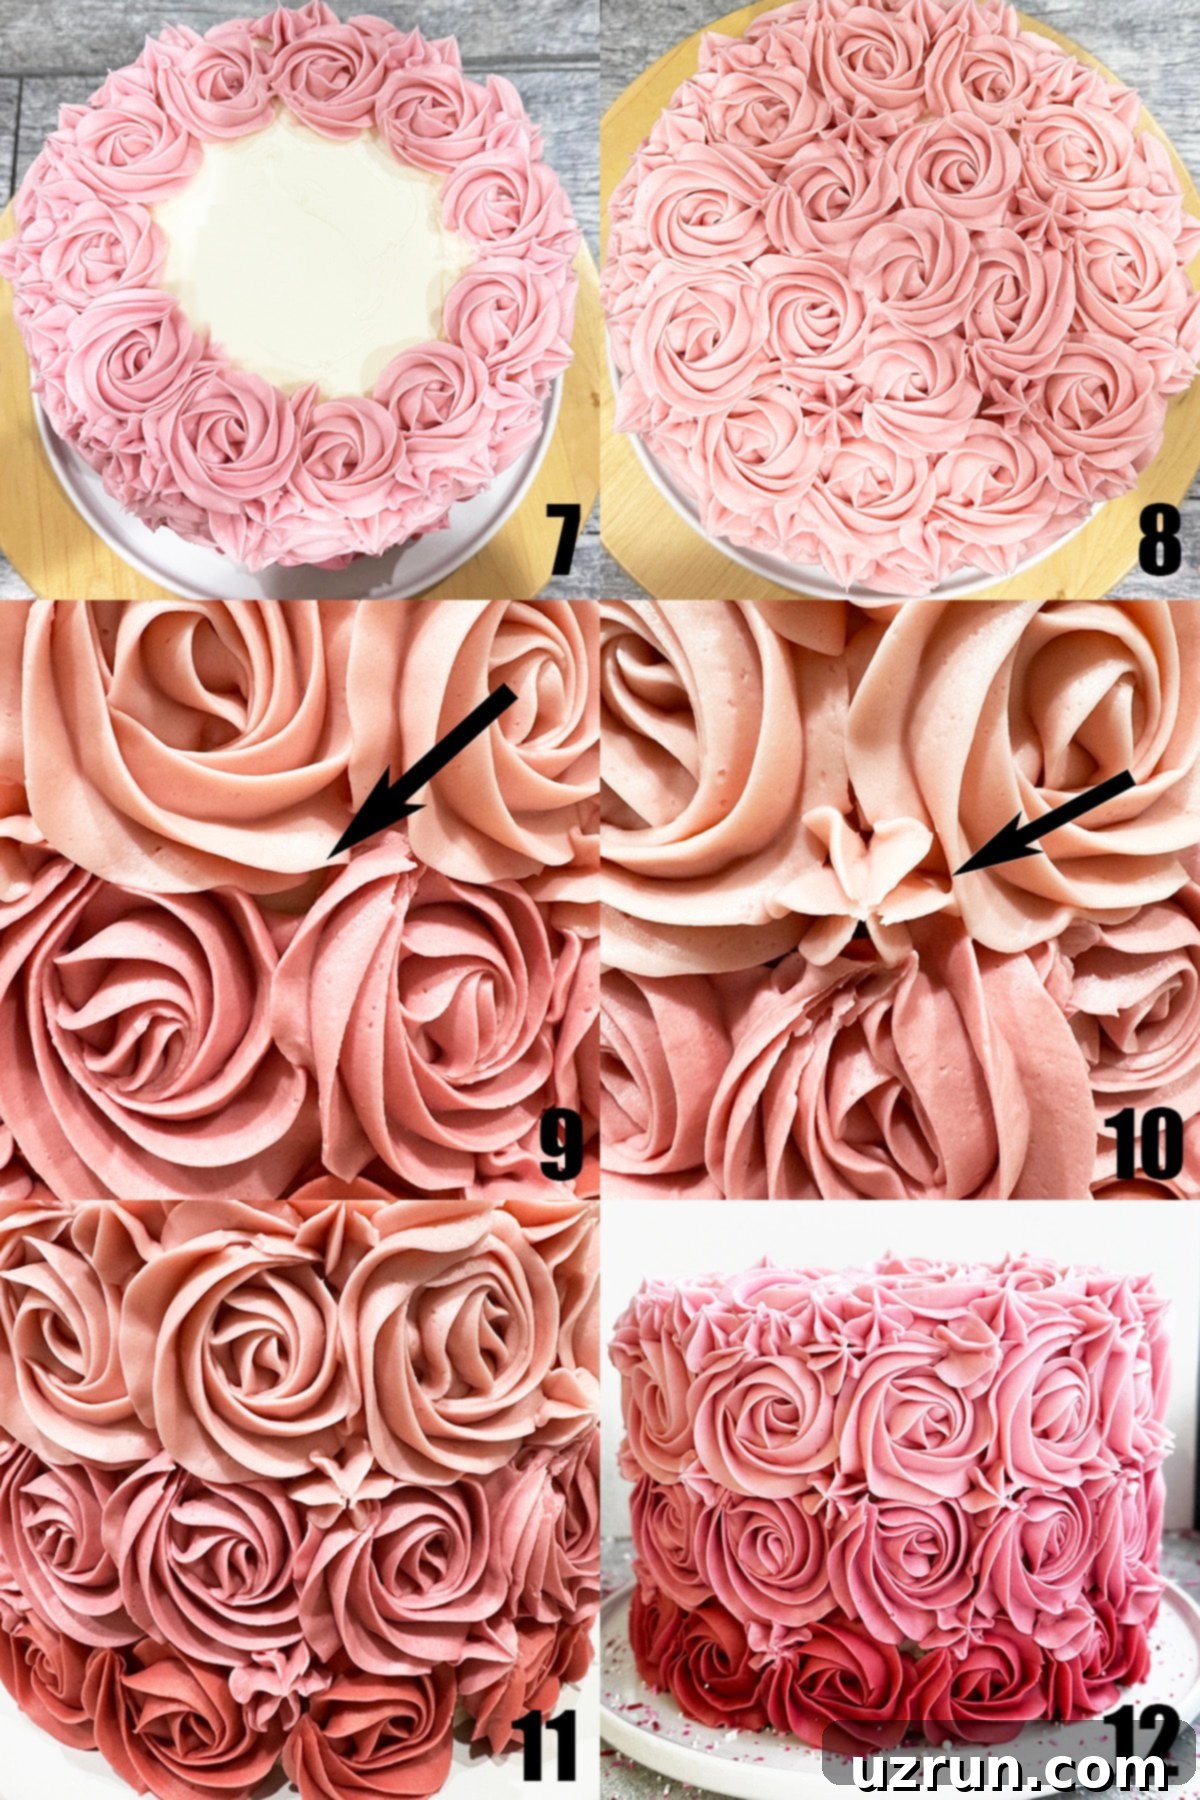
- Pipe Light Pink Roses (Top Layer): Continue using the same piping bag with light pink icing to decorate the top of the cake. Begin piping roses from the outer edge, working your way inward in concentric circles until the entire top surface is covered with beautiful light pink roses. (Image 7, 8)
- Fill Empty Spaces: You might notice small gaps or empty spaces between your piped roses, especially on the top and sides. Use the appropriate shade of icing (dark, medium, or light pink, depending on the area) and pipe small stars or dots into these spaces. This technique helps to fill out the design, making it appear seamless and lush. (Image 9, 10, 11)
- Add Sprinkles: For a final festive touch, gently toss some sprinkles around the base of the cake stand. This adds a whimsical element and ties in with the celebratory theme. (Image 12)
Essential Tips and Techniques for Perfect Cake Decorating
Achieving a professional-looking ombre rose cake is entirely within reach with a few key tips and techniques. Pay attention to these details, and your cake will be a masterpiece:
- Don’t Stress Over the Crumb Coat: The crumb coat is simply the very first thin layer of frosting you apply to your cake. Its primary purpose is to seal in any loose crumbs, preventing them from mixing into your final, decorative frosting layers. It’s meant to be covered, so there’s no need for it to be perfectly smooth or pretty. Just aim for an even, thin coverage.
- Master the Decorating Order: For the most visually appealing results, always begin decorating the sides of your cake from the bottom and work your way upwards. When it comes to the top of the cake, start piping from the outer edge and move inwards. This systematic approach ensures a clean, organized, and beautiful finish for your rose pattern.
- Ensure Your Cake is Completely Cool: This is a non-negotiable step! Attempting to frost a warm cake will inevitably lead to melted, sliding frosting and a messy result. If your cakes are still slightly warm, pop them into the refrigerator for about 20-30 minutes until they are thoroughly chilled before you begin any frosting.
- Prepare White Frosting First for Ombre Effect: To create a consistent ombre, start by preparing your entire batch of white frosting. Once it’s ready, divide it equally into four separate bowls. One bowl will remain pure white, and to the other three, you’ll progressively add more food coloring to achieve your light pink, medium pink, and dark pink shades. This ensures color consistency across your ombre layers.
- Perfect Your Frosting Technique for Roses: To create a beautifully piped rose with a star tip (like Wilton 1M), hold your piping bag at a 90-degree angle, with the tip just above the cake surface. Gently but continuously squeeze the bag while moving your hand in a full clockwise circle. This motion will build up the frosting, forming a lovely rosette. Practice on a piece of parchment paper first to get the feel for it!
- Follow Champagne Cake Tips for Best Results: If you’re using the champagne cake recipe, remember that attention to detail matters. Always use room temperature ingredients, as this helps them emulsify properly, leading to a smoother batter and a more tender cake. Also, opt for full-fat ingredients where specified, as they contribute significantly to the cake’s moisture and flavor.
- Use Separate Piping Bags for Each Color: To maintain the integrity of your ombre colors and prevent any accidental mixing, it’s crucial to use a separate piping bag for each shade of frosting (white, dark pink, medium pink, and light pink). This keeps your colors vibrant and distinct.
Recipe Frequently Asked Questions
An ombre cake is a stunning dessert decorated with various shades of the same color, creating a beautiful gradient effect that typically flows from dark to light, or vice-versa, across its layers or exterior.
For creating beautiful and consistent buttercream roses and rosettes, my go-to tip is Wilton’s Tip 1M. This open star tip is incredibly versatile and allows you to pipe perfect swirls with ease, making it a favorite for many cake decorators.
The most common reason for icing sliding off a cake is attempting to frost a cake that hasn’t fully cooled. Heat from the cake will melt the buttercream, causing it to become gooey, lose its structure, and slide right off. Always ensure your cake is completely chilled, perhaps by placing it in the refrigerator for 20-30 minutes, before applying any frosting.
For the best results and vibrant colors without thinning your frosting, use gel food coloring instead of liquid food coloring. Start with a small amount and gradually add more, mixing thoroughly after each addition until you reach your desired shade for dark, medium, and light pink. Remember that colors can deepen slightly over time.
Absolutely! While a homemade champagne cake is wonderful, you can certainly use your favorite store-bought vanilla or white cake mix to save time. Just ensure you bake and cool the cakes according to the package directions, then proceed with the frosting and decorating steps as outlined.
Proper Storage for Your Decorated Cake
Ensuring your beautifully decorated Mother’s Day cake stays fresh and delicious is key. Here’s how to store it properly, whether you’re making it in advance or saving leftovers:
- Make Ahead Instructions: Planning ahead is a great way to reduce stress. You can bake and fully decorate this ombre cake 2-3 days in advance. Alternatively, you can bake the cake layers and prepare the frostings separately. Store the cooled, unfrosted cake layers wrapped tightly in plastic wrap in the fridge for up to 3 days, and keep the different colored frostings in airtight containers in the fridge for the same duration. Then, assemble and decorate on the day of your celebration.
- Refrigerate Decorated Cake: Once decorated, your cake should be stored in a sealed cake container to prevent it from drying out or absorbing refrigerator odors. It will remain fresh and delicious in the refrigerator for 2-3 days. Bring it to room temperature for about 30-60 minutes before serving for the best flavor and texture.
- Freezing for Longer Storage: If you need to store components for a longer period, both unfrosted cake layers and the buttercream frostings can be frozen separately. Wrap unfrosted cake layers tightly in multiple layers of plastic wrap, then aluminum foil, and place them in a freezer-safe bag or container for up to 1 month. Store frostings in airtight containers, pressing plastic wrap directly onto the surface before sealing, for up to 1 month. Thaw both in the refrigerator overnight before assembling and decorating.
- Room Temperature Considerations: While buttercream can handle some time at room temperature, it’s best not to leave a decorated cake out for more than 1 day, especially if the weather is warm or humid, as the frosting could melt or become droopy. For optimal taste and texture, serve the cake within 2-3 hours of being at room temperature.
More Unique Cake Designs for Mother’s Day
If you’re looking for even more creative inspiration for Mother’s Day desserts, or just want to try a different cake design, explore these delightful options. Each offers a unique way to celebrate and show your love:
- Easy Cake Tower (With Buttercream Icing): A visually impressive stacked cake, perfect for a grand celebration.
- Best Red Velvet Cake (From Scratch): A classic, rich, and velvety cake that’s always a crowd-pleaser.
- Strawberry Shortcake Cake (Cake Mix): A light and fresh option, bursting with sweet strawberry flavor.
- Easy Cherry Cake (Cake Mix): A simple yet elegant cake featuring juicy cherries.
- Easy Kit Kat Cake (With Strawberries): A fun and playful cake, surrounded by Kit Kat bars and topped with fresh berries.
- Pink Velvet Cake (With Strawberries): A charming twist on red velvet, with a beautiful pink hue and fresh strawberry garnish.
- How to Make Cupcake Bouquet (Flower): An adorable and edible centerpiece that looks just like a real flower bouquet.
- Chocolate Marshmallow Cake (Heart Cake): A decadent and romantic choice, shaped like a heart, ideal for expressing love.
Designing Your Mother’s Day Party Setup
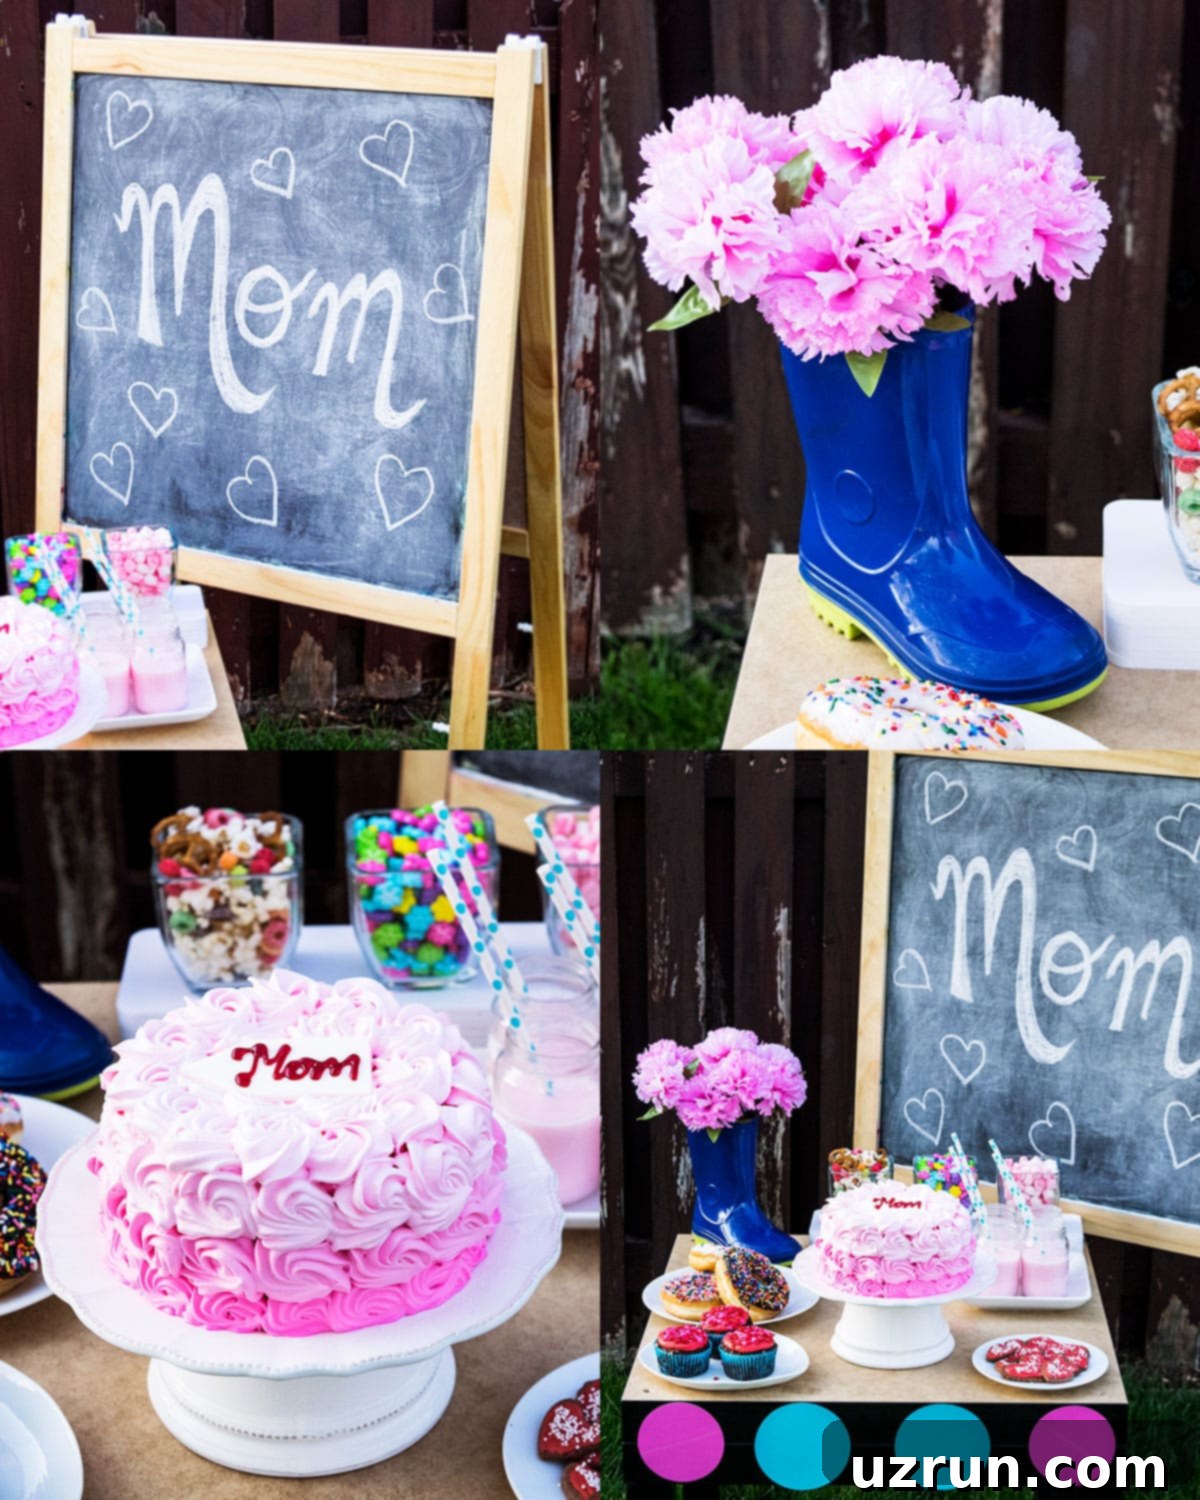
Every successful party deserves a thoughtfully arranged dessert table, and for Mother’s Day, I wanted to create an atmosphere that was both elegant and welcoming. I decided to set up our dessert station outdoors in the backyard, allowing everyone to bask in the lovely spring weather and enjoy the fresh air. I used a charming small black table with a beige top as the focal point for all the delicious treats.
To add a personal touch and a bit of rustic charm, I placed a folding chalkboard nearby. Writing the word “MOM” on it proved to be quite the artistic challenge – who knew achieving neat handwriting with chalk could be so surprisingly difficult? (I definitely spent a good 20 minutes on just those three letters, haha!) For a unique floral arrangement, instead of a traditional vase, I filled an old rain boot with a vibrant bouquet of pink flowers. This unconventional display was a huge hit; my Mom found it absolutely adorable and it added a whimsical touch to the entire setup, perfectly reflecting the casual elegance of a backyard celebration.
Delightful Dessert Table Details
A truly spectacular dessert table, in my opinion, should offer a delightful variety to satisfy every sweet craving. Beyond the main cake, consider including an assortment of cupcakes, cookies, candies, brownies, and bars. For our special Mother’s Day celebration, I went all out with a charming pink theme.
I proudly served delicious Chocolate Cherry Cupcakes, generously topped with a luscious Maraschino Cherry Frosting and sprinkled with cute heart-shaped decorations. My passion for baking took over, and I couldn’t resist making heart-shaped Chocolate Sugar Cookies, beautifully frosted with sweet Strawberry Frosting and adorned with elegant white edible pearls. To complete the pink aesthetic, I arranged jars filled with various pink candies, adding a pop of color and an extra treat for guests. For refreshing pink beverages, you could consider a vibrant Banana Raspberry Smoothie, a refreshing Blueberry Smoothie (which often has a lovely purplish-pink hue with the right berries), or a delicate Strawberry Smoothie. I chose to serve classic strawberry milk, presented in charming bottles with cute paper straws.
After meticulously arranging everything, I stepped back for one final assessment and noticed a small empty space on the table. A true dessert lover knows no table is complete without every inch filled! I quickly remedied this by adding a platter of glazed donuts. These can be easily store-bought for convenience or lovingly homemade. If you’re feeling ambitious in the kitchen, try these delightful Jelly Filled Donuts (Sufganiyot), seasonal Baked Apple Cider Donuts, or the incredibly simple Easy Baked Pumpkin Donuts (With Cake Mix). The combination of all these treats ensured a visually appealing and incredibly delicious spread, making the dessert table a true highlight of the celebration.

The Star of the Party: Your Mother’s Day Cake
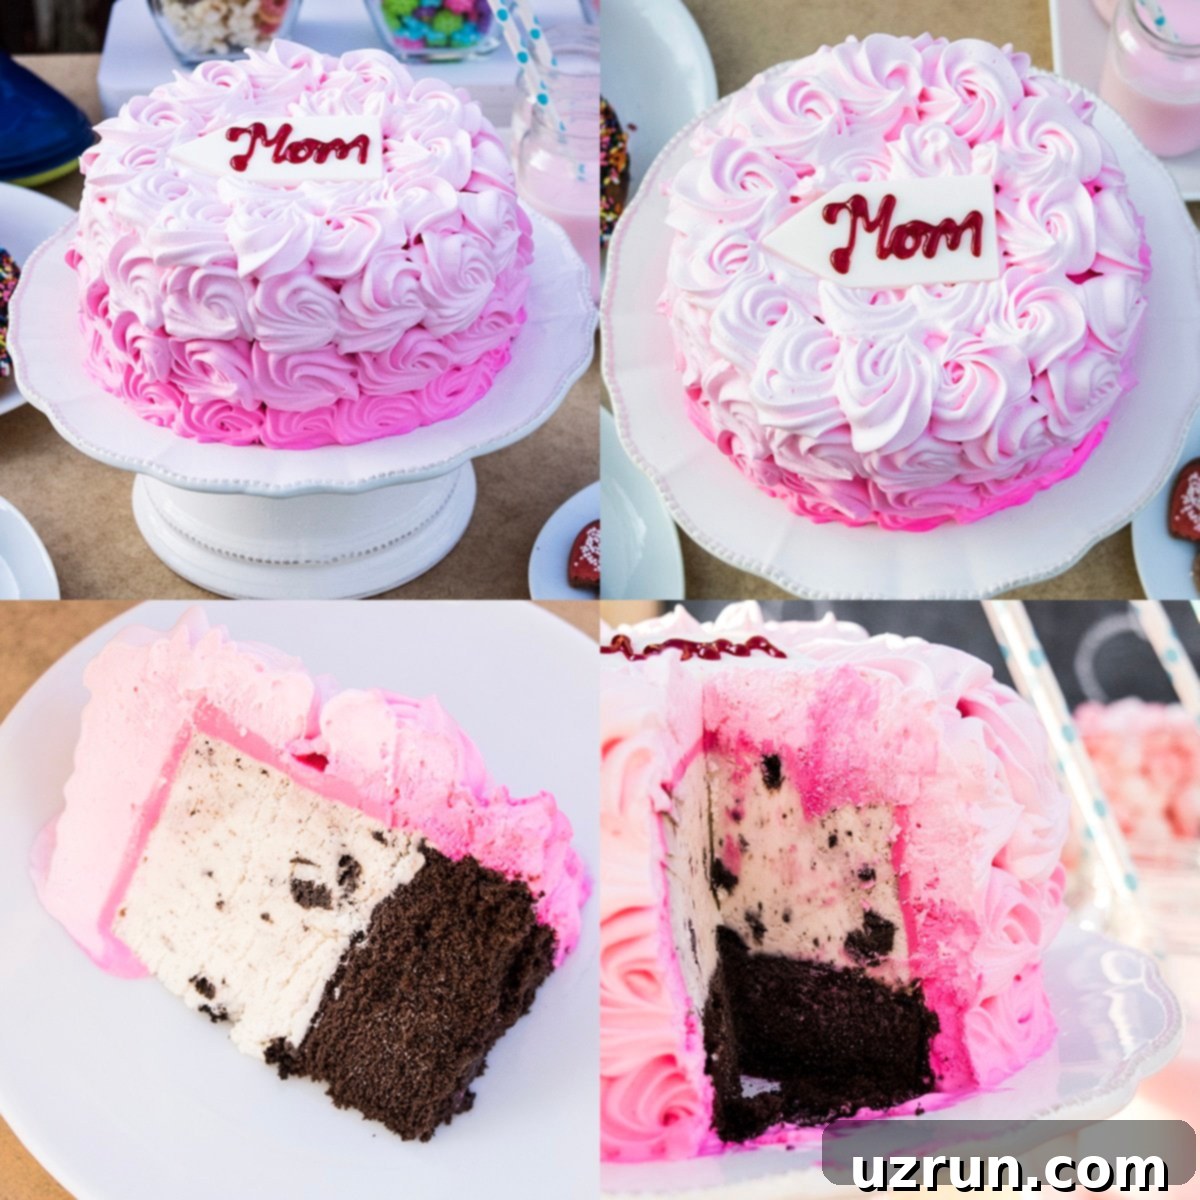
Every dessert table, no matter how elaborate, needs a show-stopping cake to serve as its ultimate centerpiece and focal point. Given how incredibly busy I was preparing all the other delightful treats for the dessert table and ensuring the house was sparkling clean for our guests, I made a practical decision that saved me precious time without sacrificing quality or visual appeal. I opted to order my Mom’s absolute favorite Oreo® Cookies ‘n Cream ice cream chocolate cake online from Baskin-Robbins.
The cake arrived, and it was truly a sight to behold! It featured a breathtaking ombre pink rose design, mirroring the theme I was aiming for, and was absolutely beautiful. The talented cake decorator at Baskin-Robbins even added a wonderfully personal touch by customizing it with “Mom” elegantly written on the top. This particular cake tasted every bit as good as it looked. The rich chocolate cake layers were incredibly soft and moist, perfectly complementing the luscious ice cream, which was generously packed with crunchy Oreo cookie bits. It was an instant hit with my entire family, and most importantly, my Mom absolutely adored it. It perfectly captured the spirit of the day.
For those who love to bake and prefer a fully homemade approach, I want to emphasize that you can absolutely create a very similar and equally stunning pink ombre cake right in your own kitchen! The detailed tutorial I shared earlier in this post provides all the guidance you need to replicate this beautiful design from scratch. Whether you choose to bake it yourself or opt for a convenient and delicious store-bought option, the goal is to present a cake that celebrates Mom in the most special way.
Recipe
Easy Mother’s Day Pink Ombre Cake with Buttercream Roses
Abeer Rizvi
Pin Recipe
Want to Save This Recipe?
Enter your email & I’ll send it to your inbox. Plus, get great new recipes from me every week!
By submitting this form, you consent to receive emails from CakeWhiz
Ingredients
- 2 Champagne Cake Layers Round, 8×3 inches each, baked and fully cooled
- 8 cups American Buttercream Frosting Divided into white, dark pink, medium pink, and light pink shades.
- 1 tablespoon Pink and White Sprinkles
Instructions
-
Begin by baking your champagne cake layers according to the recipe. Ensure they are completely cooled before proceeding with any frosting.
-
While the cakes are baking and cooling, prepare a generous batch of American buttercream frosting to a medium-firm consistency.
-
Divide the buttercream into 4 separate bowls. Leave one bowl of frosting white. Use gel food coloring to tint the remaining three bowls into distinct shades of dark pink, medium pink, and light pink. Mix thoroughly until colors are uniform.
-
Using a sharp, serrated knife, carefully slice each cooled cake horizontally in half, creating a total of 4 even round cake layers.
-
Place the first cake layer onto your chosen cake stand or serving plate.
-
Using an offset spatula, spread an even layer of the white buttercream on top of this first cake layer.
-
Carefully place the second cake layer directly on top of the frosted layer.
-
Repeat the process by spreading another layer of white buttercream on the second cake layer.
-
Place the third cake layer on top of the icing.
-
Spread a final layer of white buttercream over the third cake layer.
-
Carefully place the fourth and final cake layer on top, creating a tall stack.
-
Using your spatula, apply a thin “crumb coat” of white icing over the entire exterior of the cake (top and sides). This traps loose crumbs and creates a smooth base.
-
Chill the cake in the refrigerator for at least 20 minutes to allow the crumb coat to firm up.
-
Fill a piping bag fitted with Wilton’s Tip 1M (a large open star tip) with the dark pink icing.
-
Starting at the very bottom edge of the cake, hold the piping bag at a 90-degree angle. Gently and continuously squeeze the bag while moving your hand clockwise in a full circle to create a piped rose. Continue this motion all along the bottom circumference of the cake to form a complete row of dark pink roses.
-
Fill a separate piping bag with the medium pink icing, also fitted with Wilton’s Tip 1M.
-
Pipe a row of medium pink roses directly above the dark pink row, ensuring a slight overlap to create a smooth ombre transition. Continue this around the entire middle section of the cake.
-
Fill a third piping bag with the light pink icing and Wilton’s Tip 1M.
-
Pipe a final row of light pink roses above the medium pink row, covering the remaining upper sides of the cake in the same manner. This completes the ombre effect on the sides.
-
Using the same piping bag with light pink icing, pipe roses on the top surface of the cake. Start from the outer edge and work your way inwards, filling the entire top with beautiful roses.
-
You may notice small empty spaces between the piped roses. Fill these gaps by piping small stars or dots with the corresponding shade of icing (dark, medium, or light pink) to ensure a seamless and full design.
-
For a final festive touch, toss some pink and white sprinkles around the base of the cake stand. Your stunning Mother’s Day cake is now ready to be enjoyed!
Notes
- For perfectly defined roses, ensure your buttercream has a firm to medium-firm consistency. If it’s too thin or runny, the piped rose shapes will not hold up well.
- Before piping directly onto the cake, it’s always a good idea to practice your rose technique on a piece of wax paper. This allows you to get comfortable with the pressure and motion without any risk of messing up your final cake.
- Refer to the additional tips and variations section above for more ideas on customizing and perfecting your cake.
- Leftover cake, if stored in a sealed, airtight container in the refrigerator, will remain fresh and delicious for up to 3 days.
Nutrition
An automated tool is used to calculate the nutritional information. As such, I cannot guarantee the accuracy of the nutritional information provided for any recipe on this site.
We hope this detailed guide helps you create a truly memorable and delicious Mother’s Day celebration. Happy baking!
