Master the Art of Stabilized Whipped Cream: A Fluffy, Pipeable Gelatin Recipe
Say goodbye to deflated desserts! Learn how to make truly exceptional stabilized homemade whipped cream from scratch with simple ingredients and a touch of gelatin. This recipe ensures your whipped cream is not just creamy and fluffy, but also holds its beautiful peaks for hours, making it perfect for piping, layering, and decorating any dessert. Achieve that coveted texture and flavor, reminiscent of your favorite store-bought cool whip, but with the freshness and quality of homemade goodness. Impress your guests and elevate your baking with this indispensable technique!

Whipped cream is a beloved topping for countless desserts, from pies and tarts to cakes and hot chocolates. However, traditional whipped cream, made solely from heavy cream, powdered sugar, and vanilla (often referred to as Chantilly Cream), has one significant drawback: it tends to deflate quickly. Its airy structure can collapse within a short period, leading to a runny, unappealing mess, especially when used for intricate piping or left out at room temperature. This fragility makes decorating challenging and limits its use for make-ahead desserts.
That’s where stabilized whipped cream comes in. This recipe, incorporating unflavored gelatin, solves the problem of rapid deflation, giving you a remarkably sturdy, yet still light and airy, frosting that holds its shape beautifully. It pipes like a dream, maintains its volume, and stays fresh longer, making it an ideal choice for any occasion where presentation and durability matter. Unlike a heavier American Buttercream Frosting, this stabilized whipped cream remains beautifully white and incredibly light on the palate, offering a perfect balance of texture and flavor without being overly rich.
Why Stabilize Your Whipped Cream? The Benefits Unveiled
You might be wondering why go through the extra step of stabilizing whipped cream. The answer lies in its superior performance and longevity. Traditional whipped cream, while delicious, is notoriously fickle. Here are the key benefits of using a stabilized recipe:
- Holds its Shape: The primary advantage is its ability to maintain stiff peaks and intricate piped designs for extended periods. No more sad, sagging frosting on your beautifully decorated cakes or cupcakes!
- Prevents Wilting & Deflation: Stabilized whipped cream resists wilting, even in warmer environments, unlike its unstabilized counterpart which can collapse and become watery very quickly.
- Perfect for Piping: Its firm yet smooth consistency makes it incredibly easy to pipe intricate borders, rosettes, and other decorative elements without losing definition.
- Better for Layering: When layering cakes or parfaits, stabilized whipped cream provides a sturdy structure that won’t squish or seep into other layers.
- Increased Shelf Life: This type of whipped cream lasts significantly longer in the refrigerator, allowing you to prepare desserts in advance.
- Enhanced Texture: While stable, it still retains that delightful light and airy mouthfeel, offering the best of both worlds – stability and delicate texture.
How to make easy stabilized homemade whipped cream recipe from scratch?
Creating this perfectly stable whipped cream is surprisingly simple. Follow these straightforward steps to achieve a flawless consistency every time:
- Bloom Gelatin: Begin by adding unflavored gelatin powder and cold water to a small, microwave-safe bowl. Allow this mixture to sit for about 5 minutes until the gelatin absorbs the water and swells, becoming solid and jiggly. This process is called “blooming” and is crucial for activating the gelatin.
- Melt Gelatin Mixture: Gently melt the bloomed gelatin in the microwave. Heat in short 5-second bursts, stirring thoroughly after each interval. The goal is a clear, smooth liquid with no grainy bits, but it should not be hot. Lukewarm is ideal. A quick whisk ensures it’s perfectly smooth.
- Beat Ingredients to Soft Peaks: In a separate, thoroughly chilled mixing bowl (along with chilled beaters), combine the very cold heavy cream, sifted powdered sugar, and vanilla extract. Beat these ingredients on medium-high speed until soft peaks begin to form. At this stage, when you lift the beaters, the cream should form peaks that hold their shape briefly before gently flopping over.
- Add Liquified Gelatin Mixture: While continuing to whip the cream on medium speed, slowly drizzle in the melted (but not hot) gelatin mixture. Incorporate it completely.
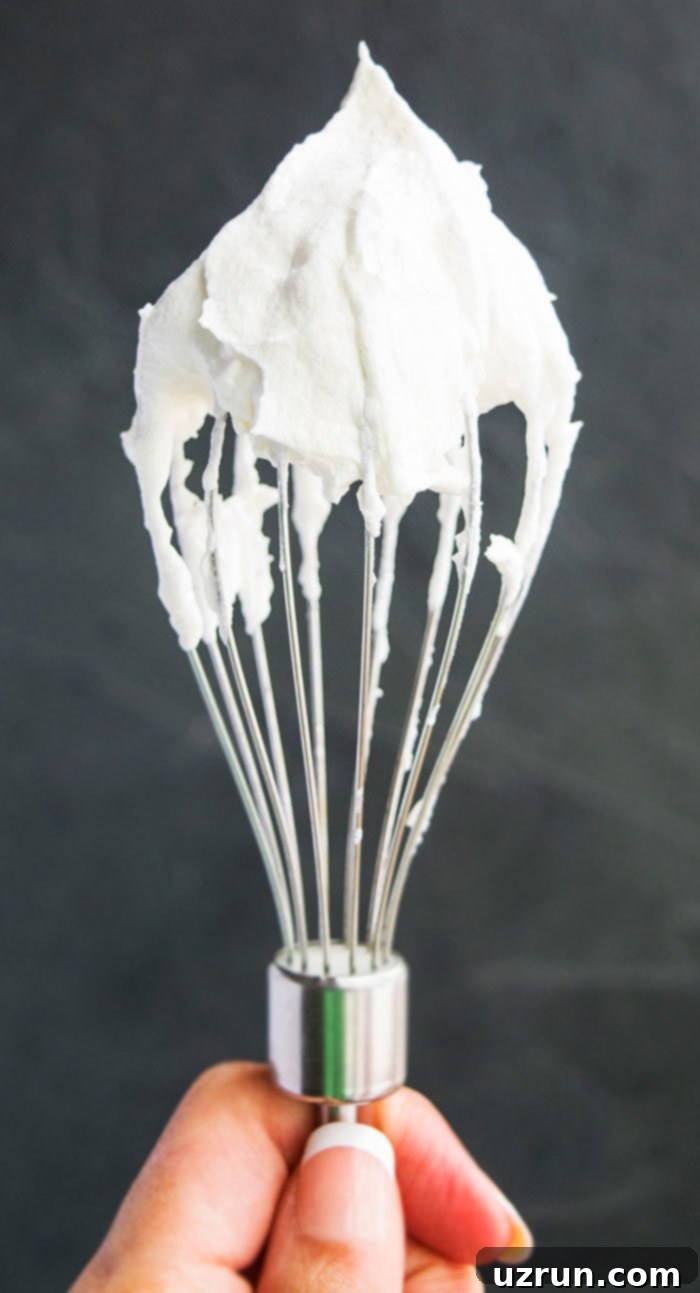
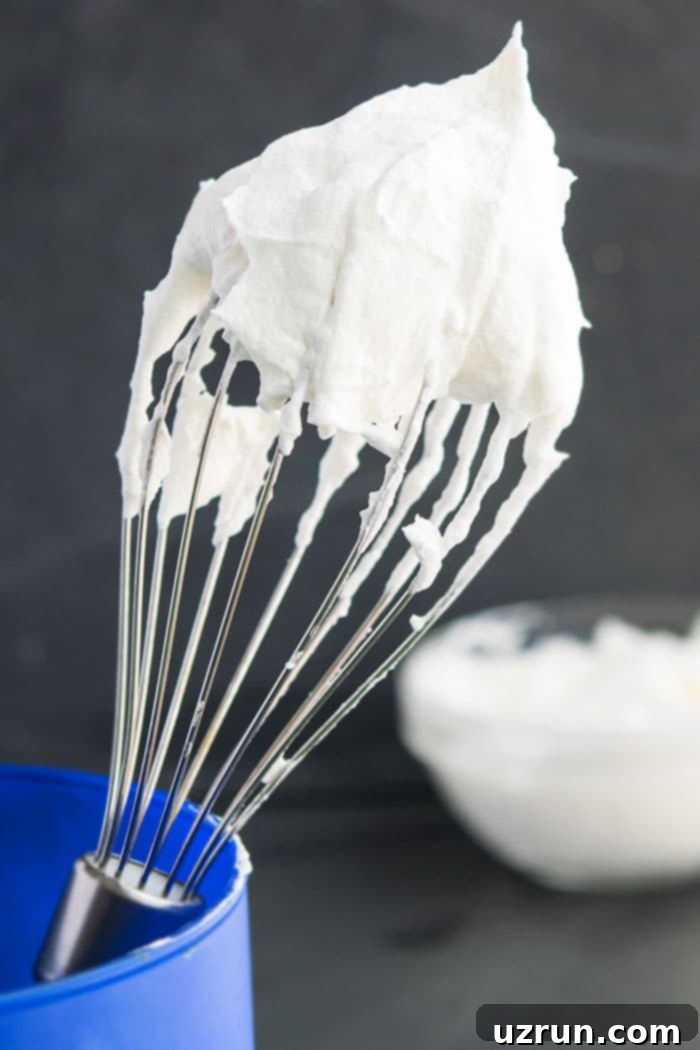
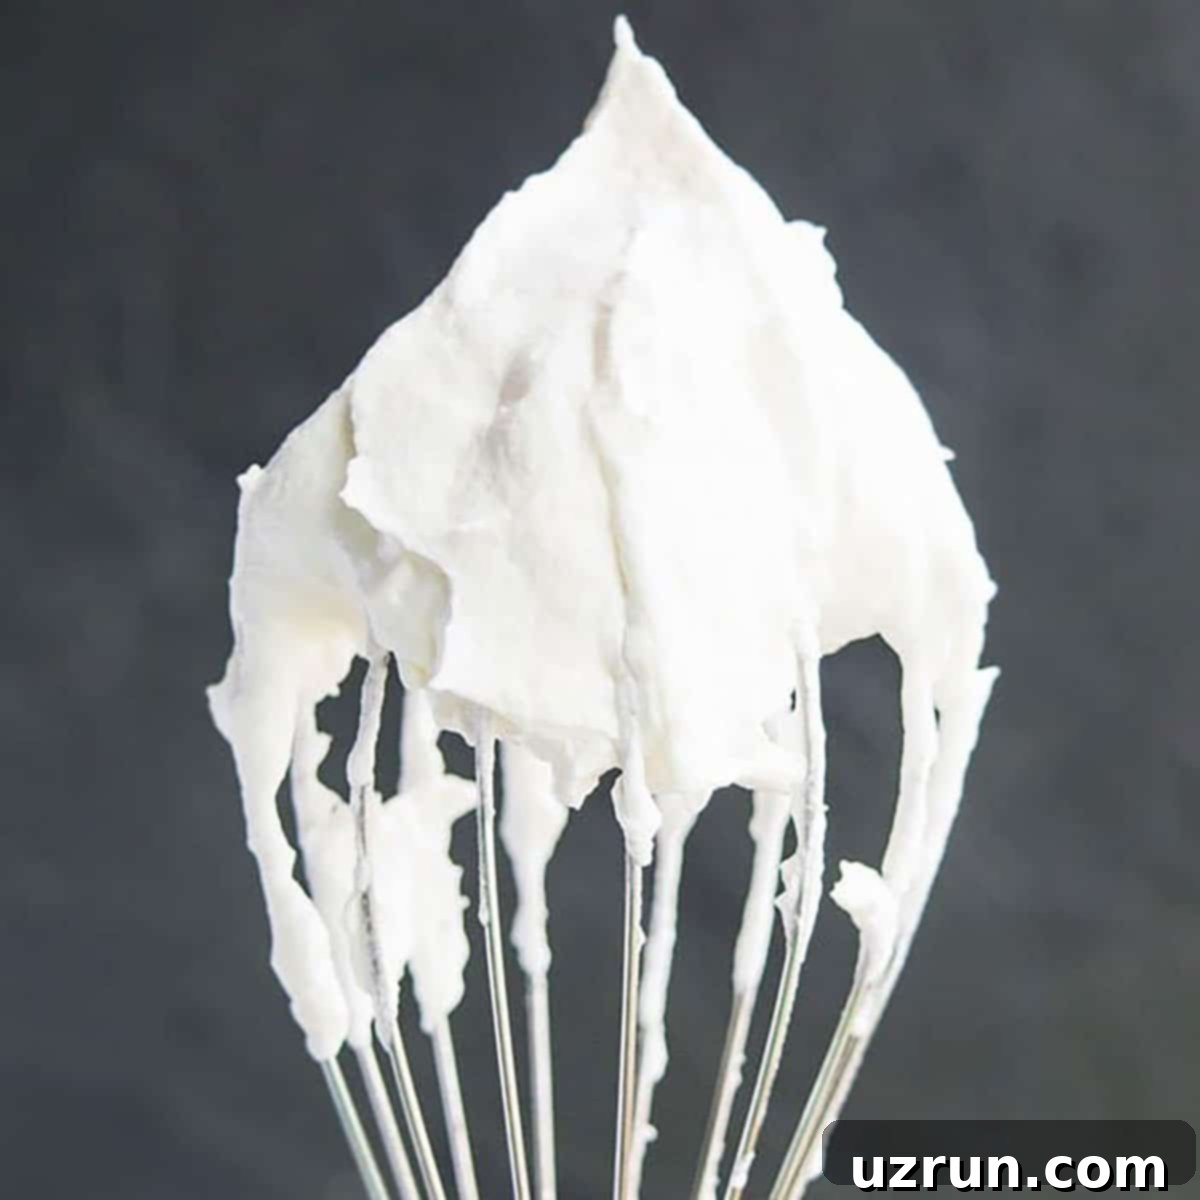
- Whip Until Stiff Peaks Form: Continue whipping the cream mixture until stiff peaks form. When you lift the beaters, the cream should form well-defined, firm peaks that stand upright without collapsing. Be careful not to over-whip!
Key Ingredients for Success
Each ingredient in this recipe plays a vital role in achieving the perfect stabilized whipped cream. Using high-quality, fresh ingredients will yield the best results:
- Heavy Cream: This is the star of the show. It’s absolutely crucial that your heavy cream is very cold. Heavy cream has a minimum of 36% milk fat, which is essential for whipping into a stable foam. Do not substitute with half-and-half, condensed milk, or evaporated milk, as their lower fat content will prevent them from whipping up properly.
- Powdered Sugar (Confectioners’ Sugar): Also known as icing sugar, powdered sugar not only adds sweetness but also a bit of extra stability due to the cornstarch typically blended in. Always sift your powdered sugar to ensure there are no lumps, which can make your whipped cream grainy.
- Vanilla Extract: Pure vanilla extract adds a classic, aromatic flavor that complements almost any dessert. While traditional, you can easily replace it with other extracts to create different flavor profiles (see “More Flavor Options” below).
- Gelatin: The secret to its remarkable stability! Unflavored gelatin, when properly bloomed and dissolved, creates a network that fortifies the cream’s structure, preventing it from deflating. This small addition makes a monumental difference in the longevity and workability of your whipped cream.
How to Stabilize Whipped Cream Frosting? Other Options Explored
While gelatin is my preferred and most effective method for stabilizing whipped cream due to its neutral flavor and reliable results, there are a few other options you can explore. Each has its own characteristics, offering different textures and flavors:
- Cream Cheese: Adding a small amount of softened cream cheese to your whipped cream provides a tangy flavor and a thicker, more structured consistency. It’s excellent for cheesecakes or fruit tarts where a slight tang is welcome. Beat the cream cheese until smooth before incorporating it into the cream.
- Cream of Tartar: A common baking ingredient, cream of tartar is an acidic salt that can help stabilize egg whites and, to a lesser extent, heavy cream. It doesn’t alter the flavor or texture significantly, but in my experience, it can be a bit temperamental and less reliable for long-lasting stability compared to gelatin.
- Cornstarch: For every cup of heavy cream, you can add about 1 tablespoon of sifted cornstarch. It helps absorb moisture and adds body. However, I find that cornstarch can sometimes impart a slightly grainy or chalky texture if not perfectly blended or if too much is used, which might not be ideal for a smooth whipped cream.
- Instant Pudding Mix Powder: This is a popular method that offers both stabilization and flavor. Add 1-2 tablespoons of instant pudding mix powder (e.g., vanilla, chocolate) per cup of heavy cream. The starches in the pudding mix provide excellent stability and can also infuse your whipped cream with a delightful flavor, making it a two-in-one solution.
- Gelatin: As detailed in this recipe, unflavored gelatin is a fantastic choice. It’s virtually undetectable in terms of flavor and texture, yet it provides superior, long-lasting stability, making your whipped cream resilient to heat and time.
Expert Tips and Techniques for Flawless Whipped Cream
Achieving perfectly stabilized whipped cream requires attention to a few key details. Master these tips and techniques for consistently excellent results:
- The Importance of Cold: This is arguably the most critical tip. Ensure your heavy cream is thoroughly chilled, ideally straight from the refrigerator. Furthermore, for best results, chill your mixing bowl and beater attachments (from your stand mixer or hand-held electric mixer) in the freezer for at least 10-15 minutes before you begin whipping. Cold equipment helps the fat in the cream emulsify more quickly and effectively, resulting in a lighter, airier, and more stable whipped cream.
- Use the Right Cream: Only use heavy cream (also labeled as heavy whipping cream) with a fat content of 36% or higher. Half-and-half, light cream, condensed milk, or evaporated milk simply do not have enough fat to whip into a stable, pipeable consistency.
- Sift Your Powdered Sugar: To prevent lumps and ensure a silky-smooth texture, always sift your powdered sugar before adding it to the cream.
- Adjust Sweetness to Your Liking: The amount of powdered sugar can be adjusted based on your personal preference. Start with the recommended amount and add more gradually if you desire a sweeter whipped cream. Remember, it’s easier to add sweetness than to remove it!
- Do Not Over-Whip: This is a common pitfall. Over-whipping heavy cream will cause the fat to separate from the liquid, leading to a curdled, chunky texture and eventually turning it into butter. Stop whipping as soon as stiff peaks form.
- Understanding Soft Peaks: When beating the cream, “soft peaks” means that when you lift the beater out of the cream, a peak forms but gently slumps or settles back down almost immediately. This is the stage just before adding the gelatin.
- Understanding Stiff Peaks: “Stiff peaks” are achieved when you lift the beater from the cream, and a peak forms that stands tall and holds its shape firmly without collapsing. This is your desired final consistency for stabilized whipped cream.
- Proper Gelatin Preparation is Key: In a small, microwave-safe bowl, combine the gelatin and cold water. Let it bloom for about 5 minutes until it solidifies. Then, melt this bloomed gelatin in the microwave in very short 5-second bursts, stirring well after each. It should become a smooth, clear liquid, but it must not be hot. Lukewarm or slightly warm is perfect; hot gelatin can melt the cream. Use a whisk to ensure it’s thoroughly smooth before adding.
- Adding Color: To match your dessert’s theme, you can easily add gel or liquid food coloring to your stabilized whipped cream. Add it after the cream has reached soft peaks, before or with the gelatin, and then continue whipping until the color is evenly distributed and stiff peaks are formed.
- Piping Possibilities: Thanks to its stability, this whipped cream is perfect for piping. Choose your favorite piping tip and let your creativity flow! If you need a refresher on piping techniques, check out this guide on How to Pipe Cake Borders.
Elevate Your Desserts with More Flavor Options
While classic vanilla is always a winner, stabilized whipped cream is a fantastic canvas for a myriad of flavors. Get creative and customize your topping to perfectly complement any dessert. Here are some delightful ideas and how to incorporate them:
- Lemon: For a bright, zesty cream, omit the vanilla extract. Instead, mix in 1 teaspoon of lemon extract and ½ teaspoon of fresh lemon zest during the whipping process.
- Maple: Add a cozy, sweet depth by mixing in 1-2 tablespoons of pure maple syrup. Reduce powdered sugar slightly if you prefer it less sweet.
- Vanilla Bean: For an elegant visual and intense vanilla flavor, use 1 teaspoon of vanilla bean paste or the scraped seeds from one vanilla bean instead of extract.
- Cinnamon: Introduce a warm, spicy note by mixing in 1 teaspoon of ground cinnamon. Perfect for apple or pumpkin desserts.
- Oreo: Crush 2-3 tablespoons of Oreo cookie crumbs (without the cream filling) and gently fold them into the whipped cream after it has reached stiff peaks.
- Chocolate: Transform your whipped cream into a rich chocolate topping by mixing in 2 tablespoons of unsweetened cocoa powder along with the powdered sugar. You might want to increase the amount of sugar slightly to balance the cocoa’s bitterness. You can also explore my dedicated Stabilized Chocolate Whipped Cream recipe.
- Coffee/Espresso: For a subtle or strong coffee kick, mix in 1 teaspoon of finely ground espresso powder (or instant coffee powder) with the powdered sugar.
- Peppermint: Ideal for holiday treats, omit vanilla extract and mix in ½ teaspoon of peppermint extract. A tiny drop of green food coloring can enhance the theme.
- Caramel: Swirl in 2 tablespoons of rich Caramel Sauce after the cream is whipped to stiff peaks. Be careful not to add too much liquid, or it might destabilize slightly.
- Peanut Butter: For a nutty, creamy treat, gently mix in 1-2 tablespoons of creamy peanut butter after the cream is fully whipped.
- Nutella: Incorporate 1-2 tablespoons of creamy Nutella for a delightful hazelnut chocolate flavor.
- Berry (Strawberry/Raspberry/Blackberry/Blueberry): Fold in 2 tablespoons of your favorite jam or fruit preserve (like this Easy Homemade Strawberry Jam) after the cream has reached stiff peaks. The jam provides both flavor and natural color.

Common Questions About Stabilized Whipped Cream
While often used interchangeably in recipes, there’s a slight difference. Both are dairy products that can be whipped, but heavy cream typically has a higher fat content (36% or more) compared to whipping cream (30-35%). For the most stable and firm whipped cream, especially for piping and stabilization, heavy cream is always the better choice due to its higher fat percentage.
You have a few options for beating heavy cream:
By hand: You can use a sturdy whisk, but be prepared for a significant arm workout! This method takes a long time and can be quite tiring on your wrist.
With a mixer: An electric hand mixer or a stand mixer fitted with the whisk attachment is highly recommended. These tools make the process quick, efficient, and effortless, allowing you to achieve the desired consistency much more easily.
Whipped cream curdles when it has been over-whipped. This means you’ve continued beating past the stiff peak stage, causing the fat particles in the cream to clump together and separate from the liquid (whey). The texture will become grainy, lumpy, and eventually turn into butter if you keep going. To avoid this, stop mixing as soon as your cream forms stiff, defined peaks.
Several factors can cause runny or watery whipped cream. The most common reasons include:
Under-whipped: The cream simply hasn’t been beaten enough to incorporate enough air and form a stable structure. Keep whipping until soft or stiff peaks form, depending on your recipe.
Warm cream or equipment: If your heavy cream isn’t very cold or your mixing bowl and beaters are warm, the cream’s fat won’t emulsify properly, preventing it from whipping up. Always start with chilled ingredients and tools.
Over-whipped then collapsed: Paradoxically, if you over-whip cream past the point of curdling, it can then become watery again as the fat solids separate and release liquid. It’s a fine line, so pay close attention during the final stages of whipping.
No, it is highly recommended to only use heavy cream (or heavy whipping cream) for this recipe. Light cream and half-and-half have a much lower fat content, which means they lack the necessary fat molecules to properly whip and hold air, especially when stabilizing with gelatin. They will not achieve the desired fluffy, stiff-peaked consistency.
Blooming gelatin refers to the process of sprinkling dry gelatin powder over cold water and allowing it to sit undisturbed for a few minutes. During this time, the gelatin granules absorb the water and swell, becoming soft and translucent. This step ensures that the gelatin dissolves smoothly when heated, preventing a grainy texture in your final product.
Storage & Make-Ahead Tips
One of the great advantages of stabilized whipped cream is its improved shelf life. Here’s how to store it and plan ahead:
- Refrigerate: Store any leftover stabilized whipped cream in an airtight container in the refrigerator for up to 3 days. Its gelatin structure will help it maintain its texture much better than traditional whipped cream.
- Freeze: Freezing whipped cream is generally not recommended, even stabilized versions. While it won’t completely separate, the texture can become somewhat icy, and it often thaws to a slightly watery or less stable consistency. It’s best used fresh or within the refrigerated timeframe.
- Make Ahead: This recipe is perfect for preparing 1-2 days in advance. Simply whip it up, store it in the fridge, and it will be ready to use when you need it. Give it a gentle whisk just before serving if it seems a little too firm, but avoid over-whipping again.
Explore More Delicious Homemade Frosting Recipes
If you love this stabilized whipped cream, you might enjoy experimenting with other homemade frosting recipes to adorn your cakes, cupcakes, and desserts. Here are some fantastic options:
- Brown Sugar Frosting
- German Chocolate Cake Frosting (Coconut Pecan Frosting)
- Easy Mint Frosting
- Caramel Frosting
- Peanut Butter Frosting
- Easy Maple Frosting
- Chocolate Ganache Frosting
- Chocolate Cream Cheese Frosting
- Lemon Frosting (Lemon Buttercream)
- Sugar Free Frosting
- Maraschino Cherry Frosting
- Marshmallow Frosting Recipe
Recipe Card

Easy Homemade Whipped Cream (Stabilized)
Abeer Rizvi
Pin Recipe
10 minutes
10 minutes
Dessert
American
2
cups
463
kcal
Want to Save This Recipe?
Enter your email & I’ll send it to your inbox. Plus, get great new recipes from me every week!
By submitting this form, you consent to receive emails from CakeWhiz
Ingredients
-
1
teaspoon
Gelatin
Unflavored -
1.5
tablespoon
Water
Cold -
1
cup
Heavy cream
Cold -
3
tablespoon
Powdered sugar
Sifted -
1
teaspoon
Vanilla extract
Instructions
-
In a small microwave-safe mixing bowl, add gelatin and water. Allow it to bloom and become solid at room temperature, which typically takes about 5 minutes.
-
Melt this bloomed gelatin mixture in the microwave using short 5-second increments, stirring thoroughly after each. It should become a clear, smooth liquid but should not be hot. Use a whisk to ensure the mixture is perfectly smooth.
-
Chill all of your mixing bowl and beaters in the freezer for at least 10 minutes. This step is crucial for quickly achieving stiff peaks.
-
In the chilled mixing bowl, add the very cold heavy cream, sifted powdered sugar, and vanilla extract. Beat with a stand mixer (using the whip attachment) or a hand-held electric mixer on medium-high speed until very soft peaks form. These peaks should hold their shape momentarily before gently collapsing.
-
While the mixer is still running on medium speed, slowly drizzle in the liquified gelatin mixture. Ensure it’s fully incorporated.
-
Continue whipping on medium speed until stiff peaks form. At this stage, the peaks will hold their shape firmly and stand upright when the beaters are lifted.
-
Be very careful not to over-mix! Stop immediately when stiff peaks are achieved to prevent the cream from curdling, becoming chunky, or turning into butter.
-
Your perfectly stabilized whipped cream is now ready! Spread this beautiful, firm icing on top of your cakes, pies, tarts, or use it for piping intricate decorations, and enjoy!
Notes
- For best results, carefully read all the expert tips and techniques provided above before starting.
- Leftover stabilized whipped cream can be stored in an airtight container in the fridge for up to 3 days, maintaining its beautiful texture.
Nutrition
Calories:
463
kcal
Carbohydrates:
15
g
Protein:
2
g
Fat:
44
g
Saturated Fat:
27
g
Cholesterol:
163
mg
Sodium:
45
mg
Potassium:
89
mg
Sugar:
12
g
Vitamin A:
1750
IU
Vitamin C:
0.7
mg
Calcium:
77
mg
An automated tool is used to calculate the nutritional information. As such, I cannot guarantee the accuracy of the nutritional information provided for any recipe on this site.
Tried this recipe?
Leave a comment below or rate and tag @cakewhiz on social
