The Ultimate Guide to Easy Homemade Mini Pavlova: Fluffy, Crispy Meringue Nests with Berries & Cream
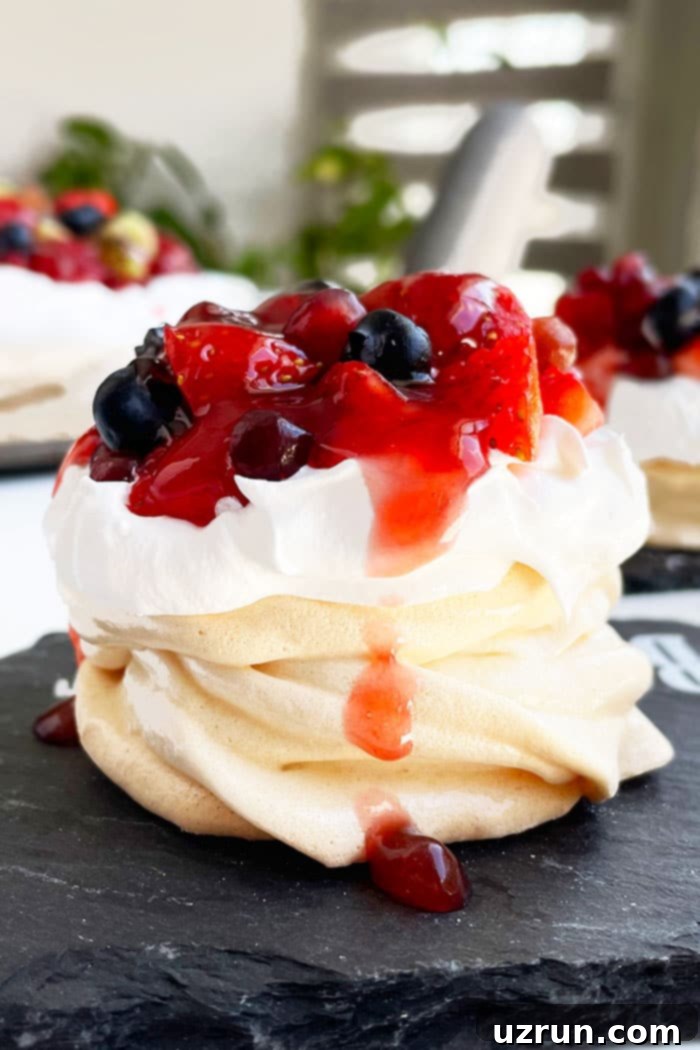
Discover how to create the most enchanting homemade mini pavlova recipe from scratch. These delightful meringue desserts are truly a culinary marvel, offering a cloud-like, light, and airy interior encased in a wonderfully crispy exterior. They are designed to be the perfect canvas for luscious whipped cream, sweet jam, and a vibrant medley of fresh berries.
Mini pavlovas are more than just a dessert; they are a statement piece, guaranteed to impress at any gathering. Picture them stealing the spotlight at bridal or baby showers, birthday celebrations, and especially as the dazzling centerpiece for Mother’s Day and Easter brunches. Their vibrant colors, achieved through fresh fruit toppings, and their delicate texture make them irresistible. If you’re captivated by the magic of meringue, don’t miss out on trying these Easy Meringue Cookies or the classic Lemon Meringue Pie, both boasting the signature light-as-air texture meringue is celebrated for.
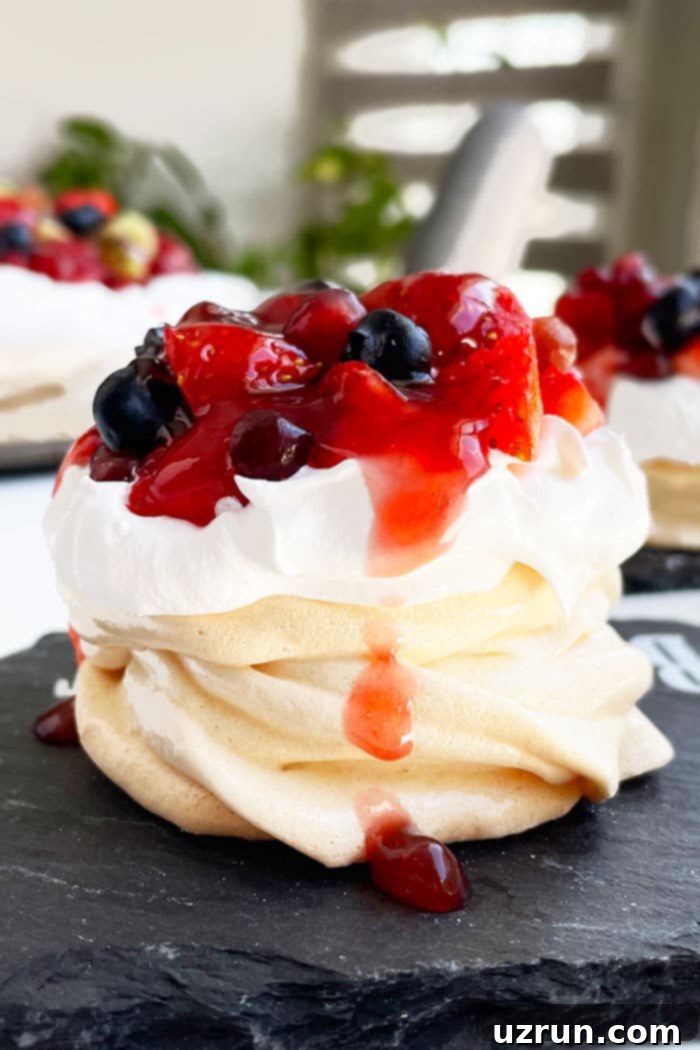
Table of Contents
- What is Pavlova?
- The Allure of Mini Pavlovas
- How to Make Easy Mini Pavlova Recipe from Scratch
- Troubleshooting Common Pavlova Problems
- Why are my small individual pavlovas soft, sticky, and not crispy?
- Why did my pavlova deflate?
- Creative Variations for Your Mini Pavlovas
- The Best Pavlova Toppings
- Essential Tips and Techniques for Pavlova Perfection
- Storage and Make-Ahead Guide for Mini Pavlova Nests
- More Fruit-Based Desserts to Love
What is Pavlova?
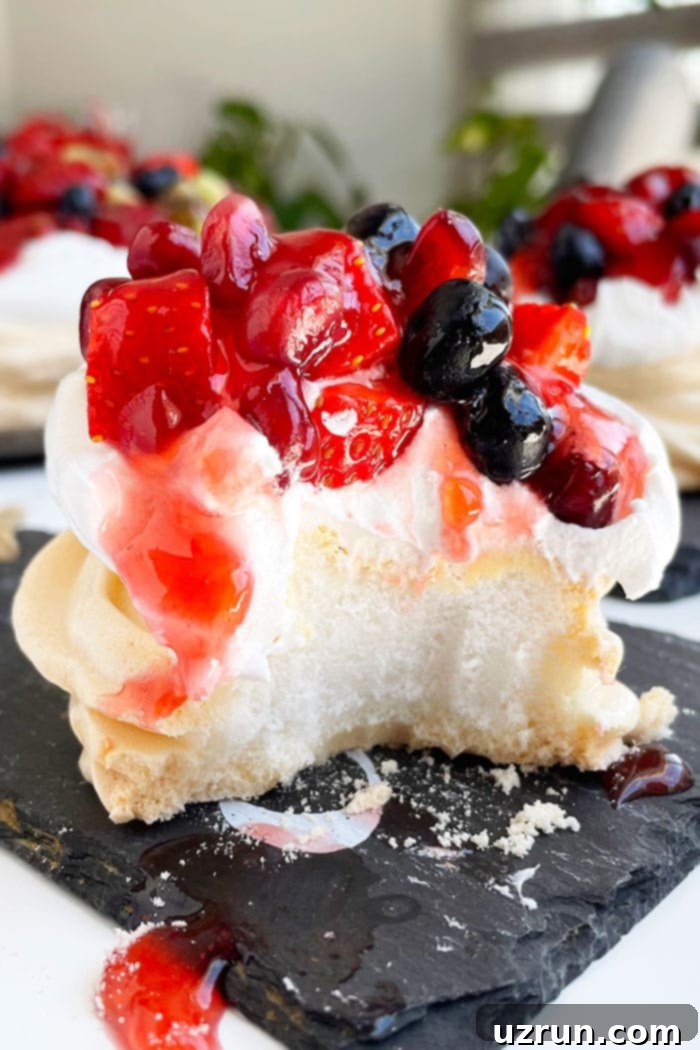
Pavlova is an iconic dessert that holds a special place in the culinary traditions of Australia and New Zealand, with both nations laying claim to its origin. Named after the Russian ballerina Anna Pavlova, this elegant confection is essentially a baked meringue. It’s crafted by meticulously whipping egg whites with sugar until they form stiff, glossy peaks, which are then slowly baked at a low temperature. This careful baking process is the secret to its distinctive texture: a delicate, crisp shell that shatters beautifully, giving way to a soft, almost marshmallow-like interior. The contrast between the crunchy exterior and the chewy, ethereal center is what makes pavlova such a beloved dessert, offering a unique sensory experience with every bite.
The Allure of Mini Pavlovas
While a large pavlova makes a grand statement, mini pavlovas offer several advantages that make them particularly appealing for home bakers and entertainers. Firstly, their individual size makes serving a breeze – no need for complicated slicing or worrying about the dessert collapsing. Each guest receives their own perfectly portioned, pristine pavlova. Secondly, mini pavlovas bake more consistently than their larger counterparts, reducing the risk of a soft or sunken center. This smaller format also allows for greater creativity in presentation and toppings, as each meringue nest can be customized to suit individual preferences or a specific event theme. They are naturally elegant, lending a sophisticated touch to any dessert spread without requiring professional baking skills. Plus, the quick assembly of toppings right before serving ensures maximum freshness and crispness, guaranteeing a delightful experience for everyone.
How to Make Easy Mini Pavlova Recipe from Scratch
Crafting homemade mini pavlovas is a rewarding process that yields stunning results. While the idea of making meringue from scratch might seem daunting, it’s surprisingly straightforward with a few key steps. The essence lies in properly whipping the egg whites and baking them slowly to achieve that signature crispy exterior and soft, chewy interior. Here’s a simplified overview of the process to guide you:
- Beat Egg Whites: Begin by beating room temperature egg whites in a clean, grease-free bowl until they form soft, billowy peaks. This is the foundation of your meringue.
- Gradually Add Sweeteners & Flavorings: Slowly incorporate granulated sugar and cornstarch into the egg whites while the mixer continues to run. Follow with vanilla extract and a touch of lemon juice, which aids in stabilization.
- Continue Beating: Persist with whipping until the mixture is thick, glossy, and forms stiff peaks. The sugar should be completely dissolved, resulting in a smooth batter.
- Pipe Meringue Nests: Transfer the meringue mixture into a piping bag and carefully pipe individual nests onto a parchment-lined baking tray. Don’t forget to create a slight indentation in the center for your toppings!
- Bake Gently: Place the tray in a preheated oven and bake at a very low temperature. Crucially, resist the urge to open the oven door during this period.
- Cool and Dry: Once baking is complete, turn off the oven but leave the pavlovas inside with the door closed. This gradual cooling and drying process is essential for achieving that desirable crispy texture.
- Cool to Room Temperature: After the initial cooling in the oven, remove the pavlovas and let them cool completely on the counter before handling.
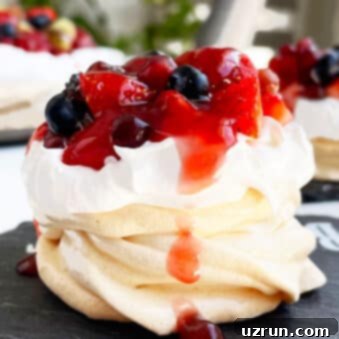
- Assemble and Serve: Plate your cooled pavlova nests, fill them generously with whipped cream, adorn with fresh berries, and finish with a drizzle of your favorite jam.
- Serve Immediately: For the best texture and taste, serve your beautiful mini pavlovas right away. Enjoy!
Troubleshooting Common Pavlova Problems
Even seasoned bakers can encounter a hiccup or two when making pavlova. Understanding the common issues and their solutions can turn potential frustration into consistent success. Here are some of the most frequent problems and how to address them:
Why are my small individual pavlovas soft, sticky, and not crispy?
This common issue, often referred to as “weeping” or “sweating,” is primarily caused by **humidity**. Meringue is essentially a sugar-rich dessert, and sugar is hygroscopic, meaning it readily attracts and absorbs moisture from the air. If the environment is too humid, or if the pavlovas are exposed to moisture too quickly after baking, they will start to absorb it, leading to a soft, sticky, and often collapsed texture instead of the desired crispness.
Solution: The absolute key to preventing this is the slow cooling and drying process in the oven. After baking, **do not open the oven door immediately.** Turn off the heat and leave the pavlovas inside the closed oven for at least 30 minutes, or even several hours (overnight is ideal if your oven stays cool). This allows them to dry out thoroughly and cool down gradually, preventing a sudden shock that could draw in moisture. Ensure they are stored in an airtight container in a cool, dry place once completely cooled, away from any humidity.
Why did my pavlova deflate?
Pavlova deflation can be disheartening, and it’s often linked to the egg white whipping process. The structure of meringue relies on the delicate air bubbles incorporated into the egg whites. If these bubbles are compromised, the structure collapses.
Primary Cause: Over-beating the egg whites. While stiff peaks are desired, beating the egg whites beyond this point can cause them to become dry and brittle. When over-beaten, the protein structure tightens too much, and the air cells become too fragile to hold their shape during baking and cooling. This leads to a loss of volume and a deflated appearance.
Other Contributing Factors:
- Opening the oven door too soon: A sudden change in temperature (thermal shock) can cause the delicate meringue structure to collapse.
- Grease in the bowl or on beaters: Even a tiny speck of fat can prevent egg whites from whipping up properly, leading to a weak, unstable meringue that will deflate.
Solution: Pay close attention to the consistency of your egg whites. Beat them only until they reach the “stiff peak” stage – when the meringue holds its shape firmly and glossily, and the peaks stand up straight when the whisk is lifted. Avoid over-beating. Always ensure your mixing bowl and whisk attachments are immaculately clean and free of any grease before you begin.
Creative Variations for Your Mini Pavlovas
One of the joys of making pavlova is its versatility. While the classic combination of whipped cream and berries is always a winner, there are endless ways to customize your mini pavlovas to suit any occasion or palate. Don’t be afraid to experiment with these exciting variations:
- Color the Batter with Gel Colors: Add a few drops of food-grade gel coloring to the meringue batter to match the theme of your celebration. Think delicate pink for Mother’s Day, vibrant red and green for Christmas, or pastel shades for Easter.
- Add Other Fruits and Jams: Expand beyond the usual berries. Tropical fruits like kiwi, passionfruit, or mango add a delightful tang. Seasonal options such as cherries, watermelon, figs, or blackberries also work wonderfully. Complement these with corresponding jams like sweet raspberry or tangy blueberry.
- Make it Chocolate: For the chocolate lovers, incorporate a few tablespoons of unsweetened cocoa powder into the meringue mixture. Instead of fruit, top these chocolate pavlovas with mini chocolate chips, crumbled Oreos, or chopped candy bars. Drizzle with a rich Chocolate Ganache instead of fruit jam for an indulgent treat.
- Flavored Pavlova: Infuse your meringue with different extracts or emulsions. Beyond classic vanilla, consider peppermint for a refreshing twist, warm cinnamon, robust espresso/coffee, or fruity essences like strawberry, raspberry, or orange. You can also use finely ground spices. Remember to pair these flavored meringues with complementary fruit toppings or other elements that enhance the chosen flavor profile.
- Nutty Crunch: For added texture and flavor, finely chop nuts like almonds, pistachios, or hazelnuts and gently fold them into the meringue batter just before piping.
- Citrus Zest Infusion: Add finely grated lemon, lime, or orange zest to the egg whites during whipping for a bright, aromatic pavlova base.
The Best Pavlova Toppings
The magic of pavlova truly comes alive with its toppings. The delicate meringue provides a perfect neutral base, allowing the vibrant flavors and textures of your chosen accompaniments to shine. Here are some incredible ideas to elevate your mini pavlovas:
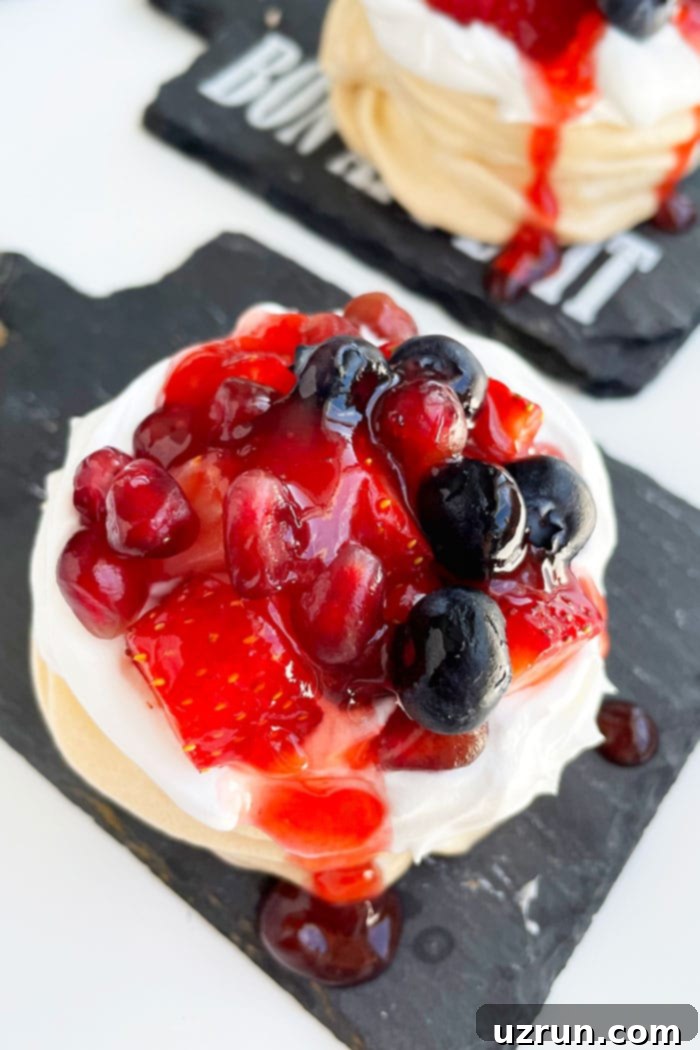
- Homemade Pie Fillings: Transform your pavlovas into mini fruit pies! Delicious options include Raspberry Pie Filling, Cherry Pie Filling, Peach Pie Filling, Homemade Apple Pie Filling, Strawberry Pie Filling, or Blueberry Pie Filling.
- Decadent Frostings: While whipped cream is classic, a dollop of frosting can add a unique twist. Consider Strawberry Frosting {With Fresh Strawberries), refreshing Easy Mint Frosting, zesty Lemon Frosting (Lemon Buttercream), or rich Caramel Frosting {3 Ingredients}.
- Bright Lemon Curd: For a burst of tart and sweet citrus flavor, fill your pavlovas with creamy Lemon Curd.
- Rich Ganache: A drizzle of smooth Chocolate Ganache adds an instant touch of elegance and deep chocolate flavor.
- Fresh Herbs: Delicate herbs can elevate the fruit flavors. A sprig of fresh mint pairs wonderfully with berries or watermelon, adding a refreshing aroma and visual appeal.
- Crunchy Nuts: Sprinkle finely chopped nuts like pistachios, peanuts, cashews, macadamias, hazelnuts, walnuts, or pecans for an added layer of texture and a nutty richness. Toasting them lightly beforehand can enhance their flavor.
- Edible Flowers: For a truly exquisite presentation, garnish with a few edible flowers, adding beauty and a subtle floral note.
- Shredded Coconut: Toasted or raw shredded coconut can add a tropical flair and a pleasant chewiness.
- Chocolate Shavings or Sprinkles: A simple sprinkle of chocolate shavings or colorful sprinkles can make your pavlovas even more festive and appealing, especially for children.
Essential Tips and Techniques for Pavlova Perfection
Achieving the perfect pavlova—crispy on the outside, marshmallowy on the inside—requires attention to detail. These essential tips and techniques will guide you to success and help you understand the science behind this delicate dessert:
- Note the Unique Baking Temperature: Pavlovas are baked “low and slow” to dry them out rather than cook them. The specified low temperature is crucial; higher temperatures will cause them to brown too quickly or crack, while lower temperatures may not dry them sufficiently, leading to stickiness. Stick to the recommended temperature for optimal results.
- Do Not Open the Oven During Baking or Immediately After: This is perhaps the most critical rule. Opening the oven door introduces a sudden rush of cooler air, causing thermal shock. This shock can lead to the meringue cracking, shrinking, or completely deflating. Allow the pavlovas to cool slowly inside the turned-off oven, with the door closed, for at least 30 minutes, or ideally several hours, to fully set their structure and dry out.
- Cornflour or Cornstarch Can Be Used Interchangeably: In this recipe, both cornflour (common in the UK and Australia) and cornstarch (common in North America) refer to the same ingredient and will work effectively to provide structure and that desirable chewy center.
- Must Line with Parchment Paper: Always line your baking sheet with parchment paper. Meringue is very sticky, and parchment paper prevents the pavlovas from adhering to the tray, ensuring easy removal without cracking or breaking.
- Why is Vinegar Added? Vinegar (or lemon juice) is an acid, and it plays a vital role in stabilizing the egg whites. The acid helps to denature the egg white proteins, preventing them from clumping together too quickly. This results in a stronger, more stable foam that holds its shape better, contributing to that smooth, glossy, and stiff consistency needed for a perfect pavlova.
- Why is Cornstarch Added? Cornstarch is the secret ingredient for the pavlova’s unique texture. It creates a tender, marshmallow-like interior while still allowing the exterior to crisp up. It also helps to absorb any excess moisture, contributing to a less sticky and more stable meringue.
- Can Use Either Lemon Juice or Vinegar: Both lemon juice and white vinegar are acidic and perform the same stabilizing function. Don’t worry, you won’t taste either in the final baked product! Use whichever you have on hand.
- Must Indent the Center: Creating a slight indentation in the center of each piped pavlova nest is essential. This forms a natural “bowl” for your fillings, ensuring they stay put and enhancing the overall presentation.
- What Piping Tip to Use? A large star tip, such as Wilton’s Tip 1M, is excellent for creating beautiful, defined meringue nests. However, any large decorating tip can be used to achieve a different design, or you can even spoon the meringue onto the parchment paper.
- Can I Skip Piping Altogether? Absolutely! If you’re not comfortable with piping, simply use the back of a spoon or an offset spatula to spread mini circles of meringue onto the parchment paper, creating a slight rim for the filling. This is a great, less intimidating alternative.
- Must Be Served Immediately After Topping: Toppings, especially whipped cream and fresh fruit, contain moisture. If left to sit for too long, this moisture will seep into the delicate meringue, causing it to become soggy and lose its crisp texture. Assemble your pavlovas just before serving for the best experience.
- Why Are My Pavlovas Brown? If your pavlovas turn brown, it means they were baked at too high of a temperature or for too long. Meringues should remain a pristine white or a very pale cream color. Adjust your oven temperature or reduce baking time if you notice browning.
- Use Room Temperature Egg Whites: This is a golden rule for meringue. Room temperature egg whites whip up faster and achieve greater volume and stability than cold egg whites. Plan ahead and separate your eggs at least 30 minutes before you start.
- Whipping Egg Whites is Crucial: The success of your pavlova hinges on properly whipped egg whites. Beat them until they form soft, glossy peaks that hold their shape. Don’t over-whip (which can make them dry and prone to deflating) and don’t under-whip (which results in a weak, unstable meringue).
- Pat Fruits Dry: Before adding fresh fruits as toppings, ensure they are thoroughly washed and gently patted dry. Excess moisture from fruit can quickly make the pavlova soggy, compromising its delicate texture.
- Can Egg Yolks Be Used? No, absolutely not. Any trace of egg yolk (fat) will prevent the egg whites from whipping into the fluffy, stiff, and classic meringue mixture you need. Be very careful when separating eggs!
- Use Clear Vanilla Extract: To maintain the pure white color of your pavlovas, especially if you’re not adding food coloring, opt for clear vanilla extract. Regular vanilla extract can impart a slight off-white or brownish tint.
Storage and Make-Ahead Guide for Mini Pavlova Nests
Planning is key when it comes to serving pavlova. While they are best enjoyed fresh, there are strategies for preparing them in advance to ensure ease on the day of your event.
- Can you make these the day before? (Make-ahead instructions): Yes, the meringue shells themselves can be prepared a day or even two days ahead of time. The crucial point is to store them correctly. Once completely cooled and dried, place the unfilled pavlova nests in an airtight container. Store them at room temperature, away from any sources of moisture or humidity (like a kitchen sink or open windows on a damp day). Do not refrigerate or freeze plain meringue shells, as this will introduce moisture and make them soggy. When you’re ready to serve, simply add your fresh toppings.
- How to store leftovers?: Unfortunately, leftover pavlovas that have already been topped with whipped cream and fruit do not store well. The moisture from the cream and fruit will quickly penetrate the delicate meringue, causing it to become soggy and lose its integrity. They are truly at their peak when served immediately after topping. For this reason, it’s best to assemble only as many pavlovas as you expect to eat in one sitting. You cannot refrigerate or freeze topped pavlovas for later consumption without significantly compromising their texture. If you anticipate leftovers, it’s better to store plain meringue shells and toppings separately.
More Fruit-Based Desserts to Love
If you’re a fan of fresh, vibrant fruit desserts, you’re in for a treat! After mastering these delightful mini pavlovas, expand your repertoire with these other fantastic fruit-centric recipes:
- Mini Dessert Pizza {Mini Fruit Pizza}
- Easy Fruit Pizza {Ready in 30 mins}
- Strawberry Rhubarb Crisp {Crumble}
- Easy Peach Pie
- Apple Cranberry Crisp {Cranberry Crumble}
- Brownie Fruit Kabobs
Recipe
Easy Mini Pavlova (With Whipped Cream and Berries)
Abeer Rizvi
Pin Recipe
Want to Save This Recipe?
Enter your email & I’ll send it to your inbox. Plus, get great new recipes from me every week!
By submitting this form, you consent to receive emails from CakeWhiz
Ingredients
- 6 Egg whites From large eggs, Room temperature
- 1.5 cups Granulated sugar
- 2 teaspoon Cornstarch
- 1 teaspoon Vanilla extract Use clear extract to prevent discoloration
- ½ tablespoon Lemon juice Or vinegar
- 2 cups Homemade whipped cream Can replace with Chantilly Cream
- 4 cups Fresh berries Such as blueberries, blackberries, strawberries, raspberries e.t.c. Washed, and patted dry
- 1 cup Strawberry jam Warmed in microwave
Instructions
-
In a stand mixer, add egg whites and beat them until soft peaks form.
-
Then, start adding sugar and cornstarch gradually while the mixer is still running.
-
Add vanilla extract, lemon juice.
-
Continue beating until stiff peaks form. This can take 8-10 minutes and the batter will be very smooth and glossy. Test it by rubbing mixture between 2 fingers. It should not be gritty.
-
Fill a piping bag with this mixture and attach Wilton’s Tip 1M (big star tip).
-
Pipe meringue nests that are about 3 inches in diameter on a large baking tray, lined with parchment paper.
-
Use a spoon to indent the center slightly. This will create space for filling later.
-
Bake at 225 degrees F for 1 hr and 15 minutes. Do not open the oven during this time period!
-
When the baking time is over, turn off the oven but DON’T open the door.
-
Let it cool in the oven and dry out further for about 30 minutes.
-
Finally, remove tray from oven and allow these meringues to cool to room temperature.
-
Place the mini meringues on individual serving dishes.
-
Fill with whipped cream, top with fresh berries, drizzle slightly warm strawberry jam on top.
-
Serve immediately and enjoy.
Notes
- Read all my tips above for detailed guidance and troubleshooting.
- Storing leftovers that have already been topped is not recommended since the moisture from the toppings will make the meringue base soggy. These are truly best enjoyed fresh.
Nutrition
An automated tool is used to calculate the nutritional information. As such, I cannot guarantee the accuracy of the nutritional information provided for any recipe on this site.
Tried this recipe?Leave a comment below or rate and tag @cakewhiz on social
