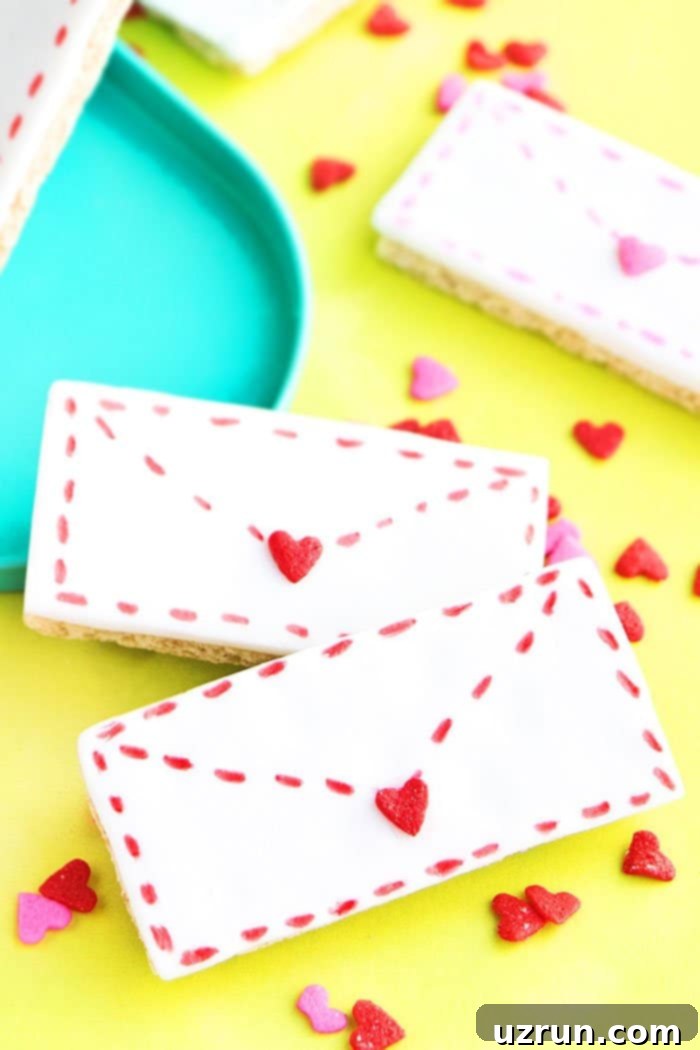
Easy Valentine’s Day Love Letter Cookies: Simple, Fun, and Perfect for Kids!
Valentine’s Day is a time for sharing love, and what better way to express affection than with delightful homemade treats? These **Easy Valentine’s Day Love Letter Cookies** are not just delicious; they’re an incredibly fun and straightforward project perfect for all ages, especially little hands eager to get creative in the kitchen. Imagine crafting edible messages of love that look like tiny, adorable envelopes, each one a sweet surprise! These **Love Letter Cookies** are remarkably quick to assemble and require just a few simple, accessible ingredients: your choice of pre-made or homemade sugar cookies or convenient graham crackers, soft marshmallow fondant, and vibrant edible markers for personalization. It’s a recipe designed for maximum enjoyment with minimal fuss, making it an ideal activity for a festive family baking session.
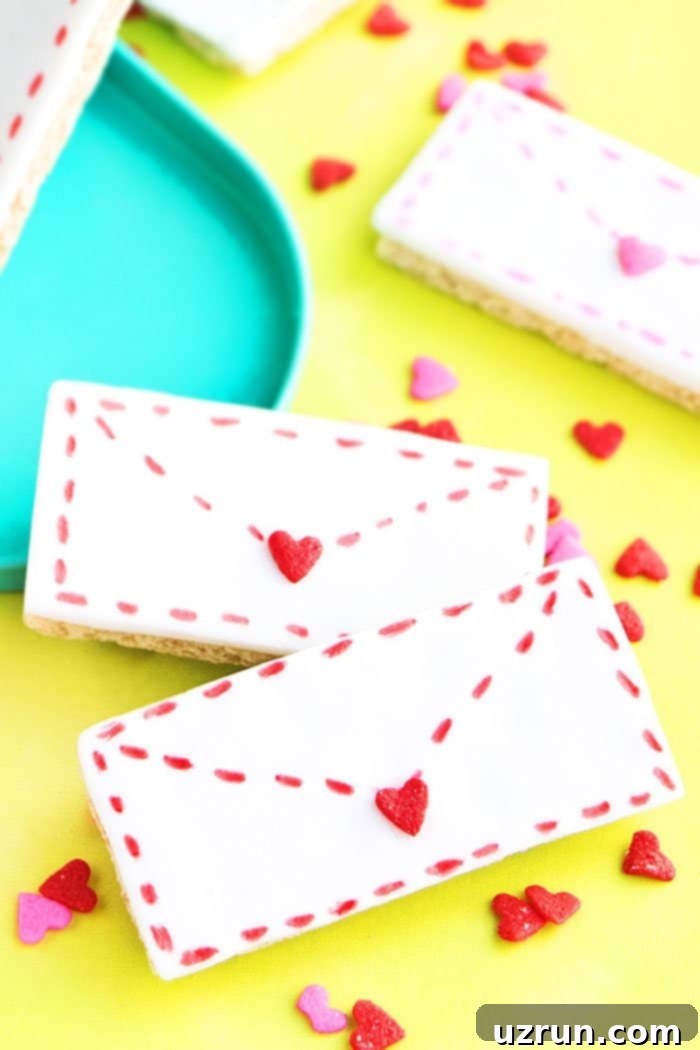
The inspiration for today’s charming cookie design came from delightful creations like these Mini Love Letter Cakes. These cookies are just as easy to make as our super popular Valentine’s Day Treats and Snacks (Fruits), offering a fantastic opportunity for kids to get truly creative with their designs. The simplicity allows for endless possibilities, making each cookie unique. If you’re still searching for more sweet inspiration to complete your holiday spread, be sure to explore our delightful collection of Pink Desserts (Valentine’s Day Desserts). Many of those ideas can be wonderfully adapted to add a special touch to your Valentine’s Day Dessert Table. And for a truly special start to the day, don’t forget to check out these cute Breakfast In Bed Ideas to make this Valentine’s Day unforgettable.
How to Make Valentine’s Day Love Letter Cookies
Crafting these delightful **Love Letter Cookies** is a breeze, involving just a few simple steps. Here’s a quick overview of how to transform plain cookies into charming edible notes of affection:
- Prepare your cookie base: Begin by spreading a thin, even layer of corn syrup across the top surface of your chosen cookie (whether it’s a sugar cookie or graham cracker). This sticky layer acts as the essential ‘glue’ to adhere the fondant, ensuring it stays perfectly in place. If corn syrup isn’t readily available or you prefer an alternative, a thin layer of white frosting or buttercream works just as effectively.
- Roll out the fondant: Take your marshmallow fondant (you can use any color you like, but white provides a classic ‘envelope’ look, while pink or red offers a festive touch) and roll it out evenly. Aim for a thickness of about 1/8 to 1/4 inch – thick enough to be easily handled, but thin enough not to overpower the cookie’s flavor.
- Apply fondant to cookie: Gently place your corn syrup-coated cookie, sticky side down, onto the rolled-out fondant. Press down lightly but firmly to ensure good adhesion, creating a smooth, bubble-free surface on top of the cookie.
- Trim excess fondant: Using a sharp knife, a small pizza cutter, or even a cookie cutter that matches your cookie shape, carefully trim away any excess fondant from around the edges of the cookie. This creates a neat, professional finish, mimicking the crisp, clean edges of a real envelope.
- Decorate with edible markers: Now comes the incredibly fun and creative part! Once the fondant is set slightly (check our tips below for details), use edible markers to draw lines, hearts, or sweet messages, transforming your cookie into an adorable love letter. Add a final touch with a few heart sprinkles for extra festive charm. Then, it’s time to enjoy your personalized edible masterpieces or share them with loved ones!
Creative Variations for Your Valentine Love Letter Cookies
One of the best things about these **Valentine’s Day cookies** is how incredibly versatile they are! Don’t feel limited to the basic recipe; unleash your creativity with these delightful variations to make your **Love Letter Cookies** truly unique:
- Choose your cookie base: While graham crackers offer a convenient, no-bake option that’s perfect for quick assembly, consider using freshly baked cookies for a more homemade and indulgent feel. Cut Out Sugar Cookies are an excellent choice, as their firm texture and ability to hold shape make them ideal for decorating. You can use rectangle or square cutters to achieve the perfect envelope shape. You could also try other delicious cut-out cookie recipes such as rich Chocolate Sugar Cookies for a decadent, dark contrast, or buttery Best Shortbread Cookies for a melt-in-your-mouth experience. The key is to select a cookie recipe that bakes flat and firm, providing a stable canvas for the fondant.
- Flavor your fondant: Elevate the taste of your **Love Letter Cookies** by infusing the marshmallow fondant with various extracts. Classic vanilla, delicate almond, bright lemon, or even a hint of rosewater can add a wonderful aromatic dimension that complements the sweetness. If you’re aiming for a pristine white fondant (for a traditional envelope look), it’s important to opt for clear extracts, as regular, brown-tinted extracts can sometimes impart a slight discoloration to the fondant.
- Color your fondant creatively: Why stick to white? You can easily color your homemade or store-bought fondant to match your Valentine’s Day theme or your personal preference. Gel food colors are highly recommended over liquid food coloring because they are much more concentrated and won’t thin out the fondant, preserving its ideal pliable consistency. Imagine vibrant pink, soft lavender, light blue, or even a playful marbleized effect using two different colors!
- Embrace piping work: For those with a steady hand and a love for intricate details, you can achieve stunning and elegant designs using icing instead of edible markers. Royal icing or Glace icing can be expertly piped with various small tips to create delicate lines, intricate patterns, or even tiny handwritten messages, adding a touch of sophistication to your **Valentine cookies**. While this method can be more time-consuming and requires a bit more practice and skill, the elegant and professional-looking results are truly worth the extra effort.
- Alternative adhesives: The primary role of corn syrup in this recipe is simply to act as a gentle ‘glue’ to secure the fondant to the cookie. If you’d prefer to use something else, a thin layer of American Buttercream Frosting or even a cream cheese frosting can serve the same purpose effectively. Just be mindful that using frosting might add a bit more sweetness to the overall cookie and may require the cookies to be handled with slightly more care, especially in warmer environments.
- Get creative with sprinkles and toppings: While classic small heart sprinkles are undeniably charming for these **Love Letter Cookies**, don’t hesitate to experiment with different types of sprinkles or edible decorations to personalize your treats. Think about tiny edible pearls, shimmering edible glitter, mini red or pink jimmies, or even larger shaped sprinkles like stars or arrows. For a truly unique and personalized touch, you can even learn how to make your own homemade sprinkles to perfectly match your specific Valentine’s Day theme or color scheme!
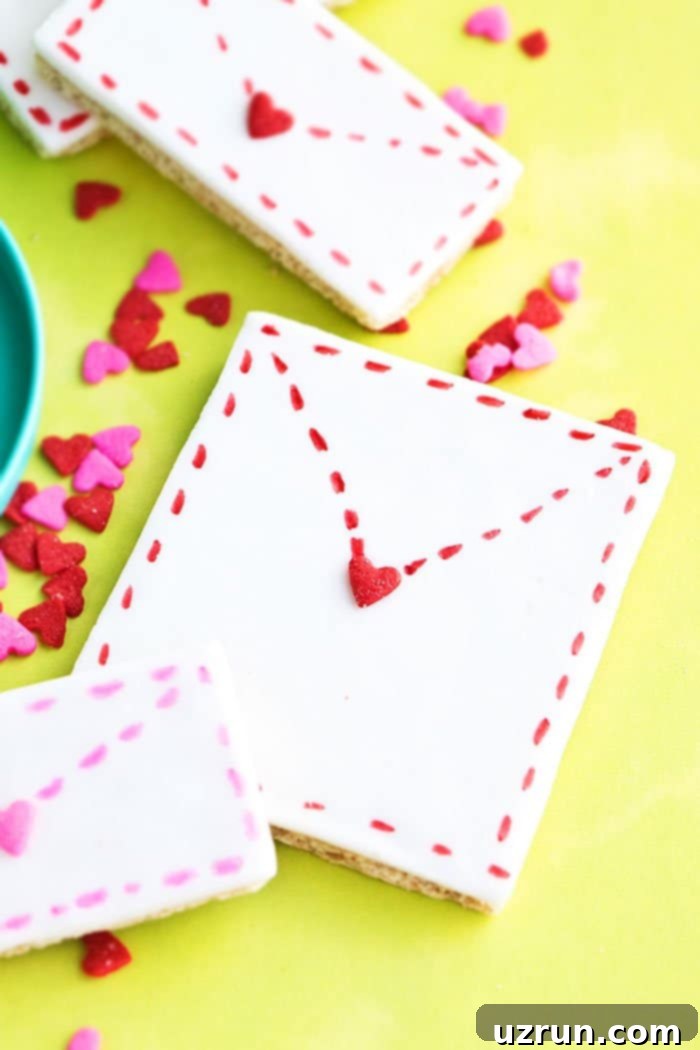
Essential Tips and Techniques for Easy Valentine’s Day Cookies
Achieving beautifully decorated **Valentine’s Day cookies** is easy, especially when you keep these helpful tips and techniques in mind. Pay attention to these details to ensure your **Love Letter Cookies** turn out perfect and picture-worthy every single time:
- Where to find edible markers: Edible markers are your essential tool for creating the delightful messages and designs on these cookies! You can typically find them in the cake decorating aisle of most large grocery stores, craft stores like Michaels or Hobby Lobby, or specialty baking supply shops. I highly recommend brands like Americolor because they often feature a fine tip, which allows for incredibly precise lines and detailed writing, ensuring your sweet messages are clear and legible.
- Homemade vs. Store-bought Fondant: Both homemade and good quality store-bought marshmallow fondant can be successfully used for this project. Homemade fondant, particularly marshmallow fondant, often has a superior taste and aroma, making the cookies even more enjoyable to eat. However, store-bought fondant is a fantastic time-saver, especially when you’re in a rush, and it’s readily available in various pre-colored options, saving you the step of coloring it yourself. Choose whichever option best suits your schedule, budget, and taste preferences.
- Don’t decorate warm cookies: This tip is crucial! If you’re using freshly baked cut-out cookies, it is absolutely essential that they cool down completely to room temperature before you attempt any decoration. Applying fondant or trying to write with markers on warm cookies will inevitably result in a sticky, melted mess, as the heat can cause the fondant to soften, warp, and lose its intended shape. Patience is key here for the best results.
- Let the fondant-covered cookies dry: Once you’ve applied the fondant to your cookies, don’t rush straight into decorating with edible markers. Allow the fondant-covered cookies to sit at room temperature for about 15-20 minutes. This short drying period allows the fondant to firm up slightly on the surface. If you try to write on soft, freshly applied fondant, the tip of your marker will likely create deep dents, drag, or even tear the surface, ruining your carefully planned design.
- Go slow and steady with markers: Edible markers are wonderful for adding detail, but remember that any mistakes are difficult to reverse. There’s no “undo” button for food! If you make a significant error, you might have to carefully peel off the entire piece of fondant from that cookie and start fresh with a new piece. So, take your time, go slow and steady, and if you’re feeling unsure, maybe even practice your design on a scrap piece of parchment paper or a less important cookie first.
- Don’t use a lot of corn syrup: Remember that corn syrup’s main function here is simply to act as a gentle adhesive. A very thin, almost invisible layer is all you need to create a strong and lasting bond between the cookie and the fondant. Applying too much corn syrup can cause it to seep out from under the fondant as it sets, creating a sticky, shiny, and unsightly mess around the edges of your beautifully decorated cookies. Less is definitely more in this instance for a clean finish.
Storage Recommendations for Fondant-Decorated Cookies
Proper storage is essential to keep your **Valentine’s Day Love Letter Cookies** looking pristine and tasting fresh for as long as possible. Here’s how to best store them and what to avoid:
- Room Temperature: This is generally the best and most recommended method for storing fondant-decorated cookies. Once the fondant has fully dried and the decorations are set (after the initial 20-minute drying period, or longer if piping), place your cookies in an airtight container or a covered box. Keep them at room temperature, away from direct sunlight or excessive heat. Stored this way, they will retain their freshness and beautiful decorative appeal for up to 3 days.
- Refrigeration (Not Recommended): While it might seem intuitive to refrigerate baked goods, it is generally not recommended for fondant-decorated cookies. The moisture and condensation naturally present within the refrigerator can cause the fondant decorations to become sticky, tacky, and develop an undesirable sheen, potentially ruining the intricate designs you’ve worked hard to create. If you must refrigerate, ensure they are in an extremely airtight container and bring them to room temperature slowly before opening the container to minimize condensation.
- Freezing (Not Recommended): Freezing is also not advisable for cookies adorned with fondant. The significant moisture content and temperature fluctuations in a freezer will almost certainly make the fondant extremely sticky, prone to melting, or becoming very tacky and difficult to handle upon thawing. For best results and to preserve their beautiful appearance and texture, it is always best to plan to make and decorate these **Love Letter Cookies** closer to when you intend to serve or gift them.

Fun Craft Paper Love Letters (Non-Edible)
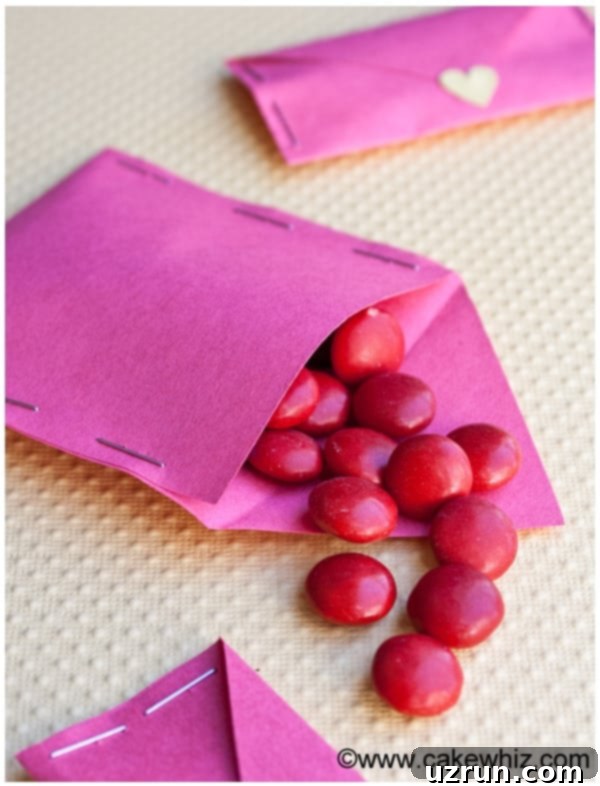
Beyond the edible delights, you can extend the charming **Love Letter** theme to a delightful craft project. If you’re looking for a non-edible alternative, a fun classroom activity, or an additional thoughtful gift idea, consider making these adorable craft paper envelopes filled with sweet treats. They’re perfect for school exchanges, party favors, or as a heartfelt gesture for friends and family.
- Cut your paper: Begin by taking a piece of pink, red, or any festive color of construction paper or craft paper. Use scissors to carefully cut out a house shape. This will form the basic structure of your envelope.
- Fold and secure: Now, carefully fold the paper house shape, as demonstrated in the accompanying picture, to create a small pocket or pouch. Once folded, secure the sides with a few staples or a dab of glue to ensure your pocket is sturdy and can hold its contents.
- Fill with treats: Fill this delightful little pocket with your chosen small candies. Red or pink M&Ms are a classic and colorful choice, but feel free to get creative with other favorites like conversation hearts, jelly beans, or small chocolate kisses.
- Create a heart seal: Next, cut out a small heart shape from yellow construction paper or any contrasting craft paper you prefer. This will act as the decorative ‘seal’ for your love letter.
- Seal and enjoy: Fold down the top triangular flap of your paper envelope. Then, using a small amount of glue, carefully stick the heart piece in the very center of this flap. And there you have it – a sweet, personalized craft paper love letter ready to be shared and enjoyed!
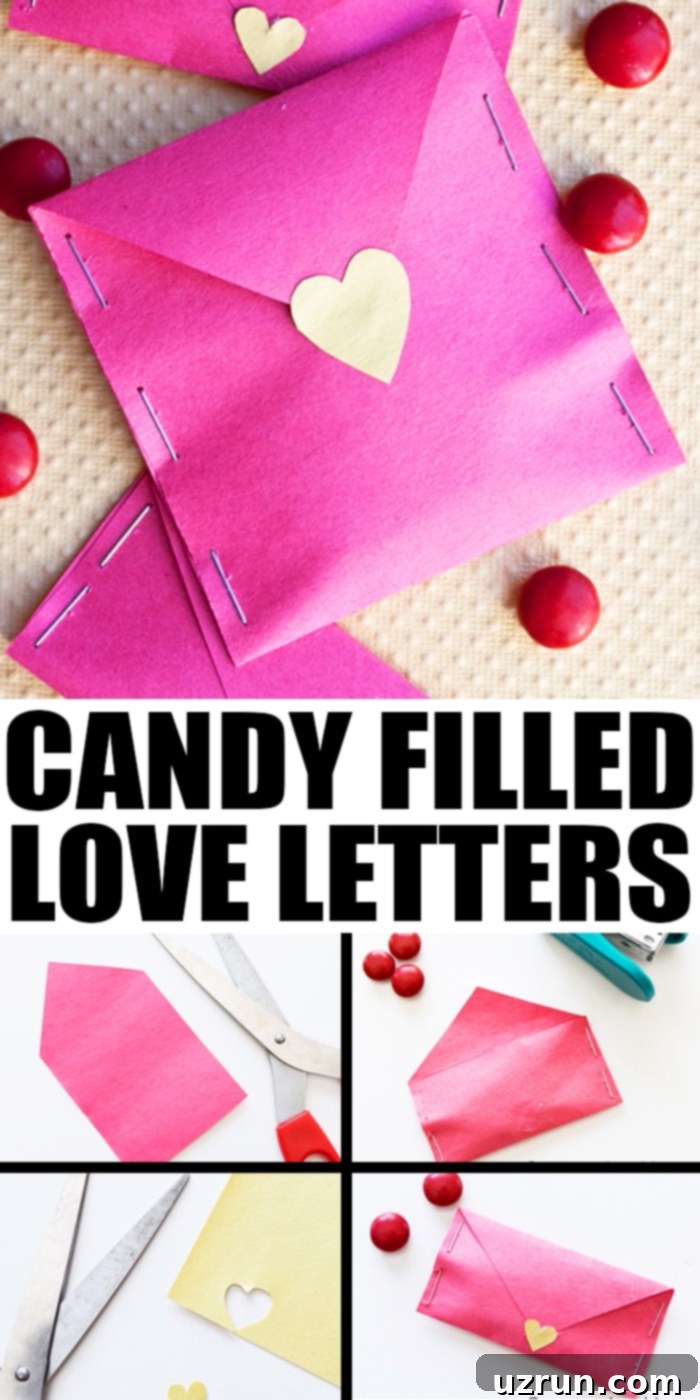
Instead of just M&M’s, consider filling these charming paper envelopes with small, individually wrapped seasonal heart chocolates, miniature cookies, or other delightful candies of your liking. While I kept these envelopes very simple in the instructions, feel absolutely free to let your imagination run wild! Experiment with a variety of different colors, patterns, and textures of craft papers to make each one unique. You can draw intricate designs, paint on them, or even use rubber stamps to add unique embellishments and patterns. Incorporate stickers, glitter glue, ribbons, or even tiny decorative buttons instead of just cutting out heart shapes for the seal. The possibilities are endless for creating truly personalized and memorable craft love letters that everyone will adore!
More Decorated Valentine Cookie Ideas
- Red Velvet Cookies (With Cake Mix)
- Champagne Cookies with Champagne Frosting
- Red Velvet Crinkle Cookies
- Heart Cookies
- Easy Flower Cookies
Recipe
Easy Valentine’s Day Cookies (Love Letter Cookies)
Abeer Rizvi
Pin Recipe
Want to Save This Recipe?
Enter your email & I’ll send it to your inbox. Plus, get great new recipes from me every week!
By submitting this form, you consent to receive emails from CakeWhiz
Ingredients
- 2 tablespoon Corn syrup Or white frosting
- 6 Graham crackers Cut in half
- 1 cup Marshmallow fondant White
- 1 tablespoon Heart sprinkles
- Edible markers (red or pink)
Instructions
-
Brush a thin layer of corn syrup on top of the cookie.
-
Roll out white (or desired color) fondant evenly.
-
Place the cookie, sticky side down, onto the rolled fondant and press gently.
-
Use a sharp knife to cut off excess fondant along the sides of the cookie.
-
Flip over the cookie and let it sit at room temperature for about 20 minutes to allow the fondant to dry slightly.
-
Use red or pink edible markers to decorate the cookie, drawing lines to resemble an envelope.
-
Gently stick a heart sprinkle in the center of the “envelope seal.” Enjoy your beautiful Love Letter Cookies!
Notes
- For best results, read all the detailed tips and techniques provided in the article above before starting.
- Leftover cookies can be stored in a covered, airtight box at room temperature for up to 3 days. Fondant cookies are not recommended for refrigeration or freezing due to moisture issues.
Nutrition
An automated tool is used to calculate the nutritional information. As such, I cannot guarantee the accuracy of the nutritional information provided for any recipe on this site.
