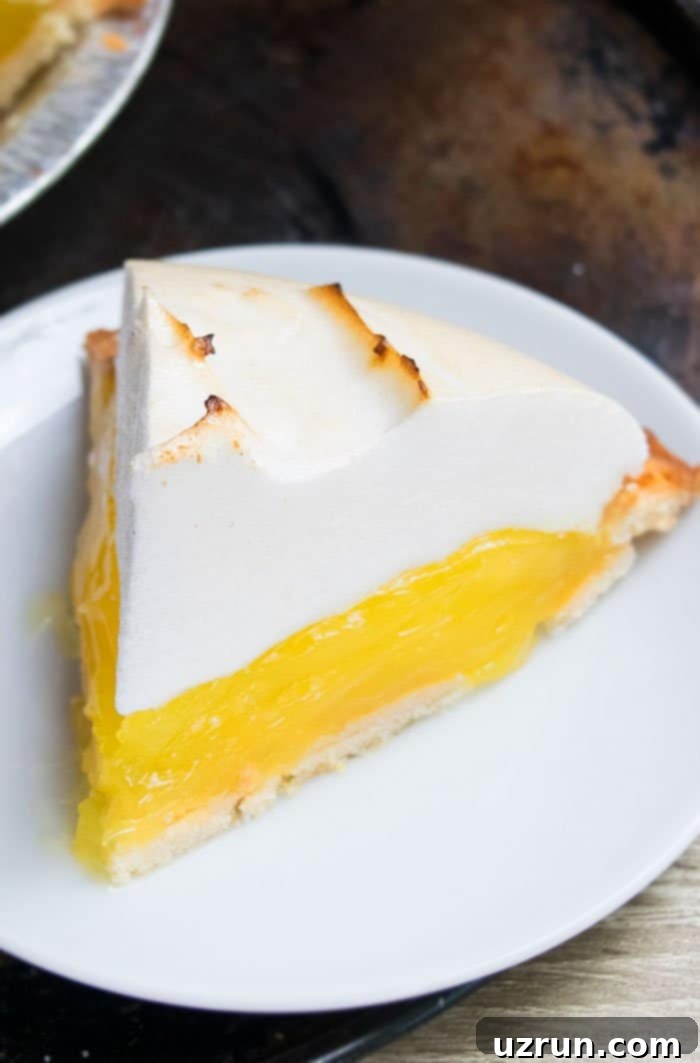
The Ultimate Homemade Lemon Meringue Pie: A No-Fail Recipe for Fluffy Meringue & Crisp Crust
Discover the secrets to a truly quick and easy lemon meringue pie recipe, made from scratch with simple, wholesome ingredients. This comprehensive guide will help you create a show-stopping dessert featuring a perfectly buttery pie crust, a luscious and creamy lemon curd filling, and a towering, fluffy meringue topping that promises no weeping and absolutely no soggy crust. Say goodbye to store-bought imitations and hello to homemade perfection!

This tried-and-true, old-fashioned summer pie is a timeless classic that far surpasses any store-bought version. The vibrant, tangy lemon flavor combined with the sweet, airy meringue is an experience you won’t forget. While some might consider lemon meringue pie a challenging bake, our meticulously refined recipe, adapted from a beloved family tradition, simplifies the process. We’ve eliminated the guesswork and perfected the balance of its three essential components: a flaky crust, a rich lemon filling, and a stable, cloud-like French meringue topping. Forget the days of weeping meringue or a disappointing soggy bottom; our step-by-step instructions and expert tips ensure a flawless pie every single time. It’s just as delightful and impressive as other homemade favorites like Banana Cream Pie (No Bake), Easy Caramel Apple Pie (No Bake) and Easy French Silk Pie, but with that irresistible citrus twist.
Key Ingredients for the Perfect Lemon Meringue Pie
Crafting the perfect lemon meringue pie relies on a handful of simple yet crucial ingredients. Each plays a vital role in achieving the desired flavor, texture, and stability for all three layers of this classic dessert. Understanding their purpose will help you make the best choices for your homemade pie.
- Pie Crust: The foundation of your pie! You can opt for a high-quality frozen, store-bought crust for convenience, ensuring it’s baked and cooled completely before filling. Alternatively, a homemade butter pie crust offers an unmatched flaky texture and rich flavor. The key here is to pre-bake or “blind bake” your crust to prevent sogginess.
- Lemon Pie Filling: This is arguably the heart of the pie, delivering that signature tart and sweet lemon flavor. We aim for a creamy, smooth consistency that sets beautifully.
- Water: Essential for bringing the lemon filling to the correct, pourable consistency, ensuring it’s neither too thick nor too runny.
- Cornstarch: A powerful thickening agent that helps the lemon filling achieve its perfect, set texture without being gummy. It works in conjunction with the egg yolks to provide structure.
- Sugar: Granulated or table sugar is used in both the lemon filling for sweetness and the meringue for structure and flavor. It balances the tartness of the lemon beautifully.
- Lemon Juice: Freshly squeezed lemon juice is paramount for a bright, vibrant, and authentic lemon flavor. Bottled lemon juice simply cannot compare in terms of zestiness and aroma.
- Lemon Zest: Do not skip this ingredient! The zest contains essential oils that provide an intense, aromatic lemon flavor that elevates the filling beyond just tartness. It adds depth and brightness.
- Eggs: You will need to carefully separate the yolks and egg whites for this recipe. The yolks are crucial for thickening the lemon filling, providing richness and color, while the whites are the star of the fluffy meringue topping. Using large, room-temperature eggs is recommended for optimal results.
- Butter: Unsalted butter is preferred for the lemon filling, allowing you to control the overall saltiness of the pie. It adds a luxurious richness and smooth texture to the curd.
- Cream of Tartar: This acidic powder is a meringue’s best friend. It helps stabilize the egg whites, allowing them to whip up to a much greater volume and form strong, stiff peaks, preventing collapse and weeping.
- Meringue Topping: The crowning glory of the pie! Made from whipped egg whites, sugar, and stabilizers, it should be light, airy, and gently browned. This recipe focuses on a “no-weep” meringue for the ultimate finish.
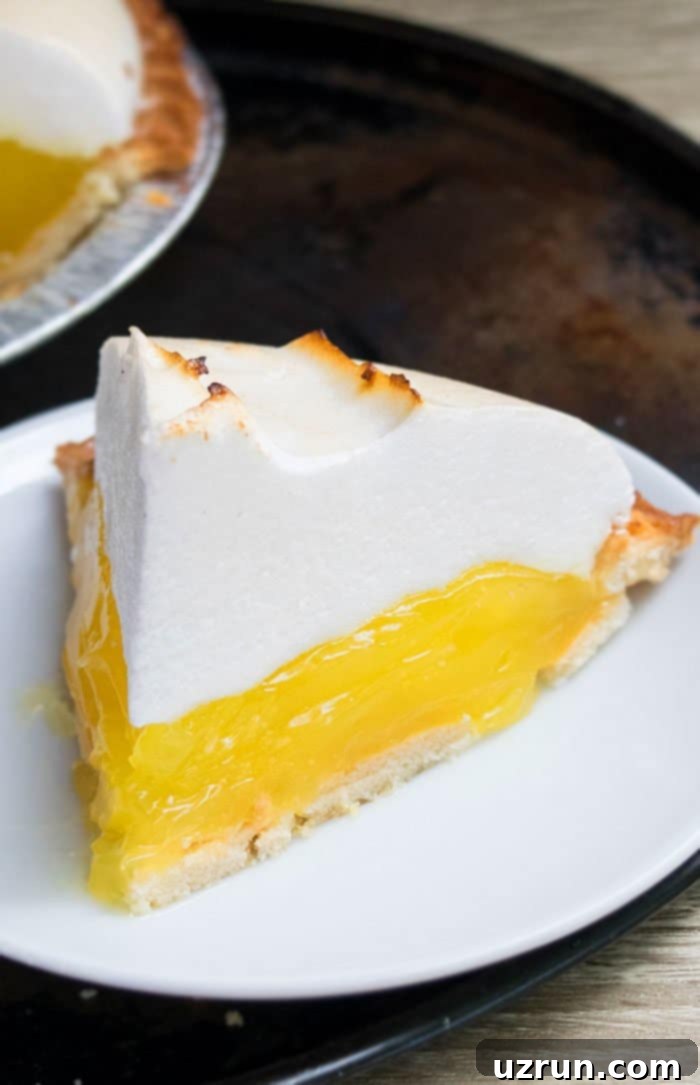
Creative Variations for Your Lemon Meringue Pie
While the classic lemon meringue pie is a masterpiece on its own, don’t hesitate to experiment with these creative variations to personalize your dessert or adapt it for different occasions and preferences. These ideas can elevate your pie, adding new dimensions of flavor and texture.
- Add Yellow Food Coloring: For an even more visually striking lemon filling, consider adding a few drops of yellow food coloring. This is entirely optional but can enhance the perception of a bright, zesty lemon flavor.
- Use a Different Type of Crust: The pie crust provides an excellent opportunity for variation. Instead of a traditional butter crust, try a no-bake Graham Cracker Pie Crust for a sweeter, crumbly base that pairs wonderfully with the lemon. An Oreo Pie Crust offers a rich, chocolatey contrast, or explore a no-bake pretzel crust for a delightful sweet and salty crunch.
- Make Mini Pies: Transform your standard pie into adorable individual servings by using frozen mini pie shells or even a cupcake tin lined with pastry circles. Bake the mini shells until golden brown, then follow the rest of the steps for the filling and meringue. Mini pies are perfect for parties, portion control, or simply a charming presentation. Adjust baking times as needed for the smaller size.
- Add Other Toppings: Beyond the meringue, a touch of extra garnish can make your pie truly special. Consider a sprinkle of shredded coconut for a tropical twist, delicate chocolate shavings for elegance, mini chocolate chips for added sweetness, crushed nuts (like pistachios or almonds) for texture, or even sliced fresh strawberries for a burst of color and fruity counterpoint. Have fun with the decoration and presentation to match the occasion.
- Place a Cheesecake Layer on the Bottom: For an incredibly decadent dessert, introduce a creamy cheesecake layer beneath the lemon filling. You can use a store-bought cheesecake or whip up a batch of this luscious New York Cheesecake Recipe (No Bake). This adds a rich, tangy, and smooth dimension that makes for an unforgettable treat.
How to Make Easy Lemon Meringue Pie from Scratch: A Step-by-Step Guide
Creating this stunning lemon meringue pie is a rewarding process, and with our clear instructions, you’ll achieve perfect results. Follow these steps carefully to master each component of this delightful dessert.
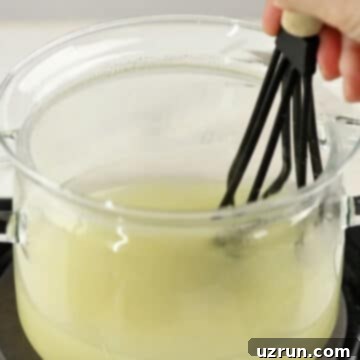
1. Prepare Lemon Filling: Begin by combining water, cornstarch, fresh lemon juice, granulated sugar, and lemon zest in a saucepan. Whisk continuously over medium heat until the mixture thickens into a glossy, smooth consistency. This forms the base of your tangy lemon curd.

2. Beat and Temper Egg Yolks: In a separate bowl, lightly whisk the egg yolks. To prevent them from scrambling, you must temper them by slowly whisking in a few spoonfuls of the warm lemon mixture into the beaten yolks. This gradually raises their temperature.
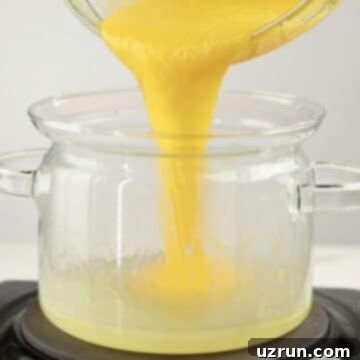
3. Incorporate Tempered Yolks: Pour the tempered egg yolk mixture back into the remaining lemon mixture in the saucepan. Continue to cook and whisk over low-medium heat until the filling becomes thick, smooth, and gently bubbling. This ensures a creamy, lump-free texture.
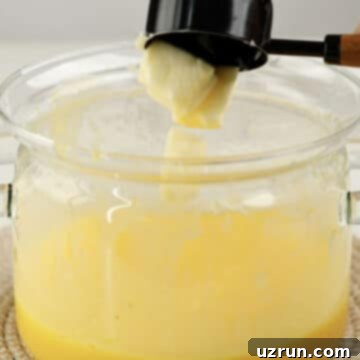
4. Finish the Filling: Remove the saucepan from the heat and stir in the unsalted butter until it is completely melted and smoothly incorporated. The butter adds a luxurious sheen and richness to the lemon filling.

5. Pour into Crust: Carefully pour the warm lemon mixture into your pre-baked and cooled pie crust. Set it aside while you prepare the meringue. Do not chill the filling yet; its warmth is key for preventing meringue weeping.
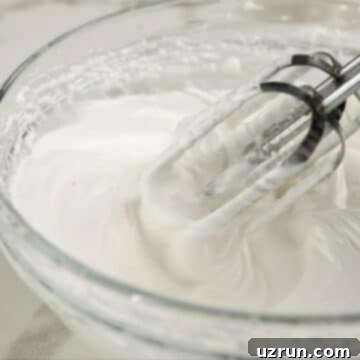
6. Prepare Meringue: In a spotless mixing bowl, whip together the room-temperature egg whites, cream of tartar, cornstarch, and gradually add sugar. Continue beating until the mixture forms glossy, stiff peaks that hold their shape perfectly.

7. Spread Meringue: Gently spoon the fluffy meringue over the warm lemon filling, ensuring it reaches and touches the pie crust all around the edges. This creates a seal that helps prevent the meringue from shrinking or weeping. Use the back of a spoon to create attractive, rustic peaks.

8. Bake and Chill: Bake the pie until the meringue peaks are beautifully golden brown. Once baked, allow the pie to cool completely to room temperature before chilling it in the refrigerator for at least 6 hours. This crucial chilling period ensures all layers firm up and set perfectly, making for clean slices.
Expert Tips and Techniques for a Flawless Lemon Meringue Pie
Achieving the perfect lemon meringue pie can sometimes be tricky, but with these expert tips and techniques, you’ll master this classic dessert. These insights will help prevent common issues like weeping meringue or a soggy crust, ensuring a stunning and delicious result every time.
- Blind Bake Your Pie Crust: This step is non-negotiable for a crisp, flaky crust. Whether you use a homemade or store-bought frozen crust, blind baking (pre-baking without filling) until it’s golden brown creates a barrier that prevents the lemon filling from making it soggy. This is the single most important factor for a perfect bottom crust.
- Homemade vs. Store-Bought Components: While store-bought pie crusts can be convenient, especially the frozen ones you just bake and cool, a homemade crust always delivers superior flavor and texture. The same applies to the lemon filling – our homemade version offers unparalleled freshness and zestiness compared to pre-made options.
- Ensure Egg Whites are Room Temperature: This is a crucial step for the meringue. Room temperature egg whites whip faster and achieve a significantly greater volume and stability than cold egg whites. Plan ahead and take them out of the fridge at least 30 minutes before you begin.
- Temper Egg Yolks Properly: This technique is vital to prevent scrambled eggs in your lemon filling. When adding egg yolks to a hot mixture, you must gradually introduce some of the hot liquid to the yolks first, whisking constantly. This slowly brings their temperature up. Once tempered, you can safely whisk this warmed yolk mixture back into the main hot lemon mixture without it curdling, resulting in a smooth and creamy filling.
- Strain the Lemon Filling (Optional but Recommended): For an exceptionally silky-smooth lemon filling, pass it through a fine-mesh sieve before pouring it into the pie crust. While I sometimes skip this for expediency, my mom always insists on it, and it does remove any tiny lumps or bits of zest, ensuring a pristine texture.
- Use Unsalted Butter: Opt for unsalted butter in your lemon filling. This gives you complete control over the salt content in your pie, preventing it from becoming overly salty and allowing the bright lemon flavors to shine.
- Choose Large Eggs: This recipe is developed using large eggs. Different sizes can impact the volume of your egg whites for the meringue and the thickening power of the yolks in the filling, leading to inconsistent results.
- Avoid High Humidity Days: Meringue is highly sensitive to moisture. The excess humidity in the air can destabilize the meringue, making it difficult to achieve stiff peaks and increasing the likelihood of “weeping” (when liquid seeps out from the meringue) during or after baking. Choose a dry day for baking your pie.
- Don’t Over-Bake the Meringue: Over-baking can cause the egg whites to shrink excessively and leads to the formation of small beads of moisture (weeping) on top of the meringue. Bake just until the peaks are golden brown and lightly set.
- Ensure Sugar is Fully Dissolved in Meringue: When whipping your meringue, make sure all the granulated sugar has fully dissolved. You can test this by rubbing a small amount of meringue between your fingers; if it feels grainy, continue whipping. Undissolved sugar can draw moisture, contributing to meringue weeping.
- Don’t Let the Lemon Filling Cool Too Much: It’s important for the lemon filling to still be warm when you spread the meringue on top. The residual warmth helps to “seal” the two layers together, creating a better bond and significantly reducing the chances of the meringue shrinking or separating from the filling as it bakes and cools.
- Spread Meringue All the Way to the Edge: When applying the meringue, ensure it completely touches and adheres to the pie crust around the entire perimeter. This act of sealing the meringue to the crust further prevents shrinking and creates a barrier against weeping, keeping all the layers beautifully integrated.
- No Egg Yolks in Whites: Even a tiny speck of egg yolk (fat) in your egg whites will prevent them from whipping up to stiff peaks. Be meticulous when separating eggs, or consider using carton egg whites for guaranteed purity. The yolks, of course, are used in the lemon filling.
- Clean Mixing Bowl and Attachments: Just like with egg yolks, any oily residue or grease on your mixing bowl or whisk attachments will inhibit the egg whites from whipping properly and forming stiff, stable peaks. Always ensure your equipment is perfectly clean and dry.
- Use Cream of Tartar and Cornstarch: These two ingredients are your allies for a stable, no-weep meringue. Cream of tartar provides acidity that helps strengthen the egg white proteins, while cornstarch acts as a stabilizer, absorbing excess moisture and adding body, helping the meringue hold its shape during baking and cooling.
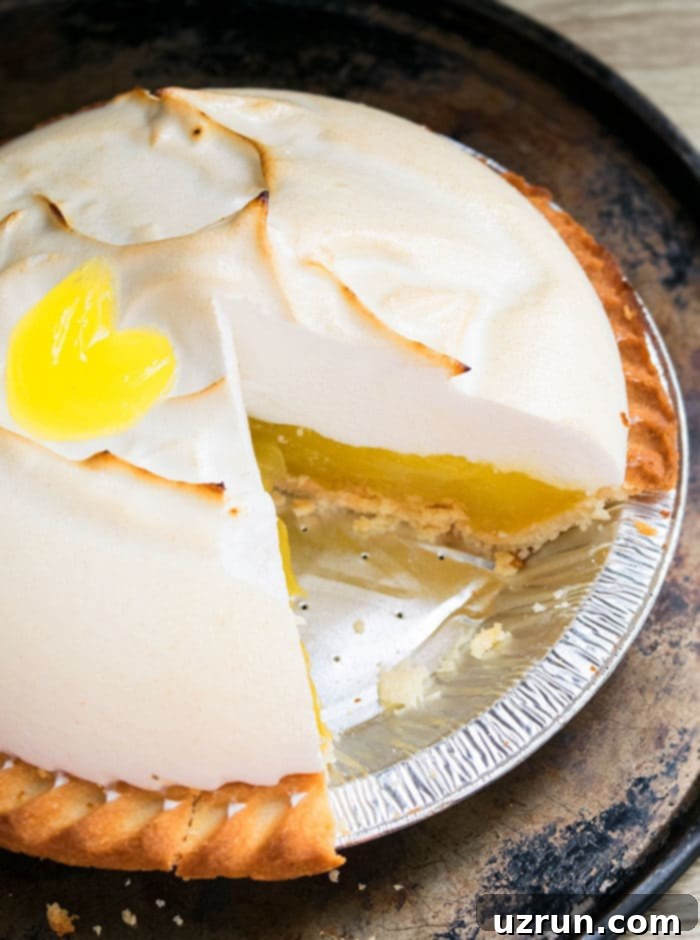
Lemon Meringue Pie Recipe FAQs
Here are some frequently asked questions about making lemon meringue pie, addressing common concerns and providing helpful solutions for a perfect bake.
“Weeping” refers to the unfortunate occurrence of a watery, syrupy layer forming between the meringue and the lemon filling, or beads of moisture appearing on top of the meringue. This is typically caused by an unstable meringue that has been either over-cooked, under-cooked, or has absorbed too much moisture, often due to undissolved sugar. A soggy crust, on the other hand, happens when moisture from the filling seeps into the unbaked or improperly baked pie crust. Nothing ruins a perfectly good pie quicker than a soggy bottom! To prevent both, ensure you:
- Blind bake your pie crust: This is the absolute most important step to achieving a crisp, flaky crust. Pre-baking the crust without any filling until it’s golden brown creates a barrier, sealing it from the wet lemon filling and preventing it from becoming soggy.
- Use room temperature egg whites: For a stable meringue that whips to maximum volume.
- Fully dissolve sugar in meringue: Grainy sugar can attract moisture and lead to weeping.
- Spread meringue to the edges: This creates a seal with the crust, preventing the meringue from shrinking and weeping.
- Apply meringue to a warm filling: The warmth helps bond the two layers.
- Don’t over-bake the meringue: Bake just until golden brown to prevent shrinking and beading.
- Avoid high humidity: Meringue absorbs moisture from the air, making dry days ideal for baking.
Yes, refrigeration is absolutely essential for lemon meringue pie. Once the meringue has been beautifully browned in the oven, allow the pie to cool completely to room temperature on your counter. Then, it must be chilled in the refrigerator for at least 6 hours (and ideally overnight) before serving. This crucial chilling period allows the lemon filling to firm up and set properly, the meringue to stabilize further, and all the flavors to meld together, ensuring clean slices and a delightful texture. It also helps with food safety given the dairy and egg components.
While both lemon curd and lemon pie filling deliver that delightful tangy lemon flavor, they differ significantly in texture and composition.
- Lemon Curd: Typically thicker, richer, and intensely flavored. It’s usually made with a higher proportion of egg yolks, butter, sugar, and lemon juice (and often zest). Curd relies primarily on the egg yolks for thickening, resulting in a very smooth, luxurious, and spreadable consistency, often used as a spread or filling for tarts and cakes. You can learn more about homemade lemon curd here.
- Lemon Pie Filling: While also rich in lemon flavor, it tends to be a bit thinner and sets more firmly, specifically designed to hold its shape when sliced in a pie. It’s often thickened with a combination of egg yolks and a starch like cornstarch (as in this recipe). The starch gives it a more stable, sliceable texture that holds up well under the meringue.
Both are delicious, but their formulations are tailored to their intended use.
Storage Tips for Lemon Meringue Pie
Proper storage is key to enjoying your homemade lemon meringue pie at its best, especially to maintain the integrity of the delicate meringue and the freshness of the lemon filling. Here’s how to store it effectively:
- Make Ahead: Lemon meringue pie is truly best enjoyed fresh, ideally on the day it’s made or the day after. However, you can prepare it up to 2 days in advance. Ensure it is fully chilled before covering loosely.
- Room Temperature: Due to its dairy and egg components, lemon meringue pie should not be left at room temperature for more than a few hours. The meringue can start to lose its crispness and stability, and the filling could spoil.
- Refrigerate: Always store leftover lemon meringue pie in the refrigerator. To keep the meringue from getting soggy, it’s best to store it loosely covered with plastic wrap or foil, taking care not to press down on the meringue. An airtight container can sometimes cause condensation, which can affect the meringue’s texture. It will remain delicious for up to 2 days.
- Freeze: Freezing a finished lemon meringue pie with the meringue topping is generally not recommended. The delicate meringue tends to break down, become watery, and lose its texture upon thawing. If you absolutely need to freeze, you could freeze just the baked lemon filling (without the meringue) in a sealed container for up to 1 month. Thaw in the refrigerator, then prepare and add fresh meringue before serving.
More Zesty Lemon Desserts to Brighten Your Day
If you’ve fallen in love with the vibrant flavor of lemon in this pie, you’ll be thrilled to explore these other fantastic lemon-infused desserts. From quick treats to more elaborate cakes, there’s a lemon dessert for every craving and occasion:
- Lemon Cake Balls (Cake Truffles)
- Lemon Cupcakes (With Cream Cheese Frosting)
- Lemon Bundt Cake (With Cake Mix)
- Lemon Fudge (2 Ingredients)
- Easy Lemon Cookies (From Scratch)
Recipe

Easy Lemon Meringue Pie
Abeer Rizvi
Pin Recipe
Want to Save This Recipe?
Enter your email & I’ll send it to your inbox. Plus, get great new recipes from me every week!
By submitting this form, you consent to receive emails from CakeWhiz
Ingredients
Pie Crust
- 1 Frozen pie crust 9 inch, Baked and Cooled
Lemon Pie Filling
- 1 ⅓ cups Water
- ⅓ cup Cornstarch
- 1 cup Granulated sugar
- ½ cup Lemon juice
- 1 tablespoon Lemon zest
- 5 Egg yolks From large eggs
- 2 tablespoon Butter Unsalted
Meringue Topping
- 5 Egg whites From large eggs
- ½ teaspoon Cream of tartar
- 1 teaspoon Cornstarch
- ½ cup Granulated sugar
Instructions
-
Bake the pie crust, according to package instructions until golden brown. Then, allow it to cool down completely.
-
Without turning on the heat, place a nonstick saucepan on the stove.
-
Add water and cornstarch and whisk them together until fully dissolved.
-
Turn on the heat to “medium” and add sugar, lemon juice, lemon zest and continue cooking, whisking often until mixture thickens. This takes about 5-6 minutes. Reduce the heat to “Low.”
-
In another mixing bowl, whisk together the egg yolks.
-
Now, temper the egg yolks. This has to be done properly or else the mixture will become lumpy. Pour 5-6 spoonfuls of the lemon mixture slowly in the bowl of beaten egg yolks, while constantly whisking. Increase the heat to “medium.” Then, add this egg mixture back into the saucepan, while constantly whisking. Continue cooking until mixture becomes smooth, thick and very bubbly.
-
Remove saucepan from heat and mix in the butter.
-
Pour filling in the baked pie crust. Keep aside. Don’t chill yet.
-
Make the meringue now. In a mixing bowl, add egg whites, cream of tartar, cornstarch and beat them until “soft peaks” form. Then, add sugar and continue mixing until “stiff peaks” form.
-
Spread this meringue on top of the lemon filling. Use the back of a spoon to make rustic peaks. Make sure to spread the meringue to the edges so that it’s touching the crust because that seals the two layers together and prevents “weeping” and shrinking away while baking.
-
Bake at 350 degrees F for about 10-15 minutes or until the meringue is browned.
-
Allow the pie to cool down to room temperature.
-
Chill in the fridge for at least 6 hours for all the layers to firm up. Enjoy!
Video
Notes
- Read all my tips above for the best results and to prevent common issues.
- This pie tastes best when served on the first day to appreciate the crisp meringue, but leftovers can be stored in a sealed container in the fridge for up to 2 days.
Nutrition
An automated tool is used to calculate the nutritional information. As such, I cannot guarantee the accuracy of the nutritional information provided for any recipe on this site.
