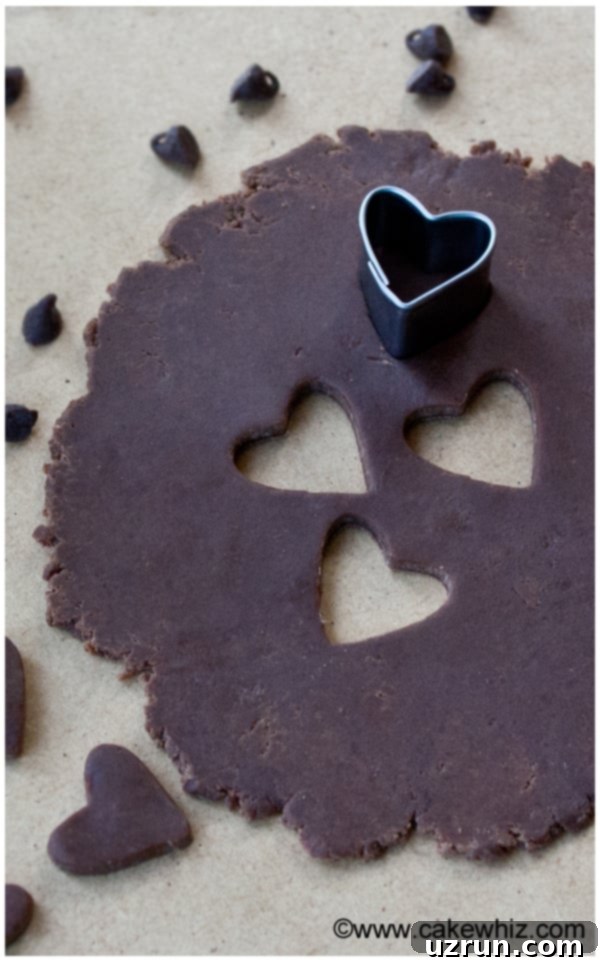
Master Homemade Modeling Chocolate: Easy 2-Ingredient Candy Clay for Stunning Cakes
Unlock the secret to flawless cake decorating with our incredibly easy homemade modeling chocolate recipe, also known as candy clay! Made with just two simple ingredients – candy melts and corn syrup – this pliable, delicious edible clay is a game-changer for anyone looking to create stunning, professional-looking desserts without the fuss of traditional fondant. Whether you’re a seasoned baker or just starting, this guide will walk you through everything you need to know to make and use this versatile confection.
My journey with modeling chocolate began years ago, captivated by the intricate designs created on shows like Cake Boss. Watching Buddy craft incredible sculptures from what looked like edible play-doh was truly inspiring. When I finally decided to try it for myself, I was amazed by how much better it tasted compared to store-bought fondant. In fact, many bakers, myself included, find its rich, chocolatey flavor far superior, even to Homemade Marshmallow Fondant. This versatile candy clay has become a staple in my kitchen, used for everything from delicate flowers to complex structures, like the memorable Flower Basket Cake (Basketweave).
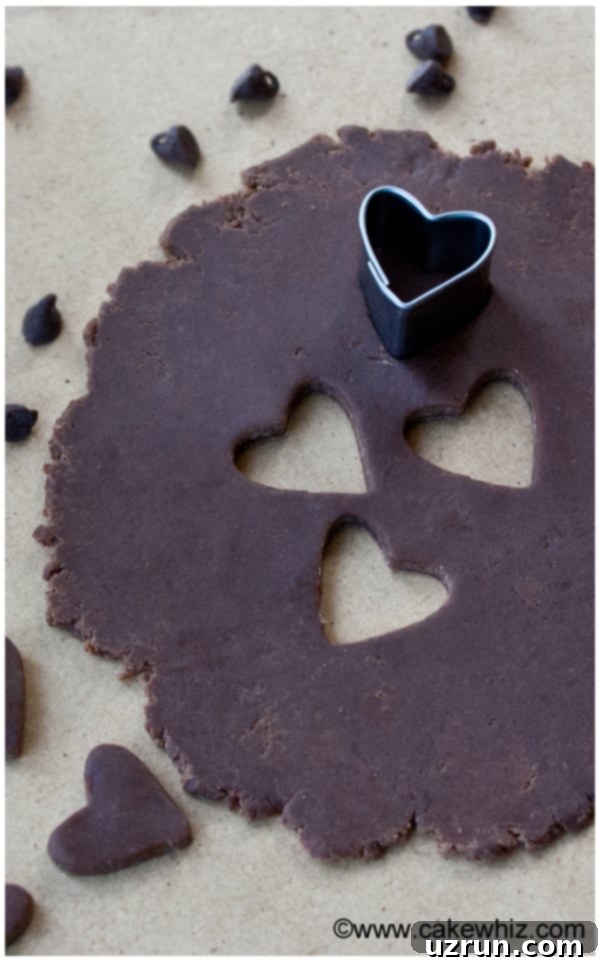
What is Modeling Chocolate (Candy Clay)?
Modeling chocolate, often called candy clay, is an edible, pliable chocolate-based paste used extensively in cake decorating and confectionery arts. Think of it as a delicious, moldable chocolate dough that retains its shape once set. It’s renowned for its ability to be sculpted, rolled, and shaped into intricate designs, figures, flowers, and decorative elements for cakes, cupcakes, and other desserts.
Does Modeling Chocolate Taste Good?
Absolutely! One of the biggest advantages of modeling chocolate over other decorating mediums like traditional fondant is its delicious flavor. It has a rich, sweet chocolate taste, often compared to a Tootsie Roll – a nostalgic candy that many people adore. This makes it a much more appealing option for edible decorations, as guests will actually enjoy eating the decorative elements rather than picking them off their cake. Unlike some fondants that can have a bland or overly sweet, artificial flavor, modeling chocolate offers a delightful chocolate experience with every bite.
How to Make Modeling Chocolate from Scratch (The 2-Ingredient Magic)
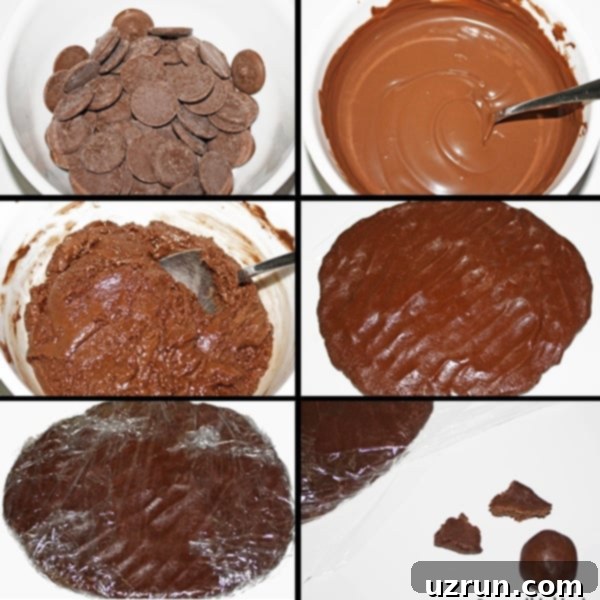
Creating your own modeling chocolate is surprisingly simple and requires minimal effort. Here’s a quick overview of the process:
- Melt Your Chocolate: Gently heat your chosen chocolate (candy melts are highly recommended for beginners) until it’s smooth and fully melted.
- Add Corn Syrup: Incorporate light corn syrup into the melted chocolate, mixing just until it comes together. The key here is to avoid over-mixing.
- Allow it to Set: Transfer the mixture to plastic wrap and let it rest at room temperature, ideally overnight, to achieve the perfect texture.
- Knead and Decorate: Once set, gently knead the modeling chocolate until it becomes pliable, then use it to bring your cake decorating visions to life!
Essential Ingredients for Easy Candy Clay
The beauty of this recipe lies in its simplicity. You only need two core ingredients, but choosing the right ones can make all the difference in your final product.
- Chocolate: While various types of chocolate can be used, I highly recommend using candy melts, especially for those new to modeling chocolate.
- Candy Melts (Recommended): These are fantastic because they are specifically designed to melt smoothly and hold color well. You can find them in a wide array of pre-colored options, which is incredibly convenient. Using pre-colored candy melts eliminates the need to add external food coloring, saving you time and ensuring a consistent hue. This is a huge advantage when you need specific colors for your decorations.
- Real Chocolate (for advanced users): If you prefer to use real chocolate, such as baking bars or high-quality chocolate chips, ensure it has a higher cocoa butter content. Dark, milk, or white chocolate can work, but the ratio of corn syrup will need to be adjusted based on the fat content of the chocolate. More on this in the “Tips and Techniques” section.
- Corn Syrup: This is the magical ingredient that gives the chocolate its pliable, clay-like consistency.
- Light Corn Syrup (Crucial): Always use light corn syrup. Its clear color ensures that it won’t discolor your modeling chocolate, especially important when working with white or pastel candy melts. Dark corn syrup contains molasses, which would significantly alter the color and flavor of your modeling chocolate. Corn syrup is essential for achieving the correct consistency, providing the elasticity and workability needed for sculpting.
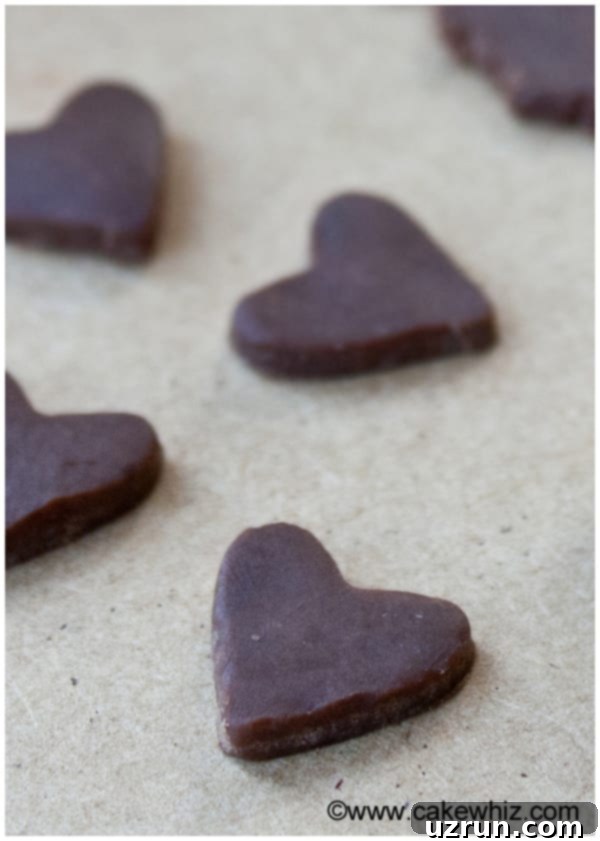
Modeling Chocolate vs. Fondant: What’s the Difference?
While both modeling chocolate and fondant are popular mediums for cake decorating, they are distinctly different in composition, handling, and taste. Understanding these differences will help you choose the best material for your specific project.
Key Distinctions:
- Ingredients: The primary difference lies in their base ingredients. Candy clay (modeling chocolate) is made predominantly from chocolate and corn syrup, giving it a rich, chocolatey flavor. Fondant, on the other hand, is typically made from sugar, water, gelatin (or agar for vegan options), glycerin, and sometimes marshmallows, resulting in a much sweeter, often less flavorful, and more sugar-based taste.
- Drying Time & Workability: This is where modeling chocolate truly shines for certain applications. Fondant tends to dry out relatively quickly when exposed to air, meaning you have to work fast and keep it covered to prevent it from cracking or developing an “elephant skin” texture. Modeling chocolate dries much slower. This extended working time is invaluable for intricate, detailed, and realistic sculpture work, faces, and figurine making. It gives you more freedom to blend seams, smooth imperfections, and refine details without constant worry about cracking.
- Blending & Seaming: The warmth of your hands and fingers is a powerful tool when working with modeling chocolate. You can easily use your body heat to seamlessly blend pieces together, smooth out any tears or cracks, and create a flawless finish. This level of seamless blending is significantly more challenging, if not impossible, with fondant once it starts to dry.
- Flavor Profile: As mentioned, modeling chocolate offers a delightful chocolate flavor, making it a truly edible and enjoyable part of the cake. Fondant, while visually appealing, often falls short in the taste department for many, with a texture and sweetness that can be overpowering or artificial.
- Pliability: Both are pliable, but modeling chocolate offers a unique elasticity and firmness that makes it excellent for holding shape while also being easy to manipulate. It has a slightly denser, more substantial feel than fondant.
- Weight: One notable drawback of modeling chocolate is its weight. It is significantly heavier than fondant. This means that heavily decorated cakes using a lot of modeling chocolate will be heavier overall. For larger, multi-tiered cakes with extensive modeling chocolate elements, you may need to consider additional internal supports to prevent structural issues. For smaller decorations or accent pieces, this is generally not a concern.
Overall, modeling chocolate is a superior choice for sculpting, molding, and detailed shaping due to its extended working time, excellent blending capabilities, and delicious flavor. While fondant excels at providing a smooth, pristine covering for cakes, modeling chocolate offers unmatched versatility for three-dimensional artistry.
Can You Mix Modeling Chocolate with Fondant?
Yes, absolutely! Mixing modeling chocolate with fondant is a fantastic technique that combines the best qualities of both mediums. This hybrid material offers enhanced elasticity, making it even more forgiving and easier to work with, especially for creating figures, delicate details, and intricate decorations.
When combined, the modeling chocolate adds a lovely chocolate flavor to the fondant, while the fondant can help temper the richness and slightly reduce the density of the modeling chocolate. The resulting mixture is incredibly smooth, less prone to cracking (especially “elephant skin” on fondant), and more stable for complex shapes. Many professional cake artists swear by this blend for their detailed figurine work and sculpted elements. A common starting ratio is 50/50, but you can adjust it to suit your specific needs and preferences for workability and taste.
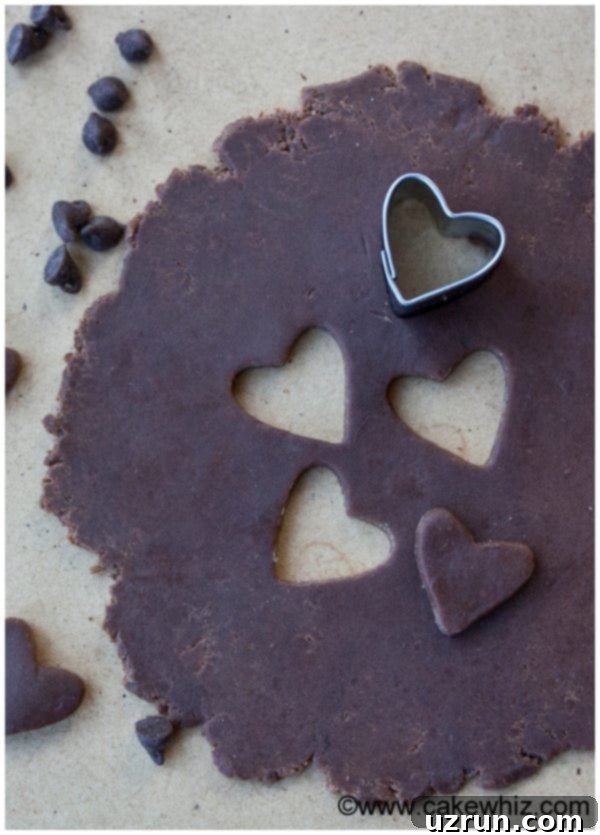
Expert Tips and Techniques for Perfect Modeling Chocolate
Achieving perfect modeling chocolate is simple with a few insider tips. These techniques will help you master this delicious candy clay and avoid common pitfalls.
- Choosing Your Chocolate: Real Chocolate vs. Candy Melts:
- For Real Chocolate: If opting for real chocolate (instead of candy melts), the general ratio is 1 pound of good quality baking chocolate (like Ghirardelli or Callebaut) to ½ cup of light corn syrup. However, different brands and types of chocolate have varying fat contents, which directly affects the ratio. Dark chocolate typically has less fat and requires slightly less corn syrup, while milk and white chocolate (which contain more milk solids and sugar) may need a bit more. It might take some trial and error to find the perfect ratio for your preferred chocolate brand. Always melt chocolate slowly and gently.
- For Candy Melts: Stick to the recipe’s given ratio for Wilton’s or similar candy melt brands. Their consistent composition makes them very reliable.
- Do Not Over-Knead or Over-Mix: This is perhaps the most crucial rule! When you first add corn syrup to melted chocolate, mix it *just* until it comes together and forms a cohesive mass. Over-mixing or over-kneading (especially when it’s warm) can cause the cocoa butter to separate from the chocolate, resulting in a greasy, oily, and crumbly mess that’s almost impossible to work with. If this happens, try letting it rest, then gently re-kneading it once cool, but prevention is best.
- Troubleshooting Crumbly Modeling Chocolate: If your mixture is too crumbly and falls apart easily, it likely needs a tiny bit more moisture or warmth.
- Reheat Gently: Place the crumbly mixture in a microwave-safe bowl and heat in 5-10 second bursts, just until it slightly softens.
- Add More Corn Syrup: Add a very small amount (e.g., ½ teaspoon at a time) of light corn syrup and gently knead it in until the crumbs come together into a smooth, play-doh-like consistency. Be cautious not to add too much.
- Troubleshooting Sticky or Too-Soft Modeling Chocolate: If your modeling chocolate is too soft or sticky to work with, it means you might have added too much corn syrup or it’s too warm.
- Chill in the Fridge: Place the mixture in the refrigerator for 10-20 minutes to allow it to firm up. Remove and test its consistency.
- Adjust Next Time: For future batches, reduce the amount of corn syrup slightly.
- Adding Color to White Modeling Chocolate: To color white modeling chocolate, always use oil-based food colors. Liquid or gel food colorings that are water-based will cause the chocolate to seize and become unusable, as chocolate and water do not mix well. Start with a small amount of color and gradually add more until you achieve your desired shade.
- Making Larger Batches: To make a bigger batch, simply double or triple all the ingredients proportionally. The technique remains the same, but you might need a larger bowl and a bit more time for the initial melting.
- Covering a Cake with Modeling Chocolate: Yes, you can absolutely cover an entire cake with modeling chocolate!
- Preparation: First, ensure your cake is smoothly iced with a stable frosting like American Buttercream Frosting and chilled. This provides a clean, firm surface for the modeling chocolate to adhere to.
- Rolling Out: Roll out your modeling chocolate on a surface dusted with cocoa powder (for brown/dark chocolate) or powdered sugar (for white/colored modeling chocolate) to prevent sticking. Roll it to an even thickness, typically around ⅛ to ¼ inch.
- Applying: For smaller cakes, you can carefully lift the rolled modeling chocolate and drape it over the entire cake, smoothing it down with the warmth of your hands or a fondant smoother. Trim off any excess with a sharp knife or pizza cutter.
- Paneling for Larger Cakes: For larger or multi-tiered cakes, applying modeling chocolate in panels is often recommended. Roll out rectangular sections and apply them to the sides of the cake first, then a circular piece for the top. Use your fingers to seamlessly blend the seams. This method reduces the risk of tearing and makes handling large amounts of modeling chocolate easier.
- The Importance of an Overnight Set: Do not rush the setting process. Allowing the mixture to set overnight (or for at least 8-12 hours) at room temperature is crucial. This resting period allows the chocolate and corn syrup to fully integrate and stabilize, resulting in the best possible texture – not too soft, not too firm, but perfectly pliable for decorating.
- Working in a Cool Environment: Modeling chocolate is sensitive to heat. If your hands are very warm or your kitchen is hot, it can become sticky and difficult to work with. Try working in a cooler room, or chill your hands under cold water occasionally. You can also place the modeling chocolate back in the fridge for a few minutes if it gets too soft.
- Dusting Surface: Always dust your work surface and rolling pin lightly. For dark modeling chocolate, cocoa powder works wonderfully and blends in invisibly. For lighter colors, use powdered sugar or cornstarch (corn flour).
- Cleaning Tools: Modeling chocolate can be sticky. Use warm, soapy water to clean your tools promptly after use.
Storing Your Homemade Modeling Chocolate
Proper storage is key to keeping your modeling chocolate fresh and workable for future projects.
- At Room Temperature: For up to 2 weeks, store modeling chocolate tightly wrapped in several layers of plastic wrap, then placed inside a sealed Ziploc bag or airtight container. Keep it in a cool, dry place away from direct sunlight and humidity.
- In the Refrigerator: For longer storage, refrigerate it for up to 1 month. Again, wrap it tightly in plastic wrap and store it in an airtight container or Ziploc bag. When ready to use, allow it to come to room temperature, then gently knead it with your hands. The warmth from your hands will quickly make it soft and pliable again.
- In the Freezer: For extended shelf life, modeling chocolate can be frozen for up to 3 months. Ensure it’s very well wrapped in plastic wrap and placed in a freezer-safe airtight bag or container to prevent freezer burn. Thaw it completely to room temperature before kneading and using. Just like with refrigeration, kneading will restore its soft, workable texture.
By following these storage guidelines, you can always have a batch of delicious modeling chocolate ready for your next creative endeavor!
More Baking & Decorating Tips
Enhance your baking skills with these other helpful guides:
- How to Make Homemade Sprinkles
- How to Make Filled Cupcakes (Stuffed Cupcakes)
- How to Make Brown Sugar
- How to Soften Brown Sugar
- Homemade Sugar Cubes (2 Ingredients)
Recipe
Easy Modeling Chocolate (Candy Clay)
Abeer Rizvi
Pin Recipe
Want to Save This Recipe?
Enter your email & I’ll send it to your inbox. Plus, get great new recipes from me every week!
By submitting this form, you consent to receive emails from CakeWhiz
Ingredients
- 12 oz. Wilton’s chocolate candy melts
- ¼ cup Light corn syrup
Instructions
-
Add candy melts in a microwave-safe bowl and start heating and mixing at 15 second increments.
-
Continue doing this until chocolate is completely melted.
-
Now, pour corn syrup and mix until it’s just combined. Please do not over-mix since it will start to break down and become very oily.
-
When it looks like a wet and messy blob, pour it out on a sheet of saran wrap and and flatten it with your hands.
-
Let it come to room temperature and then, wrap it completely in saran wrap.
-
Keep it at room temperature overnight.
-
Your candy clay is ready to be used the next day.
-
It will be hard and can be easily softened by kneading for a few seconds.The warmth of your hands and fingers will make it soft.
-
If candy clay is too soft, chill in fridge for a few minutes to make it firm again.
-
Roll it out on a surface that’s been sprinkled with cocoa powder (for brown modeling chocolate) or powdered sugar (for other colors of modeling chocolate).
-
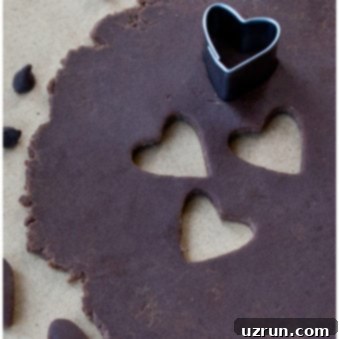
Cut shapes with cutters and decorate your cakes and cupcakes. Enjoy!
Notes
- Read all my tips above for the best results.
- Leftovers can be stored in a sealed bag in the fridge for up to 1 month or at room temperature for up to 2 weeks.
Nutrition
An automated tool is used to calculate the nutritional information. As such, I cannot guarantee the accuracy of the nutritional information provided for any recipe on this site.
With this comprehensive guide, you’re now equipped to create stunning, edible masterpieces with homemade modeling chocolate. Its versatility, delicious flavor, and forgiving nature make it a joy to work with, offering endless possibilities for your cake decorating adventures. Happy baking and decorating!
