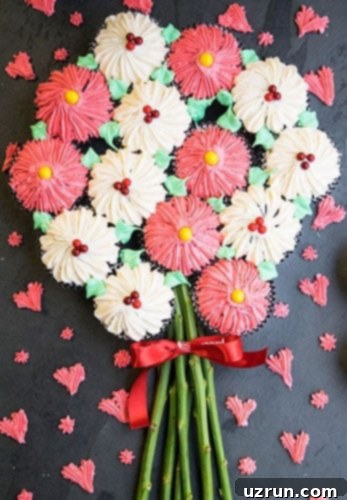
Master the Art of Edible Gifting: Your Ultimate Guide to Creating a Stunning Pull-Apart Flower Cupcake Bouquet
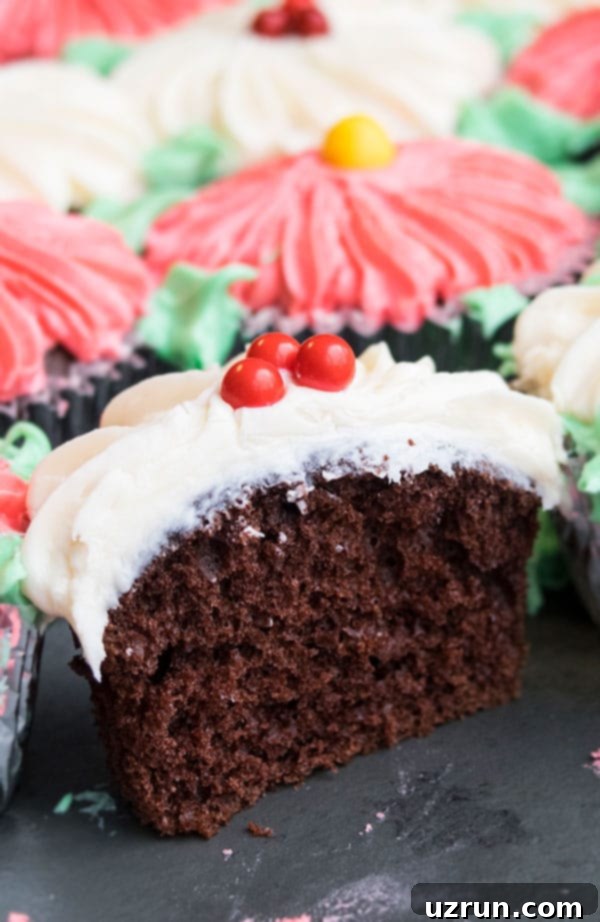
Discover the delightful world of edible floral arrangements with our comprehensive guide on how to create an easy and breathtaking cupcake bouquet. Using simple frosting techniques and delicious chocolate cupcakes, you can assemble a magnificent pull-apart flower cupcake cake that is perfect for any special occasion. Whether you’re celebrating Mother’s Day, Valentine’s Day, a birthday, or a bridal shower, this edible masterpiece is sure to impress and enchant your guests. It’s not just a dessert; it’s a beautiful centerpiece and a memorable gift all rolled into one.
*Thank you Pillsbury™ for sponsoring today’s post so that I can share this tutorial with all of you. As always, all opinions and photos are my own.*
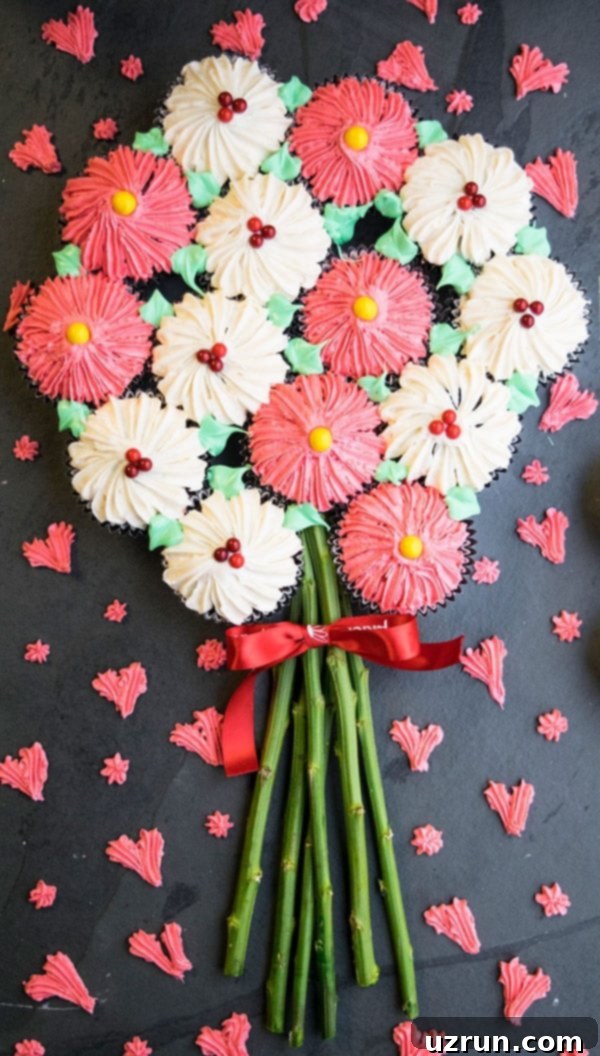
The concept behind this edible bouquet is wonderfully simple, yet the results are incredibly impactful. It’s similar to other popular pull-apart cupcake designs like Football Cupcakes Cake (Football Party) or Watermelon Cupcake (Pull Apart Cupcakes). While I’ve seen many elaborate versions presented in baskets, boxes, or even elegant vases, I aimed to create a design that offers maximum visual appeal with minimal complexity. This tutorial focuses on a method that’s both stunning and remarkably easy, making it accessible for bakers of all skill levels. The beauty of a pull-apart cupcake cake lies in its versatility. You can effortlessly match the colors and themes of any celebration, transforming a simple dessert into a personalized culinary artwork. Imagine crafting pastel bouquets for a baby shower, elegant white and gold arrangements for a wedding, or vibrant, cheerful flowers for a birthday party. The creative possibilities are truly boundless! This project not only serves as a delicious treat but also doubles as an unforgettable centerpiece that will undoubtedly leave your guests in awe.
Creating an edible cupcake bouquet is a fantastic way to combine two beloved elements: the charm of a flower bouquet and the deliciousness of individual cupcakes. Unlike traditional cakes, pull-apart cupcakes eliminate the need for cutting, making serving a breeze and minimizing mess. Each guest can simply “pull apart” their desired flower, making it a fun and interactive dessert experience. This detailed guide will walk you through every step, from baking your cupcakes to expertly piping your buttercream flowers and assembling your gorgeous, edible arrangement.
[feast_advanced_jump_to]
How to Make an Easy Cupcake Bouquet Without Styrofoam?
Crafting a beautiful cupcake bouquet doesn’t require complex tools or Styrofoam. Our method focuses on simplicity and stunning results. Here’s a quick overview of the steps involved in making this impressive dessert:
- Bake Cupcakes: Begin by baking your chosen flavor of cupcakes. Chocolate cupcakes provide a wonderful base for vibrant frosting colors. Ensure they cool down completely before you start decorating. This crucial step prevents your carefully piped frosting from melting.
- Pipe Petals: Prepare your buttercream frosting in various colors. Using a star or petal tip, pipe delicate petals all around the top of each cooled cupcake, creating a beautiful floral pattern. Don’t worry about perfection; rustic charm adds to the appeal!
- Add Flower Centers: Enhance your buttercream flowers by adding edible pearls, small round candies, or even a different colored dot of frosting to the center of each cupcake flower. This step adds a professional touch and a pop of contrast.
- Arrange the Cupcakes: On a sturdy cake board or serving platter, carefully arrange your decorated cupcakes in a tight, circular bouquet formation. The goal is to make them look like a cohesive floral arrangement.
- Tie the Stems (Optional): To mimic a real bouquet, you can tie real, food-safe flower stems with a ribbon and place them just below the cupcake cluster. Alternatively, you can pipe green frosting to create edible “stems.”
- Add Green Leaves: Fill any empty spaces between the cupcakes with green frosting piped into leaf shapes. This not only enhances the floral aesthetic but also helps to stabilize the arrangement and hide any gaps. Enjoy your magnificent creation!
How Do You Secure Cupcakes in a Bouquet?
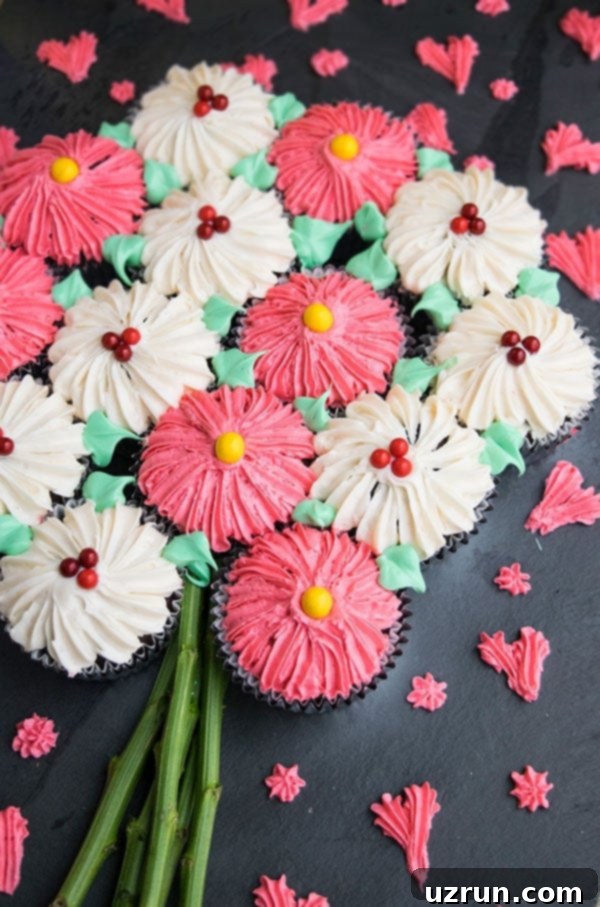
Securing your cupcakes properly is key to maintaining the integrity and beautiful shape of your edible bouquet. Without Styrofoam, there are a couple of effective methods to keep your cupcakes firmly in place, ensuring they don’t shift during assembly or transport. You can use double-sided tape on the bottom of each cupcake wrapper, firmly pressing them onto a sturdy cake board or serving platter. Another excellent and edible method is to use a dollop of frosting on the bottom of each cupcake. The frosting acts as an adhesive, securing the cupcake to the board. For best results, use a thick, stiff frosting for this purpose. Arrange them snugly together in your desired pattern, allowing the frosting to set slightly before moving the entire arrangement.
For an extra layer of stability, especially when arranging cupcakes on a larger board, you can also pipe a thin layer of frosting onto the board itself before placing the cupcakes. This creates a sticky foundation for the entire bouquet. When creating a multi-layered or larger bouquet, consider using a few toothpicks inserted into the base board and then into the bottom of the cupcakes, but be sure to inform your guests about their presence!
Creative Variations for Your Cupcake Flower Bouquet
The beauty of a cupcake bouquet lies in its adaptability. You can customize nearly every aspect to match your event, personal style, or the recipient’s preferences. Here are some fantastic variations to inspire your next edible floral masterpiece:
- Create Diverse Flower Types: Don’t limit yourself to a single flower design! Explore different piping tips to create a garden of varieties. Our guide on How to Decorate Cupcakes offers excellent ideas using Wilton’s Tip 104 (for ruffles and petals) and Tip 1M (for classic swirls and roses). You could also pipe Buttercream Poinsettia Cupcakes; simply change the icing color from traditional red to pink, yellow, or purple to transform them into other beautiful blooms. For truly breathtaking, intricate flowers with minimal effort, master the Russian Piping Tips Tutorial. These unique tips allow you to create full, multi-petal flowers with a single squeeze.
- Design a Classic Rose Bouquet: For an elegant and timeless look, a rose cupcake bouquet is always a winner. Utilize Wilton’s large star tip (Tip 1M), which is incredibly versatile. To pipe a rose, start in the very center of the cupcake, holding the piping bag at a 90-degree angle. Apply steady pressure and pipe a small swirl. Then, continue piping in an outward spiral around this center, creating a beautiful, full rose effect. Repeat for all cupcakes, using shades of pink, red, white, or even ombre colors for a sophisticated display.
- Incorporate Mini Cupcakes: Add visual interest and variety to your bouquet by using a combination of regular-sized and mini cupcakes. Mini cupcakes can serve as smaller accent flowers or fill in gaps beautifully, creating a more intricate and dense floral arrangement. This also allows for different flavor profiles in smaller bites.
- Utilize a Cupcake Bouquet Box or Basket: If you prefer a more traditional “bouquet” presentation or need to transport your creation, a box or basket method is ideal. This is assembled slightly differently:
- Tightly fill a decorative box or basket with a piece of Styrofoam or floral foam.
- Push sturdy wooden skewers or toothpicks into the foam, ensuring they are secure.
- Carefully push the cupcakes onto the toothpicks to secure them firmly.
- Fill any visible gaps between the cupcakes and around the edges of the arrangement with green tissue paper, cellophane, or even piped green frosting leaves to mimic foliage.
- Finally, pipe your desired flowers on top of each cupcake. This method provides excellent stability and makes a wonderful gift presentation.
- Pipe Edible Green Stems: Instead of using actual flower stems, you can pipe edible green stems directly onto your cake board or below the cupcake cluster. Use green buttercream with a round tip (like Wilton 1A or 12) to create thick, natural-looking stems that lead from your cupcake flowers down to the base, completing the illusion of a fresh bouquet.
- Experiment with Fondant Flowers: For a more sculpted and sophisticated look, consider using fondant to create your flowers. Fondant flowers offer clean lines and can be made in advance, allowing you to focus on assembly later. Our detailed How to Make Fondant Flowers tutorial provides excellent guidance for crafting beautiful, edible blooms that can be placed on top of frosted cupcakes.
- Explore Different Cupcake Flavors: The base cupcake flavor can greatly enhance the overall experience. While chocolate is a classic, don’t hesitate to try others. Consider light and fruity Fresh Strawberry Cupcakes {From Scratch}, decadent Best Red Velvet Cupcakes {With Cream Cheese Frosting}, or delightful Chocolate Chip Cupcakes (With Mint Frosting). The flavor possibilities are endless and can be chosen to complement your frosting colors.
- Vary Frosting Flavors and Colors: Beyond the visual appeal, different frosting flavors can add another layer of deliciousness. Classic White Chocolate Buttercream Frosting or a rich Best Cream Cheese Frosting make excellent bases for coloring. For a lighter option, try Homemade Stabilized Whipped Cream. These white frostings can be tinted with gel food coloring to create any vibrant hue imaginable.
- Customize with Themed Colors: The color palette of your flowers should align with your party or event theme. For Valentine’s Day, use romantic pinks and reds. A boy baby shower could feature lovely baby blue frosting, while a wedding shower might call for elegant all-white or ivory flowers with subtle metallic accents. The right colors instantly elevate your bouquet to a custom-made masterpiece.
Essential Tips and Techniques for a Perfect Cupcake Bouquet
Achieving a flawless and beautiful cupcake bouquet requires attention to a few key details. These tips and techniques will help ensure your edible floral arrangement looks professional and tastes amazing:
- Ensure Cupcakes Are Completely Cool Before Piping: This is perhaps the most critical step. Warm cupcakes will cause your buttercream frosting to melt, slide, and lose its shape, resulting in messy and unappealing flowers. Always allow cupcakes to cool completely, preferably in the refrigerator for a few minutes if time permits, before you begin decorating.
- Alternative Piping Bag and Tips: If you don’t have Pillsbury’s convenient pre-filled piping bags (which are fantastic!), you can easily create these cupcakes using standard decorating equipment. A star tip (such as Wilton Tip 21) is excellent for creating classic starburst flowers or swirls, and a leaf tip (like Wilton Tip 366) is perfect for piping realistic green leaves to fill in your bouquet.
- Achieve Firm Icing Consistency: The consistency of your frosting is paramount for piping defined and stable flower petals. Your buttercream should be firm enough to hold its shape when piped, but still smooth enough to flow easily through the tip. If your frosting is too soft, the petals will droop. If it’s too stiff, it will be hard to pipe. Adjust with a tiny bit of milk or powdered sugar as needed.
- Chill the Piping Bag for Best Results: If your hands are warm or your kitchen is humid, the heat can soften the frosting in your piping bag. To prevent this, chill your filled piping bag in the fridge for about 15-20 minutes before you start piping. This will help the frosting maintain its ideal consistency and result in sharper, more defined petals.
- Utilize Different Decorating Tips for Variety: Don’t stick to just one tip! Investing in a small set of different decorating tips will allow you to create a wide array of flower types and textures within your bouquet. Experiment with open star, closed star, petal, and even round tips to give your arrangement depth and visual interest.
- Opt for Gel Coloring Over Liquid Food Coloring: When coloring your frosting, always use gel food coloring. Liquid food coloring can significantly thin out the consistency of your buttercream, making it difficult to pipe intricate designs that hold their shape. Gel colors are highly concentrated, allowing you to achieve vibrant hues with only a small amount, without altering the frosting’s texture.
- Use Safe and Edible Stems (if using real ones): If you choose to incorporate real flower stems into your bouquet for a natural look, ensure they come from non-toxic, food-safe plants. Always wrap the ends of real stems in floral tape or plastic wrap to prevent them from directly touching the edible cupcakes, protecting everyone from potential toxins or contaminants.
- Employ a Thick, Sturdy Cake Board: The foundation of your cupcake bouquet is crucial. A thick, sturdy cake board or a reinforced serving platter will prevent bending and wobbling, which could otherwise disturb the delicate arrangement of your cupcakes, especially during transport. A wobbly base can quickly ruin your hard work.
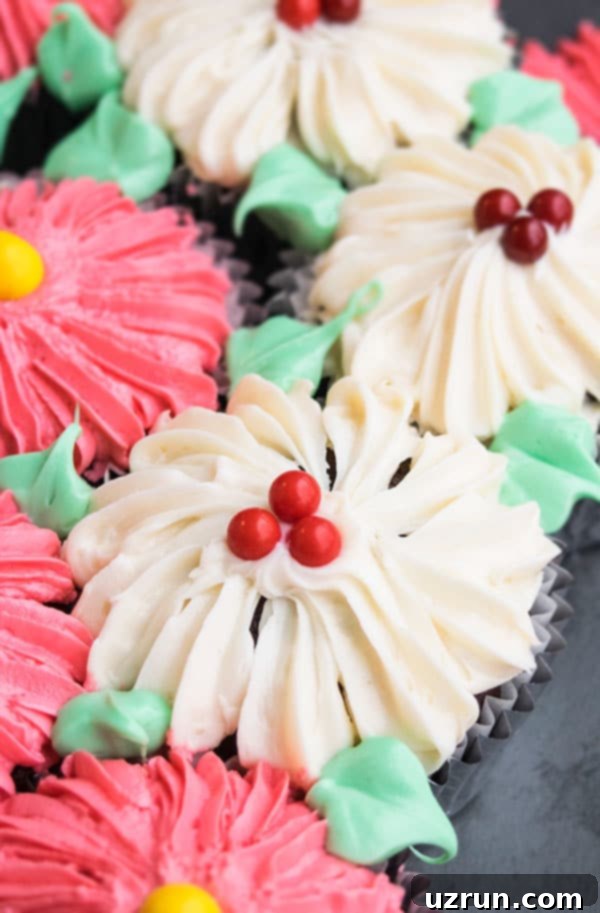
- Effortlessly Fill Gaps Between Cupcakes: To achieve a lush, full bouquet look, fill any visible spaces between the cupcakes. You can pipe green leaves using a leaf tip and green frosting, creating a continuous bed of foliage. Alternatively, strategically tuck small pieces of green tissue paper or even leftover cupcake pieces (if they are small enough) into these gaps for a seamless finish.
- Mastering Petal Piping Technique: For basic flowers, hold the piping bag at a 45-degree angle along the edge of the cupcake. Gently squeeze the bag to allow the icing to emerge, and pipe in a curving motion, working inwards towards the center. Release pressure as you pull away. Continue this process, overlapping petals slightly, all around the cupcake to form a beautiful, full flower. Practice on parchment paper first to get a feel for the pressure and movement.
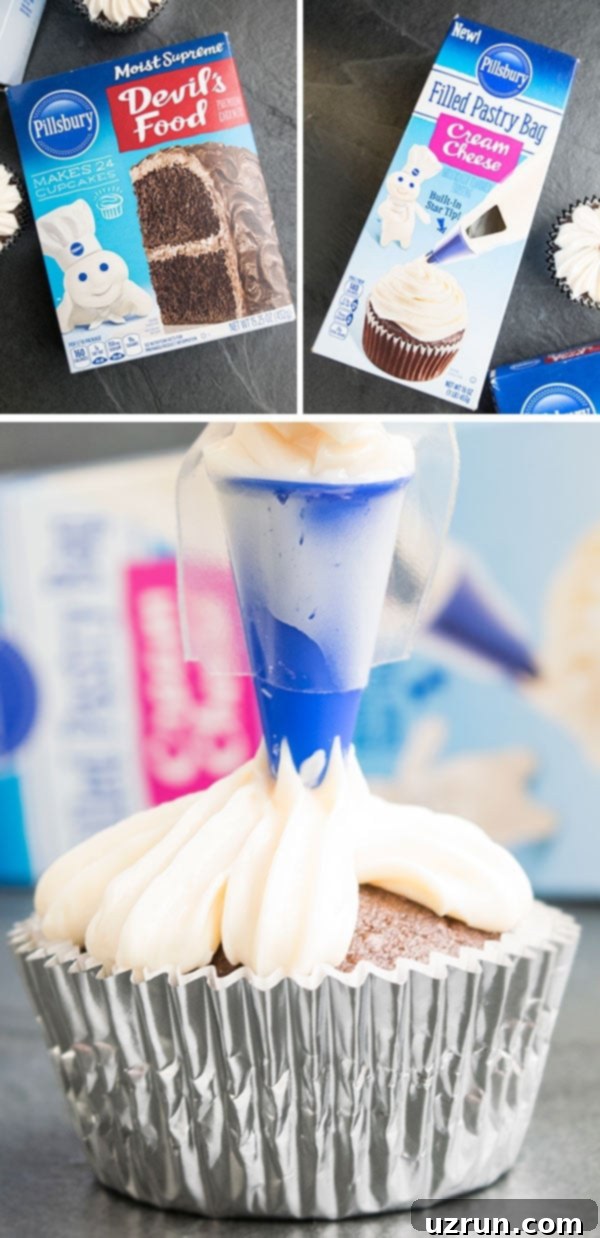
For this delightful Operation Celebration project, I relied on the exceptional quality and convenience of Pillsbury products, specifically their Devil’s Food Cake Mix and their innovative Pillsbury Filled Pastry Bag in Cream Cheese flavor. These products significantly streamlined the entire process, making it incredibly easy and enjoyable. I’ve been absolutely captivated by these pre-filled pastry bags for months now, and their ready-to-use nature is a true game-changer. Each piping bag comes with a built-in star tip, which is perfectly designed for creating stunning frosting flowers and beautiful swirls on cupcakes, just like the ones you see in this bouquet. What’s more, these bags are completely disposable, transforming cleanup into an absolute breeze and leaving you with virtually no mess. Pillsbury’s commitment to convenience and quality truly shines through, allowing even novice bakers to achieve professional-looking results with ease.
Storage Instructions for Your Cupcake Bouquet
Proper storage is essential to keep your cupcake bouquet fresh and delicious for as long as possible. Here are guidelines for refrigerating, freezing, and storing at room temperature:
- Refrigerate: If you have leftover decorated cupcakes or need to prepare your bouquet in advance, store it in a sealed, airtight container. This will keep the cupcakes fresh and moist for up to 3 days in the refrigerator. Ensure the container is large enough so that the frosting doesn’t get squashed.
- Freeze: For longer storage, it’s best to freeze unfrosted cupcakes and colored icing separately. Bake your cupcakes and let them cool completely, then place them in an airtight freezer-safe bag or container for up to 1 month. Similarly, store your colored frosting in separate airtight containers. When you’re ready to enjoy this delightful dessert, thaw the cupcakes and frosting to room temperature. Once thawed, you can assemble and decorate your bouquet as per the instructions, ensuring a fresh taste and perfect presentation.
- Room Temperature: While delicious, cupcakes with buttercream frosting are best kept cool. These cupcakes can stay out on the counter, away from direct sunlight or heat, for approximately 1 hour. Any longer and the frosting may start to soften, especially if your home is warm, potentially compromising the structural integrity and appearance of your beautiful flower petals.
Explore More Decorated Cupcake Ideas
If you’ve enjoyed creating this flower cupcake bouquet, you’ll love exploring other creative cupcake decorating projects. Here are some of our favorite decorated cupcake tutorials to spark your imagination:
- Bee Cupcakes (Bumblebee or Honey Bee)
- Dinosaur Cupcakes (Fondant Topper)
- Ladybug Cupcakes
- Easy Fondant Daisies (Daisy Cupcakes)
- Easy Flower Cupcakes (Fondant Pansy)
Recipe Card
Easy Flower Cupcake Bouquet
Abeer Rizvi
Pin Recipe
Want to Save This Recipe?
Enter your email & I’ll send it to your inbox. Plus, get great new recipes from me every week!
By submitting this form, you consent to receive emails from CakeWhiz
Ingredients
- 14 Chocolate cupcakes Or use Devil’s food cake mix to bake
- 4 cups American buttercream frosting In white, pink, and green colors
- 20-25 Edible round candies or edible pearls for flower centers
- 5 Food-safe stems from a real flower bouquet (optional, or use piped frosting)
Instructions
-
Bake your chosen cupcakes and ensure they cool down completely. This is crucial for successful frosting application.
-
Prepare your colored buttercream. Hold the piping bag at a 45-degree angle along the edge of each cooled cupcake.
-
Gently squeeze the bag, allowing the icing to emerge, and pipe inwards towards the center of the cupcake.
-
Continue piping petals, slightly overlapping them, all around the cupcake until a full flower shape is formed.
-
Carefully place a few edible pearls or round candies in the center of each piped flower to complete the look.
-
On a sturdy cake board or serving platter, arrange the decorated cupcakes closely together in a round, bouquet-like cluster formation. Use a dab of frosting or double-sided tape on the bottom of each cupcake to secure it to the board.
-
To create a fuller bouquet, cut up some leftover cupcakes into smaller pieces and strategically place them in any gaps between the main cupcakes in your arrangement.
-
Fill a separate piping bag with green icing and attach a leaf tip (such as Wilton Tip 352). Pipe green leaves to fill these gaps, enhancing the floral look and further stabilizing the bouquet.
-
For added realism, tie food-safe flower stems with a ribbon and carefully place them below the cupcake cluster. Alternatively, use green frosting with a round tip to pipe edible stems directly onto the board under your flower arrangement. Enjoy your magnificent creation!
Video Tutorial
Notes
- In the accompanying video tutorial, I opted to pipe green stems instead of using real stems, demonstrating both ideas are effective and beautiful.
- For additional guidance and creative ideas, please refer to all the detailed tips provided in the sections above this recipe card.
- Any leftover decorated cupcakes can be stored in a sealed, airtight container in the refrigerator for up to 3 days to maintain freshness.
- If you do not have Pillsbury’s convenient pre-filled piping bags, you can achieve similar beautiful results using standard decorating equipment, specifically a star tip (e.g., Wilton Tip 21) for flowers and a leaf tip (e.g., Wilton Tip 366) for the green foliage.
Nutrition Information
An automated tool is used to calculate the nutritional information. As such, I cannot guarantee the accuracy of the nutritional information provided for any recipe on this site.
