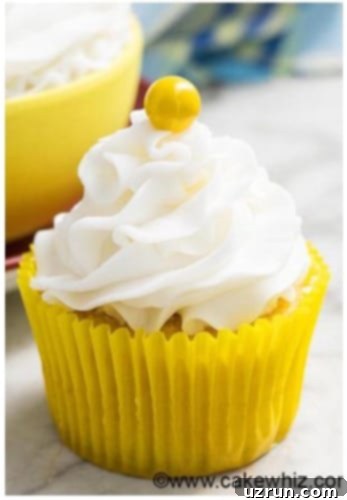
Classic American Buttercream Frosting: The Ultimate Easy 4-Ingredient Recipe for Perfect Cakes & Cupcakes
Welcome to the ultimate guide for making the most reliable, delicious, and easy-to-master **American buttercream frosting recipe**. This classic frosting is a staple in homes and bakeries across the United States and Canada, cherished for its simplicity and versatility. Requiring just **four essential ingredients**, you’ll be amazed at how quickly you can whip up a batch that’s perfect for all your baking needs. Whether you’re a seasoned baker or just starting, this recipe ensures your frosting is firm enough to hold intricate shapes for dazzling cake decorations and delicate cupcake swirls, yet remains incredibly soft and fluffy to eat.
This beloved American buttercream is crafted from common pantry items: **butter, powdered sugar, vanilla extract, and milk**. It’s the kind of frosting many of us remember from childhood birthday cakes and festive holiday treats – rich, sweet, and utterly satisfying. Its straightforward preparation makes it an ideal choice for last-minute baking projects or when you need a dependable frosting that won’t let you down. Get ready to elevate your desserts with this timeless, foolproof recipe.
Why This is the Best Buttercream Frosting Recipe You’ll Ever Need!
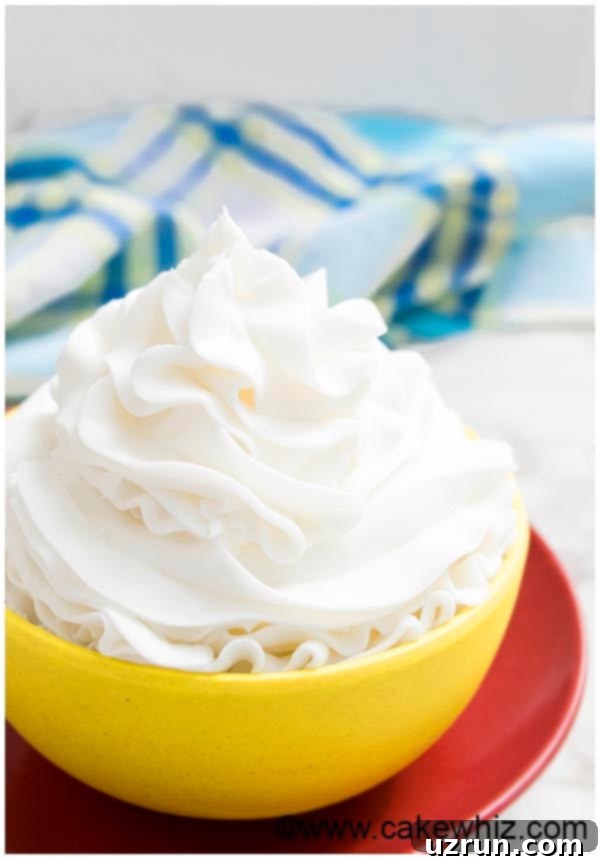
What sets this particular recipe apart is its exceptional balance of characteristics that every baker desires. This buttercream isn’t just easy; it’s meticulously designed to be **FIRMLY structured yet delightfully FLUFFY**. This unique consistency is crucial for elaborate cake decorating, making it a dream for creating smooth finishes on elegant wedding cakes, sharp edges, and intricate piping details. From delicate rosettes to bold borders, this frosting maintains its form beautifully, allowing your creative visions to come to life without the worry of collapse or smudging.
Beyond its structural integrity, this buttercream boasts an incredibly **soft texture** that melts in your mouth, leaving a pleasant sweetness rather than a greasy residue. Its inherent sweetness provides a perfect counterpoint to richer, less sweet bases, such as decadent chocolate cupcakes or a moist red velvet cake, creating a harmonious flavor profile that pleases every palate. Furthermore, its smooth consistency makes it incredibly **easy to PIPE** with various nozzles, effortlessly **easy to color** with food gels for any theme, and, perhaps most importantly, incredibly **EASY to make** for bakers of all skill levels. You won’t find a more forgiving, versatile, or gratifying frosting to work with!
Explore Other Delightful Frosting Recipes
While American buttercream holds a special place in the heart of many bakers, the world of frostings is vast and exciting. I’ve curated an extensive collection of frosting recipes, perfect for any occasion, from lively birthday parties to elegant weddings and festive holidays. Diversify your baking repertoire and discover new favorites with these fantastic alternatives:
- Easy Chocolate Buttercream Frosting Recipe
- 7 (Seven) Minute Frosting
- Cooked Flour Buttercream (Ermine Frosting)
- Orange Buttercream Frosting
- Best Cream Cheese Buttercream Frosting
- Strawberry Buttercream Frosting
- Marshmallow Buttercream Frosting
- Maraschino Cherry Frosting
- Blackberry Buttercream Frosting
- White Chocolate Buttercream Frosting
- Healthy Coconut Cream Chocolate Frosting
- Mango Frosting
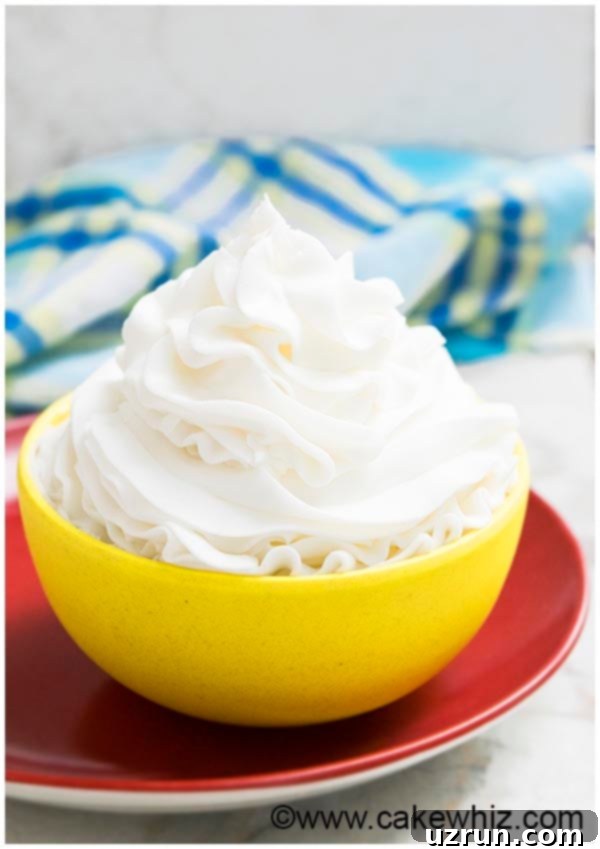
How to Make Classic American Buttercream: A Quick Overview
Creating this delightful buttercream is surprisingly straightforward, making it an excellent choice for bakers looking for speed and simplicity without compromising on quality. Here’s a brief outline of the process, with more detailed step-by-step instructions provided in the comprehensive recipe card below:
- **Cream the Butter:** Begin by placing softened unsalted butter into a clean mixing bowl. Beat it on medium-high speed using a stand mixer with a paddle attachment (or a hand mixer) until it transforms into a light, pale, and incredibly fluffy consistency. This initial creaming step is absolutely crucial for incorporating air and achieving that signature airy texture in your final frosting.
- **Gradually Add Powdered Sugar & Flavor:** With the mixer still running on low speed, slowly begin to incorporate the sifted powdered sugar, adding it about half a cup at a time. This gradual addition helps prevent a sudden cloud of sugar in your kitchen and ensures smooth, lump-free incorporation. Along with the sugar, gradually pour in your chosen liquid (milk or heavy cream) and the vanilla extract, ensuring each addition is fully combined before adding the next.
- **Mix to Perfection:** Once all the powdered sugar and liquid have been added, increase the mixer speed to medium-high. Continue beating for another 3-5 minutes, or until the frosting is completely smooth, creamy, and free of any remaining sugar crystals. Remember to scrape down the sides and bottom of the bowl frequently with a spatula to ensure all ingredients are thoroughly combined and no pockets of unmixed butter or sugar remain.
With these simple steps, you’ll have a perfect batch of stable, delicious American buttercream ready for all your baking creations!
What Exactly is American Buttercream Frosting?
American buttercream frosting, often affectionately known as “ABC,” is perhaps the most widely recognized and simplest frosting to prepare, particularly prevalent in North American baking. It’s a sweet, fluffy, and remarkably stable frosting made by creaming together softened butter (or sometimes a blend of butter and shortening), finely milled powdered sugar (also known as confectioners’ sugar or icing sugar), a small amount of liquid (like milk, cream, or water), and a flavoring agent (most commonly vanilla extract, but extracts of almond, lemon, or other flavors can also be used). Unlike its more complex meringue-based counterparts, American buttercream doesn’t involve cooking eggs or intricate temperature control, making it incredibly accessible and forgiving for home bakers of all skill levels.
This type of buttercream is celebrated for its rich, buttery taste and its exceptional ability to hold its shape. This makes it the absolute go-to choice for piping elaborate decorations on cakes, cupcakes, and cookies, as well as for creating smooth, clean finishes. Its robust nature means it “crusts” slightly when exposed to air, forming a delicate outer layer that helps protect decorations, prevents smudging, and provides a stable surface for stacking layer cakes or transporting decorated treats. You might hear it referred to by several names depending on regional preferences or specific characteristics, including “Buttercream,” “American Buttercream,” “AMBC,” “American Frosting,” or “Crusting Buttercream,” all referring to this same beloved, easy-to-make confection that has adorned countless celebration desserts.
Butter vs. Shortening: Should You Use Shortening in Homemade Buttercream Frosting?
Traditionally, American buttercream was a pure butter affair, relying solely on the rich flavor and smooth texture of butter combined with powdered sugar. However, modern variations have introduced the strategic use of shortening, leading to two main types: American buttercream with shortening (often a brand like Crisco) and American buttercream without shortening. Both approaches have their distinct merits, and the choice largely depends on your desired outcome, the specific application of your frosting, and the environmental conditions you’re baking in.
- All-Butter Buttercream: This is the classic and most flavorful version, offering a deep, creamy, and undeniably rich buttery taste. It’s unmatched for its melt-in-your-mouth quality. However, it tends to be softer and can become quite delicate, potentially melting or losing its piped shape in very warm or humid temperatures. Its natural pale yellow hue is characteristic and often embraced for a rustic or traditional look.
- Shortening-Only Buttercream: Using only shortening (like vegetable shortening) results in a pure white frosting that is exceptionally stable and holds its shape incredibly well, even in the most challenging hot and humid conditions. This makes it a popular choice for bakers in tropical climates or for elaborate outdoor events where stability is paramount. The primary trade-off is a less rich flavor, as shortening is flavorless and lacks the nuanced taste that butter provides.
- Butter and Shortening Combination: Many experienced bakers and professionals opt for a blend of butter and shortening. This approach aims to achieve the best of both worlds: the delicious, creamy flavor of butter combined with the enhanced stability, heat resistance, and whiteness provided by shortening. The shortening helps the buttercream resist melting, sagging, and wilting, making it ideal for intricate piping, multi-tiered cakes, or desserts that need to travel. A common starting ratio might be 50/50, but it can be adjusted based on personal preference and desired firmness, offering a more robust structure without completely sacrificing the beloved buttery taste.
Ultimately, the decision to use shortening, butter, or a combination comes down to personal preference, the specific aesthetic and structural requirements of your dessert, and the climate you’re working in. For maximum flavor, stick with all butter. For ultimate stability and a pristine white finish, a blend or all shortening might be your best option.
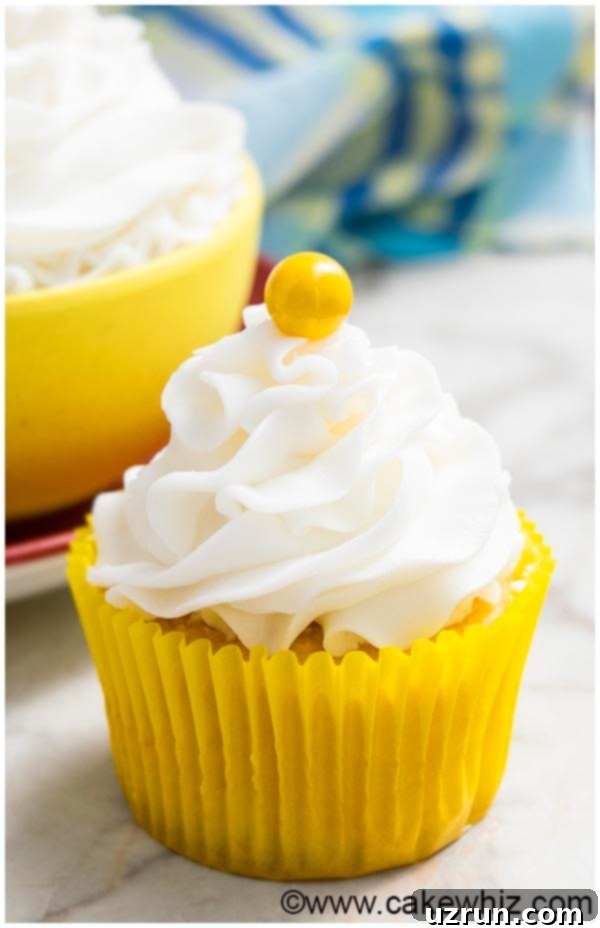
Coloring American Buttercream for Vibrant Desserts
Absolutely! One of the fantastic advantages and popular uses of American buttercream is how effortlessly it takes on color, allowing you to create stunning, vibrant, and personalized desserts for any occasion. To achieve the best and most consistent results, **gel food coloring is highly recommended** over liquid varieties. Here’s why you should reach for gel colors:
- **High Concentration:** Gel colors are far more concentrated and potent than traditional liquid food colorings. This means you need only a tiny amount – often just a small dab on a toothpick – to achieve rich, deep, and brilliant hues. Using less coloring agent prevents you from adding excess moisture to your frosting, which could otherwise compromise its texture.
- **Preserves Consistency:** Unlike liquid food coloring, which is primarily water-based and can thin out the consistency of your buttercream, gel colors are paste-like. They won’t significantly alter the texture or stability of your frosting, preserving its ability to be piped, spread, and decorated without becoming runny or losing its shape. This is vital for maintaining sharp details in your decorations.
- **Superior Vibrancy:** With gel colors, you can achieve brilliant and true-to-shade colors, from soft, delicate pastels to intensely bold and dramatic tones, all without diluting the delicious flavor or compromising the structural integrity of your frosting. The colors also tend to be more stable and less prone to fading over time.
When coloring your buttercream, always add gel a tiny bit at a time, mixing thoroughly after each addition until you reach your desired shade. Remember, the color often deepens slightly as it sits and develops, so it’s always a good practice to start with less and gradually add more if needed, rather than over-coloring from the start.
Achieving a Pure White American Buttercream: Tips and Tricks
The natural color of your American buttercream largely depends on the fat you choose as its base. If you’re using **shortening** (especially white vegetable shortening), your frosting will naturally be a beautiful, pristine white – a perfect canvas for any color scheme, particularly ideal for elegant wedding cakes or designs requiring crisp, unblemished white tones.
However, if you’re using **butter**, the frosting will typically have a very subtle pale yellow tint. This is due to the natural beta-carotene content in butterfat, which gives butter its characteristic color. This yellow hue is usually barely noticeable, especially if you’re adding other vibrant colors. But if a pristine, pure white is essential for your design, there are simple and effective solutions to achieve it:
- **White Gel Food Coloring:** The easiest and most effective way to neutralize the subtle yellow tint in butter-based buttercream is to add a few drops of **white gel food coloring**. This highly concentrated coloring agent works by introducing white pigment, brightening the frosting significantly without affecting its consistency. It effectively masks the yellow, giving you a purer, brighter white finish.
- **Clear Vanilla Extract:** While not directly contributing to whiteness, using clear vanilla extract instead of traditional brown vanilla extract (which can add a slight off-white tint) helps maintain the lightest possible base color for your frosting, ensuring your white gel coloring can work its magic more effectively.
- **A Hint of Purple Gel Coloring (Color Correction):** For a very slight yellow tint, some professional bakers utilize a minuscule amount of purple gel food coloring. Purple is directly opposite yellow on the color wheel and can help cancel out or neutralize yellow tones, making the frosting appear whiter to the eye. This method requires extreme caution, as adding too much purple will quickly turn your frosting into an undesirable lavender shade. Use a tiny toothpick dip and mix thoroughly, adding in extremely small increments.
By understanding these nuances and applying these clever tricks, you can confidently achieve the exact pristine white shade your baking projects demand, whether you’re working with an all-butter recipe or a butter-shortening blend.
Swiss Meringue Buttercream vs. American Buttercream: Understanding the Differences
While both are incredibly popular choices for frosting and decorating cakes, Swiss Meringue Buttercream (SMBC) and American Buttercream (ABC) are distinctly different in their preparation, fundamental ingredients, resulting texture, and overall taste profile. Knowing these key differences can significantly help you choose the best frosting for your specific baking needs and preferences:
-
**Preparation Method:**
- **American Buttercream (ABC):** This is a simple, no-cook “creaming” method. Softened butter is vigorously beaten with a large quantity of powdered sugar, a splash of liquid (milk/cream), and flavorings until it becomes light, fluffy, and voluminous. It’s renowned for its speed, ease, and accessibility.
- **Swiss Meringue Buttercream (SMBC):** This method is more involved and precise. Egg whites and granulated sugar are gently heated together over a double boiler (or in a heatproof bowl set over simmering water) until the sugar fully dissolves and the mixture is warm to the touch (typically around 160°F / 71°C). This heated mixture is then transferred to a stand mixer and whipped into a stiff, glossy, and perfectly stable meringue. Only once the meringue has cooled down to room temperature is softened butter gradually added and beaten until the mixture emulsifies and transforms into a remarkably silky, smooth, and luxurious buttercream. This process takes more time and attention to temperature.
-
**Sweetness Level:**
- **ABC:** Known for being quite sweet, sometimes intensely so, due to the high proportion of powdered sugar. The sweetness is a hallmark of this classic frosting.
- **SMBC:** Significantly less sweet than American buttercream. The granulated sugar is dissolved and incorporated into the egg whites differently, resulting in a frosting that is rich, buttery, and creamy but not cloyingly sweet, allowing other flavors (like the butter or added extracts) to truly shine through.
-
**Texture and Mouthfeel:**
- **ABC:** Tends to be denser and has a characteristic “crust” that forms when exposed to air. It has a robust structure for piping and a distinct, sugary mouthfeel.
- **SMBC:** Incredibly smooth, silky, light, and airy, almost cloud-like. It has a luxurious, melt-in-your-mouth quality that’s often described as less “sugary” and more “buttery.” It also holds its shape beautifully but offers a different, more refined mouthfeel than ABC.
-
**Stability and Heat Resistance:**
- **ABC:** Very stable for decorating and piping. However, it can be quite susceptible to melting and sagging in very warm or humid conditions, especially if made with all butter. Shortening can be added to increase its heat resistance.
- **SMBC:** Generally very stable and more resistant to moderate warmth than all-butter American buttercream, primarily due to the stabilized cooked egg whites. However, it can sometimes seize or curdle if temperatures are too extreme during the mixing process (e.g., if butter is too cold or meringue is too warm).
In summary, while American buttercream is celebrated for its ease, classic sweetness, and immediate gratification, Swiss meringue buttercream offers a more sophisticated, less sweet, and exceptionally smooth experience, albeit with a more complex and time-consuming preparation process. Your choice will depend on your desired flavor, texture, and the time you have available.
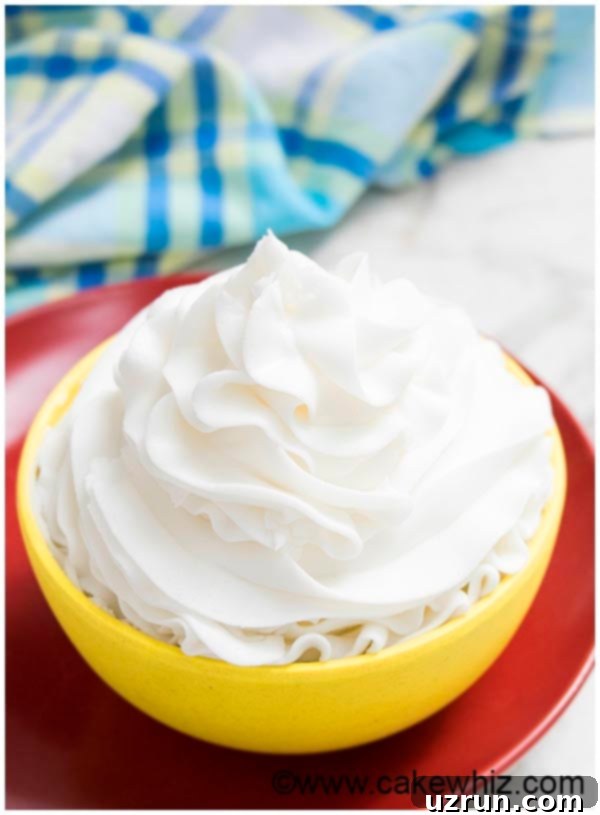
Troubleshooting: Why is My American Buttercream Gritty?
A smooth, velvety buttercream is the hallmark of a successful frosting, but sometimes, despite your best efforts, you might encounter an undesirable gritty texture. This is a common issue with American buttercream, but the good news is that it usually boils down to one of three main reasons, all of which are easily identifiable and fixable:
- **Insufficient Mixing or Undissolved Sugar:** The most frequent culprit behind gritty buttercream is simply not mixing the ingredients long enough or at a high enough speed. American buttercream relies heavily on the powdered sugar fully dissolving into the butter and liquid. If the mixture isn’t beaten adequately, the sugar crystals won’t have enough time or friction to properly incorporate and dissolve, leaving a noticeable grainy texture. **Solution:** Don’t be afraid to keep mixing! Continue beating the frosting on medium-high speed for several more minutes (up to 5-10 minutes if needed) after all ingredients are combined. The continuous friction from the mixer and the presence of liquid will gradually help dissolve the sugar crystals. Scrape down the sides of the bowl frequently to ensure even mixing.
- **Un-sifted Powdered Sugar with Lumps:** Powdered sugar, especially if it has been sitting in the pantry for a while or exposed to moisture, can easily clump together, forming small, hard lumps. These lumps are much harder to dissolve than individual sugar crystals and will remain intact, resulting in a distinctly gritty frosting. **Solution:** Always sift your powdered sugar before adding it to the butter mixture. This simple, preventative step breaks up any clumps and ensures a fine, even powder, providing a much smoother starting point for your buttercream.
- **Not Enough Liquid (Milk, Cream, or Water):** The liquid component (milk, heavy cream, or even water) plays a vital role in hydrating and dissolving the powdered sugar. If there isn’t enough liquid in your recipe, the sugar crystals will struggle to dissolve and will likely remain undissolved, contributing to a gritty texture. **Solution:** Gradually add an extra tablespoon or two of milk (or your chosen liquid) to the frosting while mixing on medium speed. Continue mixing until it reaches a smooth, creamy consistency. Be careful not to add too much liquid at once, as this can quickly make your frosting too thin; add it slowly and assess the consistency after each addition.
By carefully addressing these points – ensuring proper mixing time, sifting your powdered sugar, and adjusting liquid levels as needed – you can confidently transform a gritty buttercream into the silky-smooth, delectable frosting you desire for all your baking projects.
Storing and Shelf Life of American Buttercream Frosting
Proper storage is paramount to enjoying your homemade American buttercream for as long as possible, ensuring both its freshness and safety. Since this frosting typically contains dairy (milk or cream), it’s essential to handle and store it correctly to prevent spoilage and maintain its quality.
- **Refrigeration is Essential:** Yes, American buttercream absolutely needs to be refrigerated. Because it contains dairy, which can go bad if left at room temperature for an extended period, immediate refrigeration is crucial. Always store any leftover frosting in an airtight container in the refrigerator. This not only preserves its freshness but also prevents it from absorbing unwanted odors from other foods in your fridge and keeps it from developing a hard, dry crust.
- **Shelf Life in the Fridge:** When stored properly in an airtight container in the refrigerator, this vanilla buttercream frosting recipe will maintain its quality and freshness for up to **one week**. For best results, allow it to come to room temperature before using and re-whip it to restore its light and fluffy texture.
- **Freezing for Longer Storage:** For an even longer shelf life, American buttercream can be conveniently frozen! Place the frosting in an airtight, freezer-safe container or a heavy-duty freezer bag, pressing out any excess air. Store it in the freezer for up to **1 to 2 months**. This is a great way to prepare frosting in advance for future baking needs.
- **Thawing and Re-whipping Frozen Buttercream:** When you’re ready to use frozen buttercream, transfer it to the refrigerator to thaw overnight, or leave it at room temperature for several hours until it is fully softened. Do not attempt to re-whip it while still cold or partially frozen, as this can cause it to curdle or separate. Once it has reached room temperature, transfer the softened buttercream to your stand mixer or use a hand mixer. Beat it on medium-high speed for a few minutes until it becomes smooth, light, and fluffy again. You might find it beneficial to add an extra splash of milk or heavy cream (or a tablespoon of powdered sugar) during the re-whipping process to perfectly adjust its consistency if needed.
Following these simple yet effective storage guidelines ensures your delicious buttercream is always fresh, safe, and ready to be used, whether it’s a few days later or a month down the line, without sacrificing its incredible taste or texture.
Beyond Cakes: Sugar Cookie Buttercream and More!
While often primarily associated with adorning cakes and cupcakes, American buttercream frosting is incredibly versatile and shines brilliantly on a multitude of other delectable desserts. This particular recipe, with its firm yet fluffy consistency and perfectly balanced sweetness, is absolutely **perfect for icing cookies, especially classic sugar cookies**. Its stability allows for creating clean lines, intricate piping designs, and smooth flood fills, making your decorated cookies not only visually stunning but also incredibly delicious and professional-looking.
But why stop at cookies? This easy-to-make buttercream is a fantastic addition to a variety of other sweet treats. Consider using this versatile frosting on:
- **Brownies and Bars:** A generous, creamy layer of this sweet frosting transforms simple brownies, blondies, or other dessert bars into a decadent, show-stopping treat that’s hard to resist.
- **Dessert Pizzas:** Use it as a sweet, rich base for fruit-topped dessert pizzas, providing a creamy contrast to fresh berries and glazes.
- **Whoopie Pies:** Sandwich a dollop of this fluffy buttercream between two soft, cake-like cookies to create a delightful, classic comfort dessert that’s loved by all ages.
- **Fillings for Pastries:** Its smooth texture and stability make it an excellent filling for choux pastry (like éclairs or cream puffs), sweet tarts, or even as a surprise element in larger pastries. It holds its shape well and provides a delightful creamy component.
- **Quick Dips:** Thicken it slightly or thin it as needed for a sweet dip for fruit or pretzels.
Its inherent pipeability, robust structure, and ability to hold shape make it a decorator’s best friend for nearly any sweet confection that needs a touch of creamy, sweet perfection. Experiment and discover new ways to incorporate this beloved frosting into your baking repertoire!
Essential Tips for Perfecting Your Easy American Buttercream Frosting
Achieving consistently perfect American buttercream that is both delicious and easy to work with is simpler than you might think, especially when you follow these expert tips and tricks:
- **Always Use Unsalted Butter:** Opt for unsalted butter when making your frosting. This gives you complete control over the saltiness of your final product, ensuring it’s perfectly balanced for sweetness. If you only have salted butter on hand, you can use it, but be sure to omit any additional salt called for in the recipe and be mindful that the overall flavor profile might be slightly different. Critically, ensure your butter is at **true room temperature** – it should be soft enough to indent easily with your finger but not melted or greasy. Cold butter will result in a lumpy frosting, while melted butter will make it soupy.
- **Consider a Butter and Shortening Blend for Enhanced Stability:** If you reside in a warm, humid climate or need your frosting to hold up for an extended period (e.g., for intricate piping, outdoor events, or tiered cakes), consider using a combination of butter and shortening. Shortening adds incredible stability and helps the frosting resist melting, wilting, and sagging, ensuring your delicate decorations stay pristine. A common starting ratio is 50/50, but you can adjust this blend based on your specific needs for flavor versus firmness.
- **Opt for Clear Vanilla Extract:** To prevent any unwanted discoloration in your frosting, especially if you’re aiming for a pure white or light pastel color, always use clear vanilla extract. Regular brown vanilla extract has a natural tint that can subtly alter your frosting’s hue, making it slightly off-white or yellowish.
- **Achieving a Pure White Frosting:** As previously discussed, butter naturally possesses a pale yellow color, which can cause your finished buttercream to appear “off-white.” For a truly brilliant, pristine white frosting, your most effective strategy is to replace some or all of the butter with **white vegetable shortening**. Additionally, a tiny drop of **white gel food coloring** can dramatically brighten any buttercream, whether it’s butter-based or a blend, by introducing opaque white pigment.
- **Stick Exclusively to Gel Food Coloring:** When adding color to your buttercream, **always use gel food coloring**. Liquid food coloring contains a significant amount of water, which will thin out the consistency of your frosting, making it difficult to pipe, unstable, and potentially runny. Gel colors, being highly concentrated pastes, allow you to achieve vibrant, rich colors with minimal impact on the precious texture and stability of your frosting.
- **Adjusting Consistency (If Too Thin):** If, after mixing, your frosting turns out too thin and runny, there’s an easy fix! Simply mix in more **powdered sugar**, adding it gradually, about one-quarter cup at a time, until the frosting thickens to your desired consistency for spreading or piping.
- **Adjusting Consistency (If Too Thick):** Conversely, if your frosting is too thick, stiff, or difficult to work with, you can easily thin it out. Gradually mix in a small amount of **milk or heavy cream** (or even water), adding just one teaspoon at a time. Continue mixing until the frosting loosens up and becomes smooth, creamy, and perfectly pipeable.
- **Scale the Recipe Easily:** This American buttercream recipe is incredibly adaptable and forgiving. You can effortlessly **double or triple** the ingredients to make a larger batch for bigger celebration cakes, multiple dozens of cupcakes, or simply to have extra on hand for future impromptu baking adventures without worrying about altering ratios too much.
By keeping these valuable tips in mind, you’ll consistently create a perfect batch of American buttercream that is not only incredibly delicious but also a true joy to work with for all your decorating needs, ensuring beautiful and stable results every time.
Recipe
American Buttercream Frosting
Abeer Rizvi
Pin Recipe
Want to Save This Recipe?
Enter your email & I’ll send it to your inbox. Plus, get great new recipes from me every week!
By submitting this form, you consent to receive emails from CakeWhiz
Ingredients
- 1 cup Unsalted Butter Softened to room temperature
- 1 tablespoon Vanilla Extract Use clear vanilla for a whiter frosting
- 4 cups Powdered sugar Sifted, also known as confectioners’ sugar or icing sugar
- 3-4 tablespoon Milk or Heavy cream More or less depending on desired consistency
Instructions
-
In a large mixing bowl (preferably using a stand mixer with a paddle attachment), beat the softened butter on medium-high speed until it’s light, pale, and fluffy, about 2-3 minutes. Add vanilla extract and mix until fully combined.
-
Gradually add the sifted powdered sugar, about ½ cup at a time, mixing on low speed until just combined after each addition. Once all sugar is incorporated, increase speed to medium.
-
Pour in the milk or heavy cream, 1 tablespoon at a time, while continuing to mix. Beat on medium-high speed for another 3-5 minutes, or until the frosting is completely smooth, creamy, and has reached your desired consistency for piping or spreading. Scrape down the sides and bottom of the bowl as needed to ensure even mixing.
-
Your perfect American buttercream is now ready! Use it immediately to frost your favorite cakes, cupcakes, cookies, and other desserts, then enjoy!
Video
Notes
- For the best results and to understand how to troubleshoot common issues, please read all the detailed tips and advice provided above in the article.
- This recipe yields approximately 2 cups of frosting, which is typically enough to generously frost about 24 standard cupcakes or one 8×2 inch round layer cake. Feel free to adjust quantities by doubling or tripling the recipe as needed for larger projects.
- Store any leftover frosting in an airtight container in the refrigerator for up to 1 week. Before using, allow it to come to room temperature and then re-whip it for a few minutes to restore its light and fluffy texture. This buttercream can also be frozen for 1-2 months in an airtight, freezer-safe container; thaw in the refrigerator overnight before re-whipping.
Nutrition
An automated tool is used to calculate the nutritional information. As such, I cannot guarantee the accuracy of the nutritional information provided for any recipe on this site.
Until next time, tata my lovelies!
