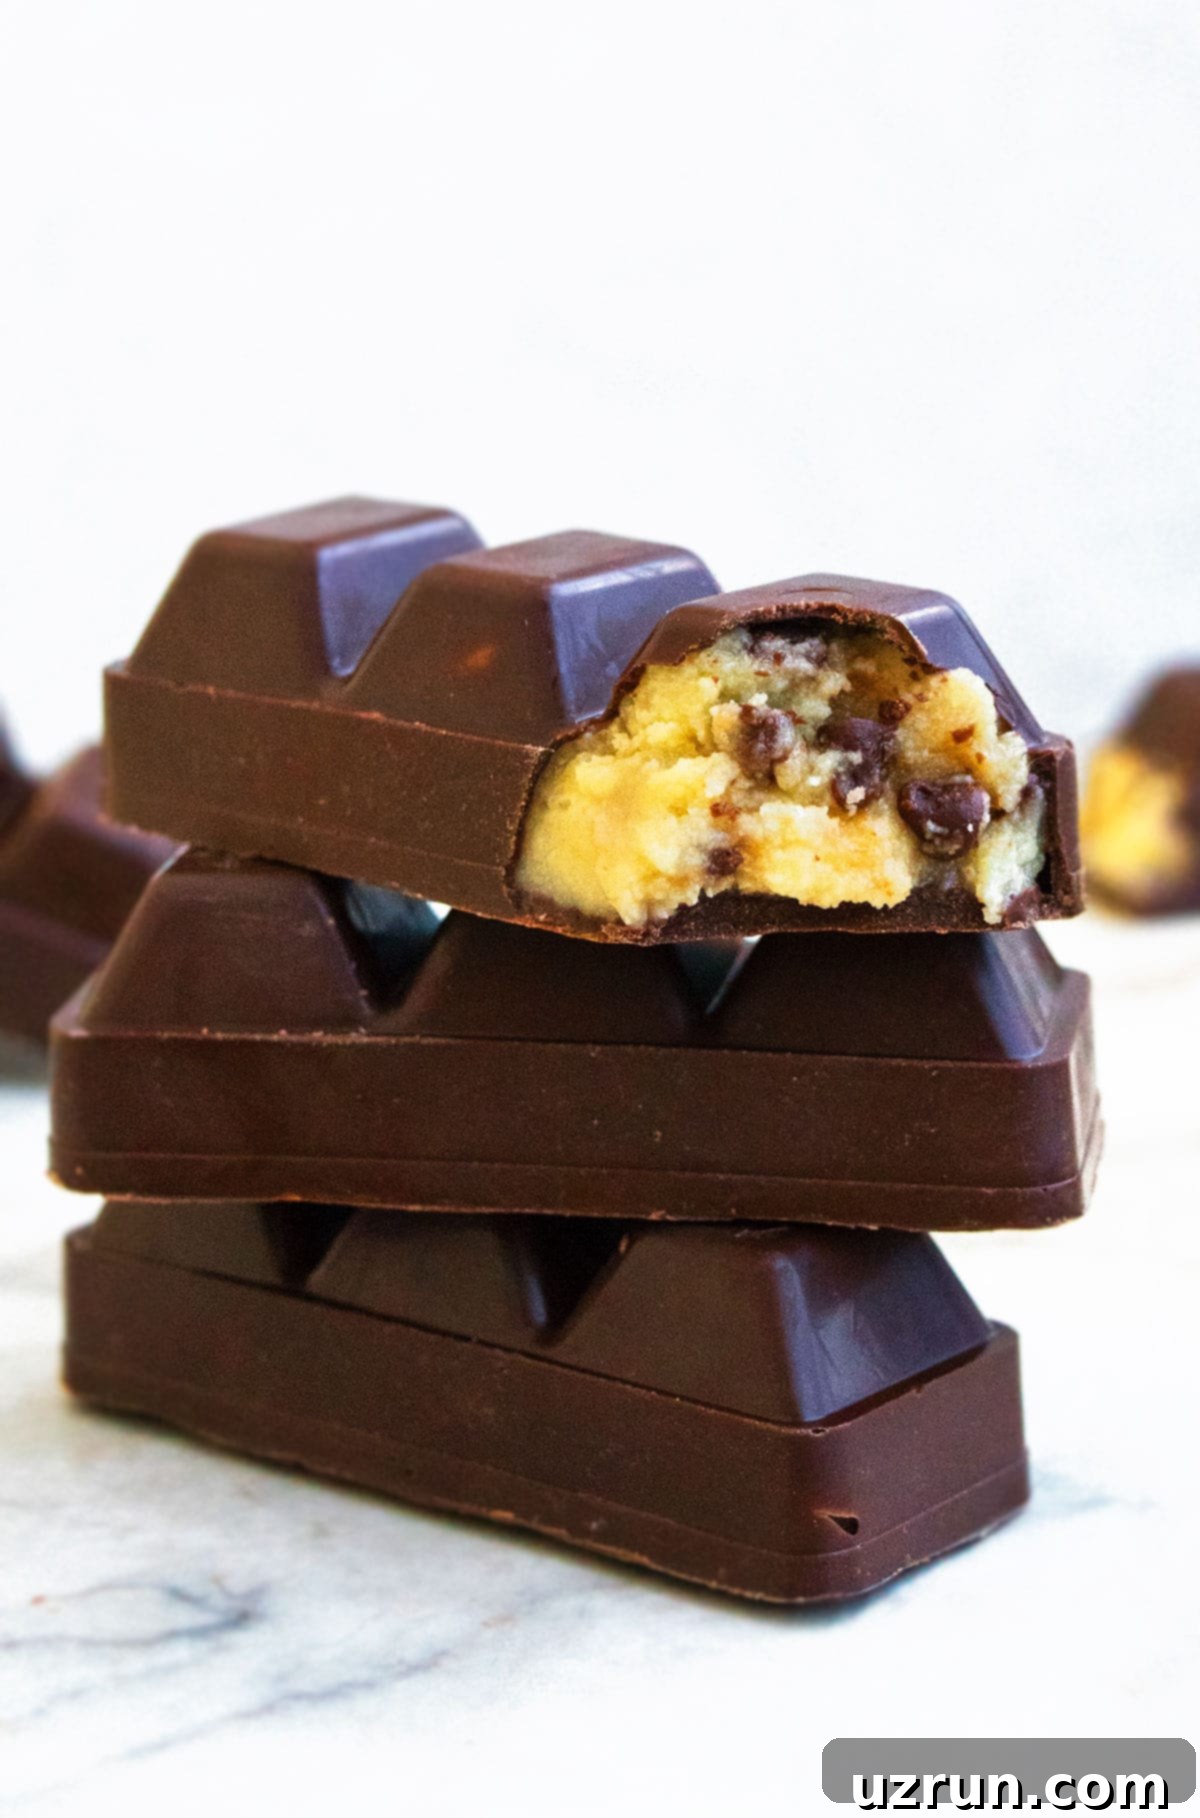
Irresistible No-Bake Chocolate Chip Cookie Dough Bars: Healthy, Eggless & Easy!
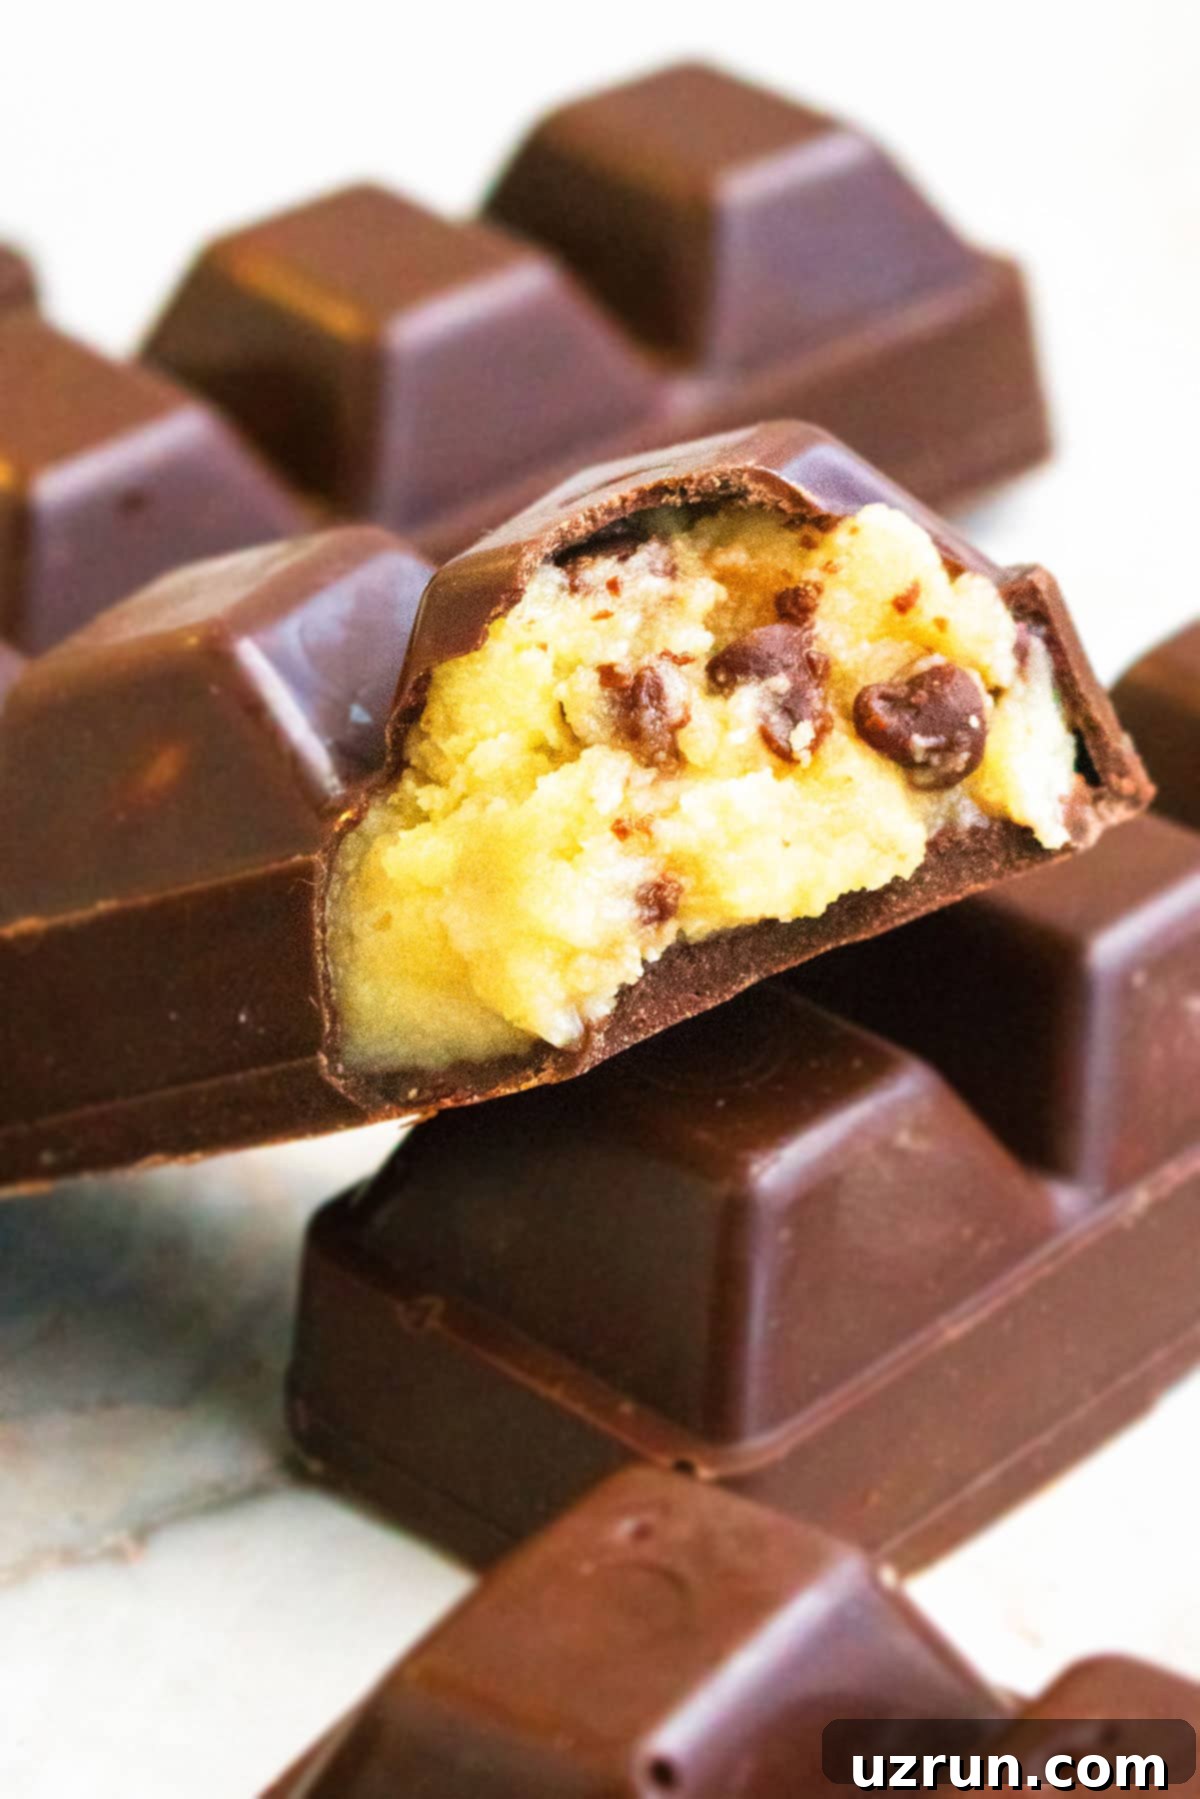
Are you dreaming of the nostalgic, comforting taste of chocolate chip cookie dough but want a healthier, no-fuss option? This incredible recipe for homemade no-bake chocolate chip cookie dough bars is exactly what you need! Crafted with simple, wholesome ingredients, these bars are not only incredibly quick and effortless to prepare, but they are also naturally healthy, completely eggless, and perfectly safe to eat raw. They offer a delightful activity for kids, making for fun family time in the kitchen, and serve as a thoughtful, impressive homemade gift for friends and loved ones.
*A special thank you to Vital Proteins for sponsoring today’s post. Their commitment to providing high-quality products allows me to share wonderful, nutritious recipes like this with all of you. As always, all opinions and recipe insights shared are entirely my own.*
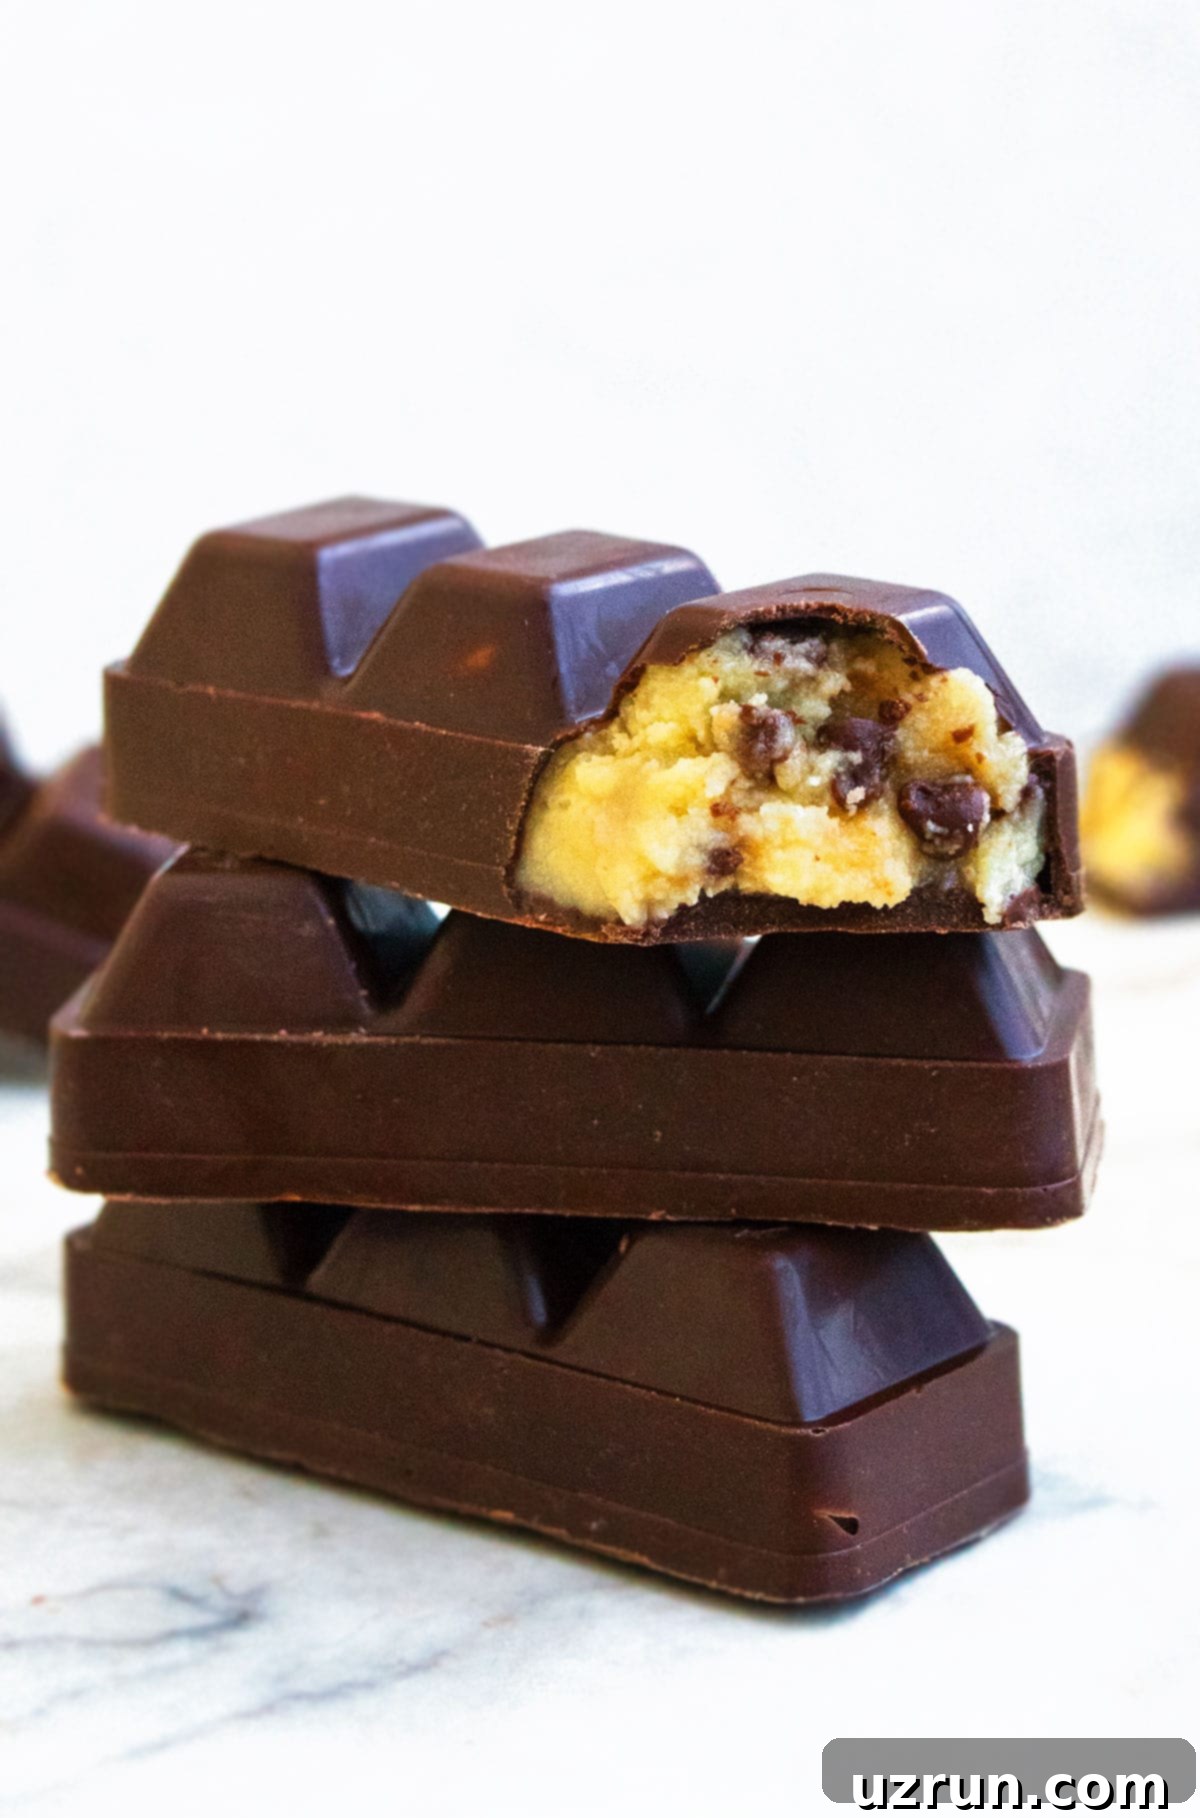
I’ve personally found myself making these decadent bars twice in just the past week, and they’ve been an absolute sensation among my friends! The requests for the recipe keep pouring in, and it’s easy to understand why these treats are such a hit. They deliver the same mouth-watering satisfaction and rich flavor profile as my beloved Chocolate Chip Cookie Dough Truffles (Eggless), but in a convenient, easy-to-serve bar form. What truly distinguishes them is their surprisingly wholesome profile. We’re talking no butter, no margarine, no shortening, and absolutely no granulated sugar, relying instead on natural sweeteners and healthier fats. Despite this lighter approach, their presentation is stunning, and their taste is nothing short of incredible. If you’re a devoted chocolate chip enthusiast, I highly recommend expanding your repertoire with these delightful White Chocolate Chip Cookies (With Cake Mix) and this festive, crowd-pleasing Chocolate Chip Cookie Cake (With Cake Mix) for your next sweet craving.
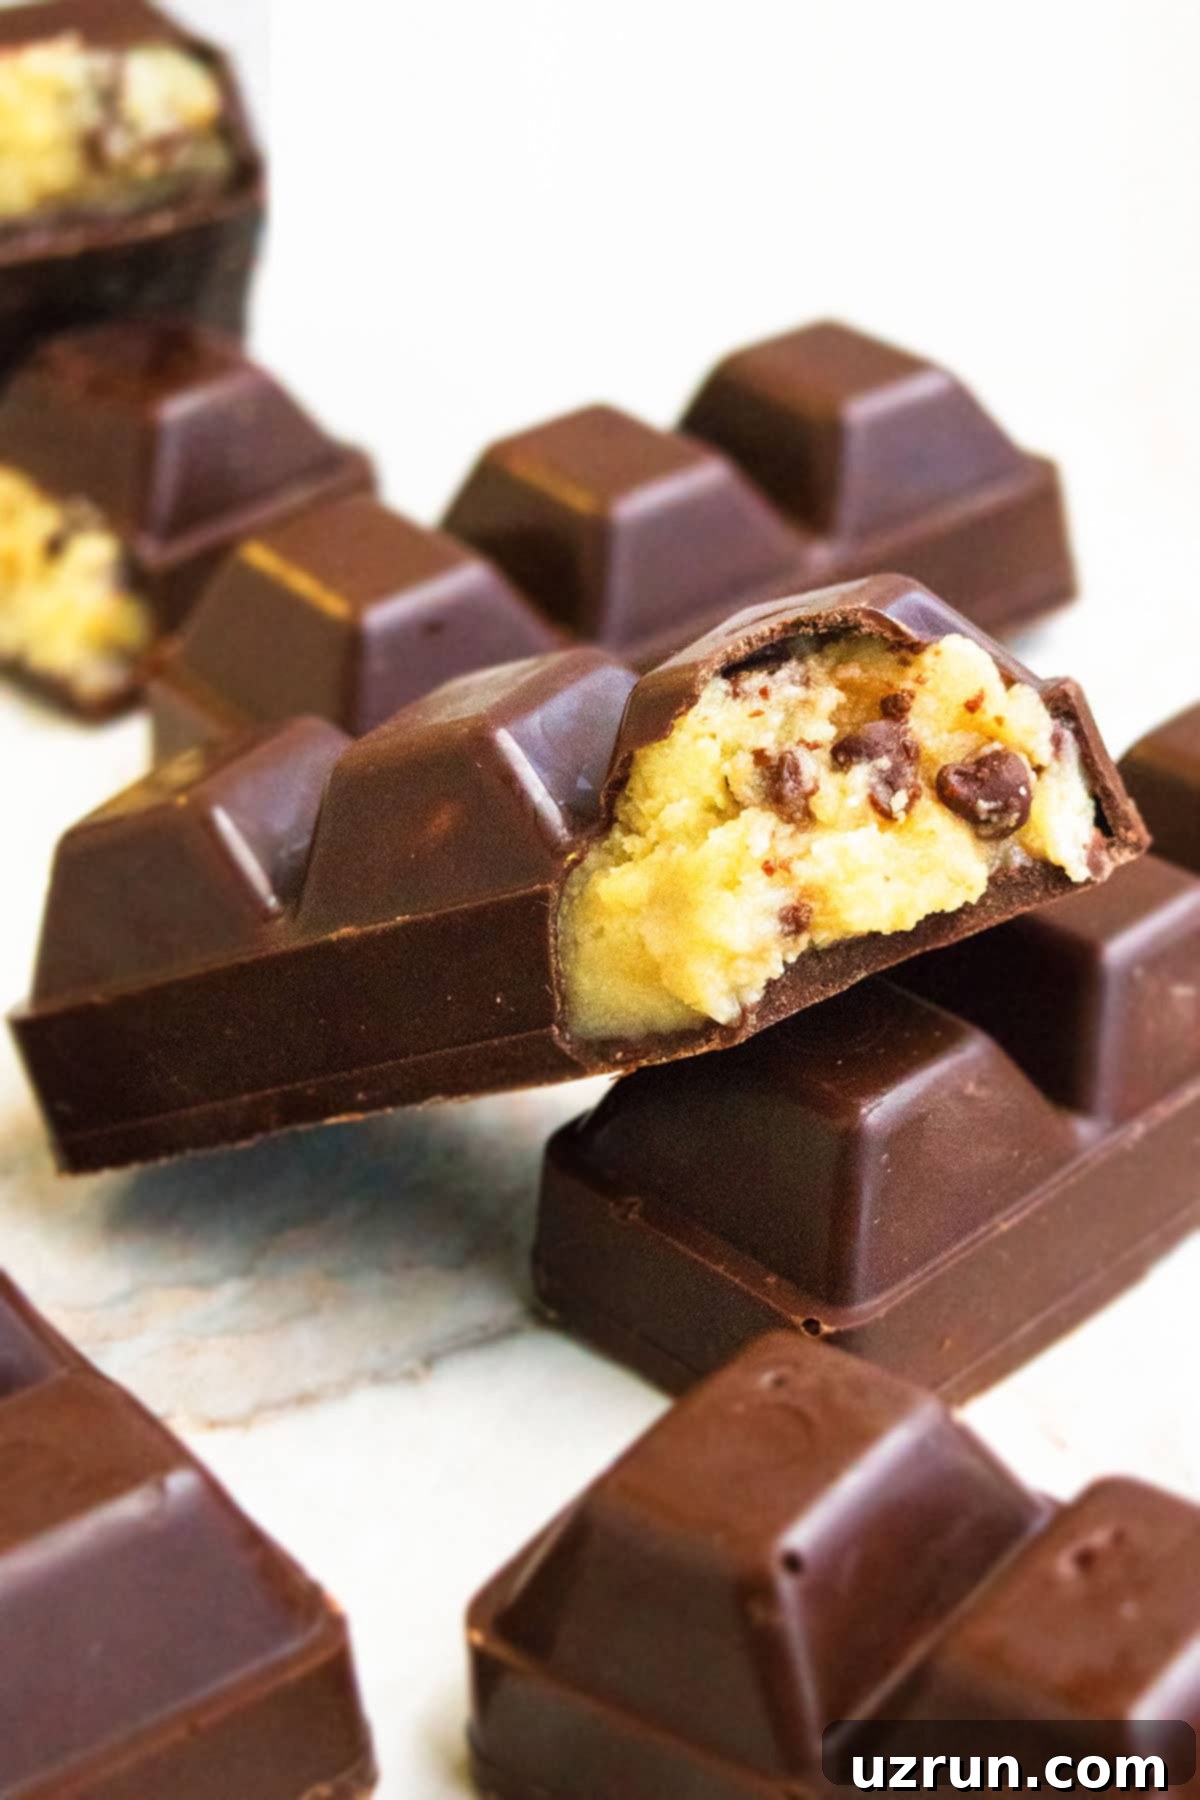
Why You’ll Fall in Love with These No-Bake Cookie Dough Bars
These cookie dough bars are far more than just a simple sweet treat; they embody how truly delicious and profoundly satisfying healthier dessert options can be. Here’s a detailed look at why this recipe is destined to become a beloved staple in your kitchen:
- Effortless No-Bake Creation: Say goodbye to the oven! This recipe requires absolutely no baking, making it an ideal choice for sweltering summer days or whenever you’re pressed for time but still crave something homemade and special.
- Completely Eggless & Worry-Free Raw Consumption: Since this recipe contains no raw eggs, you can indulge in the pure, delightful taste of cookie dough from the very first spoonful without any concerns about safety. It’s the ultimate edible cookie dough experience!
- A Healthier Indulgence: By thoughtfully replacing traditional butter and refined granulated sugar with wholesome alternatives like solid coconut oil, nutrient-rich raw honey, and protein-packed almond flour, these bars offer a significantly more nutritious and guilt-free twist on a beloved classic.
- Utilizes Simple, Accessible Ingredients: You won’t need to hunt down obscure ingredients. The list is intentionally short, sweet, and composed of items you likely already have in your pantry, or can easily find at any grocery store.
- Perfectly Kid-Friendly & Engaging: Involve the entire family in the fun! Making these bars is a wonderfully hands-on activity that children will adore, from the exciting mixing process to the creative decorating, fostering a love for cooking from a young age.
- An Exquisite Homemade Gift Option: Their beautiful appearance, combined with their universally loved flavor and thoughtful preparation, makes them an exceptional choice for homemade gifts, elegant party favors, or a standout contribution at any potluck gathering.
- Infinitely Customizable: As you’ll discover in our variations section, the creative possibilities are truly endless! This recipe provides a fantastic foundation that you can easily adapt and tailor to suit any palate, dietary preference, or special occasion.
Key Ingredients for Crafting Your Perfect Cookie Dough Bars
The secret to these incredibly delicious and healthier no-bake cookie dough bars lies in a carefully selected blend of ingredients. Each component plays a pivotal role in achieving that coveted texture and irresistible flavor, all while maintaining a focus on wholesome goodness:
- Coconut Oil: This is a cornerstone ingredient for achieving the correct dough consistency. It is absolutely crucial to use coconut oil in its solid state, not melted, as this is what allows the dough to bind properly and set firm. When solid, it lends a subtle richness and helps create that desirable, fudgy texture.
- Raw Honey: Serving as our natural primary sweetener, raw honey imparts a rich, complex sweetness that is far more nuanced than that of refined sugars. Choosing raw honey also boosts the bars’ nutritional profile, as it retains beneficial enzymes and antioxidants that are often lost in pasteurized varieties. Feel free to adjust the quantity to match your preferred level of sweetness.
- Vanilla Extract: A quintessential flavor enhancer in nearly all dessert recipes, vanilla extract introduces a comforting warmth and depth that harmonizes beautifully with the chocolate and honey. Its presence is vital for capturing that authentic, nostalgic cookie dough essence.
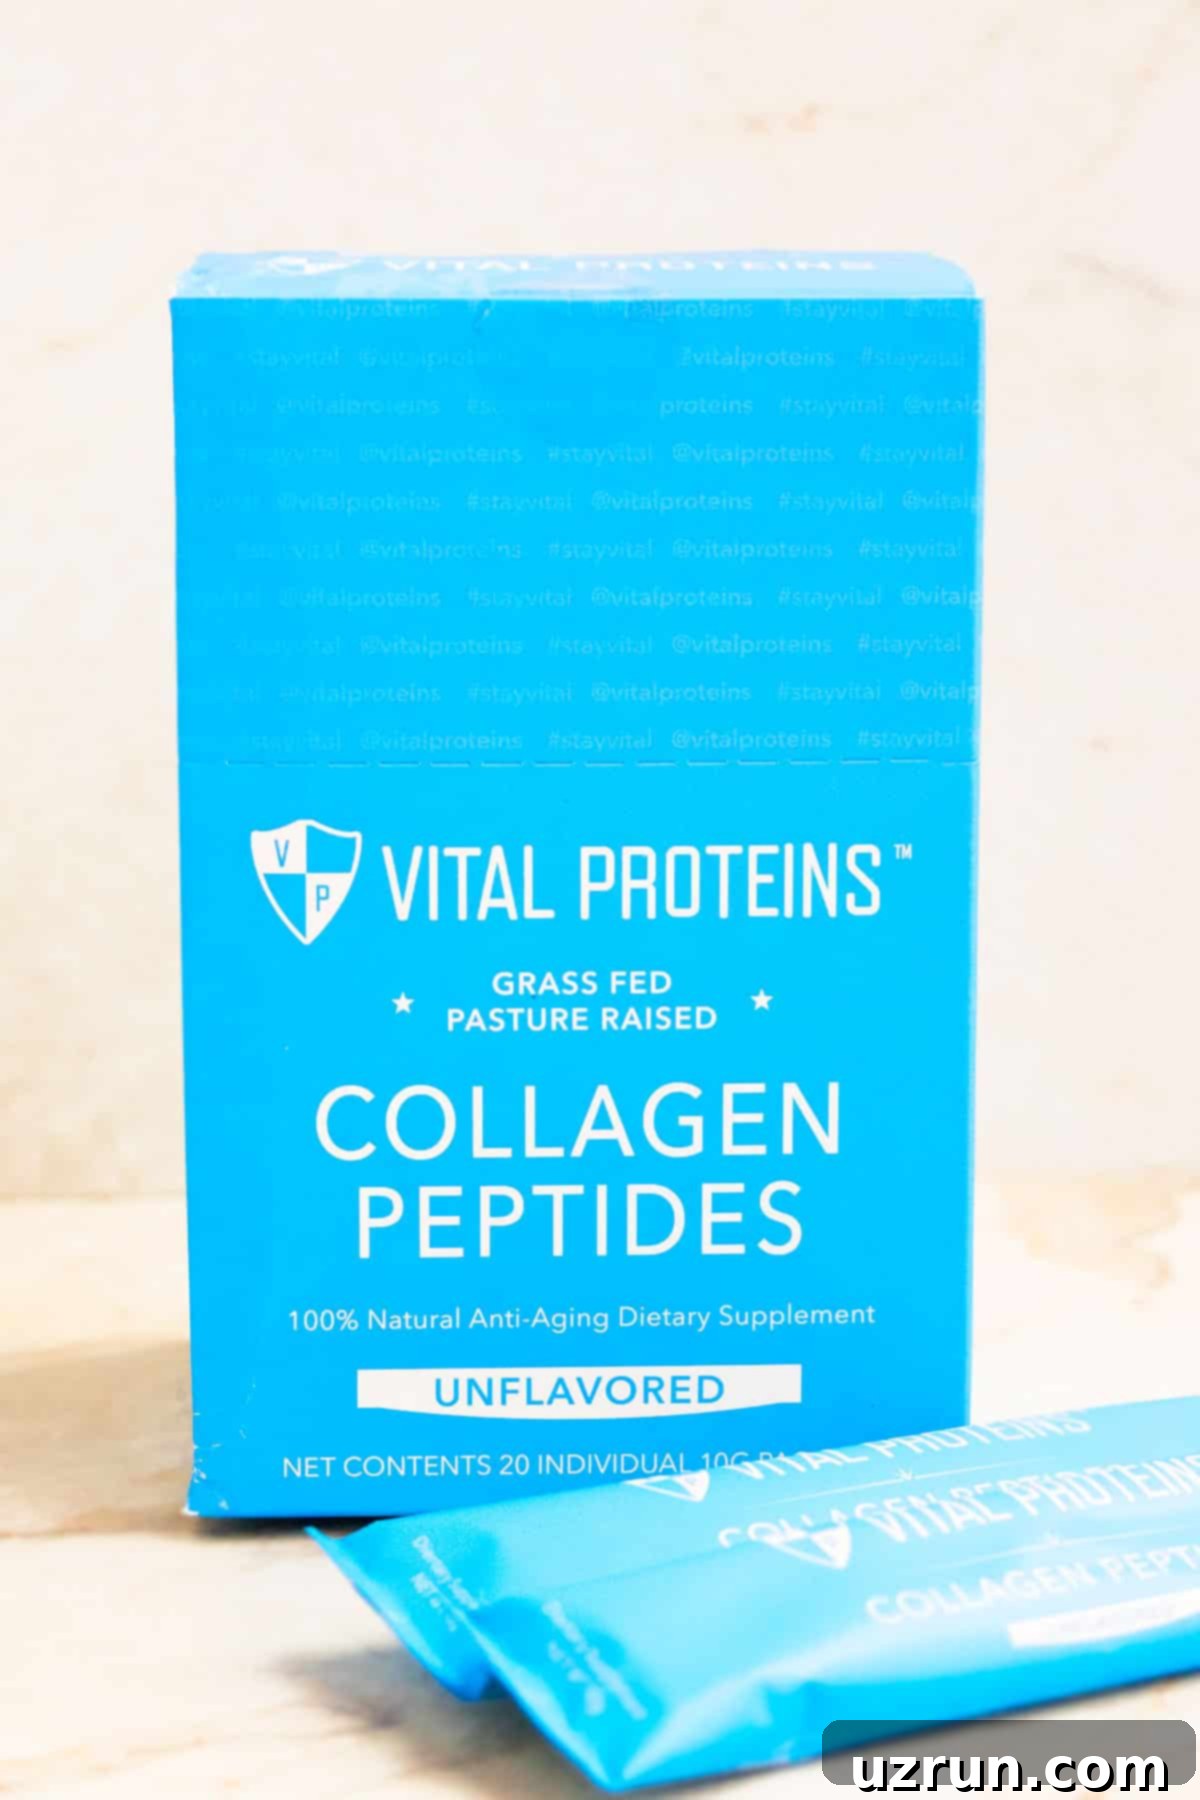
- Protein Powder: I personally recommend incorporating unflavored collagen peptides, such as those from Vital Proteins. This addition provides a significant nutritional boost – supporting skin, hair, and joint health – without altering the taste or texture of the bars. This ingredient is entirely optional; if you choose to omit it, simply substitute with an equal amount of almond flour to maintain the dough’s desired consistency.
- Almond Flour: This is the star of our dry ingredients and is far superior to conventional all-purpose flour for this recipe. Almond flour is naturally gluten-free, lower in carbohydrates, and bestows a wonderfully rich, tender texture to the cookie dough. Moreover, it’s an excellent source of healthy fats and protein, significantly contributing to the overall healthier and more satisfying nature of these bars.
- Chocolate Chips: For the ultimate chocolate chip experience, you’ll need two distinct types in this recipe:
- Mini Semisweet Chocolate Chips: These are mixed directly into the cookie dough. Their miniature size is intentional, ensuring that you get a perfect, delightful burst of chocolate in every single bite, without overwhelming the dough.
- Melted Chocolate (Semisweet, Milk, Dark, or White): This forms the luxurious, crisp outer coating of our bars. The beauty of this step is the freedom of choice; select your favorite type of chocolate – be it semisweet, creamy milk, intense dark, or even vibrant white chocolate – to fully customize the flavor and visual appeal of your finished bars.
Creative Variations to Personalize Your Cookie Dough Bars
One of the most exciting aspects of this no-bake cookie dough bar recipe is its incredible adaptability. It serves as a fantastic foundation, a blank canvas awaiting your unique culinary expression! Here are some inspiring variations to help you customize your next batch and cater to any craving:
- Transform into Fudgy Brownie Bars: For the ultimate chocolate indulgence, easily incorporate 2-3 tablespoons of unsweetened cocoa powder into your dough mixture. This simple addition will create a deeper, intensely rich chocolate flavor and a delightfully fudgier texture, reminiscent of my highly popular Fudgy Brownies with Crackly Tops.
- Infuse with M&M Candies: For a burst of vibrant color and a playful crunch, swap out the regular chocolate chips for an equal amount of mini M&M candies. The cheerful colors and candy coating will undoubtedly make these bars a hit, especially among younger snackers.
- Craft a Festive Birthday Version: Elevate these bars for any celebration by mixing in a tablespoon of colorful sprinkles into the cookie dough. It’s an instant way to add a fun, festive touch that makes them perfect for birthdays, parties, or any joyous occasion.
- Delight in a Peanut Butter Twist: Peanut butter aficionados, get ready to rejoice! You can effortlessly infuse these bars with a rich, nutty flavor by replacing half of the solid coconut oil with creamy peanut butter. If your love for peanut butter knows no bounds, you might also want to explore my dedicated Eggless Peanut Butter Bars recipe.
- Simple Slab Style (Rectangular Pan): If you don’t own a chocolate mold or prefer a more straightforward presentation, simply press the entire dough mixture evenly into a parchment-lined rectangular cake pan. Chill it in the refrigerator for about an hour, then generously top it off with a smooth layer of melted chocolate. Once the chocolate is set, cut into convenient squares and enjoy!
- Embrace a Vegan Version: Adapting this recipe for a vegan diet is incredibly simple. Just omit the collagen peptides (which are already optional) and substitute the honey with an equal amount of pure maple syrup. Ensure that any chocolate chips or melted chocolate you use are also certified dairy-free and vegan-friendly.
- Experiment with Other Extracts: Unleash your inner flavor artist by swapping out the vanilla extract for other aromatic choices. Almond extract offers a sophisticated, slightly nutty bouquet, while coconut extract can transport your taste buds to a tropical paradise. For those who truly adore almond, be sure to check out my Almond Buttercream Frosting and Easy Almond Cupcakes!
- Explore Diverse Add-in Options: The realm of additional mix-ins is truly boundless! Get creative with inclusions like roughly chopped pretzels for a delightful salty-sweet crunch, pieces of your favorite candy bars, various nuts (such as walnuts, pecans, or pistachios), a medley of dried fruits (raisins, cranberries, chopped apricots), or shredded coconut for an added layer of texture and tropical flavor.
- Indulge in a Hazelnut Harmony: Introduce a sophisticated hazelnut twist by replacing half of the solid coconut oil with smooth, creamy Nutella. Nutella is undeniably one of my all-time favorite spreads, and its inclusion creates an incredibly rich and deeply indulgent flavor profile. For more Nutella-inspired goodness, don’t miss my Easy Nutella Cookies and Mini Nutella Cheesecake (No Bake).
- Simply Enjoy as Dough! Let’s be honest, sometimes the best part of making cookies is sneaking a spoonful of the raw dough. This recipe is perfectly safe to eat straight from the mixing bowl, by the spoonful, whenever that irresistible cookie dough craving strikes!
- Tailor Your Chocolate Coating: For the exquisite chocolate coating, you have complete artistic freedom. Whether you prefer the classic semisweet, the creamy sweetness of milk chocolate, the intense depth of dark chocolate, or even the subtle vanilla notes of white chocolate, each choice will create a unique and utterly delicious bar.
- Elevate with Sea Salt: For an enhanced flavor experience that balances and brightens, sprinkle a delicate pinch of flaky sea salt over the top layer of melted chocolate just before placing the bars into the fridge to set. The salt magnificently complements and amplifies the sweetness of the chocolate.
- Spice Up Your Coating: Infuse your melted chocolate coating with an aromatic blend of warm spices. A dash of pumpkin spice, ground ginger, or cinnamon can introduce an unexpected and utterly delightful layer of flavor, making these bars perfect for seasonal treats or anytime you desire an extra cozy touch.
How to Make Easy Eggless Chocolate Chip Cookie Dough Bars from Scratch?
Creating these delightful no-bake cookie dough bars is an incredibly straightforward process, accessible even for novice home bakers. Follow these simple, clear steps to achieve perfectly set, incredibly delicious treats every single time:
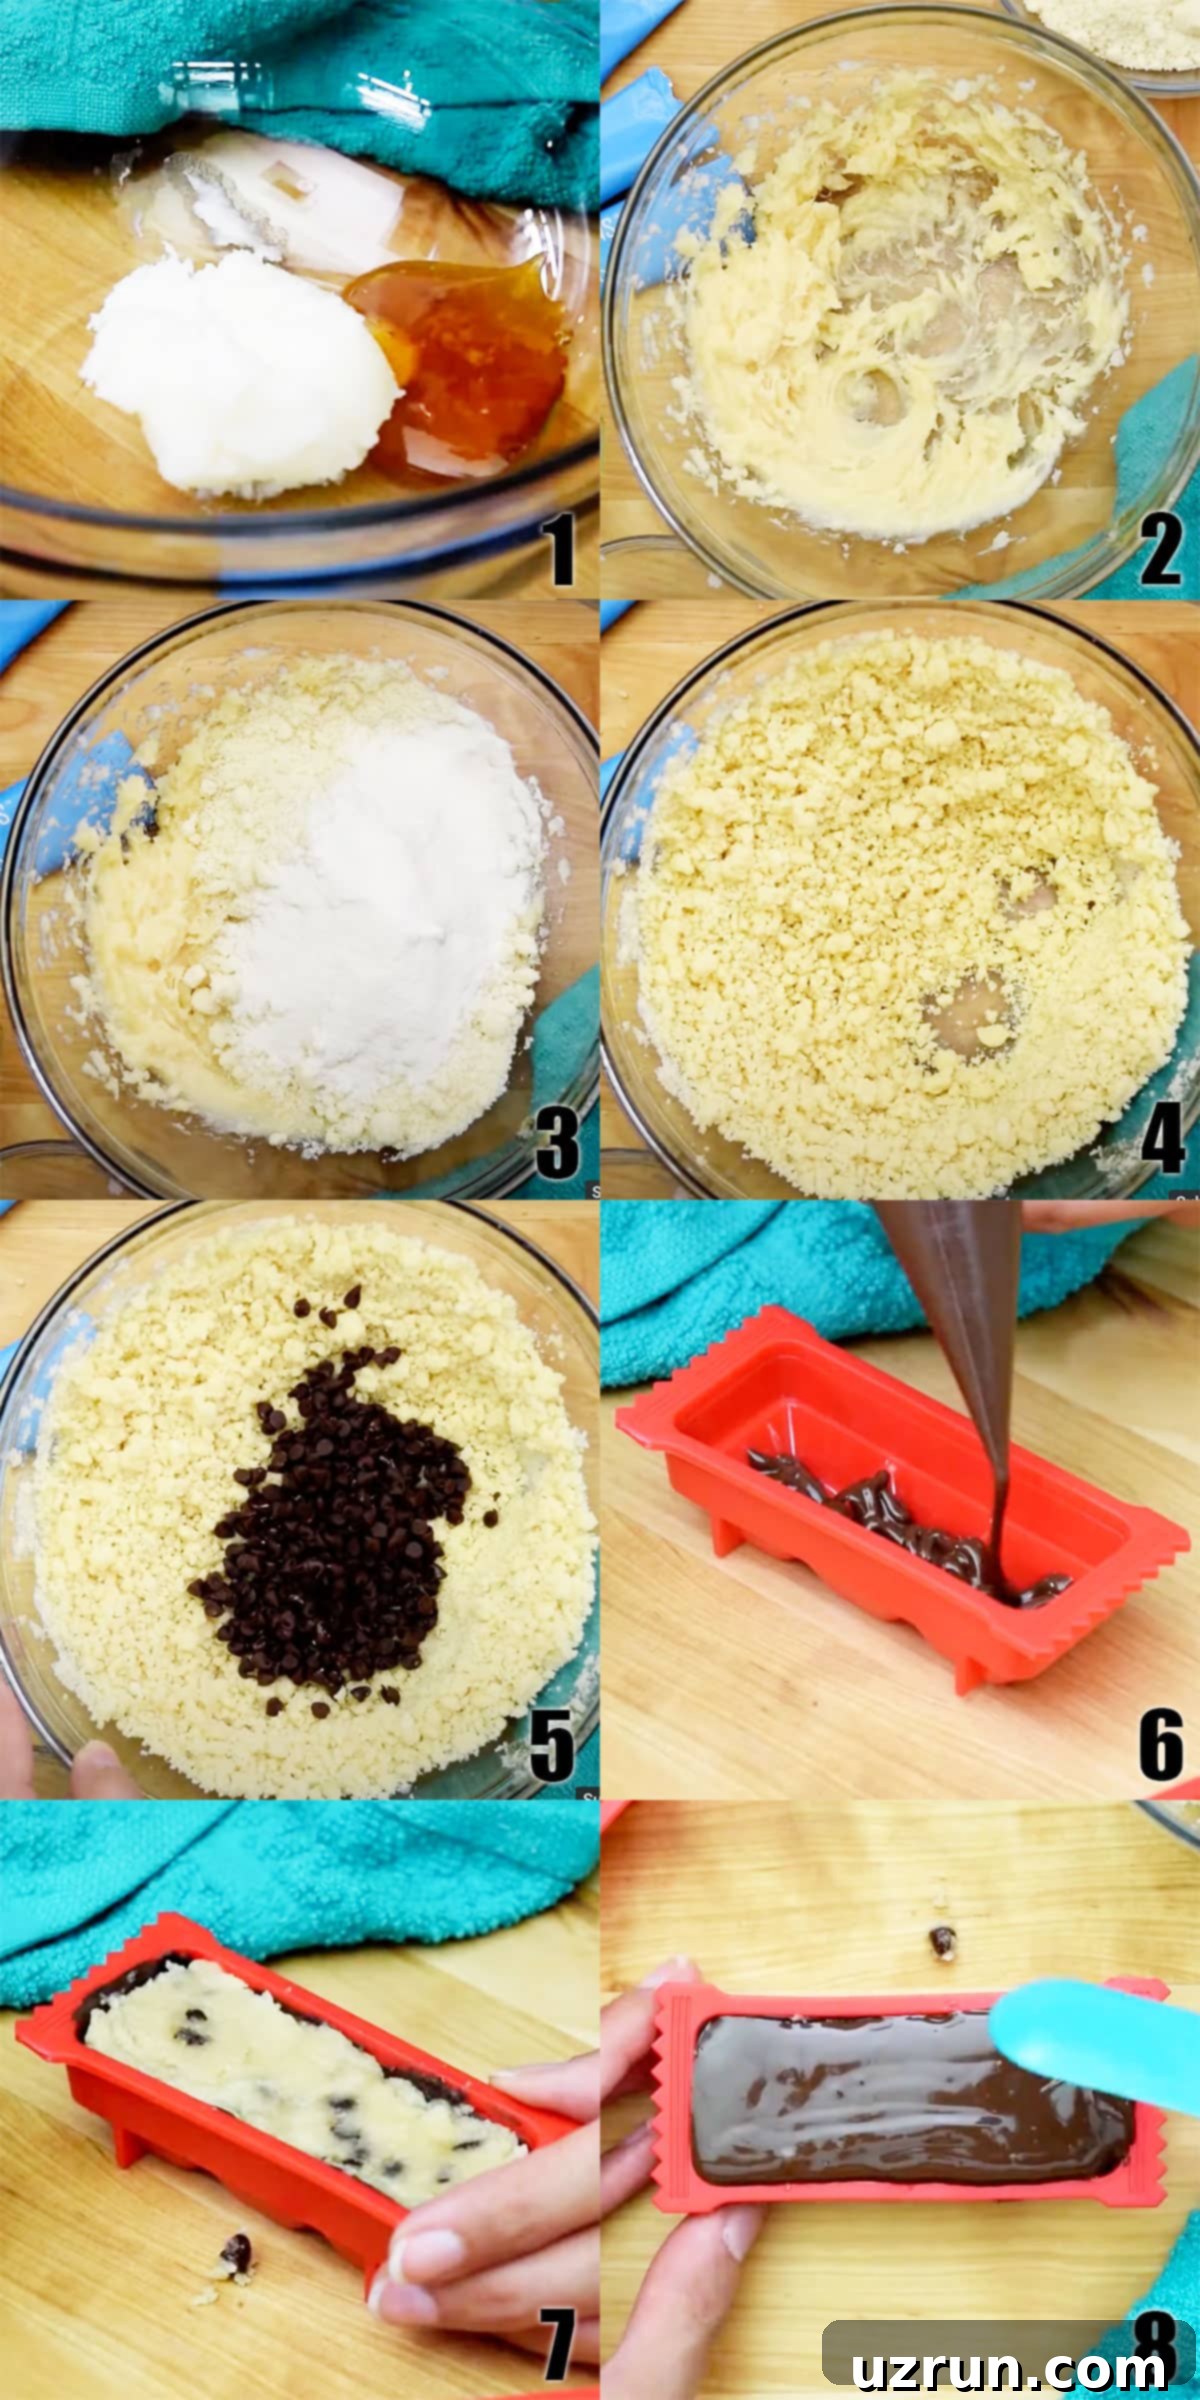
- Combine Wet Ingredients: Begin by adding your solid (and very importantly, not melted!) coconut oil, raw honey, and vanilla extract into a medium mixing bowl. Use a sturdy spatula or spoon to thoroughly mix these ingredients together until they are smoothly combined and well-incorporated. This forms the rich, flavorful base of your cookie dough. (Refer to Image 1 & 2 for visual guidance).
- Incorporate Dry Ingredients: Next, carefully add the almond flour and the optional collagen peptides (or an equivalent amount of additional almond flour if you’re opting to omit the protein powder) to the wet mixture. Continue mixing diligently until a thick, uniform dough begins to form. It’s crucial to ensure there are no visible dry pockets of flour remaining. (Refer to Image 3 & 4 for visual guidance).
- Fold in Chocolate Chips: Gently, yet thoroughly, fold in the mini semisweet chocolate chips using your spatula. Distribute them as evenly as possible throughout the dough, guaranteeing that every single bite will be packed with a satisfying burst of chocolatey goodness.
- Prepare the Mold with Chocolate: Take your chosen chocolate mold (or consider the alternative mold options mentioned in our tips section below). Use a small, clean paintbrush or the back of a spoon to delicately coat the inside of each cavity with a thin, even layer of melted chocolate. This step creates the essential bottom and side shell for your chocolate bar. Place the mold in the refrigerator for approximately 10 minutes to allow the chocolate to set firmly. (Refer to Image 6 for visual guidance).
- Fill with Cookie Dough: Once the chocolate shell has completely set, carefully spoon the prepared cookie dough into each chocolate-lined cavity. Gently press the dough down to fill the space evenly, ensuring a compact layer, but remember to leave a small, discernible gap at the very top for the final chocolate layer. (Refer to Image 7 for visual guidance).
- Seal with More Chocolate: Now, generously cover the top of each cookie dough layer with additional melted chocolate. Use your paintbrush or spoon to spread it smoothly and evenly, effectively sealing the delicious cookie dough inside. Return the mold to the refrigerator for at least 10-15 minutes, or until this top layer of chocolate is completely firm and set. (Refer to Image 8 for visual guidance).
- Demold and Enjoy: Once both chocolate layers are fully firm and solid, gently flip the mold over onto a sheet of wax paper or a clean cutting board. Lightly tap the top and sides of the mold. The perfectly formed chocolate chip cookie dough bars should then release cleanly and effortlessly.
Expert Tips and Techniques for Flawless Bars
To ensure your no-bake chocolate chip cookie dough bars achieve absolute perfection every single time, keep these essential tips and nuanced techniques firmly in mind. These small details can make a big difference in the final outcome of your delightful treats:
- Crucial: Maintain Solid Coconut Oil: This point cannot be stressed enough. Do not, under any circumstances, melt the coconut oil before incorporating it into the mixture. If your coconut oil is in a liquid state, the dough will become excessively soft, sticky, and incredibly difficult to handle and set properly. If your kitchen is particularly warm, you can even briefly chill the solid coconut oil in the fridge for a few minutes before you begin mixing.
- Prioritize Raw Honey for Best Results: For an optimal flavor profile and superior texture, always aim to use raw honey. It is naturally thicker than highly processed varieties, which significantly contributes to a more manageable and stable dough consistency. Furthermore, raw honey imparts a richer, more complex, and wonderfully nuanced sweetness.
- Creative Alternatives for Molds: If you don’t possess a specific chocolate bar mold, there’s no need to fret! You have several fantastic and creative alternatives at your disposal:
- Individual Cookie Dough Balls or Truffles: Roll the prepared dough into small, perfectly bite-sized balls and chill them until firm. Subsequently, dip these delightful balls into melted chocolate and allow them to set for exquisite, ready-to-eat cookie dough truffles.
- Utilize Ice Cube Trays: Following the method I employed for my popular Homemade Gourmet Chocolates, standard ice cube trays serve as excellent, readily available molds for creating smaller, uniformly sized pieces.
- Parchment-Lined Rectangular Container: For a more rustic, slab-style approach, simply press the dough evenly into any parchment-lined rectangular container or small baking dish, chill thoroughly, and then slice into desired squares or bars.
- Understanding Yield Variations: Please be aware that the total number of bars you will obtain from this recipe is directly proportional to the specific size and depth of the mold or container you choose to use.
- The Importance of Mini Chocolate Chips: Always opt for mini chocolate chips when mixing them into the cookie dough itself. Their smaller size ensures an ideal distribution of chocolate throughout the dough, guaranteeing that you experience a perfect, delightful burst of chocolate in every single bite. Regular-sized chocolate chips can often be too large and unwieldy for these types of compact, no-bake treats, much like their recommendation for my Homemade Granola Bars.
- Effortless Chocolate Melting Techniques: To melt your chocolate quickly, smoothly, and without any hassle, place the chocolate pieces in a microwave-safe bowl. Heat it on high in short bursts of 30-second intervals, ensuring you stir thoroughly after each interval, until the chocolate is completely smooth and fully melted. This controlled method effectively prevents burning.
- Chill in the Refrigerator, Never the Freezer: For optimal setting, visual appeal, and to prevent undesirable texture changes, always chill your chocolate-coated bars exclusively in the refrigerator for a minimum of 10-15 minutes. It is crucial to avoid using the freezer, as rapid chilling can unfortunately cause the chocolate coating to develop unsightly white streaks, or “bloom,” making them less visually appealing and potentially affecting the texture.
- Mastering Dough Consistency Adjustments: Achieving the perfect dough consistency is straightforward and easily manageable with these simple adjustments:
- If the Dough is Too Thick or Dry: Should your dough feel overly stiff, crumbly, or difficult to work with, gradually mix in a tiny amount of milk (either dairy or a non-dairy alternative) or water. Add it one teaspoon at a time, mixing well after each addition, until the dough reaches your desired pliable and easy-to-handle consistency.
- If the Dough is Too Thin or Sticky: Conversely, if the dough is too wet, overly soft, or excessively sticky, progressively add a little more almond flour (or protein powder, if you are including it in your recipe) until it firms up and becomes much easier to shape and manage.
- Flexibility with Protein Powder: Remember that protein powder is an optional ingredient in this recipe. If you don’t have it on hand, or simply prefer not to include it, feel free to omit it entirely. Just ensure you replace the specified amount of protein powder with an equal measure of additional almond flour to maintain the dough’s intended structure and consistency.
The Power of Vital Proteins Collagen Peptides in Your Treats
As a passionate advocate for nourishing our bodies with delicious, thoughtfully prepared food, I was incredibly excited to incorporate Vital Proteins Collagen Peptides into this cookie dough recipe. What makes this particular ingredient truly remarkable is its unique ability to provide a significant, beneficial boost of nutrition without in any way compromising the bars’ delectable texture or their irresistible flavor. Their unflavored collagen peptides seamlessly integrate into the dough, making it an effortlessly simple and effective way to enhance your daily collagen intake without even noticing it’s there.
I have been an enthusiastic fan of Vital Proteins for many months now, and for very good reason! This product is truly amazing for actively supporting the health and vitality of your skin, the strength of your bones, the luster of your hair, and the integrity of your nails. Furthermore, Vital Proteins now conveniently offers their collagen peptides in individual, pre-portioned packets. This makes them incredibly easy to carry with you on road trips, to the gym, or for a quick, healthy boost anytime and anywhere you might need it. It’s a simple, yet powerful, addition that elevates these already wholesome cookie dough bars into an even more beneficial and well-rounded treat, perfectly aligning with a healthy lifestyle.
Recipe FAQs: Frequently Asked Questions for No-Bake Cookie Dough Bars
The most common reason for your bars not setting to the desired firmness is insufficient chilling time. It is absolutely essential to ensure they are placed in the refrigerator for a minimum of 10-15 minutes (and potentially longer if your kitchen environment is particularly warm) to allow both the cookie dough filling and the protective chocolate layers to fully firm up and stabilize. Additionally, double-check that your coconut oil was indeed in a solid state, not melted, when you initially began preparing the dough mixture.
Absolutely, yes, this specific recipe is entirely safe for raw consumption! It is meticulously designed to be 100% eggless, eliminating any concerns about consuming raw eggs which can carry a risk of salmonella. Our recipe completely bypasses this concern, allowing you to indulge in the pure, unadulterated pleasure of raw cookie dough without any worries. Furthermore, we utilize almond flour, which is safe to eat raw, unlike conventional all-purpose flour that sometimes requires prior heat treatment.
Patience and a gentle touch are paramount here! First and foremost, ensure that the chocolate coating is completely set and thoroughly firm. Once you’re confident it’s ready, carefully flip the mold completely over onto a sheet of wax paper, a clean cutting board, or a silicone mat. Then, lightly but firmly tap the top and sides of the mold. The bars should then release cleanly and effortlessly. It’s crucial to avoid using excessive force or prying them out, as this can easily cause them to crack, break, or mar their beautiful finish. Using a flexible silicone mold will also greatly facilitate an easy release.
Storage Tips for Optimal Freshness and Enjoyment
To preserve the exquisite taste, perfect texture, and overall freshness of your no-bake chocolate chip cookie dough bars, and to ensure they remain delightful for as long as possible, adhere to these comprehensive storage guidelines:
- Room Temperature Considerations: These bars are definitively best enjoyed chilled. It is strongly advised not to leave them out at room temperature for more than 1-2 hours, particularly in warmer climates or during hot spells, as both the coconut oil in the dough and the chocolate coating will soften significantly, potentially altering their structure and taste.
- Refrigeration for Leftovers: Any leftover bars should always be meticulously stored in an airtight container. Placing them in the refrigerator will maintain their ideal texture and delicious flavor for up to 3 days. Ensure the container is truly airtight to prevent them from absorbing other odors from the fridge.
- Freezer Guidelines: Freezing the finished, already chocolate-coated bars is generally not recommended. The rapid temperature changes during freezing and thawing can often cause the chocolate coating to crack, bloom (develop white streaks), or become unpleasantly brittle, significantly detracting from their visual appeal and texture. However, if you wish to prepare the dough in advance for future use, you can store the raw cookie dough itself in a sealed, freezer-safe container for up to 1 month. When you’re ready to enjoy them, simply thaw the dough completely in the refrigerator, and then proceed with coating it in melted chocolate according to the instructions provided in the recipe.
- Make Ahead Convenience: For effortless entertaining or meal prepping, you can conveniently prepare these delicious bars up to 3 days in advance. Simply store them in an airtight container in the refrigerator, and they will be perfectly fresh and ready to serve whenever you desire a sweet, homemade treat.
More Easy Homemade No-Bake Bars to Explore
If you’ve fallen completely in love with the effortless simplicity and sheer deliciousness of these no-bake cookie dough bars, then you’re in for an absolute treat! Here are even more fantastic, incredibly easy bar recipes that require absolutely no oven time, perfect for satisfying your sweet tooth any time of year:
- Chocolate Coconut Bars (Macaroon Bars)
- S’mores Bars (No Bake)
- Chocolate Oatmeal Bars (Crumb Bars)
- Rainbow Cereal Bars
- Easy Scotcheroos (No Corn Syrup)
Recipe: Eggless Chocolate Chip Cookie Dough Bars
Chocolate Chip Cookie Dough Bars (Eggless)
Abeer Rizvi
Pin Recipe
Want to Save This Recipe?
Enter your email & I’ll send it to your inbox. Plus, get great new recipes from me every week!
By submitting this form, you consent to receive emails from CakeWhiz
Ingredients
- ¼ cup Coconut oil Solid and not melted for best results
- 2-3 tablespoons Raw honey Adjust according to your sweetness preference
- ½ teaspoon Vanilla extract
- 1 cup Almond flour
- 1.5 tablespoons Protein powder Unflavored, such as Vital Proteins Collagen Peptides. Optional; replace with additional almond flour if omitting.
- ¼ cup Mini chocolate chips Semisweet, for mixing into the dough
- 2 cups Melted chocolate Semisweet, milk, dark or white, for coating the bars
Instructions
-
In a mixing bowl, combine the solid coconut oil, raw honey, and vanilla extract. Mix thoroughly until smooth and well-combined.
-
Add the almond flour and collagen peptides (if using). Continue mixing until a thick, uniform dough forms.
-
Fold in the mini chocolate chips using a spatula until evenly distributed throughout the dough.
-
Using a small paintbrush or spoon, coat the inside of your chocolate mold cavities with a layer of melted chocolate. Place the mold in the refrigerator and chill for 10 minutes until the chocolate is firm.
-
Carefully fill each chocolate-lined mold cavity with the cookie dough mixture, pressing it gently to form an even layer. Leave a small space at the top.
-
Cover the top of the cookie dough with more melted chocolate, spreading it smoothly to seal the bar. Return the mold to the refrigerator and chill for an additional 10-15 minutes, or until the chocolate is completely set.
-
Once fully set, gently flip the mold onto a sheet of wax paper or a clean surface. Lightly tap the top and sides of the mold to release the finished chocolate chip cookie dough bars.
-
Repeat the process to make as many bars as desired, then enjoy your delightful homemade treats!
Video
Notes
- Chilling for Perfection: Always chill your bars in the refrigerator. Avoid the freezer, as rapid chilling can cause the chocolate coating to crack and develop unattractive white streaks or “bloom.”
- Dough Consistency Adjustments: If your dough feels too thick or dry, gradually mix in a small amount of milk or water (a teaspoon at a time) until it reaches the desired consistency. If it’s too thin or sticky, incorporate additional almond flour or protein powder (if using) a little at a time until it’s pliable and easy to handle.
- Honey Choice: For the best flavor and a naturally thicker consistency, I highly recommend using raw honey.
- Flavor Enhancements: Feel free to experiment with different extracts, such as almond or coconut, to create unique and exciting flavor profiles for your bars.
- Chocolate Brownie Flavor: To achieve a rich chocolate brownie taste, simply mix in 2-3 tablespoons of unsweetened cocoa powder into the dough mixture before chilling.
- Protein Powder Flexibility: The protein powder is an optional ingredient. If you choose to omit it, simply replace it with an equal amount of almond flour to maintain the dough’s structure and consistency.
- Additional Add-ins: Get creative with extra ingredients! Consider folding in mini M&M candies, chopped pretzels for a salty crunch, various dried fruits like raisins or cranberries, or shredded coconut for added texture and taste.
- Further Guidance: For more detailed information on key ingredients, exciting variations, and advanced techniques, please refer to the comprehensive sections above in the main article.
- Storage: Store any leftover bars in a sealed airtight container in the refrigerator for up to 3 days to maintain optimal freshness, prevent softening, and keep them tasting their best.
Nutrition
An automated tool is used to calculate the nutritional information. As such, I cannot guarantee the accuracy of the nutritional information provided for any recipe on this site.
