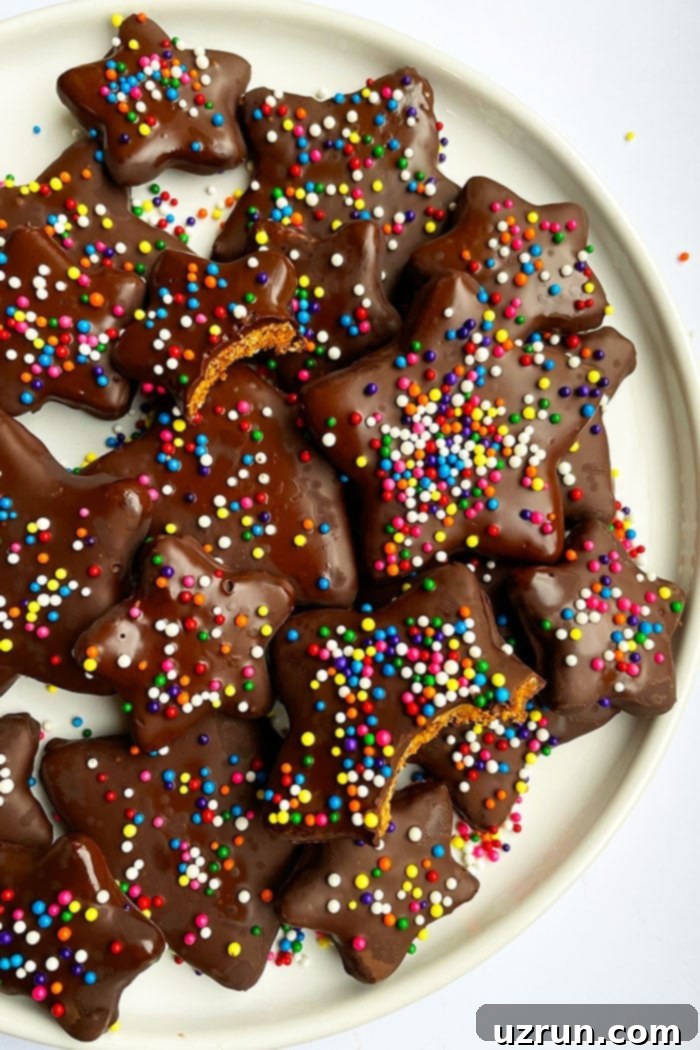
Easy Crispy Gingersnap Cookies: The Ultimate Homemade Recipe for Chocolate-Dipped Perfection
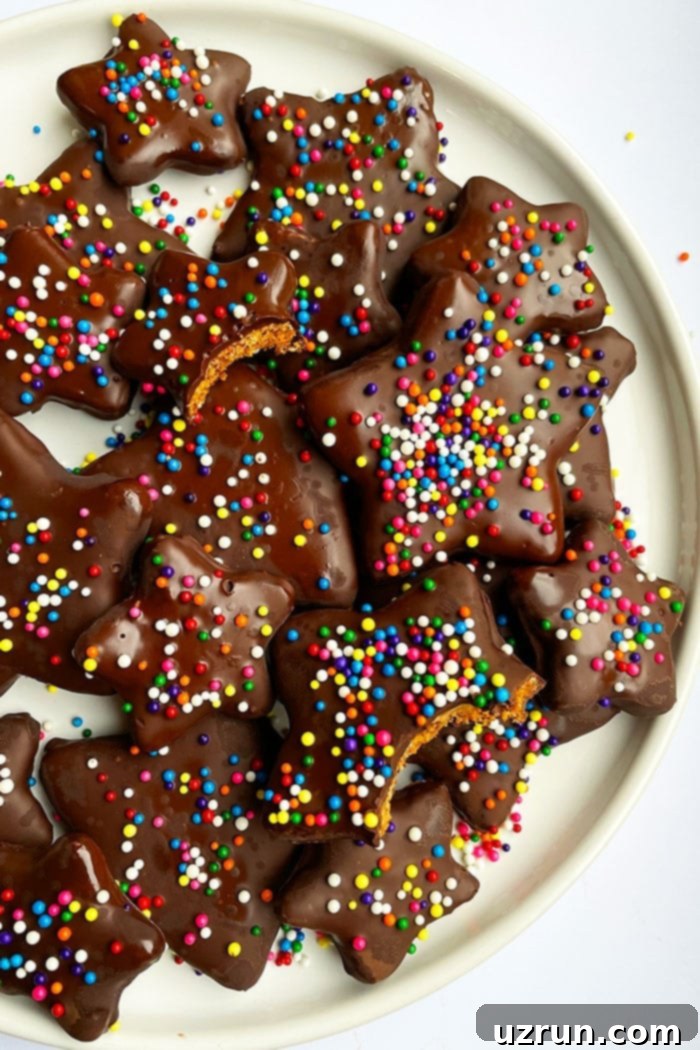
Imagine biting into a cookie that delivers a satisfying *snap*, followed by a delightful burst of warm, aromatic spices and a rich, sweet finish from a decadent chocolate coating. That’s precisely what you’ll get with this incredible recipe for **easy crispy gingersnap cookies**. Crafted with simple, readily available ingredients, these homemade treats are generously infused with classic spices such as cinnamon, ginger, nutmeg, and cloves, and then beautifully enrobed in a layer of luscious semisweet chocolate.
These chocolate-covered gingersnaps offer a fun and sophisticated twist on a beloved classic. While their intricate spice profile and crisp texture tend to captivate adult palates, don’t be surprised if they become a hit with everyone, especially when adorned with festive sprinkles! As the holiday season approaches, these cookies are a fantastic addition to your baking repertoire. If you’re looking for other ginger-themed delights, consider making these Easy Ginger Cookies for a softer bite, or even my Fat Free Ginger Cookie recipe, perfect for those mindful of their fat intake amidst all the tempting holiday goodies.
How to Make Easy Crispy Gingersnap Cookies from Scratch
Creating these delightful gingersnap cookies is a straightforward process that yields impressive results. Follow these simple steps for perfect, crispy, and spicy treats every time:
- Cream Butter and Sugar: Begin by creaming room-temperature unsalted butter with brown sugar until the mixture is light, fluffy, and pale in color. This crucial step incorporates air, which contributes to the cookies’ light texture and helps create that signature crispness.
- Add Wet Ingredients: Next, incorporate the rich molasses, a large egg, and a dash of vanilla extract. Mix thoroughly until all these liquid ingredients are smoothly combined with the butter and sugar mixture, ensuring an even distribution of flavor.
- Combine Dry Ingredients: In a separate bowl, whisk together the all-purpose flour, baking soda, ground ginger, cinnamon, cloves, nutmeg, and salt. These spices are the heart of your gingersnaps, delivering that iconic warm and spicy aroma and taste.
- Gradually Mix Dry into Wet: Slowly add the dry ingredient mixture to the wet mixture, mixing just until combined. Be careful not to overmix, as this can develop the gluten in the flour too much, leading to tougher cookies.
- Shape and Chill Dough: Gather the crumbly mixture and gently form it into a ball. If the dough feels too dry, add a tiny bit of water or milk; if it’s too wet, a sprinkle of flour will help. Cover the dough tightly with plastic wrap and chill it in the refrigerator for at least an hour. Chilling is essential as it firms up the butter, preventing the cookies from spreading too much during baking and making the dough much easier to handle and cut.
- Roll and Cut Dough: Once chilled, roll out the dough to a quarter-inch thickness. For a mess-free process, roll it between two sheets of wax paper. Use your favorite cookie cutters – star shapes are particularly festive!
- Bake to Perfection: Place the cut-out cookies on a baking sheet lined with parchment paper. Bake in a preheated oven until the edges are firm and lightly browned, while the centers remain slightly soft. This careful balance ensures a crispy exterior with a tender, chewy interior.
- Cool Completely: Remove the baking sheet from the oven and let the cookies cool on the tray for a few minutes before transferring them to a wire rack to cool completely. This residual heat from the tray helps them firm up and develop their characteristic “snap.”
- Dip in Melted Chocolate: Once fully cooled, dip each cookie into a bowl of smoothly melted semisweet chocolate. The chocolate adds a layer of richness and a beautiful finish.
- Decorate and Set: Place the chocolate-dipped cookies on wax paper and immediately decorate with your choice of sprinkles. Allow the chocolate to set at room temperature until firm before serving.

Understanding Molasses: The Heart of Gingersnap Flavor
Molasses is a key ingredient in gingersnap cookies, not just for its sweetness but for its distinctive dark, caramelized flavor and moistening properties. There are primarily two types you’ll encounter in baking: unsulphured molasses and blackstrap molasses. Unsulphured molasses is derived directly from the first boiling of sugar cane syrup and is typically what you’ll find readily available in most grocery stores. It has a lighter color and a sweeter, more mellow flavor profile, making it ideal for most baked goods, including our gingersnaps. Blackstrap molasses, on the other hand, is a byproduct of the third boiling of sugar cane, resulting in a much thicker, darker, and more bitter liquid with significantly less sugar and higher mineral content. While it offers a deeper, more robust flavor, it can be too intense for some recipes. For classic gingersnap cookies, unsulphured molasses is the preferred choice, providing that perfect balance of sweetness and characteristic depth without overpowering the delicate spice blend.
Gingersnaps vs. Gingerbread Cookies: A Tale of Two Textures
While both gingersnaps and gingerbread cookies celebrate the warm, spicy notes of ginger, their defining characteristic lies in their texture, as their names cleverly suggest. **Gingersnap** cookies are designed to be crisp and brittle, delivering a satisfying “snap” or crackle when broken or eaten. This firm texture is often achieved through specific ingredient ratios and baking times that encourage moisture evaporation. **Gingerbread cookies**, conversely, are traditionally soft, chewy, and pliable. They are often thicker and might be baked for a shorter period or at a lower temperature to retain moisture. This softness makes them perfect for decorating with icing or, ironically, for constructing sturdy gingerbread houses after they’ve had a chance to harden slightly. So, while they share a similar flavor profile thanks to ginger and other warming spices, their textural experiences are distinctly different, catering to varied cookie preferences.
Why Do We Call Them “Gingersnaps”?
The name “gingersnaps” is a direct nod to their defining characteristic: their crisp texture. When these cookies are properly baked, they become firm and brittle, producing an audible “snap” or cracking sound when you break them in half or take a bite. This unique texture is what many people love about them, setting them apart from softer ginger cookie varieties. Beyond the satisfying sound, their robust and crunchy nature makes them exceptionally versatile. They are a fantastic companion for dipping into hot beverages like tea, coffee, or a glass of warm milk, where they soften slightly but still retain some of their delightful crunch. This crispness is not just a textural pleasure but also a key part of their charm and heritage.
Irresistible Variations for Chocolate-Covered Spicy Crispy Gingersnaps
While the classic chocolate-covered gingersnap is a true delight, there are countless ways to customize this recipe and make it truly your own. Experiment with these variations to discover new flavor combinations and visual appeals:
- Embrace White Chocolate: For a delightful contrast in both flavor and appearance, swap the semisweet chocolate for creamy white chocolate. The sweetness of white chocolate beautifully complements the spicy kick of the gingersnaps, creating an elegant treat.
- Skip the Chocolate Dip: If you prefer a simpler, more traditional gingersnap, feel free to omit the chocolate altogether. These cookies are wonderfully flavorful on their own, allowing the warm spices to truly shine.
- Decorate with Icing: For a more elaborate presentation, decorate cooled gingersnaps with Royal Icing or Glace Icing (Sugar Cookie Icing). You can create intricate designs, holiday themes, or simple patterns to add a touch of artistic flair.
- Elegant Chocolate Drizzle: Instead of fully dipping each cookie, consider a delicate chocolate drizzle. Melt your preferred chocolate and use a fork or a piping bag with a fine tip to create elegant lines or patterns over the cookies. This offers a lighter chocolate touch while maintaining visual appeal.
- Festive Colored Chocolate: To truly embrace the holiday spirit, melt red, green, or white candy melts or colored chocolate. Dip your gingersnaps in these vibrant hues and then immediately top with colorful, festive sprinkles. This creates a visually stunning and joyful cookie display.
- Infuse Cocoa into the Dough: Add a tablespoon or two of unsweetened cocoa powder to the dry ingredients of the dough. This subtle addition will introduce a delicate chocolate undertone to the cookie itself, enhancing the overall depth of flavor and potentially becoming your new favorite variation!
- Adjust Spice Levels: The beauty of homemade baking is customization. Feel free to play with the quantities of ginger, cinnamon, cloves, and nutmeg. Increase the ginger for a bolder kick, or dial back the cloves if you prefer a milder spice blend.
- Explore New Spices: Don’t limit yourself to the traditional blend! Experiment with other warm spices like cardamom, star anise, allspice, coriander, or even a hint of rosemary for an unexpected and sophisticated twist.
- Use Fresh Ginger: For an incredibly vibrant and pungent ginger flavor, finely grate a tablespoon or two of fresh ginger into your wet ingredients. This will add a distinct brightness and aromatic quality that dried ginger powder can’t fully replicate. Yum!

Essential Tips and Techniques for the Best Old-Fashioned Ginger Snap Cookies
Achieving perfectly crispy gingersnap cookies is all about a few key techniques and understanding your ingredients. Keep these tips in mind for consistently delicious results:
- Monitor Baking Time Carefully: Cookie thickness and size significantly impact baking time. Keep a close eye on your cookies as they bake. They should appear lightly browned around the edges and still be slightly soft in the center when removed from the oven. Overbaking will lead to a very hard, dry cookie, while underbaking will result in a soft cookie that lacks the desired “snap.”
- Always Chill Your Dough: Chilling the dough is a non-negotiable step for crispy gingersnaps. The cold temperature solidifies the butter, which prevents the cookies from spreading too much during baking, maintaining their shape and contributing to their crisp texture. It also makes the dough much easier to handle, roll out, and cut with cookie cutters. Don’t rush this step!
- Troubleshooting Crumbly Dough: If your dough feels too dry and crumbly to form a ball or roll out, simply add a very small amount (a teaspoon at a time) of water or milk. Mix it in until the dough just comes together and reaches a workable consistency. Be careful not to add too much, or it will become sticky.
- Addressing Wet Dough: Conversely, if your dough feels too sticky or wet, gradually mix in a tablespoon of flour at a time until it reaches a manageable, non-sticky consistency. This often happens if your butter was too soft or if there was too much liquid added.
- Opt for Unsulphured Molasses: As discussed, unsulphured molasses is the best choice for this recipe. Its sweeter, milder flavor perfectly complements the spices without being overpowering, and it’s generally easier to find in most grocery stores.
- Use Wax Paper for Rolling: Rolling dough between two sheets of wax paper is a game-changer. It prevents the dough from sticking to your rolling pin and countertop, minimizes mess, and ensures an even thickness without needing extra flour, which can dry out your cookies.
- Line Baking Trays with Parchment Paper: Always line your baking trays with parchment paper. This simple step prevents the cookies from sticking to the pan, ensures even baking, and makes for super easy cleanup. It also helps in transferring the delicate baked cookies without breakage.
- Cooling is Crucial: Allow the cookies to cool on the hot baking sheet for at least 5-10 minutes after coming out of the oven. The residual heat continues to cook them slightly, helping them firm up and develop that characteristic crispiness. Moving them too soon can cause them to break or lose their shape.

Storage Solutions for Your Crispy Gingersnaps
Proper storage is key to maintaining the delicious flavor and signature crispness of your homemade gingersnap cookies. Follow these guidelines to keep them fresh:
- Room Temperature (Fridge Not Recommended): Leftover gingersnap cookies are best stored in an airtight cookie jar or container at room temperature. They will retain their crisp texture and wonderful flavor for up to 3 days. Avoid storing them in the refrigerator, as the moisture can make them soft.
- Freezing for Longer Freshness: For longer storage, these cookies freeze beautifully. Place fully cooled (and chocolate-set) cookies in an airtight freezer-safe container or a heavy-duty freezer bag, separating layers with parchment paper to prevent sticking. They can be stored in the freezer for up to 1 month. When you’re ready to enjoy them, simply thaw the cookies at room temperature for an hour or two before serving.
Explore More Delicious Ginger Desserts
If you love the warm, comforting flavor of ginger, you’re in for a treat! Here are some other fantastic ginger-infused desserts to try from our collection:
- Jumbo Gingerbread Men Cookies: Classic holiday shapes with a soft, chewy texture perfect for decorating.
- Easy Gingerbread Cookies (With Cake Mix): A clever shortcut to delicious gingerbread cookies using a convenient cake mix.
- Easy Gingerbread Recipe (Gingerbread Cake): A moist and flavorful gingerbread cake, perfect for a cozy dessert.
- Easy Ginger Cake (With Ginger Frosting): A light and airy cake infused with ginger, topped with a complementary ginger frosting.
- How to Make Gingerbread House: A step-by-step guide to constructing your very own festive gingerbread house.
Recipe
Easy Gingersnap Cookies
Abeer Rizvi
Pin Recipe
Want to Save This Recipe?
Enter your email & I’ll send it to your inbox. Plus, get great new recipes from me every week!
By submitting this form, you consent to receive emails from CakeWhiz
Ingredients
- 1 cup Brown sugar
- ¾ cup Butter Unsalted, Room temperature
- ½ cup Molasses Unsulphered
- 1 Egg Large
- 1 teaspoon Vanilla extract
- 3 cups All-purpose flour
- 1 teaspoon Baking soda
- 2.5 teaspoon Ginger powder Can replace with freshly ground ginger
- 2 teaspoon Cinnamon powder
- ¼ teaspoon Ground cloves
- ¼ teaspoon Nutmeg powder
- ¼ teaspoon Salt
- 2 cups Chocolate Semisweet or white, Melted
- 3 tablespoon Sprinkles For topping
Instructions
-
In large mixing bowl, cream together brown sugar and butter until light and fluffy.
-
Add molasses, egg, vanilla extract and mix until smooth.
-
Add flour, baking soda, ginger, cinnamon, cloves, nutmeg, salt.
-
Mix until just combined.
-
Use your hands to shape crumbly mixture into a rough ball of dough. If dough is too dry and crumbly, add a splash of milk or water. If dough is too wet, mix in some more flour.
-
Cover and chill dough in fridge for 1 hour to firm it up slightly and make it easier to handle.
-
Roll out this dough between two sheets of wax paper to a thickness of a quarter inch.
-
Use a star cutter to cut out cookie shapes.
-
Place them on a cookie tray, lined with parchment paper.
-
Bake at 350 degrees F for about 10 minutes or until edges are firm and center is slightly soft.
-
Remove tray from oven and allow cookies to cool completely. Don’t try to remove cookies from the baking tray or else they will break plus the residual heat from the baking tray continues to cook them further and makes the cookies firmer.
-
Once the cookies come to room temperature, dip each of them in a bowl of melted chocolate.
-
Place them on a tray, lined with wax paper.
-
Toss some sprinkles on top.
-
Allow chocolate to set at room temperature and enjoy!
Notes
- Refer to all the detailed tips and techniques provided above for the best results, ensuring your cookies achieve that perfect crispness and flavor.
- Leftover cookies should be stored in an airtight cookie jar or container at room temperature for up to 3 days to maintain their crisp texture.
- These cookies freeze wonderfully! Store in an airtight container for up to 1 month. Thaw at room temperature before serving.
Nutrition
An automated tool is used to calculate the nutritional information. As such, I cannot guarantee the accuracy of the nutritional information provided for any recipe on this site.
