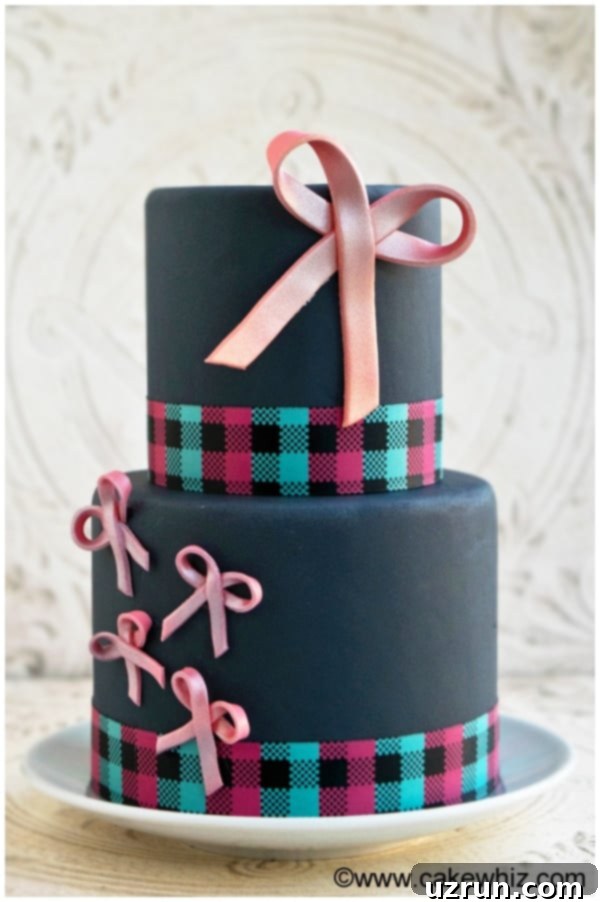
Mastering Easy Fondant Bows: A Step-by-Step Guide for Cakes and Cupcakes (No Cutters Required!)
Welcome to the ultimate guide for creating beautiful, elegant fondant bows that will transform your cakes and cupcakes into true masterpieces! You might think intricate cake decorations require specialized tools and years of experience, but today’s tutorial proves that stunning results are well within reach for every home baker. We’ll show you how to craft adorable, perfectly shaped fondant bows with no cutters, using simple techniques that yield incredibly cute results.
This easy-to-follow, step-by-step method is perfect for beginners and seasoned decorators alike. Fondant bows are a versatile and charming addition to any sweet treat, from birthday cakes and wedding desserts to everyday cupcakes. If you’re passionate about cake decorating, be sure to explore more of our creative ideas: check out these Easy Cake Decorating Ideas for Beginners, discover inspiring Bundt Cake Decorating Ideas, and browse our delightful Birthday Cake Ideas for endless inspiration.
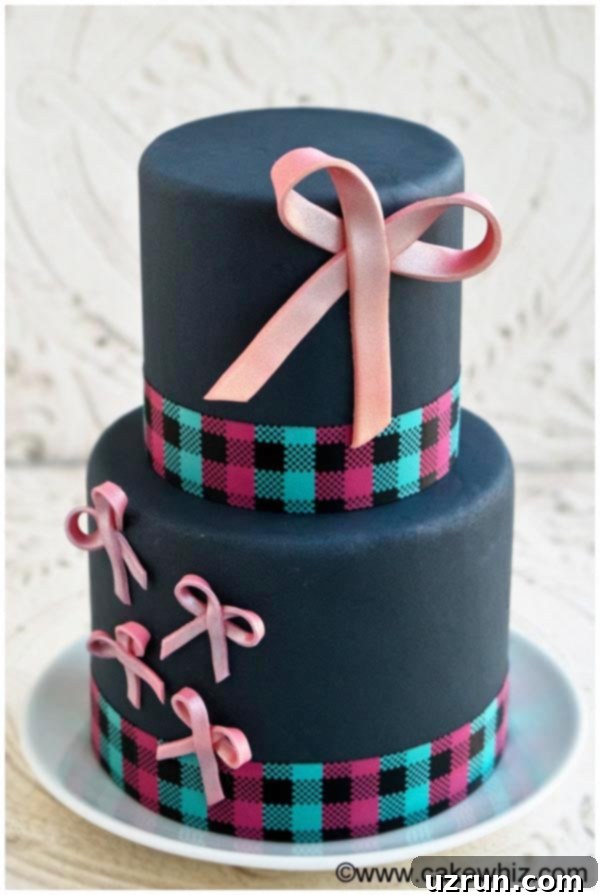
Table of contents
- How to Make Simple Fondant Bows for Cakes and Cupcakes?
- Variations for Your Fondant Cake Bows
- Essential Tips and Techniques for Decorating Cakes with Fondant Bows
- Storage: Best Practices for Fondant Decorations and Decorated Cakes
- More Decorated Cake Ideas to Inspire You
How to Make Simple Fondant Bows for Cakes and Cupcakes?
Creating beautiful fondant bows is far simpler than it looks, and you don’t need any specialized tools. Follow these straightforward steps to achieve elegant edible decorations for your cakes and cupcakes:
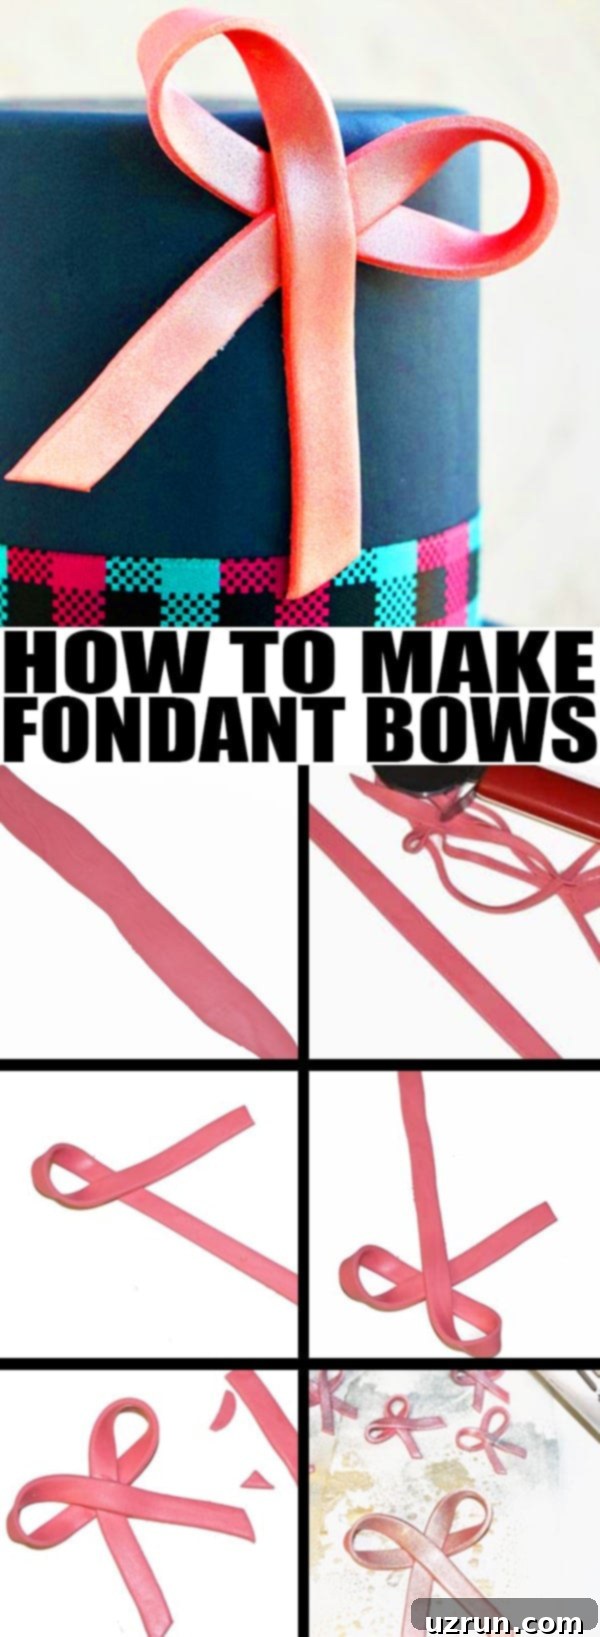
- Prepare and Roll Your Fondant: Start with a smooth, pliable piece of fondant. Knead it gently until it’s easy to work with. Using a non-stick surface or a mat lightly dusted with cornstarch (or powdered sugar), roll out your fondant evenly. Aim for a thin, consistent thickness, about 1/8 inch (3mm). This ensures your bows will be delicate yet sturdy enough to hold their shape. Remember, precision here contributes to a polished final look.
- Cut Perfect Rectangular Strips: Once your fondant is rolled, use a sharp pizza cutter, a ruler, and a sharp knife (like an X-Acto blade) to cut thin, uniform rectangular strips. The width and length of these strips will determine the size and style of your finished bows. For standard bows, aim for strips about 1 inch wide and 4-6 inches long, adjusting as needed for larger or smaller bows. Ensure the edges are clean and straight for a professional finish.
- Form the Loops of the Bow: Take one end of a rectangular strip and fold it inwards to create a loop, bringing it to meet the center of the strip. Gently press the seam where the end meets the center to secure it. Repeat this process with the other end of the strip, folding it inwards to create a symmetrical second loop. You should now have two distinct loops forming the main body of your bow.
- Pinch and Secure the Center: Once both loops are formed, carefully pinch the very center of the assembled loops. This action brings the two loops together and gives the bow its characteristic cinched appearance. Press firmly but gently to ensure the loops are well-adhered in the middle. You can lightly moisten the center with a tiny drop of water or edible glue to help them stick more securely, especially if your fondant is a bit dry.
- Trim and Shape the Bow Tails: Use your sharp knife or blade to trim any excess fondant from the back or sides of the pinched center to create a neat, defined shape. For the classic bow look, you can also cut small “V” shapes into the ends of any trailing ribbon strips (the “tails” of the bow) if you choose to add them. This adds a refined touch to your finished decoration.
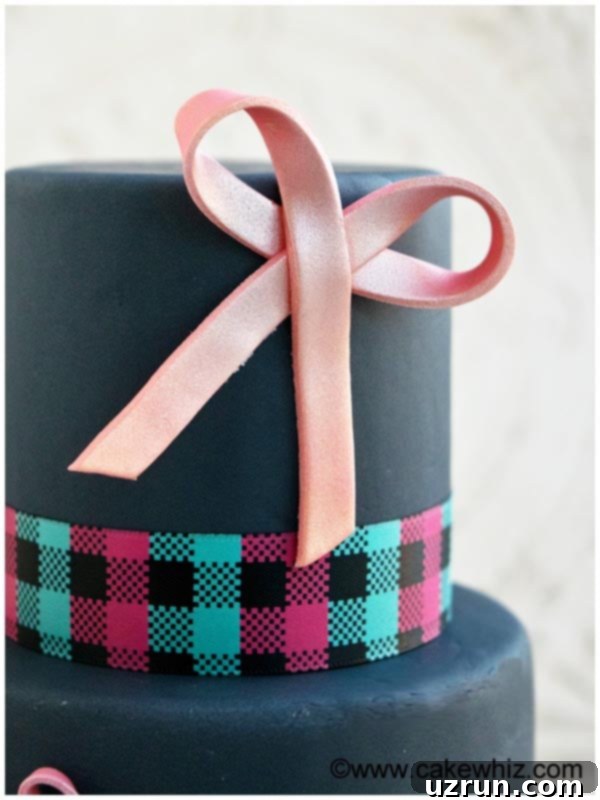
- Add Embellishments and Dry Your Bows: For an extra touch of glamour, consider spraying your fondant bows with an edible lustre spray, such as silver or gold, as shown in the example. Place your newly formed bows on a piece of wax paper or parchment paper and allow them to dry completely. This is a crucial step! The drying process can take anywhere from 12 to 24 hours, or even longer depending on the humidity and thickness of your fondant. Ensure they are hard and firm before handling or applying to your cake to prevent them from losing their shape.
Variations for Your Fondant Cake Bows
Fondant bows offer a fantastic canvas for creativity. Don’t limit yourself to just one style or color! Here are numerous ways to customize your edible bows and the cakes they adorn:
Flavor Your Fondant: While fondant often has a subtle vanilla flavor, you can easily infuse it with other extracts to complement your cake. A few drops of almond, lemon, strawberry, or even a hint of mint extract can add an unexpected and delightful taste dimension. Ensure you add extracts sparingly and knead well to distribute the flavor without making the fondant too sticky.
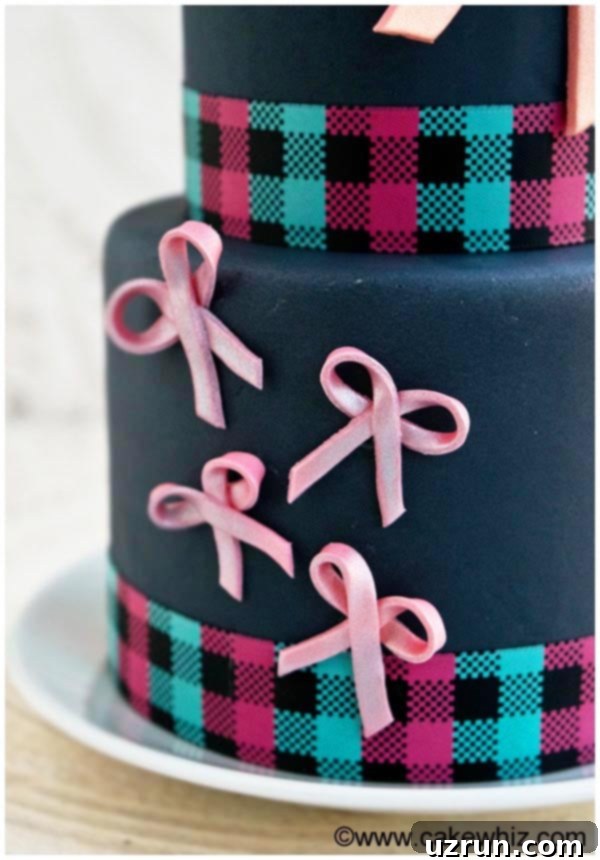
Experiment with Colors and Textures: I chose a charming pink and gray theme for this cake, but the possibilities are endless! Use gel food colors, which are highly concentrated and won’t thin out or make your fondant sticky like liquid colors. You can mix colors to create custom shades or purchase pre-colored fondant for convenience. For added sparkle, brush on edible glitter or pearl dust after the bows have dried. You can also press texture mats onto the rolled fondant before cutting strips to create patterns like lace, polka dots, or stripes, adding an extra layer of visual interest to your bows.
Pair with Different Cake Flavors: The beauty of fondant bows is their versatility. They’ll look gorgeous on any cake flavor you choose! Consider classic combinations like Chocolate Coffee Cake for a rich indulgence, or a light and airy Best Vanilla Cake for a timeless appeal. Red velvet, lemon, carrot, or even spice cakes would also make delightful foundations for your decorated masterpiece.
Match with Complementary Frostings: The frosting beneath your fondant can make a huge difference in both taste and texture. Think beyond basic buttercream! A fluffy Marshmallow Frosting can add a light, sweet contrast, while a decadent Caramel Frosting provides a rich, buttery depth. Cream cheese frosting, ganache, or a fruit curd filling could also offer exciting flavor profiles.
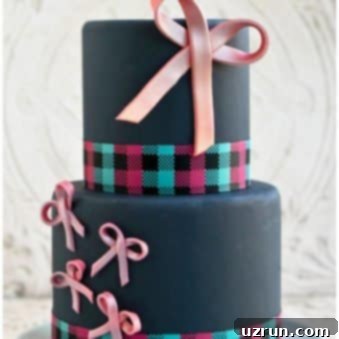
Scale for Larger Tiered Cakes: The elegant tiered cake featured in this tutorial is relatively small, with a 6-inch bottom tier and a 3-inch top tier. However, the same simple techniques for making fondant bows can be applied to cakes of any size. For larger, grander tiered cakes, simply scale up the size of your fondant strips to create proportionately larger bows. Remember to consider structural support for multi-tiered cakes, which we’ll discuss further in the tips section.
Decorate Cupcakes and Mini Treats: These charming fondant bows aren’t just for large cakes! They make incredibly cute toppers for cupcakes, mini tarts, or even cake pops. Create smaller, delicate bows to adorn a swirl of frosting on individual cupcakes. This is a fantastic way to extend your decorative theme across an entire dessert spread, perfect for parties and celebrations.
Explore Different Bow Styles: Beyond the classic loop bow, you can create variations. Make a simple “ribbon” style bow by folding a strip into an ‘S’ shape. For a multi-loop bow, attach several smaller loops together at the center. You can also add thin fondant “ribbon” pieces to drape around the cake tiers for a cohesive look.
Essential Tips and Techniques for Decorating Cakes with Fondant Bows
Achieving flawless fondant bows and a perfectly decorated cake requires a few key insights and techniques. Keep these professional tips in mind for the best results:
Choosing Your Fondant: Homemade vs. Store-Bought vs. Gum Paste:
- Homemade Fondant: Many decorators, including myself, prefer homemade marshmallow fondant for its superior taste and pliability. It’s often more forgiving to work with and tastes much better than some store-bought varieties.
- Store-Bought Fondant: Offers convenience and a wide range of pre-colored options. Quality varies, so experiment to find a brand you like.
- Gum Paste (or Fondant/Gum Paste Blend): For delicate decorations like bows that need to hold their shape and dry quickly, gum paste is often preferred. Its elastic texture allows for very thin rolling and dries much faster and harder than fondant. For the best of both worlds, use a combination of half fondant and half gum paste. This blend provides the workability of fondant with the faster drying time and firmness of gum paste, making your bows robust and durable.
Select Firm Cakes for Tiered Creations: When venturing into tiered cakes, it’s paramount to choose recipes that yield firmer, more stable cake layers. Soft, delicate cakes (like some chiffon or sponge recipes) simply cannot withstand the weight of additional tiers, frosting, and fondant decorations without collapsing or shifting. Opt for sturdier cakes such as pound cake, denser butter cakes, or stable chocolate cake recipes to ensure your masterpiece stands tall and proud.
Always Decorate a Completely Cool Cake: This tip is non-negotiable! The cake must be thoroughly cooled – preferably chilled in the refrigerator for at least 30 minutes after frosting – before you begin applying any fondant decorations. If the cake is even slightly warm, the heat will cause the fondant to soften, melt, become sticky, and ultimately lose its shape, leading to a messy and disappointing outcome. Patience here is key to a pristine finish.
Ensure Decorations Are Bone Dry: Just like a cool cake, dry decorations are critical. Your fondant bows must be completely dry and firm to the touch before you attempt to place them on your cake. If a bow is still soft or pliable, it will sag, warp, or even collapse, ruining its elegant shape. Plan ahead and give your bows ample drying time.
Understanding Fondant Drying Time:
- How long does fondant need to dry? Typically, fondant bows require about 24 hours to dry sufficiently to hold their shape.
- Factors Affecting Drying Time:
- Thickness: The thinner you roll your fondant, the faster it will dry. Thicker bows will take considerably longer.
- Humidity: This is the biggest factor! Fondant dries by losing moisture to the air. In dry climates with low humidity, fondant dries much quicker. In humid environments, drying can be significantly slower, sometimes taking 48 hours or more. Consider using a dehumidifier in your workspace if humidity is a concern.
- Air Circulation: Placing bows in a well-ventilated area can help speed up drying. Avoid direct sunlight, which can cause colors to fade.
How to Secure Fondant Bows to Your Cake:
- What do you use to attach fondant to fondant? The best adhesive for fondant decorations is thick royal icing or edible glue.
- Application: Apply a very small amount of royal icing or edible glue to the back of your dried fondant bow. Use a toothpick or a fine brush for precision.
- Placement: Carefully press the bow onto the desired spot on your cake. Hold it in place for a few seconds to ensure it adheres.
- Less is More: Do not use too much adhesive! Excess royal icing will squeeze out from under the bow, creating a messy outline and spoiling the clean appearance of your beautiful cake. A tiny dot is usually sufficient.
- Corn Syrup: For attaching ribbons or larger, flatter pieces of fondant, a thin layer of corn syrup can also work as an adhesive.
Structural Support for Tiered Cakes: For any tiered cake, especially those with heavy decorations like multiple fondant bows, proper internal support is vital. Insert food-safe wooden dowels or plastic pillars into the bottom tier, cut to the exact height of the cake layer, before placing the upper tier. This prevents the top cake from sinking into and crushing the bottom one, ensuring stability and preventing disaster.
Troubleshooting Common Fondant Issues:
- Sticky Fondant: If your fondant becomes too sticky (often due to humidity or over-kneading), lightly dust your work surface and hands with cornstarch or powdered sugar.
- Cracking Fondant: If fondant is cracking, it might be too dry. Knead in a tiny amount of vegetable shortening or food-grade glycerin to restore its pliability. Ensure it’s well-kneaded before rolling.
- Bubbles: Small air bubbles can form under fondant. Use a clean pin to prick the bubble and gently smooth it out with your finger or a fondant smoother.
Storage: Best Practices for Fondant Decorations and Decorated Cakes
Proper storage is essential to maintain the quality, appearance, and freshness of your fondant decorations and the cakes they adorn. Fondant can be a bit finicky with temperature and moisture, so follow these guidelines:
Storing Decorated Cakes:
- Room Temperature: If your cake has buttercream or ganache and is covered in fondant, it can typically be stored in a covered cake box at cool room temperature (around 68-72°F or 20-22°C) for up to 24 hours. Fondant generally doesn’t fare well in cold, humid environments.
- Refrigerate: For longer storage, or if your cake has perishable fillings (like fresh fruit, custard, or cream cheese frosting) that require refrigeration, place the decorated cake in a covered box. Refrigerate for 3-5 days. Be aware that when a fondant-covered cake comes out of the fridge, condensation will form on its surface as it warms up to room temperature. This can make the fondant sticky or slightly tacky. To minimize this, allow the cake to warm up slowly inside its box, or in a dry, cool room. Avoid touching it until the condensation evaporates.
- Freezing Decorated Cakes: Generally, decorated cakes with fondant are not recommended for freezing. While the cake itself might freeze and thaw well, the fondant decorations will almost certainly become sticky and possibly weep due to the extreme condensation that occurs during thawing. This can ruin the texture and appearance of your beautiful bows.
Storing Unused Fondant and Dried Fondant Decorations:
- Unused Fondant: Store unused fondant tightly wrapped in plastic wrap, then placed in an airtight container or a resealable bag. Keep it at room temperature in a cool, dark pantry for several weeks or even months (check the package for specific best-by dates if store-bought). Do not refrigerate or freeze raw fondant, as it can dry out and become brittle.
- Dried Fondant Bows (Separate from Cake): Once your fondant bows are completely dry and hard, they can be stored separately. Place them gently in an airtight container at room temperature for up to 1 month. Ensure they are kept away from direct sunlight, extreme temperatures, and any moisture. You can place small pieces of parchment paper between layers of bows to prevent them from sticking or breaking. These dry decorations are delicate, so handle them with care!
More Decorated Cake Ideas to Inspire You
If you’ve enjoyed mastering fondant bows, you’ll love exploring more of our creative cake decorating tutorials. Expand your repertoire with these unique and exciting cake designs:
- Crying Baby Cake – A fun, novelty cake perfect for baby showers.
- Father’s Day Tool Box Cake – Surprise Dad with this cleverly crafted edible toolbox.
- Modern Abstract Cake – Dive into contemporary cake art with this unique design.
- Mini Sushi Cake – Delightful and surprisingly easy, these mini cakes resemble sushi rolls.
- Tie Dye Shirt Cake – A vibrant and groovy cake that brings back classic fun.
- Back To School Pencil Cake – The perfect treat to celebrate the start or end of the school year.
- Blue Ombre Cake – Create a stunning gradient effect with beautiful floral details.
- Butterfly Cake – Learn to make a whimsical cake adorned with delicate butterflies.
- Galaxy Cake – Swirls of cosmic colors create an out-of-this-world dessert.
- Easy Monster Cake – A friendly and fun monster cake that’s surprisingly simple to create.
Recipe
Fondant Bows
Abeer Rizvi
Pin Recipe
Want to Save This Recipe?
Enter your email & I’ll send it to your inbox. Plus, get great new recipes from me every week!
By submitting this form, you consent to receive emails from CakeWhiz
Ingredients
- Approximately 1 lb (450g) Marshmallow fondant (or a 50/50 blend with gum paste), divided into Dark gray and Pink portions
- Edible lustre spray (Silver or desired color, optional)
- 2 Chocolate cakes (one 6-inch round, one 3-inch round – ensure they are firm enough for stacking)
- 4-5 cups Chocolate buttercream frosting (for crumb coat and final icing)
- 2 tablespoons Royal icing (thick consistency, for attaching bows)
- Wooden dowels or plastic pillars (for tiered cake support)
- Decorative ribbon (to wrap around cake base, optional)
Instructions
-
On a lightly dusted surface, roll out your pink fondant (or fondant/gum paste blend) into a long, thin, even strip. Aim for about 1/8 inch thickness. This thickness is ideal for creating sturdy yet delicate bows.
Tip: For bows that dry faster and hold their shape better, use gum paste or a 50/50 combination of fondant and gum paste. This blend offers excellent elasticity and quicker setting times, which is perfect for structured decorations.
-
Use a pizza cutter or a sharp knife with a ruler to meticulously trim the edges, creating a perfectly smooth and long rectangular strip. Ensure the strip is uniform in width for consistent bow sizes.
-
Take one end of the fondant strip and carefully fold it over to form a loop. Bring the end towards the center of the strip, gently pressing the seam to secure it.
-
Repeat the process with the other end of the strip, folding it inwards to create a second, symmetrical loop. Align both loops carefully to ensure a balanced bow shape.
-
Firmly but gently pinch the very center of the assembled loops. This action creates the classic cinched appearance of a bow and helps to secure both loops together. You can use a tiny drop of edible glue or water to reinforce the bond.
-
With a sharp knife or blade, carefully trim any excess fondant from the back or sides of the pinched center. This step is crucial for achieving a clean, professional finish on your bows.
-
Place your freshly made bows on wax paper or parchment paper. If desired, lightly spray them with edible silver (or other color) lustre spray. This step is optional but adds a beautiful metallic sheen.
-
Follow these same steps to create several bows of varying sizes if you plan to decorate a larger cake or multiple cupcakes.
-
Allow these easy fondant bows to dry and harden completely, ideally for at least 24 hours. The drying time can vary based on fondant thickness and ambient humidity. Ensure they are firm to the touch before proceeding.
-
While your bows are drying, bake your chocolate cakes according to your chosen recipe and let them cool completely on a wire rack. It is vital for the cakes to be absolutely cold before decorating.
-
Once cool, place the 6-inch chocolate cake on your desired cake stand or serving plate. Apply a crumb coat of chocolate buttercream frosting, chill, then apply a final, smooth layer of frosting.
-
Roll out your dark gray fondant to an appropriate size and thickness. Carefully drape it over the 6-inch frosted cake, smoothing it out with fondant smoothers. Trim off any excess fondant neatly around the base of the cake.
-
To prepare for the top tier, insert several food-safe wooden dowels or plastic pillars into the center of the 6-inch cake. Cut them to the exact height of the cake layer to provide stable support for the tier above.
-
Now, frost the 3-inch chocolate cake with buttercream, chilling it, and then covering it smoothly with dark gray fondant, trimming excess as before.
-
Carefully lift and center the 3-inch fondant-covered cake on top of the prepared 6-inch cake, aligning it directly over the dowels for proper support.
-
Using a small amount of thick royal icing (applied with a toothpick for precision), adhere your perfectly dried pink fondant bows onto the tiered cake, arranging them artistically as desired.
-
For a polished finish, wrap a decorative ribbon around the base of each cake tier, securing it with a small dab of royal icing or corn syrup at the back. Your stunning fondant bow cake is now ready to be admired and enjoyed!
Notes
- For best results, carefully read all the detailed tips and techniques provided in the article above before you begin.
- If you have any leftover decorated cake, store it in a sealed container in the fridge for up to 3 days. Remember that fondant may become slightly tacky from condensation when chilled cakes return to room temperature.
- Any extra dried fondant bows can be stored in an airtight container at room temperature for up to one month, ready for your next baking project!
Nutrition
An automated tool is used to calculate the nutritional information. As such, I cannot guarantee the accuracy of the nutritional information provided for any recipe on this site.
