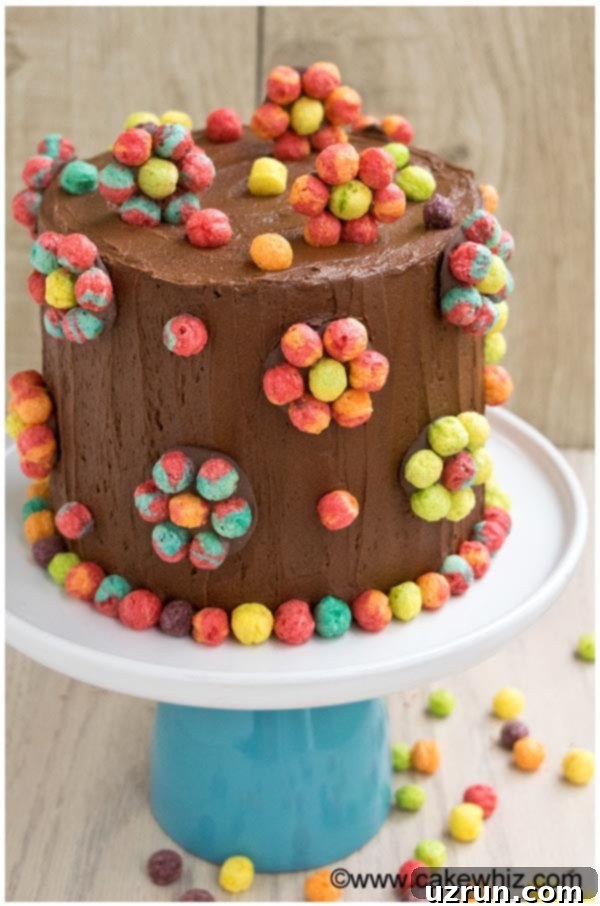
Easy & Fun Trix Cereal Cake Recipe: The Ultimate Guide for Colorful Kids’ Birthday Parties
Are you looking for a show-stopping dessert that’s both incredibly easy to make and bursting with vibrant colors? Look no further! This step-by-step tutorial will guide you through creating a delightful Trix Cereal Cake, perfect for any celebration, especially kids’ birthday parties. This homemade cake comes together with simple ingredients and requires no fancy decorating tools, making it an ideal project for beginners and even a fun activity to do with children.
Cereal isn’t just for breakfast anymore! Today, we’re transforming a beloved pantry staple into a whimsical dessert that promises to be as fun to make as it is to eat. Forget the stress of intricate fondant work or specialized cutters; this recipe focuses on straightforward techniques that yield impressive results. If you enjoyed my Cereal Cookies (With Froot Loops), you’re going to adore this cake!
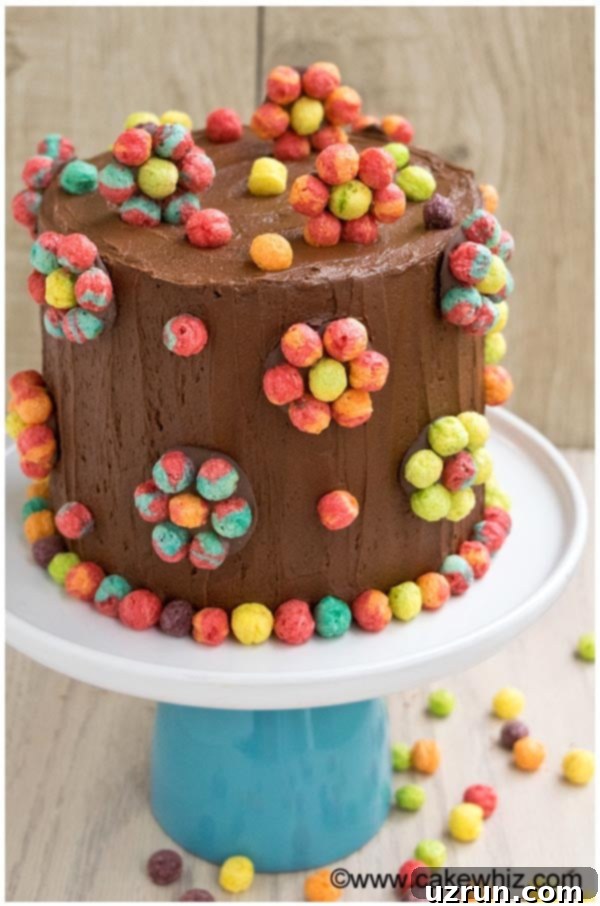
Why You’ll Love This Trix Cereal Cake
- Incredibly Easy: Perfect for bakers of all skill levels, especially beginners. No complex techniques required!
- Kid-Friendly & Fun: The vibrant colors of Trix cereal instantly appeal to children, making it ideal for birthday parties and celebrations.
- Customizable: Easily adapt with different cereal types, frosting flavors, and cake bases to suit any taste or theme.
- No Special Tools Needed: You won’t need fondant, cutters, or advanced decorating equipment. Just your trusty kitchen basics!
- Homemade Charm: Made from scratch with simple ingredients, this cake has a heartwarming, personal touch that store-bought cakes often lack.
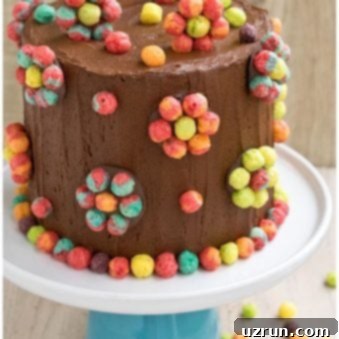
- Visually Stunning: The cheerful cereal “flowers” create an eye-catching design that’s sure to impress your guests.
How to Make a Colorful Cereal Cake from Scratch: Step-by-Step
Crafting this vibrant cereal cake is a straightforward process. Follow these detailed steps for a perfect, celebratory treat:
- Bake Your Cakes: Start by baking two 6-inch round cakes. A rainbow cake base was chosen here to make the inside as exciting and whimsical as the outside, adding an extra element of surprise and fun. Ensure your cakes bake evenly and have a good structure to hold the frosting and cereal.
- Cool Completely: This is a crucial step! Allow your baked cakes to cool down to room temperature completely. Attempting to frost a warm cake will result in melted, sliding icing and a sticky mess. Patience here is key for a beautifully finished cake.
- Prepare the Frosting: While the cakes are cooling, prepare your chocolate icing. The goal is a consistency that is thick enough to hold its shape but still easily spreadable. This ensures a smooth application and a stable base for your cereal decorations.
- Assemble the Cake Layers: Place the first cooled cake layer on your chosen cake stand or serving platter. Apply a generous layer of chocolate frosting evenly over the top. Then, carefully place the second cake layer directly on top, pressing gently to secure it.
- Crumb Coat (Optional but Recommended): For a professional finish, apply a thin layer of frosting all over the entire cake (sides and top). This “crumb coat” traps any loose crumbs, preventing them from mixing into your final frosting layer. Chill the cake in the refrigerator for about 15-20 minutes until the crumb coat is firm.
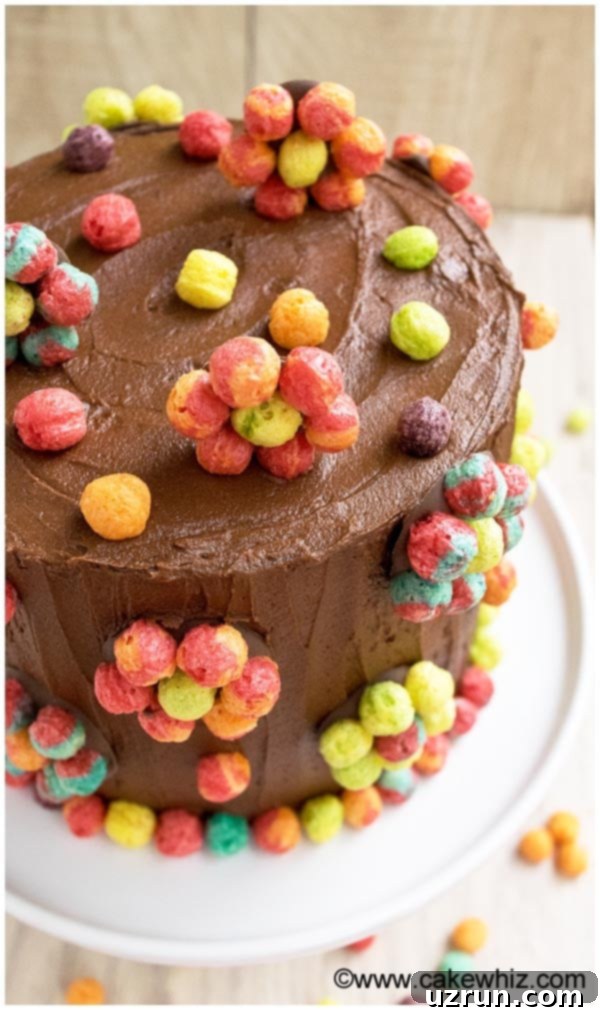
- Final Frosting Layer: Once the crumb coat is set, apply the remaining chocolate frosting over the entire cake. Use an offset spatula or a bench scraper to smooth the sides and top. For an added decorative touch, you can run the spatula vertically around the sides to create a striped pattern, and then swirl the top in a circular motion for a textured finish.
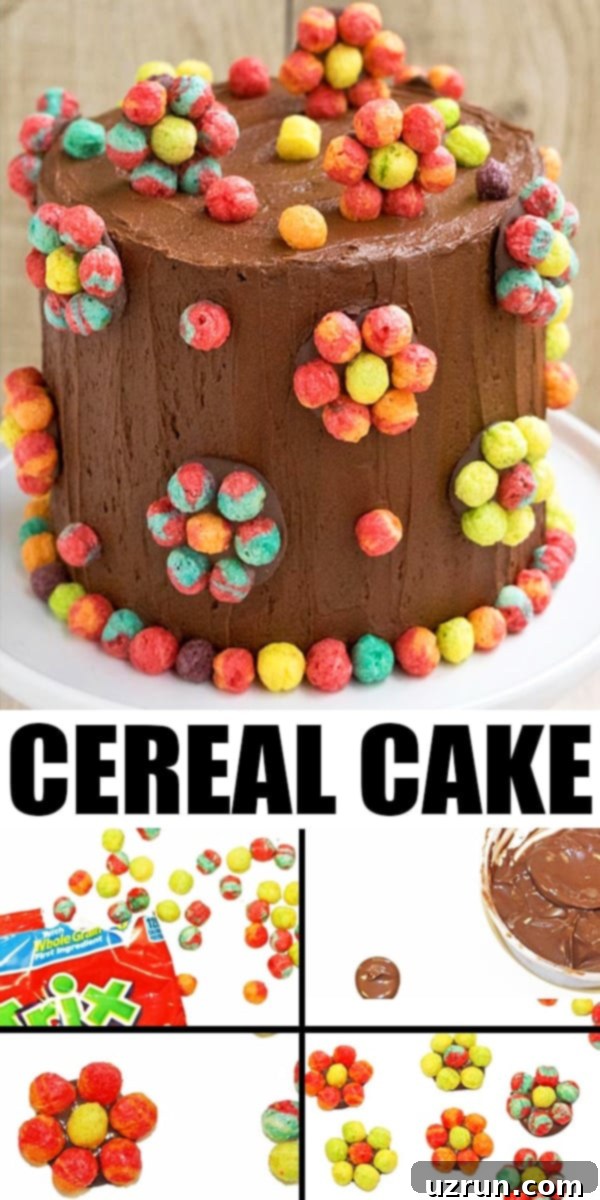
- Create Cereal Flowers: This is where the magic happens! On a sheet of wax paper, drop small spoonfuls of melted chocolate. Quickly arrange individual Trix cereal pieces in a flower formation (or any pattern you like!) on top of each chocolate drop. The melted chocolate acts as an “edible glue.” For extra fun, sort your Trix cereal by color beforehand to create monochromatic or rainbow clusters.
- Allow Cereal Decorations to Set: Let these chocolate and cereal clusters sit at room temperature for approximately 10 minutes, or until the chocolate has hardened completely. Do not rush this step, as trying to move them too soon will cause them to break.
- Decorate the Cake: Carefully peel each set cereal “flower” from the wax paper. Gently press them onto the frosted cake, arranging them randomly or in a planned design. You can also press some loose cereal pieces around the base of the cake for an extra pop of color and texture.
- Serve and Enjoy!: Your magnificent Trix Cereal Cake is now ready to be admired and devoured!
Key Ingredients for Your Cereal Cake Explained
Each component plays a vital role in the success and deliciousness of your cereal cake:
- Cake: The foundation of our dessert. A vibrant rainbow cake was chosen for its playful interior, mirroring the colorful exterior. You can use your favorite vanilla, chocolate, or even funfetti cake recipe as a base.
- Frosting: Chocolate icing was selected as the perfect pairing for the colorful cereal, offering a rich contrast in flavor. The thick, yet spreadable consistency is essential for both assembly and decoration.
- Cereal: Trix cereal is the star here, celebrated for its bright, fruity, and fun shapes. However, don’t limit yourself! Other colorful cereals like Froot Loops, Fruity Pebbles, or even Lucky Charms marshmallows would work wonderfully.
- Melted Chocolate: This ingredient is your “edible glue” for creating the charming cereal flower shapes. Semisweet chocolate chips were used, but white chocolate or colored candy melts can also be excellent alternatives, especially if you want to match specific color themes.
Exciting Variations for Your Cereal Cake
This cereal cake recipe is incredibly versatile, allowing for endless creative possibilities. Here are some ideas to customize your dessert:
Experiment with Other Cereals: The world of cereal offers an abundance of shapes, sizes, and colors. While Trix is fantastic, consider alternatives like Froot Loops for a different fruity burst, Fruity Pebbles for a finer texture and bright confetti look, or even Lucky Charms marshmallows for a whimsical, sugary touch. Get creative with your design – use individual pieces or small clusters!
Try Other Frostings: Chocolate buttercream is a classic, but don’t hesitate to venture into other flavor profiles. A refreshing Mint Frosting could offer a cool counterpoint, or a Coconut Cream Chocolate Frosting for a tropical twist. Vanilla buttercream, cream cheese frosting, or even a tangy lemon frosting could also be delightful. Ensure your chosen frosting is firm enough to hold the cereal decorations.
Explore Different Cake Flavors: The base cake can greatly influence the overall experience. A rich Chocolate Brownie Cake would make a decadent foundation, while a sophisticated Chocolate Coffee Cake could elevate the flavor profile. Consider vanilla bean, lemon, or even a simple yellow cake to let the cereal colors truly pop.
Cover Cake in Fondant: For an ultra-smooth, polished look, once your cake is smoothly iced, cover it in colored Marshmallow Fondant. Then, use melted chocolate or a dab of corn syrup to adhere your cereal “flowers” or clusters onto the fondant surface. This provides a clean canvas for your cereal art.
Make a Layer Cake: The original recipe uses a single tall cake, but you can easily transform it into a grander, multi-tiered creation. Bake multiple 3-inch cakes and stack them on top of a larger 6-inch base. Remember to use dowels or internal supports for stability, especially with taller cakes, to prevent leaning or collapsing.
Add Delicious Cake Fillings: Introduce an extra layer of flavor and texture between your cake layers. Popular choices include Homemade Strawberry Jam, creamy peanut butter, rich Nutella, or a thick chocolate ganache. These fillings add moisture and a delightful surprise with every bite.
Use White Chocolate or Candy Melts: Instead of dark or semisweet melted chocolate for your cereal clusters, opt for white chocolate or brightly colored candy melts. White chocolate can be easily tinted with food coloring to match your theme, while candy melts come in a rainbow of pre-made hues, adding even more customizability to your edible glue.
Toss on Sprinkles: To make this cake even more whimsical and festive, sprinkle a generous amount of colorful sprinkles over the top and sides of the cake. This adds extra sparkle and fun, enhancing the party-ready appeal.
Expert Tips and Techniques for Flawless Cereal Cake Decorating
Achieving a beautiful and delicious cereal cake is easy with these insider tips:
- The Golden Rule: Don’t Decorate a Warm Cake! This cannot be stressed enough. Your cakes must be completely cool to the touch before any frosting is applied. Frosting a warm cake is a recipe for disaster; the icing will melt, slide off, and create a sticky, unmanageable mess. For best results, bake your cakes a day in advance and chill them overnight.
- Line Pans with Parchment Paper: For effortless cake removal, always line the bottom of your cake pans with parchment paper. You can also lightly grease and flour the sides. This ensures your cakes come out perfectly intact, ready for decorating.
- Trim Edges and Dome of Baked Cakes: Baked cakes often have a slightly domed top and sometimes uneven edges. Use a serrated knife or a cake leveler to carefully trim these, creating flat, level surfaces. This is essential for a stable, straight cake that isn’t tilted.
- Patience with Cereal Clusters: When making your cereal flowers, resist the urge to remove them from the wax paper too quickly. The melted chocolate needs to set until it is completely hard. If you try to lift them prematurely, they will break and you’ll have to start over. Placing them in the refrigerator for a few minutes can speed up this setting process.
- The Magic of the Crumb Coat: As mentioned in the steps, a thin layer of frosting (crumb coat) is a baker’s best friend. It seals in all the loose crumbs, ensuring your final, decorative layer of frosting is smooth and crumb-free. Don’t skip this step for a professional-looking finish.
- Utilize a Turntable: If you plan on decorating cakes frequently, a rotating cake stand (turntable) is an invaluable tool. It allows you to easily access all sides of the cake for smooth frosting application and precise decoration.
- Sort Your Cereal: For intricate designs or a specific color palette, consider sorting your Trix cereal by color before you start. This allows you to create uniform color clusters or vibrant rainbow patterns.
More Easy Decorated Cakes to Try
If you enjoyed decorating this cereal cake, you might love these other simple yet stunning cake designs:
- Easy Beach Cake
- Fondant Flower Cake
- Modern Abstract Cake
- Blue Ombre Cake
- Butterfly Cake
Storage and Make-Ahead Tips
Planning ahead? Here’s how to store your cake to keep it fresh and delicious:
- Refrigerate Leftovers: Any leftover cake can be stored in a sealed, airtight container in the refrigerator for up to 3 days. This helps maintain its freshness and prevents the cereal from getting stale.
- Freezing Unfrosted Cakes: If you want to get a head start, unfrosted cake layers can be wrapped tightly in plastic wrap and then in aluminum foil, and stored in a sealed container in the freezer for up to 1 month. When you’re ready to decorate, thaw the cakes in the fridge overnight before frosting and decorating.
- Make-Ahead Instructions: The entire decorated cake can be made 1 day in advance. Store it carefully in a sealed cake carrier or container in the refrigerator. This allows you to prepare for your event without last-minute rush.
More Creative Cereal Desserts
If you love incorporating cereal into your desserts, here are some other fantastic recipes to try:
- Best Rice Krispie Treats
- S’mores Bars
- Rainbow Cereal Balls (No Bake)
- Easy Scotcheroos (No Corn Syrup)
- No Bake Breakfast Muffins
- Chocolate Crunch Bars
- Rainbow Froot Loops Marshmallow Bars
Recipe
Easy Cereal Cake
Abeer Rizvi
Pin Recipe
Want to Save This Recipe?
Enter your email & I’ll send it to your inbox. Plus, get great new recipes from me every week!
By submitting this form, you consent to receive emails from CakeWhiz
Ingredients
- 2 Rainbow cakes Round, 6 inch each
- 3 Chocolate buttercream frosting
- 1 cup Chocolate chips Semisweet, Melted
- 1 cup Trix cereal Sorted by color
Instructions
-
Bake the cakes and allow them to cool completely.
-
While they are cooling, prepare frosting.
-
Place one cake on a cake stand or serving dish.
-
Spread frosting on top with a spatula.
-
Then, place the other cake on top and press gently to secure it in place.
-
Now, frost the entire cake completely.
-
Run the spatula vertically all around the cake until there is a line pattern.
-
Run the spatula on top of the cake in a circular motion until there is a circle pattern. Keep aside.
-
Drop a spoonful of melted chocolate on a sheet of wax paper.
-
Stick the Trix cereal in the shape of a flower on top of the melted chocolate.
-
Allow the chocolate to set and harden at room temperature (about 10 minutes).
-
Make these cereal flowers in multiple colors.
-
Remove cereal flowers from wax paper and stick them randomly all over the cake.
-
Stick some cereal balls around the base of the cake. Enjoy!
Notes
- Read all my tips above for best results.
- Leftovers can be stored in a sealed container in the fridge for up to 3 days.
Nutrition
An automated tool is used to calculate the nutritional information. As such, I cannot guarantee the accuracy of the nutritional information provided for any recipe on this site.
This Trix Cereal Cake is more than just a dessert; it’s a celebration of color and fun, made accessible for everyone. Whether you’re a seasoned baker or just starting, this recipe offers a rewarding experience with delicious results. Get ready to impress your guests with this vibrant, homemade masterpiece!
