Celebrate Independence Day with a Stunning Red, White, and Blue Fondant Cake: A Step-by-Step Tutorial
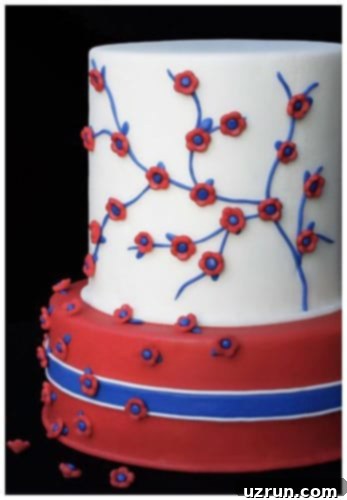
Get ready to impress your guests this Independence Day with a truly spectacular dessert! This step-by-step tutorial will guide you through creating a magnificent, two-tiered 4th of July cake, meticulously decorated with vibrant red, white, and blue marshmallow fondant. Forget the ordinary – this cake is a celebration of patriotism, transformed into an edible work of art. Whether you’re a seasoned baker or new to fondant, our detailed instructions and expert tips will ensure your patriotic masterpiece is a success, making it the perfect centerpiece for your holiday festivities.
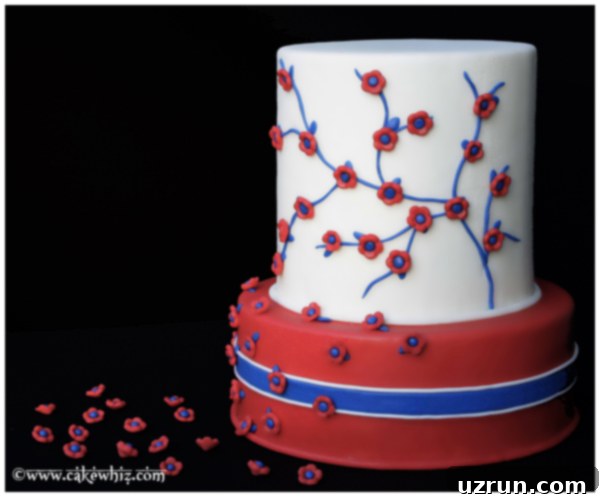
Our design is a fresh take on the classic American flag colors, featuring a striking two-tiered structure where the top tier stands elegantly taller than the bottom. Every intricate decoration, from the bold red base to the delicate blue branches and cheerful red flowers, is crafted from our delectable homemade marshmallow fondant. This same patriotic color palette proved to be a massive hit in our 4th of July Cupcakes (Red White and Blue Cupcakes), and now we’re bringing that same festive spirit to a grander scale. This cake isn’t just a dessert; it’s a statement, embodying the spirit of celebration and craftsmanship.
How to Make a Homemade 4th of July Tiered Cake from Scratch
Creating a showstopping tiered cake might seem daunting, but with our clear, step-by-step instructions, you’ll find the process enjoyable and rewarding. We’ve broken down each stage, from baking the perfect cake to applying intricate fondant details, ensuring a smooth and successful baking journey. Follow these steps to build your stunning patriotic dessert:
- Bake Your Cakes to Perfection: For this festive occasion, a classic Red Velvet Cake is an excellent choice. Its rich, slightly tangy flavor and beautiful deep red hue naturally complement the patriotic theme. Ensure you bake one 8×3 inch cake for the bottom tier and two 6×3 inch cakes for the taller top tier. Always follow your chosen recipe carefully to achieve moist, even cake layers.
- Allow Cakes to Cool Completely: This step is absolutely crucial. After baking, transfer your cakes to a wire rack and let them cool down to room temperature. Attempting to frost or cover warm cakes will cause your icing to melt and your fondant to become sticky, leading to a messy and frustrating experience. Patience here pays off in a perfectly stable and beautiful cake.
- Prepare Your Signature Icing: A luscious cream cheese frosting is the ideal companion for red velvet cake. Its slight tanginess perfectly balances the sweetness of the cake and fondant. Make sure to prepare a generous amount – you’ll need enough to fill, crumb coat, and frost both tiers. For best results, ensure your butter and cream cheese are at room temperature before mixing to achieve a smooth, lump-free consistency.
- Assemble and Fondant the Bottom Tier:
- Carefully place your fully cooled 8×3 inch cake layer onto your chosen cake stand or serving plate.
- Apply a generous layer of cream cheese frosting over the entire cake, smoothing the top and sides with an offset spatula. This is also a good time for a thin “crumb coat” to seal in any loose crumbs before the final frosting layer.
- Roll out your vibrant red marshmallow fondant to an even thickness. Carefully drape it over the frosted bottom tier, smoothing it gently from the top downwards to eliminate air bubbles and creases.
- Trim any excess fondant neatly around the base of the cake using a sharp knife or pizza cutter.
- For essential structural support, push four sturdy wooden dowels or bubble tea straws into the center of the cake, ensuring they are cut to the exact height of the bottom tier. This prevents the top tier from sinking or leaning.
- Assemble and Fondant the Top Tier:
- Place one of your 6×3 inch cake layers onto a separate cake board of the same size.
- Spread a layer of cream cheese frosting on top of this cake layer.
- Carefully place the second 6×3 inch cake layer directly on top, pressing gently to create a stable double-height tier.
- Now, ice the entire stacked top tier with the remaining cream cheese frosting, aiming for a smooth finish.
- Roll out your pristine white marshmallow fondant and carefully cover the entire top tier, just as you did with the bottom. Smooth out any imperfections and trim the excess fondant.
- Gently and carefully lift this completed top tier and center it precisely on the prepared bottom tier, resting it on the dowel supports. Take your time with this step to ensure stability and a balanced look.
- Decorate with Patriotic Fondant Art: Now for the fun part – bringing your cake to life with stunning decorations!
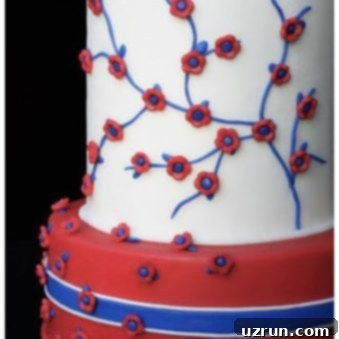
- Roll out a thin strip of both blue and white fondant. Create a subtle border by sticking this blue and white strip around the center of the bottom red tier, using a tiny bit of water as edible glue. This adds a refined finish and breaks up the solid red.
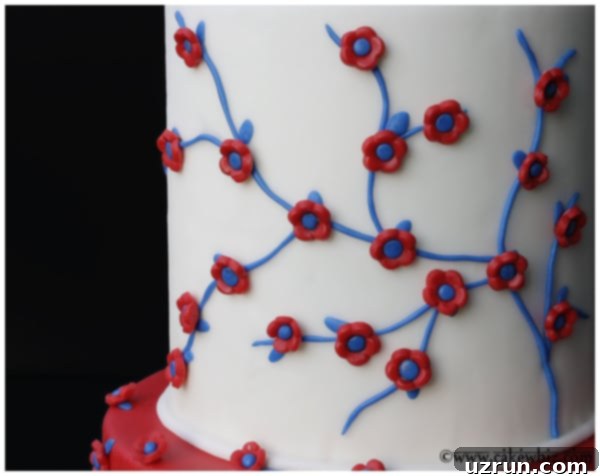
- Next, roll out very thin blue fondant to create delicate stems and branches. Arrange and stick these onto the white top tier, mimicking a graceful floral design. Remember to use minimal water for adhesion to prevent color bleeding.
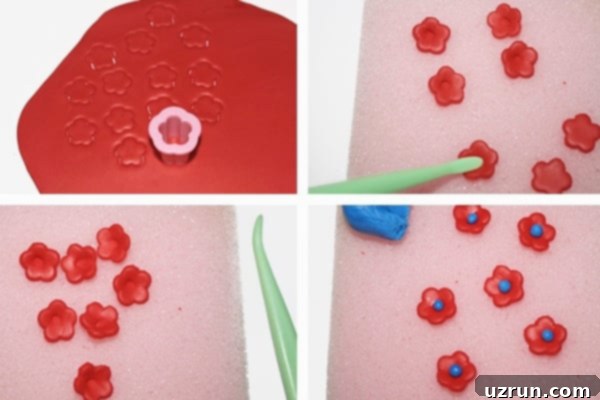
- For the red flowers, roll out your red fondant and use a small 1-inch petal flower cutter to create numerous small blossoms. Place each flower on a clean foam pad or a soft surface. Using a veining tool or the rounded end of a small paintbrush, gently press into the center of each flower to create a slight indentation and give it a more natural, cupped look.
- Roll out tiny balls of blue fondant to serve as the centers of your red flowers. Lightly dampen the center of each red flower and carefully press a blue fondant ball into place.
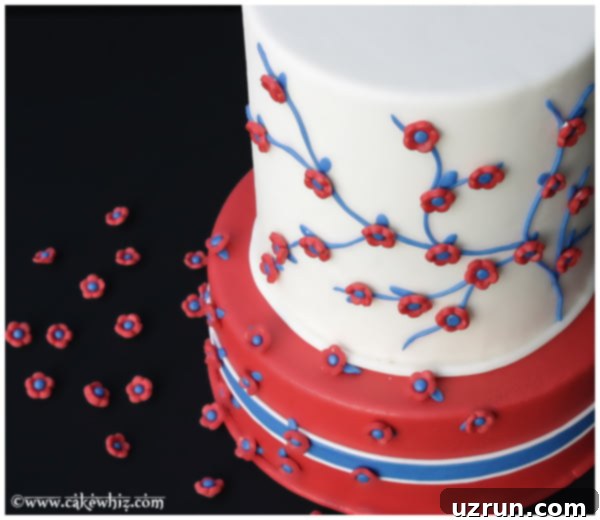
- Finally, adhere these beautiful red and blue flowers onto the blue fondant branches on the top tier, using a minimal amount of water. You can also scatter a few extra flowers artistically along the base of the top tier for an added touch of charm.
Creative Variations for Your Red, White, and Blue Cake
While this cake is designed with Independence Day in mind, its structure and decorating techniques are incredibly versatile. Feel free to unleash your creativity and customize this recipe to suit any occasion or personal preference. Here are some ideas to inspire you:
Explore Other Color Schemes: Although red, white, and blue are perfect for a 4th of July cake, don’t limit yourself! Use the same foundational tutorial to create a stunning cake for other holidays, birthdays, or themed parties. Imagine pastel pinks and purples for a baby shower, vibrant greens and golds for St. Patrick’s Day, or classic black and white for an elegant celebration. Simply swap out the fondant colors to match your desired palette.
Infuse Flavor into Your Fondant: Elevate your fondant’s taste by incorporating various extracts. When choosing a flavor, ensure it complements your cake and frosting. For instance, almond extract pairs wonderfully with vanilla or red velvet cakes, while a hint of citrus (lemon or orange) can add a refreshing zest. Experiment with flavors like mint, coconut, or even a touch of rum extract for a more adult-friendly dessert. Remember to add extracts sparingly, as a little goes a long way.
Experiment with Different Flower Styles: The beauty of cake decorating lies in its endless possibilities. Instead of fondant flowers, consider these alternatives to add unique textures and visual interest:
- Buttercream Flowers (with Russian Piping Tips): Create stunning, intricate flowers quickly and easily with Russian piping tips. These offer a softer, more delicate appearance and a creamy texture that melts in your mouth.
- Royal Icing Flowers (Sugar Flowers): For a more refined and long-lasting decoration, royal icing flowers are an excellent choice. They dry hard and can be made in advance, offering a beautiful, delicate crunch.
- Easy Wafer Paper Flowers: Lightweight and translucent, wafer paper flowers provide a modern, ethereal touch. They are surprisingly easy to make and can be shaped into realistic or abstract designs.
- More Intricate Fondant Flowers: If you enjoy working with fondant, explore more advanced techniques for realistic roses, peonies, or other fantasy blooms.
- Easy Fondant Roses (Ribbon Roses): These simple yet elegant roses are perfect for beginners and add a classic touch.
- You can also incorporate real, edible flowers (ensure they are organic and safe for consumption) for a fresh and natural aesthetic.
Switch Up Your Cake Flavors: While red velvet is a holiday favorite, there’s a whole world of cake flavors to explore! Consider these delicious options:
- Marble Cake: Offers a beautiful visual swirl and a delightful blend of vanilla and chocolate.
- Banana Chocolate Chip Cake: A comforting and flavorful choice, especially if you love a moist, fruity cake with a hint of chocolate.
- Other popular choices include classic vanilla, rich chocolate, lemon, or even a festive spice cake.
Experiment with Different Frosting Flavors: The frosting is just as important as the cake for overall flavor and texture. Beyond cream cheese, try these delectable options:
- Chocolate Cream Cheese Frosting: A richer, more indulgent alternative that pairs well with many cake flavors.
- Marshmallow Frosting: Light, fluffy, and incredibly sweet, offering a distinct texture.
- Other fantastic choices include classic vanilla buttercream, tangy lemon frosting, or a rich ganache for a truly decadent experience.
Enhance with Patriotic Sprinkles: Add an extra layer of sparkle and festivity by incorporating patriotic sprinkle blends. The market is full of fantastic red, white, and blue mixes, including stars, nonpareils, jimmies, and edible glitter. Use them generously around the base of each tier, or even sprinkle them over your fondant decorations for an eye-catching finish. Sprinkles are an effortless way to boost the holiday spirit of your cake.
Design a Larger Tiered Cake: If you’re hosting a grander celebration, easily scale up this design. Add an additional bottom tier that’s 10 inches wide and 3 inches high beneath your current 8-inch base. Remember to increase your cake and frosting recipes accordingly and to incorporate more dowel supports for the added weight. Always ensure your cake board for the 8-inch tier is sturdy enough to support the top two tiers, and use extra dowels in the largest tier for optimum stability.
Expert Tips and Essential Techniques for Your Patriotic Cake
Achieving a professional-looking tiered cake requires attention to detail and a few key techniques. These tips will help you avoid common pitfalls and ensure your 4th of July cake is not only beautiful but also structurally sound and delicious:
Never Frost or Decorate Warm Cakes: This is arguably the most critical rule in cake decorating. Warm cakes will cause your frosting to melt and slide off, making it impossible to achieve a smooth finish. Even worse, warm cakes can cause fondant to sweat, become sticky, and tear. Always allow your cake layers to cool completely, preferably chilling them in the refrigerator for 15-30 minutes before frosting to make them firmer and easier to handle.
Homemade Fondant Flowers vs. Store-bought Fondant Flowers: Both options are viable, depending on your time and skill level.
- Homemade: Crafting your own fondant flowers is more cost-effective and offers complete creative control over size, shape, and color. It allows for intricate, personalized designs that truly reflect your vision.
- Store-bought: Pre-made fondant flowers offer unparalleled convenience, saving you significant time. They come in a variety of standard shapes and colors, perfect for quick assembly. Regardless of your choice, both can contribute beautifully to your cake’s aesthetic.
Homemade Fondant vs. Store-bought Fondant: The choice between making your own fondant or buying it also comes down to preference and priorities.
- Homemade (especially Marshmallow Fondant): Tastes significantly better than most store-bought varieties, often described as soft, pliable, and subtly sweet. It’s also more economical to make.
- Store-bought: Offers convenience, consistency, and is often available in pre-colored options, saving you time on coloring. While its taste can be a point of debate among bakers, its ease of use is undeniable. Both perform well for covering cakes and creating decorations.
Always Use Gel Colors for Coloring Fondant: When it comes to coloring fondant, gel food colors are far superior to liquid food colorings.
- Gel Colors: Are highly concentrated, meaning you need only a small amount to achieve vibrant, deep hues. Their thicker consistency won’t alter the texture of your fondant, preventing it from becoming wet, sticky, or unmanageable. This is especially important when working with intricate details or covering large surfaces.
- Liquid Colors: Can dilute the fondant, making it too sticky and difficult to roll or shape, and often yield less intense colors.
Use Very Little Water for Sticking Fondant Pieces: When adhering fondant decorations, remember that less is more when it comes to water.
- Precision Application: Use a fine-tipped paintbrush and lightly dip it into water, then tap off any excess on the edge of a bowl or a paper towel. You only need a barely damp brush to create enough tackiness for fondant pieces to stick.
- Preventing Issues: Applying too much water can cause the colors of your decorations (especially red and blue) to bleed onto the white fondant, creating unsightly streaks and a messy appearance. Excess water also makes the fondant very sticky and prone to stretching or deforming. A light touch ensures clean, crisp adhesion.
Utilize Wooden Dowels or Bubble Tea Straws for Support: For any tiered cake, structural support is non-negotiable. Dowels or sturdy bubble tea straws are essential for preventing your upper tiers from sinking into or toppling off your lower tiers.
- How to Use: Measure the exact height of your bottom cake tier (including the frosting and fondant). Cut four to five dowels to this precise length. Insert them vertically into the center of the bottom tier, creating a stable platform for the tier above. They should sit flush with the top surface of the cake. This technique distributes the weight evenly, ensuring your impressive creation remains perfectly upright throughout your celebration.
Storing Your Festive 4th of July Cake
Proper storage is key to maintaining the freshness and beauty of your tiered cake. Here’s how to keep your creation delicious:
Room Temperature Storage: If your decorated cake does not contain any fruit fillings, custard, or highly perishable components that require refrigeration, it can safely be left at cool room temperature for up to 24 hours. Ensure it’s covered loosely to protect it from dust and air, which can dry out the cake and harden the fondant. A cake box is ideal for this purpose.
Refrigeration: For longer storage or if your cake contains perishable ingredients, leftovers can be stored in a sealed, airtight container in the refrigerator for up to 3 days. Be aware that fondant decorations may become slightly sticky or tacky due to the moisture and condensation within the fridge. To minimize this, you can place a piece of paper towel in the container to absorb some moisture. Allow the cake to come closer to room temperature for about 30-60 minutes before serving for the best flavor and texture.
Freezing: Unfrosted cake layers and prepared frosting can be stored separately in sealed, freezer-safe containers for up to 1 month. This is an excellent make-ahead strategy! When you’re ready to enjoy your cake, transfer the frozen components to the fridge overnight to thaw. Once thawed, bring them to room temperature (if appropriate for the frosting) and then proceed with frosting and decorating as per the instructions above.
Make-Ahead Instructions: This entire cake can be baked and fully decorated one day in advance of your event. Store it at cool room temperature (if suitable for your ingredients) or refrigerate as necessary. This allows you to tackle the intricate decorating steps without last-minute stress, ensuring your 4th of July celebration is relaxed and enjoyable.
More Festive 4th of July Desserts (Patriotic Desserts)
Looking for more delicious ways to celebrate Independence Day? Pair your stunning tiered cake with these other patriotic treats that are sure to delight:
- Homemade Chocolate Fudgesicles: A classic, refreshing treat perfect for a hot summer day’s celebration.
- Mini Oreo Bites (No Bake): Easy to make, bite-sized, and a crowd-pleaser for any party.
- Consider adding fruit tarts with fresh berries (strawberries, blueberries) for natural red and blue colors, or festive sugar cookies decorated with patriotic designs.
Recipe
4th of July Cake
Abeer Rizvi
Pin Recipe
Ingredients
- 3 Red velvet cake Bottom tier dimensions: 1 set of 8×3. Top tier dimensions: 2 sets of 6×3
- 6 cups Cream cheese frosting Double this recipe
- 5 cups Marshmallow fondant Red, white and blue colors
Instructions
-
Bake cakes and allow them to cool completely.
-
While cakes are baking and cooling, prepare frosting too.
-
Trim domes of the cakes, if necessary so that they are flat.
-
Place the large 8×3 cake on a serving dish.
-
Use a spatula to ice the entire cake in frosting.
-
Roll out red fondant and spread it over the cake.
-
Trim edges around the base of the cake with a sharp knife or pizza cutter.
-
Stick 4 dowels on bubble tea straws in the center of the cake. Keep aside.
-
To make the top tier, place one 6×3 cake on a cake board (same size as the cake).
-
Use a spatula to ice the top in frosting,
-
Place the other 6×3 cake on top and press gently to secure both cakes tightly.
-
Ice the entire cake in frosting.
-
Roll out white fondant and spread it over the cake.
-
Trim edges around the base of the cake with a sharp knife or pizza cutter.
-
Place this cake on top of the other prepared 8×3 cake.
-
Roll out a blue and white strip of fondant and stick that around the center of the bottom tier with some water.
-
Roll out very thin blue fondant stems and branches and stick that on the top tier. Use very little water to stick, if necessary.
-
Make easy fondant flowers: Roll out red fondant. Use a small 1 inch petal flower cutter to cut out many little flowers. Place your flowers on a clean sponge. Use the veining tool to press the center of each flower until it leaves a tiny dent in the middle. Roll out blue fondant balls and stick them in the middle dents with little water.
-
Stick these flowers on the blue branches of the prepared cake with water.
-
Scatter some flowers along the second tier of the cake too. Enjoy
Notes
- Read all my tips above for best results and to ensure your cake is a success.
- Leftovers can be stored in a sealed container in the fridge for up to 3 days, but please note that the fondant decorations will likely become slightly sticky due to moisture.
Nutrition
An automated tool is used to calculate the nutritional information. As such, I cannot guarantee the accuracy of the nutritional information provided for any recipe on this site.
