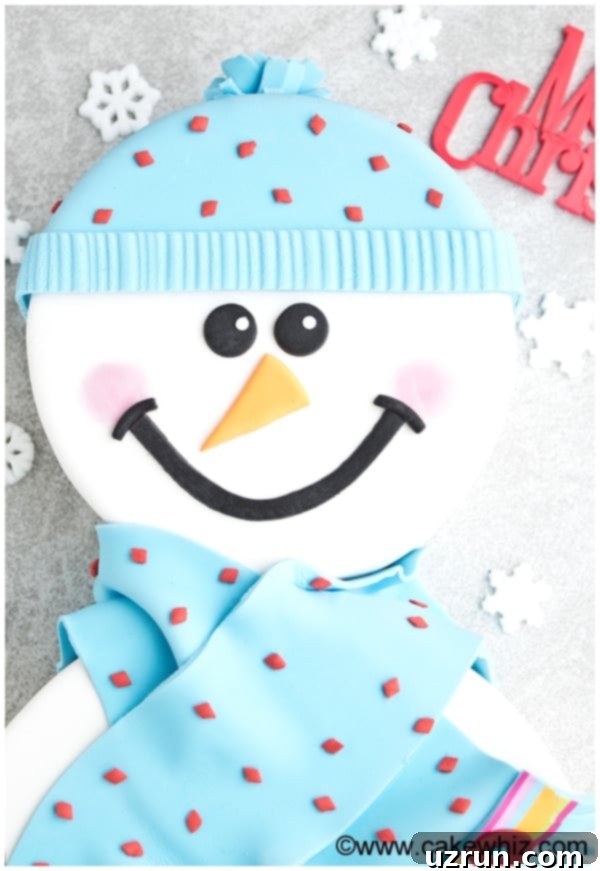
Easy Fondant Snowman Cake Tutorial: A Delightful Winter Wonderland Dessert
Welcome to this comprehensive cake decorating tutorial, where you’ll learn how to craft an adorable and easy snowman cake using fondant. This festive dessert is perfect for winter gatherings, Christmas celebrations, and children’s birthday parties, promising endless fun for bakers of all ages, especially when made with kids!
*Thank you to Cakes.com for generously sponsoring this post and providing the high-quality supplies that made sharing this detailed tutorial possible. As always, all opinions and photography shared herein are my own, reflecting an honest review and experience.*
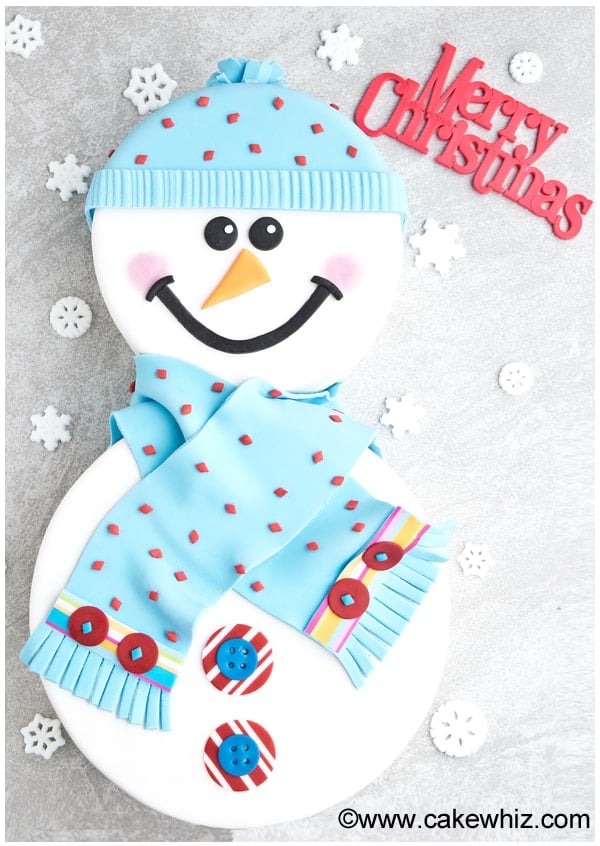
When you delve into the wonderful world of cake decorating, whether through classic cookbooks or the vast online realm, you’ll encounter a myriad of enchanting snowman cake designs. While many focus solely on the snowman’s head or face due to their charming simplicity and minimal effort, others, like the beloved Frosty, capture the full festive spirit, especially during the holiday season. I sought to combine these popular elements, creating a full-body snowman cake that is not only undeniably cute but also surprisingly achievable for home bakers. The result exceeded my expectations—isn’t he just adorable? This design perfectly complements other delightful snowman-themed treats like these Snowman Cupcakes {With Donut Toppers}, festive Snowman Cookies {Snowman Oreos}, and whimsical Snowman Ice Cream Cones. Let’s dive into making this show-stopping centerpiece for your next winter event!
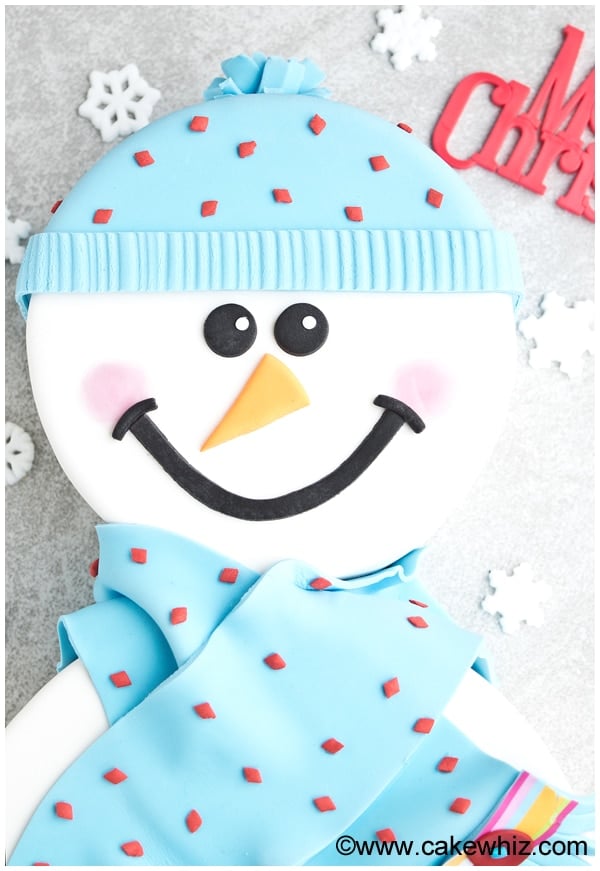
Table of contents
- How to Make an Easy Fondant Snowman Cake from Scratch?
- Creative Variations for Your Winter Snowman Cake
- Essential Tips and Techniques for Your Snowman Christmas Cake
- Optimal Storage for Your Decorated Snowman Cake
- Another Idea: Crafting a Fondant Snowman Topper
- More Delicious Winter Desserts
How to Make an Easy Fondant Snowman Cake from Scratch?
Creating this charming snowman cake is a delightful process that combines baking with artistic decoration. Follow these steps to bring your frosty friend to life, making sure to pay attention to detail for the best results.
- Bake and Cool Your Cakes: Begin by baking your chosen cake flavor. While the cakes are in the oven and then cooling completely to room temperature, use this time efficiently to prepare your frosting. This prevents the frosting from melting when applied, ensuring a smooth finish.
- Cut, Stack, and Ice Cakes: Once thoroughly cooled, carefully level each cake layer. Apply a generous layer of your prepared cream cheese frosting between each cake layer, then smoothly ice the entire exterior of both stacked cakes. This creates a perfect canvas for your fondant.
- Cover in White Fondant: Gently roll out white fondant to an even thickness and drape it over your smoothly iced cakes. Trim any excess fondant around the base with precision and use a fondant smoother to achieve a flawless, ripple-free surface.
- Assemble the Snowman Body: Carefully place the two fondant-covered cakes onto a large cake board. Position the smaller cake on top of the larger one, creating the iconic two-tiered snowman shape. Secure them in place with a dab of frosting or a little royal icing if needed.
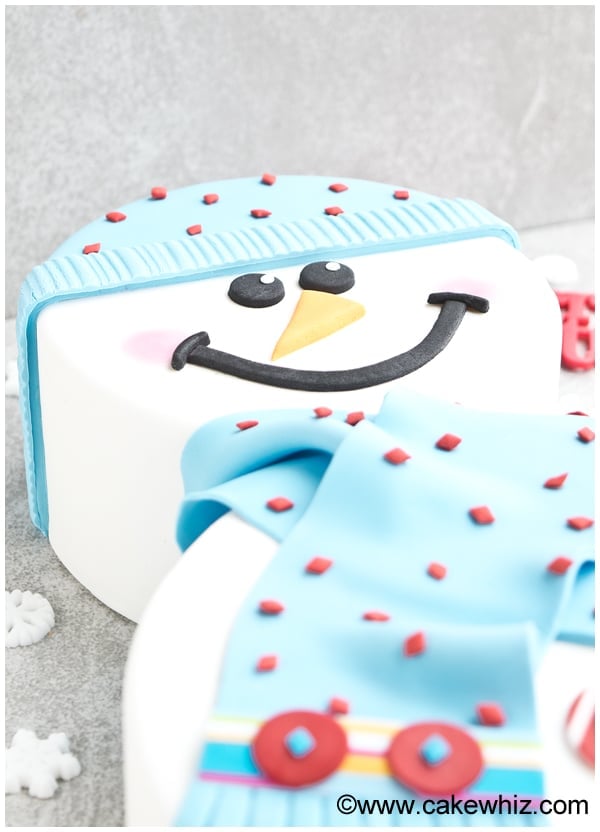
- Craft and Attach the Hat: Using light blue fondant, sculpt the dome, brim, and a small ball for the top of the snowman’s hat. Lightly brush water or corn syrup onto the cake where the hat will sit and on the hat pieces themselves to securely attach them, pressing gently until they hold.
- Adorn the Hat with Decor: Elevate the hat’s design by adding festive red diamond sprinkles all over its surface. Use a tiny brush of water or corn syrup to adhere each sprinkle firmly.
- Create the Cozy Scarf: Roll out blue fondant into a long strip for the scarf. Wrap it gently around the snowman’s “neck” where the two cakes meet, creating natural folds for a realistic effect. Secure with a tiny bit of water.
- Add Buttons for Charm: Place edible dots down the snowman’s body to act as buttons. If you don’t have pre-made dots, you can easily create small round buttons from black or colored fondant.
- Bring the Face to Life: For the nose, shape an orange fondant piece into a carrot-like triangle and attach it. For the eyes and a friendly smile, use small circles and a curved strip of black fondant, respectively.
- Give Cheeks a Rosy Glow: Using a soft brush, delicately apply a small amount of pink edible luster dust powder to create rosy cheeks, adding a touch of warmth to your snowman’s face.
- Decorate the Base: Complete your winter scene by scattering delicate sugar snowflakes around the base of the snowman on the cake board, enhancing the magical winter wonderland theme.
Creative Variations for Your Winter Snowman Cake
While the classic fondant snowman is delightful, there are countless ways to customize your winter cake to suit your taste, skill level, or party theme. Don’t be afraid to get creative!
Alternative White Finishes: If working with fondant feels too daunting, you can achieve a beautiful snowy effect by covering your cake in a smooth layer of white buttercream or cream cheese frosting, then sprinkling it generously with desiccated coconut, white sprinkles, or sparkling sugar. This provides a lovely texture and sparkle without the fondant fuss.
Expressive Snowman Faces: Give your snowman a unique personality! Instead of a simple smile, experiment with different expressions like puzzled, funny, silly, shy, or even an extremely happy wide-toothed grin. Simply adjust the shape of the black fondant mouth piece to convey the desired emotion, or use an edible marker for intricate details.
Personalize Scarf and Cap Colors: The beauty of cake decorating lies in customization. Feel free to change the colors of the scarf and cap to match your event’s specific color scheme, holiday decorations, or your favorite winter hues. Bright reds, deep greens, shimmering silvers, or even multi-colored stripes can make your snowman truly unique.
Fondant-Free Cake Decorating: For those intimidated by covering an entire cake in fondant, consider skipping the white fondant altogether. Instead, ice your cakes smoothly in white buttercream. Then, use fondant only for the accent pieces like the hat, scarf, facial features, and buttons. This significantly reduces the work while still giving you a beautifully themed cake.
Focus on the Snowman Face: If you’re short on time or prefer a simpler design, just create the snowman’s head. A single round cake can be transformed into a charming snowman face with all the delightful features, saving time without sacrificing cuteness.
Scale Up for Larger Gatherings: My recipe suggests 6-inch and 8-inch cakes, but you can easily scale up for bigger parties. Consider using an 8-inch and 10-inch combination, or even 10-inch and 12-inch cakes to feed a larger crowd. Just remember to adjust your frosting and fondant quantities accordingly.
Explore Different Cake Flavors: Don’t limit yourself to one cake base! This snowman design looks fantastic on a variety of flavors. Try it with a rich Moist Triple Chocolate Cake {From Scratch}, a classic Best Vanilla Cake Recipe {From Scratch}, or a celebratory Funfetti Cake / Confetti Cake {From Scratch} for a surprise inside.
Enhance with Delicious Fillings: Add another layer of flavor and texture by incorporating a delicious cake filling. Options include a vibrant Cherry Pie Filling, a decadent Easy Chocolate Ganache {2 Ingredients}, various nut butters, fresh fruits, or your favorite jams and preserves. Ensure your filling is stable enough for stacking.
Pair with Unique Frostings: Beyond cream cheese, consider other delightful frostings. A luxurious White Chocolate Buttercream Frosting, a fruity Strawberry Frosting (With Fresh Strawberries), or a comforting Fluffy Brown Sugar Frosting can all elevate the flavor profile of your snowman cake.
Festive Sprinkles for Hat Decor: Instead of pre-made diamond shapes, unleash your creativity with any festive sprinkles you adore. Think iridescent sugar, sparkling nonpareils, or even tiny edible stars to create a truly whimsical and unique hat for your snowman.
Add Playful Arms: Give your snowman some character by adding arms! These can be fashioned from brown fondant or modeling chocolate shaped like stick arms. For a crunchy and edible option, large pretzel rods make fantastic and delicious snowman arms.
Essential Tips and Techniques for Your Snowman Christmas Cake
Achieving a professional-looking snowman cake is easier with these handy tips and techniques. They’ll help you navigate the decorating process smoothly and ensure a beautiful final product.
Precision with a Pizza Cutter: When trimming excess fondant around the base of your circular cakes, a pizza cutter is your best friend. Its wheel design allows for much smoother, cleaner cuts than a traditional knife, resulting in a neater finish.
Fondant Adhesion Secrets: To attach fondant pieces securely to each other or to the cake, a very light brush of water or corn syrup works wonders as an edible “glue.” Remember, a small amount goes a long way; too much moisture can make fondant sticky and difficult to handle.
Cool Cakes are Key: Always ensure your cakes are completely cooled to room temperature before applying any frosting or fondant. Warm cakes will cause frosting to melt and slide, and fondant to become sticky, making decorating a frustrating endeavor.
Embrace Store-Bought Fondant: Don’t hesitate to use store-bought fondant. It’s a huge time-saver, especially since many brands offer pre-colored options, eliminating the need for messy coloring and ensuring vibrant hues.
Alternative Cheek Color: If you don’t have pink edible luster dust for the snowman’s cheeks, don’t worry! You can easily use a tiny piece of pink fondant, rolled thin and cut into small circles, or even a food-safe pink edible marker for a quick and simple rosy effect.
For this snowman cake tutorial, I had the pleasure of receiving all the necessary products from Cakes.com. My overall experience was incredibly positive, and I was thoroughly impressed with the quality and efficiency of their service. Everything I received was of top-notch quality, which made the decorating process even more enjoyable. Their delivery was remarkably fast and prompt, and I was pleased to find that all items were packaged meticulously, ensuring nothing was damaged during transit.
Here’s a closer look at the fantastic products that helped bring this festive snowman cake to life:
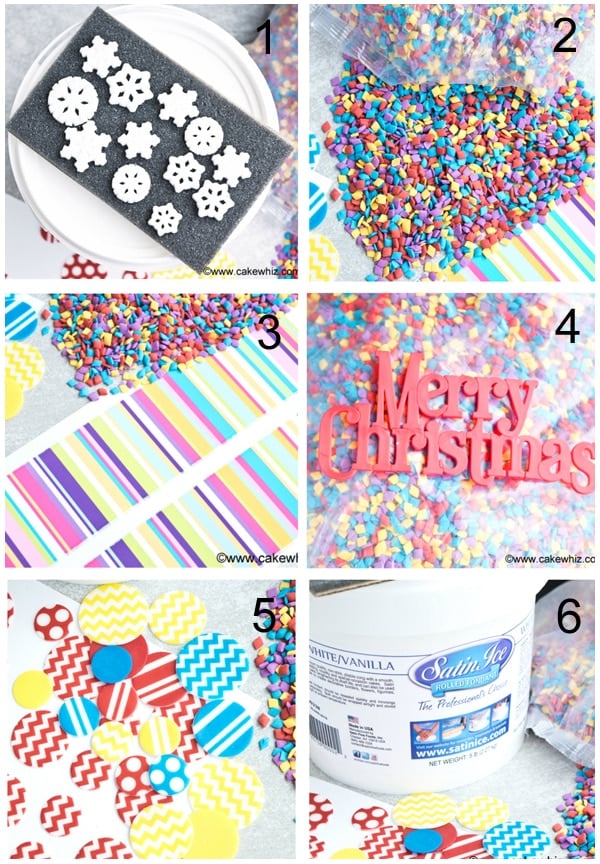
1. Snowflake Sugar Decorations: These were absolutely breathtaking! Each snowflake boasted intricate designs and a beautiful sparkle, instantly elevating the winter wonderland theme of the cake.
2. Diamond Sprinkles: I loved the unique diamond shape of these sprinkles; they’re quite distinct from what I typically find in local cake supply stores. The colors were incredibly vibrant, and the generous quantity means I can use them for many future cake projects. A definite win!
3. Edible Decorating Strips: These strips were perfectly packaged to prevent drying out, and the resealable bag was a thoughtful touch for storage. The print quality was clear and beautiful, precisely matching the images I saw online.
4. Merry Christmas Cake Topper: This simple plastic topper was of good quality, with no jagged edges. It’s an excellent choice for projects where you prefer a pre-made message over piping one onto the cake, saving time and ensuring a clean look.
5. Fondant Deco-Shapes Dots: Hands down, this was my favorite product! These pre-cut fondant circles come in various colors, sizes, and even patterns like polka dots, stripes, and chevron. They eliminate the mess and time-consuming effort of coloring fondant and cutting out countless circles, making decorating so much easier and more enjoyable. The generous quantity ensures they’ll last for many creative endeavors.
6. Satin Ice Fondant (White/Vanilla): I’ve used Satin Ice fondant before and always appreciate its quality. It’s incredibly easy to use, soft, and has a pleasant smell and taste, making it ideal for covering cakes smoothly and sculpting details.
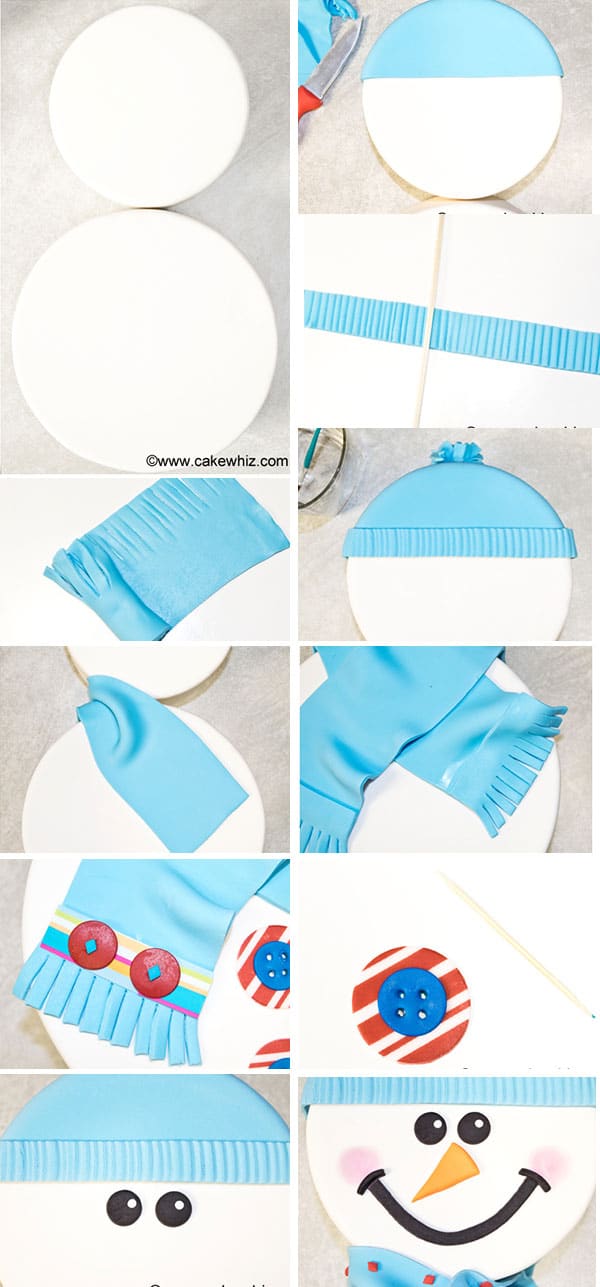
For a visual guide to each step of this delightful cake, please refer to the following collage with detailed step-by-step instructions. This will help clarify any questions and guide you through the process of creating your own charming snowman cake.
Optimal Storage for Your Decorated Snowman Cake
Proper storage is essential to keep your beautiful snowman cake fresh and delicious for as long as possible. However, fondant-decorated cakes have specific considerations due to moisture.
Refrigeration: If you have leftovers or need to store your cake for a short period, place it in a sealed, airtight container in the refrigerator for up to 3 days. It’s important to note that fondant decorations may become slightly sticky due to the moisture present in the refrigerator environment. This is a common occurrence and doesn’t affect the taste, only the texture and appearance slightly.
Freezing: Freezing a fully decorated fondant cake is generally not recommended. Upon thawing, condensation beads will form on the cake, making the fondant decorations very sticky and potentially compromising their shape and sheen. However, you can prepare the cake and frosting ahead of time and freeze them separately in airtight containers for up to 1 month. When you’re ready to serve, thaw the cake and frosting to room temperature and then proceed with the decoration steps.
Room Temperature Storage: A decorated cake that does not contain any perishable fillings (such as fresh fruit or cream-based fillings) can be safely stored at cool room temperature for 4-5 days. Ensure it is kept away from direct sunlight, excessive humidity, and any strong odors that could be absorbed by the cake.
Another Idea: Crafting a Fondant Snowman Topper
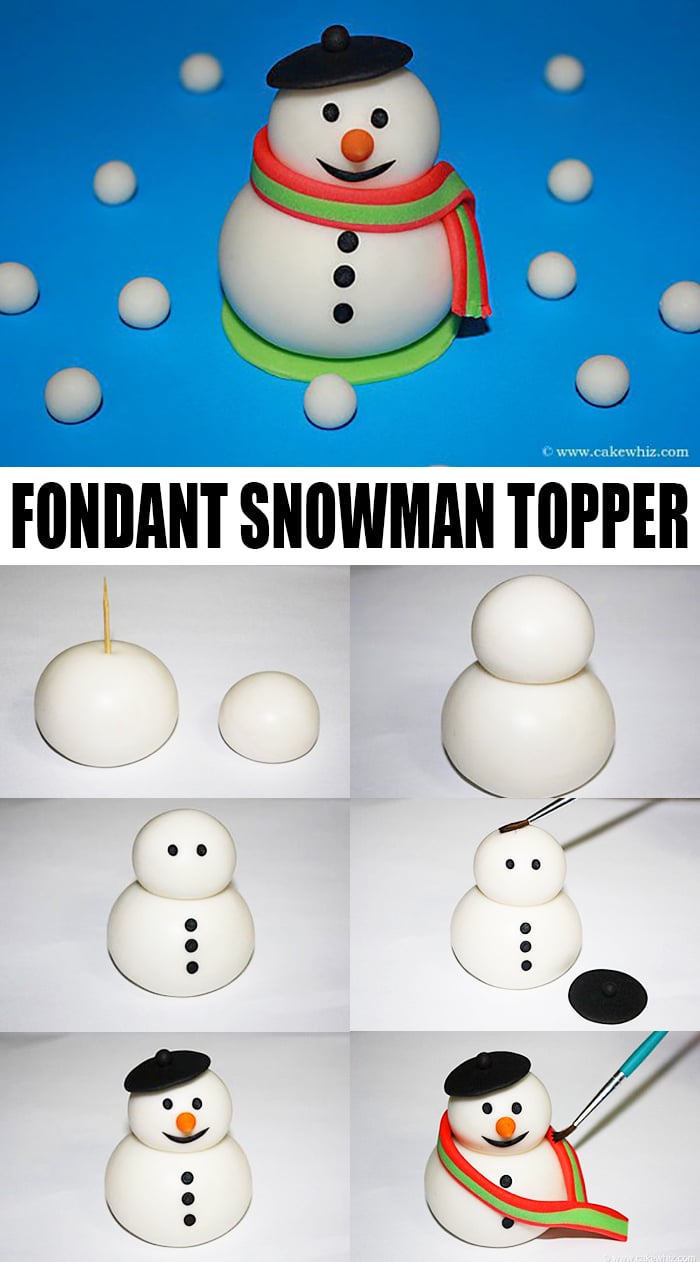
If you prefer a simpler approach or want to practice your fondant sculpting skills, consider making a standalone fondant snowman topper. You can then place this charming figure on a simple round cake, smoothly iced, for an equally festive dessert. This method offers great flexibility and can be prepared well in advance.
This fondant figure can be crafted weeks ahead of time. Once it has fully dried and hardened, you can store it safely in a cardboard box, away from direct heat and moisture, until you are ready to adorn your cake. For added stability and detail, you can also use gum paste or modeling chocolate instead of regular fondant.
Step 1: Form the Body and Head
Begin by rolling out two distinct balls of white fondant. One should be noticeably larger than the other; the larger ball will form the snowman’s body, while the smaller one will be its head. To secure the head to the body, carefully insert a toothpick into the center of the larger body ball, leaving about half of it exposed. Alternatively, an uncooked spaghetti strand can be used for an edible support.
Note: If you’re using a toothpick, remember to break off the sharp point after inserting it into the body to prevent any accidents. I unfortunately forgot to capture this step in a picture.
Step 2: Attach the Head
Gently place the smaller fondant ball (the head) onto the exposed part of the toothpick or spaghetti. Press down carefully until the head is securely in place and the entire structure feels stable, preventing any wobbling.
Step 3: Create Eyes and Buttons
Roll out five small, equally sized black fondant balls. Two of these will serve as the snowman’s eyes, and the remaining three will be its buttons. Gently press the three button-sized balls onto the body of the snowman with your finger. No water is needed for this step, as the fondant’s natural stickiness will suffice. Next, press the two remaining black balls onto the snowman’s face to form the eyes, again, without needing water.
Step 4: Craft the Hat
To make the snowman’s hat, roll out two black fondant balls of different sizes. Flatten the larger ball with your finger to create the brim of the hat, leaving the smaller ball as is for the top. Lightly brush a small amount of water onto the center of the flattened circle. Place the smaller black ball on top of this moistened area and gently press to secure it. Your hat is now ready! Brush a tiny bit of water on top of the snowman’s head, then carefully place the finished hat onto the moistened spot, holding it in place for a few seconds until it adheres firmly.
Step 5: Add a Friendly Smile
For the snowman’s smile, roll out a thin piece of black fondant into a curved “smiley” shape. Gently press this into the snowman’s face with your finger to create a cheerful expression. Again, no water is typically needed for this small detail.
Note: For an alternative, you can also use black royal icing (at a thick consistency) or a food-grade black edible marker to draw the smile, eyes, and even the buttons.
Step 6: Attach the Carrot Nose
Form a small piece of orange fondant into a classic carrot-like cone shape for the nose. Lightly brush a tiny amount of water onto the snowman’s face where the nose will be. Gently press the cone onto the moistened mark until it holds securely in place, giving your snowman its iconic feature.
Step 7: Fashion the Scarf
To create a festive scarf, roll out long, thin “snakes” of red and green fondant. Place them side-by-side and, using a rolling pin, gently roll over them to fuse them together into a single striped strip. Carefully wrap this colorful scarf around the snowman’s neck. Brush a small amount of water on the ends of the scarf to secure it in place and create a natural, draped look. You can also snip the ends with small scissors to make fringes, adding to the realistic effect.
More Delicious Winter Desserts
If you’ve enjoyed creating this snowman cake and are looking for more delightful treats to celebrate the winter season, explore these other festive dessert ideas:
- Adorable Nutter Butter Penguin Cookies
- Elegant Snowflake Cookies
- Magical Snowflake Cake
- Charming Snowflake Cupcakes (Winter Cupcakes)
- Homemade Snow Ice Cream
- Festive Penguin Cake
Recipe
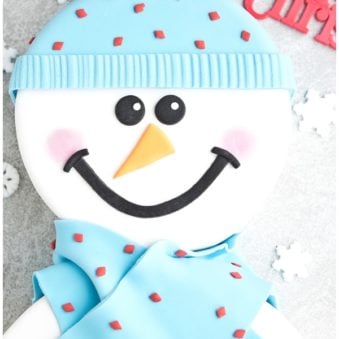
Easy Fondant Snowman Cake
Abeer Rizvi
Pin Recipe
Want to Save This Recipe?
Enter your email & I’ll send it to your inbox. Plus, get great new recipes from me every week!
By submitting this form, you consent to receive emails from CakeWhiz
Ingredients
- 2 Red velvet cake Round, Dimensions: 6×3 and 8×3 inches
- 6 cups Cream cheese frosting
- 4 cups Marshmallow fondant White, light blue, black, orange – pre-colored or homemade
- 3 tablespoon Corn syrup Or water for sticking fondant pieces
Instructions
-
Bake your chosen cake recipe (e.g., Red Velvet) in 6×3 inch and 8×3 inch round pans. Allow them to cool completely on a wire rack to prevent sinking or crumbling.
-
While the cakes are baking and cooling, prepare your cream cheese frosting. Ensure it has a firm, spreadable consistency suitable for icing.
-
Once cool, level each cake if needed and carefully cut each cake in half horizontally. Spread a thin, even layer of cream cheese frosting between the cut layers using an offset spatula.
-
Place the other halves of the cakes on top, gently pressing to secure them into place and create two stacked cake bases.
-
Carefully transfer each cake onto a round cake board of the same size. This will provide stability when moving and assembling the snowman.
-
Ice each cake smoothly and evenly with the remaining cream cheese frosting. A crumb coat followed by a final smooth coat is recommended for a flawless surface under the fondant.
-
Roll out the white fondant to your desired thickness (about 1/8 to 1/4 inch) and carefully drape it over each of the smoothly iced cakes.
-
Using a pizza cutter, trim off any excess fondant neatly around the base of each cake, creating clean edges.
-
Use a fondant smoother to gently smooth out the fondant on the top and sides of both cakes, removing any air bubbles or imperfections for a pristine white finish.
-
Place the larger, 8-inch cake on one end of a large rectangular cake board. Then, carefully stack the smaller, 6-inch cake on top, slightly off-center towards the other end of the board, to form the snowman’s body. Secure them together and to the board with a small amount of extra frosting or royal icing, and optionally, tape the cake boards together underneath if not already secured.
-
To create the snowman’s hat, roll out light blue fondant. Use a knife to cut a straight line near the bottom of a rectangular piece of fondant for the brim. Gently lift the fondant and place it over the top portion of your smaller, upper cake (the head). Brush a tiny amount of water to secure it in place. Trim any excess fondant around the base of this cap with a knife or pizza cutter.
-
Roll out blue fondant again and cut out a thin strip to create the hat band. Use a toothpick or wooden skewer to gently create a striped or stitched pattern along the entire length of this strip for texture. Attach this decorative strip near the base of the cap by brushing a little water, then trim off any excess fondant.
-
Now, let’s make the fuzzy ball for the top of the cap. Roll out a small piece of blue fondant into a rectangular strip. Use a knife to make small, shallow, half-cuts (frayed edges) along one long side of the strip. Roll this strip of fondant tightly and gently squeeze the base. Use a knife to cut off any excess from the base. Secure this fuzzy ball to the top of the cap with corn syrup or a drop of water. You will need to hold it gently in place for a short while until it sticks securely.
-
Adorn the cap with festive red diamond sprinkles. Lightly brush the cap with a tiny amount of corn syrup to act as an adhesive, then carefully place the sprinkles all over the surface.
-
It’s time for the scarf! Roll out blue fondant and use a knife to cut two rectangular pieces. Brush some water around the “neck” area of the snowman. Lay these two pieces down, intentionally creating some natural folds and drapes to give the scarf a realistic, cozy appearance. Stick some red diamond sprinkles onto this scarf as well. Brush a little water near the ends of the scarf and attach edible pattern sheets if using. Use scissors to snip the ends of the scarf to create a frayed, realistic look.
-
Use edible dots for the snowman’s buttons and attach them down the body with a tiny brush of water. If you don’t have pre-made dots, you can easily make small, round buttons from black fondant and attach them with water or small toothpicks for extra stability (ensure guests are aware of toothpicks).
-
Now, add the facial details to bring your snowman to life. Create a carrot nose using an orange triangle piece of fondant. Use small, round black fondant circles for the eyes and a thin, curved black fondant strip for a cheerful smile. Attach all these pieces with a dab of water.
-
For a touch of warmth and charm, gently brush a small amount of pink edible luster dust powder onto the snowman’s cheeks using a soft brush.
-
Finally, complete your winter scene by sticking delicate sugar snowflakes onto the cake board around the base of your snowman. Your easy fondant snowman cake is now ready to be enjoyed!
Notes
- For best results and creative variations, please refer to all the detailed tips and techniques provided above in the article.
- Leftovers of this delightful snowman cake can be stored in a sealed container in the fridge for up to 3 days. However, be aware that the fondant decorations may become slightly sticky due to the moisture naturally found in refrigerators. This is normal and doesn’t affect taste.
Nutrition
An automated tool is used to calculate the nutritional information. As such, I cannot guarantee the accuracy of the nutritional information provided for any recipe on this site.
