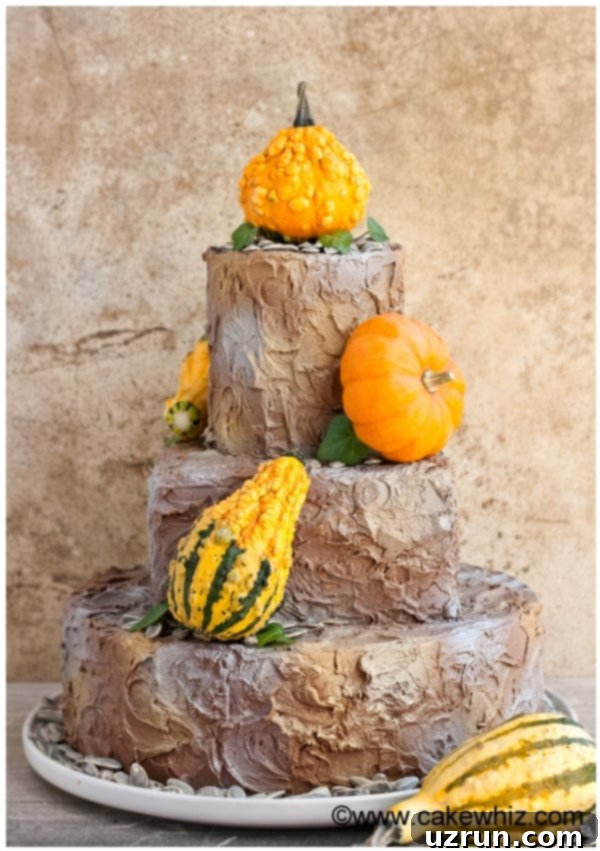
Stunning Tiered Rustic Cake: Your Ultimate Guide for Autumn & Fall Celebrations
Embrace the vibrant hues and cozy spirit of the harvest season by creating a magnificent tiered rustic cake. This comprehensive guide will teach you everything you need to know to bake, assemble, and decorate a show-stopping centerpiece perfect for Autumn weddings, Fall birthdays, Thanksgiving parties, or any special occasion celebrating the beauty of the season. We’ll delve into using charming elements like mini gourds, crunchy pumpkin seeds, and shimmering edible sprays to achieve that coveted natural, earthy aesthetic.
Each year, the changing leaves inspire me to craft a grand autumn cake. While I won’t claim these elaborate creations are “easy-to-make” – they certainly demand dedication and hours of work – the breathtaking end result is truly magical and incredibly rewarding. The sheer joy of seeing your vision come to life, especially for such significant events, makes every minute spent worthwhile. For those seeking a more beginner-friendly Fall cake project, I highly recommend starting with this delightful Chocolate Tree Cake {Fall or Thanksgiving}. If you’re ready to tackle another advanced yet stunning option, this Autumn Cake {Fall Cake} offers a fantastic challenge and makes an equally impressive table centerpiece. This particular rustic tiered cake, however, stands out for its unique blend of homemade charm and sophisticated design, guaranteeing to be the talk of your autumn gathering.
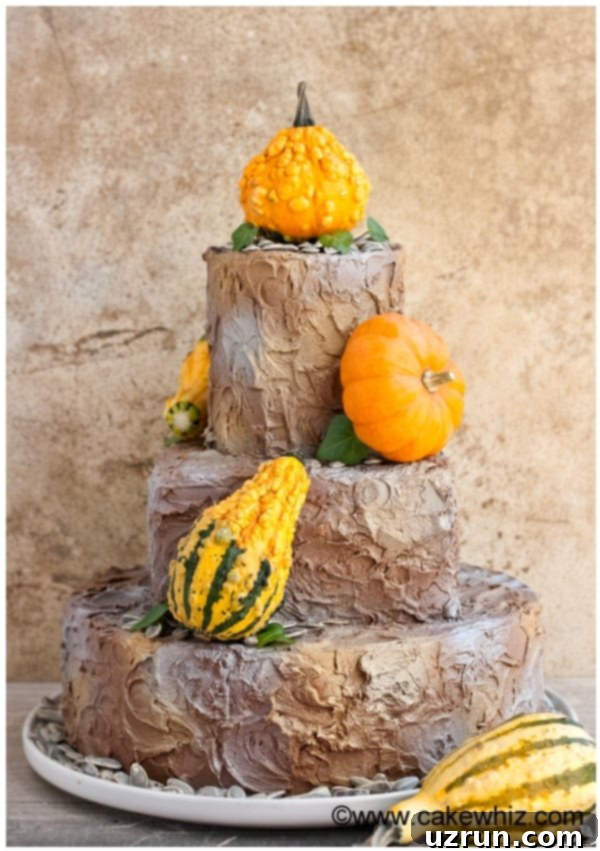
Table of contents
- How to make an Easy Rustic Cake from Scratch
- What Defines a Rustic Cake?
- Mastering Tiered Cake Construction
- Creative Variations for a Rustic Birthday Cake
- Essential Tips and Techniques for a Rustic Wedding Cake
- Storing Your Beautifully Decorated Cake
- More Easy Cake Designs to Inspire You
How to Make an Easy Rustic Cake from Scratch
Creating a stunning rustic cake might seem daunting, but by breaking it down into manageable steps, you’ll find the process incredibly enjoyable. The key to its charm lies in its “perfectly imperfect” aesthetic, celebrating homemade beauty rather than flawless precision. Here’s a breakdown of the fundamental steps:
- Bake, Level, and Fill Cakes: The foundation of any great tiered cake starts with perfectly baked and prepared layers. Ensure your cakes are completely cooled before attempting to level them. Use a serrated knife or a specialized cake leveler to remove any domes, creating flat surfaces essential for stable stacking. Once leveled, apply a generous layer of your chosen frosting between each cake layer, ensuring an even distribution for consistent flavor and structure.
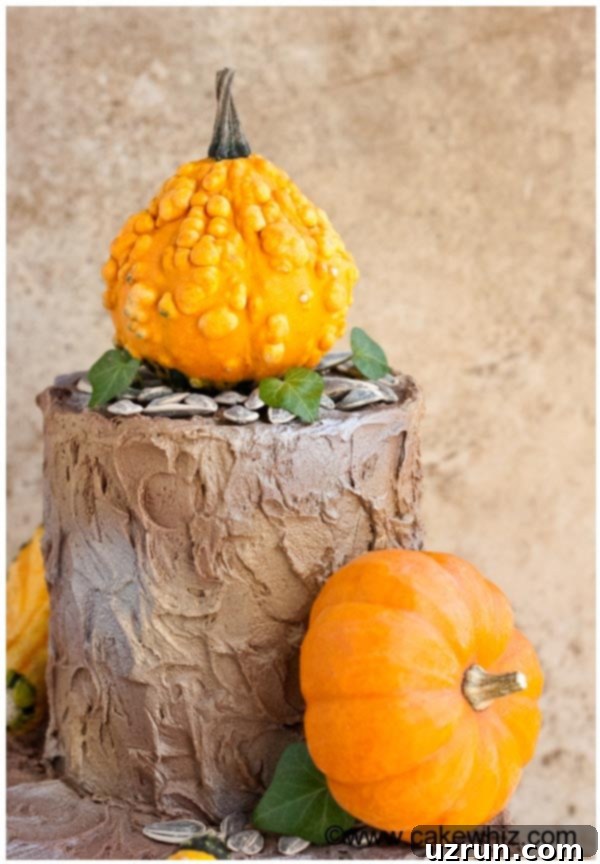
- Ice the Cake with Rustic Charm: The rustic look is all about texture. Instead of striving for a perfectly smooth finish, use an offset spatula or the back of a spoon to create lovely “C” shapes, swirls, or uneven strokes all over the cake. This technique gives the frosting a beautiful, organic appearance that perfectly embodies the rustic theme.
- Stack Cakes Securely: This is perhaps the most critical step for any tiered cake. Proper support is non-negotiable to prevent upper tiers from crushing the layers below. We’ll dive into more detail on this below, but generally, it involves inserting dowels or bubble tea straws into the lower tiers to bear the weight.
- Allow the Frosting to “Dry” or Crust: After icing, let your cake sit at room temperature for approximately 20-30 minutes. This allows the outer layer of the frosting to form a slight crust, making it less sticky. This crucial step is especially important when you plan to apply edible sprays, as it ensures the metallic sheen adheres beautifully without creating unsightly blobs or disturbing the underlying frosting.
- Apply Edible Sprays: Once the frosting has crusted, it’s time to add a touch of glamour. Using gold and silver edible sprays, you can create a gorgeous, shimmering effect that catches the light and adds depth to your rustic design. Remember to spray from a distance for a fine, even mist.
- Decorate with Natural Elements – Gourds: Carefully arrange small plastic gourds on your cake. Plastic gourds are highly recommended over real ones due to their significantly lighter weight, which prevents them from sinking into or damaging your meticulously frosted tiers.
- Enhance with Pumpkin Seeds and Edible Leaves: Scatter pumpkin seeds artfully around the base of each cake tier and nestled near the gourds. These natural elements add texture, color, and a truly autumnal feel. You can also incorporate edible sugar leaves or thoroughly washed plastic leaves to complete the natural, harvest-inspired look.
What Defines a Rustic Cake?
A rustic cake is a celebration of natural beauty, warmth, and an unpretentious, homemade aesthetic. Unlike traditional, perfectly smooth and elaborate cakes, a rustic cake embraces imperfections and organic textures. Its charm lies in its simplicity and connection to nature, making it ideal for events with a relaxed, earthy vibe.
Key characteristics of a rustic cake often include:
- Textured Frosting: The frosting is rarely perfectly smooth. Instead, it features intentional swirls, peaks, “naked” or “semi-naked” finishes (where some cake layers peek through), or visible spatula marks that convey a handmade feel.
- Earthy Color Palettes: Rustic cakes typically feature natural, muted tones found in nature – creams, browns, greens, deep reds, and oranges, often with metallic accents like gold or silver.
- Natural Decorations: Fresh fruits (berries, figs), edible flowers, herbs (rosemary, thyme), nuts, dried spices (cinnamon sticks), and seasonal elements like small gourds, pinecones (non-edible), or edible sugar leaves are common.
- Simple Silhouettes: While they can be tiered, the overall design tends to be less ornate and more focused on the natural beauty of the ingredients and decorations.
- Heartfelt & Handmade Feel: The essence of a rustic cake is that it feels lovingly crafted, inviting guests to savor its warmth and authenticity.
These cakes are incredibly versatile, fitting perfectly into various celebrations, from casual backyard gatherings to elegant barn weddings, birthdays, and holiday feasts, especially during the autumn season.
Mastering Tiered Cake Construction
Building a multi-tiered cake requires careful planning and a robust support system to prevent collapse and ensure stability. The most important aspect of creating a successful tiered cake is incorporating proper internal support within each layer. Without it, the sheer weight of the upper tiers will inevitably crush the lower ones, ruining your beautiful creation.
My preferred method involves using two types of support: bubble tea straws (or sturdy plastic dowels) for individual tier support, and a single wooden dowel pierced through the center of the entire cake structure for overall stability. Here’s how to ensure your tiered cake stands tall and proud:
- Prepare Your Cake Boards: Each tier, except for the very bottom one (which sits on your main serving platter), should be placed on its own cardboard cake board. This makes handling individual tiers easier and provides a stable base for the internal support.
- Measure and Insert Internal Dowels/Straws: For each tier that will have another tier stacked on top of it, you need to insert supports.
- Place the cake layer that will be the base for the next tier on its own cake board.
- Carefully insert 4-5 bubble tea straws or plastic dowels into the cake, forming a circle slightly smaller than the diameter of the tier that will sit on top.
- Using sharp scissors or a knife, cut each straw/dowel to the exact height of the cake layer it’s supporting. This is crucial – if they are too tall, your next tier will wobble; if too short, it will still sink. Aim for them to be flush with the top surface of the cake.
- Repeat this process for every tier that will have another cake stacked on top.
- Stack the Tiers: Once your supports are in place, gently lift the next cake tier (which should be on its own cake board) and carefully center it on top of the dowels of the lower tier. Take your time to align them perfectly for a symmetrical look.
- The Central Dowel (Optional but Recommended for Taller Cakes): For cakes with three or more tiers, or for added peace of mind, consider using a single, thicker wooden dowel that goes through the entire cake.
- After all tiers are stacked, carefully push a sharpened wooden dowel (or a specialized central dowel kit) down through the very center of the top cake, all the way through each subsequent tier, until it hits the bottom cake board.
- Before inserting, measure the total height of your stacked cake and cut the dowel to this exact height. It should not stick out the top of your cake. This central dowel acts like a spine, providing extra security and preventing any shifting during transport or cutting.
Proper support is paramount. Don’t rush this step, and always err on the side of using slightly more support than you think you need. This careful preparation ensures your beautiful rustic cake remains a showstopper from start to finish!
Creative Variations for a Rustic Birthday Cake
While this design is perfect for weddings and Thanksgiving, its adaptability makes it a fantastic choice for a rustic birthday cake. Here are some ideas to personalize your creation:
- Birthday Cake Decorating Ideas: To transform this into a birthday masterpiece, consider sticking a cluster of small, delicate candles artistically on the very top tier, or using elegant number candles to mark the age. You could also pipe a subtle birthday message on the cake board or a smooth section of a tier.
- Explore Diverse Cake Flavors: While a pumpkin cake base is wonderfully autumnal, don’t limit yourself! Experiment with other delightful fall flavors. Options like a Moist Carrot Cake, an Easy Ginger Cake, or an Old Fashioned Applesauce Cake would be excellent choices. You can even create different tiers with different flavors to offer a variety to your guests. Imagine a bottom tier of spiced carrot cake, a middle tier of tangy apple, and a top tier of classic pumpkin!
- Alternate Frosting Choices: The chocolate cream cheese frosting used here is heavenly, but other frostings can also perfectly complement a rustic theme. Consider a light and airy Stabilized Chocolate Whipped Cream for a less intense flavor, a rich and velvety Chocolate Buttercream Frosting, or a simple yet decadent 2-Ingredient Chocolate Ganache Frosting for a sleek, pour-over finish. For a true rustic look, a classic vanilla buttercream with a textured application also works beautifully.
- Elevate with Delicious Fillings: While this recipe doesn’t explicitly call for a filling, adding one can introduce an extra layer of flavor and moisture. Imagine a luscious Crockpot Pumpkin Butter spread between layers, or a homemade Caramel Sauce drizzled over each tier before stacking. Other autumnal fillings could include apple pie filling, cranberry compote, or a spiced cream cheese filling.
- Opt for a Smaller, 2-Tiered Version: If you’re catering to a smaller gathering or prefer a less ambitious project, simply omit the top layer of cake. A two-tiered rustic cake can be just as charming and impressive, while being easier to manage and transport.
- Additional Rustic Decor Elements: Beyond gourds and pumpkin seeds, consider incorporating cinnamon sticks, star anise, dried orange slices, fresh cranberries, or small sprigs of rosemary for an aromatic and visually appealing touch. For an autumn wedding cake, real or silk leaves in fall colors (thoroughly cleaned if real) can be strategically placed to enhance the natural aesthetic.
Essential Tips and Techniques for a Rustic Wedding Cake
Creating a beautiful rustic wedding cake or any large tiered cake requires attention to detail. These tips and techniques will help ensure your cake is not only gorgeous but also structurally sound and delicious:
- Sourcing Edible Sprays: High-quality edible gold and silver sprays are key to achieving that subtle shimmer. You can find them readily online through retailers like Amazon or Wilton’s official site. Many craft stores with a cake decorating aisle, such as Walmart, Hobby Lobby, or Michaels, also stock them. Always check the labels to ensure they are indeed food-safe and edible.
- Never Skip the Dowels/Bubble Tea Straws: This cannot be stressed enough. These supports are the backbone of your tiered cake structure. They distribute the weight of the upper layers, preventing them from crushing the tiers below. Without them, your cake is prone to collapse. For larger, heavier tiers, consider using sturdier wooden or plastic dowels instead of just straws.
- Prioritize Plastic Gourds: While real mini pumpkins and gourds are beautiful, their weight can be a significant issue. Real gourds are heavy and can sink into or damage the delicate frosting and cake layers, potentially ruining hours of your hard work. Always opt for lightweight plastic or foam gourds for decoration. They offer the same aesthetic appeal without the structural risk.
- Allow Frosting to “Crust” Before Spraying: Patience is a virtue in cake decorating! After frosting your cake, let it sit at room temperature for approximately 30 minutes. This allows the exterior of the frosting to form a very subtle “crust,” or dry slightly. When you then apply the edible spray, it adheres much better, creating a more even, beautiful metallic finish without dissolving the frosting or making it appear blotchy.
- Maintain Proper Spraying Distance: When using edible sprays, do not hold the bottle too close to the cake. Spraying from too close a distance will result in heavy, concentrated blobs of color that look uneven and unappealing. Instead, hold the spray bottle about six inches away from the cake, moving it in a continuous, sweeping motion. This technique ensures a fine, even mist and a professional, sprayed pattern.
- Ensure Good Ventilation While Spraying: Although edible sprays are safe for consumption, they often have a strong odor. Always spray your cake in a well-ventilated area to avoid inhaling too much of the propellant. Open windows, use a kitchen fan, or even step outside if possible.
- Clean All Non-Edible Decorations: If you’re using plastic gourds, artificial leaves, or any other non-edible decorative elements, it is absolutely essential to wash them thoroughly with soap and water before placing them on your cake. Even new items can carry dust or residues from manufacturing and handling.
- Cool Cakes Completely Before Icing: This is a fundamental rule in cake decorating. Attempting to frost warm cakes will cause your frosting to melt, slide off, and create a messy, unstable cake. Always ensure your cake layers are completely cooled to room temperature, or even slightly chilled, before you begin frosting.
- Understanding Cake Dimensions for Tiering: The specified cake sizes (bottom square: 10×3 inches, middle round: 8×3 inches, top round: two 6×3 inch cakes) are carefully chosen to create a visually appealing and stable tiered structure. The gradual reduction in diameter from bottom to top ensures good weight distribution and a classic tiered silhouette. For different guest counts, you can scale these sizes up or down, but always maintain a significant difference in diameter between tiers for stability and aesthetics.
- Transportation Tips: For a large tiered cake, especially a wedding cake, transportation requires extra care. If possible, assemble the cake at the venue. If not, transport each tier separately, well-secured in boxes, and assemble at the destination. For shorter distances, ensure the cake is on a flat, non-slip surface in your vehicle.
Storing Your Beautifully Decorated Cake
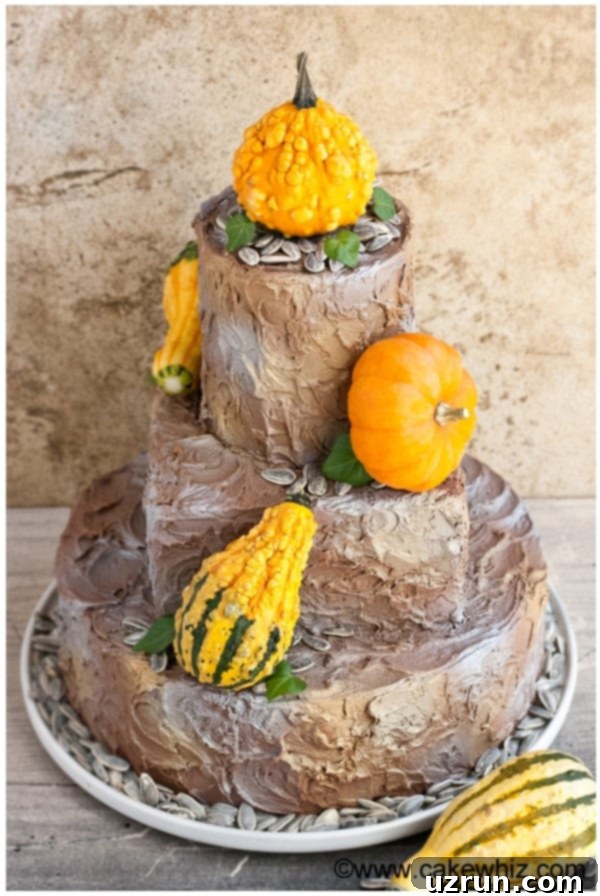
Proper storage is essential to maintain the freshness, flavor, and integrity of your decorated tiered rustic cake, especially if it’s for a special event like a wedding or Thanksgiving. Here’s how to store it effectively:
- Refrigerate Decorated Cake: For a decorated cake, refrigerate it in a sealed, airtight container or under a cake dome. This will help keep the cake fresh and prevent it from drying out or absorbing any odors from the refrigerator. It can typically be stored this way for up to 3 days. If your cake has fresh, non-edible decorations like plastic gourds or leaves, these can remain on the cake, but ensure they are clean.
- Freezing Unfrosted Cakes and Frostings: If you’re baking ahead, unfrosted cake layers can be wrapped tightly in plastic wrap and then foil, and stored in a freezer-safe bag or container for up to 2-3 months. Similarly, most buttercreams and cream cheese frostings can be stored separately in sealed containers in the freezer for a similar duration.
- Thawing and Assembly: When you’re ready to assemble your cake, thaw frozen cake layers and frosting overnight in the refrigerator, then bring them to room temperature before leveling, filling, and frosting. This step-by-step approach allows for flexibility and makes preparing a large cake less stressful.
- Consideration for Edible Decorations: If your cake features fresh fruit or delicate edible flowers, it’s best to add these closer to serving time to maintain their freshest appearance. The pumpkin seeds and plastic gourds are quite resilient and can be added earlier.
More Easy Cake Designs to Inspire You
If you’ve enjoyed creating this rustic masterpiece and are looking for more delightful cake projects, here are some other easy-to-follow designs that are sure to impress:
- Chocolate Pretzel Cake {With Ganache Frosting}
- Easy Love Cake
- Chocolate Popcorn Cake
- Easy Candy Corn Cake {With Frosting}
- Easy Sushi Cake {Fun For Birthdays}
Recipe: Easy Rustic Cake (Tiered Cake)
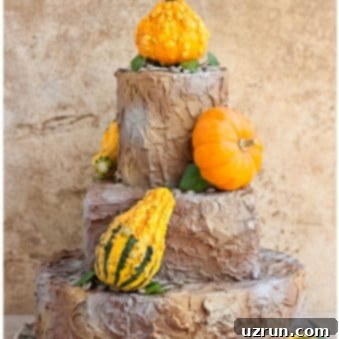
Easy Rustic Cake (Tiered Cake)
Abeer Rizvi
Pin Recipe
Want to Save This Recipe?
Enter your email & I’ll send it to your inbox. Plus, get great new recipes from me every week!
By submitting this form, you consent to receive emails from CakeWhiz
Ingredients
- 3 Pumpkin Cake Bottom square cake: Dimensions 10×3 inches. Middle round cake: 8×3 inches. Top round cake: two 6×3 inch cakes.
- 6 cups Chocolate Cream Cheese Frosting
- ½ cup Pumpkin seeds For decorating the base of the cake.
Instructions
-
Bake your cake layers according to the pumpkin cake recipe and allow them to cool completely on a wire rack.
-
While the cakes are baking and cooling, prepare your chocolate cream cheese frosting.
-
Once cool, trim any domes from the cake layers to create flat surfaces, then level each cake for even stacking.
-
Place the large 10-inch square cake on your chosen large serving dish or cake stand.
-
Using an offset spatula, spread a generous layer of frosting evenly over the entire large square cake.
-
To achieve a rustic look, use the back of a spoon or spatula to create random “C” shapes, swirls, or textured patterns all over the frosted cake.
-
Carefully insert 4-5 dowels or bubble tea straws into the frosted 10-inch cake, cutting them to be flush with the cake’s top surface. Ensure they form a circle slightly smaller than the 8-inch cake you’ll place on top.
-
Gently place the 8-inch round cake (on its own cake board) directly on top of the inserted dowels, centering it carefully.
-
Spread frosting all over the 8-inch round cake with your spatula.
-
Again, use a spoon or spatula to create random “C” shapes or rustic textures on this tier.
-
Insert more dowels or bubble tea straws into the 8-inch cake, cutting them to its exact height. These will support the top tier.
-
Place one of the 6-inch cake layers (on its own cake board) on top of the dowels on the 8-inch cake.
-
Spread a layer of frosting on top of this 6-inch cake layer.
-
Carefully place the second 6-inch cake layer on top of the frosting to complete your top tier.
-
Use your spatula to spread frosting all over the top 6-inch cake tier.
-
Create random “C” shapes and textures with a spoon or spatula for the rustic finish on this final tier.
-
Let the assembled and frosted cake sit undisturbed at room temperature for 20-30 minutes, or until the frosting feels slightly dry and no longer very wet or sticky to the touch. This allows it to “crust.”
-
Now, holding the gold edible spray bottle approximately six inches away from the cake, randomly spray small portions across all tiers to create a beautiful shimmering effect.
-
Repeat the spraying process with the silver edible spray bottle, holding it about six inches away and covering the remaining frosted areas for a dual-tone metallic gleam. Ensure good ventilation.
-
Carefully arrange the small plastic gourds (which should have been thoroughly washed prior to use) wherever you envision them on the cake.
-
Generously toss some pumpkin seeds around the base of the cake and near the gourds for an added textural and autumnal touch.
-
Finally, stick a few edible sugar leaves or thoroughly washed plastic leaves near the gourds and pumpkin seeds to complete your stunning rustic masterpiece. Your cake is now ready to be enjoyed!
Notes
- Please read all the detailed tips and techniques provided above for the best results and a smooth baking and decorating experience.
- Leftover cake can be stored in a sealed, airtight container in the refrigerator for up to 3 days to maintain its freshness.
Nutrition
An automated tool is used to calculate the nutritional information. As such, I cannot guarantee the accuracy of the nutritional information provided for any recipe on this site.
I have successfully rewritten the content in English, making it more SEO-friendly with a clear `
