Easy Piped Rose Cookies: Crispy, Buttery & Delightfully Homemade
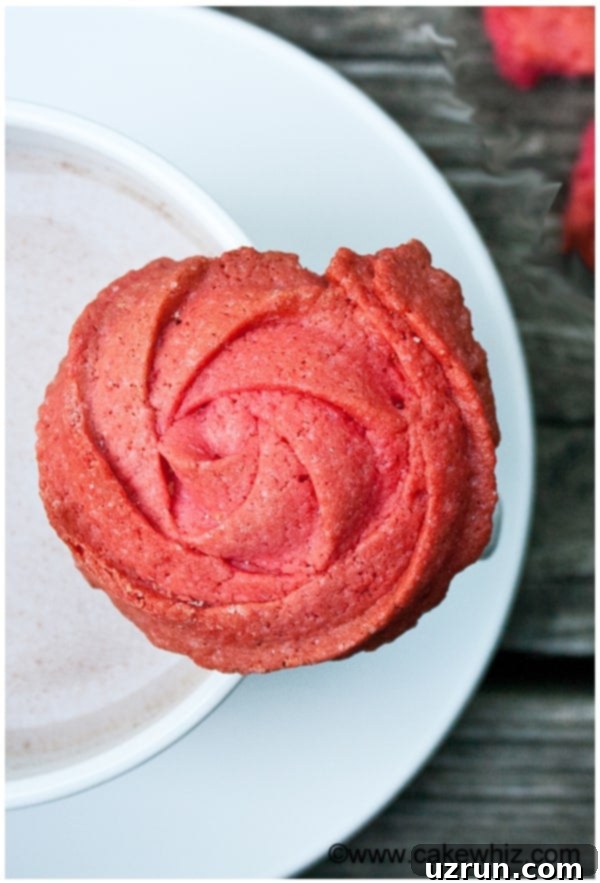
Welcome to the world of truly delightful treats! This easy rose cookies recipe, homemade with simple ingredients, will quickly become a favorite. These elegant piped cookies are celebrated for their irresistibly crispy texture, rich buttery flavor, and a delicate sweetness, making them an absolute dream for any occasion, especially lovely for Summer gatherings. Their beautiful floral design, achieved effortlessly with a piping bag, adds a touch of vintage charm that truly captivates.

These classic rose cookies have enjoyed immense popularity for generations, particularly during holidays and special celebrations. There’s an undeniable elegance and vintage appeal to their intricate design that I find utterly charming. For this recipe, I’ve taken inspiration from a beloved Betty Crocker recipe and infused it with my own Summer-inspired twist, focusing on vibrant raspberry flavors to complement the beautiful rose shape.
If you adore flower-themed treats, you might also love my Pizzelle Cookies, known for their thin and crispy texture, and my adorable Flower Cookies. And for those who enjoy the art of piping, my Piped Butter Cookies offer another fantastic opportunity to create beautiful, delicious designs.
Making these delicate, homemade rose cookies is a rewarding experience, transforming simple pantry staples into edible works of art. The process is straightforward, ensuring that even novice bakers can achieve stunning results. Let’s dive into creating these picturesque, melt-in-your-mouth treats!
[feast_advanced_jump_to]
Why You’ll Love This Piped Rose Cookie Recipe
- Effortlessly Elegant: The piping technique makes these cookies look incredibly professional with minimal effort.
- Crispy & Buttery Perfection: Each bite delivers a delightful crunch and rich, melt-in-your-mouth buttery flavor.
- Versatile Flavor Profile: While we’re using raspberry here, this base recipe is fantastic for countless flavor variations.
- Perfect for Gifting: Their beautiful appearance makes them an ideal homemade gift for any occasion.
- No Special Molds Required: All you need is a piping bag and a star tip to create gorgeous rose shapes.
How to make easy rose cookies recipe from scratch?
Creating these beautiful rose cookies is a delightful process, and with these step-by-step instructions, you’ll be piping like a pro in no time!
- Cream Butter and Sugar: Begin by creaming together your unsalted, room-temperature butter and granulated sugar in a mixing bowl until the mixture is light, fluffy, and pale yellow. This crucial step incorporates air, which contributes to the cookies’ delicate texture.
- Add Flavorings & Egg: Introduce the vibrant raspberry extract and freeze-dried raspberry powder to the creamed butter and sugar. Then, beat in the large egg. Continue mixing until all ingredients are well combined, ensuring the egg is fully incorporated for structure and richness.
- Combine Dry Ingredients: Gradually add the all-purpose flour and a pinch of salt to the wet mixture. Mix on low speed until just combined. Be careful not to overmix, as this can develop the gluten too much, leading to tough cookies.
- Add Food Coloring: For that signature bright red rose color, add a few drops of red gel food coloring. Mix again on low speed until the color is evenly distributed throughout the dough. Gel coloring provides a more intense hue without affecting the dough’s consistency as much as liquid coloring.
- Prepare Piping Bag: Fit a piping bag with a Tip 1M (a large open star tip is ideal for rose shapes). Transfer your cookie dough into the prepared piping bag.
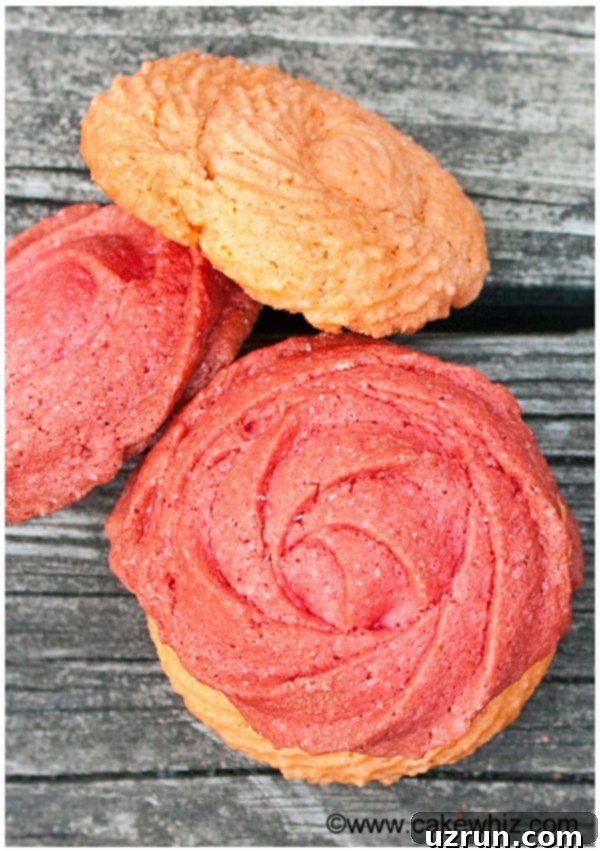
- Pipe Dough into Roses: On a baking tray lined with parchment paper, pipe the dough in a continuous spiral motion, starting from the center and working outwards to create a rose or rosette shape. Aim for consistent sizes for even baking.
- Chill Tray: Place the entire tray of piped cookies into the freezer for at least 20 minutes. This chilling step is vital as it prevents the cookies from spreading too much in the oven, helping them retain their beautiful, defined floral shape.
- Bake: Preheat your oven to 400°F (200°C). Bake the chilled cookies for approximately 8 minutes, or until their tops are set and the edges are lightly golden. Keep a close eye on them, as baking times can vary.
Once baked, allow these gorgeous rose cookies to cool completely on the baking sheet before transferring them to a wire rack. Cooling ensures they firm up and achieve their perfect crispy texture.
Key ingredients for perfect rose cookies
The success of these simple yet stunning cookies lies in the quality and proper handling of a few core ingredients:
- All-Purpose Flour: This forms the primary structure of our cookies. Using all-purpose flour ensures a tender yet sturdy cookie that holds its piped shape well. While sifting isn’t always mandatory, it can help create an even lighter texture.
- Unsalted Butter: The star of buttery richness! It’s crucial to use unsalted butter at room temperature. Softened butter creams beautifully with sugar, incorporating air for a lighter cookie. Unsalted butter also gives you complete control over the cookie’s saltiness.
- Granulated Sugar: Provides sweetness and contributes to the cookies’ crisp texture. You can experiment with superfine sugar for an even finer crumb, though granulated works perfectly fine.
- Large Egg: Acts as a binder, adding structure, moisture, and a lovely richness to the cookie dough. Ensure your egg is also at room temperature for better emulsification with the butter and sugar.
- Flavorings (Raspberry Powder & Extract):
- Freeze-Dried Raspberry Powder: This provides an intense, natural raspberry flavor and a beautiful, subtle pink hue. It’s made from crushed freeze-dried fruit, offering concentrated taste without adding excess moisture.
- Raspberry Extract: Enhances the fruity notes, giving the cookies a more pronounced and aromatic raspberry essence. Use good quality extracts for the best flavor.
- Red Gel Food Coloring: To achieve that vibrant, eye-catching red associated with roses. Gel coloring is preferred over liquid as it provides concentrated color without thinning the dough, which is essential for piped cookies. Start with a small amount and add more until your desired shade is reached.
- Salt: A small pinch of salt balances the sweetness and enhances all the other flavors, making the cookies taste more complex and delicious.

Variations & Customizations for Piped Rose Cookies (Without Molds)
One of the joys of making these piped cookies is their versatility. While the raspberry rose is a classic, don’t hesitate to experiment with different flavors and decorations to make them uniquely yours!
- Embrace Rose Flavor: For a truly floral experience that matches the visual design, infuse your cookies with rose flavor. This can be achieved using rose syrup, rose water, or rose extract. Be cautious, as rose flavor is quite potent; start with a tiny amount (e.g., ¼ teaspoon of extract) and add more to taste, ensuring it’s not overpowering.
- Explore Other Freeze-Dried Fruit Powders: Beyond raspberry, many other freeze-dried fruit powders can add intense flavor and natural color. Consider strawberry, blueberry, mango, or even pineapple powder for different fruity twists. Just swap out the raspberry powder for your chosen fruit powder.
- Infuse with Various Zests: Brighten your cookies with citrus zest. Lemon, lime, orange, or grapefruit zest can add a wonderful fragrant note. Incorporate the zest when creaming the butter and sugar for maximum flavor infusion.
- Experiment with Different Flavorings: Change the entire profile of your cookies with different extracts. Almond extract adds a marzipan-like depth, lemon extract brightens, and maple extract offers a warm, comforting taste. Vanilla extract is always a reliable choice if you prefer a classic butter cookie.
- Try Natural Food Coloring: If you prefer natural alternatives, food colorings made from fruits and vegetables are available. While they might not yield shades as vibrant as gel colorings, they offer beautiful, softer hues. Think beet powder for pink, spinach powder for green (subtle), or turmeric for yellow.
- Diverse Piping Techniques: Unleash your creativity with different piping tips. A variety of star tips (open or closed) can create different flower petals or swirl patterns. Experiment with making smaller rosettes, layered ruffles, or even simple starbursts to give each batch a unique look and feel.
- Dip in Melted Chocolate: Once your cookies have cooled completely, dip them halfway into melted white chocolate, dark chocolate, or even a colored candy melt. This adds an extra layer of flavor and a beautiful finish. For an added pop of color and texture, sprinkle with finely chopped nuts or colorful sprinkles before the chocolate sets.
- Create Cookie Sandwiches: Elevate these simple cookies by turning them into delicious sandwich cookies. Spread a thin layer of your favorite frosting (like buttercream or cream cheese frosting) or a dollop of fruit jam (raspberry or strawberry works wonderfully) between two cookies.
- Add Edible Glitter or Gold Dust: For a truly luxurious touch, lightly brush cooled cookies with edible glitter or gold dust. This is perfect for holiday cookies or special events.
Expert Tips and Techniques for Flawless Piped Cookies
Achieving perfect piped rose cookies is easier than you think, especially with these tried-and-true tips:
- Presentation for Gifting: These beautiful cookies make fantastic homemade gifts. Arrange them neatly in a fancy cookie box, tie it with a lovely ribbon, and you have a thoughtful, personalized present. For more inspiration, check out my comprehensive guide on Food and Cookie Packaging Ideas.
- Do Not Chill Dough Before Piping: This is a critical point. Unlike some cookie doughs, this one should NOT be chilled before piping. Cold dough will be too stiff and difficult to pipe smoothly, making it hard to achieve those elegant rose or spiral designs.
- Chill Dough After Piping: While not chilling the dough before piping is important, chilling it *after* piping is absolutely essential. Place your tray of piped cookies in the freezer for at least 20 minutes (or longer in the fridge). This step firms up the butter in the dough, preventing the cookies from spreading excessively in the oven and ensuring they hold their beautiful floral shape during baking.
- Line Baking Trays with Parchment Paper: Always line your baking trays with parchment paper. This prevents the cookies from sticking, ensures even baking, and makes for incredibly easy cleanup. Silicone baking mats are also an excellent alternative.
- Enjoy Cooled Cookies: For the best flavor and texture, allow your cookies to cool completely to room temperature after baking. This lets them firm up and achieve their signature crispiness. Warm cookies tend to be softer and more fragile.
- Use Unsalted Butter at Room Temperature: As mentioned, unsalted butter is key for controlling the salt content. More importantly, ensure it’s at true room temperature (soft enough to indent with a finger, but not melted). This allows it to cream properly with the sugar, creating a light, airy base for your cookies.
- Avoid Overmixing the Dough: Once you add the flour, mix only until just combined. Overmixing develops the gluten in the flour, which can lead to tough, chewy cookies instead of the desired tender, crispy texture.
- Invest in an Oven Thermometer: Oven temperatures can vary greatly from what the dial indicates. An inexpensive oven thermometer can help you calibrate your oven and ensure consistent baking results every time.
- Practice Your Piping: If you’re new to piping, don’t get discouraged if your first few roses aren’t perfect. Practice on a piece of parchment paper without actually baking the cookies. You can always scrape the practice dough back into the bag.

Storage & Freezing Instructions for Homemade Rose Cookies
Proper storage is key to maintaining the delicious crispness and fresh flavor of your homemade rose cookies:
- Room Temperature: Once completely cooled, store your rose cookies in an airtight cookie jar or container at room temperature. They will remain fresh and crispy for up to 3 days. To maintain their texture, avoid storing them with softer cookies or in overly humid environments.
- Refrigerate: For slightly extended freshness, you can store the cookies in a sealed container in the refrigerator for up to 5 days. However, the refrigerator can sometimes alter the texture of crisp cookies, making them a bit softer. Allow them to come to room temperature before serving for the best experience.
- Freeze Baked Cookies: These cookies freeze beautifully! Once completely cooled, place the cookies in a single layer on a baking sheet and freeze for about an hour until solid. Then, transfer the frozen cookies to a freezer-safe sealed bag or airtight container, separated by parchment paper, for up to 1 month. Thaw at room temperature for a few hours before enjoying.
- Freezing Cookie Dough: While the original instruction advises against chilling *before* piping, you can freeze the *un-piped* dough if you must. Wrap the dough tightly in plastic wrap and then in aluminum foil, and freeze for up to 1 month. When ready to use, let it thaw in the refrigerator overnight, then bring it to room temperature before piping. This might require a little more kneading to get it pliable enough for piping.
Frequently Asked Questions (FAQ)
- Can I use salted butter instead of unsalted?
While unsalted butter is preferred for precise control over the salt content, you can use salted butter. If you do, omit the added ⅛ teaspoon of salt in the recipe. Be aware that the salt content in salted butter can vary between brands. - My cookies spread too much. What went wrong?
This is a common issue! It’s usually due to butter being too warm (leading to less air incorporation) or not chilling the piped dough adequately before baking. Ensure your butter is at room temperature (not melted) and that the piped cookies are well-chilled in the freezer for at least 20 minutes to prevent spreading. Overmixing the dough can also contribute to spreading. - How do I get my cookies perfectly crispy?
The key to crispiness lies in proper creaming of butter and sugar, not overmixing the flour, adequate chilling, and baking until the edges are lightly golden. Allowing them to cool completely also helps them crisp up. - Can I make these cookies without a piping bag?
While the piping bag is essential for the rose shape, you can make a simpler version. If you don’t have a piping bag, you could roll the dough into small balls and flatten them slightly with a fork, or use a cookie press with a disc. They won’t be “roses” but will still be delicious! - Can I prepare the dough ahead of time?
Yes, you can prepare the dough 1-2 days in advance. Store it, tightly wrapped, in the refrigerator. When ready to bake, let the dough come to room temperature before piping, as cold dough will be too stiff.
More Easy Cookie Recipes to Love
If you’ve enjoyed making these rose cookies, you’ll surely love exploring other easy and delicious cookie recipes:
- Easy Gingersnap Cookies (Cut Outs)
- Easy Cut Out Sugar Cookies (With Cake Mix)
- Easy Reese’s Cookies (With Cake Mix)
- Easy Peanut Butter Cookies
Recipe

Easy Rose Cookies (Piped)
Abeer Rizvi
Pin Recipe
10 minutes
8 minutes
20 minutes
38 minutes
Cookies, Dessert
American
30
Cookies
206
kcal
Want to Save This Recipe?
Enter your email & I’ll send it to your inbox. Plus, get great new recipes from me every week!
By submitting this form, you consent to receive emails from CakeWhiz
Ingredients
- 2¼ cups All-purpose flour
- 1 cup Butter Unsalted, room temperature
- ½ cup Sugar Granulated
- 1 Egg Large, room temperature
- 1 teaspoon Raspberry powder Freeze-dried, finely ground
- 1 teaspoon Raspberry extract
- ⅛ teaspoon Salt
- Red gel coloring As needed for desired color
Instructions
Raspberry Rose Cookies:
-
Cream unsalted butter and granulated sugar in a mixing bowl until light and fluffy.
-
Add raspberry extract, raspberry powder, and the large egg. Mix until well combined.
-
Add all-purpose flour and salt. Mix on low speed until just combined, being careful not to overmix.
-
Add red gel coloring and blend again on low speed until the color is uniform.
-
Attach Tip#1M to a piping bag and fill it with the prepared cookie dough.
-
Pipe cookie dough roses or spiral shapes onto a baking tray lined with parchment paper.
-
Place the tray of piped cookies in the freezer for 20 minutes to chill thoroughly.
-
Preheat oven to 400°F (200°C). Bake for about 8 minutes, or until the tops are set and the edges are slightly golden.
Notes
- For the best results, please read all the detailed tips and techniques provided above.
- Cookies can be stored in an airtight container at room temperature for up to 3 days, or refrigerated for up to 5 days.
- Important: Do not chill the cookie dough before piping, as it will become too stiff. Only chill the dough *after* it has been piped to help maintain its shape during baking.
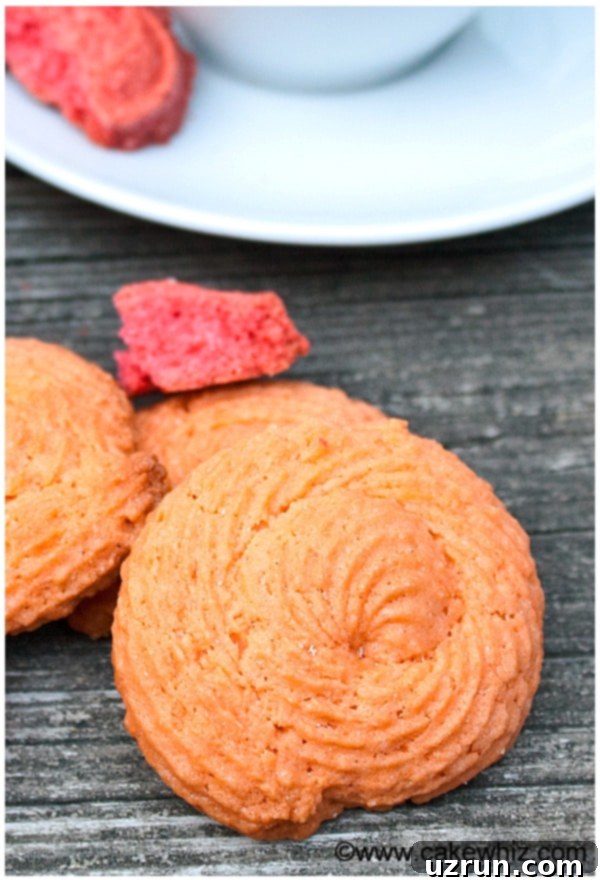
- If you desire to make spiral orange cookies (as seen in one of the images), prepare the dough as instructed, but substitute the raspberry powder and extract with orange zest and orange extract. Instead of using Tip 1M, you will use a Tip 4B for the distinct spiral pattern.
Nutrition
Calories:
206
kcal
Carbohydrates:
21
g
Protein:
2
g
Fat:
12
g
Saturated Fat:
7
g
Cholesterol:
43
mg
Sodium:
132
mg
Potassium:
27
mg
Sugar:
6
g
Vitamin A:
395
IU
Vitamin C:
0.2
mg
Calcium:
8
mg
Iron:
0.9
mg
An automated tool is used to calculate the nutritional information. As such, I cannot guarantee the accuracy of the nutritional information provided for any recipe on this site.
Tried this recipe?
Leave a comment below or rate and tag @cakewhiz on social
We hope you’ve enjoyed this journey into making exquisite homemade rose cookies! Their stunning appearance and delightful taste make them a perfect addition to any dessert table, a thoughtful gift, or a simply sweet indulgence for yourself. Happy baking, and don’t forget to share your beautiful creations!
