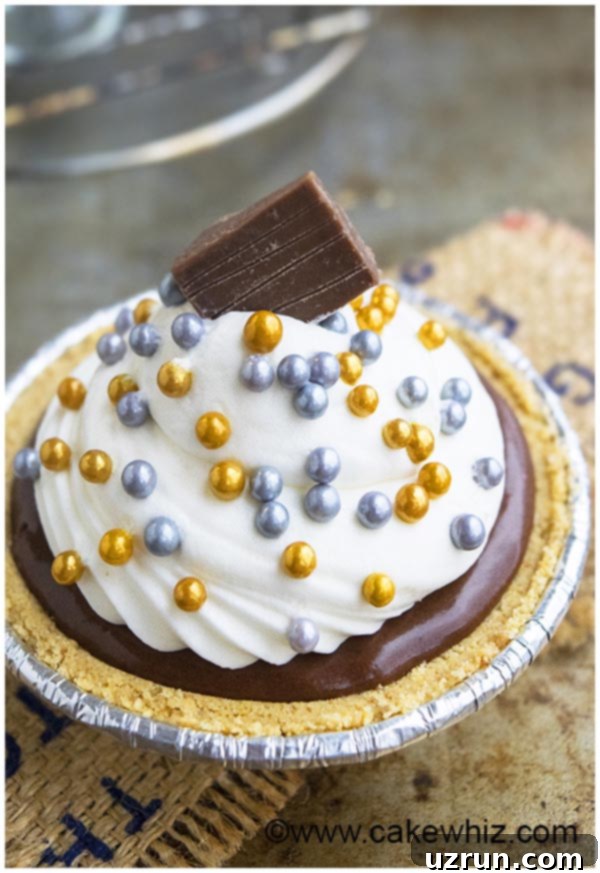
Decadent No-Bake Chocolate Tart with Graham Cracker Crust: Your Easiest Dessert Ever!
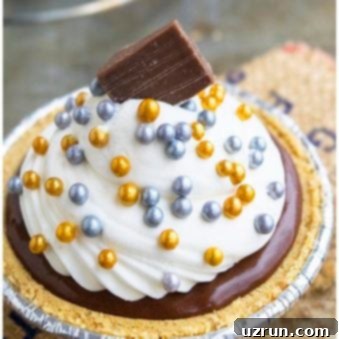
Prepare to fall in love with this incredibly simple yet utterly luxurious no-bake chocolate tart! Featuring a delightful, buttery graham cracker crust and a velvety-smooth, rich egg-free chocolate pudding filling, this dessert comes together with just a few basic ingredients and zero oven time. Topped with a cloud of homemade whipped cream, it’s a showstopper that tastes like it took hours, but only requires minimal effort and some chill time.
While many chocolate tart recipes rely on a ganache filling, my family’s favorite, and this recipe’s secret weapon, is a classic chocolate pudding. It’s surprisingly easy to make and yields an irresistibly creamy texture that’s less intense than ganache, making it a universally beloved treat. This homemade chocolate tart is the perfect personalized dessert for all your upcoming gatherings, holidays, or simply a sweet weeknight indulgence. Looking to expand your no-bake repertoire? Consider adding this equally easy and delightful Chocolate Peanut Butter Pie to your menu – your family and friends will thank you!
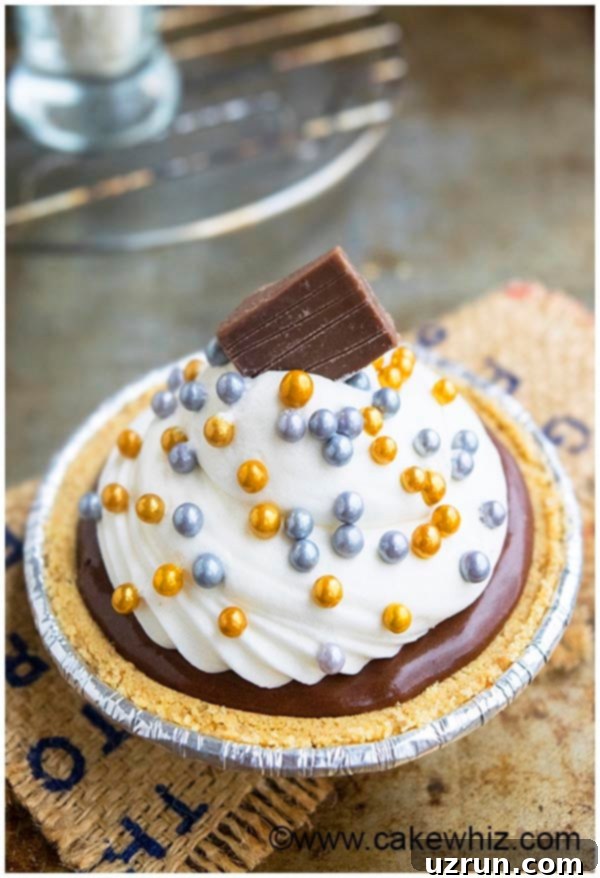
Table of Contents
- How To Make Decadent No-Bake Chocolate Tart From Scratch
- Creative Tart Topping Ideas
- Delightful Variations for Your Chocolate Tartlet
- Essential Tips and Techniques for Mini Chocolate Tarts
- Proper Storage for Your No-Bake Chocolate Tart
- More Irresistible Chocolate Desserts
How To Make Decadent No-Bake Chocolate Tart From Scratch
Creating this impressive no-bake chocolate tart is surprisingly straightforward. Follow these simple steps for a dessert that’s guaranteed to be a hit:
- Prepare the Crust: Begin by making your graham cracker crust (or use a store-bought one for extra convenience). Press this crumbly mixture evenly into small individual tart pans or one large tart pan, creating a sturdy base for your filling.
- Whip Up the Chocolate Pudding: In a saucepan, combine whole milk, evaporated milk, rich cocoa powder, cornstarch, and sugar. This combination of ingredients will create a lusciously smooth and thick chocolate pudding.
- Cook and Thicken: Cook the mixture over medium heat, whisking continuously to prevent lumps and ensure even thickening. As soon as it reaches a satisfying, pudding-like consistency, remove it from the heat.
- Enrich the Filling: Stir in a generous knob of unsalted butter and a splash of pure vanilla extract. These additions are crucial for enhancing the flavor and providing that irresistible creamy finish to your chocolate filling.
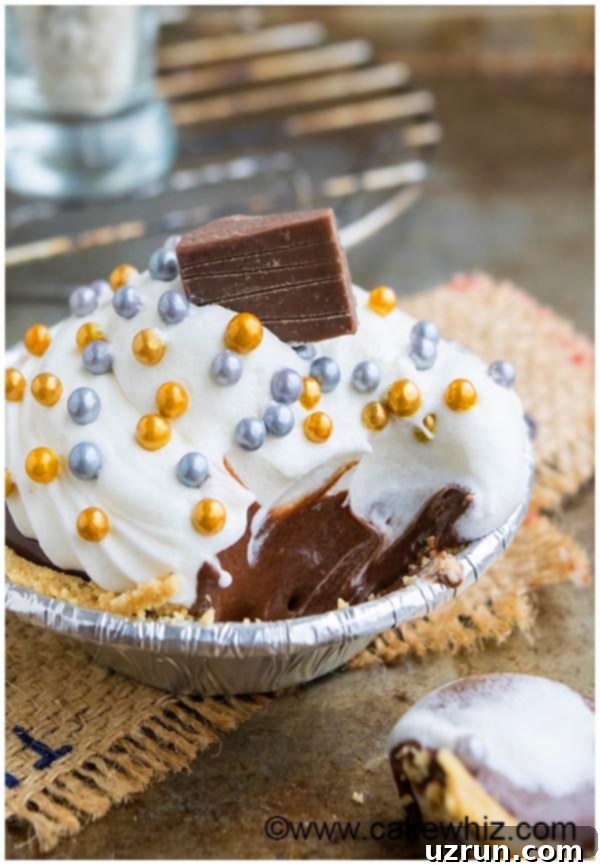
- Assemble the Tart: Carefully pour the warm, decadent chocolate pudding mixture over your prepared graham cracker crust(s). Smooth the top with a spoon or spatula to ensure an even layer.
- Chill to Perfection: The most crucial step for a firm and sliceable tart! Transfer the tart(s) to the refrigerator and chill overnight, or for a minimum of 6 hours, until the pudding is completely set and firm.
- Decorate and Serve: Once fully chilled, it’s time to add the finishing touches! Generously top your tart with fresh whipped cream, chocolate shavings, edible pearls, or any of your favorite garnishes. Slice and enjoy this effortless masterpiece!
Creative Tart Topping Ideas
One of the joys of making a homemade chocolate tart is customizing it with a variety of toppings. Here are some fantastic ideas to elevate your dessert and add both flavor and visual appeal:
- Caramelized Fruit: Slices of warm, caramelized fruit like pears, apples, or even these delightful Caramelized Bananas add a wonderful sweetness and textural contrast.
- Toffee Bits: Finely chopped toffee bits provide a delightful crunch and a buttery, caramel-like flavor that pairs beautifully with chocolate.
- Candied Fruit: For a vibrant and tangy contrast, sprinkle on Sugared Candied Cranberries, or thinly sliced Candied Orange Peel or lemon peel. Their chewiness and bright flavors cut through the richness of the chocolate.
- Candied Bacon: For a unique sweet and salty twist, chop up some candied bacon into small pieces and scatter them over the tart. It’s an unexpected but delicious pairing!
- Meringue Topping: A light, airy, and slightly toasted meringue topping adds a sophisticated touch and a lovely contrast in texture. It’s fluffy perfection!
- Fresh Berries: Bright and juicy fresh berries such as strawberries, raspberries, or blackberries not only add a pop of color but also a refreshing tartness.
- Caramel Sauce: Drizzle generously with Homemade Caramel Sauce, perhaps with a dash of sea salt for a salted caramel effect. A similar decadent option is Dulce De Leche.
- Chopped Nuts: Add a satisfying crunch and nutty flavor with chopped almonds, pistachios, peanuts, walnuts, pecans, or cashews. Toast them lightly for enhanced aroma.
- Sprinkles: Go classic with chocolate sprinkles or make it festive and colorful with rainbow sprinkles – perfect for celebrations!
- Dried Fruits: Chewy dried fruits like raisins, cranberries, blueberries, or chopped apricots can add concentrated sweetness and an interesting texture.
- White Chocolate Drizzle: A simple drizzle of melted white chocolate or a delicate white chocolate ganache adds an extra layer of sweetness and visual elegance.
- Nut Butters: Gently warm and drizzle your favorite nut butter, such as peanut butter, Nutella, almond butter, or sunflower butter, for a rich and creamy topping.
- Cocoa Powder: A light dusting of cocoa powder offers a sophisticated, slightly bitter note and a beautiful matte finish.
- Powdered Sugar: A delicate dusting of powdered sugar creates an elegant, snow-kissed appearance, especially beautiful for holiday tarts.
- Pie Fillings: Spoon over a layer of vibrant fruit pie filling like Homemade Raspberry Pie Filling, Homemade Apple Pie Filling, Strawberry Pie Filling, or Cherry Pie Filling for a fruit-and-chocolate combination.
- Syrups: Indulge with a drizzle of Nutella Syrup or your favorite store-bought fudge or chocolate sauces.
- Frosting: Beyond classic whipped cream, consider other light and fluffy frostings like elegant Chantilly Cream or a smooth buttercream icing for a more celebratory look.
Delightful Variations for Your Chocolate Tartlet
This no-bake chocolate tart recipe is incredibly versatile, allowing for numerous creative twists to suit any preference or occasion. Here are some ideas to inspire your next dessert creation:
- Rich Ganache Tart: If you prefer an intensely rich chocolate experience, replace the pudding filling with an Easy Chocolate Ganache {2 Ingredient}. This variation offers a denser, more profound chocolate flavor, perfect for true chocoholics.
- Citrus Zest Infusion: Brighten your chocolate tart with the fragrant zest of citrus fruits. Incorporate finely grated orange, lemon, or lime zest into the chocolate pudding mixture as it cools for a subtle, refreshing lift.
- Flavorful Extracts: Experiment with different extracts to add depth and unique flavor profiles. Try almond, hazelnut, peppermint, coconut, or even a hint of bourbon or maple extract to complement the chocolate beautifully.
- Alternative Cookie Crusts: While a graham cracker crust is classic, don’t hesitate to explore other cookie bases. An Oreo Pie Crust offers a darker, fudgier flavor, while a hazelnut or gingersnap crust can add a sophisticated and spicy dimension.
- Vary the Size: This recipe works wonderfully in various forms. You can make one impressive 8- to 9-inch tart, or divide the mixture into six smaller, charming 4-inch individual tartlets, perfect for portion control and elegant presentation.
- Deconstructed Tart: For a modern and fun serving idea, create a deconstructed tart. Layer the chocolate pudding mixture in individual cups or a large bowl, then top it with crumbled cookie pieces and generous dollops of whipped cream for a playful dessert experience.
Essential Tips and Techniques for Mini Chocolate Tarts
Achieving the perfect no-bake chocolate tart is easy when you keep a few key tips in mind. These techniques will help ensure your dessert is smooth, creamy, and sets beautifully every time:
- Egg-Free Delight: You might be wondering, “Does this tart contain eggs?” The answer is no! This recipe is completely egg-free, making it suitable for those with egg allergies or dietary preferences. The luscious thickness of the pudding is achieved using cornstarch, a fantastic natural thickener.
- Crust Selection: While a homemade graham cracker crust is highly recommended for its fresh flavor and texture, feel free to use a good quality store-bought crust if you’re short on time. Ensure it’s pressed firmly into the pan.
- Optimal Chilling Time: Patience is a virtue when it comes to no-bake desserts! For the best results, chill the pudding in the refrigerator for at least 6 hours. However, an overnight chill is even better, guaranteeing that the pudding is fully set and firm, allowing for clean slices.
- Unsalted Butter is Key: Always opt for unsalted butter in the filling. This gives you complete control over the saltiness of your dessert and prevents the rich chocolate from tasting overly salty.
- Remove Promptly from Heat: The moment your pudding mixture reaches a thickened consistency, remove the saucepan from the heat. Overcooking can lead to an overly gelatinous texture, compromising the desired creamy and smooth mouthfeel.
- Whisk Continuously: To ensure a perfectly smooth, lump-free chocolate pudding, it’s crucial to whisk the mixture continuously while it cooks. This helps the cornstarch dissolve evenly and prevents sticking to the bottom of the pan.
- Troubleshooting – Why Isn’t My Filling Setting?: If your tart filling isn’t setting, there are typically two reasons. First, ensure you’ve used the correct amount of cornstarch as specified in the recipe – it’s the primary thickening agent. Second, the mixture might not have been cooked long enough to activate the cornstarch fully. Continue whisking and gently heating until it noticeably thickens.
- Quality Ingredients Matter: Using good quality cocoa powder and vanilla extract will significantly impact the depth of flavor in your chocolate tart. Choose a Dutch-processed cocoa for a darker color and smoother taste.
Proper Storage for Your No-Bake Chocolate Tart
Proper storage ensures your no-bake chocolate tart remains delicious and fresh for as long as possible. Here’s how to keep it at its best:
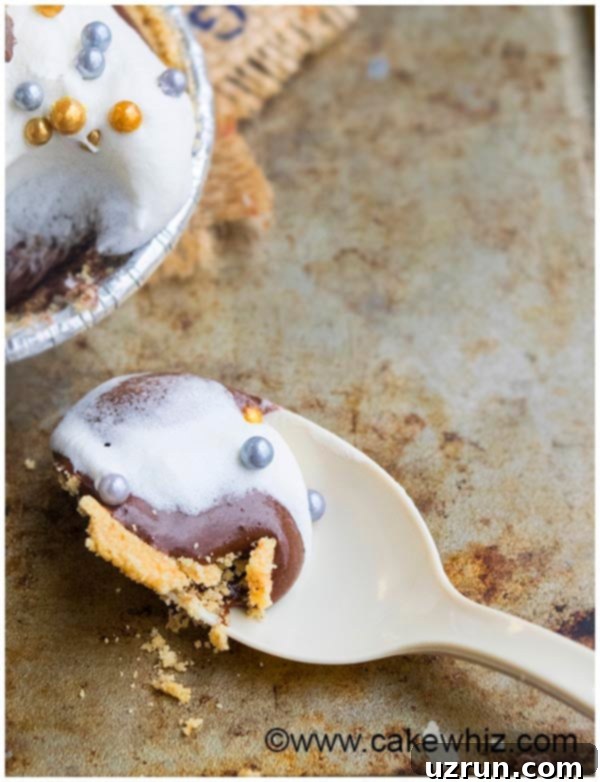
- Refrigerate: Store any leftover tart in an airtight container in the refrigerator for up to 3 days. This will prevent it from absorbing other odors and keep the crust from getting soggy. For best quality, add whipped cream topping just before serving, as it tends to deflate over time.
- Freezing: Unfortunately, this particular no-bake chocolate pudding tart does not freeze well. The cornstarch-thickened pudding filling can separate and become watery or grainy upon thawing, significantly affecting its creamy texture. If you’re looking for a freezer-friendly chocolate tart, a ganache-based tart would be a better option, as it can typically be frozen for up to 1 month in tightly sealed freezer bags or containers.
More Irresistible Chocolate Desserts
If you’re a chocolate lover, there are always more decadent treats to explore. Here are some other delightful chocolate desserts you might enjoy:
- Mexican Chocolate Cake {With Cake Mix}
- Chocolate Raspberry Cake {With Cake Mix}
- Triple Chocolate Cookies {Fudgy & Chewy}
- Easy Chocolate Cream Pie {No Bake}
- Gooey Brownies {Chocolate Cherry Brownies}
No-Bake Chocolate Tart Recipe
No-Bake Chocolate Tart
Abeer Rizvi
⭐⭐⭐⭐⭐
📍Pin Recipe
Want to Save This Recipe?
Enter your email & I’ll send it to your inbox. Plus, get great new recipes from me every week!
By submitting this form, you consent to receive emails from CakeWhiz
Ingredients
Tart crust
- 1 batch Graham cracker crust
No Bake Tart Filling
- 2 cups Whole milk
- ¾ Evaporated milk
- ½ cup Granulated sugar
- ¼ cup Cornstarch
- 4 tablespoons Cocoa powder
- 2 tablespoons Unsalted Butter
- 1 tablespoon Vanilla extract
Topping
- 2 cups Whipped cream
- 2 tablespoons Edible pearls (Gold and Silver)
- Chocolate bar (Cut into squares for decorating)
Instructions
-
Prepare one batch of homemade graham cracker crust according to recipe instructions.
-
Press the crust mixture evenly into one 8-inch round tart pan or six individual 4-inch mini tart pans.
-
Chill the prepared crust(s) in the refrigerator for at least one hour, or until the cookie crust is firm.
-
While the crust chills, prepare the easy chocolate pudding filling. In a non-stick saucepan over medium heat, combine whole milk, evaporated milk, cocoa powder, cornstarch, and granulated sugar.
-
Continuously mix with a whisk until all ingredients are fully dissolved and the mixture begins to thicken into a pudding consistency.
-
As soon as the mixture has thickened, remove the saucepan from the heat immediately. Stir in the unsalted butter and vanilla extract until fully incorporated and smooth.
-
Pour the warm chocolate pudding mixture into the chilled graham cracker crust(s). Use a spatula to gently spread it evenly.
-
Return the tart(s) to the refrigerator and chill overnight, or for a minimum of 6 hours, ensuring the pudding is completely set.
-
Before serving, top the tart with fresh whipped cream, scattered chocolate pieces, and a few edible pearls for decoration. Slice and enjoy!
Notes
- Refer to the “Tips and Techniques” section above for detailed advice on making the perfect tart.
- Leftovers can be stored in an airtight container in the fridge for up to 3 days.
- This specific pudding-filled tart does not freeze well due to texture changes upon thawing.
Nutrition
Carbohydrates: 48g
Protein: 6g
Fat: 26g
Saturated Fat: 14g
Cholesterol: 60mg
Sodium: 310mg
Potassium: 260mg
Fiber: 2g
Sugar: 28g
Vitamin A: 700IU
Calcium: 146mg
Iron: 1.6mg
An automated tool is used to calculate the nutritional information. As such, I cannot guarantee the accuracy of the nutritional information provided for any recipe on this site.
Tried this recipe?
Leave a comment below or rate and tag @cakewhiz on social
