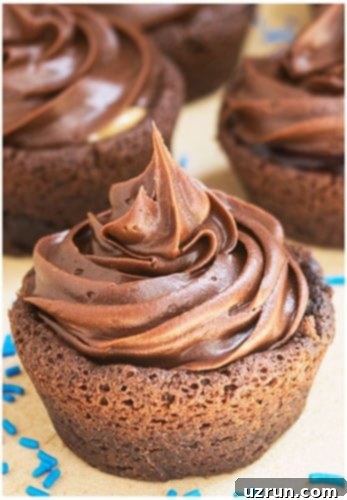
Delicious & Easy Brownie Bowls: Your Go-To Recipe for Customizable Treats
Imagine a warm, fudgy brownie, perfectly shaped into a delightful bowl, ready to be filled with your favorite sweet surprises. That’s exactly what these quick and easy brownie bowls offer! Ready in just 30 minutes and made with simple, accessible ingredients, they are the ultimate versatile dessert. Whether you’re planning a birthday bash, a holiday gathering, or simply want a special treat for lunchboxes, you can effortlessly change the filling, frosting, and decorations to match any theme or occasion.
*This post is a sponsored conversation written by me on behalf of Pillsbury™. As always, all opinions and text are mine.*
Discovering the Magic of Brownie Bowls
The first time I encountered brownie bowls was at a lively birthday party a few years ago. I was instantly captivated by the sheer brilliance of the idea! The concept of a single-serving, edible dessert cup, brimming with possibilities for fillings and artistic decorations, struck me as truly inspired. It wasn’t just a dessert; it was an experience, a little package of joy waiting to be discovered.
Inspired by this fantastic idea, I eagerly set out to recreate them in my own kitchen. My baking journey involved trying several different methods to achieve that perfect bowl shape. Through trial and error, I honed in on a technique that consistently delivers the best results, creating sturdy yet tender brownie bowls every time. I’ll be sharing all the details of my preferred method and insights into others below, so you can achieve the same delicious success.
Unleash Your Creativity: Endless Filling & Frosting Options
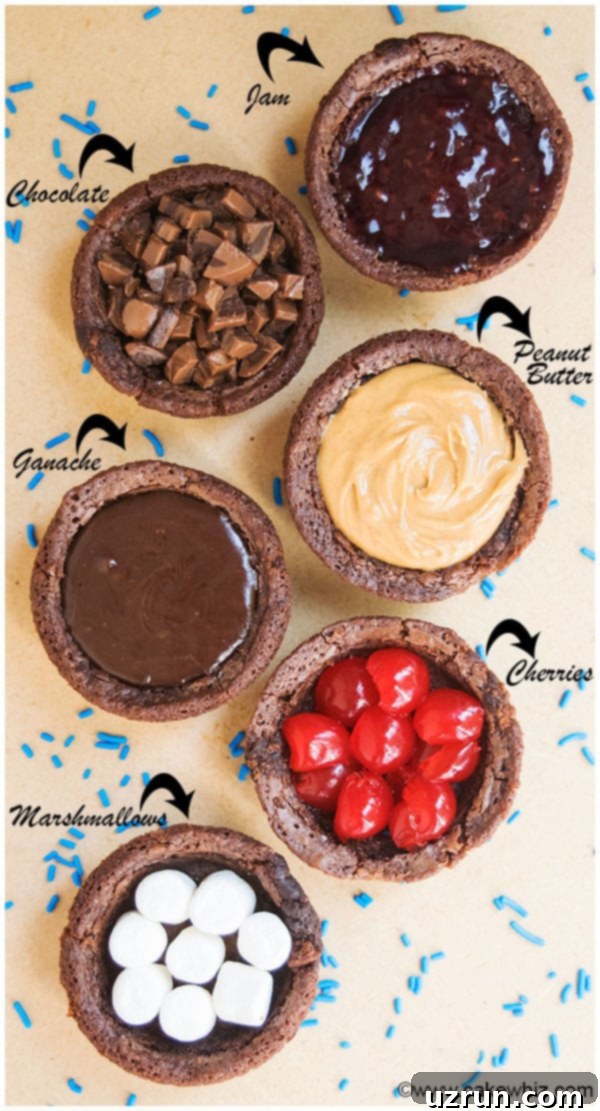
One of the BEST aspects of these delightful brownie bowl cups is their incredible versatility. You’re limited only by your imagination when it comes to what you can tuck inside. This makes them perfect for pleasing diverse tastes and catering to various dietary preferences (with appropriate substitutions, of course!). Here are some of my all-time favorite FILLING options that are sure to be a hit:
- Strawberry Jam: A classic, fruity choice that adds a wonderful burst of sweetness and a slight tang, beautifully contrasting the rich brownie.
- Chocolate Bits: Mini chocolate chips or chopped chocolate bars provide an extra layer of chocolatey indulgence and delightful texture.
- Peanut Butter: For the ultimate sweet and savory combination, a dollop of creamy peanut butter is irresistible. It’s a crowd-pleaser!
- Chocolate Ganache: Elevate your brownie bowls with a luxurious, velvety chocolate ganache. It adds richness and a sophisticated touch.
- Maraschino Cherries: Bright red and deliciously sweet, maraschino cherries offer a pop of color and a juicy, fruity bite.
- Mini Marshmallows: These tiny clouds of sweetness melt slightly into the warm brownie, creating a gooey, delightful texture.
- Caramel Sauce: Drizzly, buttery caramel is always a winner, adding a decadent sweetness.
- Nutella: A hazelnut-chocolate spread is a guaranteed hit, especially with kids and chocolate lovers.
- Fruit Compote: Beyond strawberry, consider raspberry, blueberry, or mixed berry compotes for fresh, vibrant flavors.
- Whipped Cream: A light, airy filling that’s simple yet effective, especially when paired with fresh fruit.
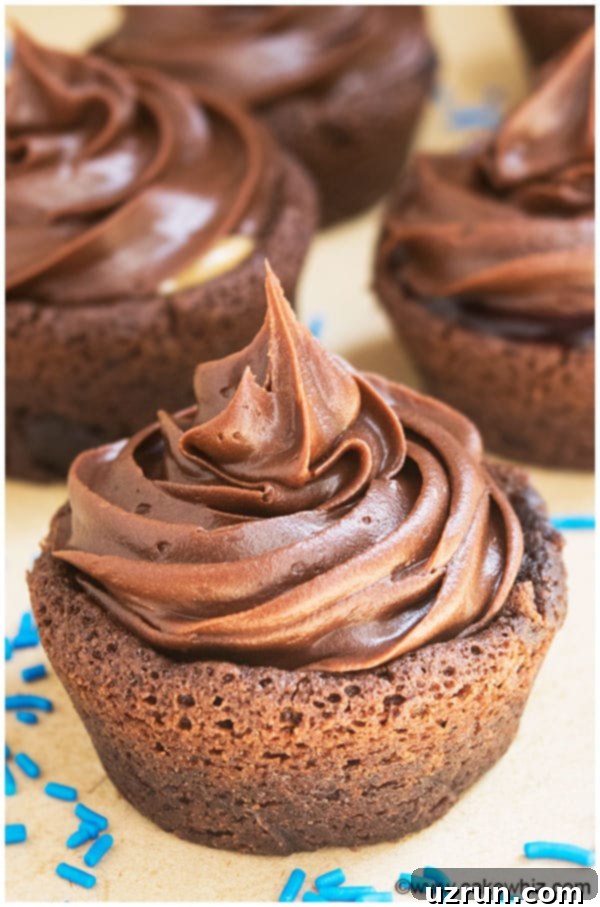
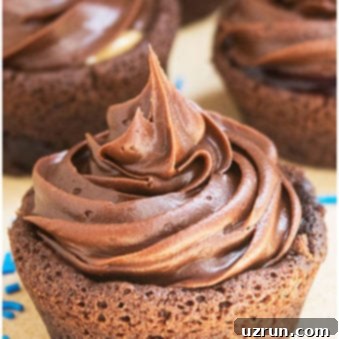
When it comes to frosting, convenience is key, especially when you’re baking for a crowd or on a tight schedule. Using Pillsbury™ Filled Pastry Bags makes the decorating process incredibly simple and mess-free. These pre-filled bags are a game-changer, allowing you to pipe beautiful swirls and designs without the hassle of preparing frosting from scratch or cleaning piping bags. Currently, Pillsbury offers delicious chocolate fudge, classic vanilla, and tangy cream cheese flavors, providing excellent choices to complement any brownie bowl creation.
Perfect for Any Occasion: A Back-to-School Treat!
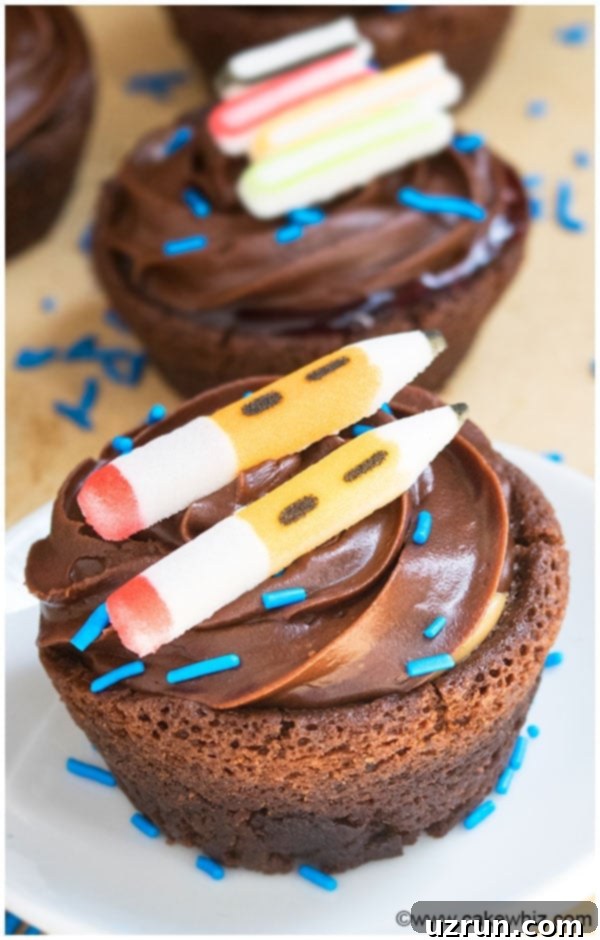
My family and friends absolutely ADORE these brownie bowls! Their individualized nature and the surprise filling make them incredibly popular. With the “Back to School” season upon us, I decided to create a special batch of brownie bowls tailored for the occasion. Imagine decorating them with school-themed sprinkles, edible alphabet letters, or even mini apple cutouts!
The best part? No one knows what delicious filling awaits them until they bite into one, which is always a delightful SURPRISE, especially for kids. This element of discovery adds an extra layer of fun to the treat, making it more than just a dessert.
Beyond the classroom theme, these brownie bowls are fantastic for any event:
- Birthday Parties: Customize with favorite fillings and colors.
- Holiday Gatherings: Use seasonal fillings like pumpkin puree for fall or peppermint for winter.
- Potlucks: Easy to transport and serve.
- Game Nights: A fun, interactive dessert.
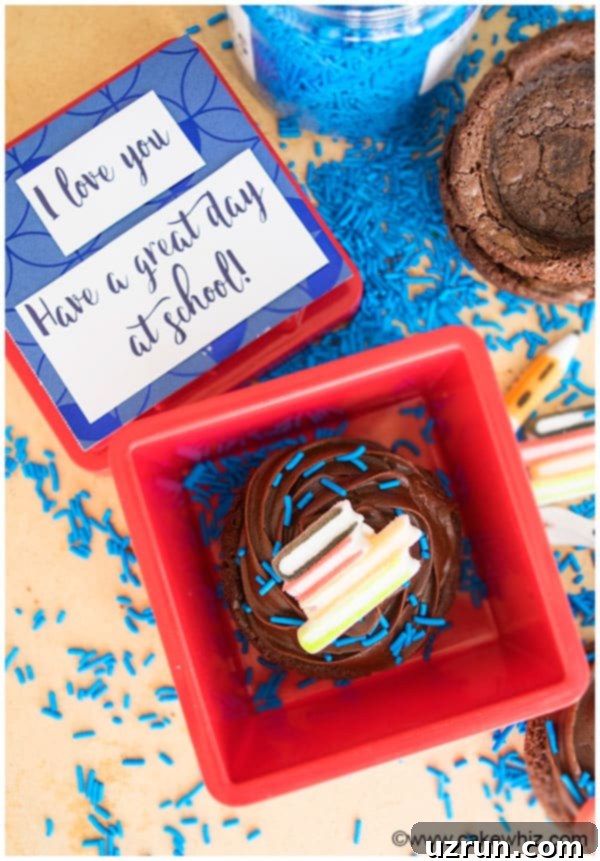
You can even tuck these adorable treats into your kids’ lunch boxes, accompanied by a CUTE little note to brighten their day. Can you imagine the sheer joy and excitement on their faces when they discover these special brownie bowls during lunch time? I believe the start of a new school year is a significant and special time, and kids truly DESERVE a delicious and encouraging treat like this on their first day to kick things off right!
How to Make Brownie Bowls with a Muffin Pan or Cupcake Pan?
Creating these perfectly formed brownie bowls might seem tricky, but it’s surprisingly simple with the right technique. Over my baking adventures, I’ve come across three primary methods for shaping brownie bowls:
- First Method (Double Pan Technique): This involves pouring brownie batter into a standard cupcake or muffin pan. Then, another cupcake pan, generously sprayed with oil on its underside, is placed directly on top of the batter. The idea is that as the brownies bake, they will rise around the inverted pan, forming a bowl shape. While innovative, I’ve found this method often leads to the brownie batter overflowing, creating a sticky, burnt mess in the oven. It requires precise batter amounts and can be inconsistent.
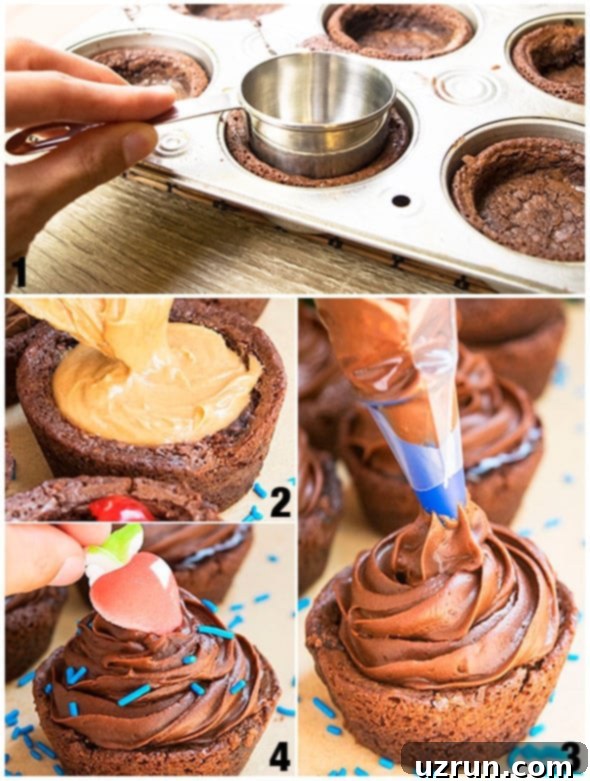
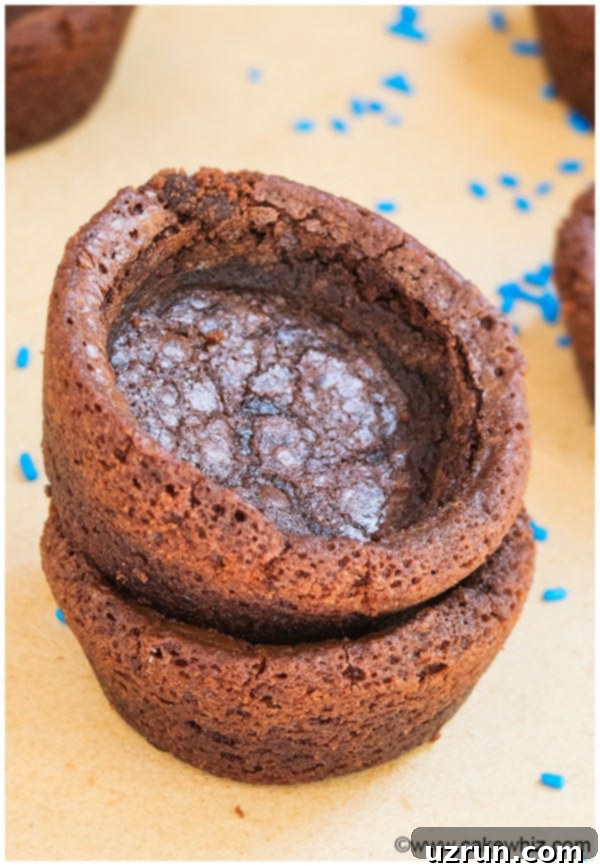
- Second Method (Indentation Technique – My Preferred Method): For this technique, you first pour brownie batter into a well-greased cupcake pan and bake it until just done. The key is timing: immediately after removing them from the oven, while the brownies are still warm and pliable, you use the bottom of a smaller measuring cup (or a similarly shaped, heat-safe object) to gently but firmly press into the center of each brownie, creating a deep indentation. This must be done before the brownies have a chance to cool and firm up. Once they cool down completely, you can easily run a spatula around each brownie and remove it from the pan, revealing perfectly formed brownie bowls. This method is, in my experience, the most reliable and efficient.
- Third Method (Cut-Out Technique): This method involves baking regular brownie cupcakes and allowing them to cool completely. Once cooled, you use a sharp knife or a small cookie cutter to carefully cut out a hollow center from each brownie cupcake. While this works, it often results in a lot of discarded brownie crumbs (which can still be enjoyed, of course, but it’s not ideal for a neat bowl). It can also be more time-consuming and doesn’t always yield as smooth a finish as the indentation method.
Among these three approaches, I unequivocally prefer the second method. The first method, while theoretically sound, consistently results in messy overflows for me, leading to extra cleanup and wasted batter. The third method, while functional, causes me to discard a significant amount of brownie, which feels wasteful. The indentation technique is efficient, creates minimal waste, and consistently produces beautifully shaped bowls that are ready to be filled.
How long do you bake brownie bowls?
The baking time for these delicious brownie bowl cupcakes is approximately 20 minutes. You’re looking for the edges to be firm and set, while the center should still retain a soft, fudgy consistency. A good indicator is when a toothpick inserted into the edges comes out clean, but a few moist crumbs still cling to a toothpick inserted into the very center. Over-baking will result in dry brownies, so keep a close eye on them to achieve that perfect balance of crispy edges and gooey centers.
How do you make a brownie sundae?
Transforming these brownie bowls into an indulgent brownie sundae is a fantastic idea, especially for dessert lovers! First, prepare your brownie bowls as instructed and allow them to cool completely. Once cooled, fill each bowl with generous scoops of your favorite ice cream – vanilla, chocolate, or even a fun mint chip! Then, unleash your creativity with all the toppings your heart desires. Think hot fudge sauce, caramel drizzle, colorful sprinkles, a mound of whipped cream, chopped nuts, fresh berries, or even extra chocolate bits. These individual brownie bowls for ice cream are also absolutely perfect for summer birthday parties, offering a mess-free and customizable dessert experience!
How do you make brownie cupcakes?
Making brownie cupcakes is very straightforward. Simply prepare your brownie batter according to your recipe or box instructions. Instead of pouring the batter into a traditional rectangular baking pan, you’ll spoon it into a greased cupcake or muffin pan. Fill each cup about two-thirds full to allow for rising. Bake them until they are fully cooked through, typically when a toothpick inserted into the center comes out with moist crumbs but no wet batter. This results in individual, perfectly portioned brownie treats, which are the base for our incredible brownie bowls.
Essential Tips for Making Perfect Brownie Bowls:
- Grease Generously: Always SPRAY the cupcake pan generously with baking spray or grease it thoroughly with butter and flour. This is absolutely crucial, or else the brownies will stick to the pan, making them very difficult to remove without crumbling.
- Patience is Key for Cooling: Brownies can only be removed from the pan once they have fully COOLED down. Attempting to remove them while still warm will almost certainly cause them to break apart. Allow ample time for them to set completely.
- Brownie Mix for Simplicity: For consistent results and ease, I highly recommend using a high-quality brownie mix instead of making brownies from scratch, especially if you’re new to making brownie bowls. Mixes are formulated to be less likely to stick and provide reliable texture.
- Muffin Pan vs. Molds: While you can purchase specialized brownie bowl molds, using a standard muffin pan or cupcake pan is far more economical and just as effective. It’s a cheap and easy way to achieve the same great results.
- Customization for Any Theme: The beauty of these brownie cupcake bowls lies in their adaptability. You can effortlessly make them for any themed event – birthdays, holidays, graduations, or casual gatherings. Simply adjust the decorations, sprinkles, and filling colors accordingly to match your theme.
- Pillsbury for Convenience: I personally used Pillsbury products for these edible bowls (specifically Pillsbury Chocolate Fudge Brownie Mix – Family Size, and Pillsbury Filled Pastry Bag – Chocolate Fudge). This combination truly simplified the entire process, making it not only easy but also a wonderfully fun activity for my son and me to do together! The fantastic team at Pillsbury also sent us some engaging baking worksheets that my kiddo and I enjoyed completing while the brownies were baking. We even incorporated some math skills using brownies afterward! Additionally, Pillsbury is keen to inspire you to join their “Operation Celebration” initiative, encouraging more shared baking moments.
- Variety of Fillings: Don’t be afraid to experiment with different fillings. Consider alternating between sweet and tangy, or creamy and crunchy, to keep things interesting.
- Garnish for Impact: A sprinkle of colorful jimmies, a drizzle of contrasting sauce, or a fresh berry can elevate the visual appeal of your brownie bowls.
- Proper Storage: Store any leftover brownie bowls in an airtight container at room temperature for up to 2-3 days, or in the refrigerator for up to a week.
Well, that’s all for today on these delightful brownie bowls. I hope you’re inspired to try making them yourself!
If you enjoyed this post and are looking for more fun and easy baking ideas, especially for the back-to-school season, you may love some of these other creative desserts:
Back to School Pencil Cake
Fondant Paper Clips
Fondant Pencil
Recipe
How To Make Brownie Bowls
Abeer Rizvi
Pin Recipe
Want to Save This Recipe?
Enter your email & I’ll send it to your inbox. Plus, get great new recipes from me every week!
By submitting this form, you consent to receive emails from CakeWhiz
Ingredients
- 1 box Pillsbury Brownie Mix (Family Size recommended for 12 bowls)
- 1 box Pillsbury Filled Pastry Bag (Chocolate Fudge, Vanilla, or Cream Cheese)
- ~2 tablespoons Assorted Fillings (e.g., Strawberry Jam, Peanut Butter, Chocolate Bits, Chocolate Ganache, Maraschino Cherries, Mini Marshmallows, Caramel Sauce, Nutella)
- 2 tablespoons Sprinkles (various colors/shapes)
- 12 Sugar decorations (optional, for themed events)
- Parchment paper cupcake liners (optional, but recommended for easier removal)
- Baking spray or oil for greasing pan
Instructions
-
Preheat oven according to brownie mix instructions. Prepare the brownie batter as per the box instructions. Generously grease a 12-cup cupcake or muffin pan, or line with paper liners. Pour or spoon the brownie batter evenly into each cup, filling about two-thirds full.
-
Bake for approximately 20 minutes, or until the edges are firm and a toothpick inserted into the center comes out with moist crumbs (not wet batter).
-
Immediately after removing the brownies from the oven (while they are still very warm and soft), gently press the bottom of a small, lightly greased measuring cup (or a similarly sized shot glass or small spice jar) into the center of each brownie to create a deep indentation. Do this carefully to avoid pushing all the way through.
-
Allow the brownie bowls to cool down completely in the pan. This is crucial for them to firm up and maintain their shape. Once fully cooled, run a thin spatula or knife around the edges of each brownie to loosen it, and then carefully remove them from the pan.
-
Now comes the fun part! Fill each brownie bowl with your chosen fillings (e.g., jam, peanut butter, chocolate bits, ganache).
-
Finally, top them off with frosting (using your Pillsbury Filled Pastry Bag for ease!), colorful sprinkles, and any other desired decorations. Serve and enjoy these customizable, delightful treats!
Video
Notes
- Please read all my detailed tips above for the best results and troubleshooting advice.
- Leftovers can be stored in a sealed airtight container at room temperature for up to 3 days, or in the fridge for up to a week. For optimal freshness, consider adding very moist fillings or perishable toppings just before serving.
Nutrition
An automated tool is used to calculate the nutritional information. As such, I cannot guarantee the accuracy of the nutritional information provided for any recipe on this site.
