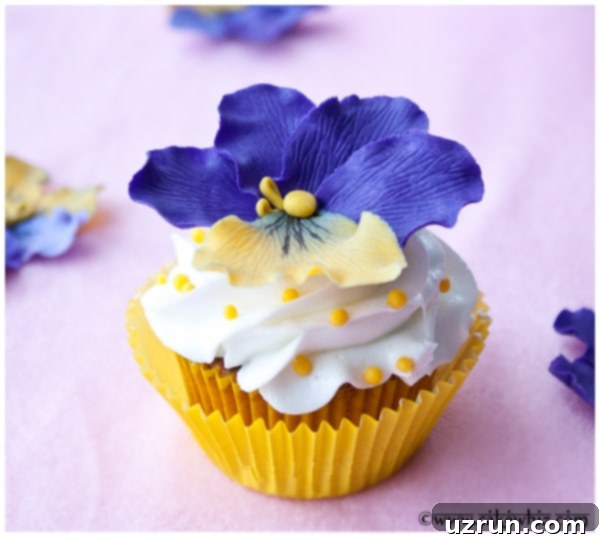
Effortless Elegance: Crafting Beautiful Fondant Pansy Cupcakes for Any Celebration
Welcome to the enchanting world of cupcake decorating! This comprehensive tutorial will guide you through making stunning and easy fondant flower cupcakes, specifically focusing on the charming pansy design. These delightful floral toppers are crafted right at home using simple ingredients, making them an ideal project for any baker. Whether you’re planning for vibrant Spring festivities, warm Summer birthday parties, a sophisticated garden party, or simply want to add a touch of edible artistry to your dessert table, these pansy cupcakes are guaranteed to impress.
If you’ve enjoyed our previous guides, such as the How to Make Flower Cupcake Bouquet, you’ll absolutely adore today’s featured creation. While that tutorial focused on elaborate buttercream arrangements, this post takes a different approach by utilizing the smooth, pliable beauty of fondant for exquisite floral designs. Don’t worry, even with fondant, the process remains simple and accessible for decorators of all skill levels. For those who love the classic touch of piped icing, you can always explore our detailed posts on How to Make Buttercream Flowers or this extensive guide on How to Decorate Cupcakes to master various techniques.
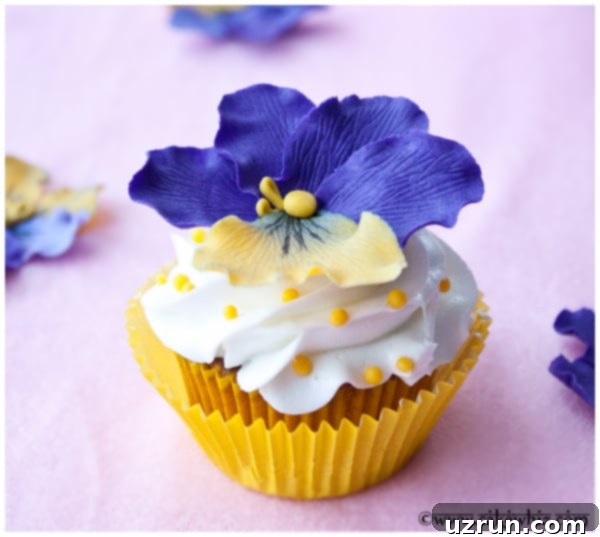
Your Simple Step-by-Step Guide to Making Floral Pansy Cupcakes
Creating these charming fondant pansy cupcakes is a straightforward process when broken down into manageable steps. Here’s a quick overview, followed by more detailed explanations to ensure your decorating journey is smooth and successful:
- Bake Your Cupcakes: The foundation of any great decorated cupcake is a perfectly baked base. Choose your favorite recipe, bake, and ensure they are completely cooled.
- Prepare Your Icing: Whether you opt for a classic buttercream or another preferred frosting, prepare it to the right consistency. Don’t forget to add a pop of color if you desire!
- Craft Fondant Pansy Flowers: This is where the magic happens! We’ll guide you through shaping and detailing your beautiful fondant pansies. Allow them adequate time to dry and harden for durability.
- Assemble and Decorate: The final, rewarding step involves piping a smooth swirl of icing onto your cooled cupcakes and delicately placing your handcrafted pansy toppers on top.
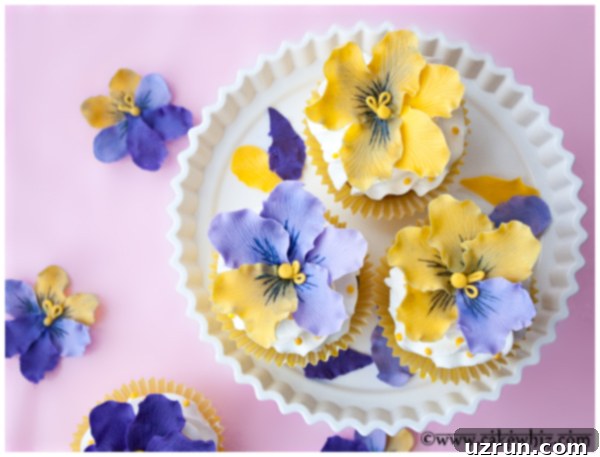
Creative Variations for Your Fondant Pansy Cupcakes
While the classic fondant pansy is a showstopper on its own, there are countless ways to customize and enhance your floral cupcakes. Experiment with these variations to match any theme or personal preference:
Make Mini Cupcakes: For elegant tea parties, dessert buffets, or bite-sized treats, consider using mini cupcake liners. Remember that baking times will be shorter, and you’ll need to scale down the size of your fondant flower toppers to maintain a balanced look. Mini pansies are incredibly adorable and add a delicate touch!
Fill Your Cupcakes: Add an exciting surprise inside your cupcakes! Coring out the center and filling it before frosting can elevate the experience. Delicious options include Easy Homemade Strawberry Jam for a fruity burst, or tangy Lemon Curd for a bright, zesty contrast. Other fantastic fillings could be chocolate ganache, pastry cream, or a fruit compote.
Explore Different Color Combinations: Pansies are known for their vibrant and diverse color palettes. You can create a stunning rainbow version with petals in all different hues, or carefully select colors to perfectly match the theme of your party – pastels for a baby shower, bold shades for a summer celebration, or even ombre effects within a single flower. Don’t be afraid to experiment with unexpected color pairings for truly unique results.
Consider Different Cupcake Flavors: The base cupcake flavor can greatly complement your pansy toppers. For Spring and Summer celebrations, light and refreshing flavors are ideal. Think about these bright Easy Orange Cupcakes or the ever-popular Lemon Cupcakes. Vanilla, almond, or even a subtle lavender cupcake could also create a wonderful harmony with the floral theme.
Pair with Other Frosting Flavors: While buttercream is a classic choice, don’t limit yourself! A creamy Mango Frosting can add an exotic flair, or a zesty Lemon Frosting will enhance the fresh, garden-like appeal. Cream cheese frosting, strawberry buttercream, or even a light whipped ganache could also provide a delightful base for your fondant pansies.
“Flower Pot” Cupcakes: For an incredibly charming and Instagram-worthy presentation, place your decorated pansy cupcakes into mini ceramic pots. You can even crumble some chocolate cookies on top of the icing before adding the pansy to mimic “soil.” This creative presentation is perfect for garden parties, Mother’s Day, or any event where you want to evoke a whimsical, botanical feel.
Add Edible Accents: Elevate your pansies with a touch of sparkle. Edible glitter dust, shimmer spray, or small edible pearls can be delicately applied to the center or edges of your fondant flowers for an extra layer of elegance and magic. This simple addition can transform a beautiful pansy into a truly captivating edible artwork.
Expert Tips and Techniques for Crafting Perfect Fondant Pansies
Mastering fondant work requires a few key insights and practices. These tips will help you create beautiful, long-lasting pansy toppers with ease and confidence:
Homemade Marshmallow Fondant vs. Store-Bought Fondant: Both options are viable, each with distinct advantages. Homemade marshmallow fondant, often praised for its superior taste and pleasant aroma, is more pliable and forgiving to work with for intricate details. However, it requires more preparation time. Store-bought fondant offers unparalleled convenience; it’s ready to use straight out of the package and often comes pre-colored, saving you time and effort in tinting. Consider your priorities—taste and texture or speed and simplicity—when making your choice.
Gum Paste vs. Fondant (or a 50/50 Combination): The choice between gum paste and fondant depends on the desired final texture and drying time. Gum paste dries significantly harder and much faster than fondant, making it ideal for delicate, intricate structures like thin petals that need to hold their shape. Fondant remains softer and more flexible for longer. For an excellent balance, many decorators prefer a 50/50 combination (half gum paste and half fondant). This mixture offers the flexibility of fondant with the quicker drying and firmer texture of gum paste, perfect for durable yet elegant flower petals.
Ensure Cupcakes Are Fully Cooled Before Decorating: This is a golden rule in cupcake decorating! Rushing this step can lead to a sticky disaster. If your cupcakes are even slightly warm, the heat will quickly melt your delicate icing and fondant decorations, causing them to slide, lose shape, and create an unappealing mess. Always allow your cupcakes to cool completely to room temperature, or even chill them slightly, before applying any frosting or fondant. Patience here pays off immensely.
Use Gel Colors Instead of Liquid Food Coloring to Color Icing and Fondant: When tinting your icing or fondant, opt for gel food coloring over liquid varieties. Gel colors are highly concentrated, meaning you need only a tiny amount to achieve vibrant hues, which helps prevent over-saturation. More importantly, gel colors won’t alter the consistency of your icing or fondant, unlike liquid food colorings which can thin them out and make them difficult to work with. For fondant, add gel color gradually and knead thoroughly until you reach your desired shade.
Essential Tools for Crafting Fondant Pansies
Having the right tools can make all the difference in achieving professional-looking fondant pansies. Here’s a list of key items you’ll need and why they’re important:
- Fondant/Gum Paste: Your primary medium, either homemade or store-bought, in desired colors (dark purple, light purple, yellow as suggested in the recipe, or any other combination).
- Rolling Pin (Non-Stick): Essential for rolling out fondant evenly and thinly. A non-stick version prevents sticking without excessive dusting.
- Oval and Heart Cutters: These specific shapes are crucial for forming the distinct petals of a pansy. Ensure they are clean and sharp for precise cuts.
- Leaf Veiner (or textured mat): This tool imprints realistic vein patterns onto your petals, adding depth and natural texture to your pansies.
- Foam Pad: A soft, flexible surface used for thinning and shaping petals without sticking or damaging the delicate edges.
- Balling Tool (or small rolling tool): Features a rounded end, perfect for thinning the edges of petals to create a delicate, ruffled, and lifelike appearance.
- Petal Dust (Blue/Purple): Edible dust used to add shading and dimension to the petals, giving the pansies a more natural, hand-painted look.
- Edible Black Marker: Used to draw subtle, realistic lines in the center of pansy petals, enhancing their characteristic markings.
- Corn Syrup (or edible glue/water): A tiny amount is used as an adhesive to stick the fondant petals together in the center of the flower.
- Flower Forming Cups (or crumpled foil): Small, rounded cups or DIY crumpled foil shapes are used to support the fondant pansies as they dry, allowing them to harden with a natural, slightly curved shape.
- Corn Starch/Powdered Sugar: A light dusting helps prevent fondant from sticking to your work surface and tools.
Optimizing Storage for Your Beautiful Floral Cupcakes
Proper storage is essential to maintain the freshness of your cupcakes and the integrity of your delicate fondant decorations. Here’s how to store your floral cupcakes to keep them looking and tasting their best:
Room Temperature Storage: Decorated cupcakes can be stored in a covered box at room temperature for up to 2 days. It’s crucial that the container is not airtight or sealed too tightly. A slightly breathable box allows for air circulation, which prevents the fondant decorations from becoming sticky due to trapped moisture or condensation. Avoid direct sunlight or warm environments, which can also affect the fondant’s texture and the icing’s stability.
Refrigeration: Generally, refrigeration is not recommended for cupcakes adorned with fondant decorations. The moisture and humidity inside a refrigerator can cause fondant to become sticky, tacky, and even seep color. If you must chill your cupcakes (perhaps due to perishable fillings or frosting), it’s best to store the iced cupcakes in a covered box in the fridge and then add the fondant pansy toppers just before serving. This way, the flowers remain perfectly dry and beautiful.
Freezing: Freezing decorated cupcakes is also not advised if they have fondant decorations. When frozen cupcakes thaw, the condensation that forms on the surface will inevitably make the fondant decorations sticky and potentially ruin their appearance. For best results, freeze undecorated cupcakes and frosting separately, then assemble and decorate with freshly made or stored fondant pansies once thawed.
More Inspiring Cupcake Decorating Tutorials
If you’ve enjoyed crafting these beautiful pansy cupcakes and are eager to explore more creative decorating ideas, we have a variety of tutorials to spark your imagination. Dive into these guides to learn new techniques and create even more delightful edible masterpieces:
- Ladybug Cupcakes
- Pull Apart Watermelon Cupcakes
- Easy Poinsettia Cupcakes
- Snowflake Cupcakes (Winter Cupcakes)
- How to Make Fondant Daisies
Recipe
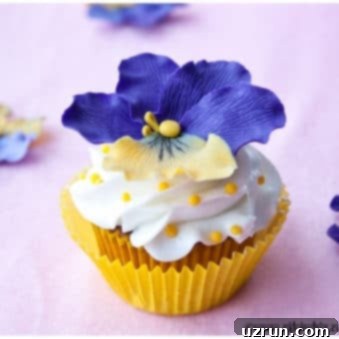
Easy Fondant Pansy Flower Cupcakes
Abeer Rizvi
Pin Recipe
Want to Save This Recipe?
Enter your email & I’ll send it to your inbox. Plus, get great new recipes from me every week!
By submitting this form, you consent to receive emails from CakeWhiz
Ingredients
- 24 Baked Cupcakes (your favorite flavor, fully cooled)
- 4 cups Buttercream icing (or your preferred frosting, colored if desired)
- 2 cups Marshmallow Fondant (or store-bought, in dark purple, light purple, and yellow)
- Oval cutter (for petals)
- Heart cutter (for bottom petal)
- Leaf veiner (or silicone veining mat)
- Foam pad
- Balling tool (or small modeling tool)
- Blue/Purple petal dust (edible)
- Black edible marker
- Corn syrup (or edible glue/water)
- Flower forming cups (or crumpled foil)
Instructions
-
Begin by baking your favorite cupcakes (like strawberry, lemon, or vanilla) and ensure they cool down completely to room temperature before moving on. This prevents the frosting from melting.
-
Prepare your buttercream icing (or chosen frosting). If you wish to add color, tint it with gel food coloring for vibrant shades without altering consistency.
-
Pipe a generous swirl of frosting on top of each cooled cupcake. Set them aside while you prepare the fondant pansies.
-
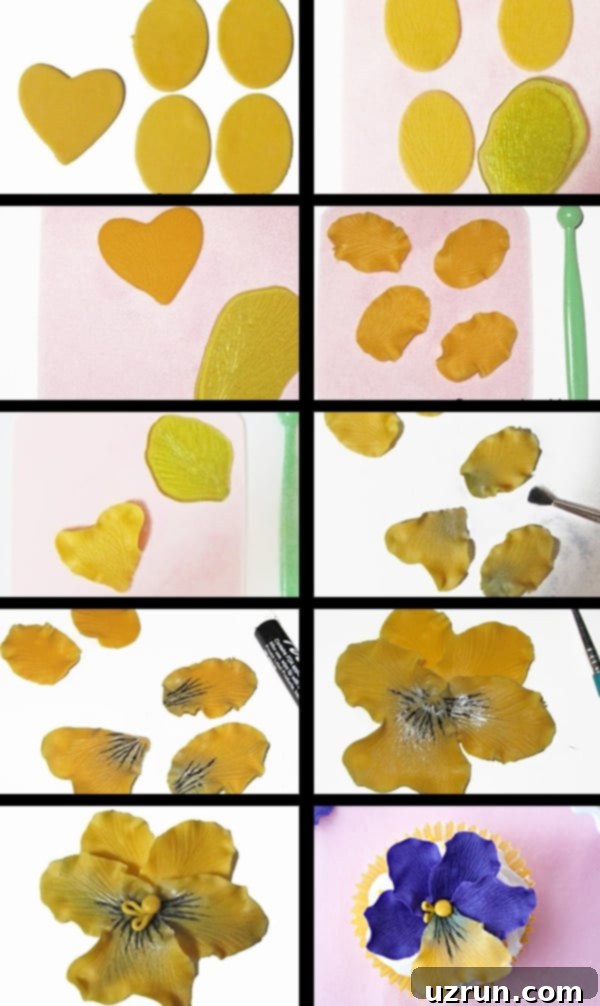
Lightly dust your work surface with cornstarch. Roll out a small piece of dark purple or light purple fondant/gum paste very thinly. Use an oval cutter to cut out 4 oval pieces for the top petals and a heart cutter to cut out 1 heart piece for the bottom petal. Repeat with other colors as desired for variety.
-
Place each oval piece on a foam pad. Gently press a leaf veiner on top of each piece to transfer a realistic leaf pattern. This adds texture and realism to your petals.
-
Similarly, place the heart-shaped piece on the foam pad and press the leaf veiner onto it to create the vein pattern.
-
Using the balling tool, carefully thin out the edges of the heart piece until it appears delicately ruffled. This gives the petal a natural, soft look.
-
Repeat the process with the balling tool for all the oval pieces, thinning out their edges to create a gentle, lifelike frill.
-
For added dimension, lightly brush blue or purple petal dust onto the bottom (inner) portions of 2 oval pieces and the heart piece. This creates a subtle shading effect characteristic of pansies.
-
On the petals you just dusted with petal dust, use a black edible marker to draw delicate lines extending only halfway from the base, mimicking the unique markings of a pansy.
-
Now, it’s time for assembly: Arrange the petals in a circular formation, with the heart-shaped petal at the bottom and the four oval petals overlapping above it. Secure them together by brushing a tiny amount of corn syrup (or edible glue) in the center where the petals meet.
-
Roll out a small ball of yellow fondant or gum paste and gently press it into the center of the assembled flower. This forms the distinctive yellow eye of the pansy.
-
Additionally, form two small yellow gum paste loops and carefully attach them around the central yellow ball, adding more detail to the pansy’s intricate center.
-
Carefully place your freshly made fondant pansy into a flower-forming cup (or a piece of crumpled foil) to help it maintain its natural curve as it dries. Let it dry overnight, or until it has completely hardened, ensuring it will hold its shape when placed on the cupcake.
-
Once your pansy toppers are dry and firm, gently place them on top of your iced cupcakes. Arrange them artfully for a beautiful display. Enjoy your magnificent, homemade floral cupcakes!
Notes
- For detailed guidance, be sure to read all the expert tips and techniques provided in the sections above to ensure the best results for your fondant pansies.
- Any leftover decorated cupcakes should be stored in a covered box at room temperature for up to 2 days. Avoid airtight containers, as they can cause fondant to become sticky.
Nutrition
An automated tool is used to calculate the nutritional information. As such, I cannot guarantee the accuracy of the nutritional information provided for any recipe on this site.
