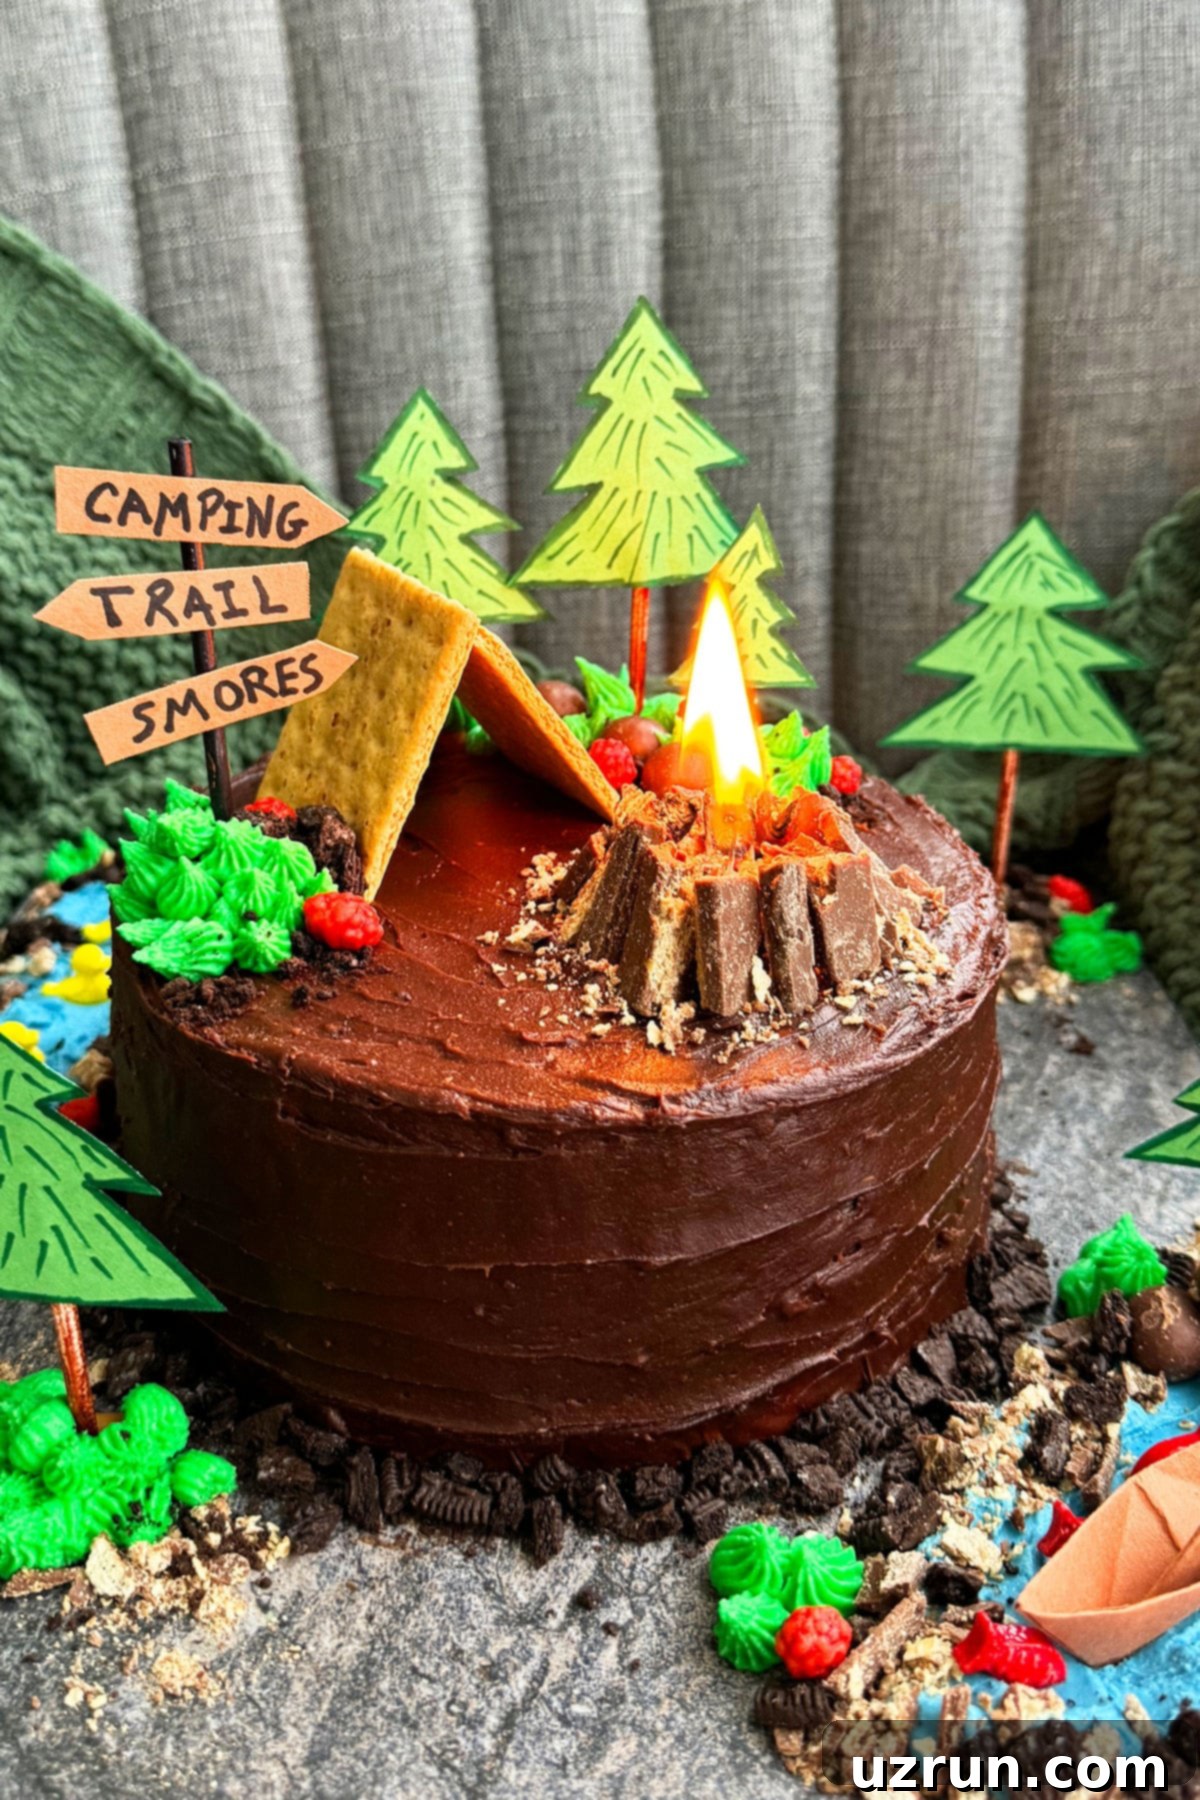
Easy Camping Cake with a Real Campfire: Your Ultimate Guide to an Unforgettable Celebration
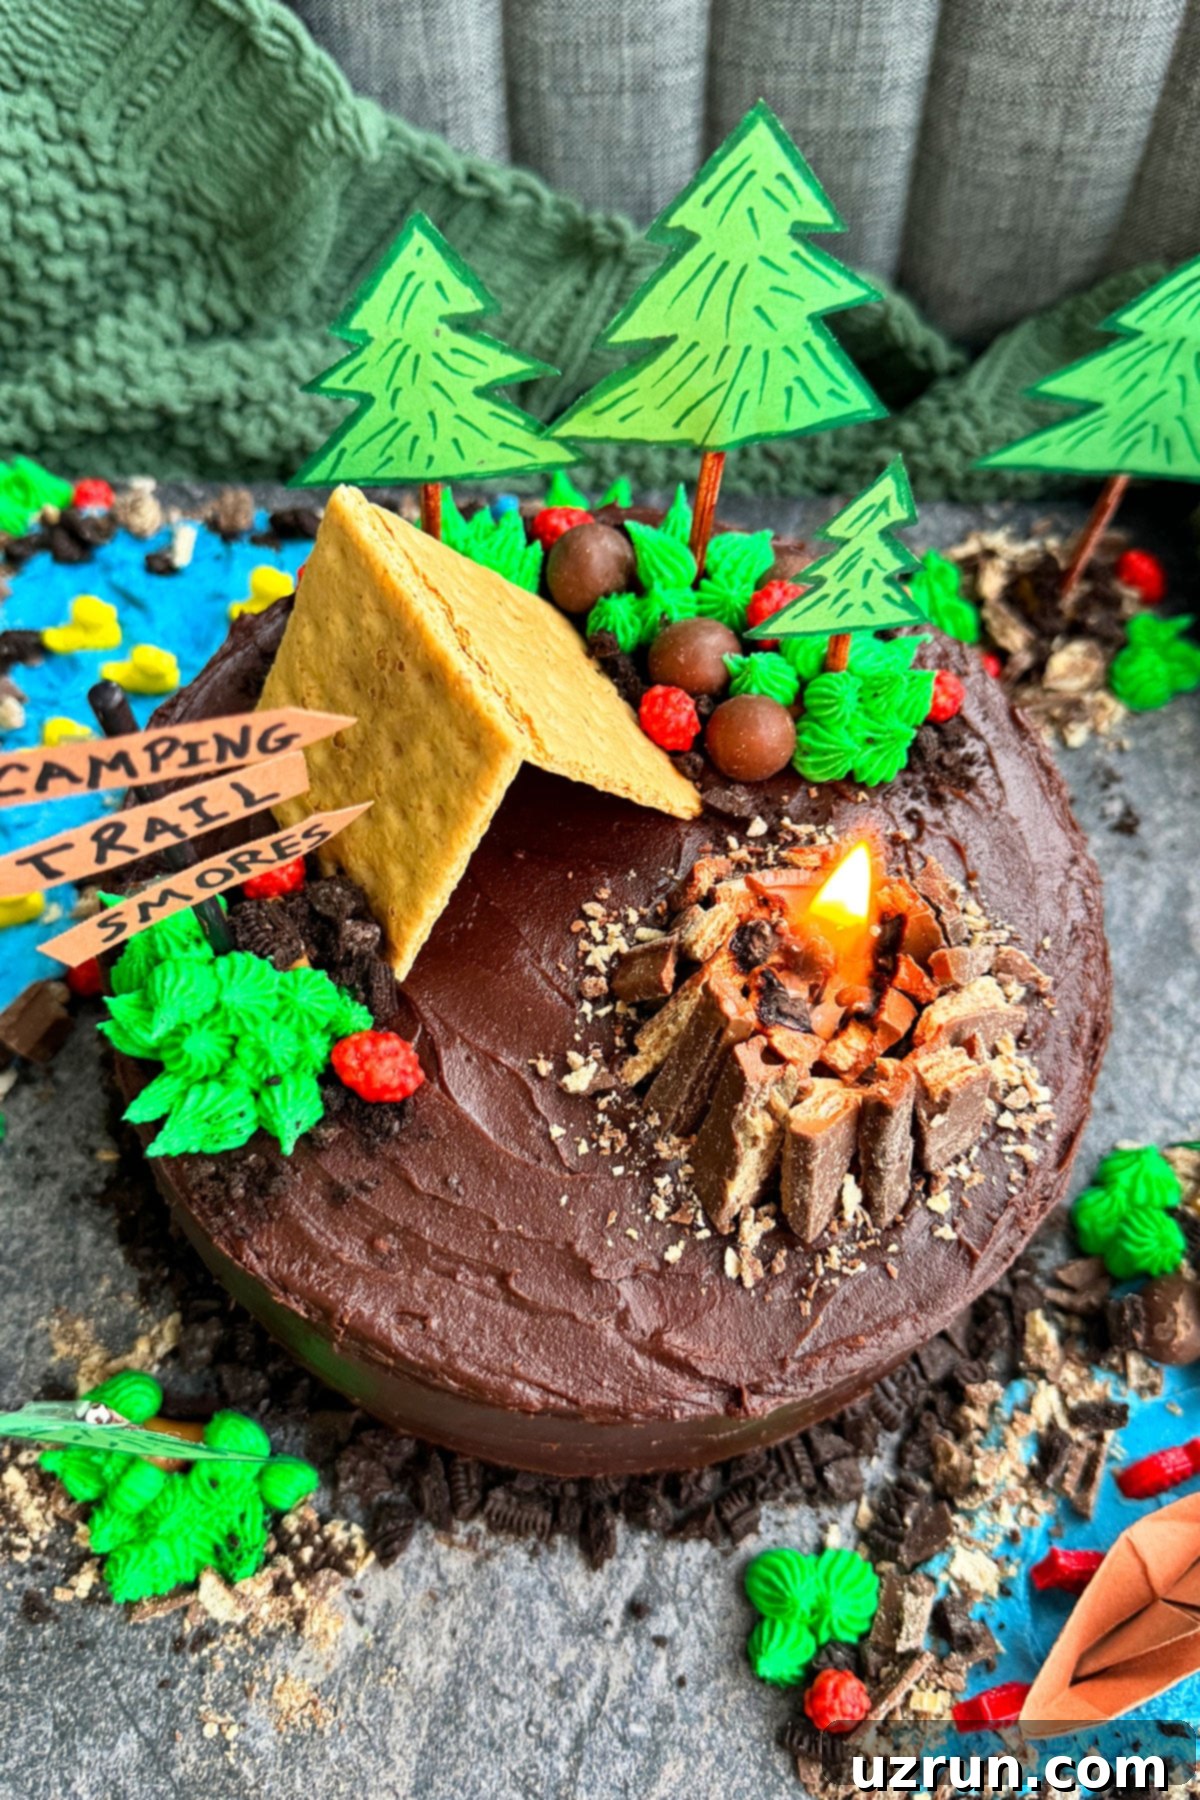
Get ready for an adventure with this incredibly easy and delightful camping cake recipe! Perfect for birthdays, themed parties, or just a fun family activity, this homemade cake brings the magic of the outdoors right into your home. Decorated with luscious chocolate buttercream icing, an array of candies, and featuring a truly unique real campfire element, this cake is guaranteed to be the centerpiece of any celebration. We’ll also share creative party details to complete your indoor camping experience, making it an event to remember.
*Thank you Nestlé® Drumstick® S’mores for sponsoring today’s post. As always, all content and opinions expressed here are all my own.*
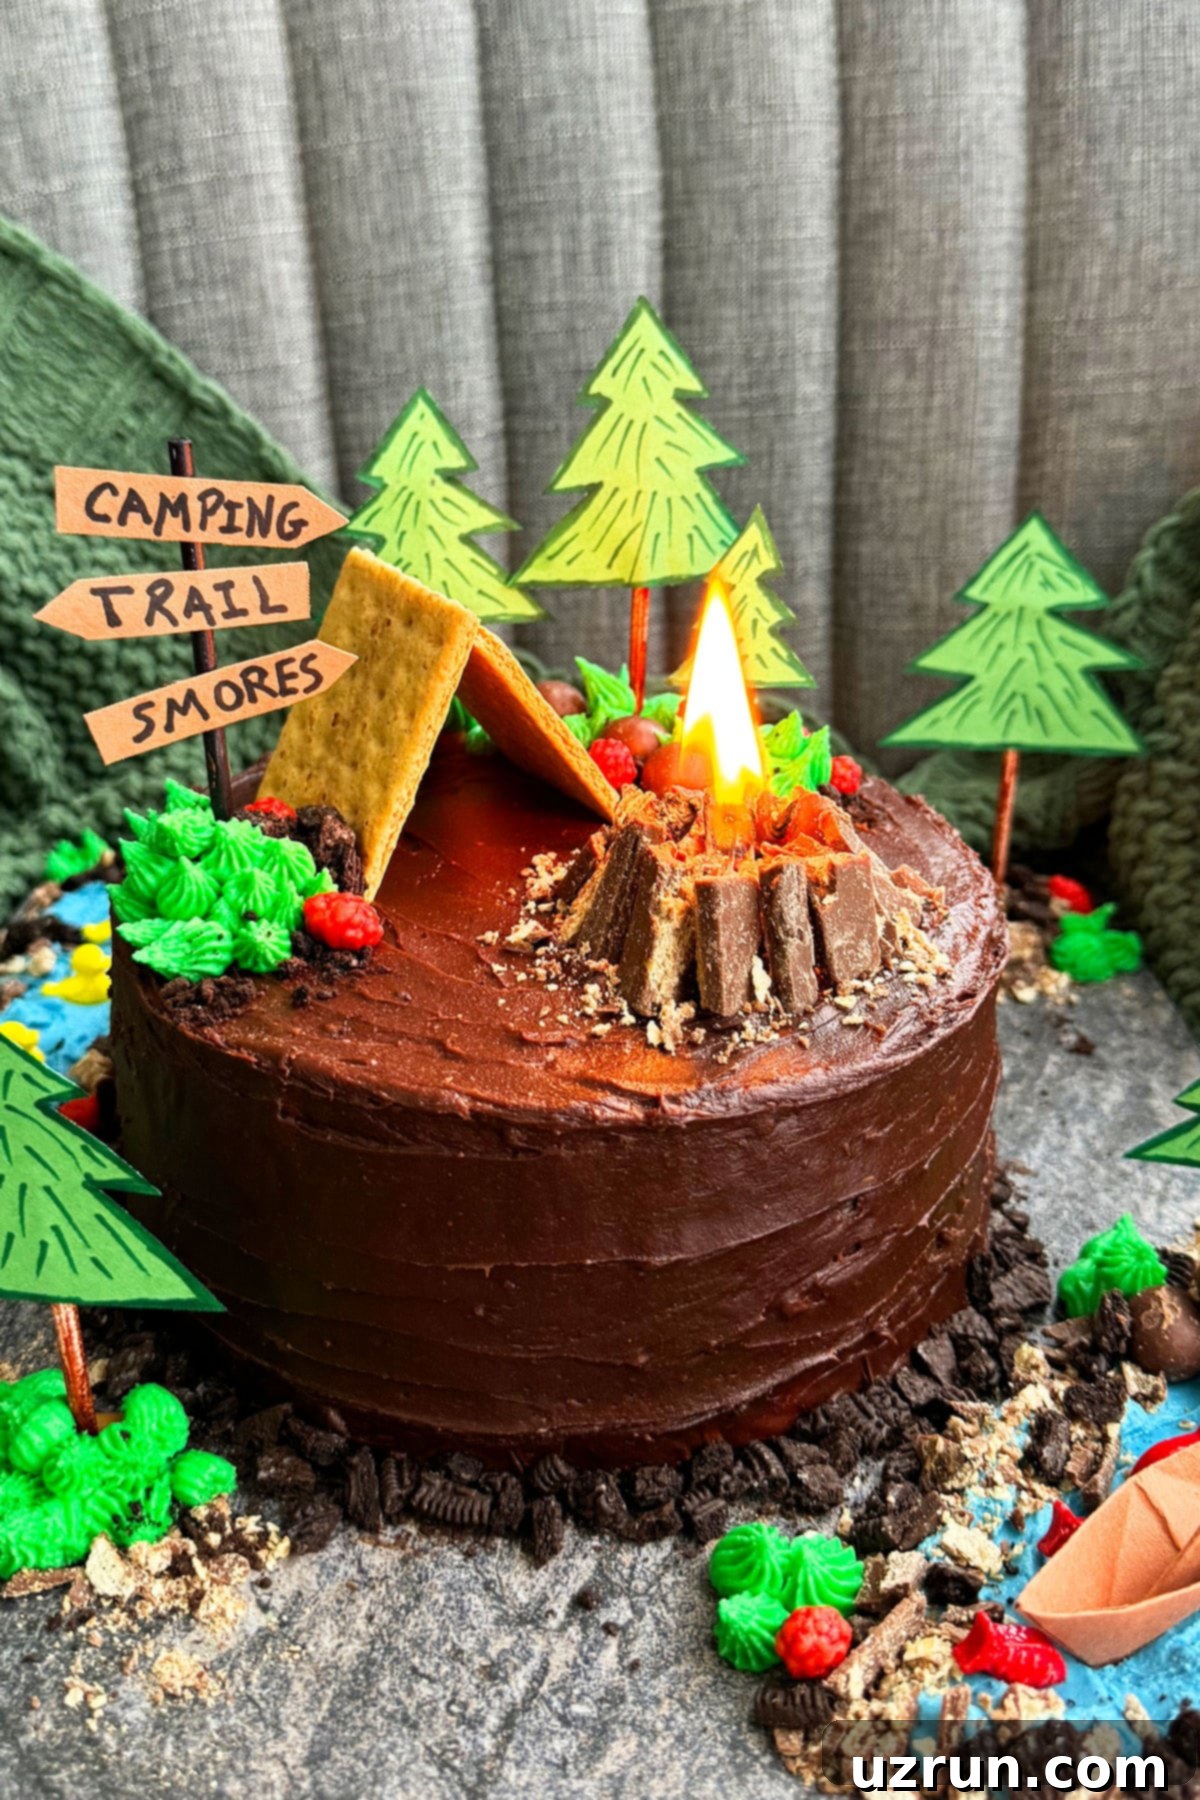
I absolutely adore hosting parties, especially for my son. For months, he’s dreamt of a camping trip, but the chilly Chicago weather has kept us indoors. So, we decided to bring the great outdoors inside with an exciting indoor camping theme! This concept is fantastic for both boys’ and girls’ parties, offering endless possibilities for creativity and fun. If you’re looking for more delightful cake inspiration, don’t miss these Easy Cake Decorating Ideas (Beginners) and a variety of Birthday Cake Ideas.
Table of contents
- Key Ingredients for DIY Camping Birthday Cake
- Creative Variations for Your Camping Cake
- How to Make This Easy Camping Cake from Scratch
- Essential Tips and Decorating Techniques
- Recipe FAQs
- Storage Solutions for Your Camping Cake
- More Easy Decorated Cake Ideas
- Setting Up Your Indoor Camping Party
- Engaging Party Activities for Campers
- Delicious Camping-Themed Food Ideas
Key Ingredients for DIY Camping Birthday Cake
Crafting this whimsical camping cake is a breeze when you have the right components. Here’s a breakdown of the essential ingredients that bring this edible wilderness to life:
- Coca Cola Cakes: We opted for a Coca Cola cake recipe for its rich flavor and delightful moistness, forming the perfect base for our camping scene. You’ll need two 8×2 inch round cakes for stacking.
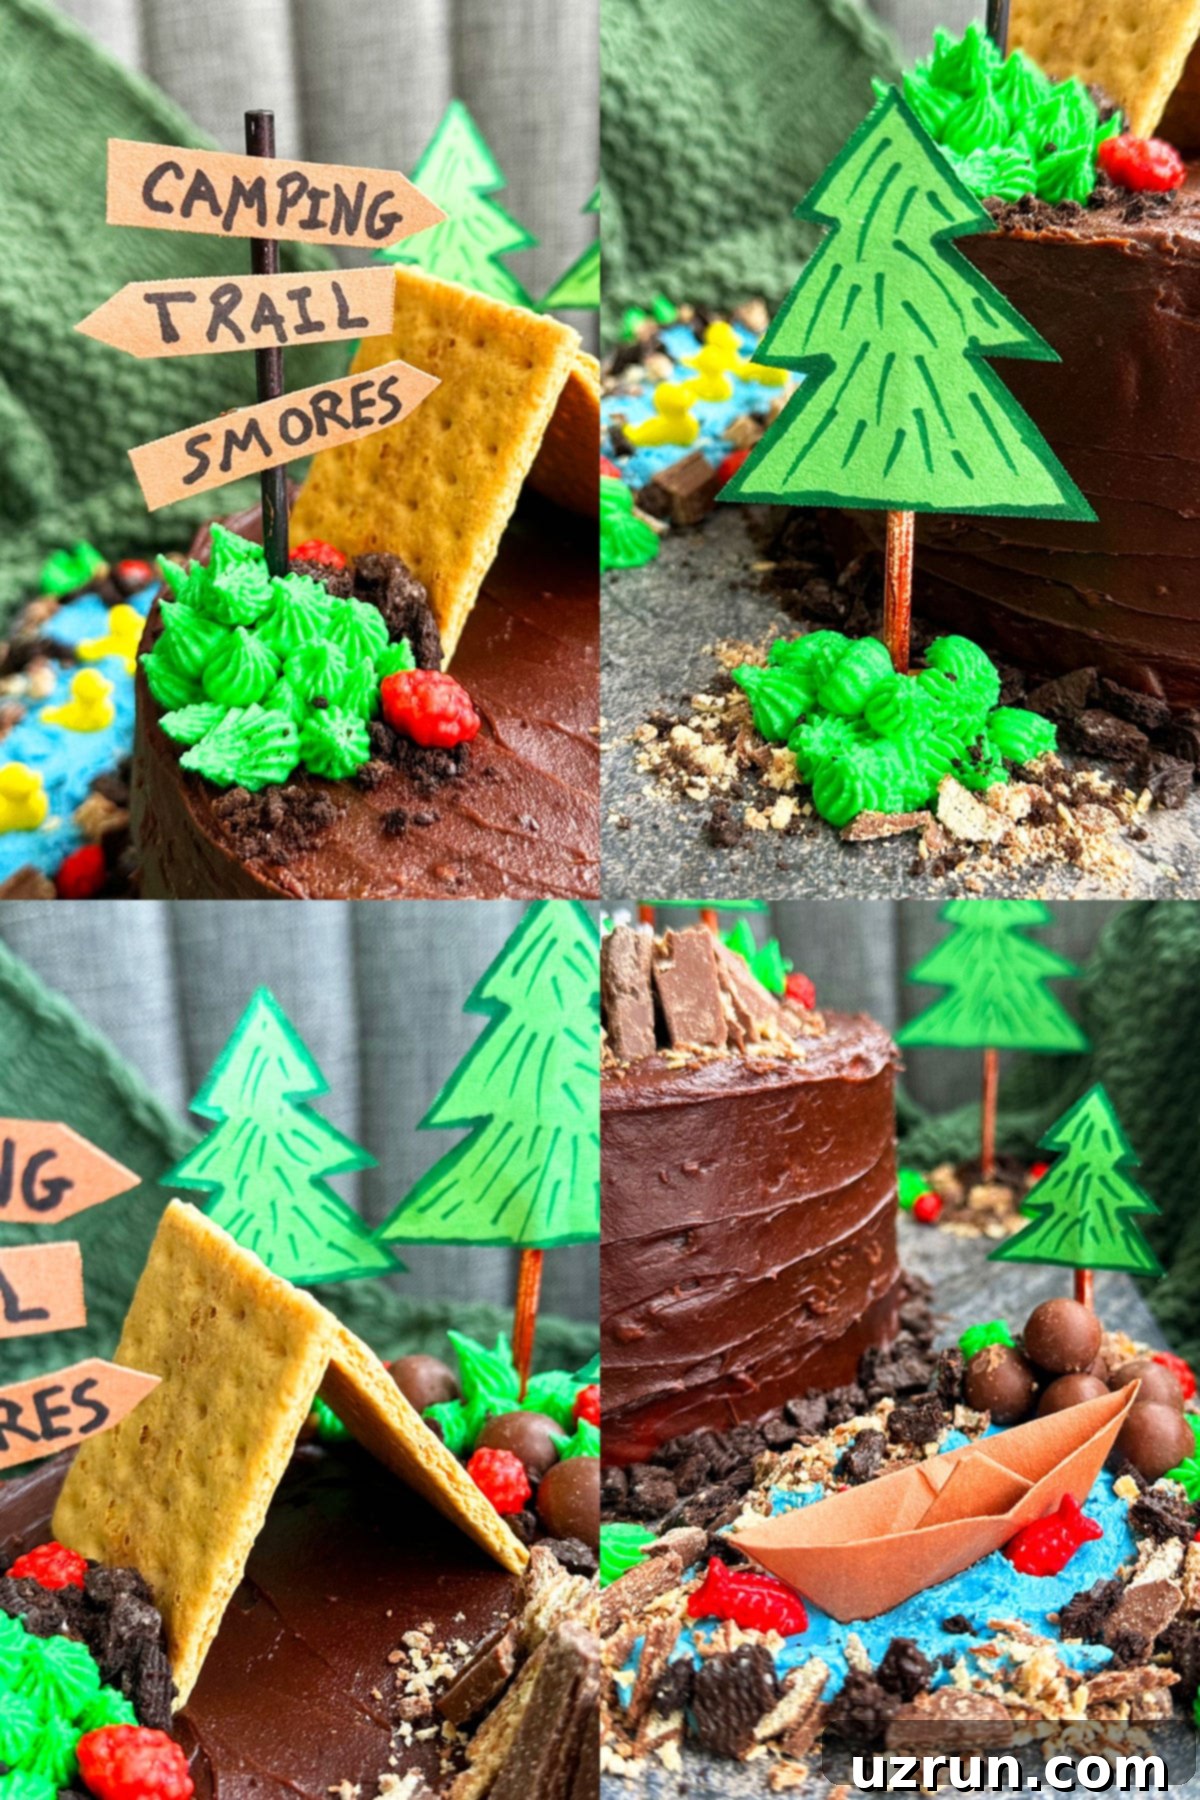
- Graham Crackers: These are ingeniously used to construct the adorable tent on top of your cake, providing a crunchy, edible shelter for your miniature campers.
- Soft Caramel Candies: Crucial for making your edible decorations like trees and signs. Ensure they are soft and pliable, not hard, so you can easily mold them and insert lollipop sticks.
- Whoppers: These round chocolate malt balls serve as excellent “rocks” or “boulders” scattered around the cake, adding texture and a touch of realism to your landscape.
- Red Candy Balls: Use these small, vibrant candies to simulate berries or bright little elements of nature amidst the green “grass” and brown “dirt.”
- Oreos: Roughly chopped, these chocolate cookies transform into realistic “dirt” or rich, dark earth on your cake and cake board. Remember to remove the cream for a drier, more authentic texture.
- Kit Kats: Break these chocolate bars into rough, stick-like pieces to form the base of your miniature campfire, creating a cozy and inviting focal point.
Creative Variations for Your Camping Cake
While our easy camping cake recipe is fantastic as is, there are many ways to customize it to your liking and make it truly unique. Get creative with these variations:
- Homemade Marshmallow Fondant: For truly intricate and edible decorations, consider using my Homemade Marshmallow Fondant. With fondant, you can craft detailed trees, a charming little boat, tiny fish, or even miniature wildlife to populate your edible landscape. It offers a smooth, artistic finish that buttercream alone can’t achieve.
- Add Miniature Toys: If you prefer non-edible decorations or want to enhance the scene with more characters, purchase small toys! Think tiny bears, birds perched on branches, ducks swimming in a candy pond, or even a miniature camper and a sleeping bag tucked into the tent. For a hunter, a tiny rifle could be a fun, personalized touch. Just remember to clean all toys thoroughly before placing them on the cake.
- Experiment with “Dirt” Options: The crushed Oreos and Kit Kats create a wonderful dirt effect, but don’t limit yourself! Other fantastic alternatives include chocolate and/or regular graham cracker crumbs, crunchy Chips Ahoy! cookies, chocolate Animal Crackers, finely chopped nuts (like walnuts or pecans for a forest floor feel), or various other chocolate candies that are easily crumbled. Each option offers a slightly different texture and shade.
- Try Different Frostings: While chocolate buttercream is a classic choice, feel free to experiment with other frosting flavors and textures. Consider a rich Chocolate Ganache Frosting for an intense chocolate flavor, a tangy Chocolate Cream Cheese Frosting, or a lighter Healthy Coconut Cream Chocolate Frosting for a dairy-free option.
- Create a Winter Wonderland Scene: Who says camping is only for summer? Transform your cake into a beautiful winter camping scene! Use white icings like American Buttercream Frosting, Cream Cheese Frosting, White Chocolate Buttercream Frosting, or Marshmallow Frosting. You can even dust dark chocolate frosting with powdered sugar to mimic snow. Add dabs of white frosting to the edges of trees and the tent for a snowy effect. Replace cookie dirt with coconut flakes, and make your pond look like ice using melted Jolly Ranchers or rock candies, similar to what I did in these Window Cookies. Snowflake sprinkles and bare-looking trees would complete this chilly, yet charming, scene.
- Add a Delicious Filling: Elevate your cake’s flavor by adding a filling between the layers. Options like rich Chocolate Ganache, creamy Homemade Vanilla Pudding, light Chocolate Whipped Cream, fresh Whipped Cream, or sweet Strawberry Jam would all be delightful.
- Explore Different Cake Flavors: While Coca Cola cake is a fun choice, any sturdy cake recipe will work! Try a classic Red Velvet Cake, a simple Best Vanilla Cake, a zesty Moist Lemon Cake, or something more sophisticated like a Pink Champagne Cake or an Easy Spice Cake.
- Keep it Simple with a Sheet Cake: For a less elaborate but equally charming cake, use a 9×13 baking pan. Decorate the flat surface with your camping elements, making it as intricate or minimalist as you desire.
- Go Taller with More Tiers: To create an even more impressive and grand camping cake, add more tiers! Simply repeat the layering process, ensuring each tier is stable and frosted to continue the rustic camping theme upwards.
- Decorate Camping Cupcakes: Instead of a large cake, bake individual cupcakes and decorate each one with various miniature camping elements like tiny tents, campfires, or trees. You can even arrange them together on a large board and frost them as one to create a “cupcake cake,” much like my Football Cupcake Cake.
How to Make This Easy Camping Cake from Scratch
Creating this stunning camping cake is a fun and straightforward process. Follow these step-by-step instructions to assemble and decorate your edible outdoor adventure:
Decorating the Cake
- Prepare Your Cakes: Begin by baking your chosen cake layers (we used two 8×2 inch Coca Cola cakes) and allow them to cool completely on a wire rack. This is crucial to prevent your frosting from melting. While the cakes are cooling, prepare your chocolate, green, and blue buttercreams.
- First Layer of Frosting: Place one cooled cake layer on your chosen cake stand or serving platter. Using an offset spatula, spread a generous and even layer of chocolate buttercream icing over the top surface of the cake.
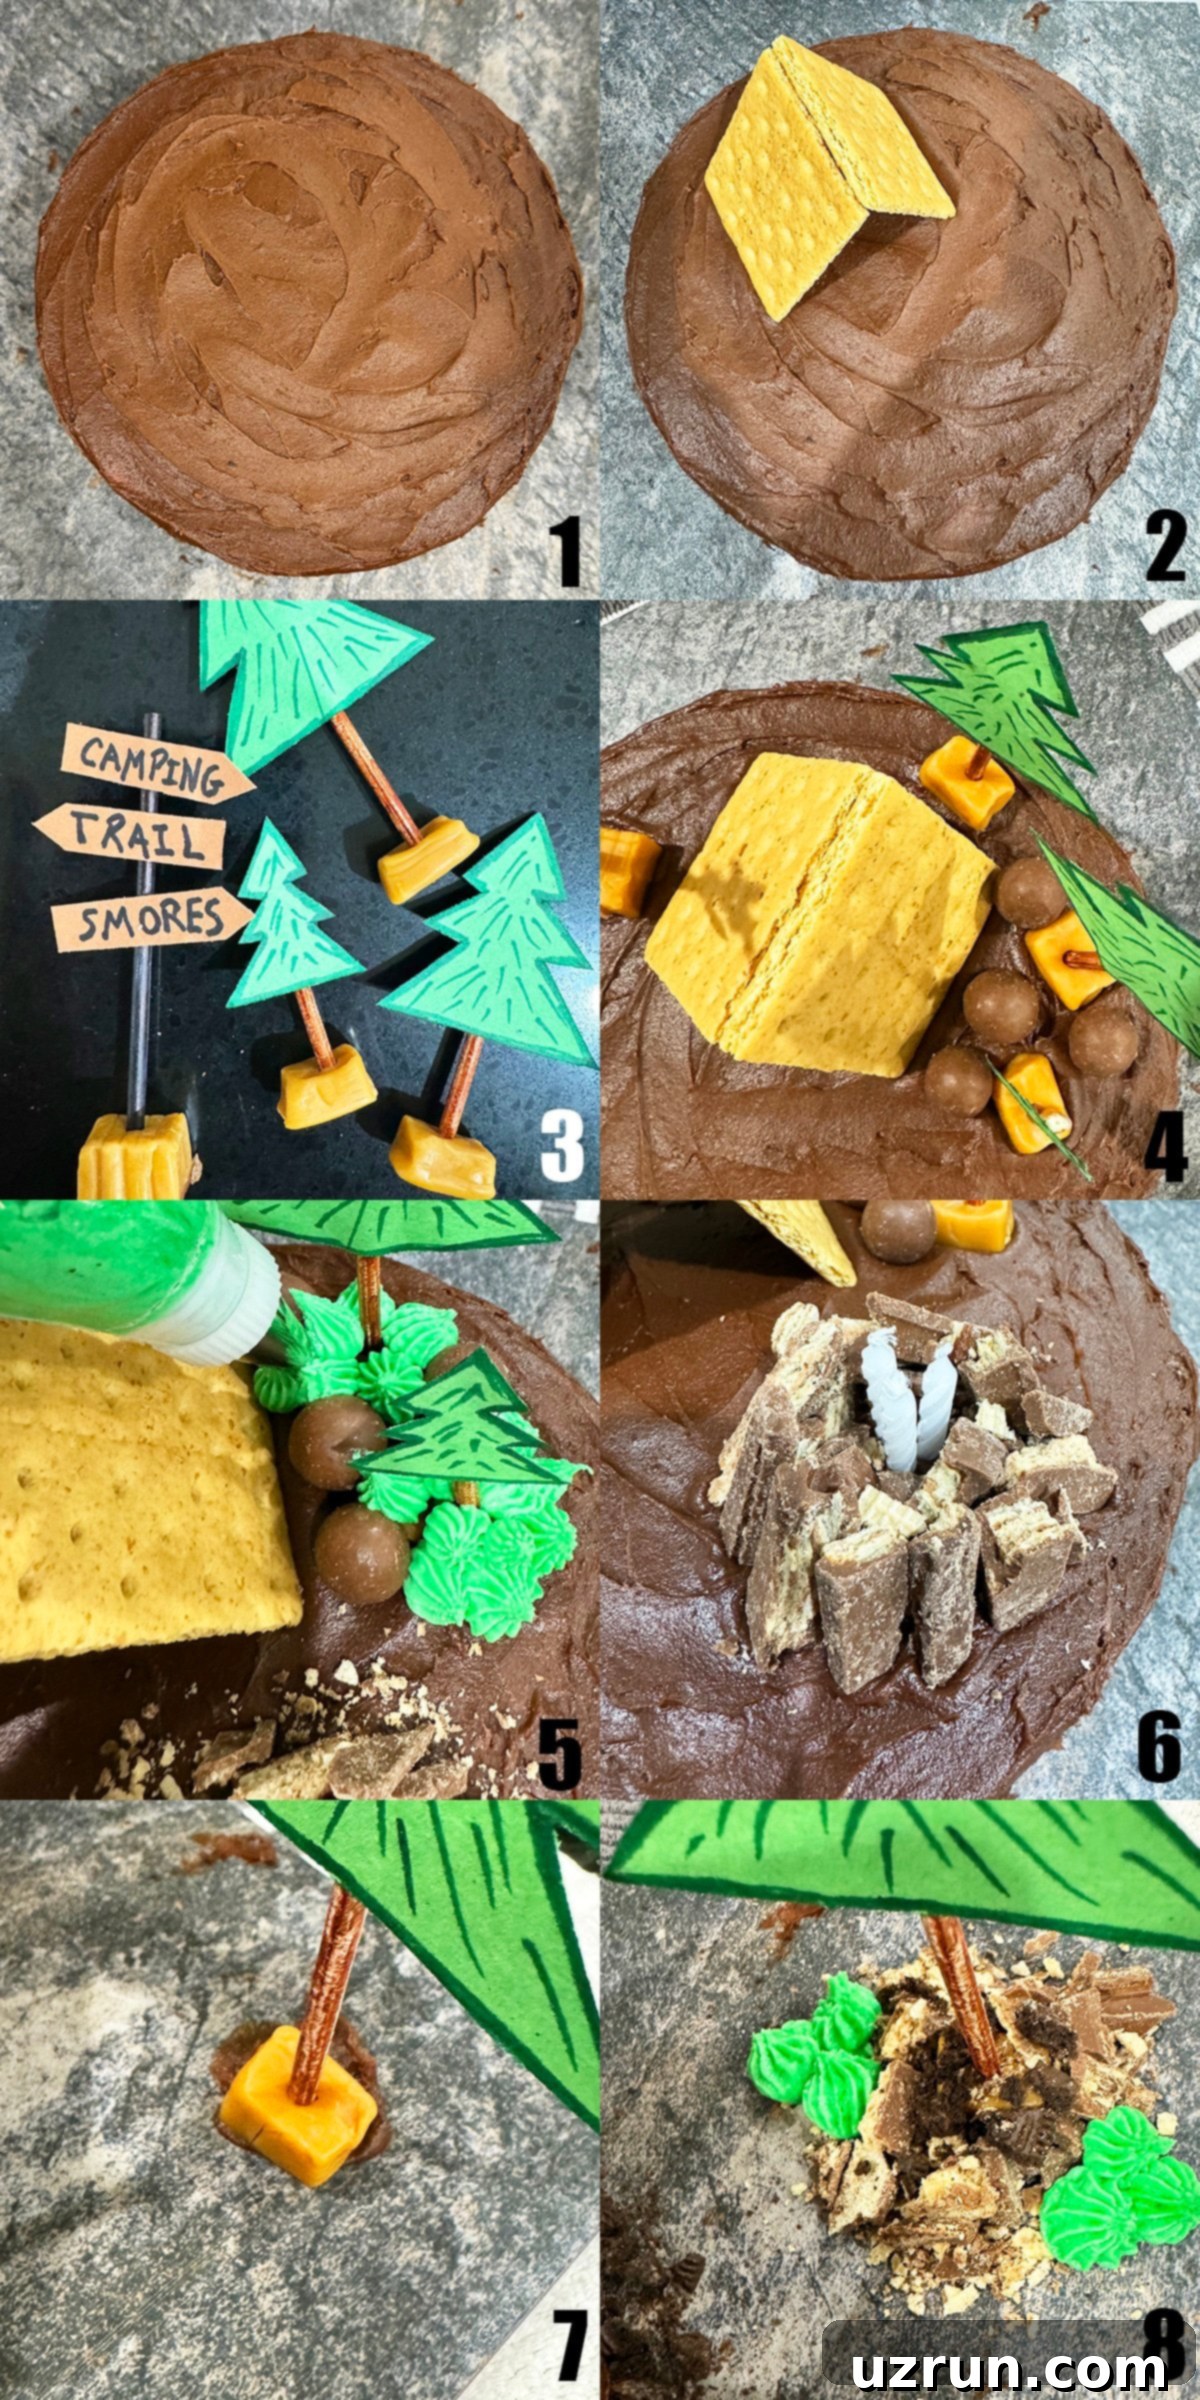
- Stack and Frost: Carefully place the second cake layer directly on top of the frosted first layer. Now, use your spatula to generously cover the entire cake – top and sides – with the remaining chocolate buttercream. Don’t worry about achieving a perfectly smooth finish; a rustic, textured look adds to the natural camping aesthetic (refer to Image 1 in the original collage for a visual guide).
- Build the Tent: Take two graham cracker squares and arrange them on the top of the cake, leaning against each other to form a charming little tent (see Image 2).
- Prepare Decorations: If using homemade cardstock trees and a camping sign, attach a lollipop stick to the back of each. Press the base of the lollipop stick firmly into a soft caramel candy to create a stable anchor (this technique is illustrated in Image 3). This makes them easy to position on the cake.
- Position Trees and Sign: Gently place your prepared trees and camping sign on and around the cake, securing them with a small dab of frosting if needed (Image 4 & 7).
- Add Whopper Rocks: Strategically arrange Whopper candies on top of the cake and around its base to represent realistic rocks or boulders (Image 4).
- Pipe the Grass: Fill a piping bag fitted with a Wilton star tip #21 (or similar grass tip) with green buttercream icing. Pipe small bursts of green frosting around the base of the trees and any other areas you wish to designate as grassy patches (Image 5). This also cleverly conceals the caramel bases of your decorations.
- Create “Dirt” and “Stones”: Generously sprinkle crushed Oreos (with cream removed) and broken Kit Kat pieces on top of the cake, especially around the base and between decorations, to create the illusion of dirt, gravel, and fallen twigs (Image 8).
- Dot with Red Candies: Randomly place a few red candy balls on the green buttercream to add pops of color, simulating small berries or flowers in the wilderness.
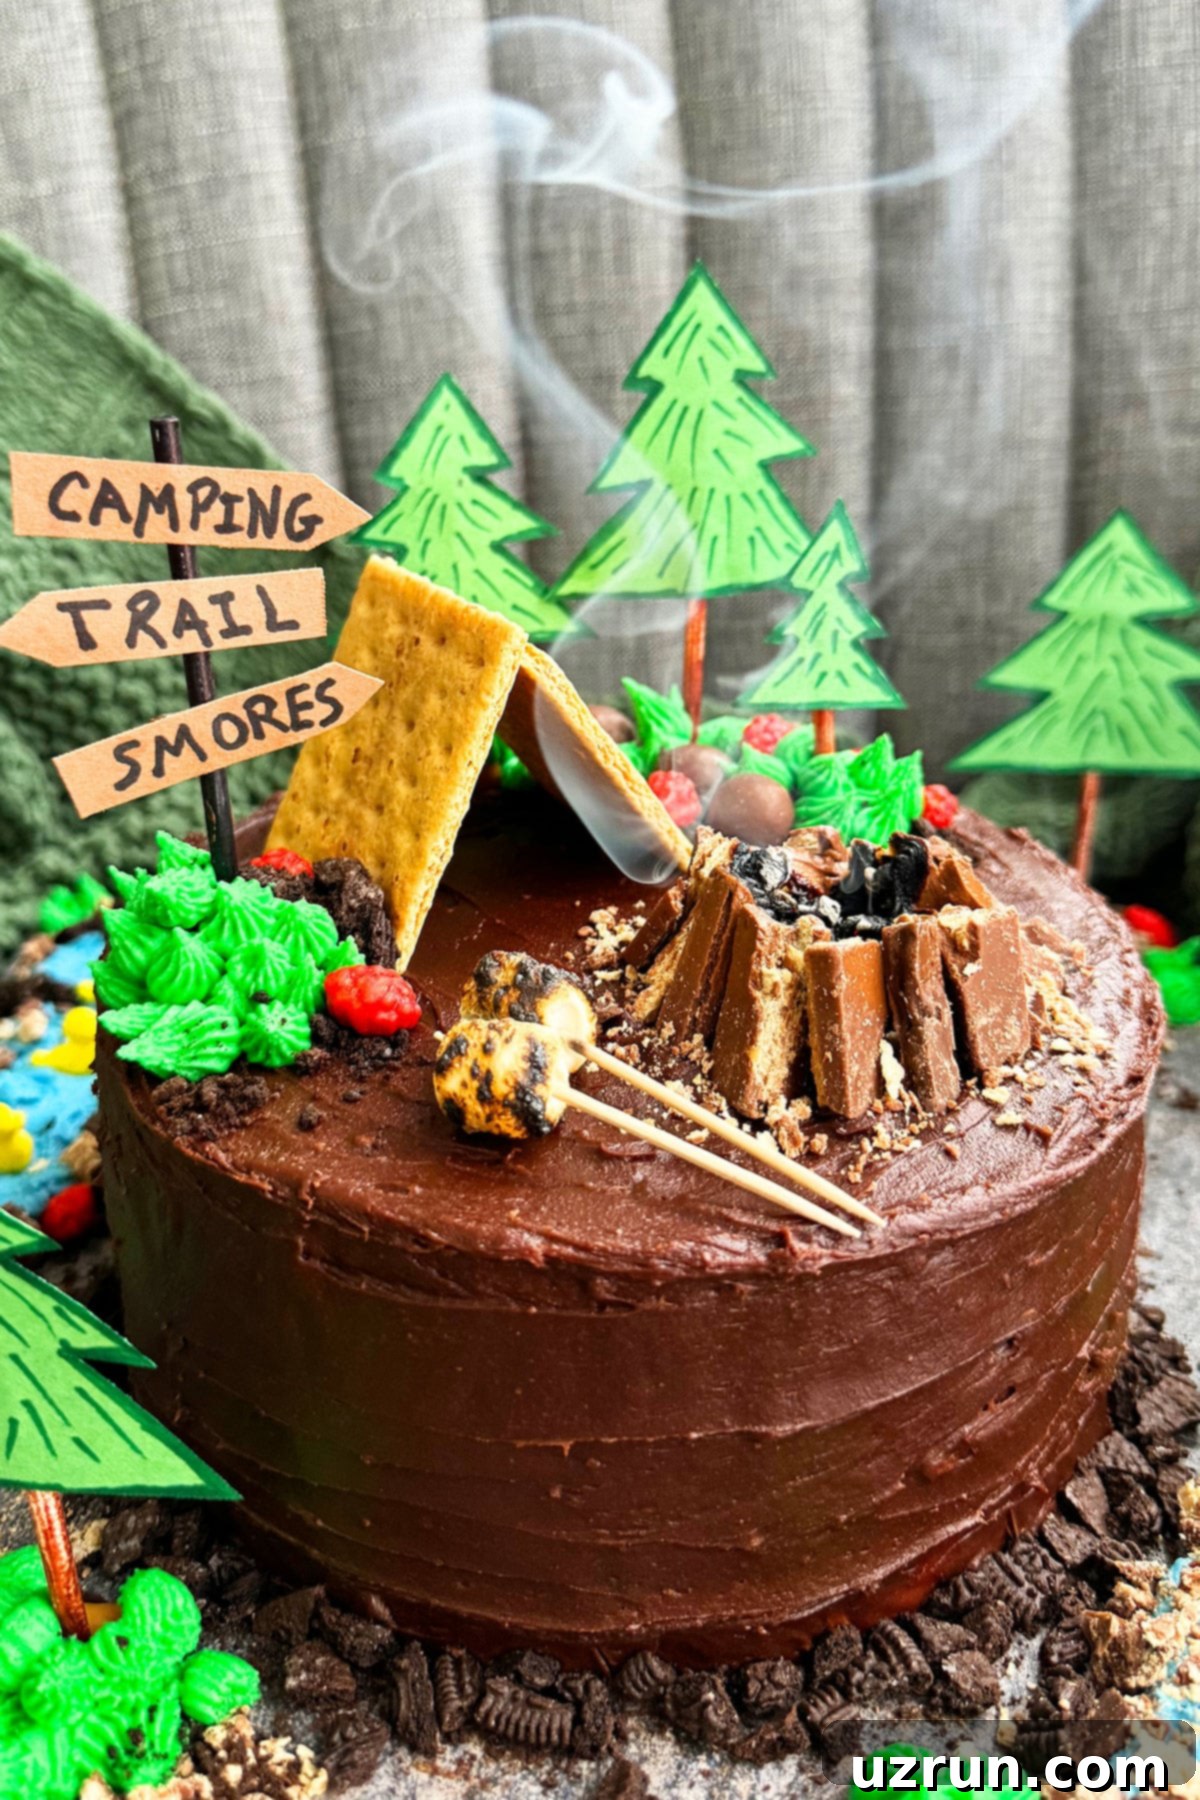
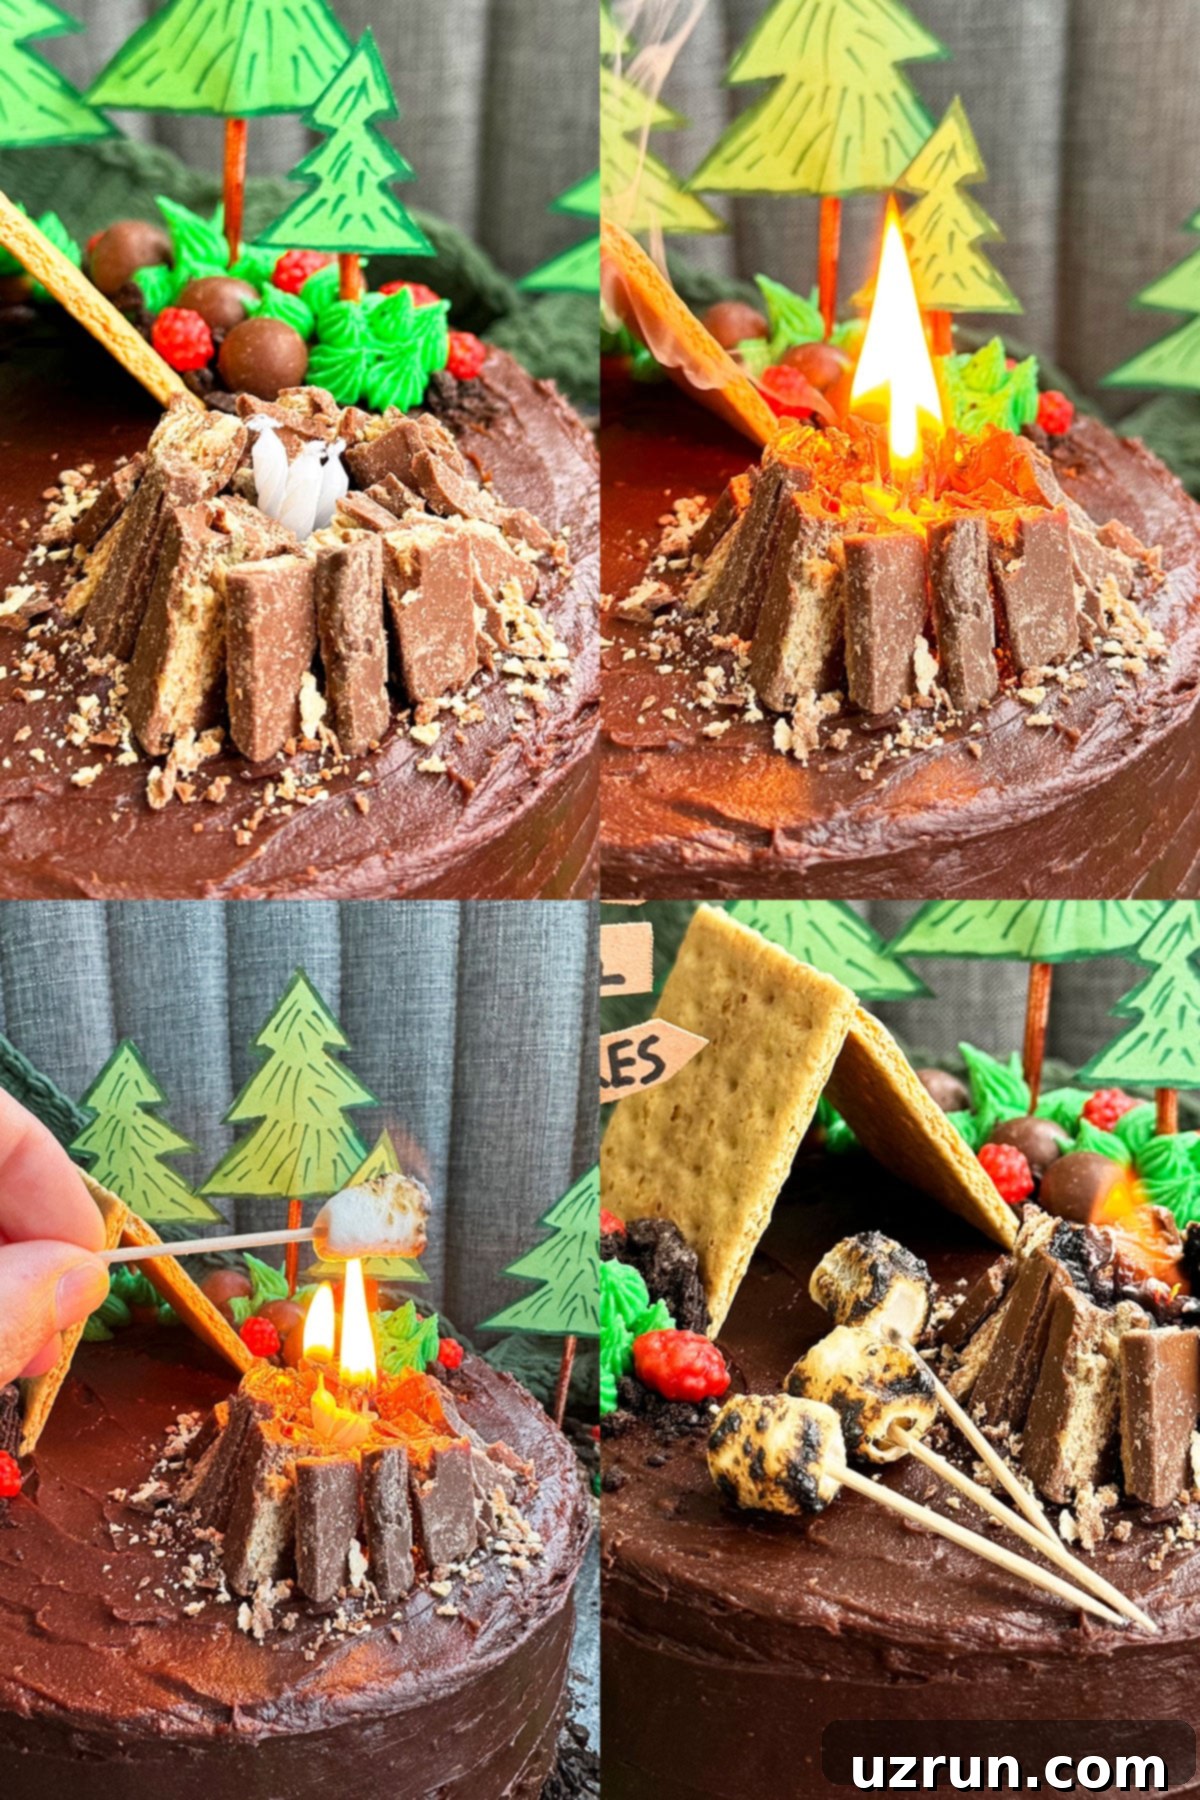
- Assemble the Campfire: For the star attraction, arrange broken Kit Kat pieces in a small, hollow circle on top of the cake to form the fire pit. Carefully push three small stick birthday candles into the center of this circle. Trim the candles with scissors if necessary, ensuring their wicks are level with the top of the Kit Kat “logs” for a truly realistic effect (Image 6). When ready, light them for a magical, flickering campfire!
Adding Details to the Cake Board
Don’t forget the cake board – it’s your canvas for expanding the camping narrative!
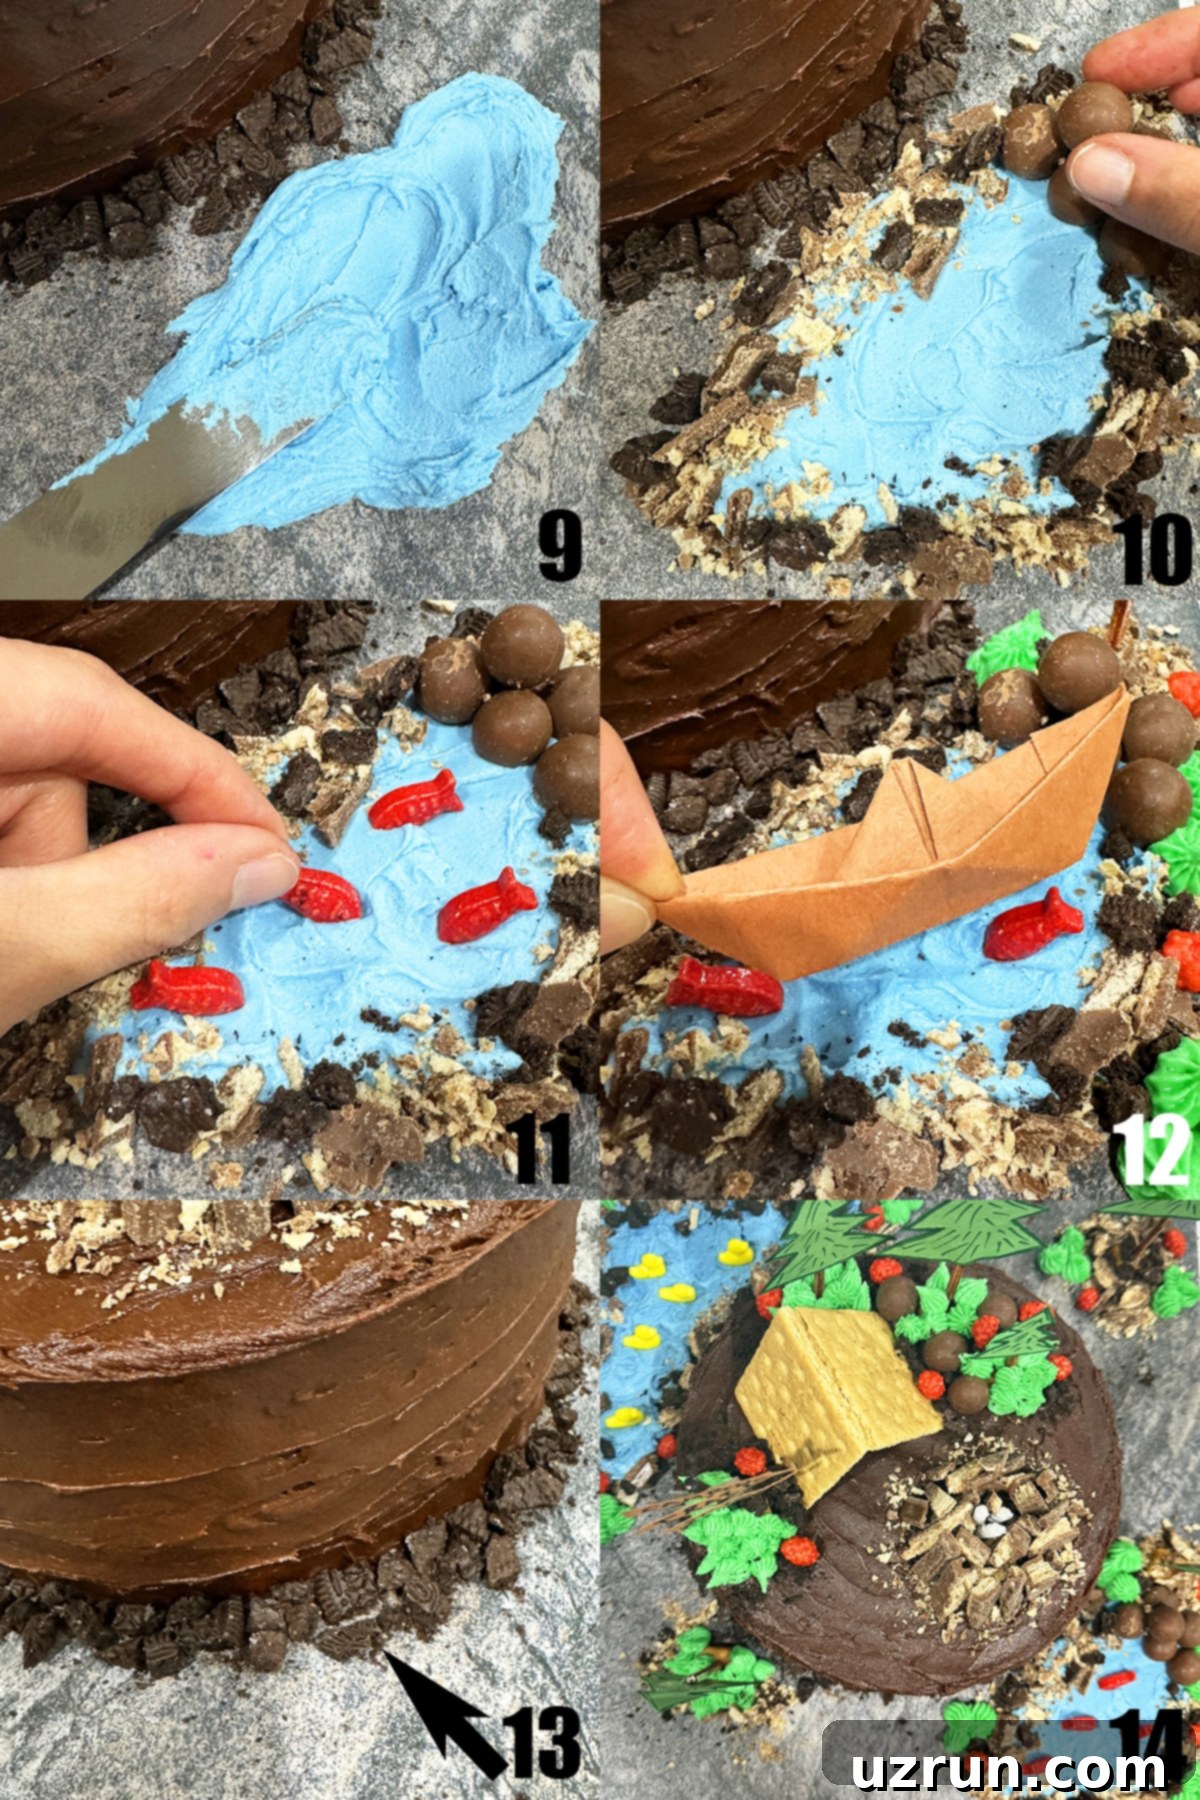
- Create Lakes: Use a spatula to spread patches of blue icing directly onto the cake board to form serene lakes or ponds (Image 9).
- Edge the Lakes: Place more Whopper candies around the edges of your blue “lakes,” and sprinkle additional crushed Oreos and Kit Kats to blend the water feature seamlessly into the “landscape” (Image 10).
- Add Aquatic Life: If you have fish or duck-shaped candies or sprinkles, gently push them partially into the blue icing to create the illusion of aquatic life (Image 11).
- Launch a Boat: Craft a small boat from thick brown paper (or use a toy boat) and place it delicately onto one of your blue frosting lakes (Image 12).
- Final Touches: Sprinkle a final layer of crushed Oreos around the entire base of the cake to tie all the elements together and complete your edible camping scene. Now, your masterpiece is ready to be admired and enjoyed (Image 13 & 14)!
Essential Tips and Decorating Techniques
Achieving the perfect camping cake is easy with these helpful tips and techniques:
- Utilize the Cake Board as Part of the Scene: Don’t treat the cake board merely as a base. Extend your decorating to it! The board is a fantastic space to create lakes, rivers, additional “dirt” paths, and to place more edible or toy decorations like trees and candies, truly completing the camping narrative. Using a large board gives you more room to play.
- Always Decorate a Fully Cooled Cake: This tip is paramount! Attempting to frost a warm or even slightly warm cake will result in your buttercream melting and sliding off, creating a messy situation. Patience is key – ensure your cake layers are completely cool to the touch before applying any frosting.
- Homemade vs. Store-Bought Decorations: I enjoyed crafting some elements like the trees and camp sign from cardstock, which adds a personal touch. However, you can absolutely purchase ready-made camping-themed decorations online or at craft stores. Alternatively, for completely edible decorations, try making them from fondant. Choose what works best for your skill level and time constraints.
- Opt for Full-Fat Ingredients: For the richest flavor and best consistency in both your cake and buttercream recipes, always use full-fat ingredients. This ensures a moist cake and a stable, delicious frosting that holds its shape well.
- Ensure Room Temperature Ingredients: When preparing your cake batter and buttercream, make sure all dairy products (like butter, eggs, milk) are at room temperature. This allows them to emulsify properly, resulting in a smooth, well-mixed batter and a creamy, lump-free frosting.
- Remove Cream from Oreos for “Dirt”: If using Oreos to create your “dirt” effect, scrape out the white cream filling first. The cream can become gooey and sticky when mixed, whereas the dry chocolate cookie crumbs provide a more realistic, crumbly soil texture that’s easier to work with.
- Clean Toy Decorations Thoroughly: If you’re incorporating miniature toys (like animals, people, or accessories) onto your cake, always clean them meticulously with soap and water before placing them on your edible creation. This ensures hygiene and prevents any unwanted substances from contaminating your cake.
- Embrace the Rustic Look: For this camping cake, there’s no need to strive for perfectly smooth, pristine icing. In fact, a slightly rustic, textured frosting job enhances the natural, outdoorsy feel of a campsite. Don’t stress over imperfections; they add to the charm!
Recipe FAQs
Absolutely! Fondant is an excellent medium for decorating this camping cake, allowing for more intricate and smooth designs. Be sure to check out my Marshmallow Fondant recipe linked at the top of this post for a homemade option. For best results, also review my Fondant Coloring Tips and explore designs from my New Year’s Cake. A practical tip: buying red and black fondant can save you time and effort, as these colors can be challenging to achieve from scratch.
No, this particular two-layer camping cake does not require dowel support. Dowels are generally necessary only for taller, multi-tiered cakes or when you’re placing exceptionally heavy decorative elements on top. For examples of cakes that do require support, you can look at my Teddy Bear Cake and Easy Rustic Cake.
Creating a real, flickering campfire on your camping cake is surprisingly simple and adds an incredible “wow” factor! Once you’ve arranged the Kit Kat stick “teepee” for your fire pit, simply take three standard birthday candles and carefully push them into the center. Ensure the wicks are roughly the same height as your Kit Kat logs. Then, when it’s time for the big reveal, light the candles, and watch your miniature campfire come to life with a warm, glowing flame!
Storage Solutions for Your Camping Cake
Proper storage ensures your camping cake remains delicious and fresh for as long as possible:
- Make Ahead Instructions: You can prepare and decorate this cake up to 3 days in advance. Once fully decorated, place it in a covered cake box or an airtight container and store it in the refrigerator.
- Room Temperature Storage: If your cake does not contain any perishable fillings (like fresh fruit, whipped cream, or custard), it can safely be left covered in a cake box at cool room temperature for 3-5 hours. Beyond that, refrigeration is recommended.
- Refrigerate Leftovers: Any leftover slices or the remaining cake should be stored in a sealed airtight container in the fridge. It will stay fresh and delicious for up to 3 days.
- Freezing: For longer storage, an unfrosted cake can be wrapped tightly in plastic wrap and then aluminum foil, and stored in a sealed container for up to 1 month in the freezer. Frostings can also be stored separately in an airtight container for up to 1 month. When you’re ready to enjoy, thaw the cake and frosting overnight in the refrigerator, then bring to room temperature and decorate as per the instructions.
More Easy Decorated Cake Ideas
If you loved creating this camping cake, here are more simple yet stunning decorated cake ideas to inspire your next celebration:
- Easy Teddy Bear Cake (And Party)
- Pink Ombre Mother’s Day Cake (And Party)
- Summer Cake (Kids Backyard Summer Party)
- Easy Baby Cake
- Homemade Wedding Cake
- Easy Caterpillar Cake (And Party)
Setting Up Your Indoor Camping Party
Creating an immersive indoor camping experience is all about setting the right atmosphere. Here’s how I transformed our living room into a cozy wilderness retreat:
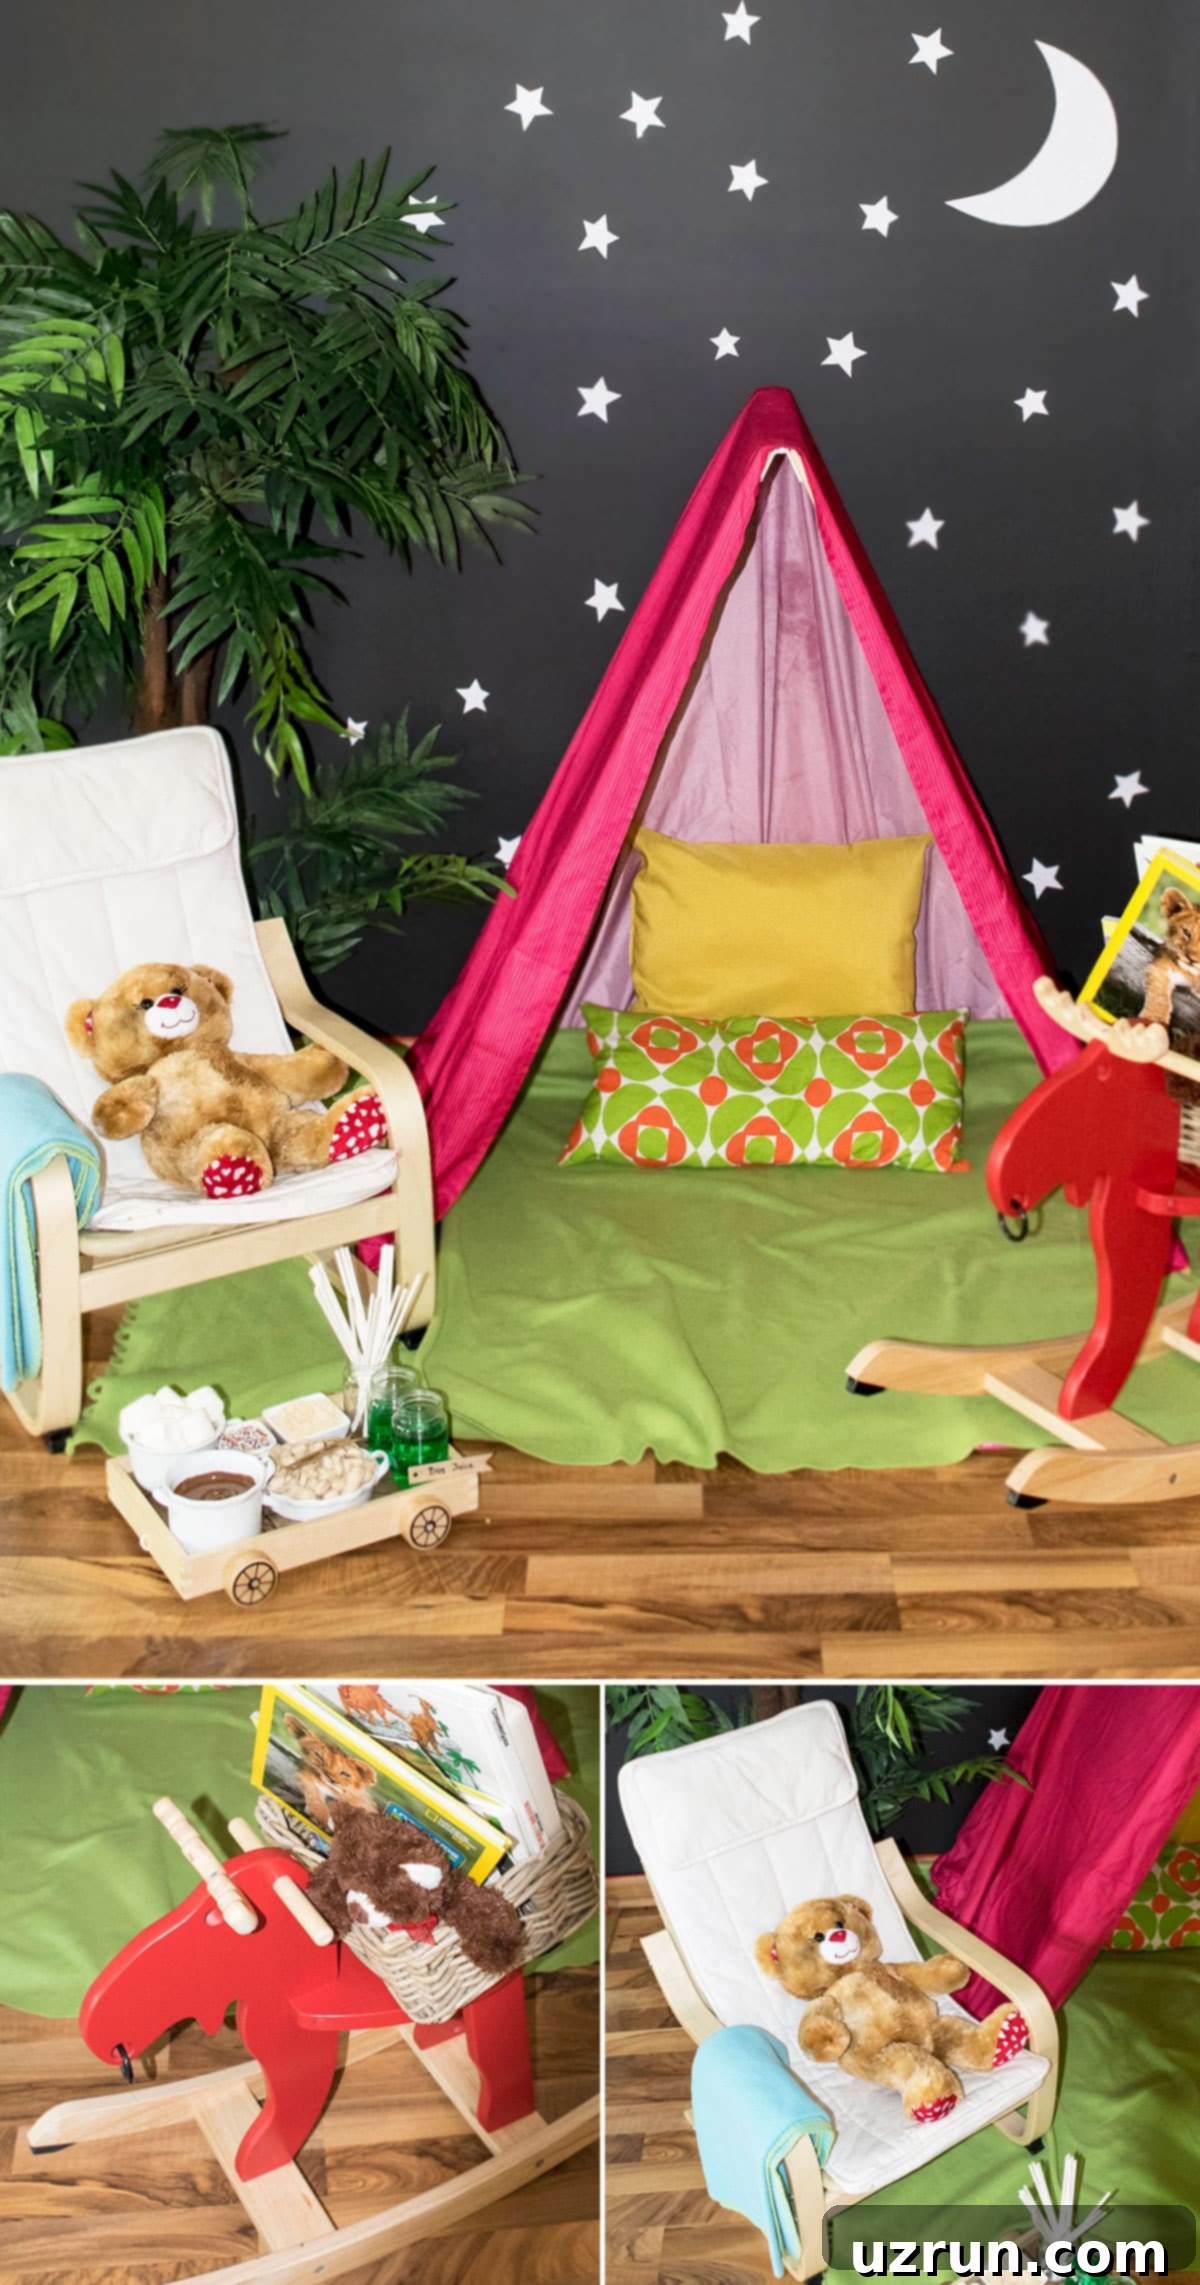
I began by laying a small, soft carpet in the living room and draping it with a lush green fleece blanket, instantly creating a grassy forest floor. The centerpiece was a makeshift tent, positioned right in the middle, complete with an assortment of comfy pillows inside for ultimate coziness. My ingenious tent was fashioned from an Ikea chalkboard set up in a triangle shape, then simply covered with a bed sheet – a truly smart and resourceful hack! To capture the essence of a starry night, I taped sparkly white stars and a shimmering moon onto the adjacent black wall. This instantly transported us to an enchanting evening under the sky.
Around the tent, I arranged artificial plants to mimic natural foliage and added my son’s favorite comfy chair, along with a basket filled with adventure books. For future parties, I plan to incorporate LED light strings, which would undoubtedly resemble twinkling stars, adding another layer of magic to the ambiance. The key is to think about textures, lighting, and simple elements that evoke the feeling of being outdoors.
Engaging Party Activities for Campers
Beyond the delicious food and captivating decorations, a memorable camping party needs engaging activities to keep everyone entertained. Here’s a glimpse into the fun we had:
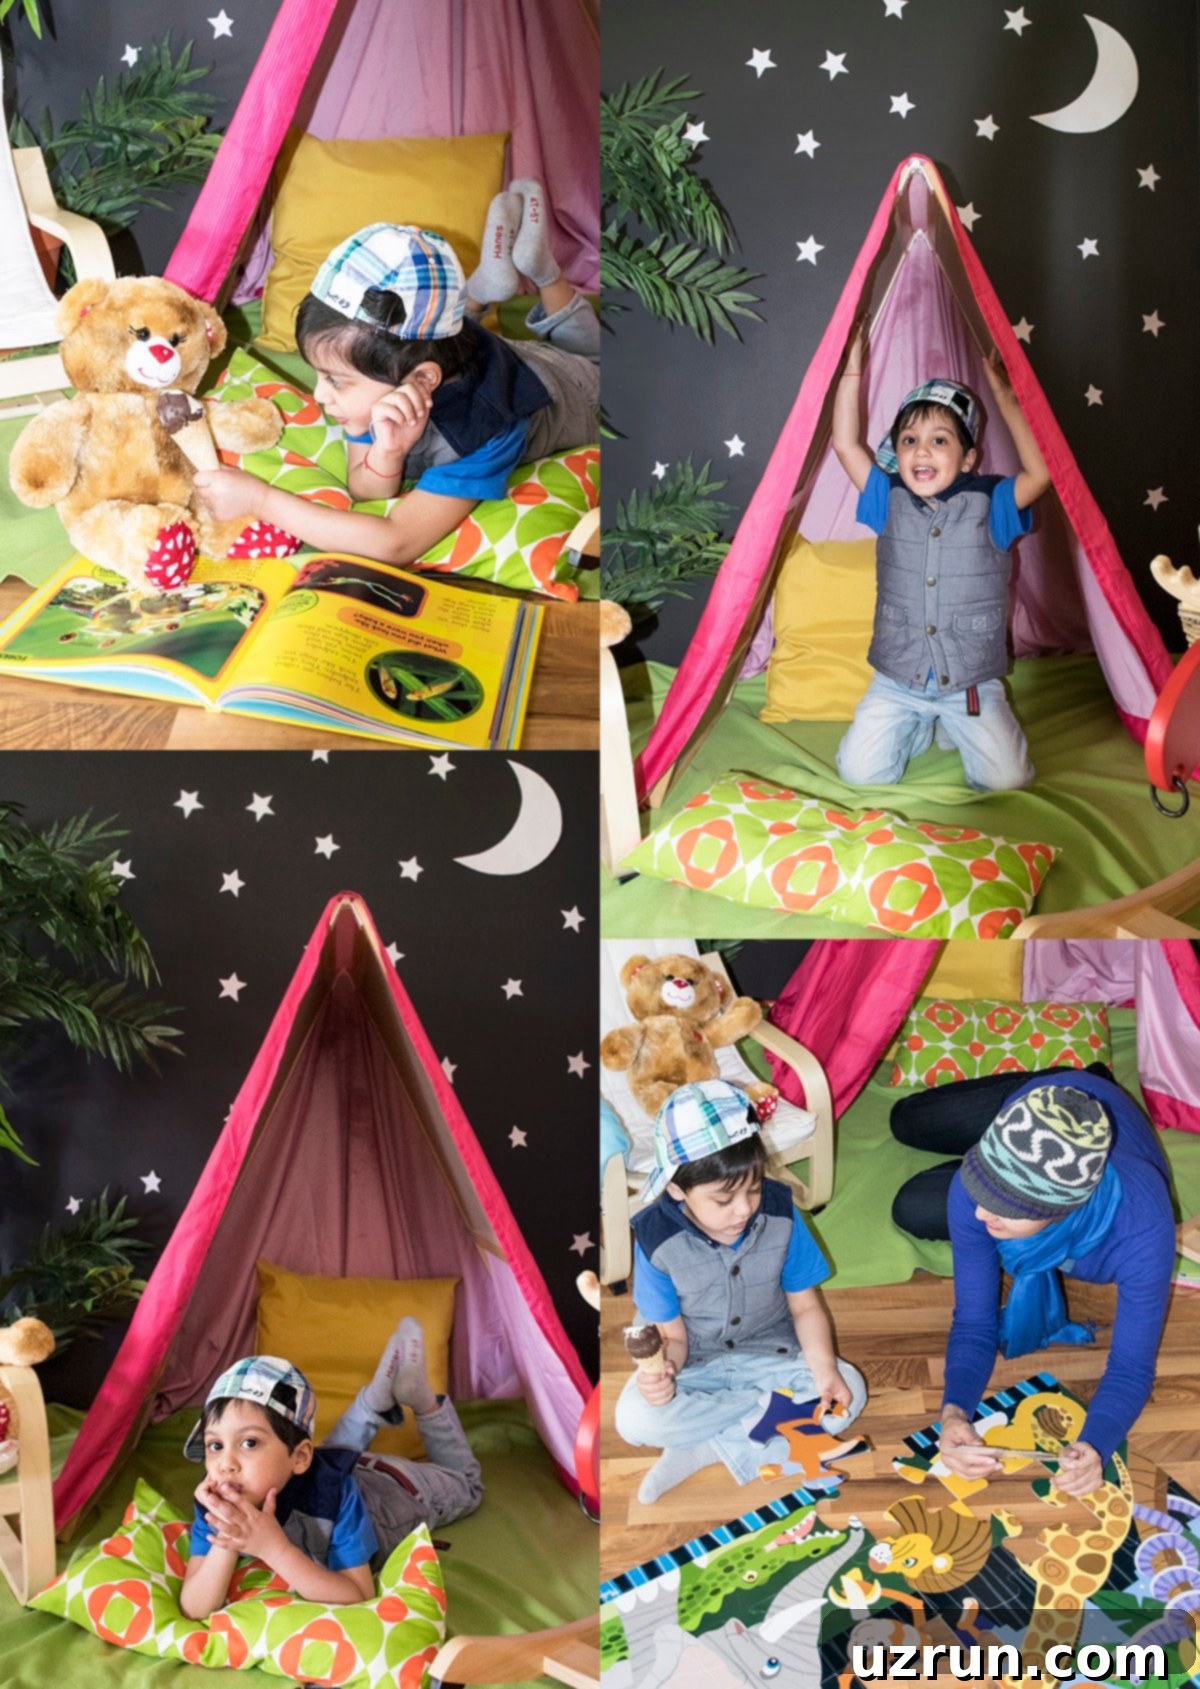
Naturally, a significant portion of our time was dedicated to enjoying all the delicious treats! But we also dove into a variety of other activities. We tackled large, animal-themed puzzles, which provided a wonderful group activity and stimulated critical thinking. Craft time was a hit, allowing for creative expression, perhaps making DIY binoculars or “trail mix” necklaces. We spent time reading National Geographic books, exploring fascinating facts about wildlife and nature, which perfectly complemented our outdoor theme. My little one particularly enjoyed pointing out all the animals commonly found in the woods, showcasing his burgeoning knowledge.
To really get into the camping spirit, we made loud and playful animal noises, imitating bears, owls, and wolves. I regaled him with funny camping stories from my own childhood, sparking his imagination and sharing cherished memories. We even conjured up our own silly ghost stories around our “campfire,” which was an absolute blast and a huge hit with everyone. These activities fostered imagination, learning, and plenty of laughter, making our indoor camping adventure truly unforgettable.
Delicious Camping-Themed Food Ideas
No camping trip, whether indoors or out, is complete without a spread of delicious and thematic food. Here’s a rundown of the yummy treats we enjoyed at our indoor camping party:
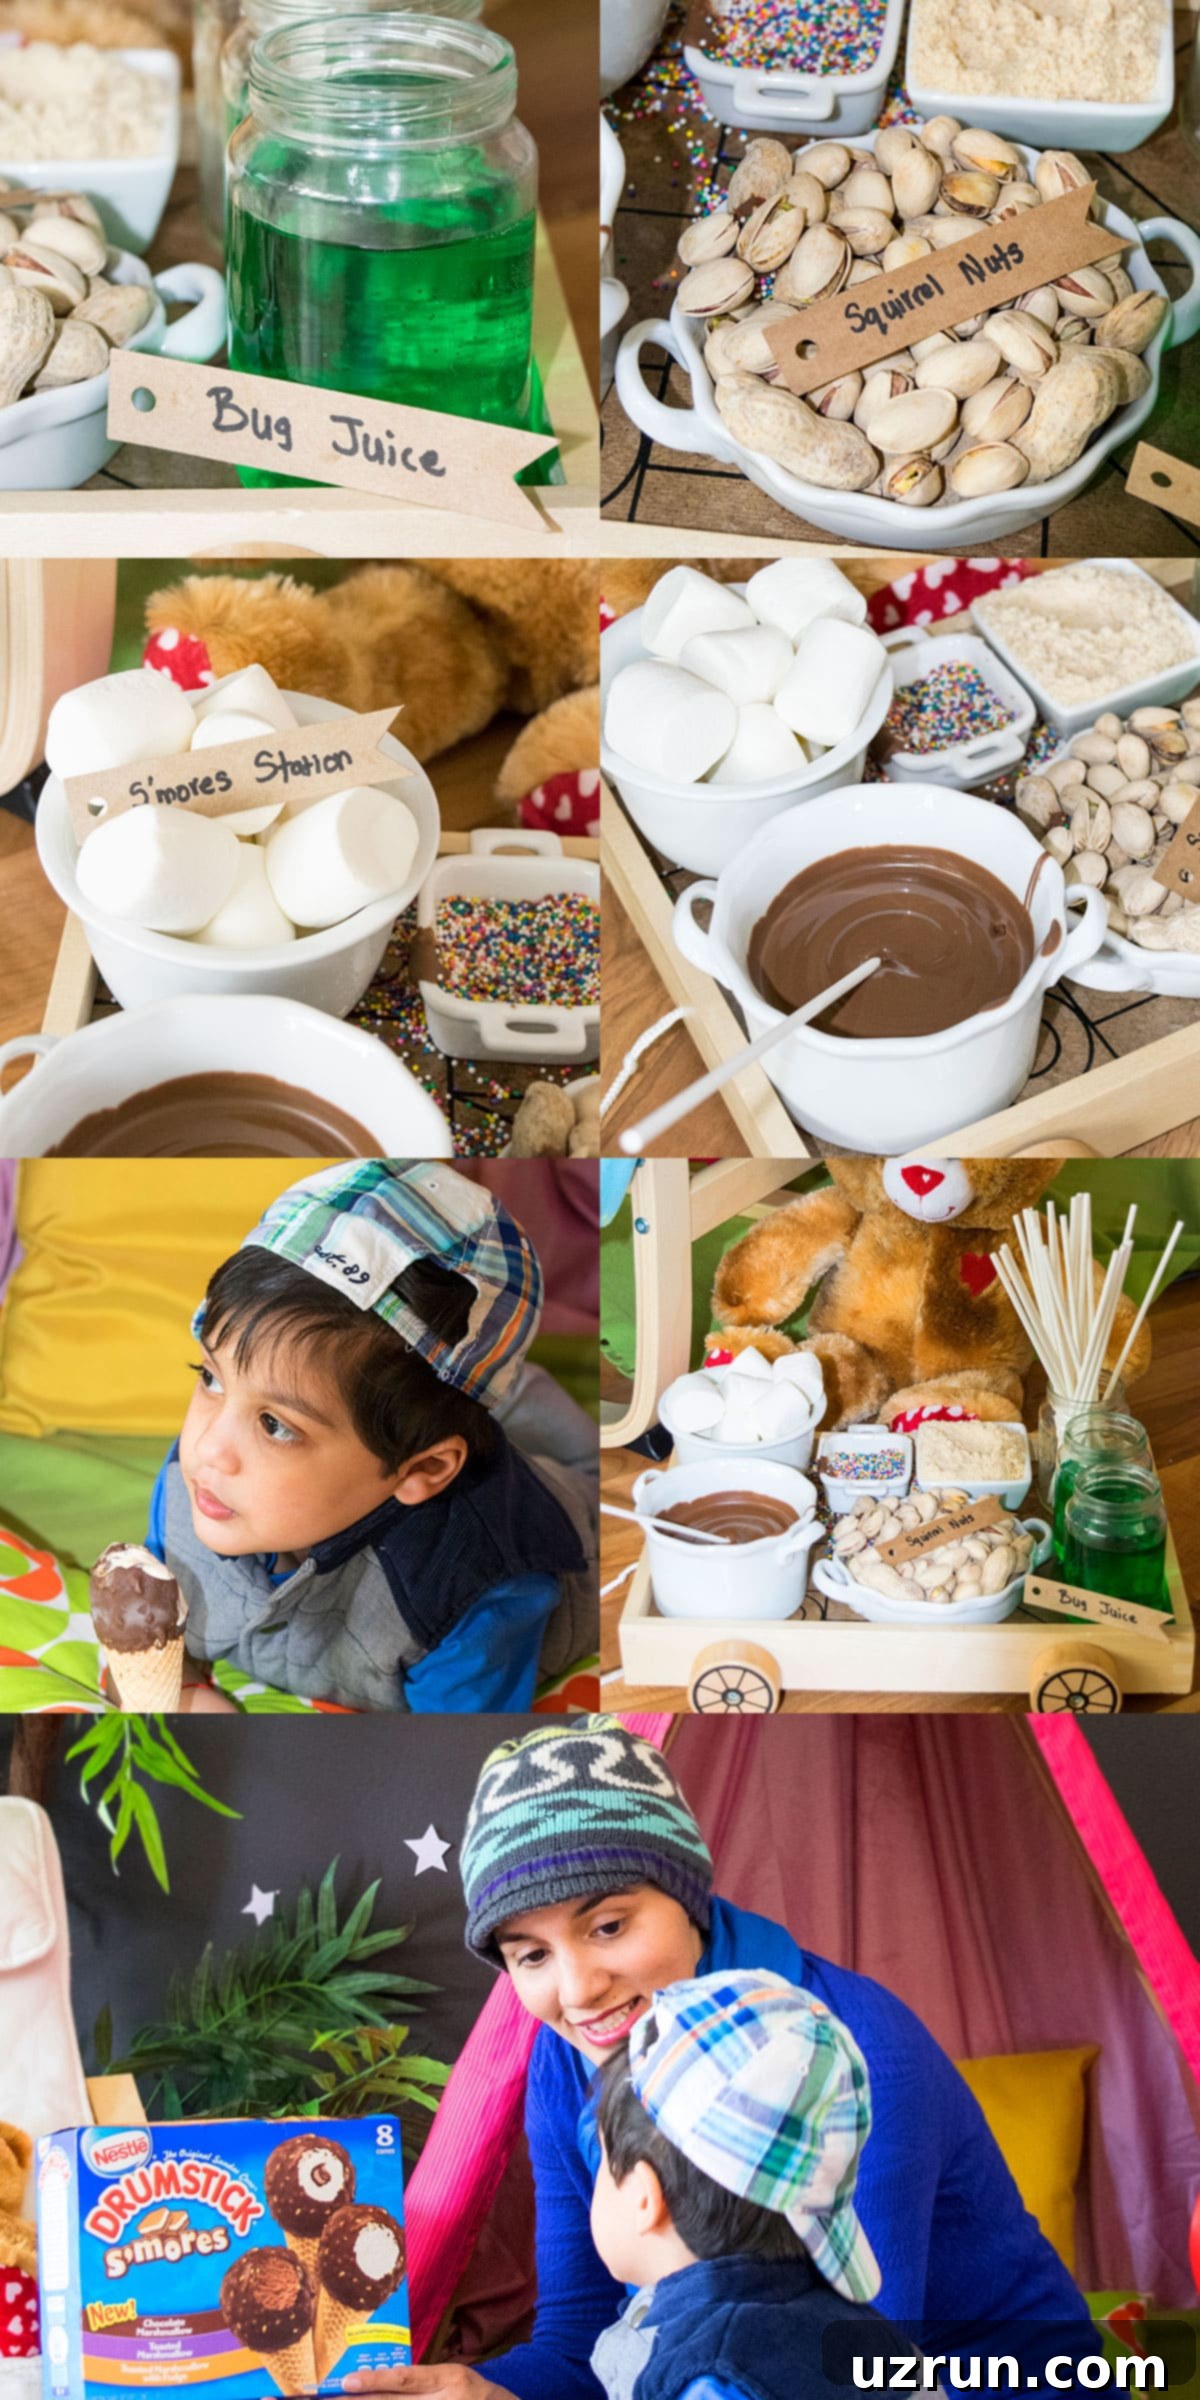
First and foremost, our magnificent camping cake, which you’ve just seen, was the star of the dessert table. But a camping adventure truly isn’t complete without s’mores! Since setting up a real open fire indoors wasn’t practical (or safe!), we opted for an easy and equally delightful alternative. We made “no-fire” s’mores by simply dipping marshmallows in melted chocolate and then rolling them in crushed graham crackers or festive sprinkles. The little one absolutely loved this hands-on activity, and the result was just as satisfying!
Every good camping party also calls for ice cream. So, we stocked up on a box of Nestlé® Drumstick® S’mores, which come in three irresistible flavors: Toasted Marshmallow with Fudge, Toasted Marshmallow, and Chocolate Marshmallow. Our unanimous favorite was the one with rich fudge – absolutely divine! My thoughtful little munchkin even shared his ice cream with his beloved teddy bear and his dear Mama, a truly heartwarming moment.
For beverages, we sipped on vibrant “green bug juice,” served in charming little jars. You can easily make this by mixing green fruit powders into water, or simply adding a few drops of green food coloring to water. For a more flavorful option, consider making my delicious kid-friendly green punch recipe. And because campsites often have busy little squirrels, we gathered some “squirrel nuts” – a fun name for a mix of trail mix, roasted almonds, or peanuts – to snack on and imagine sharing with our wild animal friends. These themed treats added another layer of fun and authenticity to our indoor camping celebration, making every bite an adventure.
Recipe
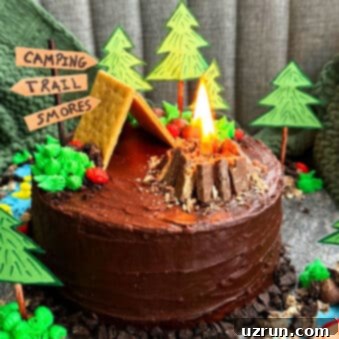
Easy Camping Cake (With Real Campfire)
Abeer Rizvi
Pin Recipe
Want to Save This Recipe?
Enter your email & I’ll send it to your inbox. Plus, get great new recipes from me every week!
By submitting this form, you consent to receive emails from CakeWhiz
Ingredients
- 2 Coca cola cake Round, 8×2 inches each
- 4 cups Chocolate buttercream icing
- ½ cups Green buttercream icing
- ½ cup Blue buttercream icing
- 2 Graham crackers
- 5-6 Soft caramel candies
- ¼ cup Whoppers Or your choice of round chocolate candy balls
- ¼ cup Red candy balls
- 1 cup Oreos Roughly chopped up (cream removed)
- 2 Kit Kats Broken up into rough shaped sticks
Instructions
-
Bake your chosen cake layers (e.g., Coca Cola cake) and allow them to cool completely on a wire rack.
-
While cakes are cooling, prepare your chocolate, green, and blue buttercream frostings.
-
Place one cooled cake layer on your chosen cake stand or serving board.
-
Using an offset spatula, spread an even layer of chocolate icing over the top of the first cake.
-
Carefully place the second cake layer directly on top of the frosted layer.
-
Use your spatula to frost the entire cake (top and sides) with the remaining chocolate buttercream in a rustic design. A perfectly smooth finish is not required.
-
Arrange the 2 graham cracker squares on top of the cake, leaning them against each other to form a tent.
-
Prepare cardboard or fondant trees and a camping sign. Attach a lollipop stick to the back of each. Push the base of the lollipop stick into a soft, chewy caramel candy to create a stable anchor, then place them on top of the cake and around the cake board, securing with a dab of icing.
-
Arrange some Whopper candy balls around the trees and camping sign to act as rocks.
-
Fill a piping bag with green icing and attach Wilton star tip #21 (or similar). Pipe grass around the base of the trees to cover the caramel candies and add texture. Sprinkle crushed Oreos (cream removed) and broken Kit Kats on top to create the illusion of dirt and stones.
-
Stick a few red candy balls randomly on the green buttercream for a vibrant pop of color, like berries.
-
To make the miniature campfire, arrange the broken Kit Kat pieces in a small, hollow circle on top of the cake. Push 3 small stick birthday candles into the middle of the circle. Trim the candles with scissors if needed to make them the same height as the Kit Kat logs.
-
Extend your scene to the cake board: use a spatula and blue icing to create small lakes or ponds on the board.
-
Arrange more Whopper candy balls around the lakes and sprinkle additional crushed Oreos and Kit Kats to blend them into the landscape.
-
If you have fish and duck candies or sprinkles, push those partially into the blue icing to create aquatic life.
-
Buy or make a small boat out of thick brown paper and place it gently on the blue frosting “lake.”
-
Finally, sprinkle crushed Oreos around the entire base of the cake on the board for a finished, cohesive look. Enjoy your magnificent camping cake!
Notes
- Always ensure your cake is completely cool before frosting to prevent melting.
- Extend your decorations to the cake board to create a complete and immersive camping scene.
- While not included in this recipe, feel free to add a delicious cake filling such as chocolate ganache or your favorite jam between the layers.
- The trees and camp sign decorations can be homemade from cardstock or purchased online/at craft stores, or even made from edible fondant.
- Refer to the “Essential Tips and Decorating Techniques” and “Creative Variations for Your Camping Cake” sections above for more helpful advice and customization ideas.
- Leftovers should be stored in a sealed container in the fridge and will remain fresh for up to 3 days.
Nutrition
An automated tool is used to calculate the nutritional information. As such, I cannot guarantee the accuracy of the nutritional information provided for any recipe on this site.
