Easy Boston Cream Pie (with Cake Mix): Your Ultimate Guide to a Classic Dessert
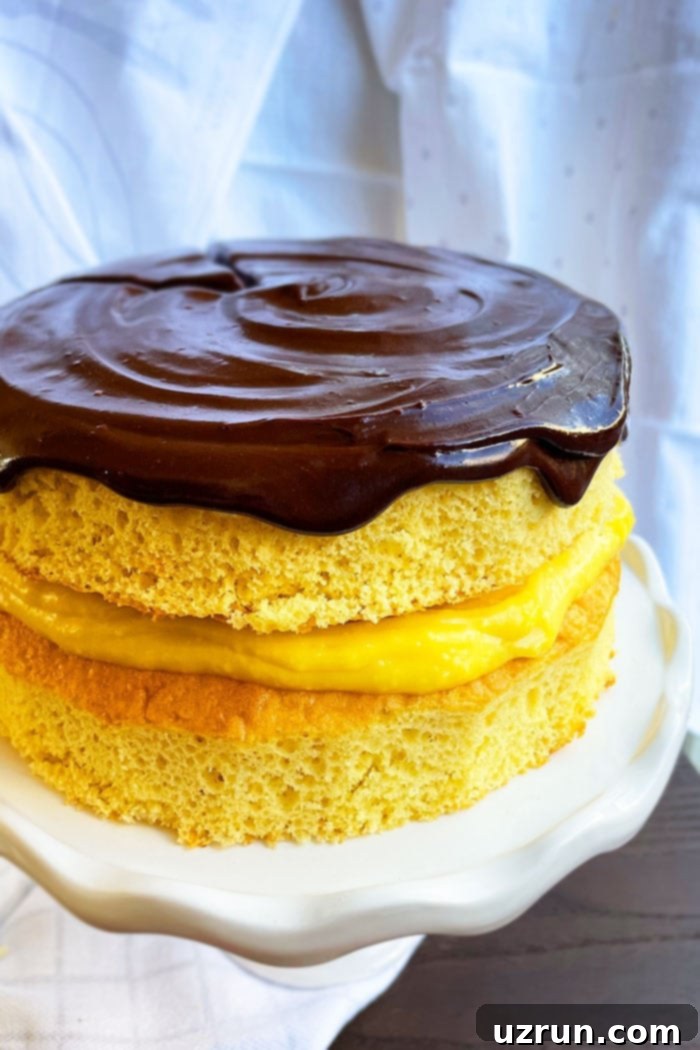
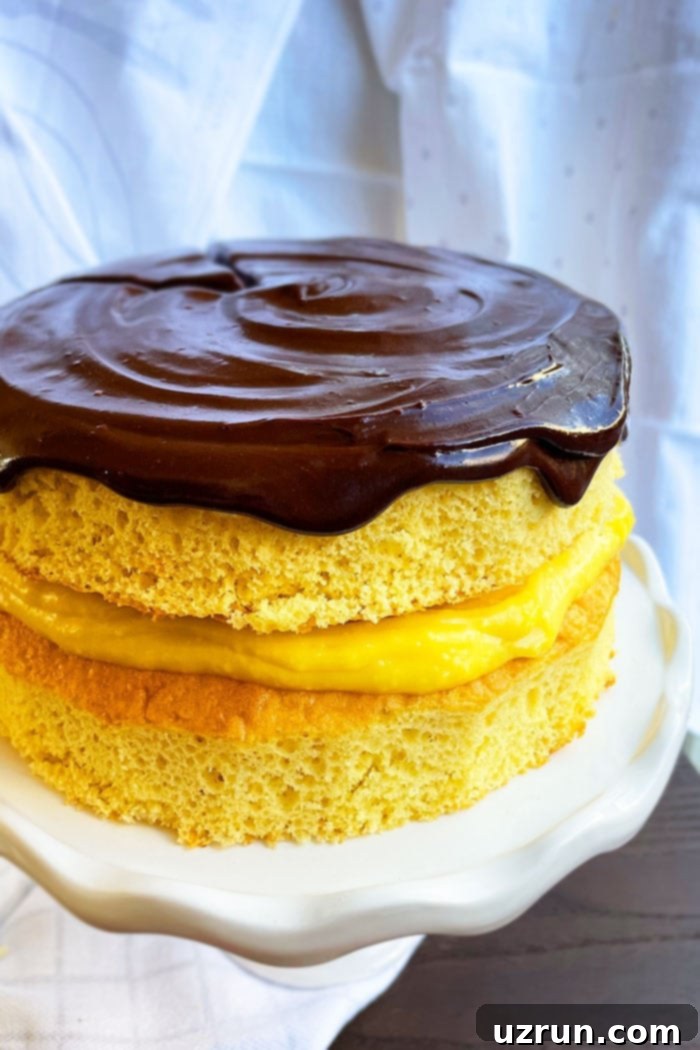
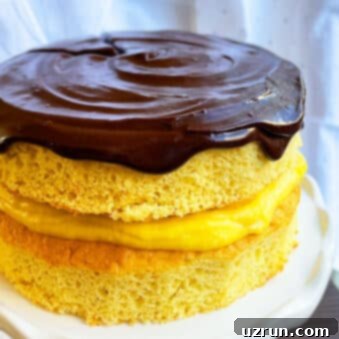
Step into the delightful world of classic American desserts with this incredibly easy Boston Cream Pie recipe. Often mistaken for a pie, this iconic dessert is actually a two-layer yellow cake, generously filled with a luscious vanilla pudding, and crowned with a rich, glossy chocolate ganache. What makes this particular recipe stand out is its clever use of a simple cake mix, transforming what might seem like a complex baking project into an accessible and enjoyable experience for home bakers of all skill levels. You don’t need to be a pastry chef or even travel to Boston to savor this official dessert of Massachusetts; with our straightforward instructions, you can recreate this beloved treat right in your own kitchen.
While you might be thinking of a flaky pie crust, rest assured, this Boston Cream “Pie” is definitively a cake! Its name is a nod to its historical origins, when “pies” often referred to baked goods that were round and filled. For those who prefer a more personalized, bite-sized version of this delightful dessert, be sure to check out these adorable Boston Cream Cupcakes. But for now, let’s focus on the grand classic that will surely impress.
How to Make Boston Cream Pie from Scratch (The Easy Way!)
Creating this stunning dessert might seem intimidating, but by utilizing a convenient yellow cake mix, we significantly streamline the process without compromising on flavor or texture. Follow these simple steps for a homemade Boston Cream Pie that tastes like it’s from a high-end bakery.
- Prepare the Wet Ingredients: In a large mixing bowl, combine your room temperature eggs, whole milk, melted unsalted butter, and vanilla extract. Whisk them together thoroughly until they are well integrated and smooth. Using room temperature ingredients is crucial as it helps create a more cohesive batter, resulting in a lighter, fluffier cake texture.
- Incorporate the Pudding: Add the pre-made vanilla snack pack pudding to your wet ingredients. Mix until this is completely smooth and there are no lumps. This adds an extra layer of moisture and a subtle vanilla flavor boost to your cake, distinguishing it from an ordinary yellow cake.
- Add the Cake Mix: Gently fold in the yellow cake mix. Be careful not to overmix at this stage; mix until just combined. Overmixing can develop the gluten too much, leading to a tough, dense cake. A few small lumps are perfectly fine and will disappear during baking.
- Pour the Batter: Divide your prepared cake batter evenly between two greased and floured (8×2 inch) round cake pans. Ensuring the pans are properly prepared prevents the cake from sticking and ensures an easy release. Alternatively, you can line the bottoms with parchment paper for extra insurance.
- Bake to Perfection: Bake the cakes at 350°F (175°C) for approximately 40 minutes, or until a wooden toothpick inserted into the center comes out clean. This is the ultimate test for doneness; an early removal might lead to a collapsed cake, while over-baking results in a dry cake.
- Cool the Cakes: Once baked, remove the cakes from the oven and let them cool in their pans for about 10-15 minutes before inverting them onto a wire rack. It’s absolutely essential that the cakes cool completely to room temperature before assembling. Attempting to fill or top a warm cake will cause your pudding and ganache to melt and create a messy situation.
- Prepare Filling and Ganache: While your cakes are baking and cooling, take this time to prepare your homemade vanilla pudding for the filling and the chocolate ganache for the topping. Both of these components require sufficient time to cool and thicken to the right consistency. The pudding needs to chill for several hours, ideally overnight, and the ganache should cool enough to be pourable but not runny.
- Trim the Cakes (Optional): If your cakes have domed tops, you can use a serrated knife to carefully level them. This creates flat surfaces for easier assembly and a more professional look. If the cake is too crumbly to trim, freezing it for 15-20 minutes can make slicing much easier. Placing the cut side down for each layer will also help achieve a perfectly level cake.
- Assemble the Cake: Place one cooled cake layer onto your serving plate or cake stand. Spread your chilled vanilla pudding evenly over this layer. Gently place the second cake layer on top. Finally, pour the cooled chocolate ganache over the top, letting it drip artfully down the sides.
Mastering the Filling: How to Perfectly Fill Your Boston Cream Pie
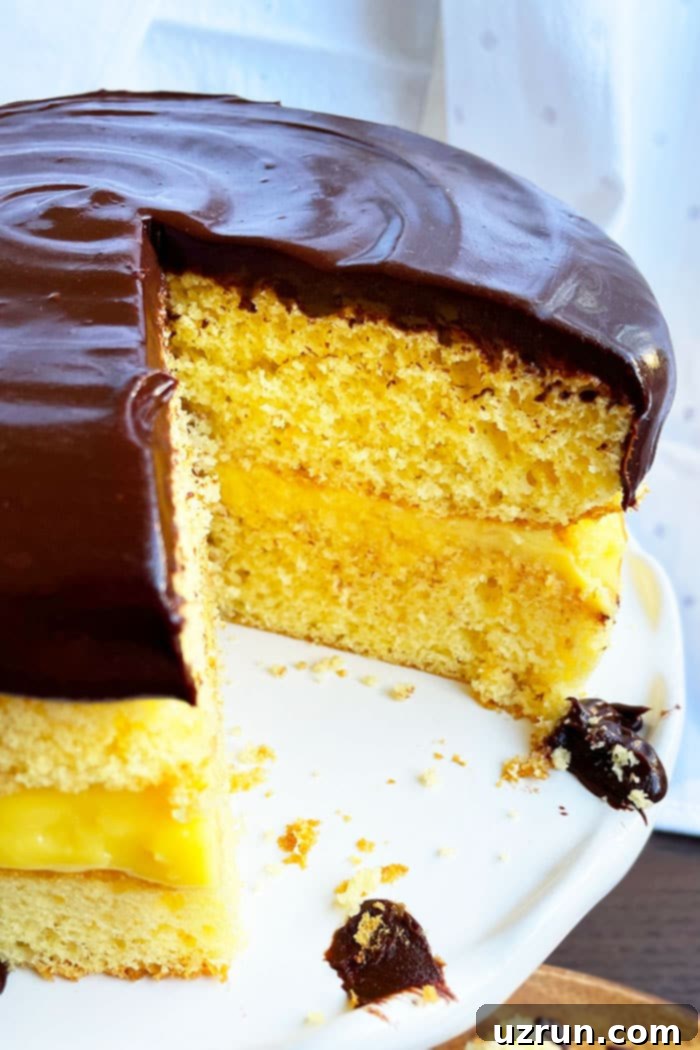
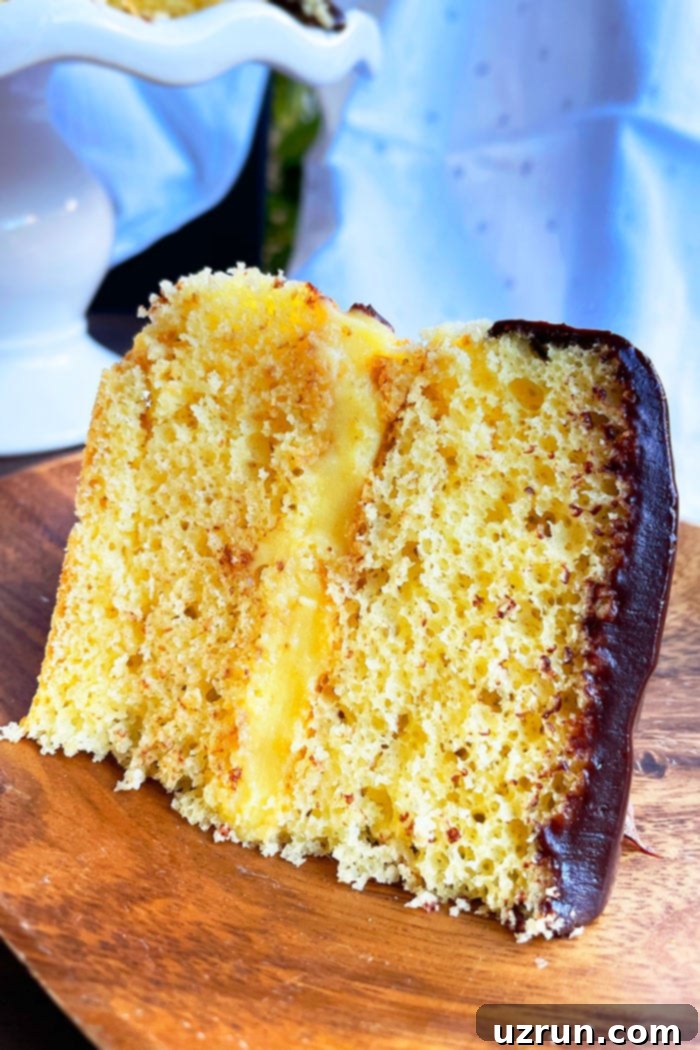
The filling is arguably the heart of the Boston Cream Pie, offering that delightful creamy contrast to the tender cake. Achieving a neat and perfectly distributed filling is key to both the aesthetics and taste of your dessert. The simplest method involves placing one cake layer on your serving plate, spreading the prepared vanilla pudding evenly across its surface with an offset spatula, and then carefully placing the second cake layer on top. If you’ve baked your cake in two separate pans, you can skip the step of cutting a single cake in half, making assembly even quicker.
When applying the filling, aim for an even layer from edge to edge. A good technique is to use an offset spatula to spread the pudding smoothly. For those who prefer a pristine, bakery-quality finish, consider transferring the pudding into a piping bag fitted with a large round or star tip (like Tip 1M). This allows for precise application, especially useful for creating a cleaner edge or even for Naked Cakes where the layers are visible. A crucial tip: do not overload the cake with filling. Too much pudding will inevitably ooze out from the sides when the top layer is added or when the cake is sliced, leading to a messy presentation. Approximately ½ cup of pudding per layer is usually sufficient for a balanced slice.
Boston Cream Pie Filling: Is it Custard or Pastry Cream?
A common question that arises with Boston Cream Pie is about its signature creamy filling. Is it a custard, or something else? The filling traditionally used in Boston Cream Pie is a smooth, rich **pastry cream** (crème pâtissière). While similar in their creamy texture and often sharing ingredients like eggs, milk, and sugar, there’s a subtle but important distinction between pastry cream and custard.
Pastry cream typically relies on a higher proportion of starch (like cornstarch or flour) as its primary thickening agent, in addition to egg yolks. This gives it a more stable, sliceable consistency when chilled. It’s almost always served cold or at room temperature as a filling for tarts, cakes, or éclairs. Custards, on the other hand, often rely more heavily on eggs for their thickening, resulting in a more delicate, wobbly texture. They can be baked (like crème brûlée) or stirred on the stovetop (like crème anglaise) and are frequently served warm as a sauce or dessert on their own. For our Boston Cream Pie, we use a homemade vanilla pudding, which aligns with the characteristics of a pastry cream due to its starch content and the fact that it’s served chilled for optimal firmness and flavor.
Creative Variations: Customizing Your Boston Cream Pie
While the classic Boston Cream Pie is perfect in its traditional form, there are countless ways to get creative and adapt this recipe to your taste or occasion. Here are some inspiring variations to try:
- Make Mini Cakes: Instead of a large, full-sized cake, bake individual Boston Cream Pies using 4-inch round cake pans or even standard cupcake pans. Adjust baking times accordingly. These mini versions are perfect for individual servings, parties, or gifting.
- Add a Nutty Crunch: Introduce a delightful texture contrast by adding nuts. After spreading a thin layer of pudding or ganache around the sides of the cake, gently press slivered almonds, chopped pecans, walnuts, or pistachios onto the sides. You can also sprinkle them generously on top of the chocolate ganache before it sets. Toasting the nuts beforehand enhances their flavor profile.
- Layer it Up: For a more dramatic presentation and an extra dose of filling, cut your baked cake layers in half horizontally to create a four-layer cake. Alternate layers of cake with vanilla pudding and ganache, creating a truly decadent dessert. Ensure each layer is thin and even for stability.
- Fresh Fruit Medley: Brighten up your Boston Cream Pie with fresh fruit. A handful of vibrant raspberries or sliced strawberries on top of the ganache, or even layered with the pudding, adds a refreshing tartness that balances the richness of the cake. Dust with powdered sugar and garnish with a fresh mint leaf for an elegant touch. Freeze-dried fruit can also add a pop of color and intense flavor.
- Transform into a Trifle: Deconstruct your Boston Cream Pie into a delightful trifle! Cut your cooled cake into cubes. Layer these cake cubes in a large glass bowl with spoonfuls of vanilla pudding and chocolate ganache. Repeat the layers until your trifle bowl is full, creating a visually stunning and incredibly delicious dessert.
- Decorate the Ganache: Don’t just pour and spread the ganache. Use the back of a spoon to create elegant swirls, waves, or other artistic designs on the top of the cake before it fully sets. This adds a personalized touch and enhances the cake’s visual appeal.
- Sprinkle Magic: A simple yet effective way to decorate is by adding sprinkles or chocolate shavings. Choose colorful sprinkles for a festive look or dark chocolate shavings for sophisticated elegance. Toss them generously over the wet ganache so they adhere.
- Tiered Celebration Cake: For a special event, double or triple the recipe to create a stunning tiered Boston Cream Pie. Bake cakes of various sizes and stack them, remembering to use dowels or supports between layers for stability. This creates a magnificent centerpiece.
- Explore Other Pudding Flavors: While vanilla is classic, don’t shy away from experimenting with other pudding flavors for a unique twist. Consider a rich Homemade Banana Pudding for a fruity note, or a luxurious Vegan Chocolate Pudding for a deeper cocoa experience (adjusting for dietary needs if applicable).
- Venture with Different Cake Flavors: Stepping outside the traditional yellow cake can open up a world of new flavors. A moist chocolate cake, such as this Moist Triple Chocolate Cake (From Scratch), could offer a wonderfully rich contrast to the vanilla pudding and chocolate ganache. A delicate almond cake or a subtly spiced cake could also create intriguing flavor profiles.
Essential Tips & Troubleshooting for Boston Cream Pie Success
Even with a simplified cake mix recipe, a few expert tips and techniques can make all the difference, ensuring your Boston Cream Pie turns out perfectly every time. Here’s what you need to know:
- The Importance of Room Temperature Ingredients: Always use eggs, milk, and other dairy ingredients at room temperature when baking cakes. This allows them to emulsify better with the fats, creating a smoother, more uniform batter. The result is a lighter, fluffier, and more tender cake with a finer crumb. Cold ingredients can cause the batter to seize and become lumpy.
- Preventing Cake from Sticking: Nothing is more frustrating than a cake that clings stubbornly to its pan. Ensure your cake pans are thoroughly greased and floured, or greased and lined with parchment paper at the bottom. This creates a non-stick barrier that allows the cake to release cleanly after baking. Don’t skip the flouring step even if using a non-stick pan.
- Avoiding a Dry Cake: A dry cake is often an over-baked cake. To prevent this, always monitor your cake closely towards the end of the baking time. Start checking for doneness a few minutes before the recipe suggests. Insert a toothpick into the very center; if it comes out clean, the cake is ready. Remove it from the oven immediately to prevent further drying.
- Why Cakes Collapse: Several factors can cause a cake to collapse in the center. Overmixing the batter can lead to too much air being incorporated, causing the cake to rise quickly and then fall. Under-baking is another common culprit, as the cake’s structure isn’t fully set. Most importantly, resist the urge to open the oven door during the crucial initial baking phase. A sudden drop in temperature can shock the cake, preventing it from setting properly and causing it to sink.
- Trimming for a Level Surface: Trimming the domed tops of your cake layers is an optional but highly recommended step for a polished, professional-looking cake. Use a long serrated knife to carefully slice off any unevenness, creating a flat surface. If your cake feels too soft or crumbly to trim cleanly, place it in the freezer for about 15-20 minutes. This firms it up, making it much easier to slice without crumbling.
- Assembling a Level Cake: For the flattest possible cake, always place the cut side of each trimmed layer face down when assembling. This ensures that the smoothest, most level part of the cake forms the top and bottom of your dessert, creating a clean, even presentation.
- Use Unsalted Butter: Stick to unsalted butter in your cake recipe. This gives you complete control over the salt content of your dessert. Using salted butter, especially with a cake mix that might already contain salt, can make your Boston Cream Pie overly salty and throw off the flavor balance.
- Do Not Substitute Butter: Resist the temptation to replace butter with oil or shortening in the cake recipe. Butter contributes significantly to the cake’s flavor, moisture, and tender crumb. Substituting it will alter the texture and taste, potentially resulting in a cake that is less rich or has a different mouthfeel than intended.
- Cool Cakes Completely Before Assembly: This cannot be stressed enough. Attempting to assemble a warm or even slightly warm cake will lead to disaster. The warmth will cause your delicate vanilla pudding and rich chocolate ganache to melt and run, resulting in a messy, unstable cake. Patience is key; ensure all components are fully chilled or at room temperature before layering.
- Avoid Over-Filling with Pudding: While tempting to load up on the creamy filling, too much pudding will inevitably leak out from the sides of the cake, creating a very messy appearance. Aim for about ½ cup of pudding per layer for a balanced and tidy result. Spread it evenly, leaving a small margin from the edge to prevent spills.
- Snack Pack Pudding vs. Instant Mix: For this particular yellow cake recipe, it’s crucial to use the pre-made, prepared “Snack pack” style vanilla pudding. Do not substitute this with an instant pudding *mix* that requires additional preparation. The snack pack pudding adds specific moisture and flavor to the cake batter in a way that dry mix cannot replicate.
Storage & Make-Ahead Tips for Your Boston Cream Pie
Proper storage is essential to keep your Boston Cream Pie fresh and delicious, especially given its perishable filling. Here’s how to manage leftovers and prepare components in advance:
- Refrigerate: Due to the dairy-based pudding filling, Boston Cream Pie must be stored in the refrigerator. Place any leftover slices or the entire cake in a sealed, airtight container. It will remain fresh and delightful for up to 3 days.
- Room Temperature: Storing this cake at room temperature is strongly not recommended. The perishable nature of the pudding filling means it can quickly spoil or grow bacteria if left out for extended periods. Always keep it chilled.
- Freezer: For longer storage, you can freeze individual components. The unfrosted cake layers and the prepared chocolate ganache can be stored separately in airtight containers for up to 1 month. However, the vanilla pudding filling does not freeze well; its texture will become watery and grainy upon thawing. When you’re ready to enjoy a frozen cake, allow the cake layers and ganache to thaw overnight in the refrigerator. Then, prepare a fresh batch of vanilla pudding, chill it thoroughly, and assemble the cake as directed.
- Make-Ahead Instructions: Boston Cream Pie is an excellent candidate for making ahead, which can save you significant time on the day you plan to serve it. The homemade vanilla pudding requires several hours (or preferably overnight) to chill and set properly. The chocolate ganache also needs time to cool and thicken to the right consistency. Furthermore, the baked cake layers must be completely cool before assembly. Therefore, it’s highly advisable to prepare the pudding and ganache a day in advance. You can also bake the cake layers a day ahead and store them tightly wrapped at room temperature. This allows for a stress-free assembly process on serving day.
More Delicious Cake Recipes to Explore
If you’ve enjoyed making this Boston Cream Pie, you might be ready to tackle more exciting cake recipes. Here are some other favorites:
- German Chocolate Cake: A rich chocolate cake with a unique coconut-pecan frosting.
- Strawberry Shortcake Cake: A light and airy cake layered with fresh strawberries and whipped cream.
- Easy Black Forest Cake {With Cake Mix}: A simplified version of the classic cherry and chocolate cake, made easy with cake mix.
- Easy Key Lime Cake (With Cake Mix): A zesty and refreshing cake that captures the taste of key lime pie.
Recipe
Boston Cream Pie (With Cake Mix)
Abeer Rizvi
Pin Recipe
Want to Save This Recipe?
Enter your email & I’ll send it to your inbox. Plus, get great new recipes from me every week!
By submitting this form, you consent to receive emails from CakeWhiz
Ingredients
Cake
- 4 Eggs Large, Room temperature
- 1 cup Whole milk Room temperature
- ½ cup Butter Melted, Unsalted
- 2 teaspoon Vanilla extract
- 1 container Vanilla snack pack pudding 3.25 oz
- 1 Yellow cake mix
Filling
- 1 cup Homemade vanilla pudding
Topping
- 1 cup Chocolate ganache Use 1:1 ratio (1 cup chocolate chips and 1 cup heavy cream)
Instructions
-
In a large mixing bowl, add eggs, milk, butter, vanilla and mix until combined.
-
Add vanilla pudding and mix until smooth.
-
Add cake mix and mix until just combined.
-
Pour batter in two greased and floured round cake pans (Dimensions: 8×2).
-
Bake at 350 degrees F for 40 minutes or until an inserted toothpick in the center comes out clean.
-
Remove from oven and let the cakes cool completely.
-
While the cakes and baking and cooling, prepare the pudding and ganache and let them cool and thicken.
-
To assemble, trim the edges and domes of the cake (optional).
-
Place one cake on cake stand.
-
Use a spatula to spread vanilla pudding on top.
-
Place the other cake on top of the pudding.
-
Pour ganache on top and spread it with a spatula so that it starts dripping slightly along the sides of the cake. Enjoy!
Notes
- Be sure to read all the detailed tips and techniques provided above for the best results!
- Leftover Boston Cream Pie should be stored in a sealed container in the fridge for up to 3 days.
Nutrition
An automated tool is used to calculate the nutritional information. As such, I cannot guarantee the accuracy of the nutritional information provided for any recipe on this site.
