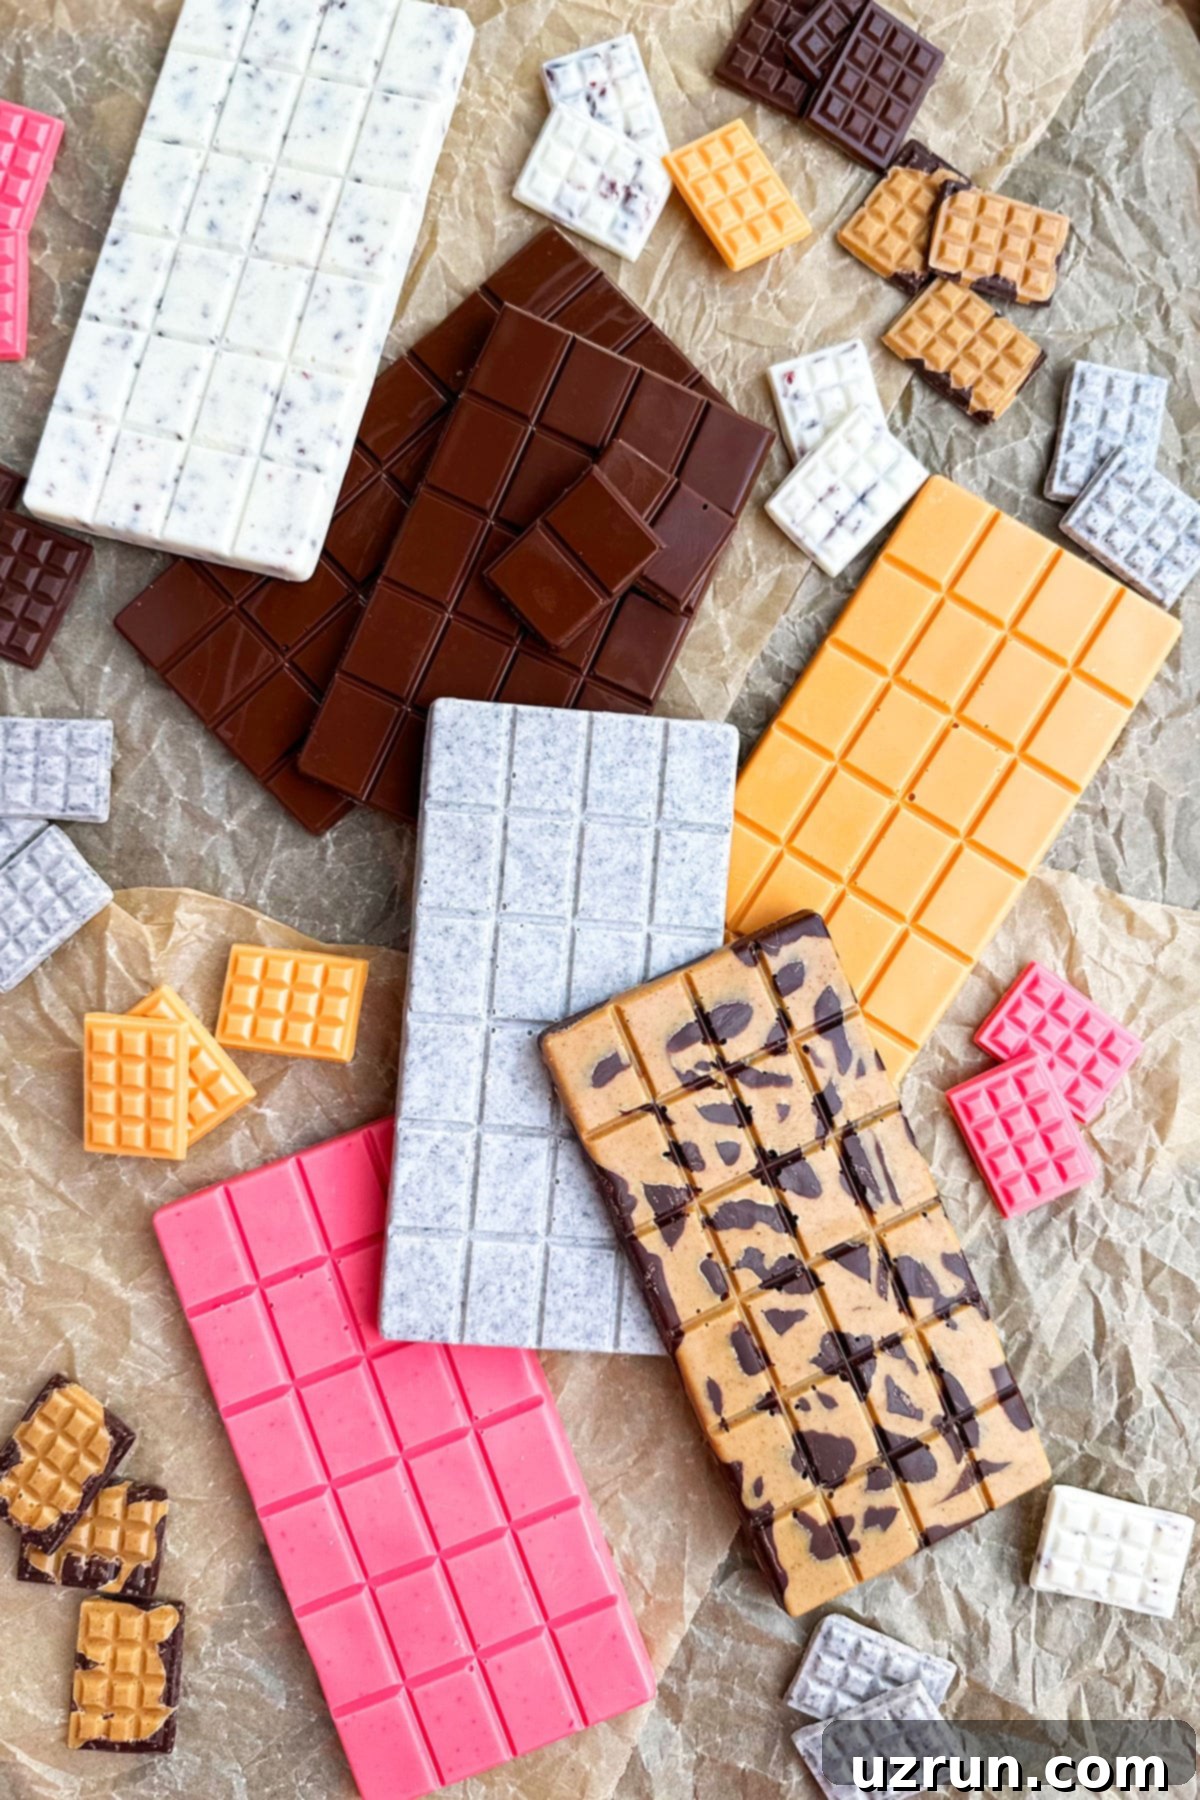
Easy Homemade Chocolate Bars Recipe: Craft Your Own from Scratch (Dark, Milk & White)
Imagine biting into a rich, creamy, and perfectly customized chocolate bar, knowing you made it yourself with just a few simple ingredients. This comprehensive guide will show you exactly how to make homemade chocolate bars from scratch using only four core ingredients: cocoa powder, cacao butter, powdered sugar, and milk powder. Whether your heart desires a deep, intense dark chocolate, a silky smooth milk chocolate, a balanced semisweet, or a sweet, velvety white chocolate, this recipe has you covered. Beyond the basic flavors, we’ll explore a bounty of creative add-in options, allowing you to personalize every bar to your unique taste or for special occasions.
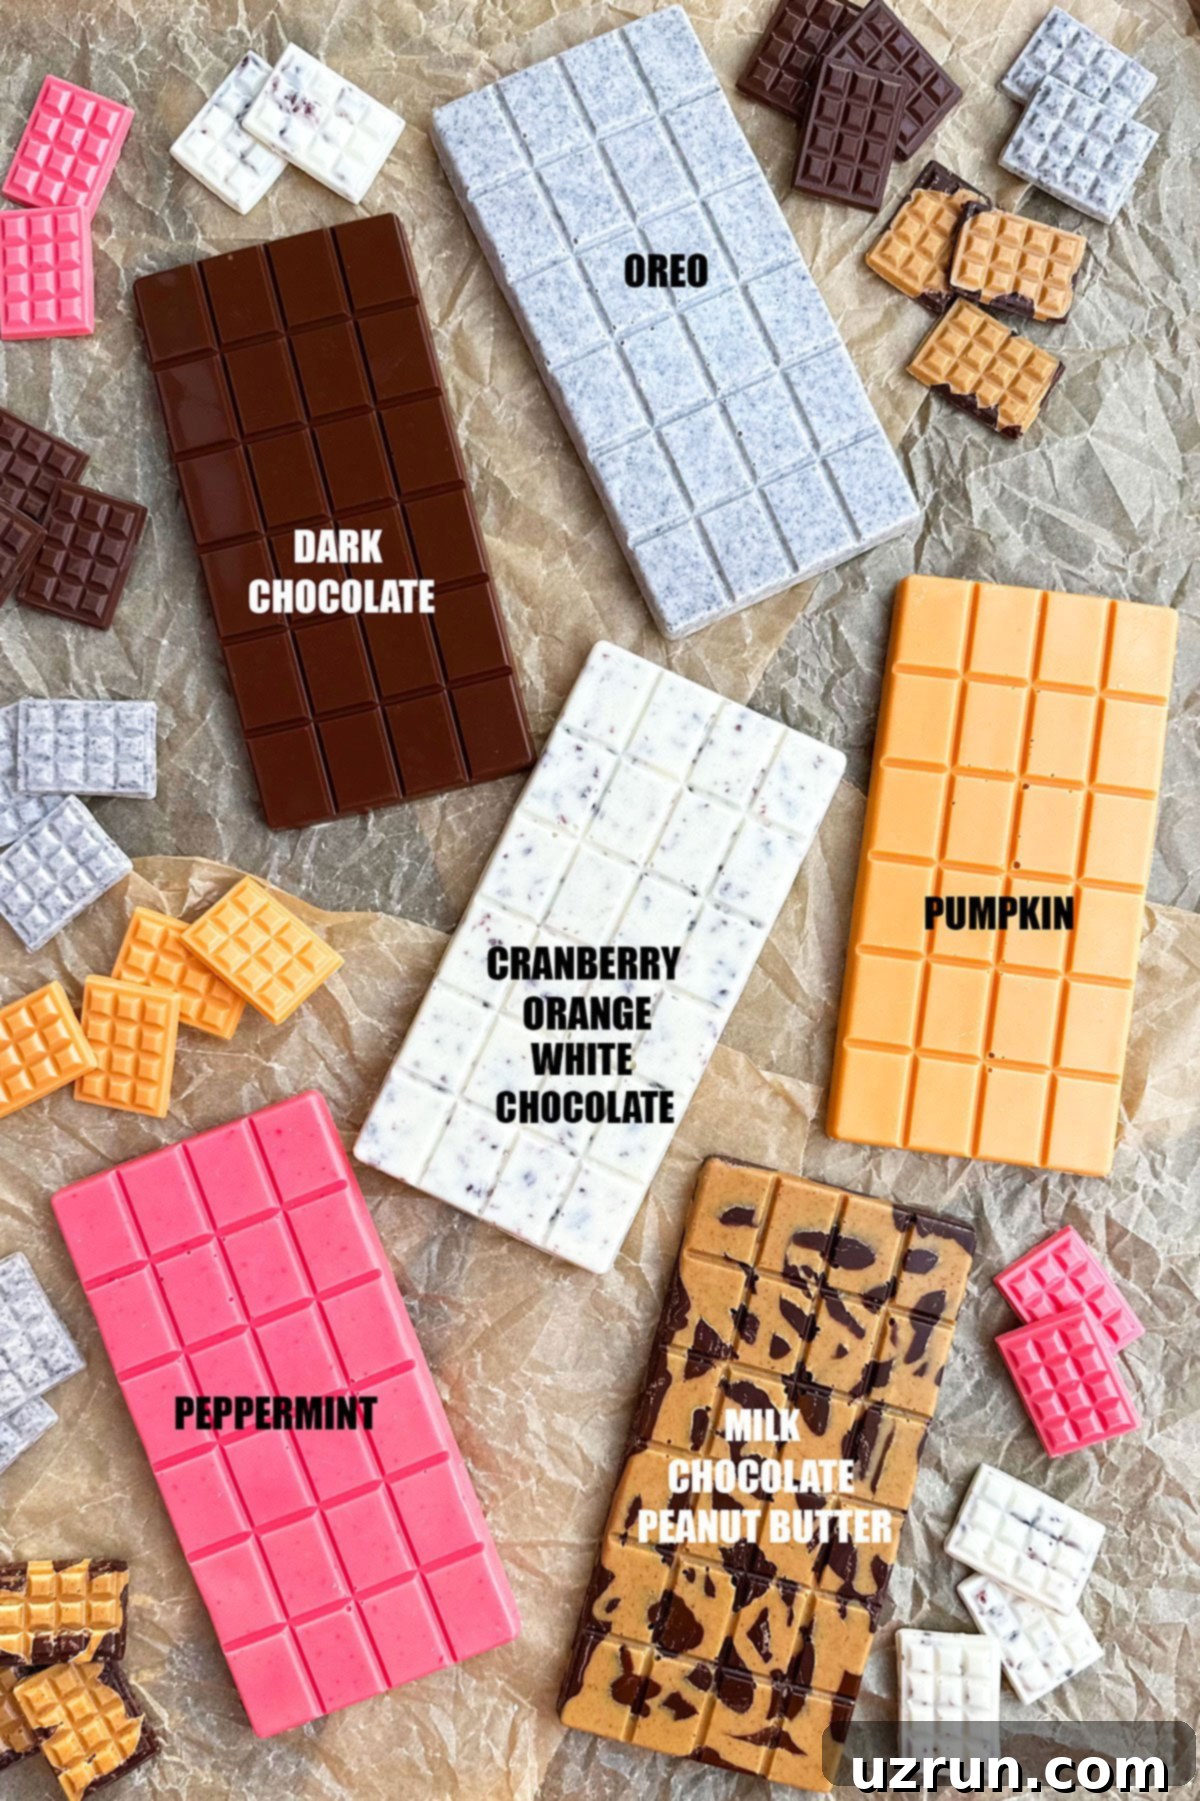
These rich and creamy homemade chocolate bars are not just a treat for yourself; they make a fantastic addition to any collection of Easy Homemade Christmas Gift Ideas. Imagine gifting a personalized assortment of chocolate delights! You can even tuck them into festive Christmas Cookie Boxes to fill any empty spaces and add an extra touch of sweetness. There’s something truly special and thoughtful about handmade gifts, and these chocolates are sure to impress. If you’re looking for more candy inspiration to round out your homemade gifting, be sure to explore these simple yet decadent Chocolate Truffles (3 Ingredients) and the ever-popular Chocolate Chip Cookie Dough Bars.
Table of contents
- Key Ingredients for Best Homemade Chocolate Bars
- Exciting Variations & Customizations
- How to Make Easy Homemade Chocolate from Scratch in Molds?
- Creative Toppings and Add-ins for Your Chocolate Bars
- Essential Tips and Techniques for Perfect Homemade Chocolate
- Homemade Chocolate Recipe FAQs
- Storage Best Practices for Homemade Chocolate
- More Delicious Chocolate Desserts to Explore
Key Ingredients for Best Homemade Chocolate Bars
Creating sensational chocolate bars at home starts with understanding the role of each primary ingredient. Our simple recipe relies on just four core components, each vital for achieving that desirable chocolate texture and flavor. Let’s dive into what makes these ingredients so essential:
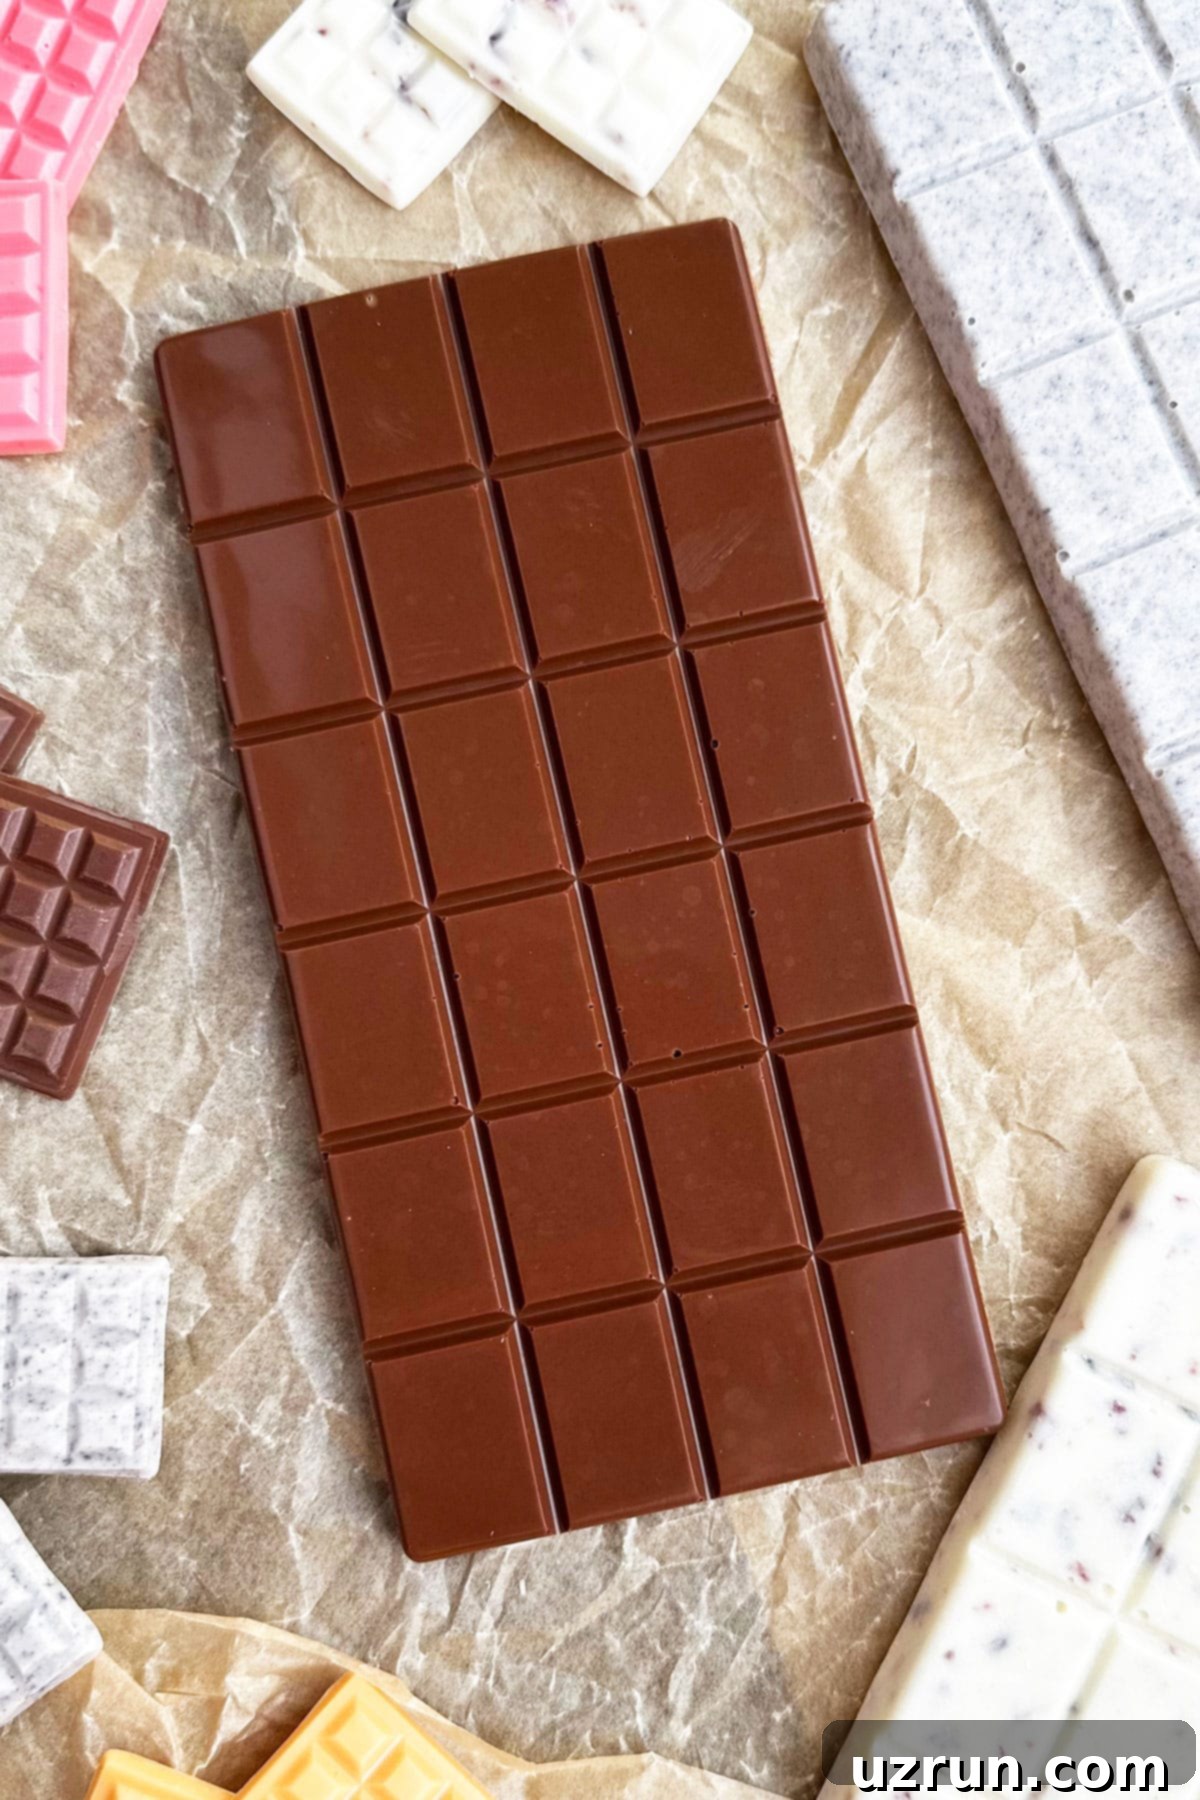
- Cocoa Powder: This is the heart of your dark, milk, and semisweet chocolate, providing all the rich, chocolatey goodness. The quality of your cocoa powder directly impacts the final flavor, so invest in the best you can find. For white chocolate, this ingredient is omitted entirely, as white chocolate gets its character from cacao butter and milk solids. You can experiment with natural cocoa powder for a fruitier, more acidic note, or Dutch-processed cocoa for a darker, mellower flavor.
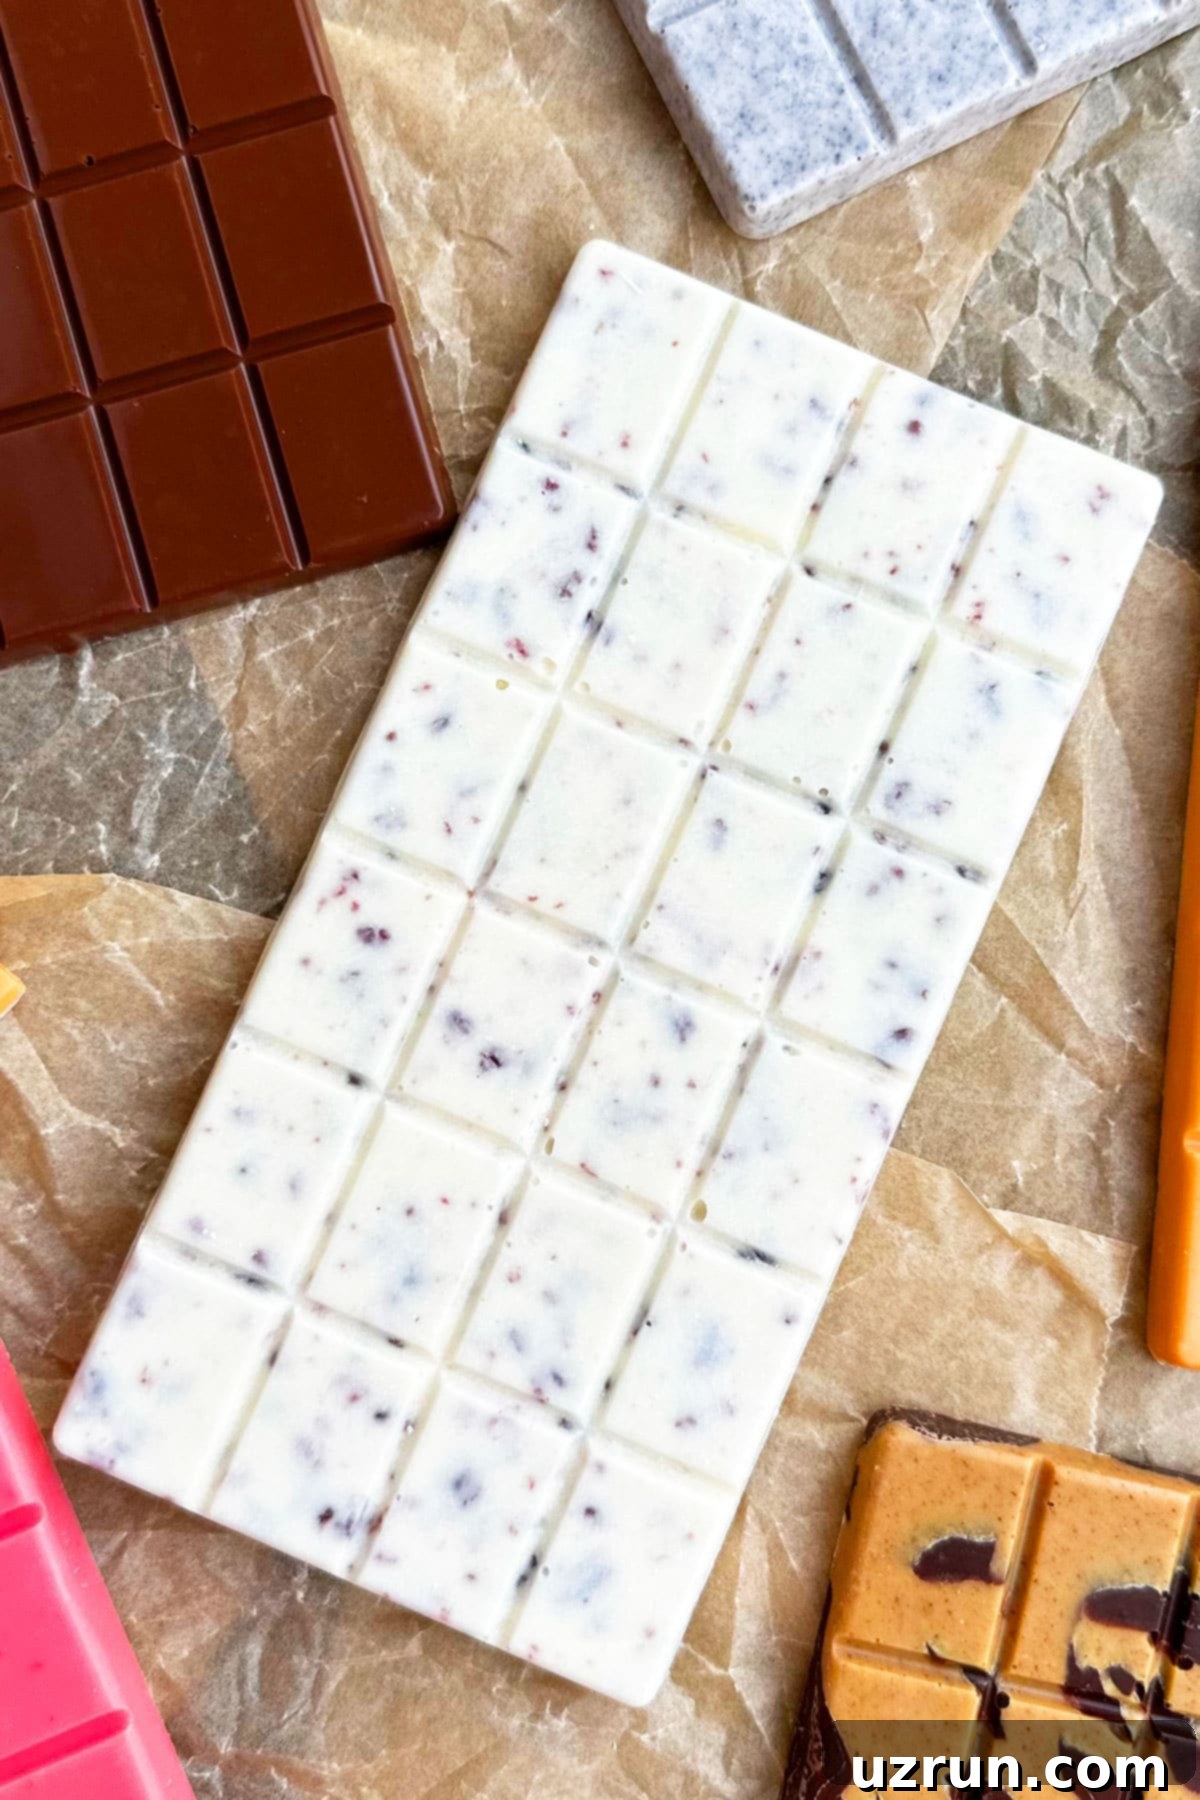
- Milk Powder: Crucial for achieving the creamy texture and characteristic flavor of milk and white chocolate. It’s imperative to use whole milk powder, not low-fat or fat-free versions. The fat content in whole milk powder contributes significantly to the chocolate’s smooth mouthfeel and helps it solidify correctly. Liquid milk cannot be substituted, as it will cause the chocolate mixture to seize and become grainy.
- Powdered Sugar (Confectioners’ Sugar): This provides the sweetness and, more importantly, a super fine texture that contributes to the overall smoothness of your homemade chocolate. Unlike granulated sugar, powdered sugar dissolves easily into the cacao butter without leaving a gritty sensation. The quantity can be easily adjusted to create dark (less sugar), semisweet (moderate sugar), milk (more sugar), or even unsweetened chocolate (no sugar) to perfectly suit your palate.
- Cacao Butter: The foundational fat that gives chocolate its signature melt-in-your-mouth texture and snap. Cacao butter should be food-grade and melted gently before being incorporated into the dry ingredients. It’s what carries the flavors and provides the structure for your bars. While coconut oil can be used in a pinch, cacao butter offers superior stability, a neutral flavor, and a much better texture for a traditional chocolate bar experience. Look for it in specialty baking stores or online.
Exciting Variations & Customizations
One of the greatest joys of making chocolate at home is the endless possibility for customization. Once you’ve mastered the basic recipe, you can unleash your creativity and craft unique flavor combinations and decorative elements. Here are some fantastic ideas to inspire your next batch:
- Use Different Molds: The world of silicone molds is vast and wonderful! Beyond classic bar shapes, you can find everything from intricate floral designs to fun Lego molds, geometric patterns, or even seasonal shapes for holidays. Using different molds adds a professional and artistic touch, making your homemade chocolates even more appealing, especially when gifting.
- Experiment with New Add-ins: This is where the real fun begins! Don’t be afraid to experiment with a variety of textures and flavors. While it might take a little trial and error to find your perfect combination, the options are limitless. Consider toasted nuts, dried fruits, crunchy cereals, or small candy pieces. Refer to our dedicated “Toppings and Add-ins” section below for a comprehensive list of ideas.
- Create Unique Press Discs (if applicable): If you’re using specialized chocolate-making equipment or presses, different discs can create beautiful, intricate shapes for various occasions, elevating the visual appeal of your chocolates.
- Make Delightful Cookie Sandwiches: Transform your chocolate into an even more decadent treat by sandwiching various frostings and fillings between two cookies. Imagine a rich chocolate bar filled with Chocolate Whipped Cream, fluffy Whipped Cream, tangy Raspberry Pie Filling, or spiced Crockpot Apple Butter.
- Consider Adding a Luscious Filling: For a truly gourmet experience, incorporate a gooey or creamy filling. A thick, homemade Caramel Sauce or a rich Chocolate Ganache can be layered into your molds before pouring the chocolate mixture over them, creating delightful surprise centers.
- Infuse with Fresh Zests: Brighten up your chocolate with aromatic citrus zests. Finely grated orange, lemon, or lime zest adds a vibrant, fragrant note that beautifully complements the chocolate, especially white or dark varieties.
- Use as a Topping or Decoration: Your homemade chocolate isn’t just for eating on its own! Use it to elegantly decorate cakes, similar to how I’ve used chocolate in my Chocolate Bark Cake or Kit Kat Cake. Mini homemade chocolate pieces also make perfect cupcake toppers for special occasions. Try them on my Chocolate Strawberry Cupcakes, Lemon Raspberry Cupcakes, Red Velvet Cupcakes, or Gingerbread Cupcakes.
- Integrate into Other Layered Bar Recipes: These homemade chocolate bars can serve as a superior replacement for store-bought chocolate in other recipes. For instance, substitute them for the Hershey bars in these amazing Cookie Bars (5 Layers) for an elevated flavor profile.
How to Make Easy Homemade Chocolate from Scratch in Molds?
Making your own chocolate bars from scratch might sound intimidating, but with our step-by-step guide, it’s surprisingly simple and incredibly rewarding. The key to success lies in proper ingredient preparation and gentle handling. Follow these easy steps to craft your perfect chocolate bars:
- Prepare a Very Fine Powder Mixture: The secret to smooth, homemade chocolate is ensuring your dry ingredients are incredibly fine. Combine the cocoa powder (if making dark, milk, or semisweet), whole milk powder, and powdered sugar in a clean coffee grinder or a powerful blender. Process until you achieve a powder as fine as flour, ensuring no visible granules remain. This crucial step prevents a gritty texture in your final chocolate.
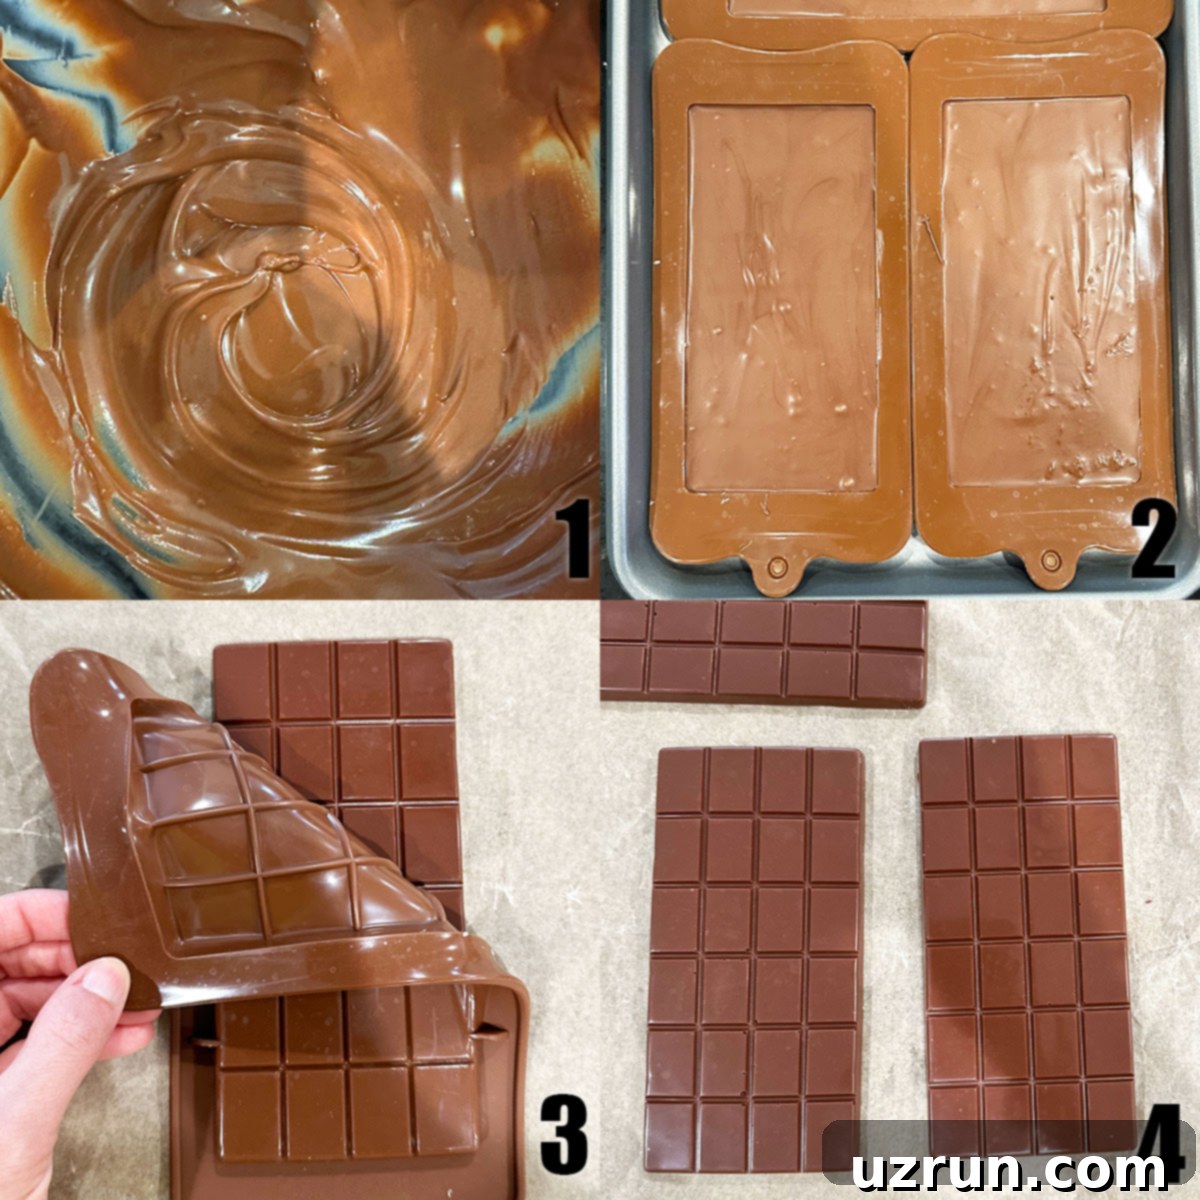
- Combine with Melted Cacao Butter: In a clean, dry mixing bowl (preferably warmed slightly or over a double boiler for optimal smoothness), pour your gently melted, food-grade cacao butter. Gradually, and I mean *gradually*, add the finely ground dry mixture to the cacao butter, a tablespoon at a time. Stir continuously and thoroughly after each addition. This slow incorporation ensures a silky smooth, lump-free mixture, forming the perfect base for your delicious chocolate. (1)
- Incorporate Your Desired Add-ins: Once your chocolate base is smooth and uniform, it’s time to add your personal touch. This is when you’d stir in flavor extracts (ensure they are oil-based to prevent seizing), ground spices, nut butters, sprinkles, or small candy pieces. For larger, chunkier add-ins like nuts or dried fruit, you can either stir them directly into the mixture or sprinkle them into the molds before or after pouring the chocolate.
- Pour into Molds: Carefully spoon or pour the chocolate mixture into your chosen silicone molds. Fill them evenly, ensuring the chocolate reaches all corners for a professional finish. Gently tap the molds on your countertop a few times to release any trapped air bubbles, which helps achieve a smooth surface. (2)
- Initial Setting at Room Temperature: Do not rush the cooling process! Allow the filled molds to sit at room temperature for approximately 20 minutes. This allows the chocolate to begin setting gradually, which helps prevent “blooming” (white streaks or dullness) that can occur from too rapid cooling.
- Chill to Firmness: After the initial room temperature setting, transfer the molds to the refrigerator. Chill for another 20-30 minutes, or until the chocolate bars are completely firm and easily release from the molds.
- Demold and Enjoy: Once thoroughly chilled, turn the mold onto a clean sheet of wax paper or parchment paper. Gently flex the silicone mold to release the hardened chocolate bars. They should pop out easily if fully set. Now your beautiful, homemade chocolate bars are ready to be enjoyed or packaged! (3,4)
Creative Toppings and Add-ins for Your Chocolate Bars
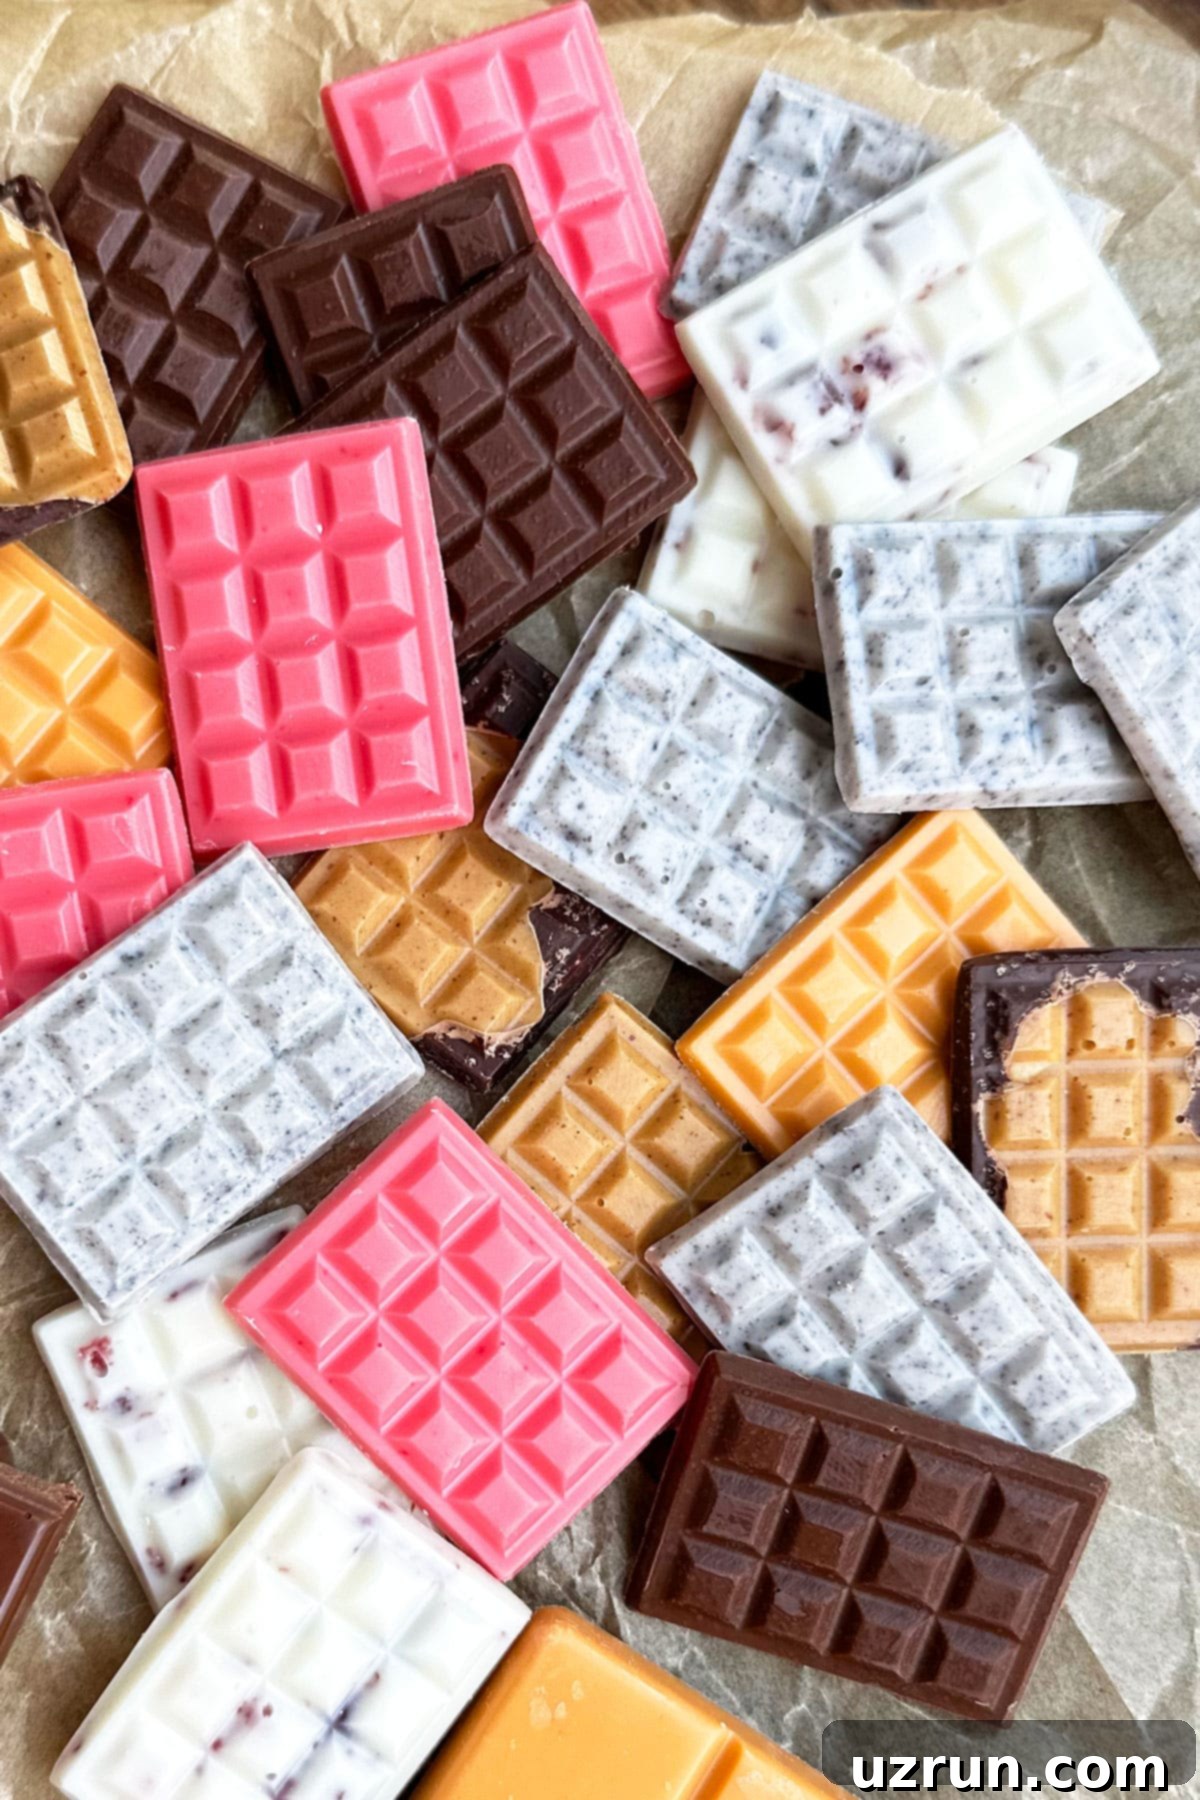
The canvas of a homemade chocolate bar is ripe for imagination! With a myriad of delicious toppings and add-ins, you can create unique flavor profiles and appealing textures that elevate your simple chocolate into a gourmet delight. Here are some fantastic ideas to get you started:
- Nuts: Add a satisfying crunch and nutty flavor with your favorite varieties. Think roughly chopped, preferably toasted peanuts, almonds, pistachios, macadamias, or cashews. Toasting beforehand enhances their flavor significantly.
- Shredded Coconut: For a tropical twist, incorporate finely shredded, unsweetened coconut. It adds a lovely texture and a delicate, sweet aroma.
- Zest: Brighten your chocolate with the vibrant aroma of finely chopped orange, lemon, or lime zest. Citrus zest pairs beautifully with both dark and white chocolate, offering a refreshing counterpoint to the richness.
- Sea Salt: A sprinkle of flaky sea salt on top of your chocolate bars not only looks elegant but also enhances the chocolate’s natural sweetness and depth of flavor, creating a delightful sweet-and-salty balance.
- Dried Cranberries: For a chewy, tart element, use finely chopped dried cranberries. Their vibrant color and tangy taste are a wonderful contrast to sweet chocolate.
- Oreos: Crush or roughly chop your favorite chocolate sandwich cookies for a familiar and beloved flavor and textural addition that’s always a hit.
- Mini Marshmallows: These tiny puffs of sweetness add a soft, chewy texture. You can use regular mini marshmallows or, for extra crunch, try freeze-dried mini marshmallow candies.
- Nut Butters: Swirl creamy peanut butter (or almond butter, sunflower seed butter, cashew butter) into your chocolate mixture for a marbled effect and a rich, nutty flavor. You can also create a thin layer of nut butter in the mold before pouring chocolate.
- Dried or Freeze-Dried Fruits: Beyond cranberries, explore other dried or freeze-dried fruits like strawberries, blueberries, or raspberries. They offer intense fruit flavor and a delightful chewiness or crunch.
- Puffed Quinoa or Rice Krispie Cereal: For an airy, crispy texture that’s reminiscent of classic candy bars, stir in puffed quinoa or rice krispie cereal.
- Spices: Infuse your chocolate with warm, aromatic spices like pumpkin pie spice, ground cinnamon, cardamom, nutmeg, clove, or allspice. These are particularly wonderful in dark chocolate.
- Extracts: Introduce a burst of flavor with oil-based extracts. Try classics like mint, peppermint, vanilla, or more unique options like coconut or caramel extracts. Remember, only use oil-based extracts to prevent the chocolate from seizing.
- Oil-based Food Coloring: If you want to create colorful chocolate bars for holidays or special events, always use oil-based food coloring. This type of coloring is designed to blend seamlessly with chocolate, ensuring a smooth, vibrant result without any seizing.
Essential Tips and Techniques for Perfect Homemade Chocolate
Achieving delicious homemade chocolate bars is easier with a few expert tips and techniques. These insights will help you avoid common pitfalls and ensure your chocolate is as smooth, flavorful, and beautiful as possible:
- Cacao Butter vs. Coconut Oil: While coconut oil can be a substitute for cacao butter in a pinch, be aware of the trade-offs. Coconut oil has a distinct flavor and fragrance that will be noticeable in your chocolate. More importantly, it’s not as stable as cacao butter and will result in bars that are softer and melt much more easily, especially at room temperature. For the best snap and stability, stick to food-grade cacao butter.
- Use Oil-Based Colors and Flavors: This is a critical rule in chocolate making. If you decide to add food coloring or flavor extracts, they absolutely must be oil-based. Water-based ingredients will cause the chocolate to seize, turning it into a thick, gritty, unworkable paste. Always double-check labels!
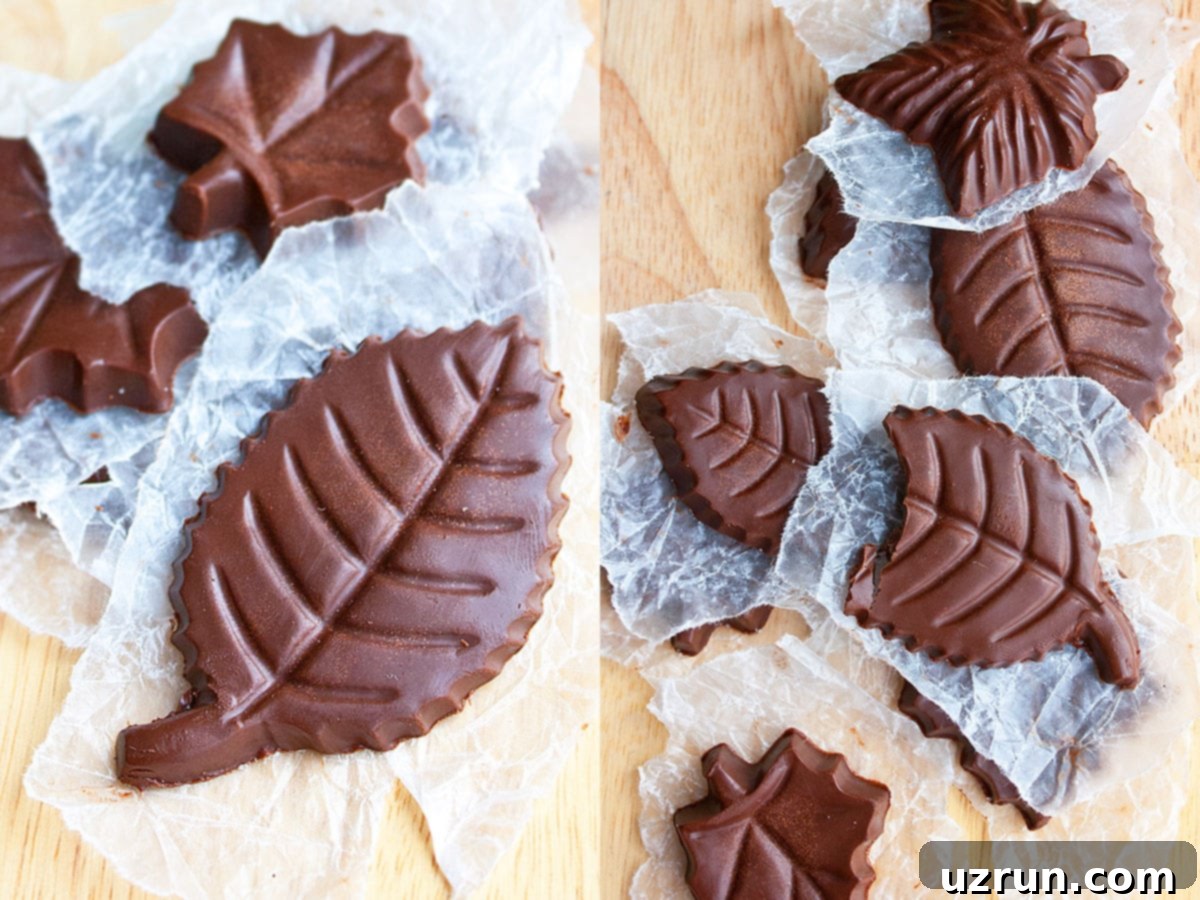
- Finding Candy Molds: Candy molds are widely available both online (Amazon is a great source) and at craft stores like Michaels, Walmart, and Hobby Lobby. You can find classic candy bar shapes or get creative with fun designs like the leaf molds I used for a unique touch. Silicone molds are generally preferred over firm plastic ones as they make demolding much easier.
- Double Boiler Method for Smoothness: For the smoothest possible consistency and to ensure the cacao butter melts gently and evenly, consider doing all your mixing over a double boiler. This provides consistent, indirect heat, preventing scorching or uneven melting.
- Scaling the Recipe: This recipe is incredibly versatile and can easily be doubled or tripled if you’re preparing a large batch for a party, event, or as gifts. Just maintain the ratios of ingredients.
- Get Creative with Chocolate Leaves: Beyond bars, you can use this chocolate mixture to make delicate Chocolate Leaves. Simply paint melted chocolate onto clean, non-toxic leaves (like mint or rose leaves), let them set, and then gently peel the leaf away. It’s a fun and elegant way to use your homemade chocolate.
- Reheating a Thick Mixture: If your cocoa mixture becomes too thick or difficult to combine while stirring (which can happen if the cacao butter starts to solidify), simply warm it in the microwave for 10-second intervals, stirring in between, until it becomes smooth and pliable again. Be careful not to overheat.
- Powdered Sugar vs. Liquid Sweeteners: While you *can* use 2-3 tablespoons of maple syrup or honey instead of powdered sugar, it will affect the final texture. Liquid sweeteners tend to make the bars less firm and slightly softer, especially at room temperature. However, they can lend a unique, smoother taste for those who prefer it. For classic firmness, powdered sugar is best.
- Only Use Whole Milk Powder: As mentioned, whole milk powder is essential. Low-fat or fat-free milk powders lack the necessary fat content to achieve the desired creamy texture and proper solidification of your chocolate bars.
- Quality of Cocoa Powder Matters: Your homemade chocolate will only taste as good as the ingredients you use. Investing in a high-quality cocoa powder will make a significant difference in the depth and richness of your chocolate’s flavor.
- Choosing Your Cocoa: You can use unsweetened or special dark cocoa powder. However, be aware that special dark cocoa can make the chocolate quite bitter. My family found it a bit too intense, so consider your preference for bitterness when making your choice.
- Grinding and Sifting is Crucial: To achieve that smooth, melt-in-your-mouth texture that chocolate is famous for, it is absolutely vital to grind and thoroughly sift your dry ingredients. This step ensures there are no gritty particles, contributing significantly to a superior finished product.
- Avoid Liquid Milk: Never attempt to use liquid milk in your chocolate mixture. The water content will instantly cause the chocolate to seize, turning it into a crumbly, unworkable mess. Stick to milk powder for the dairy component.
- Cacao Butter is Key, Not Regular Butter: Regular butter contains water solids, which will also cause your chocolate to seize. Cacao butter is the pure fat extracted from the cocoa bean, specifically designed for chocolate making, providing the correct flavor, texture, and stability.
- Steer Clear of Porous Wooden Spoons: When mixing your chocolate, avoid using porous wooden spoons. They can absorb flavors from previous recipes and impart them into your delicate chocolate. More critically, they can hold onto moisture, and even a tiny amount of water can cause your chocolate to seize. Use clean, dry silicone spatulas or metal spoons.
- Gradual Cooling Prevents Blooming: Resist the urge to immediately place your molds in the fridge. Chilling chocolate too quickly can cause the cocoa butter solids to separate and recrystallize improperly, leading to “bloomed” chocolate. This appears as white streaks, patches, or a dull, grayish surface. While still edible, the appearance is less appealing. Allow a brief room-temperature set before refrigerating.
- Adjusting Sugar for Chocolate Types: The beauty of homemade chocolate is control over sweetness. For dark and semisweet chocolate, simply use less powdered sugar according to your preference. For truly unsweetened chocolate, omit the sugar altogether.
Homemade Chocolate Recipe FAQs
Chocolate seizes when it comes into contact with even a tiny amount of water. This can happen if you use regular butter, liquid milk, water-based food colorings or extracts, or even a porous wooden spoon that has retained moisture. Unfortunately, once chocolate has seized, it’s very difficult to fully restore its smooth texture. While you might be able to incorporate it into baked goods, it won’t be suitable for molding into bars.
Those white streaks and patches, or an overall dull appearance, are known as “bloomed” chocolate. This typically occurs when the chocolate cools too quickly or is exposed to significant temperature fluctuations. While it doesn’t look as appealing, bloomed chocolate is perfectly safe to eat and still tastes great. To minimize blooming, allow your chocolate to set at room temperature for a short period before transferring it to the fridge.
While often used interchangeably, there’s a subtle difference. Cacao butter generally refers to the fat extracted from the raw, unroasted cacao bean, often implying a more minimally processed, higher-quality product. Cocoa butter, on the other hand, typically comes from roasted cocoa beans and is a more common commercial term. For this recipe, either will work, but food-grade quality is essential, and pure cacao butter will offer the most neutral flavor and best performance.
A gritty or grainy texture is almost always due to the dry ingredients (cocoa powder, milk powder, powdered sugar) not being fine enough. It is incredibly important to grind these ingredients into a very fine powder using a coffee grinder or powerful blender, and then sift them thoroughly. Any undissolved sugar crystals or cocoa particles will result in a less-than-smooth finish. Next time, ensure your powder mixture is exceptionally fine before adding the melted cacao butter.
Several factors can cause your homemade candy bars to melt prematurely. It might be that your kitchen or storage area is too warm, or perhaps you handled them with hot hands or utensils. Another common reason is if you opted to use honey or maple syrup instead of powdered sugar, as liquid sweeteners can make the chocolate less stable and more prone to melting at lower temperatures. Unlike commercially tempered chocolate, these homemade bars are more sensitive to heat.
Storage Best Practices for Homemade Chocolate
Proper storage is key to maintaining the quality, flavor, and texture of your homemade chocolate bars. Since they are not tempered in the traditional commercial sense, they benefit from slightly cooler conditions to retain their firmness and shine.
- Make Ahead: These chocolate bars are perfect for making in advance! You can prepare them up to 2 weeks before a party or event. Store them in an airtight container or sealed bag in the refrigerator. At a cool room temperature (around 70-72 degrees F or 21-22 degrees C), they will last for up to 1 week, though they might soften slightly.
- Room Temperature: While your chocolate bars will hold their shape well at a cool room temperature (ideally below 72°F/22°C), they won’t be as super firm as tempered store-bought chocolate. They can be left out for up to 1 week. If your environment is warmer, they will become softer and may even melt.
- Refrigerate: For optimal firmness and extended shelf life, I highly recommend storing your homemade chocolate bars in the refrigerator. Wrap each bar individually in wax paper or elegant candy foil to protect them from moisture and odors, then place them in an airtight container. They will stay fresh for up to 2 weeks.
- Freeze: Yes, you can freeze homemade chocolate bars! Place them in a sealed freezer-safe bag or container, ensuring they are well-protected from freezer burn. They can be frozen for up to 1 month. When ready to enjoy, thaw them slowly in the refrigerator to prevent condensation and maintain their texture.
More Delicious Chocolate Desserts to Explore
If you have a love for all things chocolate, you’re in the right place! After mastering these homemade chocolate bars, delve into our collection of other delectable chocolate-centric recipes that are sure to satisfy any sweet craving:
- Best Chocolate Chip Cookies (Soft and Chewy)
- Chocolate Pudding
- Easy Chocolate Oreo Cake
- Easy Chocolate Fondue Recipe
- Chocolate Blueberry Truffles
- Coconut Cream Chocolate Frosting
- Sugar Free Chocolate Cupcakes
- Chocolate Muffins
- Chocolate Banana Ice Cream
Recipe
Easy Homemade Chocolate Bars (Dark, Milk, White)
Abeer Rizvi
Pin Recipe
Want to Save This Recipe?
Enter your email & I’ll send it to your inbox. Plus, get great new recipes from me every week!
By submitting this form, you consent to receive emails from CakeWhiz
Ingredients
Dark, milk, semisweet and unsweetened chocolate
-
⅓
cup
Cocoa powder -
2
tablespoon
Whole milk powder
Don’t use the fat free or low fat version -
¾
cups
Powdered sugar
Adjust quantity according to your preference -
½
cup
Cacao butter
Melted, Food grade
White chocolate
-
½
cup
Whole milk powder
Don’t use the fat free or low fat version -
½
cup
Powdered sugar -
½
cup
Cacao butter
Melted, Food grade
Optional Add-ins
-
1-2
tablespoon
Nuts
Such as peanuts, almonds, pistachios, macadamias, cashews. Roughly chopped. Preferably toasted -
1-2
tablespoon
Shredded coconut -
1
teaspoon
Orange zest
Finely chopped -
1
teaspoon
Sea salt
Scattered on top of the chocolates -
1-2
tablespoon
Dried cranberries
Finely chopped -
1-2
tablespoon
Oreos
Roughy chopped -
1
tablespoon
Mini marshmallows -
1
tablespoon
Peanut butter
For swirling into the chocolate mixture. Can replace with other types of nut butters too. -
1-2
tablespoon
Dried fruits or freeze dried fruits
Such as strawberries, blueberries, raspberries -
2
tablespoon
Puffed quinoa or rice krispie cereal -
½-1
teaspoon
Pumpkin pie spice
Or ground cinnamon, cardamom, nutmeg, clove, allspice. -
1
teaspoon
Extracts
Use oil-based flavors. Try mint, peppermint, vanilla, coconut, caramel. - Oil-based food coloring
Instructions
Dark, milk, semisweet and unsweetened chocolate
-
Add cocoa powder, whole milk powder, powdered sugar in a coffee grinder and grind until you have a very fine powder mixture.
-
Sift this dry mixture to remove any lumps.
-
In a mixing bowl, add melted cacao butter and gradually add the dry mixture (1 tablespoon at a time), while continuing to stir until there are no lumps and the mixture is silky smooth. This will be the base of a delicious milk chocolate.
-
For dark and semisweet chocolate, use less sugar.
-
For unsweetened chocolate, omit sugar altogether.
-
You are ready to include your add-ins now. Please note these important tips: You can either toss the add-ins into this mixture OR pour the mixture in molds and sprinkle your toppings on top and let it set. Also, remember that extracts, colors and dry spices or spice blends must be mixed into the mixture, if using. For nut butters, it’s best to swirl some of that in the mold first and then pour the chocolate mixture on top and let it set.
-
Use a spoon to pour this mixture in candy bar silicon molds.
-
Keep aside and let it set at room temperature for 20 minutes.
-
Then, transfer to the fridge to chill for another 20-30 minutes until firm.
-
Turn the mold onto a sheet of wax paper and remove the mold gently. Enjoy!
White chocolate
-
Add whole milk powder and powdered sugar in a coffee grinder and grind until you have a very fine powder mixture.
-
In a food processor, add the fine powder mixture and melted cacao butter. Blend for about 30-40 seconds until mixture is very smooth.
-
Use a spoon to pour this mixture in candy bar silicon molds.
-
Keep aside and let it set at room temperature for 20 minutes.
-
Then, transfer to the fridge to chill for another 20-30 minutes until firm.
-
Turn the mold onto a sheet of wax paper and remove the mold gently. Enjoy!
Notes
- Get creative with your add-ins and make fun new flavors.
- Use mini candy molds to make smaller chocolates. These are great as cake and cupcake decorations.
- Use a silicon mold rather than the firm plastic ones because removal is easier with the silicon ones.
- Coconut oil can be used instead of cacao butter but it is not as stable and the candy bar doesn’t hold its shape well.
- This chocolate has a subtle texture to it because of the use of powdered sugar. It’s not as smooth as the store-bought bars because we don’t have the specialized equipment that the big companies use to make them super smooth.
- These will last at room temperature (70-72 degrees F) but won’t stay super firm since they are not tempered. They will still hold their shape very well though. I recommend storing them in the refrigerator, wrapped in wax paper or fancy candy foil for up to 2 weeks. These can also be frozen in a sealed bag or container for up to 1 month.
- Read additional tips and variations above.
Nutrition
Calories: 139kcal
Carbohydrates: 10g
Protein: 1g
Fat: 12g
Saturated Fat: 10g
Sodium: 700mg
Potassium: 75mg
Fiber: 1g
Sugar: 7g
Calcium: 6mg
Iron: 0.7mg
An automated tool is used to calculate the nutritional information. As such, I cannot guarantee the accuracy of the nutritional information provided for any recipe on this site.
Tried this recipe?Leave a comment below or rate and tag @cakewhiz on social
With this detailed guide, you’re now equipped to create delightful, customizable homemade chocolate bars that rival anything you’d find in a store. Experiment with flavors, textures, and designs to make them truly your own. Whether you’re making them for a special occasion, a thoughtful gift, or simply to indulge your own sweet tooth, the process of crafting your own chocolate from scratch is an incredibly rewarding culinary adventure. Happy chocolate making!
