Bake the Perfect Rainbow Sprinkle Cake: A Step-by-Step Decorating Guide
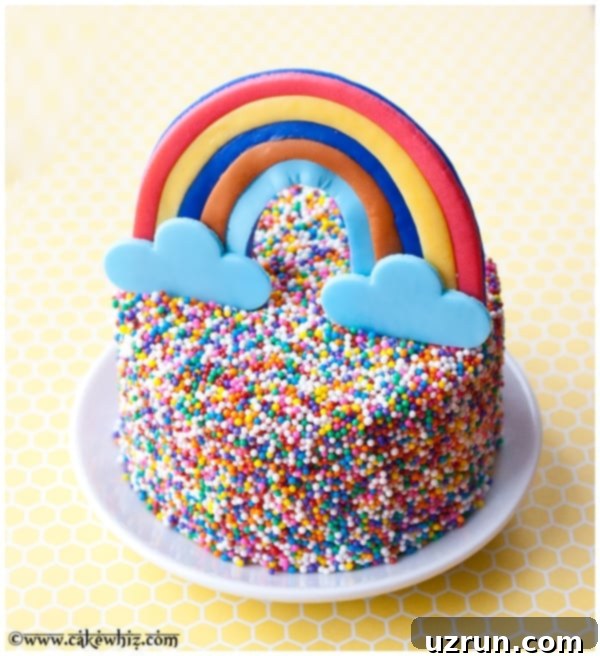
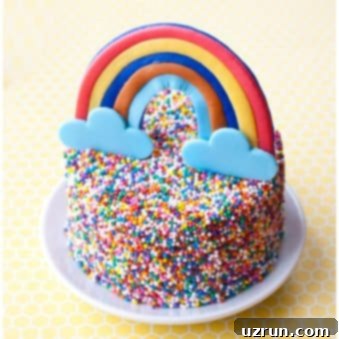
Unleash a burst of color and joy with this delightful Rainbow Sprinkle Cake! Whether you’re celebrating a child’s birthday, adding a festive touch to St. Patrick’s Day, or simply want to brighten someone’s day, this cake decorating tutorial makes it incredibly easy for even beginners to create a stunning, vibrant dessert. Imagine a fluffy, colorful vanilla cake, generously covered in rich white chocolate buttercream frosting, adorned with a dazzling array of sprinkles, and crowned with a whimsical fondant rainbow topper. It’s a showstopper that promises smiles and a taste of pure happiness!
Rainbows and sprinkles hold a timeless appeal, captivating not just children but adults too, with their universal symbols of joy and celebration. Our featured cake today is designed to be both fun and colorful, and approachable enough for anyone to tackle. If you’re enchanted by the magic of multicolored treats, be sure to explore more creative Rainbow Desserts for endless inspiration. And for those planning a special St. Patrick’s Day feast, you’ll find an abundance of delightful Green Desserts (St. Patrick’s Day Desserts) to complement your celebration.
For fellow baking enthusiasts who love crafting personalized birthday cakes for family and friends, you’ll definitely want to browse through these fantastic resources: our collection of Easy Cake Decorating Ideas offers simple yet impressive techniques, while these comprehensive Birthday Cake Ideas will spark your imagination for your next special occasion.
Crafting Your Rainbow Sprinkle Masterpiece: A Simple Overview
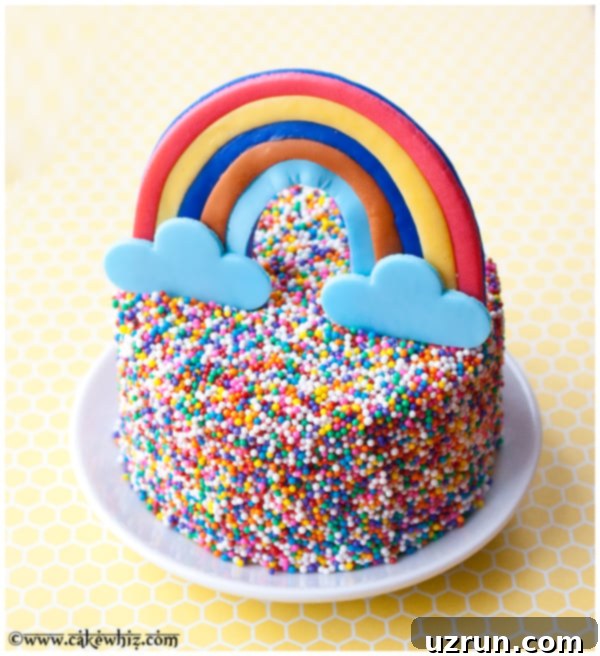
Creating this eye-catching rainbow sprinkle cake is surprisingly straightforward. Here’s a quick glance at the main steps involved. Each stage is designed to be beginner-friendly, ensuring a smooth and enjoyable baking and decorating experience.
- Bake Cakes: Begin by baking your vibrant rainbow cake layers. Ensure they are perfectly baked and, most importantly, allowed to cool completely. Rushing this step can lead to a messy frosting experience!
- Prepare Frosting: Next, whip up a batch of creamy white chocolate buttercream. There’s no need to color this frosting, as its pristine white hue beautifully contrasts with the colorful cake layers and festive sprinkles, making the vibrant decorations truly pop.
- Assemble the Cake: Carefully place your first cooled cake layer on your serving plate or cake stand. Spread an even layer of frosting on top, then gently position the second cake layer. Once stacked, use the remaining buttercream to generously cover the entire cake, creating a smooth, even canvas for your sprinkles.
- Decorate with Sprinkles and Topper: This is where the magic happens! Adhere a generous amount of sprinkles to the frosted cake. Once the cake is fully coated, add your homemade fondant rainbow topper to complete this enchanting dessert.
Exciting Variations to Personalize Your Rainbow Sprinkle Cake
While the classic rainbow sprinkle cake is undeniably charming, don’t hesitate to experiment and customize it to suit your taste, theme, or occasion. These variations offer creative ways to make your cake truly unique:
- Embrace Pastel Colors: Instead of vibrant, bold hues, opt for a softer palette. Use pastel sprinkles and delicate fondant colors for your rainbow topper. This creates a charmingly understated yet equally beautiful cake, perfect for baby showers, spring celebrations, or a more subtle aesthetic where the colors are gentle but still very pretty.
- Explore Different Cake Flavors: The base cake doesn’t have to be vanilla. Consider other delicious options to add another dimension of flavor. A rich Red Velvet Cake would offer a subtle cocoa flavor and a striking red hue, while a nutty Pistachio Cake could introduce a unique taste and a beautiful green tint, pairing wonderfully with the white frosting and colorful sprinkles. Other ideas include chocolate, lemon, or even a funfetti cake for extra sprinkles inside!
- Creative Filling Ideas: Elevate your cake with a delicious filling between the layers. Beyond more frosting, you could use sweet jams and preserves, creamy peanut butter, decadent Nutella, rich chocolate ganache, luscious caramel sauce, velvety dulce de leche, a thick custard or pudding, or even fresh, finely chopped fruits for a lighter touch. For an extra treat, consider chopped up candy bars or cookie crumbles for added texture and flavor.
- Alternative Frosting Flavors: While white chocolate buttercream is fantastic, feel free to try other frosting flavors that complement your chosen cake. A zesty Lemon Frosting would offer a bright, tangy counterpoint, while a sweet and fruity Maraschino Cherry Frosting would add a lovely pink hue and a nostalgic flavor. Cream cheese frosting, strawberry buttercream, or a classic vanilla bean frosting are also excellent choices.
- Diverse Decoration Options: Think beyond the fondant rainbow topper and sprinkles. Enhance your cake with colorful candles, dazzling sparklers for a celebratory flair, small store-bought toys for a themed party, an assortment of candies (gummy bears, M&Ms, jelly beans), or even creative cardboard toppers to match your event.
- Adjust Cake Size: This tutorial typically features a small cake, perfect for intimate gatherings. However, you can easily scale up the recipe to make a larger 8-inch or 9-inch cake to serve more guests. Remember to adjust baking times accordingly and ensure you have enough frosting and sprinkles for the increased surface area.
- Add More Layers: For an even more impressive presentation, transform this into a taller layer cake. Make another set of 3-inch cakes and stack them on top of your 6-inch cakes, or simply bake extra layers of your chosen size. For multi-tiered or very tall cakes, remember to use dowels or internal supports for stability.
- Try a Piñata Cake Surprise: For an extra element of fun and surprise, convert your rainbow sprinkle cake into a Piñata Cake! Follow a specific tutorial for creating a cavity in the center of your cake layers, then fill it with an abundance of sprinkles and mini candies. The anticipation of cutting into the cake to reveal a cascade of treats is always an exciting highlight!
Expert Tips and Techniques for a Flawless Rainbow Sprinkle Cake
Achieving a picture-perfect rainbow sprinkle cake is easier with a few insider tips and techniques. Pay attention to these details, and your cake will not only look stunning but also be a joy to create and devour!
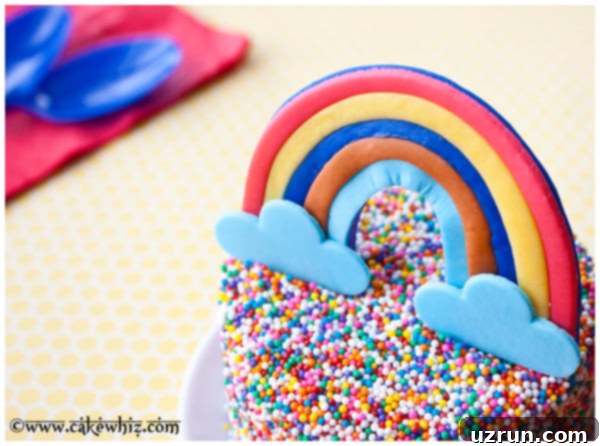
- Embrace Creative Rainbow Colors: Don’t feel bound by the traditional ROYGBIV spectrum. For the cake pictured, I actually used up leftover fondants from previous projects, resulting in a unique “wacky rainbow” with red, yellow, dark blue, brown, and light blue. This goes to show that you can be flexible and use any colors you have on hand or prefer. However, if you desire a classic rainbow, follow a standard rainbow color guide for your fondant. The most important thing is to have fun with it!
- Never Frost or Decorate a Warm Cake: This is perhaps the most crucial rule in cake decorating. If your cake layers are even slightly warm, the buttercream frosting will melt on contact, becoming a sticky, greasy mess. Always ensure your cakes are completely cool to the touch before you even think about applying frosting. Chilling the layers in the fridge for 15-30 minutes after baking can also help.
- Accelerate Topper Drying Time: For your fondant rainbow topper, speed up the drying process by using gum paste or a 50/50 mix of fondant and gum paste (also known as flower paste). Gum paste dries much faster and harder than pure fondant, ensuring your rainbow holds its shape perfectly. For even quicker results, aim a small table fan at your fondant rainbow overnight. This constant air circulation will significantly reduce drying time, especially in humid environments.
- Handle Sprinkles with a Gentle Touch: When applying sprinkles, be gentle. Pressing them too hard into the soft buttercream can create unsightly dents and blemishes in your perfectly smooth frosting. Instead, cup handfuls of sprinkles and lightly press them onto the sides of the cake, or gently sprinkle them over the top. The frosting’s natural stickiness will hold them in place without excessive pressure.
- Line Your Pans with Parchment Paper: To ensure your cake layers release cleanly and easily from the pans without breaking or sticking, always line the bottoms of your cake pans with parchment paper. You can also lightly grease and flour the sides for extra assurance. This simple step saves you from frustrating baking mishaps.
- Use a Large, Deep Pan for Sprinkle Application: This is a game-changer for keeping your kitchen clean and conserving sprinkles! Place your iced cake (still on its serving plate or stand) inside a large, deep baking tray or rimmed sheet pan before you start applying sprinkles. As you apply the sprinkles to the sides and top, all the excess will fall directly into the tray, allowing you to easily gather and reuse them. This minimizes waste and mess significantly.
- Protect Your Decorated Cake from Moisture: Fondant and sprinkles are very sensitive to humidity and moisture. Keep your decorated cake away from high-humidity environments, steam, or direct contact with water. Excessive moisture can cause the fondant topper to become sticky and soft, losing its shape, and might even cause the colors in your sprinkles to bleed, creating a less appealing appearance. Store in an airtight container if your environment is humid.
- Ensure the Fondant Topper is Completely Dry: Before attempting to place your rainbow topper on the cake, it is absolutely critical that it is fully dry and hardened. If the fondant is still soft or pliable, it will not maintain its curved shape and could sag or break when handled or placed on the cake. Patience here is key!
- Understand Drying Time Variability: The exact drying time for your fondant rainbow topper will vary depending on several factors, primarily the humidity levels in your area. In higher humidity, fondant takes considerably longer to dry and harden (sometimes up to 48 hours or more), whereas in drier climates, it can be ready in 12-24 hours. Plan accordingly and allow ample time for drying.
- Chill for Stability: After assembling and crumb-coating (a thin layer of frosting that traps loose crumbs), chill the cake for 15-20 minutes. This firms up the frosting, making it easier to apply the final smooth layer and ensuring a crumb-free finish for your sprinkles.
- Achieve Smooth Frosting: For a perfect sprinkle canvas, aim for the smoothest possible buttercream. Use an offset spatula or a bench scraper to get sharp edges and a flat top. Don’t be afraid to take your time and re-smooth as needed.
Storage and Make-Ahead Instructions
Proper storage is key to keeping your Rainbow Sprinkle Cake fresh and delicious. Here’s how to ensure your masterpiece stays in perfect condition:
- Refrigerate Leftovers: Any leftover slices of your decorated cake can be stored in a sealed, airtight container in the refrigerator for up to 3 days. This helps maintain its freshness and prevents the cake from drying out.
- Freeze Unfrosted Cakes: If you’re looking to get a head start, unfrosted cake layers can be frozen. Once completely cooled, wrap each layer tightly in plastic wrap, then an additional layer of aluminum foil. Store them in a sealed freezer-safe container for up to 1 month. When you’re ready to enjoy, simply let the frozen layers thaw in the fridge overnight before proceeding with frosting and decorating as per the instructions.
- Make Ahead Instructions: For maximum convenience, this cake can be baked and fully decorated 1 day in advance. Once decorated, store it at cool room temperature (if your environment isn’t too warm or humid) or in the refrigerator in an airtight cake carrier until you are ready to serve. Allowing it to sit at room temperature for about 30 minutes before serving will ensure the buttercream is soft and creamy.
Explore More Whimsical Decorated Cake Ideas
If you’ve enjoyed making this colorful creation, you’ll love these other fun and festive cake decorating projects. Each one offers a unique design and a chance to hone your baking and decorating skills:
- Easy Cereal Cake: A playful cake topped with your favorite breakfast cereal!
- Tie Dye Shirt Cake: Recreate the groovy patterns of tie-dye in edible form.
- Blue Ombre Cake: A beautiful cake featuring graduating shades of blue and delicate floral details.
- Butterfly Cake: Learn to craft elegant butterflies to adorn your next dessert.
- Easy Galaxy Cake: A cosmic cake design that’s surprisingly simple to achieve.
- Back to School Pencil Cake: A charming and clever cake perfect for celebrating the start of the school year.
Recipe
Rainbow Sprinkle Cake
Abeer Rizvi
Pin Recipe
Want to Save This Recipe?
Enter your email & I’ll send it to your inbox. Plus, get great new recipes from me every week!
By submitting this form, you consent to receive emails from CakeWhiz
Ingredients
- 2 Rainbow cakes Round, 6 inch each, baked and cooled completely
- 1 cup Marshmallow fondant In vibrant rainbow colors (or a 50/50 mix with gum paste for quicker drying)
- 4 cups White chocolate buttercream frosting Freshly prepared and at room temperature
- 3 cups Sprinkles Colorful, jimmie-style sprinkles work best
- 2-3 Toothpicks For securing the rainbow topper
- 1-2 tbsp Melted chocolate For attaching toothpicks to the topper
Instructions
-
Prepare Cake Layers: Bake your two 6-inch round rainbow cake layers according to your chosen recipe and allow them to cool completely on a wire rack. It is vital that they are fully cooled to prevent the frosting from melting.
-
Make the Frosting: While the cakes are cooling, prepare a batch of the delicious white chocolate buttercream frosting. Ensure it has a smooth, spreadable consistency.
-
Stack the First Layer: Place one of your cooled cake layers on your chosen serving plate or cake stand. If desired, you can place a few strips of parchment paper under the cake edges to keep the plate clean during decorating.
-
Fill the Cake: Spread a generous and even layer of white chocolate buttercream frosting on top of the first cake layer.
-
Add Second Layer: Carefully place the second cake layer directly on top of the frosted first layer. Gently press down to secure it into place and ensure it’s level.
-
Crumb Coat and Frost: Apply a thin “crumb coat” of frosting all over the cake (top and sides) to trap any loose crumbs. Chill for 15 minutes. Then, spread the remaining white chocolate buttercream smoothly and evenly over the entire cake, aiming for a clean, uniform finish.
-
Prepare for Sprinkles: To minimize mess and allow for sprinkle reuse, place the cake (still on its serving plate) into a large, deep baking dish or tray. This will catch all the excess sprinkles.
-
Apply Sprinkles: Generously cover the entire cake with sprinkles. It’s easiest to start by gently pressing handfuls of sprinkles onto the sides of the cake. Then, pour or sprinkle them over the top. The excess sprinkles will fall into the tray, ready to be collected and reused. Be careful not to press too hard to avoid denting the frosting.
-
Set Aside Cake: Once fully covered in sprinkles, carefully remove the cake from the deep tray and set it aside in a cool, dry place while you prepare the topper.
-
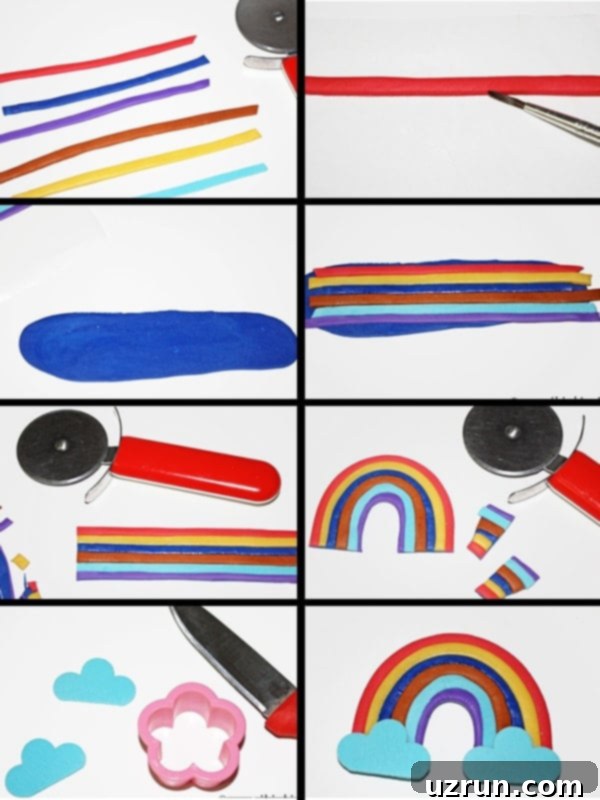
Roll Out Fondant: Roll out your marshmallow fondant (or gum paste/50-50 mix) in various vibrant rainbow colors on a lightly dusted surface. Aim for an even thickness, about 1/8 inch.
-
Cut Fondant Strips: Use a pizza cutter or a sharp knife to cut out thin, even strips from each color of fondant. Aim for consistency in width for a neat rainbow.
-
Assemble Rainbow Base: Lay your first fondant strip on a sheet of wax paper or parchment paper.
-
Attach Strips: Lightly brush a tiny amount of water along one edge of the first strip. This acts as an edible glue.
-
Layer Colors: Stick the next colored strip firmly onto this damp edge, pressing gently to secure.
-
Repeat Process: Continue brushing water and adding strips until all your desired rainbow colors are neatly joined together in a flat band. Set this aside.
-
Create Backing (Optional): Roll out some fondant in a backing color (dark blue was used in the example, but white or a neutral color works well). The length should be roughly the same as your assembled rainbow strips, and slightly wider.
-
Attach Rainbow to Backing: Brush some water over the backing piece. Gently lift your entire rainbow strip arrangement and carefully place it on top of the backing, adhering it securely. This backing adds stability to your rainbow.
-
Trim Edges: Use your pizza cutter to trim any irregular ends, ensuring a clean, straight edge for your rainbow band.
-
Shape the Rainbow: With both hands, gently curve the entire rainbow strip into an upside-down “U” shape. You can lay it over a cylindrical object (like a rolling pin or an empty paper towel roll) to help it maintain its curve as it dries.
-
Straighten Bottoms: Once curved, use a pizza cutter to ensure the bottoms of your rainbow are straight, allowing it to stand properly on the cake.
-
Create Fondant Clouds: To make charming clouds for your rainbow, roll out some light blue (or white) fondant. Use a flower-shaped cutter to cut out two flower shapes. Then, use a knife to cut these flower shapes in half, creating two cloud-like bases.
-
Attach Clouds to Rainbow: Brush a small amount of water on both ends of the curved rainbow strip. Gently attach the fondant cloud halves to these damp ends, pressing them firmly to stick.
-
Allow Topper to Dry: Let your assembled fondant rainbow topper dry completely for at least 24 hours, or until it becomes firm and rigid. This is essential for it to hold its shape on the cake, especially in humid conditions. You can place it in front of a small fan to speed up this process.
-
Prepare Topper for Placement: Once the rainbow is completely dry and hard, carefully flip it over. Use a tiny bit of melted chocolate to attach 2-3 toothpicks to the backside of the rainbow, near its base on both ends. Ensure the toothpicks are firmly adhered and pointing downwards.
-
Decorate Your Cake: Gently push the toothpick-supported rainbow topper into the top of your sprinkle-covered cake. Position it carefully to create a charming display. Your beautiful Rainbow Sprinkle Cake is now ready to be admired and enjoyed!
Notes
- For best results and a smooth decorating process, always read through all the tips and techniques mentioned above before starting.
- Store any leftover cake in a sealed, airtight container in the fridge for up to 3 days to maintain freshness.
- For make-ahead convenience, unfrosted cake layers can be frozen for up to 1 month. Thaw overnight in the fridge before decorating.
- Humidity can significantly affect fondant drying times and sprinkle color bleeding, so take this into consideration when planning.
Nutrition
An automated tool is used to calculate the nutritional information. As such, I cannot guarantee the accuracy of the nutritional information provided for any recipe on this site.
