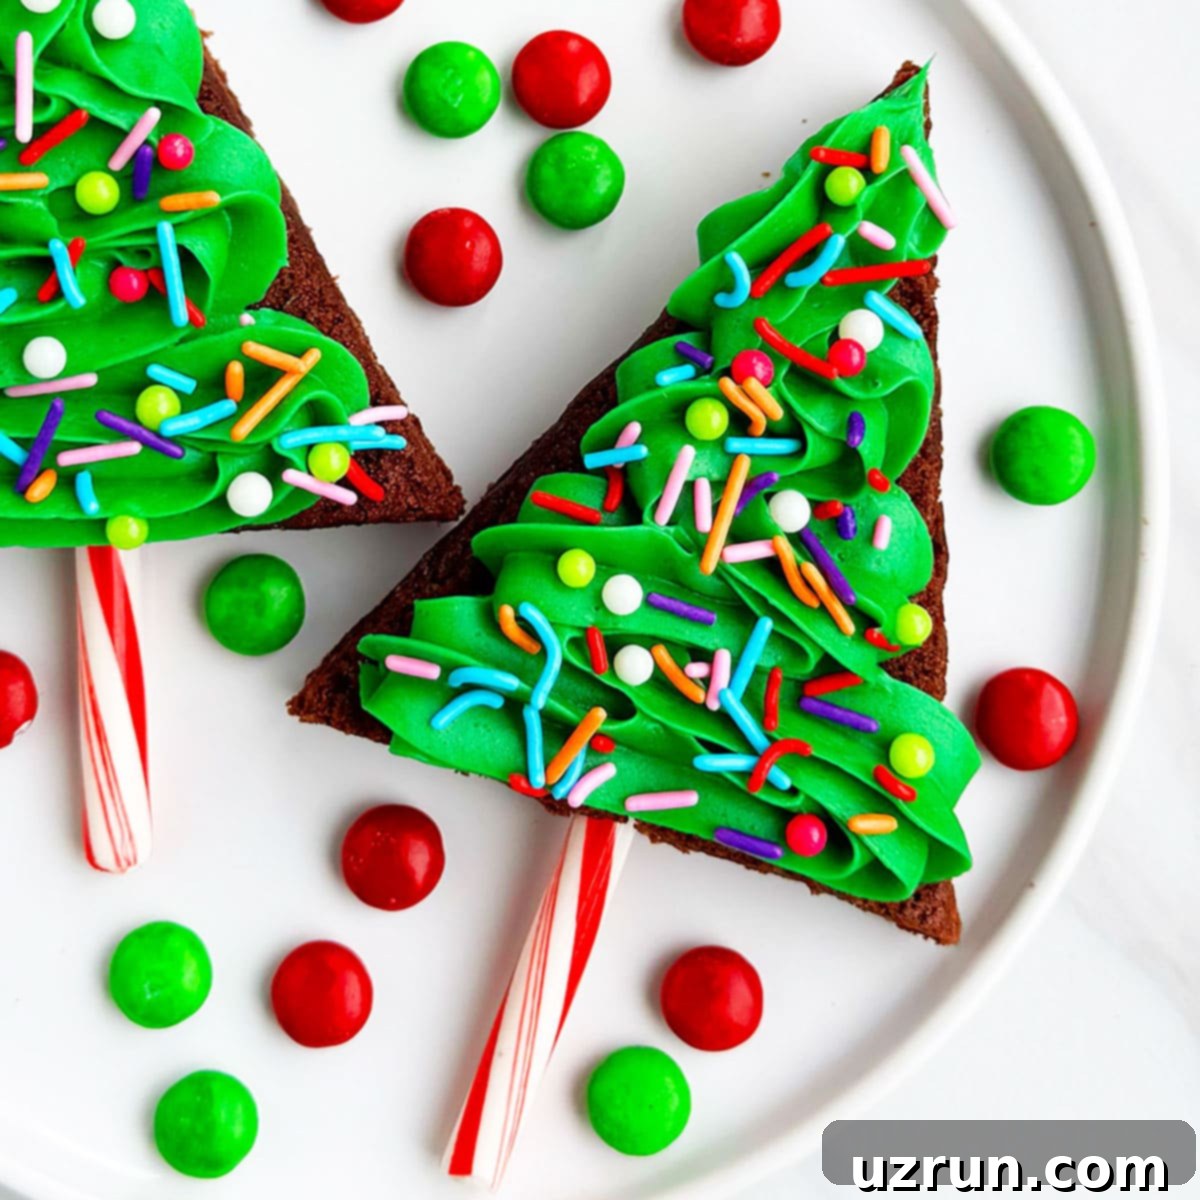
Easy & Festive Christmas Tree Brownies: Your Ultimate Holiday Baking Guide
Get ready to infuse your holiday season with an extra dose of cheer and chocolate! These delightful Christmas tree brownies are incredibly quick and easy to make right in your home, using simple, readily available ingredients. Imagine soft, fudgy brownie bites transformed into adorable miniature Christmas trees, perfect for sharing the festive spirit. They are not just a treat for the palate but also a fantastic activity to enjoy with kids, making cherished memories during the most wonderful time of the year. Whether you choose to adorn them with fluffy buttercream frosting, elegant fondant, a cascade of colorful sprinkles, or charming candy cane trunks, these brownies promise to be the star of your holiday dessert table.
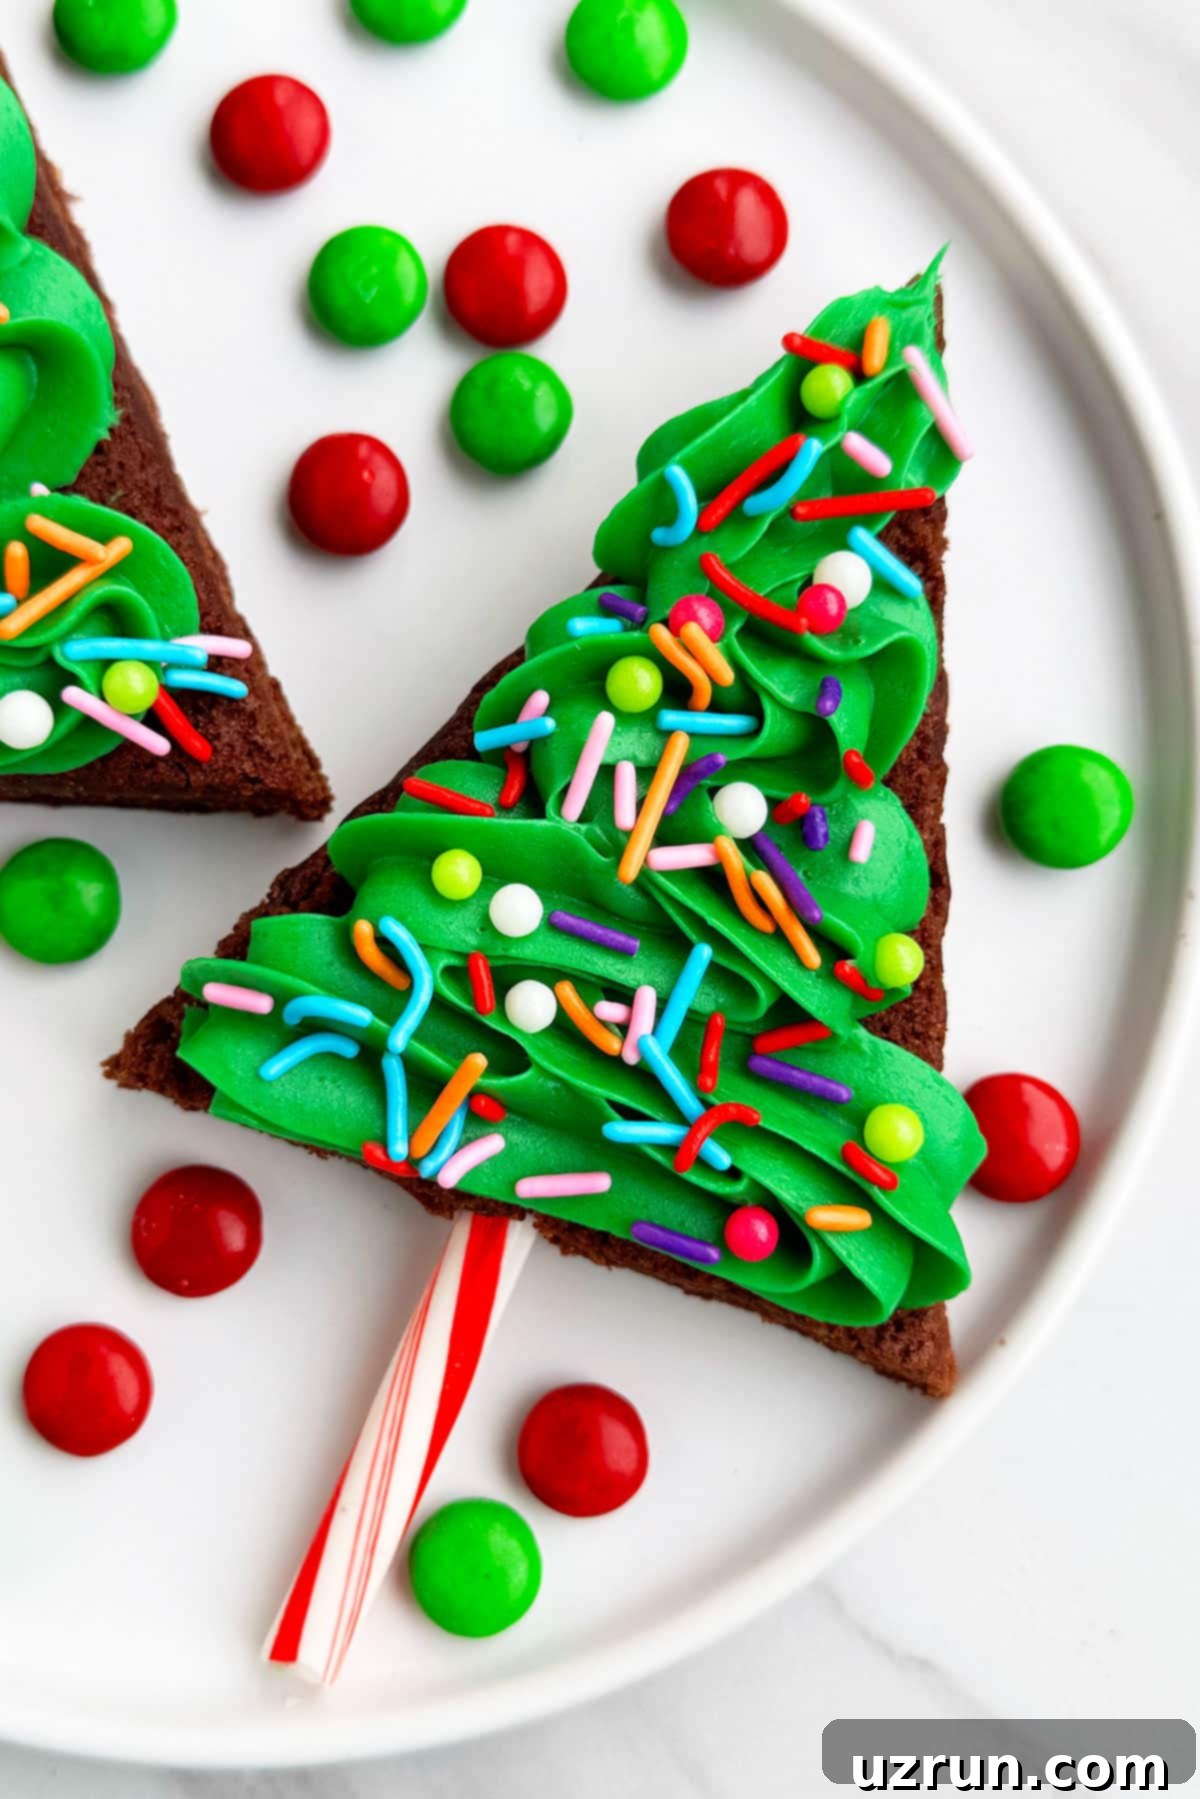
As Christmas approaches, the joy of creating festive treats becomes irresistible. This recipe for holiday-themed brownies is just as enchanting and fun to prepare as our popular Christmas Tree Cupcakes, the whimsical Santa Hat Brownies, or our stunning Christmas Cake (Tree). What makes these Christmas tree brownies truly special is their simplicity; they are so straightforward that even the youngest aspiring bakers can lend a hand, transforming baking into a heartwarming family tradition. You’ll find immense joy not only in devouring these sweet confections but also in the delightful process of assembling and decorating each little tree. Get ready to spread some holiday cheer, one brownie at a time!
Why You’ll Adore This Christmas Tree Brownie Recipe
These festive brownie bites aren’t just a dessert; they’re an experience! Here’s why they’ll quickly become a holiday favorite:
- Unbelievably Easy: Whether you’re a seasoned baker or a complete novice, this recipe is designed for success. We offer options for homemade brownies or a convenient box mix, making it accessible to everyone.
- Fun for All Ages: The decorating process is highly engaging, especially for kids. Piping frosting, adding sprinkles, and inserting candy canes turns baking into a playful holiday craft.
- Irresistibly Fudgy: At their core, these are rich, decadent fudgy brownies that are delicious even before decorating. The chocolatey base perfectly complements the sweet frosting.
- Customizable & Versatile: From different frosting flavors and colors to a variety of sprinkles and edible decorations, the possibilities for customization are endless.
- Perfect for Gifting & Parties: These adorable treats make excellent homemade gifts, party favors, or a standout addition to any holiday potluck or dessert spread.
- A Festive Visual Treat: Their charming Christmas tree shape and vibrant decorations bring an instant festive touch to any table, delighting both young and old.
Key Ingredients for Your Festive Brownie Trees
Crafting these adorable Christmas tree brownies requires just a few essential components. The beauty lies in their flexibility, allowing you to choose between homemade goodness or convenient store-bought options, depending on your time and preference.
- Chocolate Brownies: This forms the delicious base of our trees.
- Homemade from Scratch: For the most decadent and personalized flavor, making your brownies from scratch is always a fantastic option. Aim for a rich, fudgy recipe that holds its shape well when cut.
- Store-Bought: In a pinch, pre-made brownies from your local bakery or grocery store are an excellent time-saver. Just ensure they are plain and un-iced.
- Box Mix: A brownie box mix offers a perfect balance of convenience and homemade taste. Follow the package directions for a reliable and consistently delicious batch. Whichever option you choose, ensure your brownies are fully cooled before cutting.
- Buttercream Frosting: This is where the magic of “tree” coloring happens.
- You’ll primarily need a vibrant green color to mimic the lush foliage of a Christmas tree. Use gel food coloring for intense, rich hues without altering the frosting’s consistency.
- While green is classic, feel free to experiment with white (snowy trees) or even pastel pinks and blues for a unique, whimsical touch.
- Homemade buttercream offers the best flavor and piping consistency, but good quality store-bought frosting can also work for convenience.
- Sprinkles: These are your festive ornaments!
- I adore using bright, multi-colored sprinkles to give the brownies a cheerful “pop” of color, just like Christmas lights.
- Seasonal blends, featuring red, green, silver, and gold, are also fantastic for a cohesive holiday look.
- Consider using star-shaped sprinkles for the top of your trees or tiny ball sprinkles for delicate “ornaments.”
- Candy Canes: The perfect edible tree trunk!
- Unwrap standard-sized or mini candy canes. You’ll want to break off the curved part, leaving you with a straight stick for the tree trunk.
- The peppermint flavor of candy canes adds a wonderful festive touch that complements the chocolate brownies.
- Alternatively, pretzel sticks can be used for a less sweet, salty contrast.
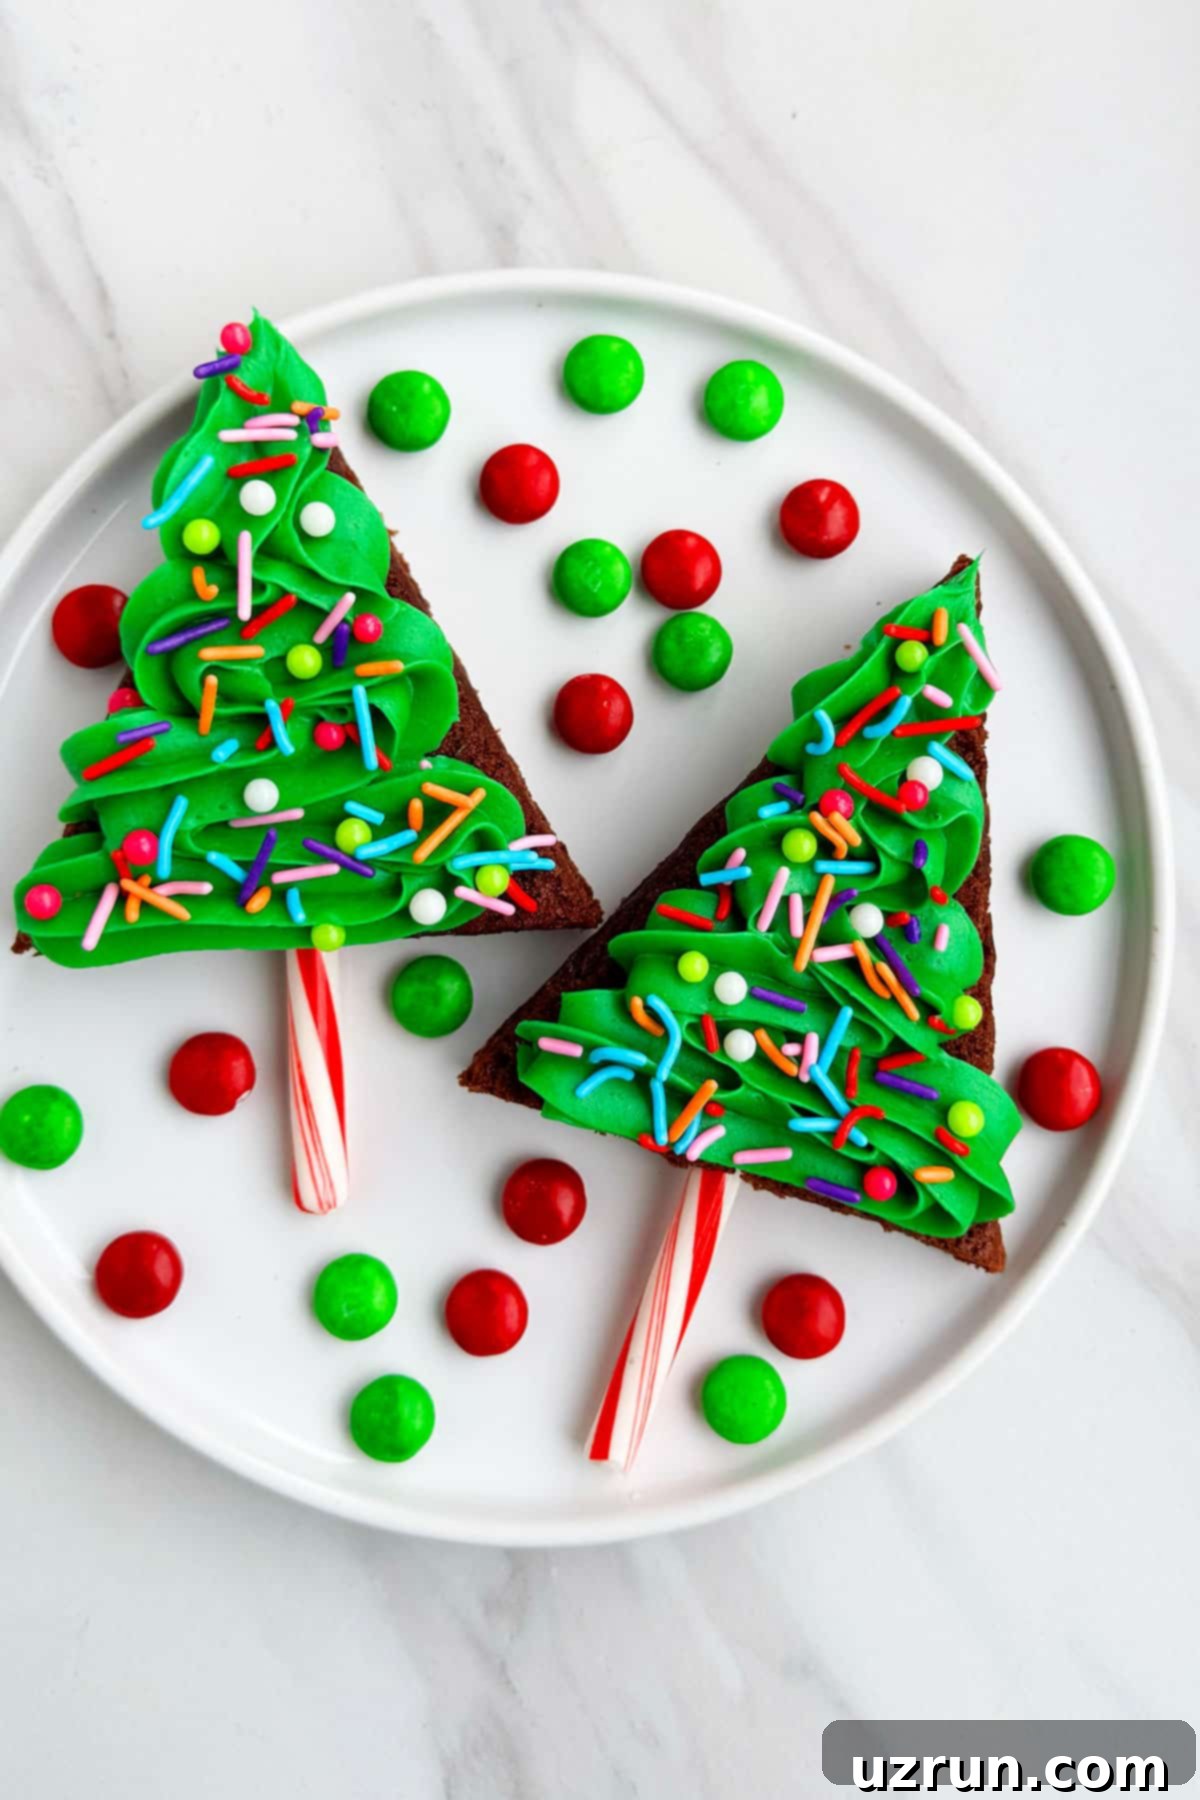
Essential Equipment for Christmas Tree Brownies
Before you dive into decorating, gather these basic tools to ensure a smooth and enjoyable baking process:
- 9×13 inch baking pan: For baking your brownies.
- Parchment paper: Lines the pan for easy removal and clean cuts.
- Sharp knife: Essential for precise, clean cuts of your brownies into squares and triangles. A large chef’s knife works best.
- Piping bag(s): For applying the buttercream frosting.
- Star piping tip(s): Wilton tip 21 for smaller details or a classic star texture, and Wilton tip 1M for a bolder, ruffled look on larger trees.
- Mixing bowls: For preparing homemade frosting or mixing your brownie batter.
- Rubber spatula: For scraping bowls and folding ingredients.
- Cooling rack: To ensure your brownies cool completely and evenly.
How to Make Easy Christmas Tree Brownies with Buttercream Frosting: A Step-by-Step Guide
Transforming ordinary fudgy brownies into festive Christmas trees is a remarkably simple and fun process. Follow these steps for beautifully decorated holiday treats:
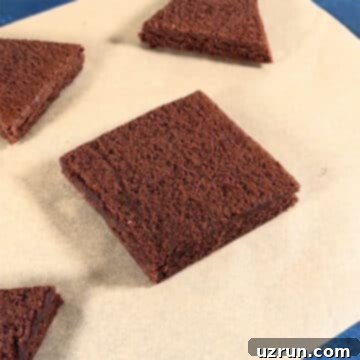
1. Prepare and Cut Brownies into Squares: First, ensure your brownies are completely cooled to room temperature. This is crucial for clean cuts and to prevent frosting from melting. Once cooled, use a very sharp knife to cut the entire batch of brownies into even squares. The size of your squares will determine the size of your final trees.
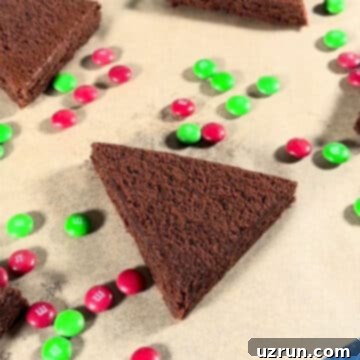
2. Cut Again into Triangles: Take each brownie square and cut it diagonally from corner to corner. This will yield two perfect triangle-shaped brownie pieces, forming the base of your Christmas trees. Repeat this process for all your brownie squares.
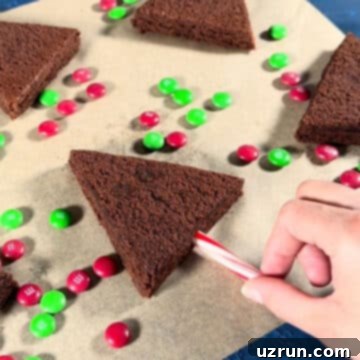
3. Push Candy Cane Trunks: Carefully unwrap your candy canes. For each brownie triangle, gently push the straight end of a candy cane piece into the thicker, bottom base of the brownie. This will serve as the festive tree trunk. Ensure it’s secure enough to hold the brownie upright.
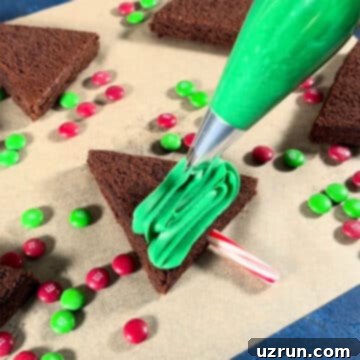
4. Ice the Top of the Brownie with Green Buttercream: Prepare your green buttercream frosting. Load it into a piping bag fitted with your chosen star tip (e.g., Wilton tip 21 or 1M). Hold the brownie by its candy cane trunk and begin piping the green frosting onto the top surface of the brownie, starting from the wider base.
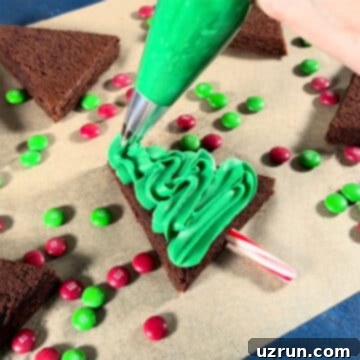
5. Work Your Way Up to Cover Fully: Continue piping the green buttercream in a zigzag motion or small star bursts, moving upwards along the brownie triangle. Aim to cover the entire surface, creating a beautiful, textured “tree” effect. Make sure the frosting comes to a point at the top, just like a real Christmas tree.
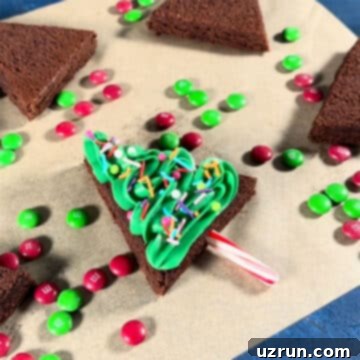
6. Toss Sprinkles and Decorate: Immediately after piping the frosting (before it sets), liberally toss your chosen sprinkles on top of the green icing. They will stick beautifully, acting as colorful ornaments. You can also add a small star-shaped sprinkle to the very top for a finishing touch. Repeat for all your brownie trees and get ready to enjoy your festive creations!
Creative Variations to Make Your Christmas Tree Brownies Unique
While the classic green tree with sprinkles is always a hit, don’t shy away from experimenting! These variations can help you customize your Christmas tree brownies to perfectly match your holiday theme or personal taste:
- Make a Giant Tree: Instead of individual mini brownie bites, bake your brownies in a larger, possibly round or square pan. Cut a large triangle from the center, or arrange smaller triangles to form one big tree. Decorate this grand centerpiece with an array of fondant cutouts (stars, circles), more intricate icing designs, and an abundance of sprinkles. For the trunk, a jumbo candy cane or even a small pretzel rod would work perfectly.
- Switch Up the Type of Brownie: The base brownie can significantly alter the flavor profile.
- Try rich Nutella Brownies for a hazelnut chocolate twist.
- Opt for ultra-decadent Fudgy Brownies with Crackly Tops Recipe for an even more luxurious texture.
- If you’re pressed for time, there’s absolutely no shame in using high-quality store-bought brownies or a convenient brownie mix box, as this recipe is all about the fun of decoration!
- Add More “Ornaments” and Details: Go beyond basic sprinkles!
- Use small M&M’s, mini chocolate chips, silver dragees, or tiny edible pearls to resemble colorful ornaments.
- Pipe thin garlands of contrasting frosting colors (e.g., white or red) to create string lights.
- Add a tiny edible star or pretzel star to the very top of each tree.
- Make Other Colors of Trees: Who says Christmas trees must be green?
- Create elegant “snowy” trees with white buttercream frosting and silver or blue sprinkles.
- Experiment with festive pinks, blues, or even purples for a whimsical, modern Christmas palette.
- A vibrant red tree could be striking!
- Try Other Frosting Flavors: Elevate the taste by varying your frosting.
- An Easy Mint Frosting would pair wonderfully with chocolate brownies and candy cane trunks.
- Marshmallow Frosting offers a lighter, fluffier texture and distinct sweet flavor.
- Almond Buttercream Frosting provides a delicate nutty note that can complement the chocolate.
- Cream cheese frosting, spiced with a touch of cinnamon or gingerbread, could also be a delicious choice.
- Different Trunks: If candy canes aren’t your preference, try pretzel sticks for a salty-sweet contrast, or even a simple piece of chocolate bar cut into a small rectangle.
Expert Tips and Techniques for Perfect Christmas Tree Brownie Bites
Achieving picture-perfect and delicious Christmas tree brownies is easier than you think with these expert tips and tricks:
- Any Type of Sprinkles Can Be Used: Don’t feel limited! While seasonal sprinkles are fun, use whatever you have on hand – jimmies, nonpareils, edible glitter, or even crushed peppermints for an extra minty kick.
- How to Cut Brownies into Triangles Perfectly:
- First, bake your brownies in a rectangular pan (e.g., 9×13 inch).
- Once completely cooled, use a ruler to mark where you’ll make even cuts. Cut the brownies into equal-sized squares first.
- Then, take each square and cut it diagonally from one corner to the opposite corner, creating two perfect triangles.
- For even more precision, a clean, sharp knife is key. Alternatively, a triangle-shaped cookie cutter can yield uniform results, though it might result in more scraps.
- Always Use the Smooth Bottom Side of the Brownie: After cutting your brownie triangles, flip them over. The bottom surface of a baked brownie is usually much smoother and flatter than the top, which might have cracks or bumps. Piping icing onto this smooth surface ensures a cleaner, more professional-looking “tree” and makes the decorating process much easier.
- Use a Very Sharp Knife: This cannot be stressed enough! A sharp knife will glide through the brownies, giving you clean, crisp triangle cuts without tearing or crumbling the edges. Wipe your knife clean between cuts for the best results.
- Cool Brownies Completely Before Decorating: Patience is a virtue here! Decorating warm brownies is a recipe for disaster, as the heat will quickly melt the buttercream frosting, leading to a sticky, unappealing mess. Allow your brownies to cool thoroughly, ideally for several hours or even overnight, before attempting to frost them.
- Pipe Your Frosting Effectively: Practice makes perfect! If you’re new to piping, try a few practice swirls on a piece of parchment paper first. Hold the piping bag at a 90-degree angle to the brownie for star tips and apply even pressure. Start at the base and work your way up, overlapping slightly to create a full, lush tree appearance.
- Make Ahead for Stress-Free Holidays: You can bake the brownies up to 2-3 days in advance and store them in an airtight container. The buttercream frosting can also be made 2-3 days ahead and stored in the refrigerator. Assemble and decorate the brownies just a few hours before serving for optimal freshness and presentation.
Another Creative Idea: Christmas Tree Brownies with Fondant
If you enjoy the smooth, sculpted look of fondant and its versatility, this alternative method offers a different aesthetic for your Christmas tree brownies. Working with Marshmallow Fondant can be a fun and rewarding experience, allowing for very clean lines and vibrant colors. To achieve that perfect festive green, you’ll need gel food coloring. If you’re new to this technique, you can learn more about How to Color Fondant in a separate guide.
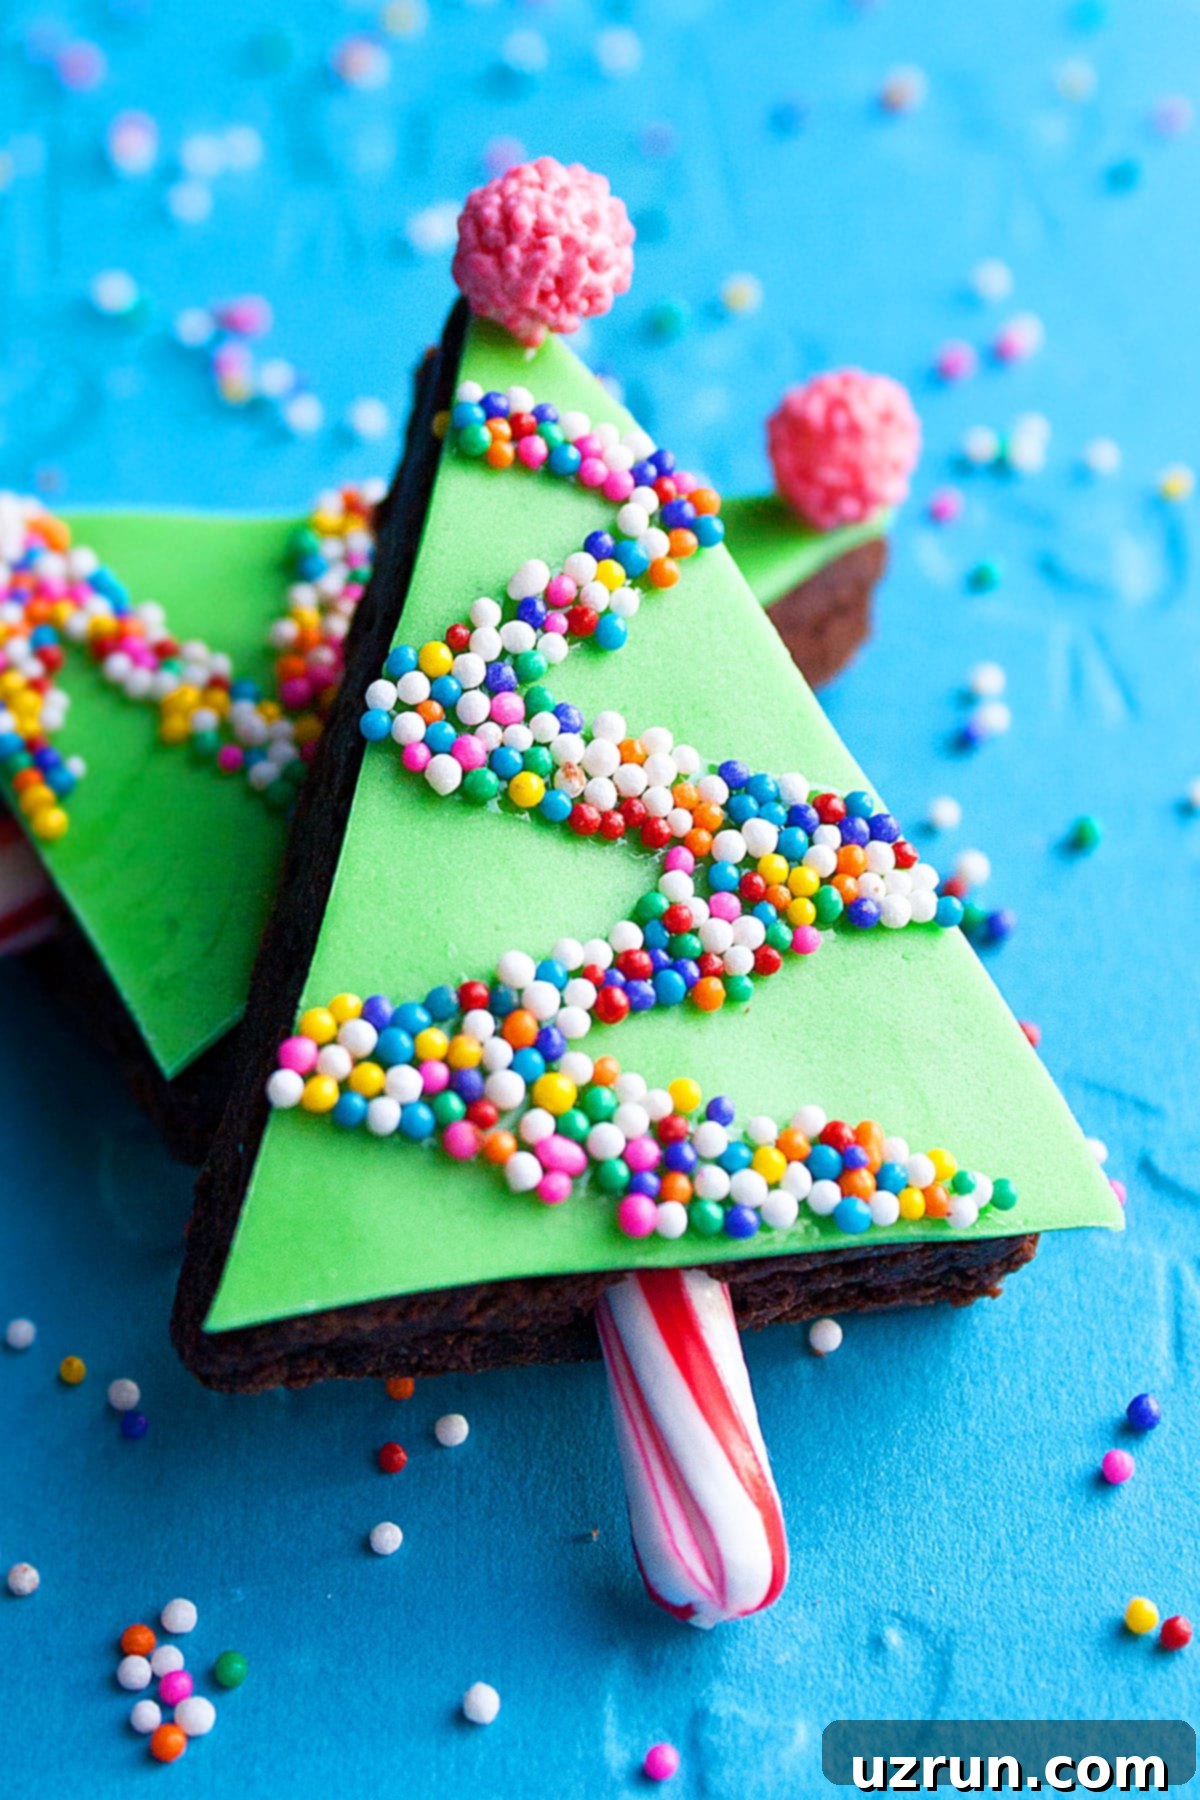
Here’s how to create beautiful fondant-covered Christmas tree brownies:
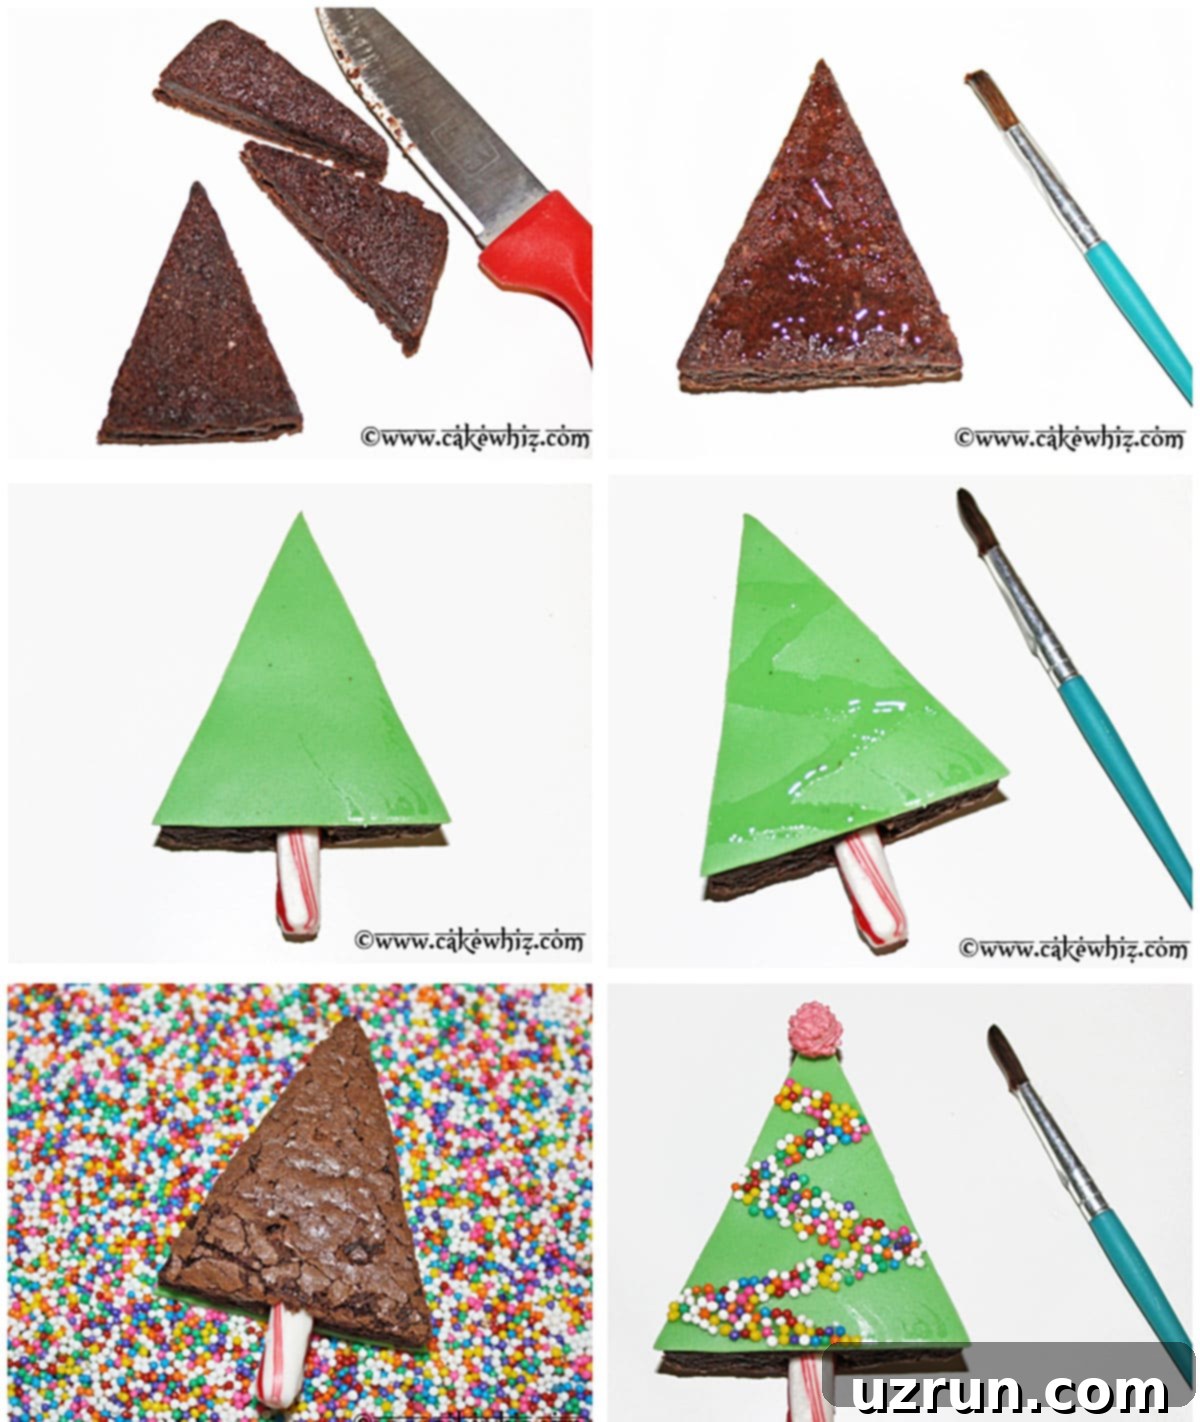
- Cut Brownies into Triangles: Just as with the buttercream method, use a sharp knife to cut your thoroughly cooled brownies into precise triangle shapes. For a cleaner fondant application, it’s best to use the smooth bottom side of the brownie as your top surface.
- Prepare Brownies for Fondant Adhesion: Lightly brush a thin layer of corn syrup on top of your brownie triangles. This sticky layer will act as an adhesive for the fondant, ensuring it stays firmly in place. Remember to use the smooth side of the brownie for this step.
- Roll Out and Apply Green Fondant: On a surface lightly dusted with powdered sugar or cornstarch, roll out your green fondant to an even thickness (about 1/8 inch). Place your brownie triangle, corn syrup side down, directly onto the rolled-out fondant. Gently press to secure.
- Trim Excess Fondant: Using a sharp paring knife or a pizza cutter, carefully cut around the edges of the brownie triangle, removing any excess fondant. This creates a neat, perfectly shaped fondant-covered brownie.
- Add the Candy Cane Trunk: Break a mini candy cane into small, straight pieces. Gently insert one piece into the bottom base of the fondant-covered brownie triangle, serving as the tree trunk.
- Decorate with a Zig-Zag Pattern: For decorations, paint a zig-zag pattern or small dots of corn syrup on top of your green fondant “tree.” This will be the sticky base for your sprinkles.
- Apply Sprinkles: Place the brownie, sticky side down, into a shallow bowl filled with your desired sprinkles. The sprinkles will adhere beautifully to the corn syrup lines, creating a festive “garland” or ornament effect. Alternatively, you can gently press individual sprinkles onto the corn syrup.
- Add a Star and Enjoy: For the ultimate finishing touch, use a tiny dab of corn syrup to attach a large star-shaped sprinkle (or any decorative sprinkle) to the very top of your fondant Christmas tree. Now they are ready to be admired and enjoyed!
Storage Tips for Your Christmas Tree Brownies
To keep your festive creations fresh and delicious, proper storage is key:
- Room Temperature: If your brownies are frosted with buttercream and your home isn’t overly warm, leftovers can be stored in a covered, airtight container at room temperature for about 4-5 hours. Beyond that, refrigeration is recommended to maintain freshness and prevent frosting from becoming too soft.
- Refrigerate: For longer storage, place the decorated brownies in a single layer in an airtight container. They can be refrigerated for up to 3 days. If stacking is necessary, place a piece of parchment paper between layers to prevent the frosting from sticking or smudging.
- Freeze:
- Unfrosted Brownies: Bake and cool your brownies completely. Cut them into triangles and freeze them in a single layer on a baking sheet until firm. Then, transfer to a freezer-safe bag or container for up to 1 month.
- Frosting: Buttercream frosting can be stored separately in an airtight container in the freezer for up to 1 month. Thaw in the refrigerator overnight, then bring to room temperature and re-whip briefly before piping.
- When ready to enjoy, thaw the unfrosted brownies to room temperature, then prepare and pipe the frosting as per the instructions above.
- Make Ahead: These brownies are perfect for holiday prep! You can easily bake the brownies and prepare the green buttercream frosting 1-2 days in advance. Store the brownies at room temperature in an airtight container and the frosting in the refrigerator. On the day of serving, bring the frosting to room temperature (re-whip if needed), then assemble and decorate your Christmas trees.
Frequently Asked Questions (FAQs)
Q: Can I use store-bought frosting instead of homemade buttercream?
A: Absolutely! If you’re short on time, a good quality store-bought vanilla frosting can be colored green with gel food coloring. Just be sure it’s thick enough to hold its shape when piped. You might want to chill it for a bit before piping if it feels too soft.
Q: My brownies are crumbling when I try to cut them. What can I do?
A: This usually happens if the brownies are still warm or if your knife isn’t sharp enough. Ensure your brownies are completely cooled before cutting. Use a very sharp knife and wipe it clean with a damp cloth after every few cuts to prevent sticking and crumbling. You can also try chilling the brownies in the refrigerator for about 30 minutes before cutting to firm them up.
Q: How can I prevent the candy cane trunks from breaking?
A: Mini candy canes are often quite delicate. To prevent breaking, use a gentle, twisting motion as you push them into the brownie. If they still break easily, you can use a small skewer or toothpick to create a pilot hole in the brownie first, then insert the candy cane. Alternatively, consider using sturdy pretzel sticks as trunks.
Q: Can these brownies be made gluten-free or vegan?
A: Yes! You can definitely adapt this recipe. For gluten-free brownies, use a certified gluten-free brownie mix or your favorite homemade gluten-free brownie recipe. For vegan brownies, ensure your brownie recipe uses plant-based ingredients (e.g., flax eggs, oil, plant milk) and make a vegan buttercream frosting using vegan butter and powdered sugar.
Q: How do I transport these decorated brownies without smudging the frosting?
A: The best way to transport them is in a container with individual cupcake inserts, or by arranging them in a single layer in a sturdy box. If you must stack them, chill them thoroughly first to firm up the frosting, then place a sheet of parchment paper between layers. Keep them cool during transport, ideally in an insulated bag or cooler.
More Festive Christmas Desserts to Try
If you’ve enjoyed making these Christmas tree brownies, you’ll love exploring these other festive holiday treats from our kitchen:
- Sugared Cranberries (Candied Cranberries) – A beautiful and tangy garnish for any holiday dessert.
- Easy Penguin Cookies (Nutter Butter) – Adorable, no-bake cookies that are a hit with kids!
- Easy Gingerbread Cookies (With Cake Mix) – Classic holiday spice made simple with a cake mix base.
- Easy Poinsettia Cupcakes (Buttercream) – Stunning floral cupcakes that make a beautiful centerpiece.
- Easy Reindeer Cupcakes (Rudolph) – Whimsical and fun cupcakes perfect for a kids’ party.
Recipe Card: Easy Christmas Tree Brownies (Bites)
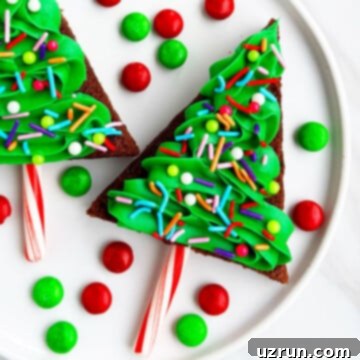
Easy Christmas Tree Brownies (Bites)
Abeer Rizvi
Pin Recipe
Want to Save This Recipe?
Enter your email & I’ll send it to your inbox. Plus, get great new recipes from me every week!
By submitting this form, you consent to receive emails from CakeWhiz
Ingredients
- 1 Brownie mix Family size (or homemade brownies)
- 4 cups American buttercream frosting Colored vibrant green
- 2 tablespoon Assorted sprinkles (e.g., colorful jimmies, nonpareils, or star sprinkles)
- 12 Candy canes Break off the curved part; use straight pieces for trunks
Instructions
-
Prepare brownies as per box instructions (or your favorite homemade recipe) in a 9×13 inch pan. Line the pan with parchment paper for easy removal.
-
Allow the brownies to cool completely to room temperature on a wire rack. This is essential for clean cuts and preventing frosting melt.
-
While the brownies are baking and cooling, prepare your green buttercream frosting. Use gel food coloring to achieve a vibrant green hue.
-
Once cooled, use a very sharp knife to cut the brownies into even square slices, then cut each square further into two triangle shapes by cutting diagonally.
-
Unwrap the candy canes and break off the curved part. Gently push a straight piece of candy cane through the bottom (the thickest part) of each brownie triangle to create the tree trunk.
-
Fill a piping bag with your green buttercream frosting and attach a star tip (Wilton tip 21 for smaller trees, Wilton tip 1M for larger, fluffier trees).
-
Hold the brownie by its trunk and begin piping the frosting from the bottom of the brownie, working your way up to the top in a continuous or overlapping star pattern to cover the entire triangle, forming a “tree.”
-
Immediately after piping each tree, toss your favorite sprinkles on top of the green icing to adhere. For a final touch, you can add a small star sprinkle to the peak of each tree. Enjoy your festive creations!
Video
Notes
- Frosting Shortcuts: Feel free to use good quality store-bought frosting if you are short on time. Make sure to color it green with gel food coloring.
- Cake Base Option: Instead of brownies, you can follow the same cutting and decorating steps using a firm cake (like pound cake or sheet cake) to create festive mini cakes.
- Cooling is Crucial: Never decorate warm brownies! The heat will cause the icing to melt and slide off, creating a sticky, unappealing mess.
- Clean Cuts: Similarly, avoid cutting warm brownies. They will crumble and create messy edges. Always ensure they are completely cool for perfect triangle shapes.
- Sharp Knife: A very sharp knife is your best friend for making clean, precise triangle cuts without tearing the brownie. Wipe it between cuts for optimal results.
- More Tips & Variations: Don’t forget to read the “Tips and Techniques” and “Variations” sections above for more creative ideas and helpful advice.
- Storage: Leftovers can be stored in a sealed, airtight container in the fridge for up to 3 days.
Nutrition
An automated tool is used to calculate the nutritional information. As such, I cannot guarantee the accuracy of the nutritional information provided for any recipe on this site.
