The Ultimate Guide to Making Easy & Colorful Christmas Pinwheel Cookies
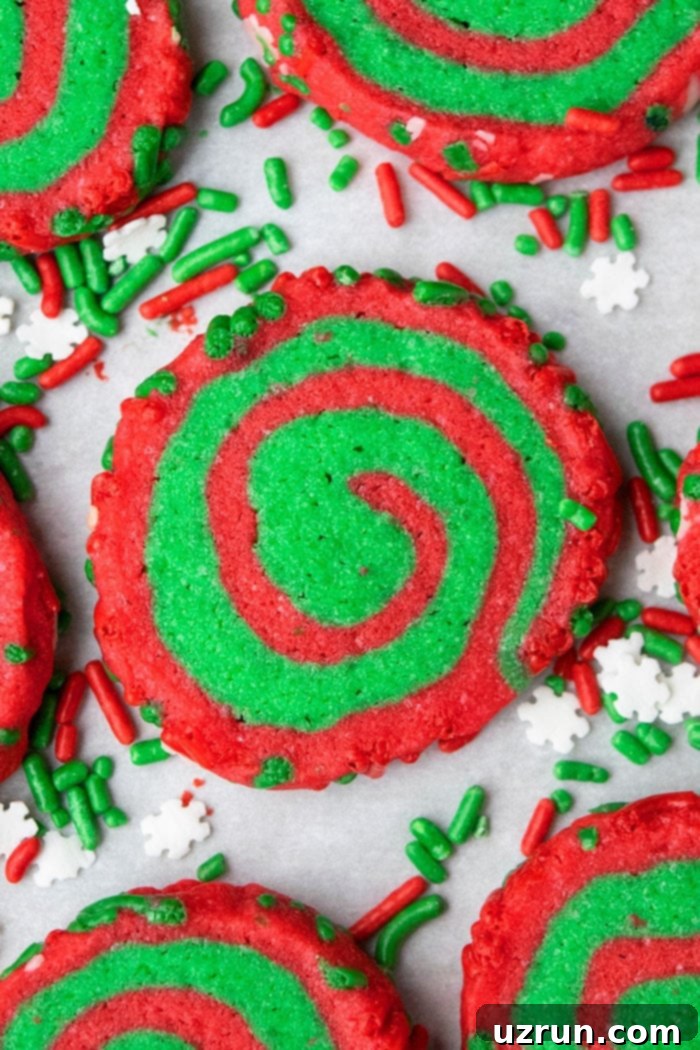
There’s nothing quite like the magic of homemade cookies during the Christmas holidays, and few are as enchanting and delightful as the classic Christmas Pinwheel Cookies. With their vibrant, swirling colors and perfectly crispy texture, these old-fashioned sugar cookies are a festive staple that brings joy to every cookie platter. This comprehensive guide will walk you through creating these beautiful, easy-to-make treats, ensuring your holiday baking is both impressive and stress-free.
Imagine a tray filled with an assortment of holiday delights: classic Spritz Cookies, sweet Jam Thumbprint Cookies, and the star of the show – these mesmerizing pinwheel cookies. They aren’t just delicious; they’re edible works of art, making them an ideal homemade gift for family and friends or a stunning centerpiece for your holiday dessert table.
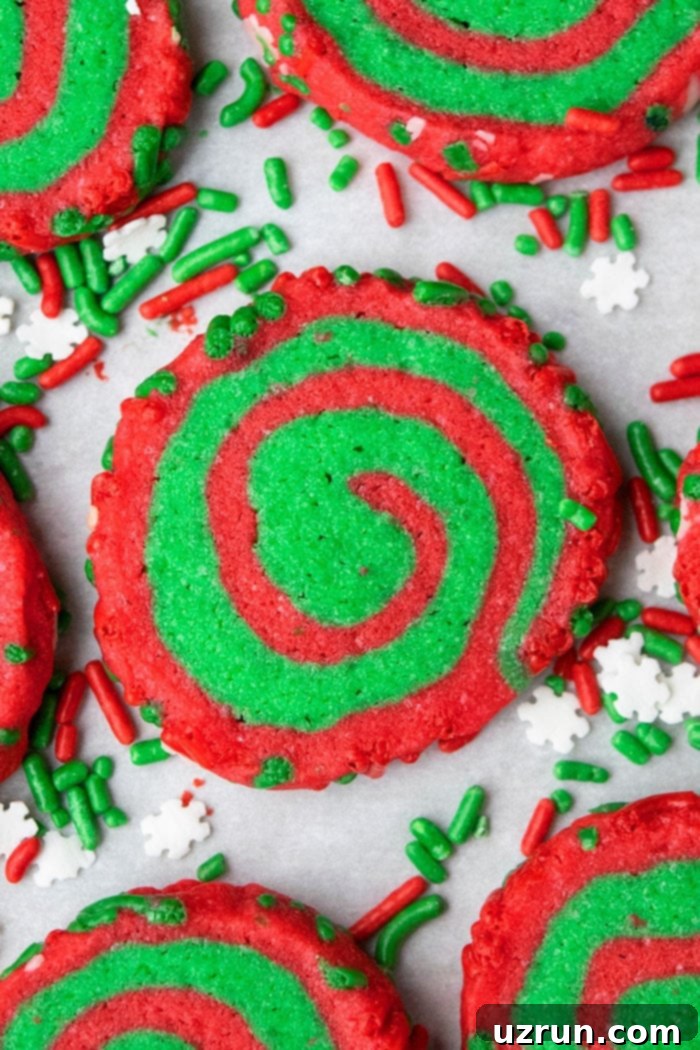
What makes pinwheel cookies so special? Their visual appeal is undeniable. The mesmerizing swirl of contrasting colors instantly captures attention, making them look far more complicated to achieve than they actually are. With just a few simple ingredients and a straightforward technique, you can create a batch of these charming cookies that will earn you rave reviews. The possibilities for color combinations are endless, allowing you to customize them for any occasion, though they truly shine during the festive Christmas season.
Why You’ll Love This Pinwheel Cookie Recipe
- Visually Stunning: The vibrant, swirling patterns are incredibly eye-catching and festive, perfect for holiday gatherings.
- Surprisingly Easy: Despite their intricate appearance, these cookies are straightforward to make, requiring basic baking skills.
- Perfectly Crispy: Made from a cut-out sugar cookie dough, they bake up with a delightful crispness that everyone loves.
- Customizable: Easily adapt colors, flavors, and toppings to suit any holiday or personal preference.
- Great for Gifting: Homemade pinwheel cookies make a thoughtful and delicious present for loved ones.
- Old-Fashioned Charm: They evoke a sense of nostalgia, reminiscent of classic holiday baking traditions.
Key Ingredients for Perfect Pinwheel Cookies
The beauty of pinwheel cookies lies in their simplicity, starting with a reliable sugar cookie dough. Here’s a closer look at the essential ingredients:
- Sugar Cookie Dough: The foundation of these cookies. A good cut-out sugar cookie dough recipe is crucial because it holds its shape well during baking and provides that satisfying crisp texture. Using two batches of dough, as specified in the recipe, ensures you have enough for vibrant color layers.
- Food Coloring: This is where the magic happens! Gel food coloring is highly recommended over liquid food coloring. Gel colors are concentrated, providing intense hues without adding excess moisture to your dough, which can affect the cookie’s texture. For Christmas, classic red and green are perfect, but feel free to experiment with other festive shades like blue, white, or even gold.
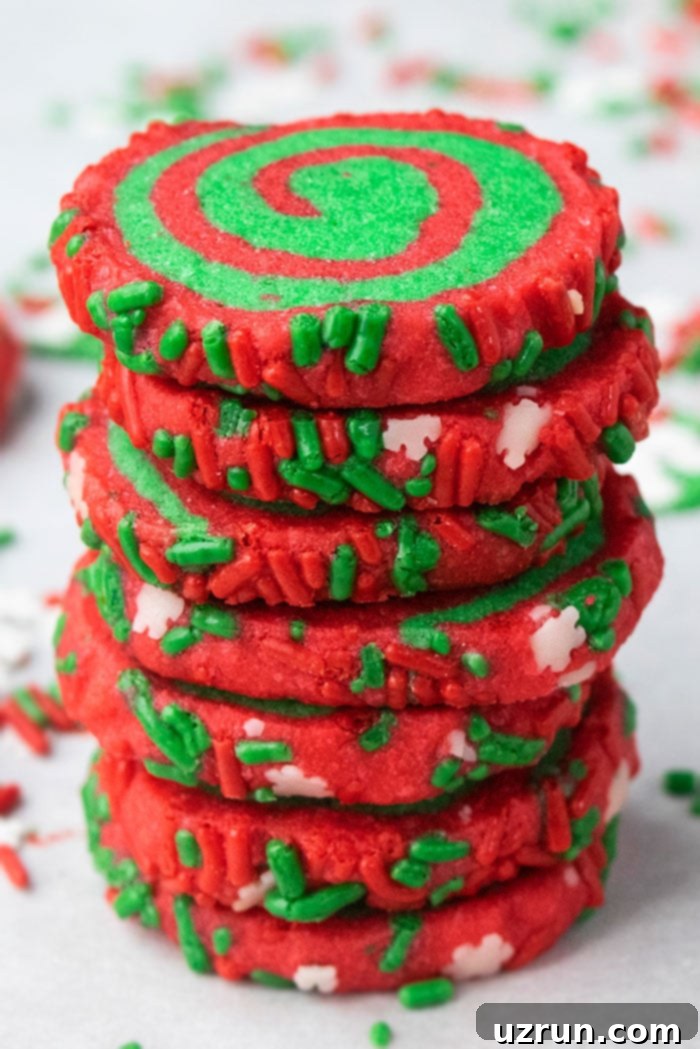
- Sprinkles: An optional but highly encouraged addition. Sprinkles add an extra layer of festivity and crunch. Choose holiday-themed sprinkles (stars, trees, snowflakes) or simply colorful jimmies to coat the outside of your cookie roll for a delightful finish.
How to Make Pinwheel Cookies: A Step-by-Step Guide
Making these colorful pinwheel cookies is a fun and rewarding process. Follow these detailed steps for perfect results every time:
- Prepare Your Dough: Start by preparing a reliable cut-out sugar cookie dough. The recipe calls for two batches, which you can make simultaneously or one after the other. Ensure the dough is well-mixed but not overmixed, as this can lead to tough cookies.
- Divide and Color the Dough: Split your prepared cookie dough into two equal portions. In separate bowls, mix your chosen food coloring into each portion. For Christmas, red and green gel food coloring work beautifully. Knead the color into the dough until it’s evenly distributed and you achieve your desired vibrant shade. Remember, gel coloring provides richer color without making the dough sticky.
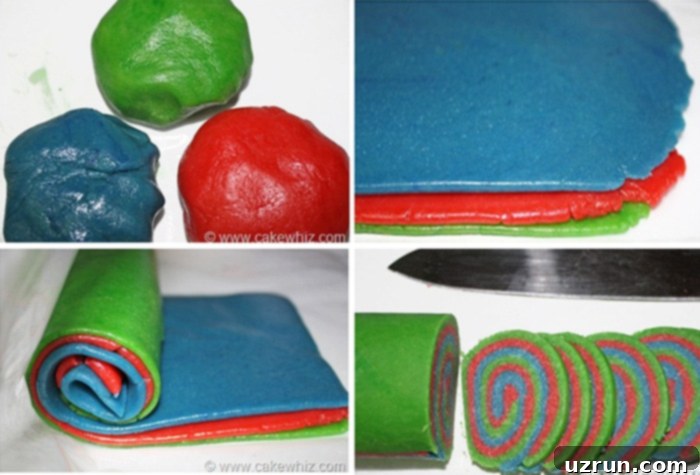
- Flatten the Dough Layers: This step is critical for creating even layers. Take one colored dough portion and place it between two sheets of wax paper or parchment paper. Using a rolling pin, roll the dough out evenly to about ⅛ to ¼ inch thickness. Repeat this process with the second colored dough portion. Rolling between paper prevents sticking and makes transfer easy.
- Stack the Dough: Carefully peel the top sheet of wax paper from one flattened dough. Invert this dough onto the other flattened dough, then gently peel off the remaining wax paper. You should now have two distinct colored layers stacked perfectly on top of each other, resembling a colorful sandwich. Ensure the edges align as much as possible for a neat swirl.
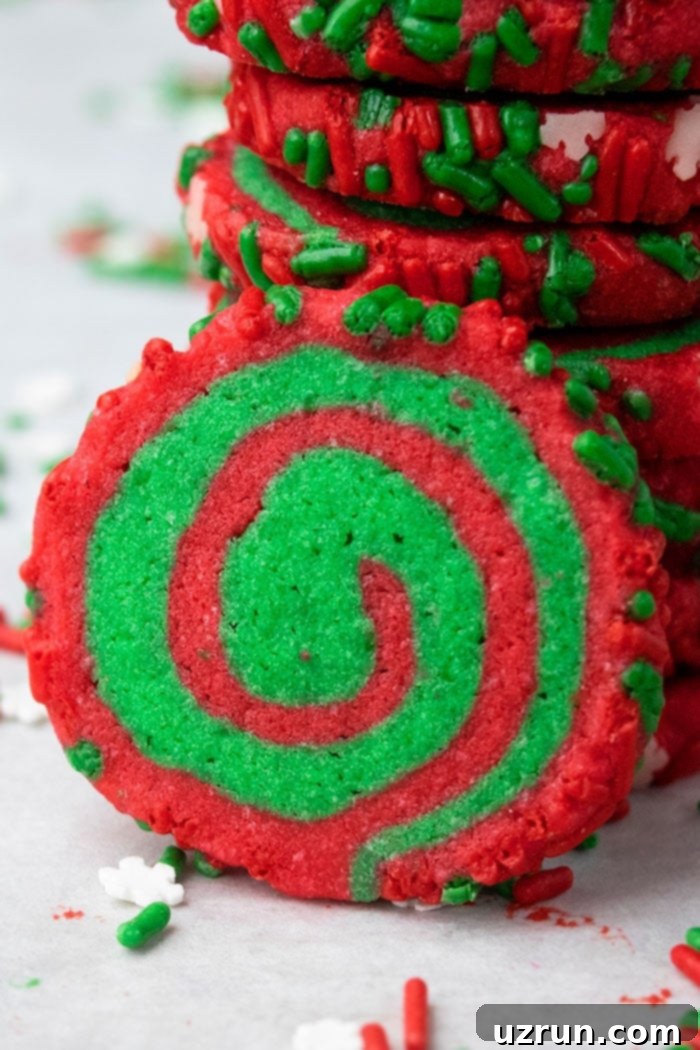
- Roll the Stacked Dough: Starting from one end, tightly roll the stacked dough layers into a log, similar to how you would roll a Swiss roll cake. Use the bottom sheet of wax paper to help guide the roll, making sure it doesn’t get incorporated into the dough itself. The tighter you roll, the more defined your pinwheel swirl will be.
- Add Sprinkles (Optional but Recommended): Once you have a firm cookie log, remove the wax paper. Generously toss your chosen sprinkles all over the exterior of the cookie roll, including the sides. Gently roll the log back and forth on a clean surface to ensure the sprinkles adhere firmly. This adds a beautiful festive coating.
- Chill the Dough: This is arguably the most important step! Place your sprinkle-coated cookie log in the refrigerator for at least 1 hour, or preferably overnight, until it is very firm. Chilling is essential for two reasons: it allows you to cut sharp, clean, and even slices without distorting the layers, and it helps the cookies hold their shape while baking.
- Cut Even Slices: Once the dough is thoroughly chilled and firm, use a very sharp knife to cut the log into even slices, approximately ¼ inch thick. A sharp knife is key to achieving clean, defined pinwheel patterns. Avoid cutting slices that are too thick, as they may not bake evenly.
- Bake to Perfection: Arrange the sliced pinwheel cookies on a baking sheet lined with parchment paper, leaving a little space between each. Bake in a preheated oven at 350 degrees F (175 degrees C) for 10-12 minutes, or until the edges are firm and slightly golden, but the centers still look slightly soft. Remember that cookies continue to cook slightly as they cool on the hot baking sheet.
- Cool and Enjoy: Once baked, remove the cookies from the oven and let them cool on the baking sheet for a few minutes before transferring them to a wire rack to cool completely. Once cooled, they will achieve their signature crispy texture. Now, dig in and enjoy these beautiful, homemade treats!
Creative Variations to Elevate Your Pinwheel Cookies
While the classic colorful pinwheel is a showstopper, these cookies are incredibly versatile. Don’t be afraid to experiment with different flavors and textures to create your unique spin:
- Date Pinwheel Cookies: For a delightful chewiness and natural sweetness, spread a thin layer of finely chopped dates (or a date paste) between the two cookie dough layers before rolling. This adds a wonderful, rich flavor.
- Chocolate Pinwheel Cookies: Infuse one of your dough layers with cocoa powder for a delicious chocolate swirl. Simply replace a small portion of flour with unsweetened cocoa powder (about ¼ cup per batch) in one half of the dough before coloring.
- Coconut Pinwheels: After rolling your dough log, skip the sprinkles and roll it generously in desiccated coconut or finely shredded coconut for a tropical twist and added texture.
- Funfetti/Seasonal Sprinkles: Beyond Christmas, tailor your sprinkles to any holiday! Use spooky Halloween sprinkles, pastel Easter sprinkles, or patriotic red, white, and blue for the Fourth of July.
- Citrus Zest Infusion: Add finely grated lemon, lime, or orange zest to your cookie dough for a bright, refreshing flavor. Zest can be added to one or both dough portions before coloring.
- Flavor Extract Swaps: While vanilla extract is a staple, try other extracts for different flavor profiles. Almond extract is fantastic for a classic holiday taste, or a hint of peppermint extract can make them extra festive for Christmas.
- Jam-Filled Pinwheels: Spread a thin layer of your favorite jam (strawberry, raspberry, apricot, or grape) between the flattened dough layers before rolling. This creates a sweet, fruity surprise in every bite.
- Cinnamon Swirl: For a comforting aroma and taste, sprinkle a mixture of cinnamon and sugar between the dough layers before rolling, much like a cinnamon roll.
- Drizzle & Decorate: Once your pinwheel cookies are completely cooled, take them to the next level with a drizzle! Melted white chocolate, a simple vanilla glaze, or even a contrasting colored royal icing can add an elegant touch.
- Marble Effect: Instead of distinct layers, lightly swirl two different colored doughs together before rolling them out flat for a marbled, artistic effect.
Essential Tips and Techniques for Pinwheel Cookie Success
Achieving those perfectly crisp, beautifully swirled pinwheel cookies is easy with a few key techniques:
- Don’t Skip the Chill Time: This is paramount! Chilling the cookie dough roll for at least an hour (or ideally, several hours/overnight) is crucial. It firms up the dough, preventing it from spreading excessively in the oven and allowing you to cut neat, defined slices that hold their intricate swirl pattern.
- Use a Very Sharp Knife: A sharp knife is your best friend when slicing the chilled dough. It ensures clean cuts and prevents the dough layers from smushing or dragging, resulting in crisp, well-defined pinwheels.
- Opt for Gel Food Coloring: As mentioned, gel food coloring is superior for cookie dough. It’s concentrated, so a little goes a long way to achieve vibrant colors without altering the dough’s consistency. Liquid food coloring can add too much moisture, making the dough wet and difficult to handle.
- Slice Evenly (Not Too Thick): Aim for slices that are about ¼ inch thick. If they are too thick, they won’t bake through evenly, and the edges might overcook before the center is done. If too thin, they might become overly brittle.
- Troubleshooting Crumbly Dough: If your dough feels too dry and crumbly after mixing or coloring, add a very small amount (half a teaspoon at a time) of water or milk. Mix it in until the dough comes together and is pliable.
- Fixing Sticky Dough: If your dough becomes wet and sticky, resist the urge to add more flour, as this can make the cookies tough. Instead, wrap the dough tightly and chill it in the refrigerator for at least 30 minutes. Cold dough is much easier to handle.
- Avoid Overmixing the Dough: Overmixing develops the gluten in the flour too much, leading to tough, chewy cookies instead of the desired crisp texture. Mix just until the ingredients are combined.
- Knowing When Cookies Are Done: Pinwheel cookies are baked when their edges are firm and slightly golden, but the centers still look a little soft. They will continue to firm up as they cool on the baking sheet. Overbaking can lead to overly brown or hard cookies.
- Experiment with More Colors: Don’t limit yourself to two colors! For a truly show-stopping effect, divide your dough into three or even four portions and color each one differently. Stack them carefully for beautiful rainbow pinwheel cookies.
- Parchment Paper is Your Friend: Always line your baking sheets with parchment paper. This prevents sticking, promotes even baking, and makes cleanup a breeze. It’s also incredibly helpful when rolling out and handling the dough.
Serving and Storage Suggestions
These festive pinwheel cookies are perfect for serving at holiday parties, including in cookie gift baskets, or simply enjoying with a warm cup of coffee or tea.
- Serving: Arrange them artfully on a dessert platter with other holiday treats. Their vibrant colors will make them stand out.
- Storage: Leftover pinwheel cookies can be stored in an airtight container or cookie jar at room temperature for up to 5 days. Ensure they are completely cool before storing to prevent them from becoming soft.
- Freezing Dough: You can prepare the cookie dough roll ahead of time and freeze it for up to 1-2 months. Wrap the unbaked dough log tightly in plastic wrap, then aluminum foil. When ready to bake, thaw the log slightly in the refrigerator until it’s firm enough to slice, then proceed with cutting and baking.
- Freezing Baked Cookies: Baked pinwheel cookies can also be frozen for up to 3 months. Once completely cooled, layer them between sheets of parchment paper in an airtight freezer-safe container. Thaw at room temperature before serving.
Frequently Asked Questions (FAQ)
Here are answers to some common questions about making pinwheel cookies:
What kind of sugar cookie dough is best for pinwheel cookies?
A “cut-out” sugar cookie dough recipe is ideal. These doughs are designed to hold their shape well during baking and are less prone to spreading, ensuring your pinwheel design remains intact and sharp. Avoid doughs that are too soft or spread a lot, as they will lose their swirl pattern.
Can I use natural food colorings?
Yes, you can use natural food colorings, but be aware that their colors might be less vibrant and you might need to use more, which could affect the dough’s consistency. Gel-based natural colorings tend to work better than liquid ones.
My dough is cracking when I try to roll it – what went wrong?
Cracking dough usually indicates it’s too cold or too dry. Let the dough sit at room temperature for 5-10 minutes to soften slightly, or if it’s genuinely dry, knead in a tiny amount of milk or water (half a teaspoon at a time) until it becomes pliable.
How thick should I roll the dough layers?
Aim for about ⅛ to ¼ inch thick for each layer. This thickness ensures a good balance between maintaining the swirl and achieving a crisp cookie texture. If rolled too thin, the layers can tear; if too thick, the cookies might not bake evenly.
Can I make these cookies without sprinkles?
Absolutely! The sprinkles are optional. The vibrant swirl alone is beautiful. You can also roll them in desiccated coconut, chopped nuts, or coarse sugar for a different finish.
How do I prevent the colors from bleeding into each other?
The key to preventing color bleeding is to ensure the dough is well-chilled before slicing and baking. Cold dough sets the colors and prevents them from melding together in the oven. Also, avoid overly sticky or wet doughs, which are more prone to bleeding.
More Delicious Christmas Cookie Ideas
If you’re looking to expand your holiday cookie repertoire, here are some other fantastic recipes that pair wonderfully with pinwheel cookies:
- Easy Stained Glass Cookies
- Easy Cut Out Funfetti Cookies
- Gooey Butter Cookies (With Cake Mix)
- Iced Oatmeal Cookies
- Chocolate Crinkle Cookies (With Cake Mix)
Recipe
Christmas Pinwheel Cookies
Abeer Rizvi
Pin Recipe
Want to Save This Recipe?
Enter your email & I’ll send it to your inbox. Plus, get great new recipes from me every week!
By submitting this form, you consent to receive emails from CakeWhiz
Ingredients
- 2 batches Sugar cookie dough Double this recipe
- Red food coloring
- Green food coloring
- 1 cup Sprinkles
Instructions
-
Prepare the cookie dough.
-
Divide the dough in half.
-
Color one portion red and color the other portion green.
-
Use a rolling pin to flatten each portion of colored dough between two sheets of wax paper.
-
Place the flattened dough on top of each other, similar to a stack of paper.
Tip: Since you rolled out the dough between two sheets of wax paper, you can just flip one sheet of dough on top of the other. -
Start rolling this stack of cookie dough from one end to the other end. Use the sheet of wax paper from the base to help you roll. Just make sure it doesn’t roll into your dough.
-
Toss sprinkles all over the cookie roll and along the sides and roll it back and forth until sprinkles stick on.
-
Chill in the refrigerator for a few hours or overnight until firm.
-
Then, use a very sharp knife to cut even slices.
-
Place them on a cookie tray, lined with parchment paper.
-
Bake at 350 degrees F for 10-12 minutes or until edges are firm.
-
Allow them to cool down completely and enjoy!
Notes
- Read all my tips above.
- Leftovers can be stored in a cookie jar at room temperature for up to 5 days.
Nutrition
An automated tool is used to calculate the nutritional information. As such, I cannot guarantee the accuracy of the nutritional information provided for any recipe on this site.
With this detailed guide, you are now equipped to bake the most beautiful and delicious Christmas Pinwheel Cookies. These colorful, crispy sugar cookies are more than just a treat; they’re a festive tradition waiting to be made in your kitchen. So gather your ingredients, embrace the holiday spirit, and get ready to create some truly magical swirls. Happy baking!
