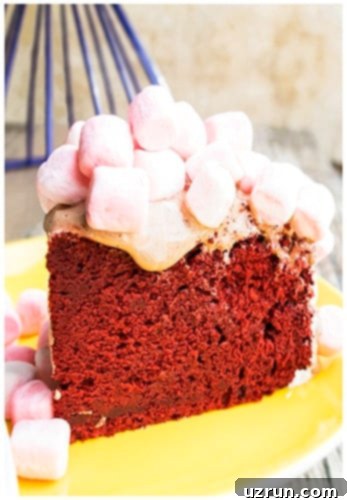
Ultimate Homemade Red Velvet Cake Recipe: Moist, Easy, and From Scratch
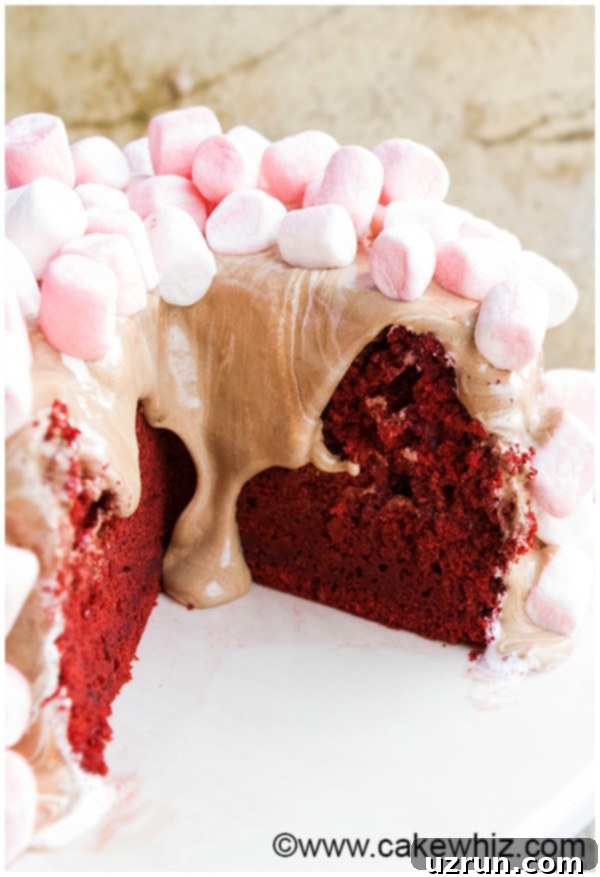
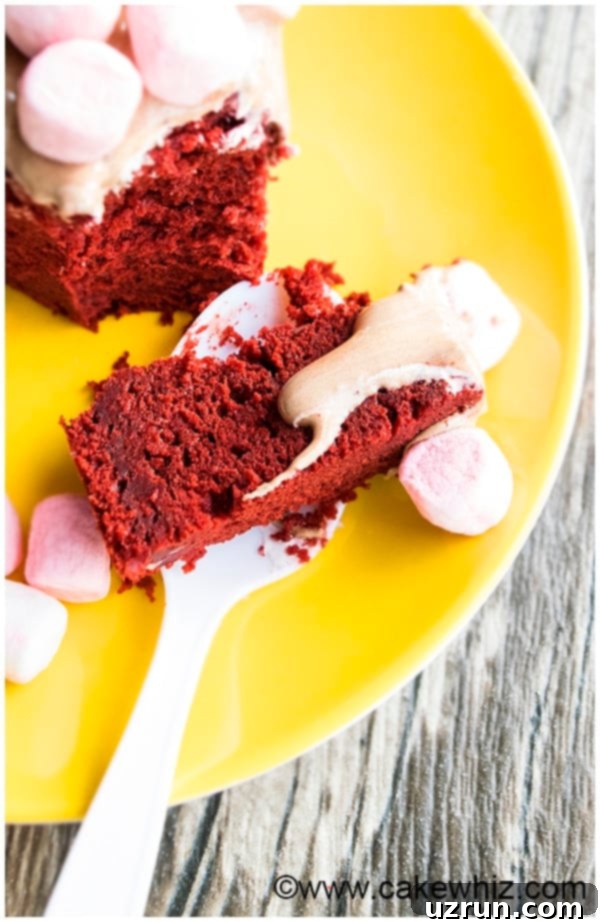
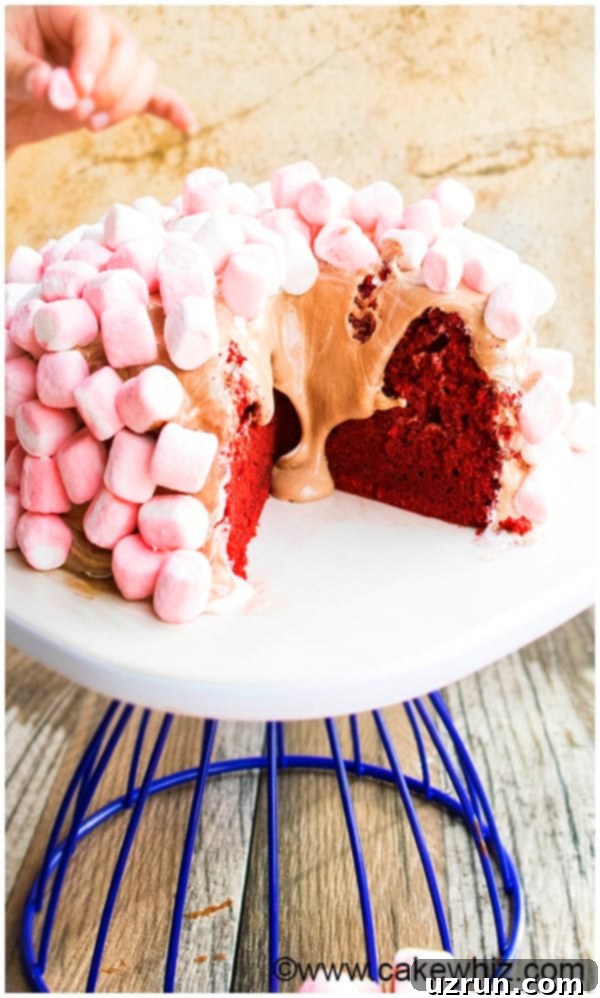
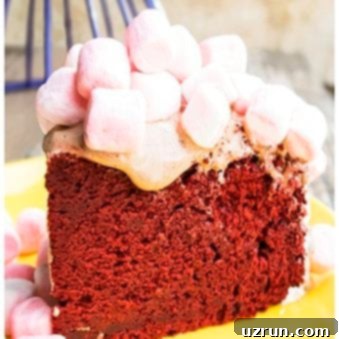
Embark on a culinary journey to create the ultimate homemade Red Velvet Cake from scratch. This recipe has been meticulously developed over several years to guarantee an extraordinarily moist, tender, and perfectly structured cake that won’t crumble when sliced. It’s infused with a delightful vanilla flavor beautifully complemented by subtle hints of chocolate – exactly as a classic Red Velvet should be! While traditionally adorned with a rich cream cheese frosting, this recipe offers a unique twist: a luscious ooey-gooey chocolate marshmallow fluff, generously topped with mini pink marshmallows for an extra touch of whimsy. Get ready to bake a cake that will impress with its vibrant color, exquisite taste, and irresistible texture.
Beyond this show-stopping cake, the versatile flavors of red velvet can be enjoyed in various forms. If you’re a fan, you might also love exploring these other delightful red velvet desserts:
- Best Red Velvet Cupcakes {With Cream Cheese Frosting}
- Red Velvet Cookies {With Cake Mix}
- Red Velvet Truffles
- Red Velvet Crinkle Cookies
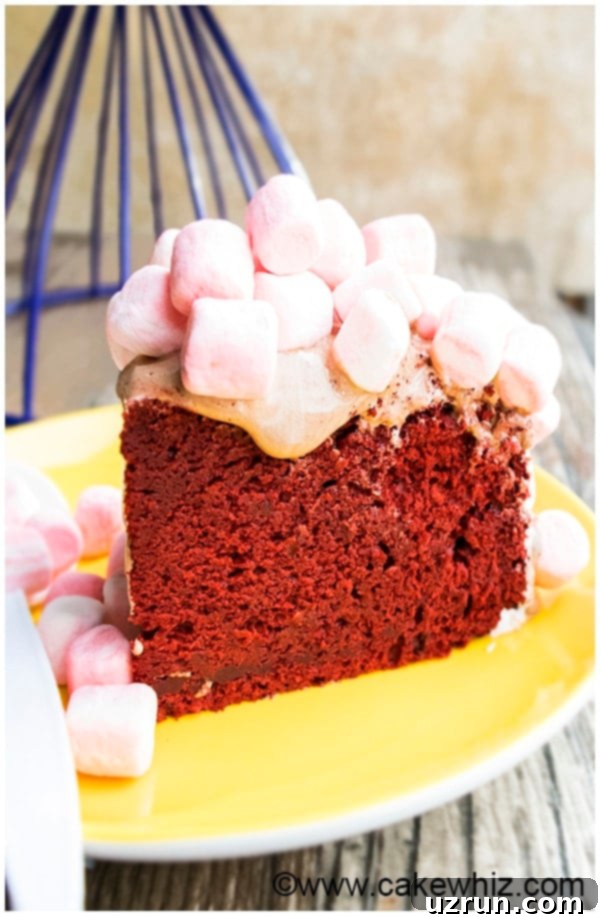
Table of Contents
- What Is Red Velvet Cake Flavor/Taste? Is It Just Chocolate Cake?
- How To Make This Easy Red Velvet Cake Recipe From Scratch
- Key Ingredients for the Perfect Red Velvet Cake
- Red Velvet Frosting and Topping Ideas
- Secrets to Making an Incredibly Moist Cake
- The Role of Vinegar in Red Velvet Cake (and why sour cream is a star)
- Variations for Your Best Red Velvet Birthday Cake and Beyond
- Expert Tips and Techniques for Baking Red Velvet Cake
- Storage for Your Homemade Red Velvet Cake
- More Classic Cake Recipes
What Is Red Velvet Cake Flavor/Taste? Is It Just Chocolate Cake?
Red Velvet Cake is often misunderstood, with many wondering if it’s merely a chocolate cake dyed red. The truth is, it’s a unique creation that balances several distinct flavors. While it does contain cocoa powder, its flavor profile is far from a standard chocolate cake. This cake is characterized by its soft, incredibly moist, and rich texture. The predominant flavor is a delightful vanilla, beautifully complemented by a subtle, tangy cocoa undertone. The cocoa doesn’t overpower; instead, it provides a gentle depth that enhances the vanilla, creating a sophisticated taste. Historically, the red hue was a natural reaction between buttermilk, vinegar, and the anthocyanin in older cocoa powders, which would turn reddish when exposed to acid. Today, food coloring is typically used to achieve that iconic vibrant crimson, making the visual as much a part of the experience as the taste. This combination of subtle chocolate, vanilla, and a slight tang from ingredients like buttermilk or sour cream is what truly defines a classic red velvet, setting it apart from its darker chocolate counterparts.
How To Make This Easy Red Velvet Cake Recipe From Scratch?
Creating this irresistible Red Velvet Cake from scratch is a straightforward process, broken down into simple, manageable steps. Following these instructions will lead you to a perfectly moist and flavorful cake:
- Cream butter and sugar: Begin by creaming softened unsalted butter with granulated sugar until the mixture is light, fluffy, and pale in color. This step incorporates air, which is crucial for a tender cake texture.
- Beat in the eggs: Add the large eggs one at a time, ensuring each is fully incorporated before adding the next. This helps create a stable emulsion, contributing to the cake’s structure.
- Add wet ingredients: Gently fold in the sour cream, whole milk, vanilla extract, and red food coloring. Mix until these wet ingredients are just combined and the color is evenly distributed throughout the batter.
- Whisk dry ingredients: In a separate bowl, whisk together the all-purpose flour, unsweetened cocoa powder, baking powder, baking soda, and salt. This ensures that the leavening agents and flavorings are evenly distributed before being added to the wet mixture.
- Combine dry and wet mixtures: Gradually add the dry ingredient mixture to the wet mixture, mixing until just combined. Be careful not to overmix, as this can lead to a tough cake. Pour the vibrant batter into your prepared round cake pans.
- Bake: Transfer the filled cake pans to a preheated oven and bake until a toothpick inserted into the center comes out clean, indicating the cake is perfectly cooked.
- Prepare frosting: While the cake cools, prepare your chosen frosting. For our unique chocolate marshmallow fluff, simply combine marshmallow fluff, cream cheese, and cocoa powder, then whip until smooth and creamy.
- Decorate cake: Once the cake is completely cooled, generously spread your frosting over the top and sides. For our suggested decoration, adorn with mini marshmallows for a delightful finish.
Key Ingredients for the Perfect Red Velvet Cake
Each ingredient in this recipe plays a vital role in achieving the iconic flavor, texture, and vibrant color of the Red Velvet Cake. Here’s a closer look at the stars of the show:
- Flour: All-purpose flour is recommended as it provides the perfect balance of gluten for structure without making the cake too dense. It’s the backbone of your cake’s texture.
- Cocoa powder: Use unsweetened cocoa powder. This is essential for delivering that characteristic subtle chocolate undertone of red velvet, which is distinct from a full-bodied chocolate cake.
- Butter: Unsalted butter, softened to room temperature, is crucial for its rich flavor and for creating a tender crumb. Creaming butter and sugar together effectively traps air, contributing to the cake’s lightness.
- Sugar: Regular granulated sugar sweetens the cake and helps tenderize it, contributing to its moist texture.
- Eggs: Large eggs bind the ingredients, add richness, and help with leavening, contributing to the cake’s fluffy structure and moisture.
- Sour cream: This is a secret weapon for an exceptionally moist and tender cake. Its acidity reacts with the baking soda, aiding in leavening, while its fat content adds richness and prevents dryness.
- Milk: Whole milk further enhances the moisture and richness of the cake. The fat in whole milk contributes to a velvety texture.
- Red food coloring: To achieve that iconic, eye-catching vibrant red hue, food coloring is indispensable. Gel food coloring often provides a more concentrated color with less liquid, but liquid food coloring can also be used effectively.
- Baking soda & Baking powder: These leavening agents work in tandem. Baking soda reacts with acidic ingredients (like sour cream and cocoa powder) to produce carbon dioxide, while baking powder provides additional lift, ensuring a light and airy cake.
- Salt: A pinch of salt balances the sweetness and enhances all the other flavors in the cake.
Red Velvet Frosting and Topping Ideas
While the classic pairing for Red Velvet Cake is undeniably a luscious cream cheese frosting, the beauty of baking lies in customization. This recipe features a decadent chocolate marshmallow fluff, but don’t hesitate to explore other delightful options to complement your cake:
- Cream Cheese Frosting: The quintessential choice, known for its tangy, sweet, and creamy texture that perfectly contrasts the cake’s richness. It’s truly a match made in heaven.
- Chocolate Ganache Frosting: For chocolate lovers, a smooth, rich chocolate ganache provides a sophisticated and intense chocolate experience that pairs wonderfully with the subtle cocoa notes of the cake.
- American Buttercream Frosting Recipe: A versatile and easy-to-make frosting that can be flavored with vanilla or even a hint of cocoa to create a customized topping. It holds its shape well for intricate decorations.
- Marshmallow Frosting Recipe: Light, fluffy, and incredibly sweet, this frosting adds a whimsical touch and a delightful texture, especially when paired with chocolate elements.
- Chocolate Frosting: A classic choice that enhances the subtle chocolate flavor within the red velvet cake, offering a comforting and familiar sweetness.
- White Chocolate Buttercream Frosting: For a different kind of richness and sweetness, white chocolate buttercream offers a smooth, sweet, and decadent contrast to the red velvet base.
Secrets to Making an Incredibly Moist Cake
Achieving a cake that is consistently moist and tender is a hallmark of great baking. While many bakers have their go-to ingredients for moisture, my personal secret weapon for this Red Velvet Cake, which consistently yields outstanding results, is full-fat sour cream. The high fat content and acidity in sour cream work wonders, breaking down tough gluten strands while keeping the cake incredibly tender and rich.
Other popular ingredients renowned for their moisture-boosting properties include buttermilk, which similarly leverages acidity and fat, and Greek yogurt, which provides a denser, richer texture. Some bakers even swear by incorporating cream cheese directly into the batter for an extra layer of moisture and tang. Ultimately, the key is to use ingredients with a good balance of fat and acidity, which react with leavening agents to create a fluffy, yet deeply moist crumb.
The Role of Vinegar in Red Velvet Cake (and why sour cream is a star)
Historically, vinegar, often combined with baking soda and buttermilk, played a crucial role in traditional Red Velvet Cake recipes. The primary purpose of vinegar in baking is its acidic properties. When it reacts with alkaline baking soda, it creates carbon dioxide gas, which helps leaven the cake, giving it a lighter texture. Additionally, in older recipes, this acid reaction with cocoa powder contributed to the characteristic reddish hue before artificial food colorings became prevalent. Vinegar also helps to tenderize the cake by breaking down gluten strands, contributing to a softer crumb.
However, in my perfected Red Velvet recipe, I’ve opted to exclude both buttermilk and vinegar in favor of full-fat sour cream. I firmly believe that sour cream offers a superior result. It provides the necessary acidity to react with the baking soda for leavening, but its higher fat content also adds an unparalleled richness and moisture that is difficult to achieve with buttermilk alone. This substitution streamlines the ingredient list while still delivering a cake that is exceptionally tender, moist, and flavorful, proving that sometimes, a modern twist can enhance a classic.
Variations for Your Best Red Velvet Birthday Cake and Beyond
This ultimate Red Velvet Cake recipe is incredibly versatile, lending itself to a multitude of creative variations perfect for any occasion, from birthday celebrations to elegant gatherings. Its robust yet tender structure allows for exciting transformations:
Make a layer cake: Despite its delicate softness, this cake is remarkably firm enough for stacking, making it ideal for a show-stopping layer cake. For best results, bake in two 9-inch round pans to create even layers. Once cooled, level the tops with a serrated knife for a flat surface, then fill and stack with your favorite frosting. This creates a visually impressive dessert perfect for any celebration.
Decorate it for any occasion: The vibrant red hue makes this cake a fantastic canvas for various festive decorations. Adorn it with white or cream-colored frosting and sprinkles for birthdays, heart-shaped candies for Valentine’s Day, green and red accents for Christmas, delicate edible flowers for Mother’s Day or anniversaries, or even spooky spiderwebs for Halloween. The possibilities are endless for customizing its look.
Create delightful cake-in-a-jar treats: For a charming individual dessert, bake the cake as usual and allow it to cool completely. Using a round cookie cutter that matches the diameter of your jars, cut out circular cake pieces. Layer a cake piece into the bottom of a jar, then top with a generous dollop of cream cheese icing (or your chosen frosting). Continue alternating layers of cake and frosting until the jar is filled. These are perfect for picnics, gifts, or portion control.
Experiment with delicious add-ins: Elevate the flavor and texture of your Red Velvet Cake by incorporating exciting additions to the batter. Fold in dark chocolate chips or white chocolate chips for pockets of melted goodness. Chopped pecans, walnuts, or other nuts can add a delightful crunch. For an truly indulgent experience, consider adding a luscious cheesecake layer in the middle – this combination is absolutely incredible and takes the cake to a new level of decadence!
Transform into fun cake balls or cake pops: Don’t let any cake go to waste! Bake the cake and let it cool. Once cooled, crumble the cake into fine crumbs. Mix in just enough frosting to create a thick, dough-like mixture that is pliable but not sticky. Scoop out small portions and roll them into uniform balls. If making cake pops, insert a lollipop stick into each ball and chill them in the fridge until firm. Once firm, dip the cake balls or pops into melted white chocolate or dark chocolate, then decorate with sprinkles or drizzles for a festive finish. These are always a hit at parties!
Expert Tips and Techniques for Baking Red Velvet Cake
Baking a perfect Red Velvet Cake goes beyond just following the steps; a few expert tips and techniques can elevate your results from good to absolutely phenomenal. Pay close attention to these details for an outstanding cake:
All ingredients must be at room temperature: This is a non-negotiable step for successful baking. Room temperature ingredients, especially butter, eggs, and dairy, emulsify more evenly. This creates a smooth, well-combined batter that traps air efficiently, resulting in a cake with a finer crumb and superior texture.
Don’t omit the red food coloring: For that signature, vibrant red velvet shade, you will indeed need a generous amount of red food coloring. Without it, your cake will have a rather unappetizing brownish-red hue. Gel food coloring typically provides a more intense color with less liquid, ensuring the consistency of your batter isn’t compromised.
Don’t omit the cocoa powder: The cocoa powder is vital for the distinct subtle chocolate flavor that differentiates red velvet from a plain vanilla cake. While not as prominent as in a chocolate cake, it adds a crucial depth and tang. If you skip it, you’re essentially making a vanilla cake dyed red.
Don’t replace butter with oil: In this specific recipe, butter is key not only for its rich flavor but also for its contribution to the cake’s structure and texture. Butter, when creamed with sugar, creates air pockets essential for a light crumb. Oil, while it can add moisture, won’t provide the same richness or structural support in this particular formulation.
Use full-fat sour cream and whole milk: For the best possible results in terms of moisture and richness, always opt for full-fat sour cream and whole milk. Their higher fat content contributes significantly to a tender, velvety crumb and a more luxurious mouthfeel.
Preheating your oven is crucial: Always preheat your oven for at least 15-20 minutes before baking. A consistently hot oven ensures that the cake starts baking immediately, helping the leavening agents activate properly for an even rise and preventing a dense center.
Avoid overmixing the batter: Once you combine the wet and dry ingredients, mix only until just combined. Overmixing develops the gluten in the flour too much, which can lead to a tough, dry cake instead of a tender, moist one.
Properly prepare your cake pans: Grease and flour your cake pans thoroughly. This creates a non-stick surface, ensuring your beautiful cake releases easily after baking without sticking or tearing.
If you have time, freeze your cake overnight: For an exceptionally moist and soft cake, I highly recommend baking your cake, letting it cool completely, covering it tightly in plastic wrap (saran wrap), and then freezing it overnight. This process locks in moisture beautifully. When you’re ready to frost, simply let it thaw (still covered in plastic wrap) on your countertop at room temperature for about an hour.
How to make this cake without food coloring? If you prefer a natural approach, some bakers use beet juice or natural food colorings derived from dried fruits and vegetables. Be aware that the shade of red might be less intense and can vary.
Salted butter or unsalted butter? Always use unsalted butter in baking recipes unless specified otherwise. This allows you to control the exact amount of salt in your recipe, ensuring a balanced flavor profile.
Plain flour or self-rising flour? I consistently use all-purpose (plain) flour because this recipe includes specific amounts of baking powder and baking soda. Using self-rising flour would disrupt the carefully balanced leavening system, potentially leading to an unpredictable rise or texture.
Sour cream or buttermilk? While both are excellent for adding moisture and tang, through extensive testing, I’ve found that sour cream delivers the best results for this particular recipe, hands down. It contributes a richness and tenderness that truly makes the cake exceptional.
Why is my cake brown? If your Red Velvet Cake isn’t showcasing that signature vibrant red, there could be a few reasons:
- Not enough red food coloring was used: The most common culprit. Be generous with the coloring to achieve a deep, rich red.
- Too much cocoa powder was added to the recipe: Excess cocoa can overwhelm the red dye, making the cake appear more brown than red.
- Cake was over-baked: Over-baking can cause the top and sides of the cake to brown, masking the red color and drying out the cake in the process. Ensure you bake just until a toothpick comes out clean.
Storage for Your Homemade Red Velvet Cake
Proper storage is essential to maintain the freshness and moisture of your homemade Red Velvet Cake. Here’s how to best store it:
Refrigerate: Any leftover frosted cake should be stored in a sealed, airtight container in the refrigerator. This will keep it fresh and moist for up to 3 days. Ensure the container is truly airtight to prevent the cake from drying out or absorbing refrigerator odors. It’s best to bring the cake to room temperature for about 30 minutes before serving for the best flavor and texture.
Freeze: An unfrosted cake can be frozen for longer storage. Wrap the cooled cake tightly in several layers of plastic wrap (saran wrap), then an additional layer of aluminum foil to prevent freezer burn. It can be stored in the freezer for up to 1 month. When you’re ready to enjoy it, simply thaw the cake to room temperature (still wrapped) on your countertop, then frost and decorate as desired. You can also freeze individual slices of frosted cake, wrapped similarly, for convenient single servings.
More Classic Cake Recipes
If you’ve enjoyed baking this Red Velvet Cake, you might be interested in exploring other beloved classic cake recipes:
- Funfetti Cake/Confetti Cake {From Scratch}
- German Chocolate Cake {With Cake Mix}
- Moist Carrot Cake With Cream Cheese Frosting
- Best Vanilla Cake Recipe {From Scratch}
- Angel Food Cake Recipe
Recipe
Best Red Velvet Cake Recipe
Abeer Rizvi
Pin Recipe
Want to Save This Recipe?
Enter your email & I’ll send it to your inbox. Plus, get great new recipes from me every week!
By submitting this form, you consent to receive emails from CakeWhiz
Ingredients
Cake
- 1 cup Butter Unsalted, Softened
- 2 cups Sugar Granulated
- 4 Eggs Large
- 1 cup Sour cream Full fat
- ½ cup Milk Whole
- 1 tablespoon Vanilla extract
- 3-4 tablespoon Red food coloring
- 2½ cups All-purpose flour
- ½ cup Cocoa powder
- 1 teaspoon Baking soda
- ½ teaspoon Baking powder
- ½ teaspoon Salt
Chocolate marshmallow fluff/cream
- 2 cups Marshmallow fluff
- ¾ cup Cream cheese
- 1- 2 tablespoon Cocoa powder
Decoration
- 1 cup Mini marshmallows
Instructions
-
In a mixing bowl, cream together the butter and sugar until light and fluffy.
-
Beat in the eggs, one at a time.
-
Add sour cream, milk, vanilla extract, food coloring and mix until smooth.
-
In a separate bowl, whisk together the flour, cocoa powder, baking powder, baking soda and salt.
-
Dump this dry mixture into the wet mixture and mix until just combined.
-
Pour this batter into two greased and floured round cake pans (Dimensions: 9×2).
-
Note: Since I was not planning on making a layer cake, I used an 8×3 round cake pan and filled it about two thirds and baked it for about 50-55 minutes (Yes! It took long!). I also had a little leftover batter for a few cupcakes. However, I highly recommend making this cake in two 9 inch round cake pans for the perfect red velvet layer cake.
-
Bake at 350 degrees for 40 minutes or until an inserted toothpick comes out clean.
-
To prepare the chocolate marshmallow fluff/cream, add the marshmallow fluff, cream cheese and cocoa powder in a mixing bowland whip everything until smooth.
-
Prior to serving, spread chocolate marshmallow fluff/cream all over the cake and stick mini marshmallows. DO NOT spread this chocolate marshmallow fluff until you are ready to serve or else it will drip off the cake.
-
Serve and enjoy!
Notes
- Read all my tips above.
- Instead of chocolate marshmallow fluff/cream, you can use cream cheese frosting instead.
- Leftovers can be stored in a covered container in the fridge for up to 3 days.
Nutrition
An automated tool is used to calculate the nutritional information. As such, I cannot guarantee the accuracy of the nutritional information provided for any recipe on this site.
