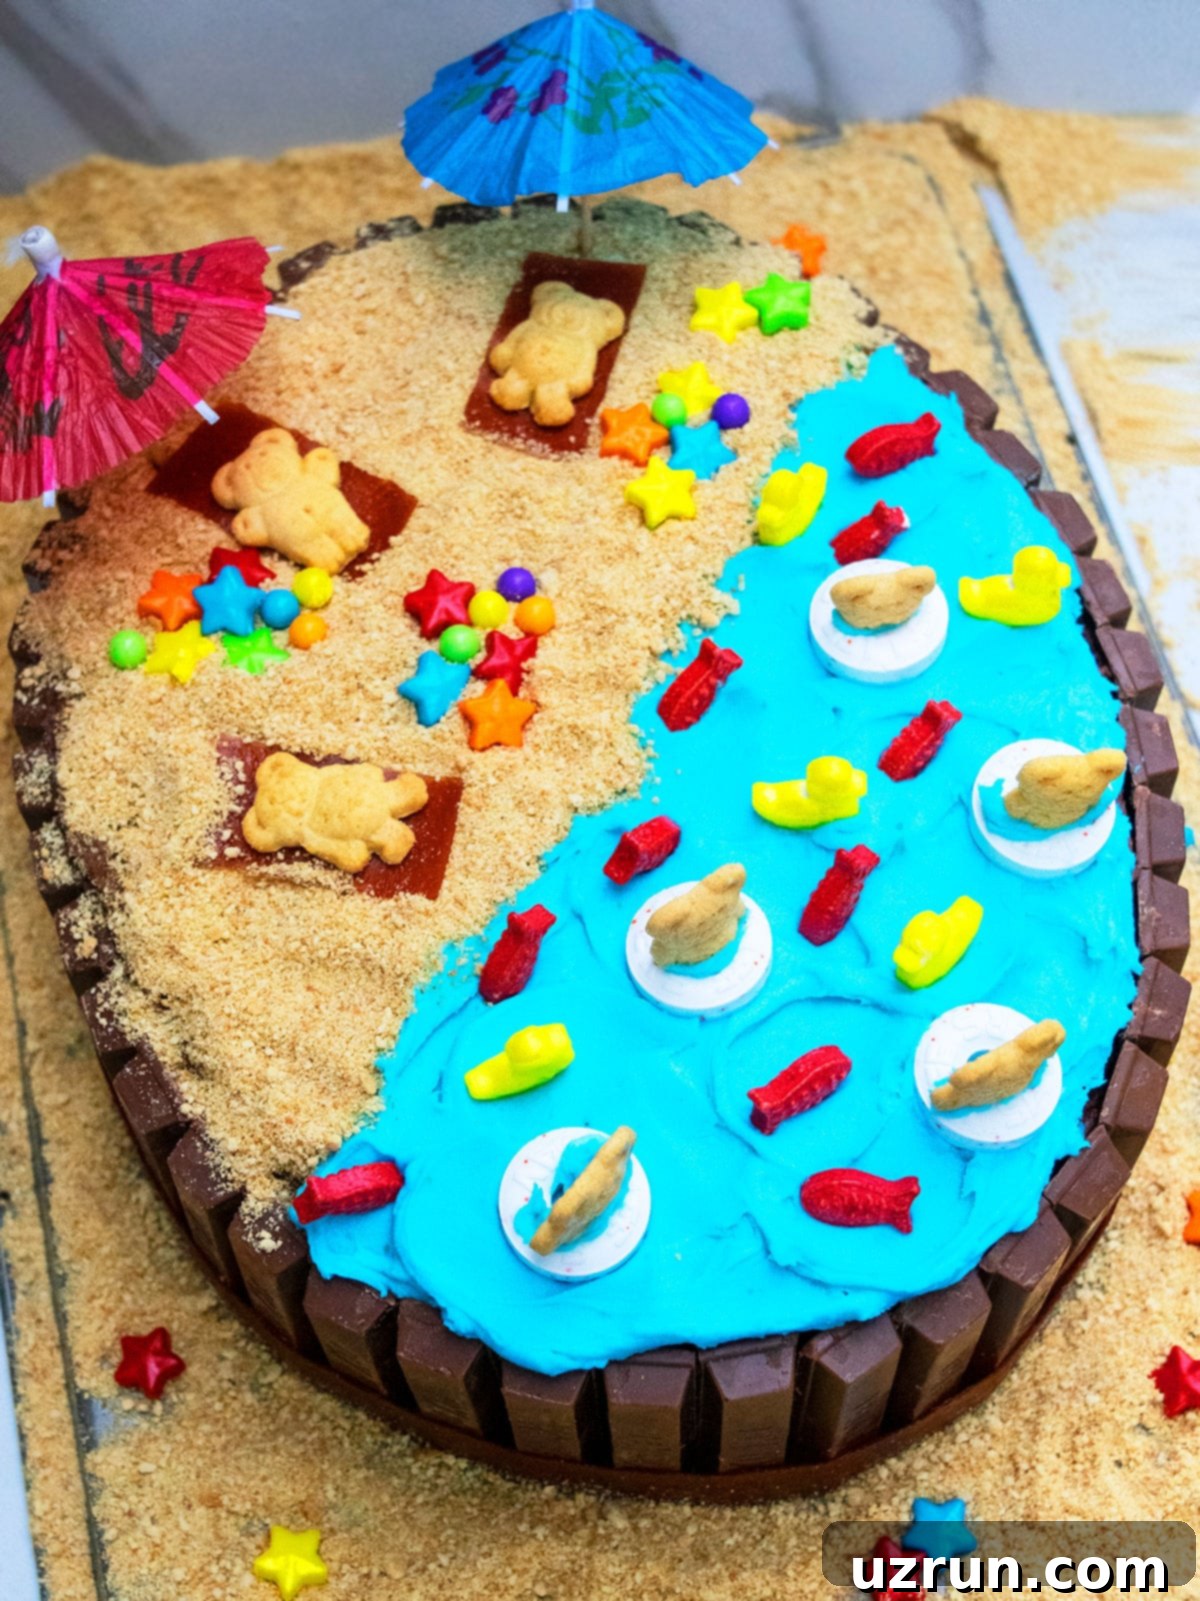
Easy Summer Beach Cake with Kit Kat: The Ultimate Guide to a Fun Party Dessert
Creating memorable parties is just as thrilling for me as the artistry of baking and cake decorating. This year, my son and I embarked on a delightful project: an easy summer beach cake, homemade with simple ingredients and adorned with a playful Kit Kat fence. The result was beyond adorable and became the centerpiece of our annual backyard summer celebration, where all the kids had an absolute blast. This charming dessert isn’t just for backyard parties; it’s also ideal for summer birthdays, beach-themed gatherings, or even a refreshing pool party. If you’re looking for more creative cake inspiration, be sure to explore our collection of Easy Cake Decorating Ideas for Beginners and a variety of Birthday Cake Ideas. And for those who love decorating with Kit Kat, don’t miss our imaginative Treasure Chest Cake (With Kit Kat) and the delightful Easy Kit Kat Cake (With Strawberries), or even this charming Easy Pig Cake.
*A special thank you to Häagen-Dazs® for generously sponsoring today’s post. All opinions expressed are, as always, entirely my own.*
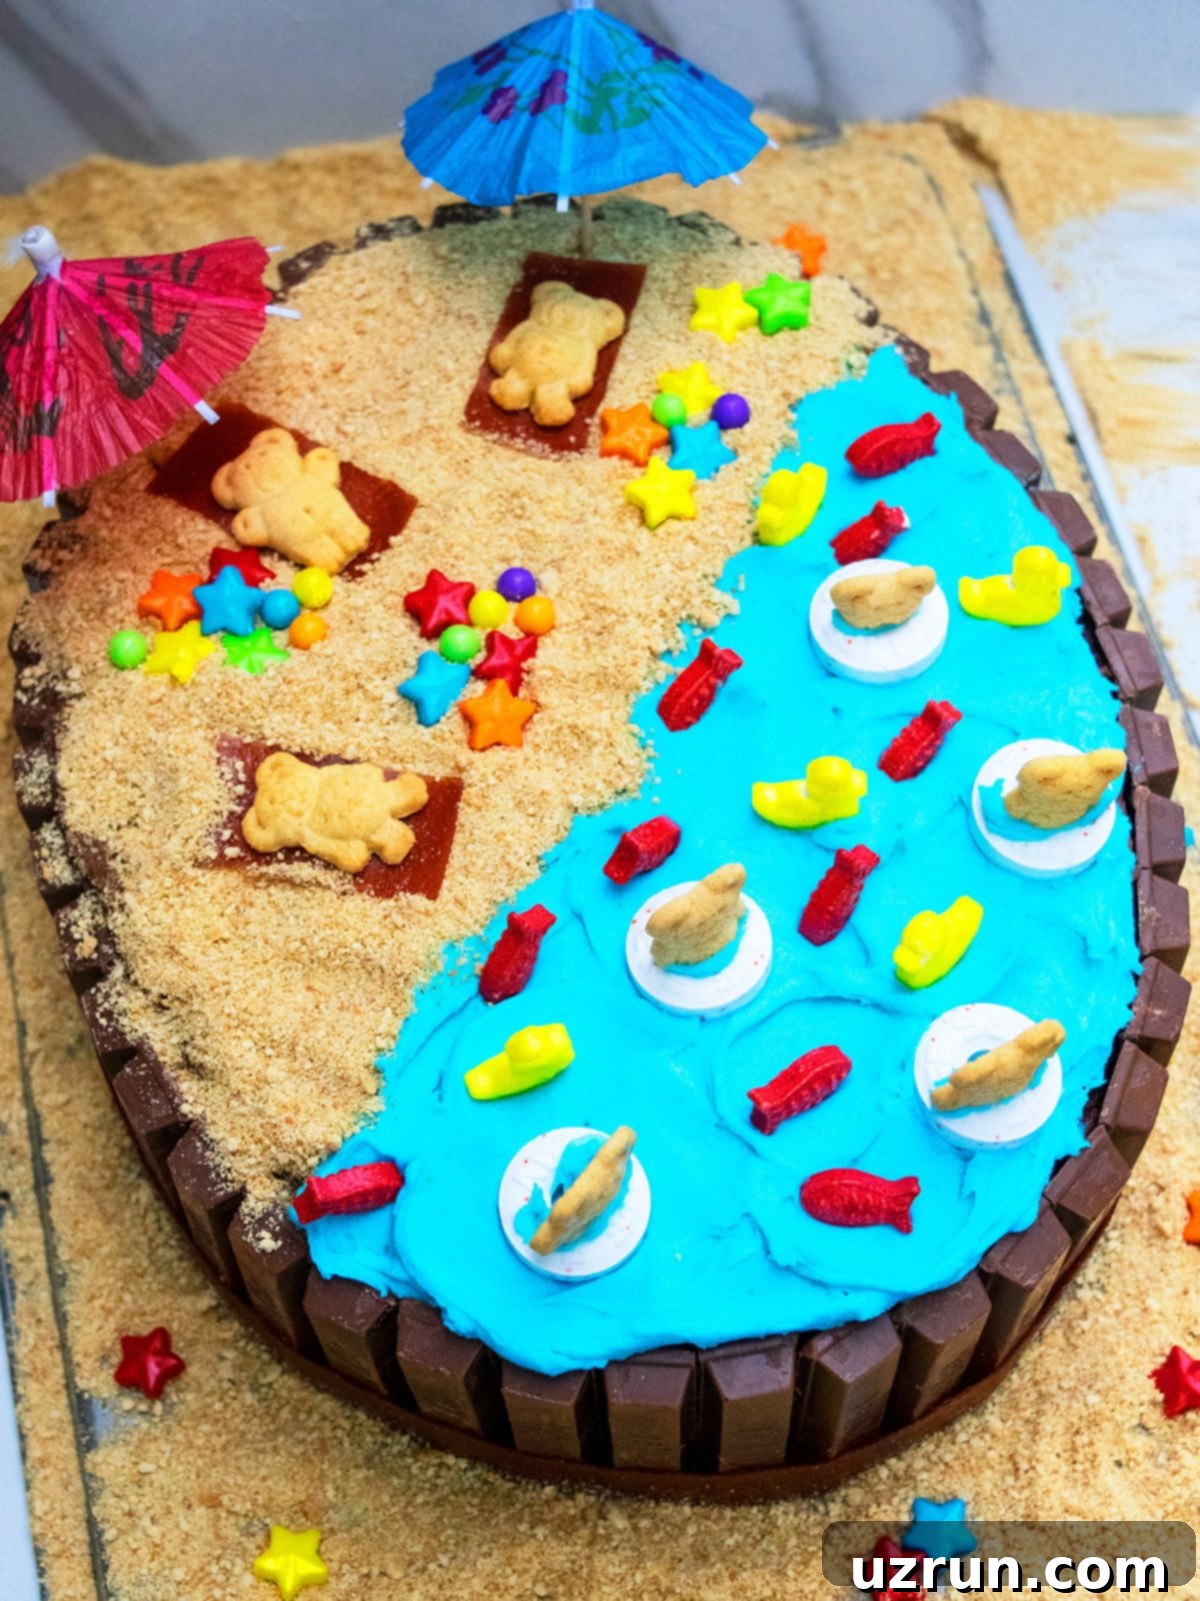
Table of Contents
- Key Ingredients for Your Summer Beach Birthday Cake
- Creative Variations to Customize Your Beach Cake
- How to Make This Easy Summer Cake Recipe from Scratch with Kit Kat
- Essential Tips and Techniques for Perfect Cake Decorating
- Recipe FAQs: Your Questions Answered
- Storage Best Practices for Your Decorated Cake
- More Easy Decorated Cake Ideas to Inspire You
- Backyard Kids Summer Party Setup Details
- Delicious Party Food Ideas for Summer Gatherings
- Engaging Party Activities for Kids
Key Ingredients for Your Summer Beach Birthday Cake
Crafting this delightful beach-themed cake is made simple with a selection of readily available ingredients. Each component plays a crucial role in both the flavor and the visual appeal of our summer masterpiece:
- Chocolate Raspberry Cake: We started with a rich and moist doctored cake mix recipe, infused with the delightful essence of chocolate and raspberry. This provides a robust and flavorful base that perfectly complements the fillings and frostings.
- Raspberry Pie Filling: There’s an undeniable magic in the pairing of sweet, tart raspberry with deep, decadent chocolate. This filling adds a burst of fruity flavor and a luscious texture between the cake layers, creating a truly enchanting taste experience.
- Chocolate Buttercream Icing: This creamy, flavorful icing forms the first frosted layer of our cake. While it will largely be covered by other decorations, its rich chocolate taste ensures that every bite is a pleasure. It also acts as the “glue” for our Kit Kat fence.
- American Buttercream Icing: Transformed into vibrant blue with gel food coloring, this frosting beautifully mimics the sparkling waters of a beach or swimming pool. Its smooth consistency makes it easy to spread and create a serene aquatic scene.
- Kit Kat Bars: You’ll need approximately 20-22 bars to create the iconic fence around your beach cake. These chocolate bars not only add a satisfying crunch but also provide a charming border that frames your edible landscape. Purchasing the mini packets with two segments each works perfectly for this design.
- Graham Crackers: Finely crushed, these crackers become our edible sand. Their subtle sweetness and crumbly texture are perfect for replicating a realistic beach environment, providing a delightful contrast to the smooth icing.
- Fruit Roll-Up (or Red Fruit Strip): A vibrant red fruit strip, cut into small pieces, adds a pop of color and serves as miniature beach towels for our tiny beachgoers.
- Fish and Duck Candies: Small, colorful candies in the shape of fish and ducks bring life and whimsy to the “water” portion of your cake. You’ll want a handful of these to create a playful swimming scene.
- Lifesavers: The hard, round variety of Lifesavers are ingeniously used to create floating rings for our beach characters. Any color will work, adding to the festive atmosphere.
- Mini Teddy Grahams: These adorable little bear-shaped crackers are the true stars of our beach scene. Placed strategically, they animate the cake, making it look like tiny bears are lounging on towels or floating in the water.
- Star Sprinkles: Complementing the other beach-themed candies, these add a touch of sparkle and fantasy to the edible sand.
- Edible Pearls: These small, colorful pearls scatter across the “sand,” providing a lovely pop of color and a touch of elegance to your fun beach cake.
Creative Variations to Customize Your Beach Cake
While our easy summer beach cake recipe provides a fantastic foundation, don’t hesitate to get creative and personalize it to your taste and party theme. Here are several exciting variations you can explore:
- Experiment with Cake Shapes: I opted for an elegant oval cake, but this design is incredibly versatile. You can easily adapt it to different pan sizes to bake a classic round, a rectangular sheet cake perfect for a crowd, or a modern square cake. For a super simple approach, bake the cake in a 9×13-inch pan and focus your decorating efforts solely on the top surface with basic candy embellishments.
- Choose a Different Cake Flavor: The chocolate raspberry base is undeniably delicious, but feel free to swap it for another favorite. Imagine a vibrant Best Red Velvet Cake offering a stunning contrast, a light and airy Best Vanilla Cake, a whimsical Rainbow Cake, a festive Funfetti Cake, or even an exotic Mexican Chocolate Cake for a unique twist. The flavor of the cake can perfectly complement the overall summer vibe you’re aiming for.
- Decorate with Fondant Instead of Frosting: If you prefer the smooth, sculpted look of fondant, you can certainly adapt this design. Follow the same basic layout for the beach scene, but use Homemade Marshmallow Fondant or a good quality store-bought fondant to cover your cake. While I generally don’t recommend making black or red fondant from scratch due to the intensity of coloring needed, you can check out my Fondant Coloring Tips for other shades. Fondant is also fantastic for creating small, intricate decorations like fish, tiny towels, or even ducks, offering a different texture and precision compared to candies. For an example of a stunning fondant-covered cake, see this New Year’s Clock Cake for guidance on achieving the best results.
- Explore Different Frosting Options: The choice of frosting significantly impacts the flavor and texture of your cake. For the chocolate section, you could opt for a rich Chocolate Ganache Frosting, a tangy Chocolate Cream Cheese Frosting, or even a lighter Healthy Coconut Cream Chocolate Frosting. For the “water” element, which will be colored blue, consider using a classic Cream Cheese Frosting, a luxurious White Chocolate Buttercream Frosting, or a fluffy Marshmallow Frosting.
- Change Up the Type of “Sand”: Graham cracker crumbs create a wonderful edible sand, but you have other options! You could use fine sanding sugar for a shimmering effect, ground nuts for a richer texture and flavor, crushed vanilla or shortbread cookies for a different taste profile, brown sugar for a coarser, darker sand, or even creative concoctions with malt or oat flour for unique shades and textures.
- Incorporate Small Toys: For a non-edible decorative element, consider using clean, small plastic beach-themed toys instead of candies. Just ensure they are food-safe and remember to remove them before serving the cake, especially to young children, to avoid any choking hazards.
How to Make This Easy Summer Cake Recipe from Scratch with Kit Kat
This delightful beach-themed cake comes together with straightforward steps, making it a perfect project for bakers of all skill levels. Follow these instructions to create your own edible summer masterpiece:
- Bake and Cool the Cake: First, bake your chosen cake flavor and allow it to cool completely on a wire rack. This is a crucial step to prevent your frosting from melting and sliding off. While the cake cools, you can prepare your chocolate buttercream, blue-tinted American buttercream, and raspberry filling.
- Prepare for Layering: Once the cake is fully cooled, use a sharp serrated knife to carefully slice it in half lengthwise, creating two even layers.
- Assemble the First Layer: Place one half of the cake onto a large cake board or serving platter. Spread a generous layer of chocolate frosting evenly over the top, followed by the luscious raspberry pie filling.
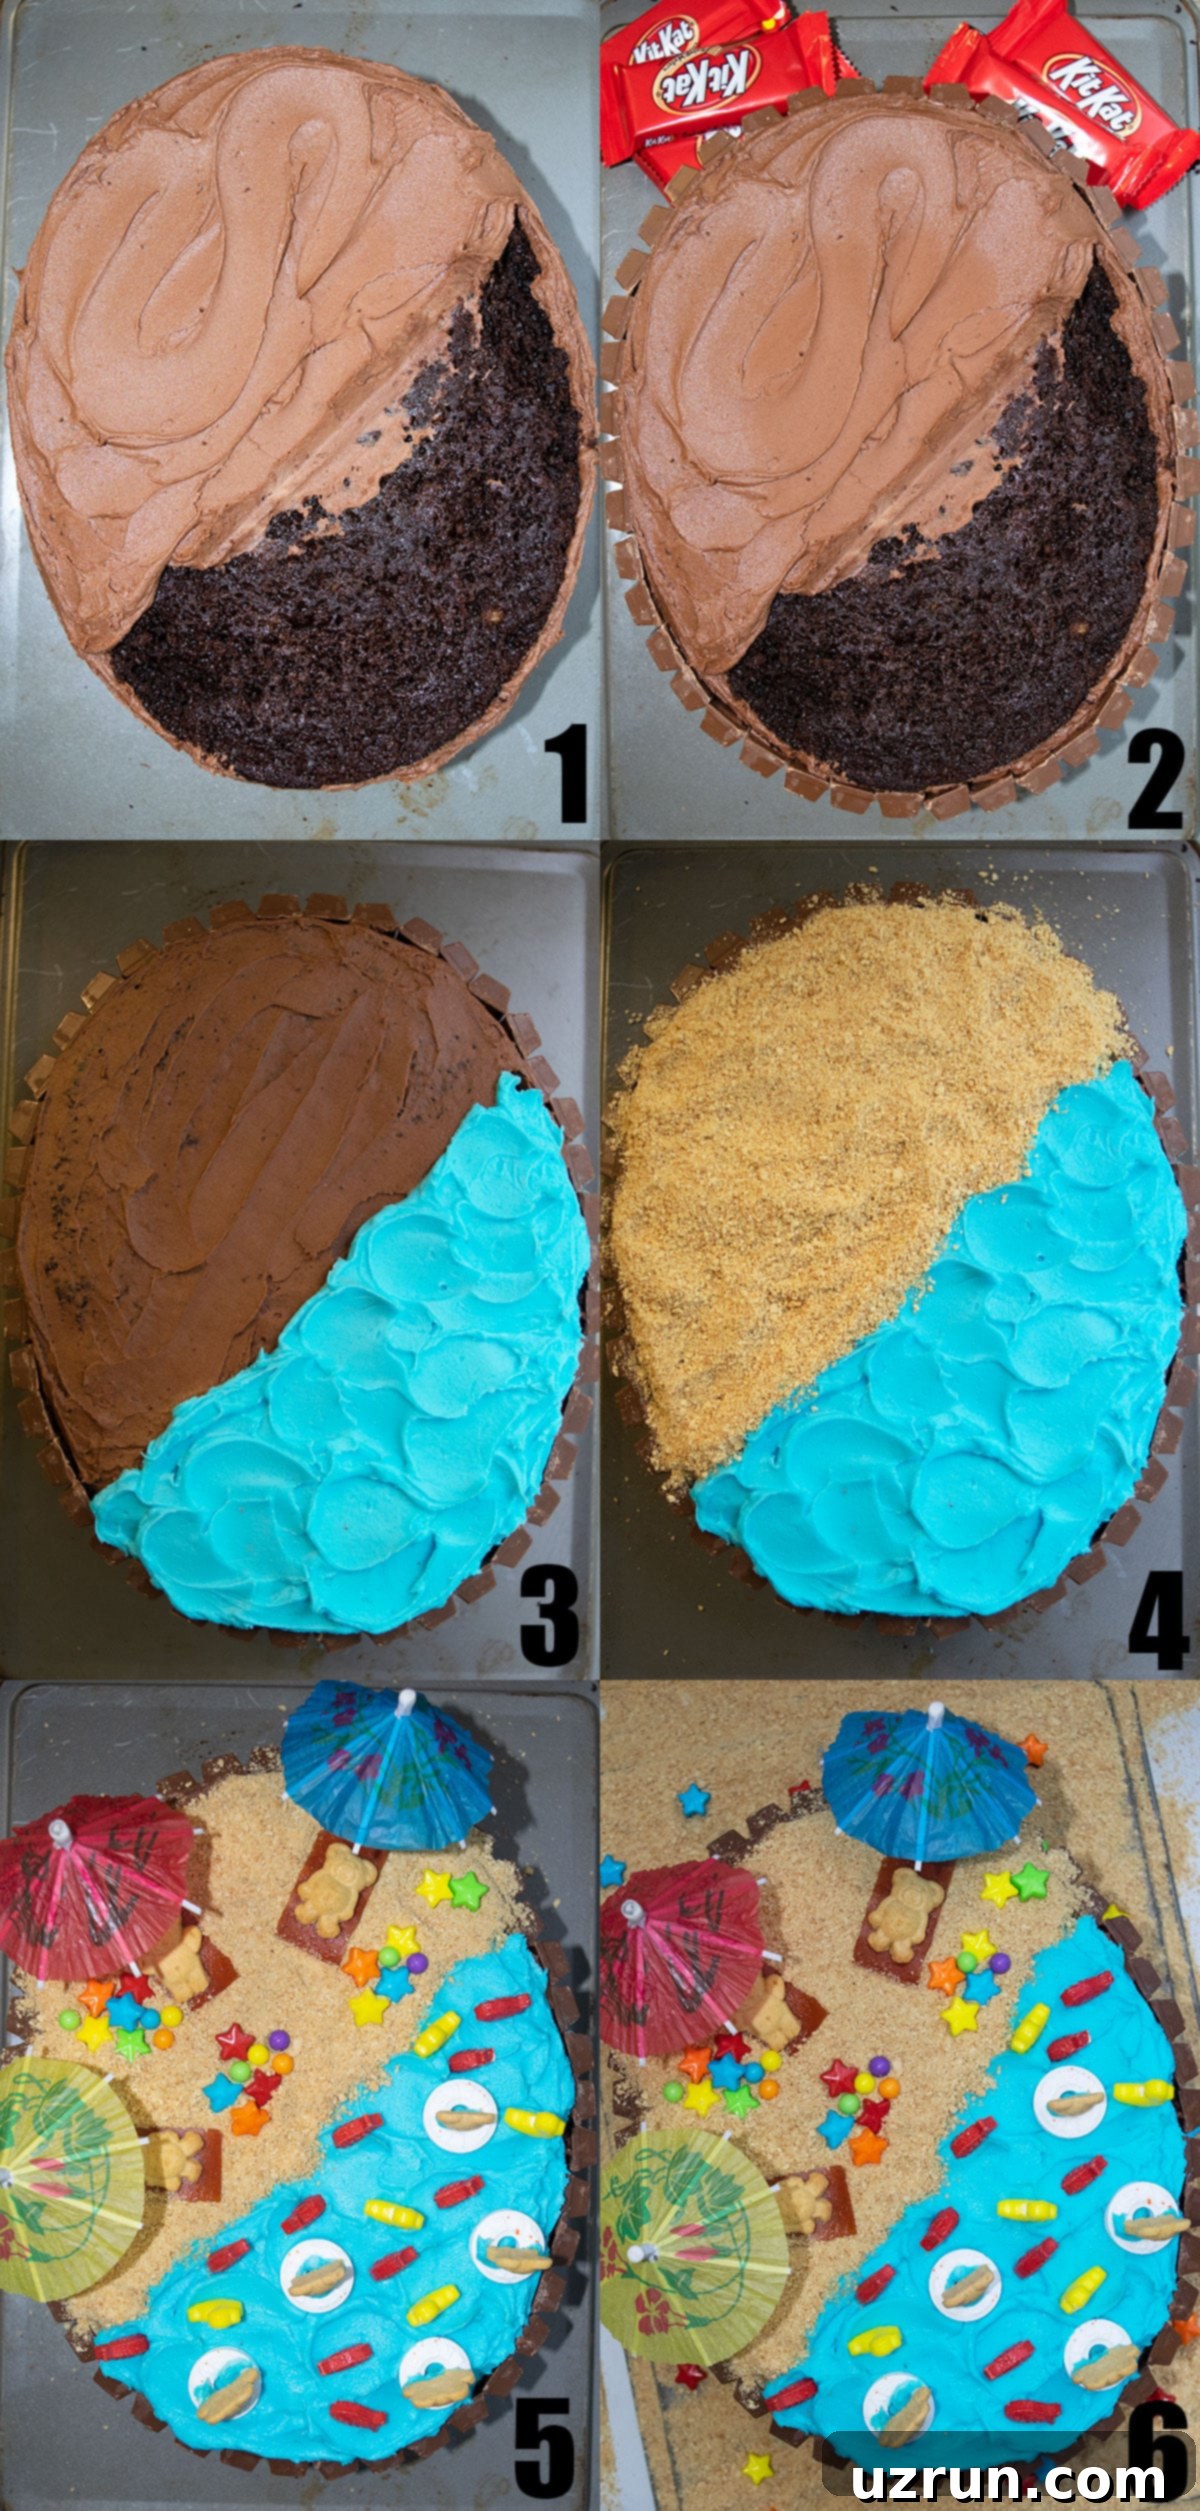
- Add the Second Layer and Crumb Coat: Gently place the second cake layer on top of the filling, pressing down lightly to secure it. Now, frost the sides of the entire cake and approximately half of the top with the remaining chocolate icing. Don’t worry about making this layer perfectly smooth; it serves as a crumb coat and the base for our Kit Kats (see Image 1 for guidance).
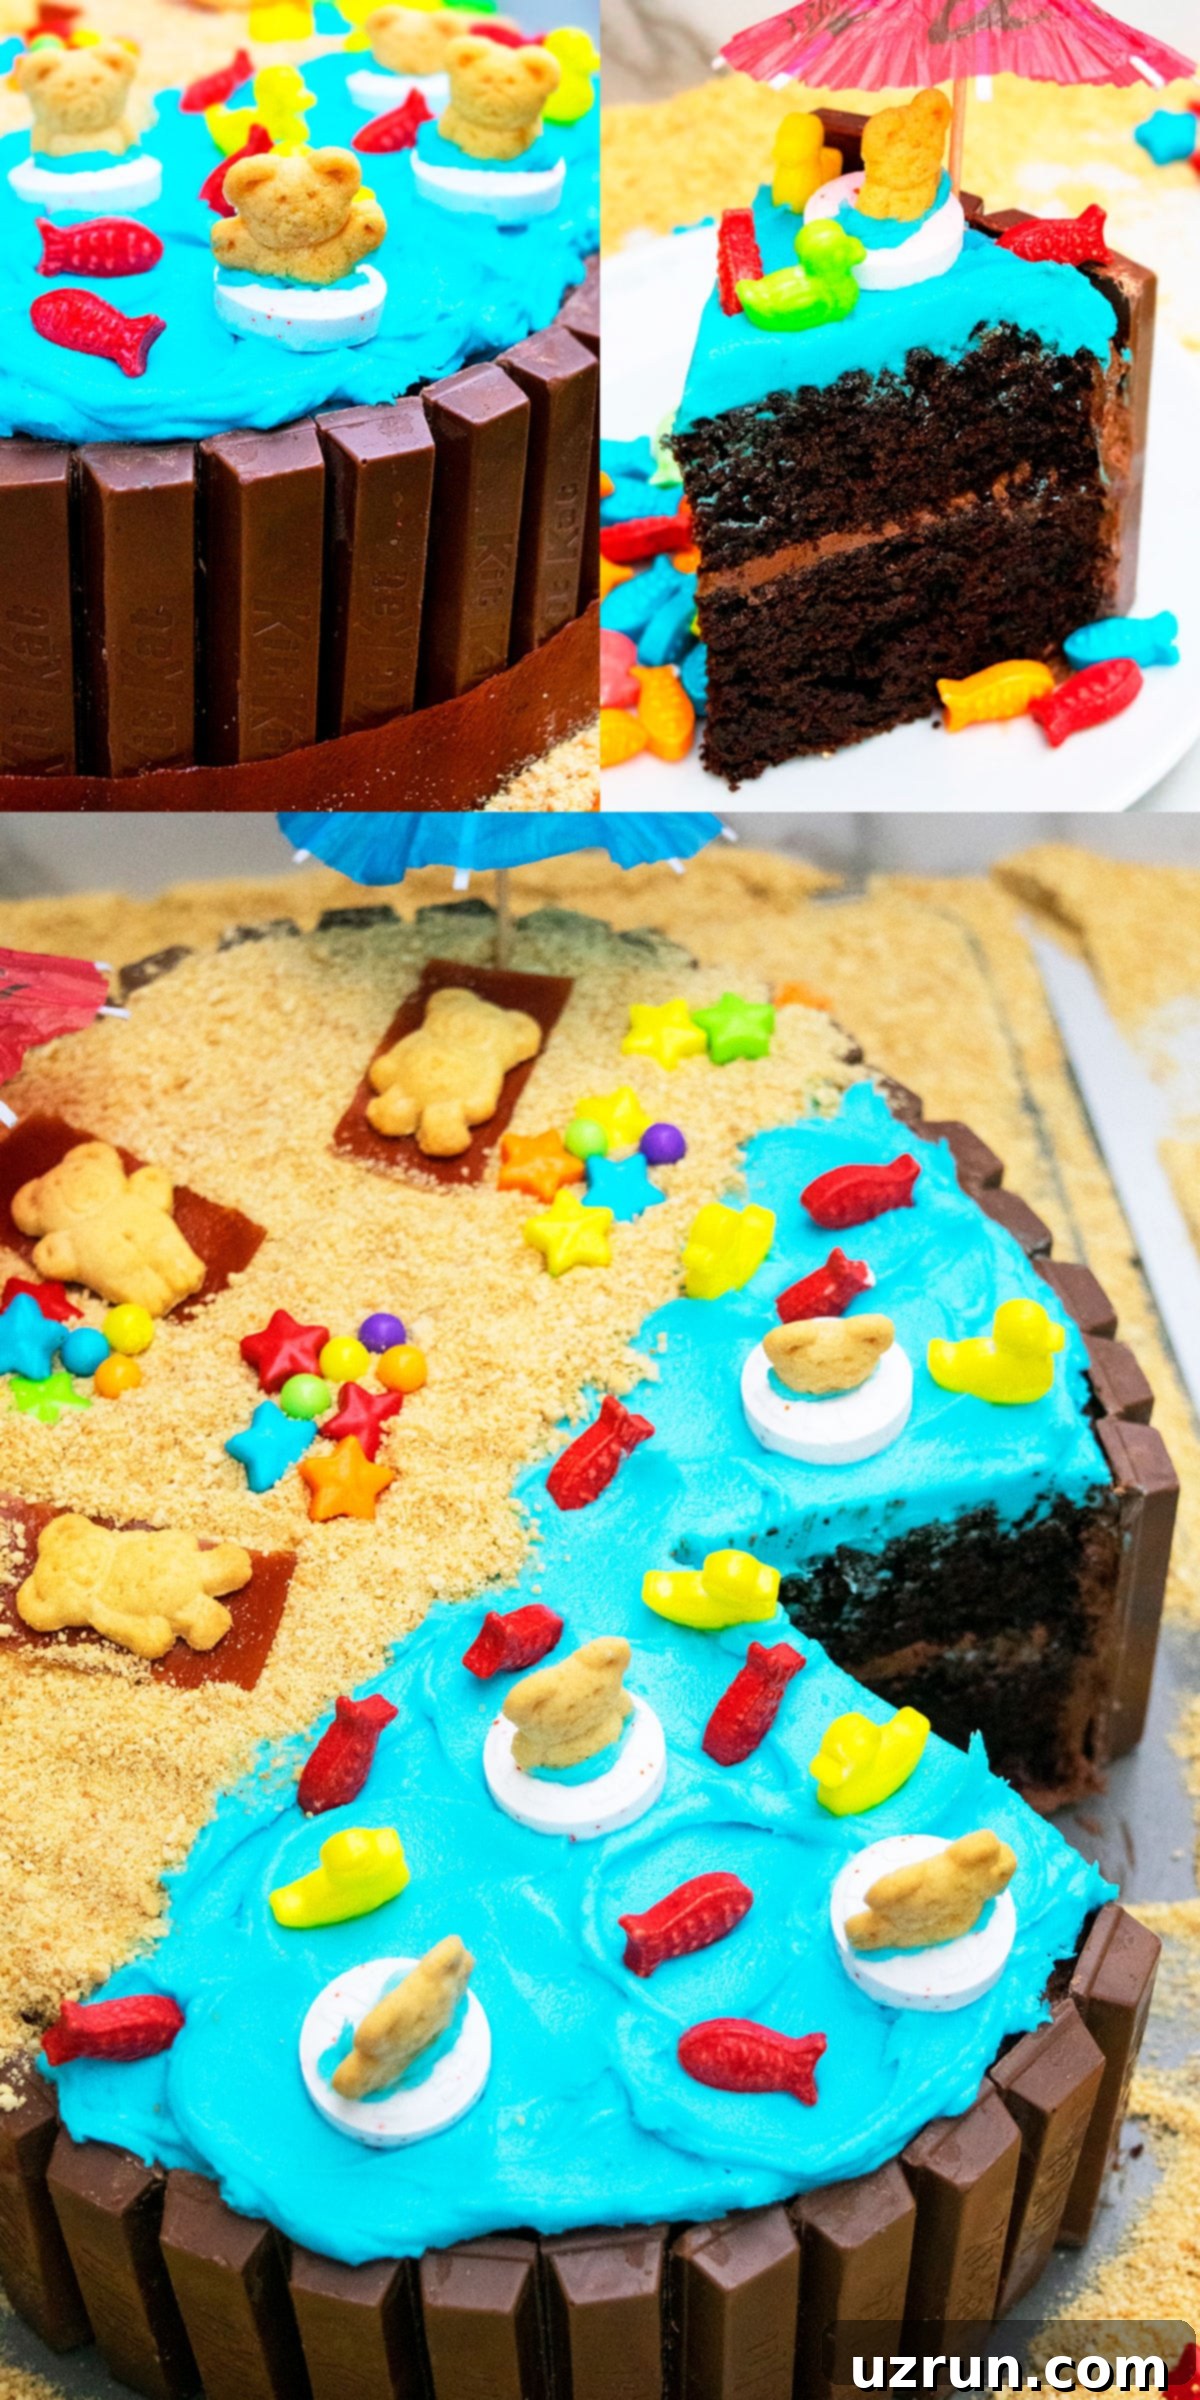
- Create the Kit Kat Fence: Unwrap all your Kit Kat bars. While the chocolate frosting is still fresh and tacky, carefully press the Kit Kat bars around the sides of the cake. The frosting will act as a “glue,” holding them firmly in place to create a charming fence (as shown in Image 2).
- Form the “Water” Feature: Take your blue-colored American buttercream and, using a spatula, spread it smoothly over the unfrosted half of the cake’s top. This will form the vibrant blue water of your beach or pool scene (refer to Image 3).
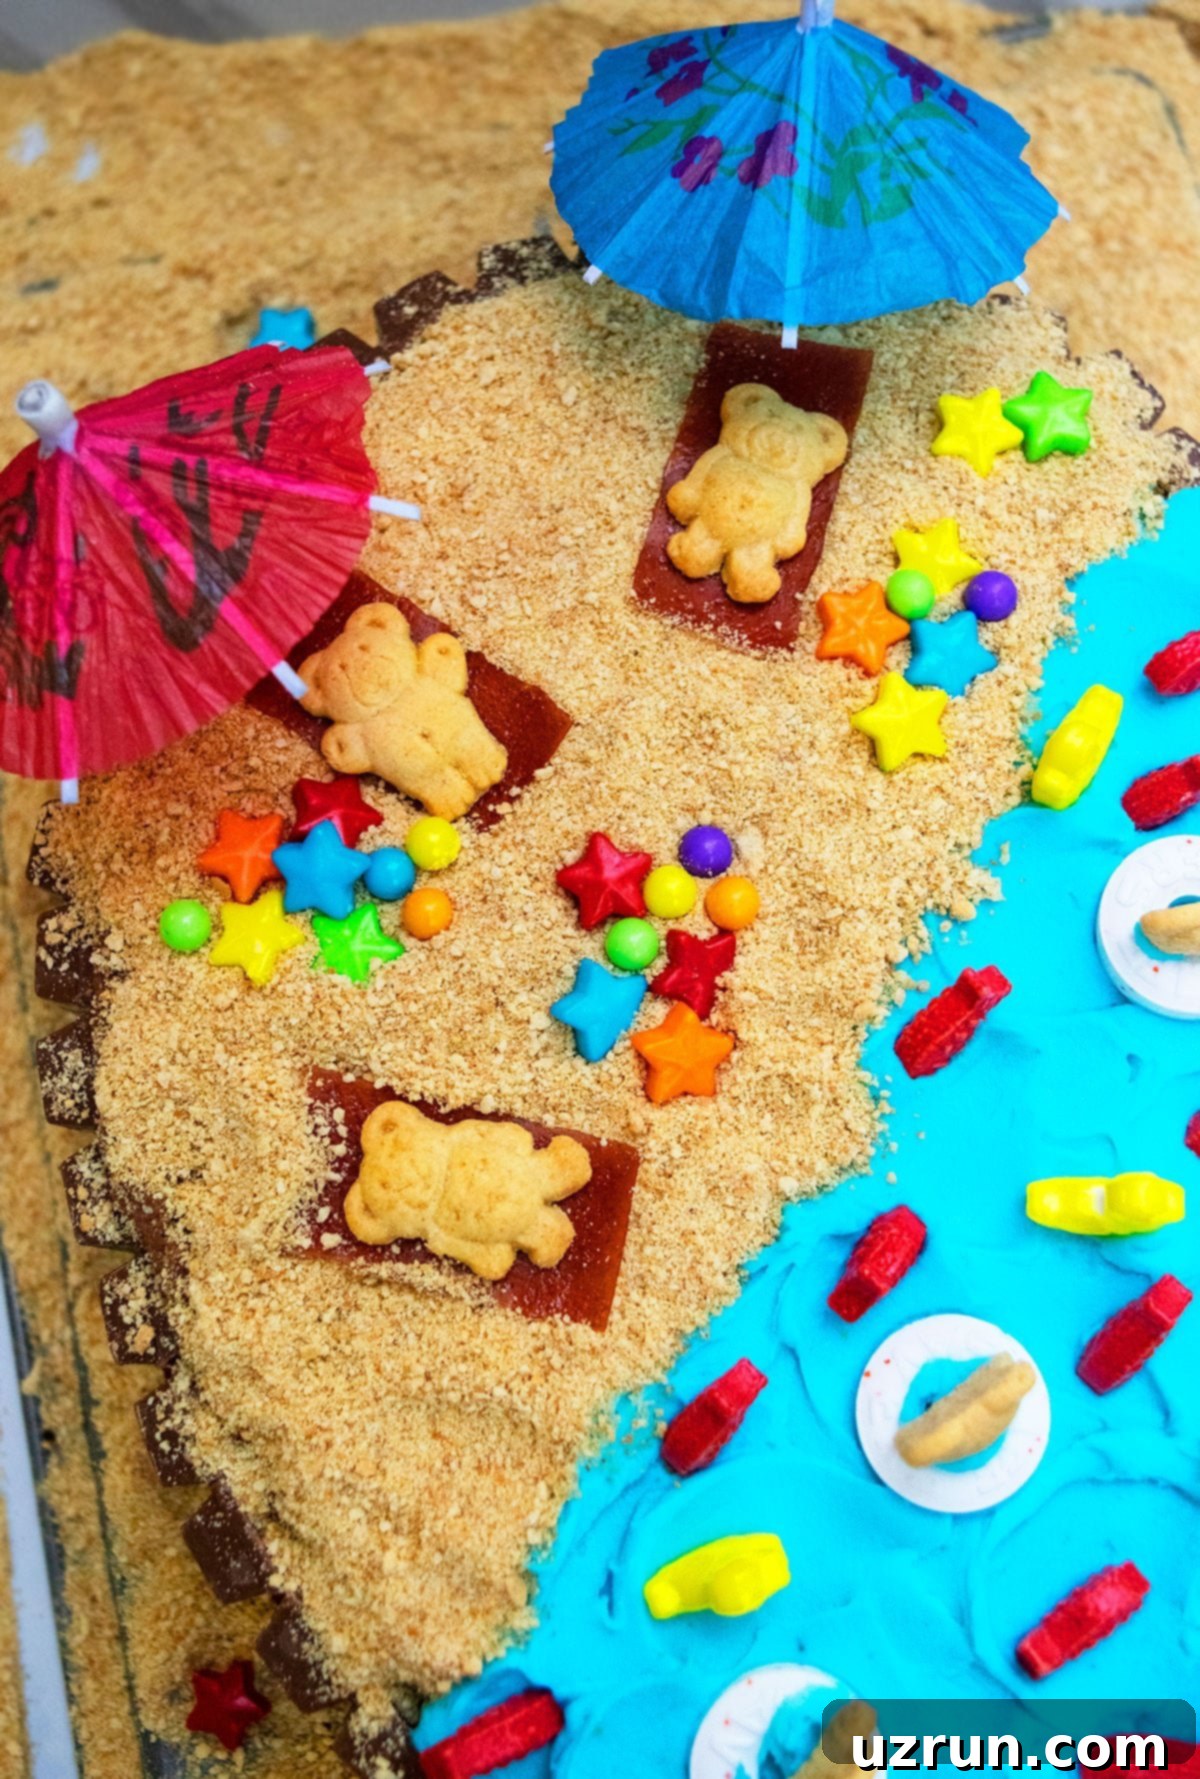
- Lay Down the “Sand”: On the portion of the cake frosted with chocolate icing, generously sprinkle the crushed graham cracker crumbs. This creates your edible sandy beach. Gently pat the crumbs down to adhere them to the frosting (see Image 4).
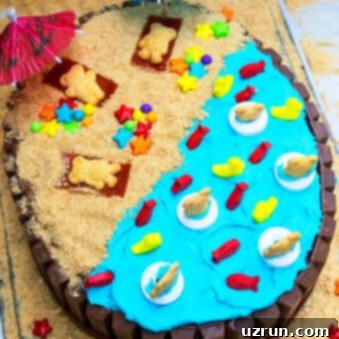
- Set the Beach Scene: Cut your fruit strip into small, approximately 2-inch pieces to resemble beach towels. Arrange these “towels” on the crushed graham cracker “sand.” Place your mini Teddy Grahams on top of the towels, making them look like sunbathers. Push a few cocktail umbrellas into the cake around the towels for added beach ambiance. Finish this area by tossing some star sprinkles and edible pearls onto the “sand” (Image 5).
- Animate the Water: Break a few Teddy Grahams in half. Use a tiny dab of frosting to stick the top portion of these broken Grahams onto round Lifesaver candies. Carefully place these on the blue icing to create the illusion of teddy bears floating in their Lifesaver rings. Add the small fish and duck candies to the blue “water” to complete the aquatic scene (Image 5).
- Extend the Beach to the Board: To tie the entire design together and create a more expansive beach story, sprinkle more graham cracker crumbs randomly on the cake board around the base of the cake. Scatter additional star sprinkles and edible pearls for an extra festive touch (Image 6). Your Easy Summer Beach Cake is now complete and ready to impress!
Essential Tips and Techniques for Perfect Cake Decorating
Achieving a beautifully decorated cake, especially one as fun and detailed as our beach cake, becomes much easier with a few key tips and techniques:
- Embrace the Crumb Coat: The initial layer of frosting (the crumb coat) doesn’t need to be perfectly smooth. Its primary purpose is to seal in any loose cake crumbs, preventing them from mixing into your final decorative layers. This ensures a clean and polished finish for the visible frosting and decorations. Since this layer will be covered by the Kit Kats and other elements, perfection is not required.
- Always Decorate a Cooled Cake: This is a golden rule in cake decorating. Attempting to frost or decorate a warm cake will inevitably lead to melted frosting, a messy finish, and decorations that simply slide off. Ensure your cake is completely at room temperature, or even slightly chilled, before you begin any frosting work.
- Maintain Proper Icing Consistency: The consistency of your frosting is paramount. For this cake, aim for a medium to medium-firm consistency. If your frosting is too runny, it won’t hold its shape, it will drip off the cake, and it won’t provide a stable base for the Kit Kat bars. If it’s too stiff, it will be difficult to spread smoothly. You can adjust consistency by adding a small amount of liquid (milk or cream) to thin it, or more powdered sugar to thicken it.
- Improvise with Candies and Cookies: Don’t feel constrained if you can’t find the exact candies or cookies I used for the decorations. The beauty of a themed cake like this lies in creativity! Look for similar items in terms of shape, size, and color that can represent fish, ducks, or beach accessories. Jelly beans, gummy bears, small chocolate pebbles, or even custom-cut fondant shapes can all work wonderfully as substitutes.
- Time Your Kit Kat Placement: When adhering the Kit Kat bars around the cake, it’s crucial that the first layer of chocolate frosting is still fresh and slightly tacky. This stickiness acts as a natural “glue” to firmly hold the candies in place. If you wait for the frosting to dry out, you’ll find it much harder to get the Kit Kats to stick, and they may fall off.
- Utilize the Cake Board for Storytelling: Don’t overlook the cake board as an extension of your creative canvas! It’s a fantastic space to continue the theme and tell more of your cake’s story. By sprinkling extra graham cracker crumbs, star sprinkles, and edible pearls on the board, you can create a more expansive and immersive beach environment. For larger cakes or parties, you can find oversized cake boards online, or, like me, use large, clean tiles from a home improvement store covered with grease-proof paper for a sturdy and impressive display.
Recipe FAQs: Your Questions Answered
Absolutely! If you prefer the smooth, polished finish and versatility of fondant, you can certainly adapt this design. You would omit the frosting on the outside of the cake and instead cover it with store-bought or homemade fondant. Fondant is also excellent for crafting the smaller, intricate decorations, providing a different aesthetic compared to candies. For more detailed tips on using fondant for this cake, please refer to the “Variations” section above.
Creating edible sand is quite simple, and there are several fantastic methods. For this recipe, I found that finely crushing graham crackers into uniform crumbs works perfectly, providing both the right texture and a subtle sweetness. Other excellent options include using fine sanding sugar for a shimmering, sparkling effect, finely ground nuts (like almonds or walnuts) for added flavor and texture, crushed vanilla wafers or shortbread cookies, or even brown sugar for a slightly coarser, darker sand. If you’re short on time, you can also purchase edible sand specifically designed for cake decorating online or at specialty baking stores.
To create a captivating edible beach scene, you first need to establish your “sand” and “water” base, as detailed in the instructions. Once your edible sand (e.g., graham cracker crumbs) and blue “water” frosting are in place, you can bring the scene to life with small, themed edible items. For instance, I used colorful Lifesavers with mini Teddy Grahams attached to mimic little bears floating in swimming rings. You can also use small fish and duck candies to populate the water. Fruit strips can become beach towels, cocktail umbrellas add shade, and sprinkles or edible pearls serve as sparkling details on the sand. Get creative with what you have – small cookies, fondant cutouts, or even tiny chocolate rocks can all contribute to your unique beachscape.
Storage Best Practices for Your Decorated Cake
Proper storage is key to keeping your beautiful beach cake fresh and delicious. Here’s how to best store your cake for maximum enjoyment:
- Make Ahead Option: You can prepare and fully decorate this cake up to 3 days before your event. Store it in an airtight container in the refrigerator to keep it fresh. If you want to prepare further in advance, you can bake the unfrosted cake layers and make the frostings and filling separately, storing them in sealed containers in the freezer for up to 1 month. When ready to use, simply thaw them in the refrigerator overnight and then assemble and decorate according to the instructions.
- Room Temperature: Due to the raspberry pie filling and buttercream icing, this cake should not be left at room temperature for more than a few hours. Given that this is a summer-themed cake, it’s highly likely you’ll be serving it on a warm day. High temperatures can cause the icing to melt and soften, ruining your carefully crafted decorations and compromising the cake’s structural integrity. Always prioritize refrigeration.
- Refrigerate Leftovers: Any leftover cake should be stored in a sealed, airtight container in the refrigerator. When properly stored, it will remain fresh and delicious for up to 3 days. Ensure the container is truly airtight to prevent the cake from drying out or absorbing other odors from the fridge.
- Freezing: The unfrosted cake layers and any un-used frostings (stored separately) can be frozen for up to 1 month in airtight containers. It is generally not recommended to freeze a fully frosted and decorated cake, as the decorations, especially the candies and Kit Kats, may not hold up well during thawing, and the frosting’s texture could be affected. Thaw frozen components in the refrigerator before decorating and serving.
More Easy Decorated Cake Ideas to Inspire You
If you loved creating this summer beach cake, you’ll be thrilled to discover more simple yet stunning decorated cake ideas that are perfect for any occasion. Unleash your inner cake artist with these fun projects:
- Easy Teddy Bear Cake (And Party)
- Pink Ombre Mother’s Day Cake (And Party)
- Easy Tie Dye Cake (Shirt Cake)
- Easy Baby Cake
- Homemade Wedding Cake
- Easy Camping Cake
Backyard Kids Summer Party Setup Details
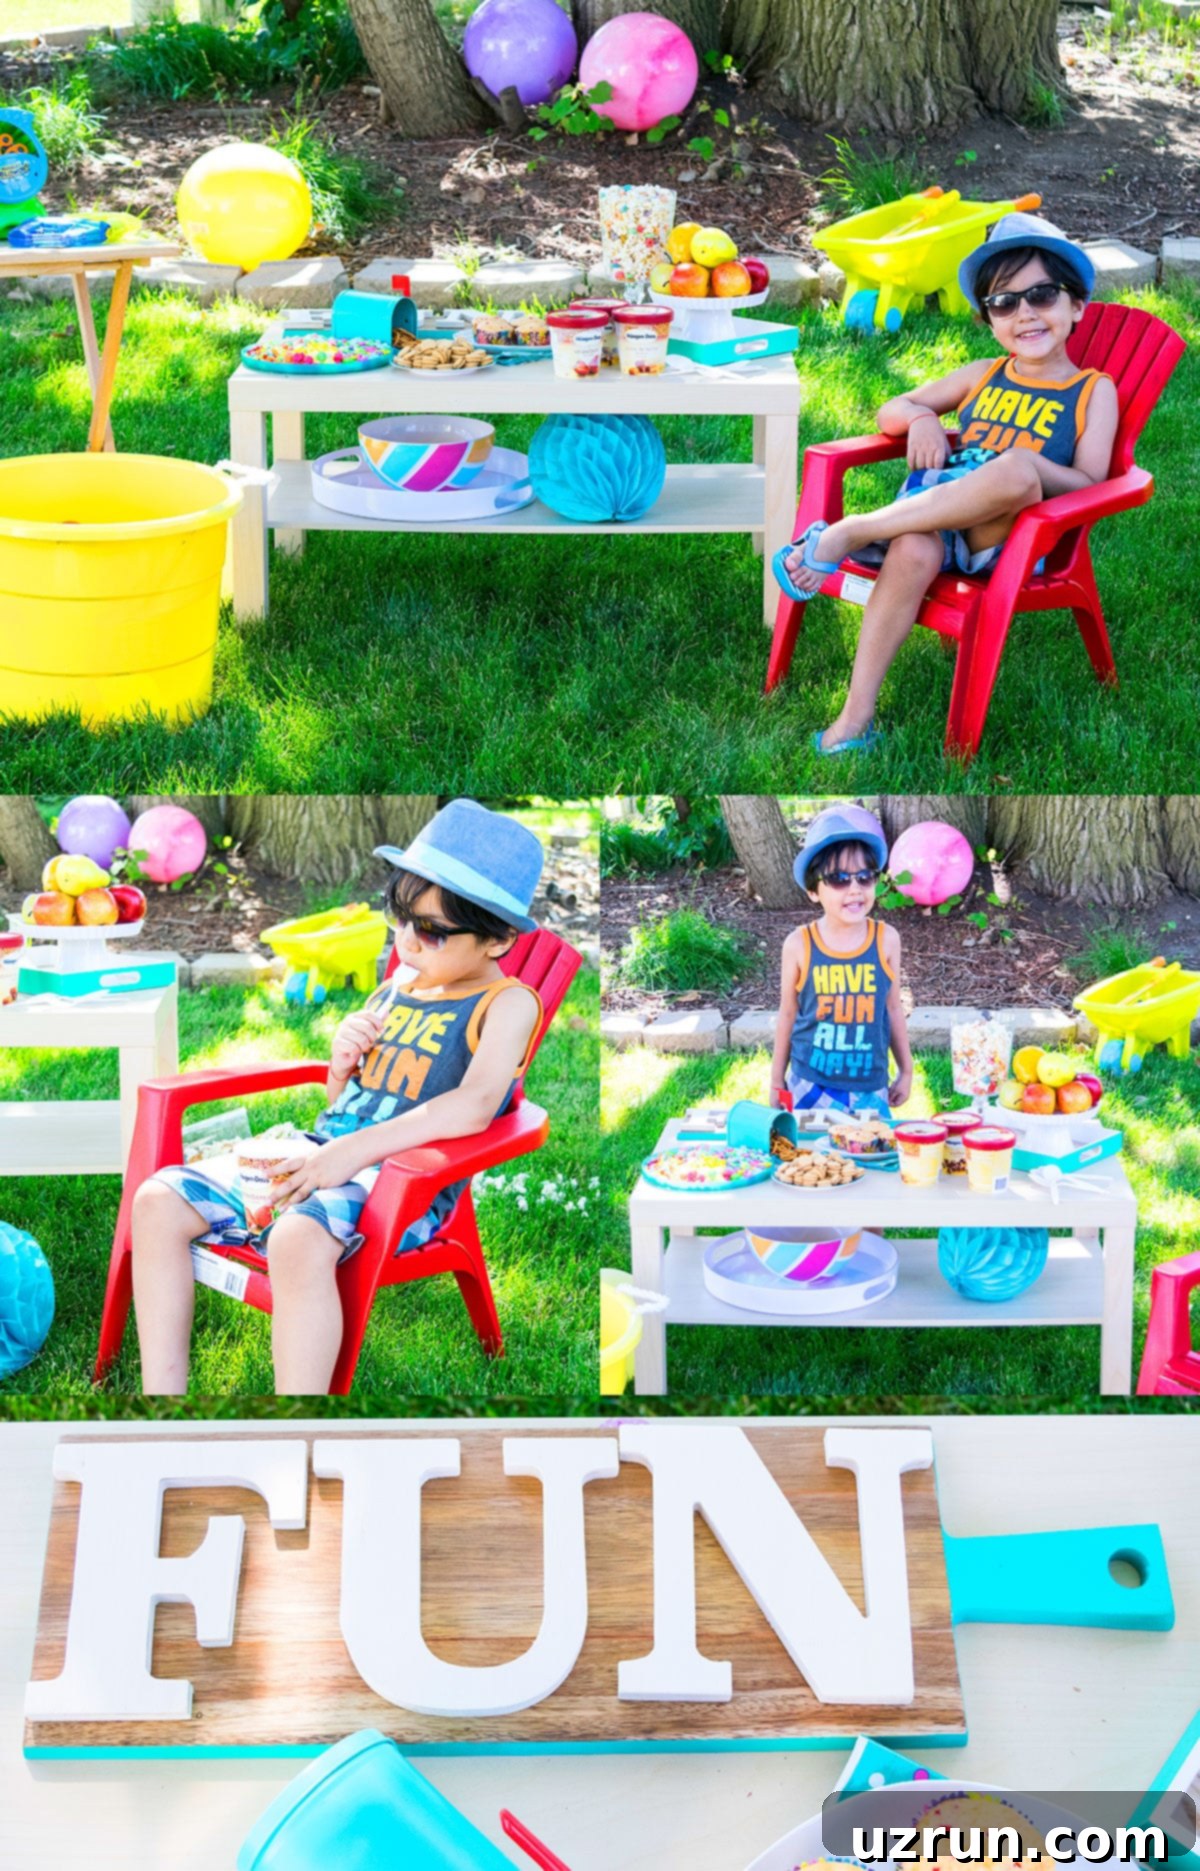
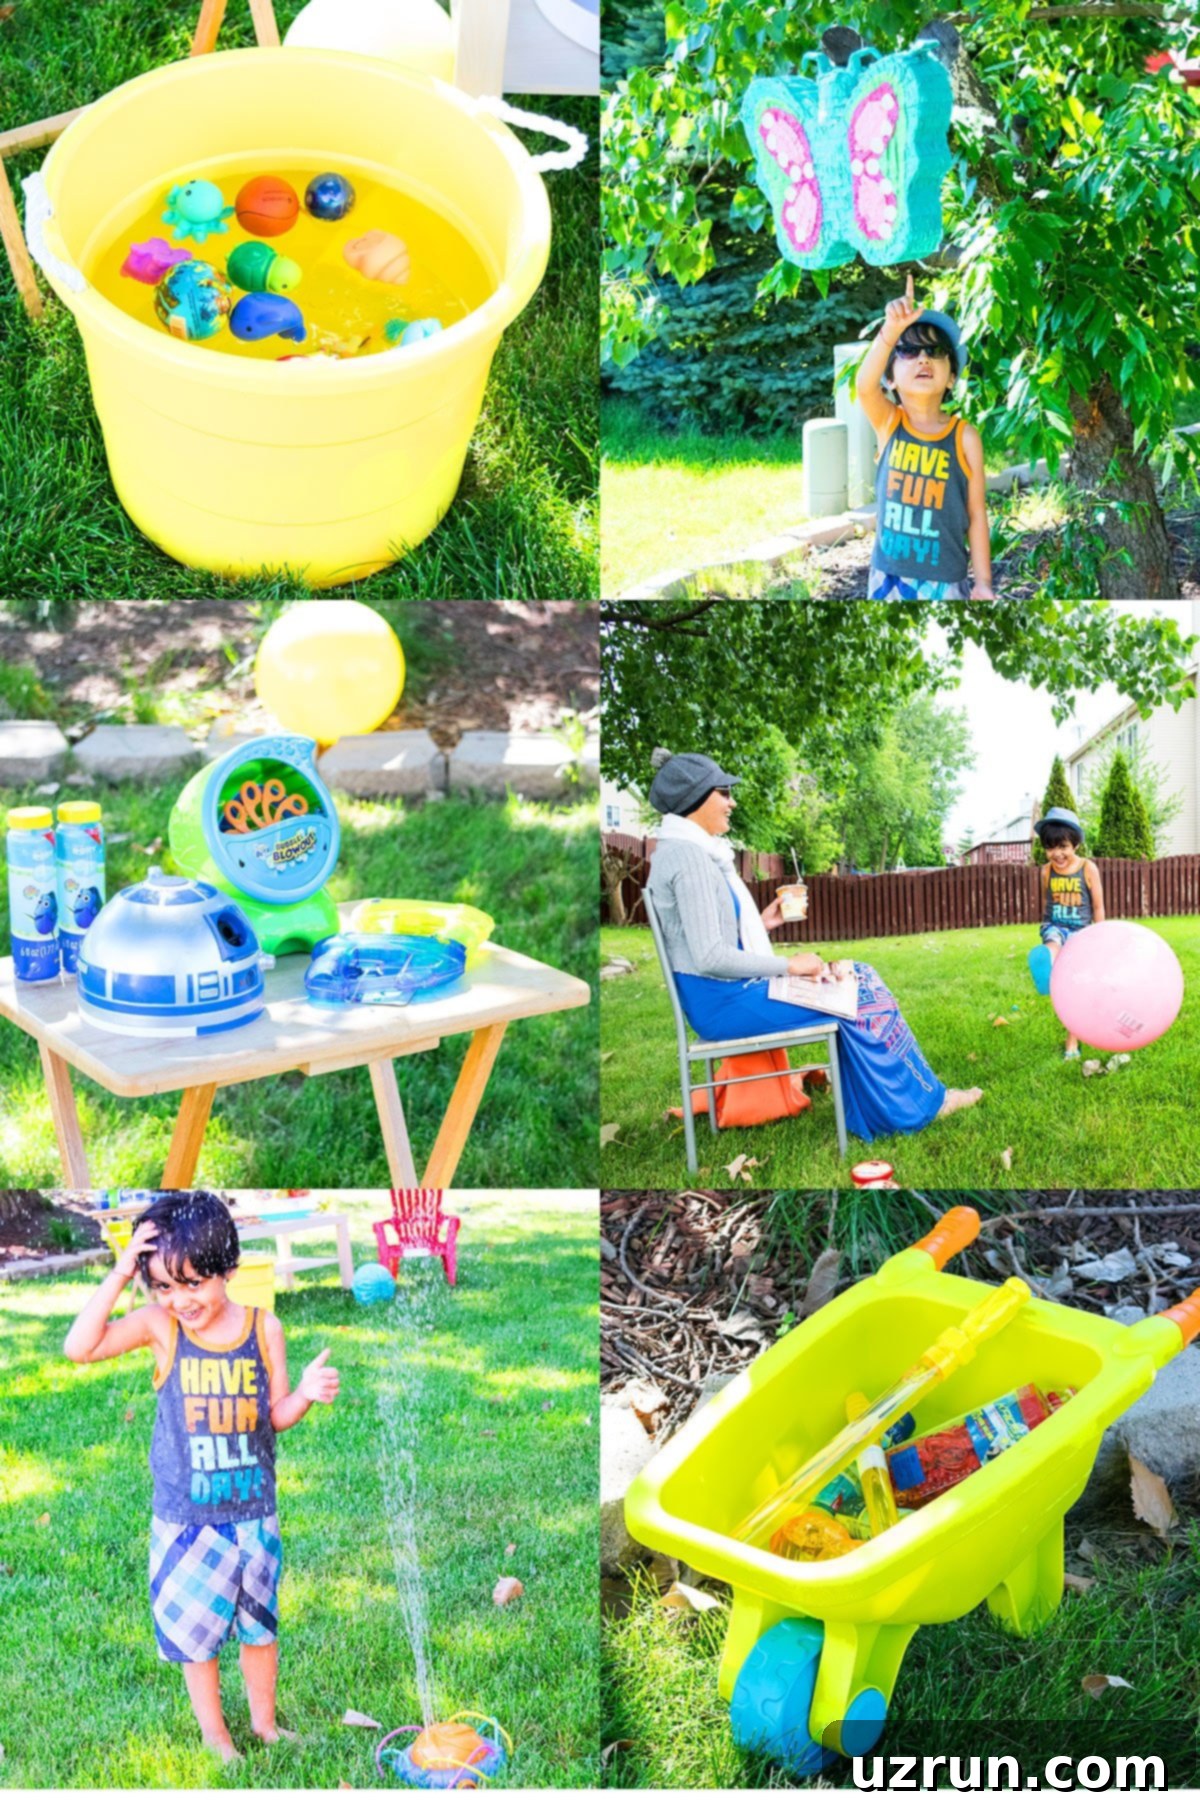
Hosting a backyard party for kids is always a joy, and creating a festive atmosphere is half the fun! For our summer bash, I meticulously set up two main activity zones. One table was dedicated entirely to an array of delicious party food and desserts, designed to entice hungry little guests. The other table was transformed into an exciting bubble station, complete with various wands and bubble solutions, guaranteeing endless giggles. To amplify the summer fun, I filled a large bucket with water and tossed in an assortment of colorful floating water toys, inviting interactive play. Additionally, a wheelbarrow brimming with water balloons and a collection of other outdoor summer toys, which I gathered from around the house, added to the spontaneous play opportunities. My little one, who is utterly obsessed with his trusty red chair and insists on taking it everywhere, made a special request to have it prominently featured. I strategically placed his red chair at one end of the food table and a bright yellow bucket at the other, creating a visually symmetrical setup. Yes, I admit, I’m quite the perfectionist when it comes to party aesthetics – a true nerd at heart, but it always pays off with a charming display! The coordinated elements truly brought the entire backyard party theme to life.
Delicious Party Food Ideas for Summer Gatherings
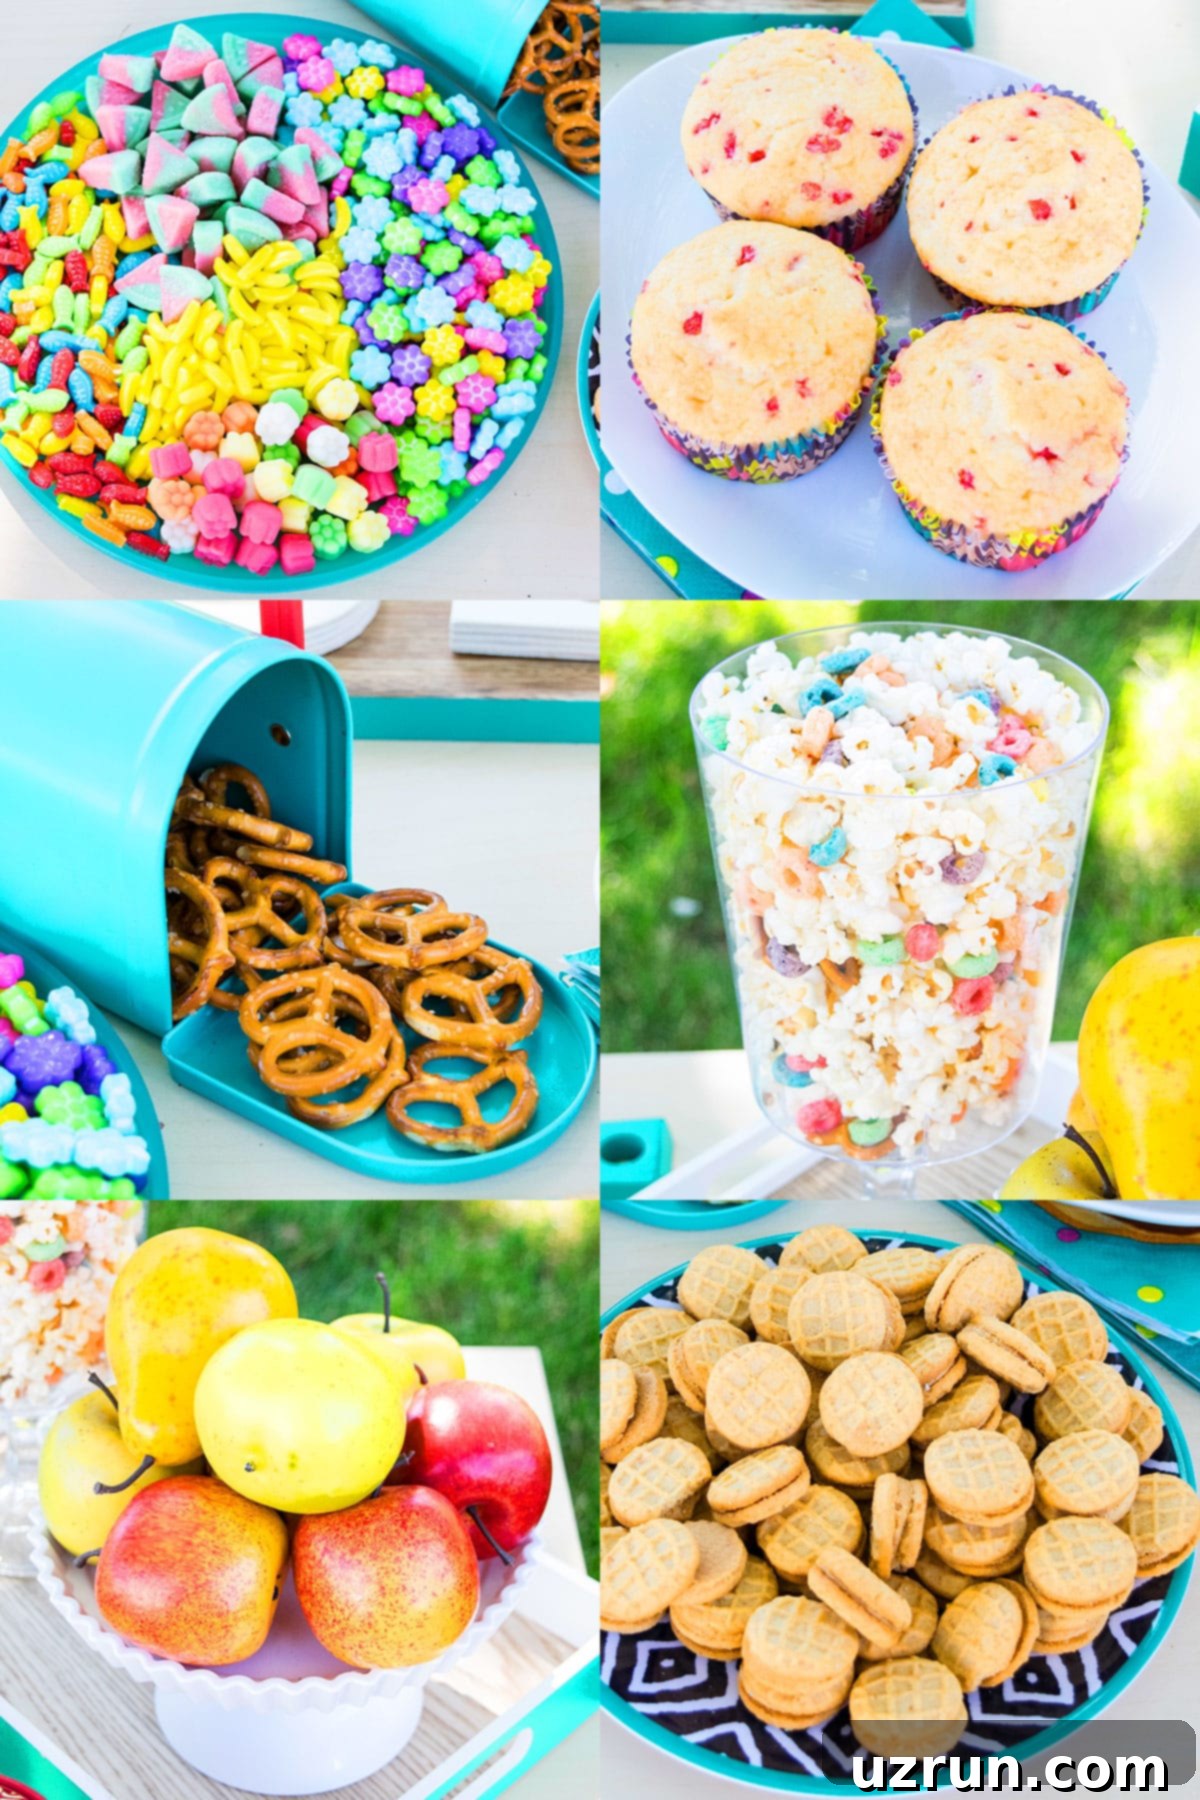
No summer party is complete without a spread of delicious treats, and I made sure our backyard bash was well-stocked! We served a delightful variety of items to cater to all tastes, especially our younger guests. Our dessert table featured light and fluffy vanilla cupcakes, baked with exciting rock candy pieces hidden inside for a sweet surprise. Next time, I might consider decorating them with these adorable Easy Fondant Daisies, charming Bee Cupcakes, whimsical Ladybug Cupcakes, or elegant Flower Cupcakes (Fondant Pansy). Alongside these, we offered classic peanut butter cookies and crunchy pretzels, always a hit with kids. My son even made a special request for his favorite colorful trail mix, a delightful blend of popcorn and cereal that disappeared quickly! Fresh fruits provided a refreshing balance to the sweets, and of course, there were plenty of candies to go around. The star of the show, the summer beach cake you saw earlier in this post, was brought out later in the party for its grand reveal. For those looking for more elaborate cake ideas, a charming Bumblebee Cake (Spring Cake) or an impressive Flower Basket Cake (Basketweave) would also be fantastic choices.
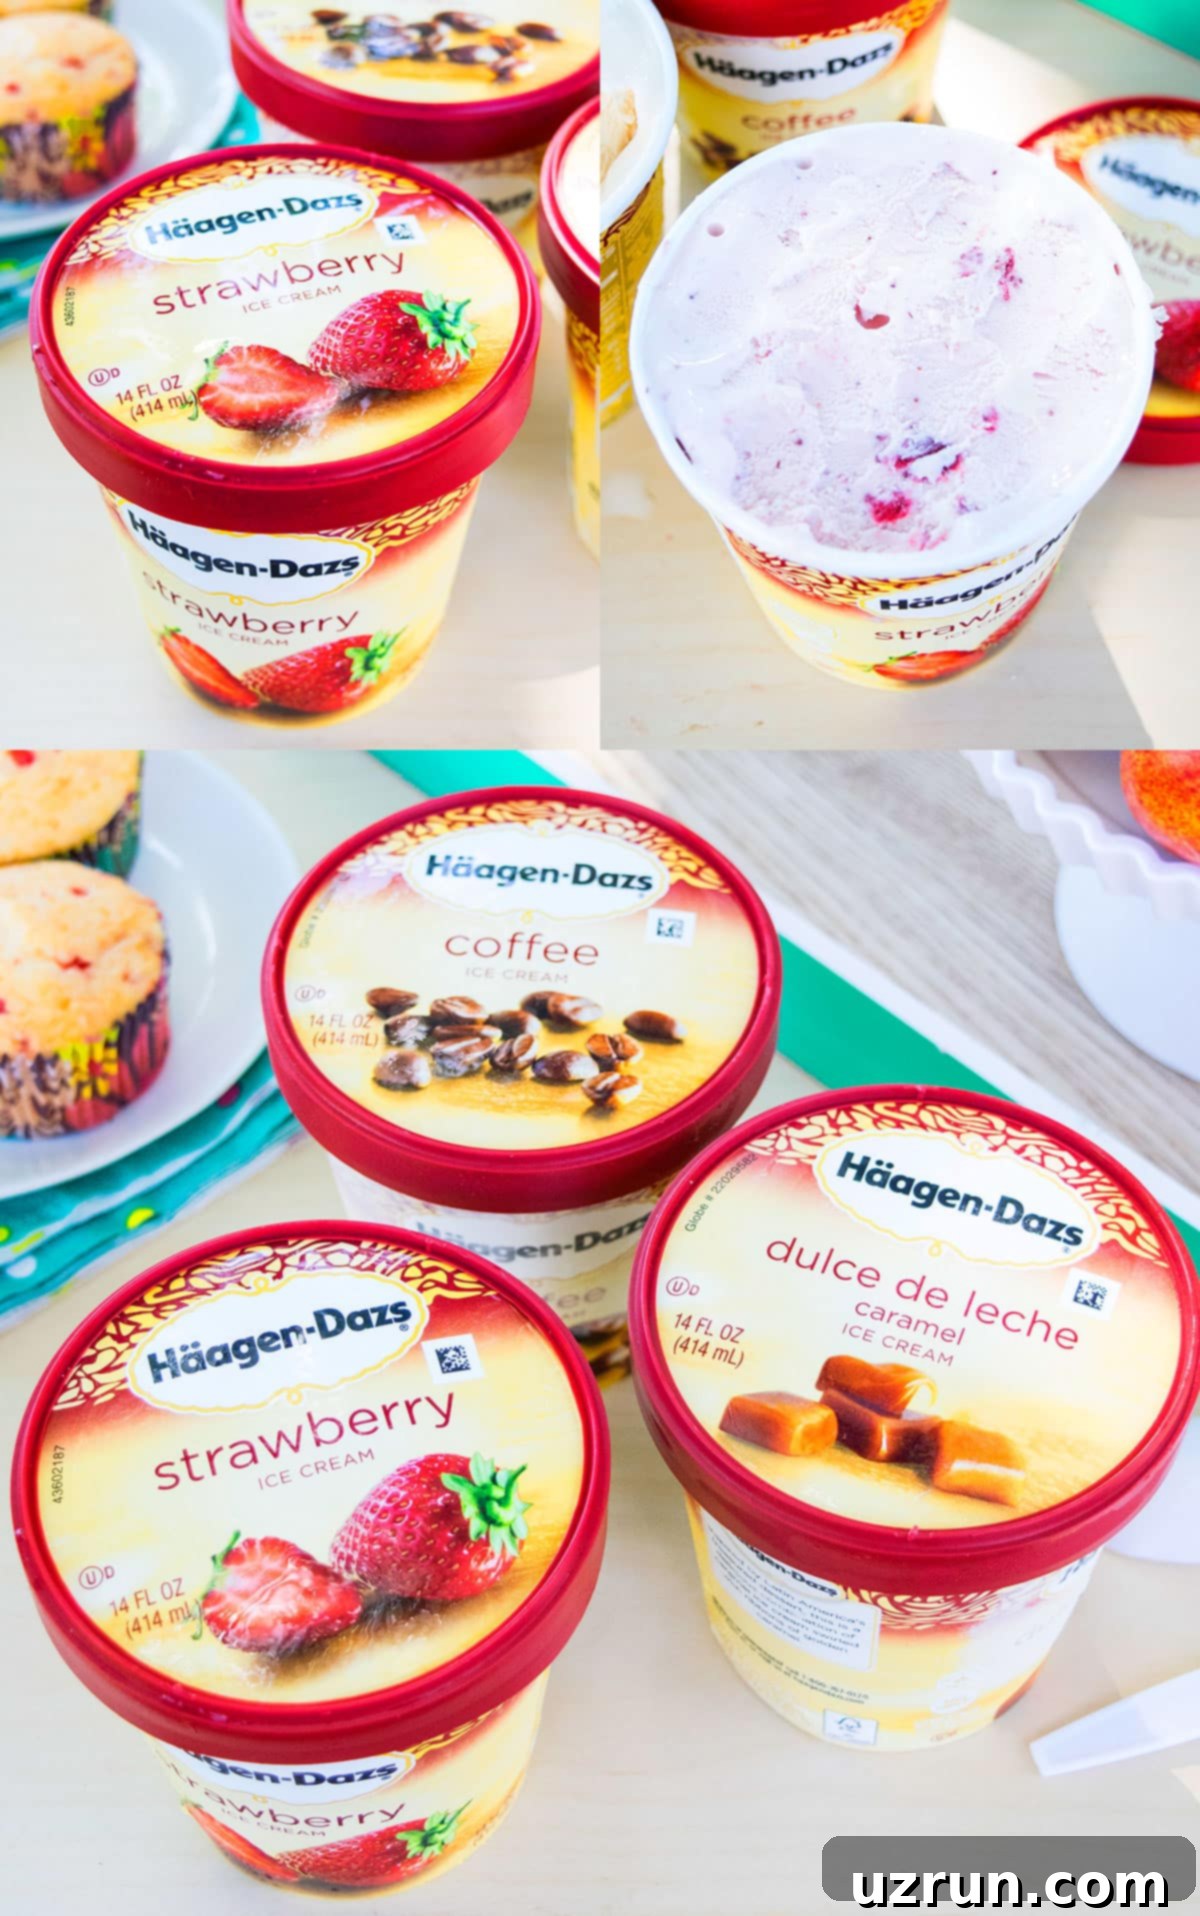
And, of course, a hot summer day absolutely demands ice cream! We were thrilled to feature Häagen-Dazs® ice cream, offering a selection of their delightful strawberry, rich coffee, and decadent dulce de leche caramel flavors. The strawberry was an instant favorite with my little one, while the coffee flavor was my personal indulgence. Häagen-Dazs® ice creams are renowned for their incredible creaminess and richness, crafted with the finest ingredients, making them an utterly refreshing treat on a warm afternoon. Beyond simply scooping, you could also consider serving other ice cream-inspired desserts like a bubbly Ice Cream Float, adorable Ice Cream Cone Cupcakes (With Cake Mix), a classic Ice Cream Cake, or even homemade Ice Cream Sandwiches for a truly cool summer celebration.
Engaging Party Activities for Kids
Keeping the little ones entertained is key to a successful kids’ party, and I love planning a variety of engaging activities. For our summer gathering, I set up a fantastic water sprinkler, perfect for running through and cooling down on a warm day. We also had a vibrant butterfly piñata, which is always a huge hit, filled with treats and toys that the kids eagerly awaited. As mentioned, the dedicated bubble station provided endless amusement, creating a magical atmosphere with countless shimmering bubbles floating through the air. Big colorful balls were scattered around the yard for spontaneous games, and the water bucket with floating toys offered another zone for imaginative play. Witnessing my son’s excitement and pure joy as he participates in these themed parties truly fills my heart with happiness. It allows me to relax, soak in the beautiful outdoors, and enjoy a scoop of delicious ice cream while his laughter and giggles echo around me. These are truly precious “me moments” that I cherish and will remember forever. It’s incredible how motherhood shifts one’s perspective, making a child’s happiness the ultimate source of contentment. When he’s happy, I’m happy – and those are the memories that truly matter!
Recipe
Easy Summer Cake (With Kit Kat)
Abeer Rizvi
Pin Recipe
10 minutes
40 minutes
20 minutes
1 hour
10 minutes
Dessert
American
10
Slices
558
kcal
Want to Save This Recipe?
Enter your email & I’ll send it to your inbox. Plus, get great new recipes from me every week!
By submitting this form, you consent to receive emails from CakeWhiz
Ingredients
- 1 Chocolate raspberry cake Oval, 11x8x3 inches (or your preferred shape)
- 1 cup Raspberry pie filling
- 3 cups Chocolate buttercream icing
- 1 cup American buttercream frosting Colored blue with gel food coloring
- 20-22 bars Kit Kats Mini packets (2 segments each) or regular ones (4 segments each)
- 2 cups Crushed graham cracker crumbs
- 1 Fruit roll-up Or red fruit strip for beach towels
- 10-12 Small fish and duck candies
- 10 Round Lifesavers
- 10 Mini Teddy Graham crackers
- 1-2 tablespoons Star sprinkles and colorful edible pearls
Instructions
-
Bake your chosen cake according to recipe instructions and allow it to cool completely on a wire rack.
-
While the cake is cooling, prepare the chocolate buttercream icing, American buttercream (coloring it blue with gel food coloring), and the raspberry filling. Ensure all frostings are at a medium-firm consistency.
-
Using a sharp serrated knife, carefully cut the cooled cake in half lengthwise to create two even layers.
-
Place one cake layer onto a large cake board or your serving platter.
-
Spread a layer of chocolate frosting evenly over the first cake layer using a spatula, then follow with the raspberry filling.
-
Carefully place the second cake layer on top of the filling, pressing gently to secure it into place.
-
Frost the entire sides of the cake and approximately half of the top of the cake with the chocolate icing. This doesn’t need to be perfectly smooth as it will be covered.
-
Unwrap all the Kit Kat bars. While the chocolate icing is still fresh and sticky, press the Kit Kat bars around the iced sides of the cake. The fresh icing will act as a “glue.”
-
Using a clean spatula, spread the blue icing evenly over the unfrosted top area of the cake. This will represent the pool or water.
-
Generously spread the crushed graham cracker crumbs on top of the chocolate-frosted portion of the cake. This creates your sandy beach. Gently pat them down.
-
Cut the fruit strip into small, approximately 2-inch pieces to resemble miniature beach towels. Place these on the graham cracker “sand.” Lay the mini Teddy Grahams on top of the fruit strip “towels.” Insert a few cocktail umbrellas around the “towels” for shade. Scatter some star sprinkles and edible pearls on the “sand” for extra sparkle.
-
To create swimming teddy bears, break a few Teddy Grahams in half and use a tiny dot of frosting to stick the top portion onto the round Lifesaver candies. Place these gently on the blue icing. Add the small fish and duck candies to the blue “water” to complete your aquatic scene.
-
To enhance the overall beach setting, sprinkle additional graham cracker crumbs, star sprinkles, and edible pearls randomly on the cake board around the base of the cake. Serve and enjoy your fun and festive Easy Summer Cake!
Notes
- Always ensure your cake is completely cool before decorating to prevent frosting from melting.
- The consistency of your icing should be medium to medium-firm; too runny, and it will slide off.
- If specific candies or cookies are unavailable, feel free to improvise with similar items in shape, size, and color.
- While an oval cake was used here, this design adapts well to round, square, or rectangular cake shapes.
- Refer to the “Tips and Techniques” and “Variations” sections above for more detailed guidance.
- Leftover cake can be stored in a sealed container in the refrigerator for up to 3 days.
Nutrition
Calories:
558
kcal
Carbohydrates:
91
g
Protein:
3
g
Fat:
23
g
Saturated Fat:
6
g
Polyunsaturated Fat:
5
g
Monounsaturated Fat:
10
g
Trans Fat:
0.004
g
Cholesterol:
0.2
mg
Sodium:
525
mg
Potassium:
286
mg
Fiber:
2
g
Sugar:
71
g
Vitamin A:
4
IU
Vitamin C:
0.01
mg
Calcium:
73
mg
Iron:
3
mg
An automated tool is used to calculate the nutritional information. As such, I cannot guarantee the accuracy of the nutritional information provided for any recipe on this site.
Tried this recipe?
Leave a comment below or rate and tag @cakewhiz on social
