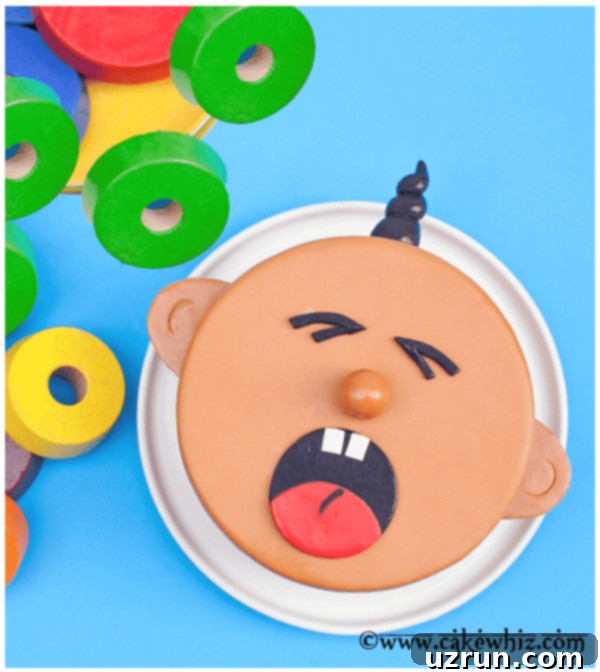
Crying Baby Cake Tutorial: A Humorous Fondant Design for Baby Showers & Birthday Parties
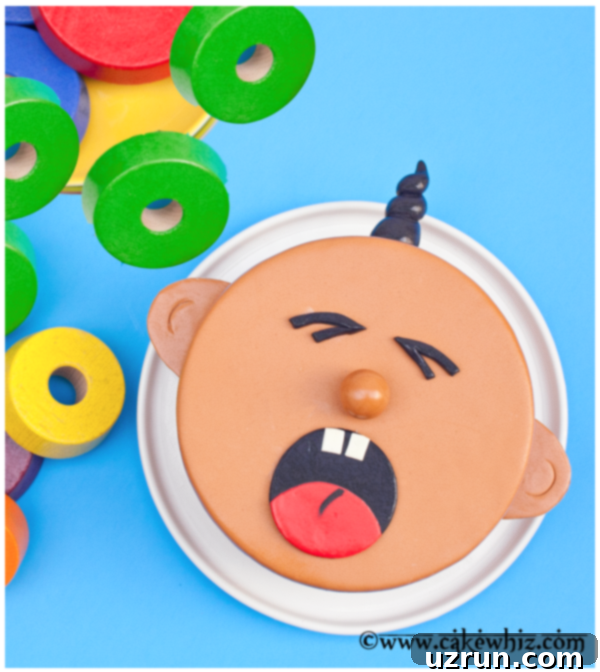
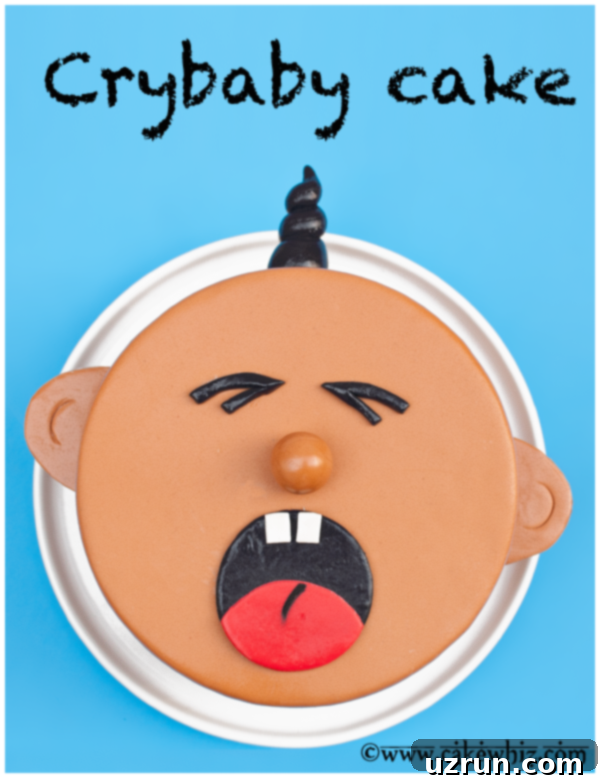
Welcome back, cake decorators and baking enthusiasts! I’m absolutely thrilled to return to the blogosphere with a project that’s close to my heart, inspired by the newest addition to my family. This detailed crying baby cake tutorial is not only incredibly cute but also boasts a wonderfully humorous touch, making it a perfect centerpiece for your next baby shower, gender reveal party, or even a child’s birthday celebration. If you enjoyed my Gender Reveal Cake, you’re going to love bringing this little fondant character to life!
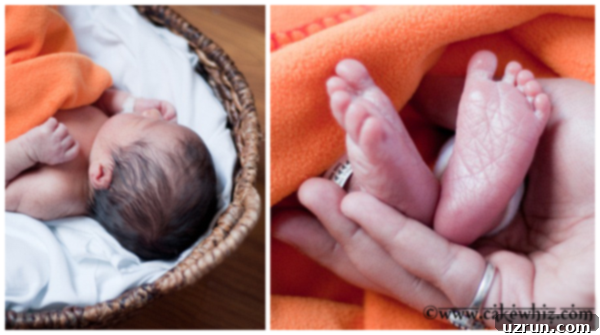
My recent absence from sharing delightful cake creations was for the most wonderful reason imaginable: my husband and I welcomed our first child, a beautiful baby boy, into our lives! Becoming a parent has been an incredible journey, filled with boundless joy, endless cuddles, and, let’s be honest, a fair share of adorable wails. Witnessing those tiny hands and feet, experiencing the rollercoaster of emotions that comes with new parenthood, truly inspired this unique cake design. It’s a sweet, albeit sometimes loud, adventure.
The Inspiration Behind the Crying Baby Cake: A Relatable Glimpse into Parenthood
Initially, I knew I wanted to create a baby-themed cake, but the specific concept eluded me. Then, it finally hit me – a fundamental, universal truth of infancy: babies cry! They cry when they’re hungry, when they need a diaper change, when they’re sleepy, or even when they’re just bored and seeking attention. It’s their primary mode of communication, and while sometimes challenging, it’s an undeniable and often endearing part of their charm. So, why not embrace this universal aspect of babyhood and create a charming, slightly melodramatic “crybaby” cake?
The idea felt perfect – a playful nod to the relatable realities of parenting, designed to bring smiles and knowing laughs from anyone who’s ever spent time with a little one. This cake isn’t just a dessert; it’s a conversation starter, a lighthearted tribute to the joys and occasional challenges of welcoming a new family member. And honestly, I think it turned out incredibly cute! What do you think of this tearful little fondant creation? The best part is that despite its charming details and intricate appearance, this crying baby cake is surprisingly straightforward to make, requiring just fondant and a few basic tools you likely already have on hand. It’s an accessible project for bakers of varying skill levels.
Unleash Your Creativity: Customizing Your Fondant Baby Cake
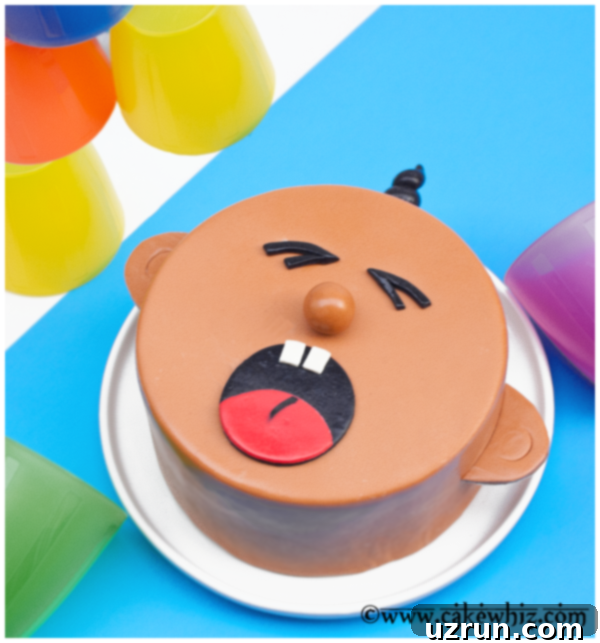
While the crying expression adds a delightful touch of humor and uniqueness, the true beauty of this cake decorating tutorial lies in its incredible versatility. You are absolutely encouraged to let your imagination run wild and personalize your baby cake to suit any occasion, preference, or even the personality of the baby you’re celebrating. This adaptable design allows for endless creative modifications:
- Expression Variations: If a tearful baby isn’t quite the mood you’re going for, you can easily change the facial expression! Opt for an upward-curved smile and open, round eyes for a joyful, giggling baby. Or perhaps gentle, closed eyes and a small, peaceful mouth to create a serene, sleeping baby cake. Each expression tells a different story!
- Hair Options Galore: The original design features a cute swirl of black fondant hair, inspired by my own little one’s first locks. However, the possibilities are vast! You could omit the hair entirely for an equally adorable bald baby, or experiment with different hair colors and styles. Imagine blonde curls, reddish pigtails, a soft brown fringe, or even a whimsical blue mohawk for a fun, modern twist.
- Accessorize for Personality: Elevate your design with miniature fondant accessories. Add a tiny fondant bow for a baby girl, a delicate bonnet for a classic look, a miniature party hat for a birthday celebration, or even a tiny pacifier to enhance the baby’s character. These small, thoughtful details can drastically alter the cake’s theme and appeal.
- Skin Tones and Blanket Colors: Easily adapt the cake to celebrate any baby by experimenting with various shades of brown, peach, or ivory fondant for different skin tones. You can also add a decorative fondant “blanket” or “swaddle” around the base of the cake in a color that perfectly matches your event’s theme, whether it’s pastel pinks, baby blues, vibrant yellows, or neutral greens.
The possibilities are truly endless, ensuring that each baby cake you create will be a unique and cherished work of edible art, perfectly tailored to your vision and celebration.
Essential Supplies for Your Crying Baby Fondant Cake Project
To embark on this delightful cake decorating journey, you won’t need an overwhelming array of highly specialized tools. Most of these items are standard in a well-equipped baker’s kitchen, making this a very accessible DIY project. Here’s a detailed list of what you’ll need, along with a few helpful notes to ensure your success:
- Round Cake: A sturdy, baked and completely cooled round cake is your essential foundation. For this design, a delicious mango cherry cake was used, but any firm, round cake of your choice (like a vanilla or chocolate sponge) will work beautifully. Ensure it’s dense enough to support the fondant decorations without crumbling.
- White Chocolate Buttercream Frosting: This acts as a delicious adhesive layer and provides a perfectly smooth canvas for your fondant. My trusted white chocolate buttercream recipe offers a wonderfully stable, flavorful, and easy-to-spread option.
- Red Marshmallow Fondant: Used for the delicate, expressive details of the baby’s mouth. Marshmallow fondant is often a favorite choice among home decorators for its excellent pliability, pleasant taste, and ease of handling compared to some other types of fondant.
- Brown Marshmallow Fondant: This will be the primary color for the baby’s face and ears. You have the flexibility to adjust the shade to create various skin tones, from light peach to deeper browns, to personalize your baby cake.
- White Marshmallow Fondant: Essential for small, bright details such as tiny teeth (if desired) or the whites of the eyes (should you opt for an open-eye expression).
- Black Fondant: Used specifically for crafting the hair and the expressive crying eyes. If you prefer, a black edible marker can also be used to draw on details on white fondant, offering an alternative for finer lines.
- Toothpicks: Absolutely crucial for providing structural support for the standing ears and the hair swirl. Always insert them carefully and remember to inform anyone serving or eating the cake about their presence for safety.
- Circle Cutter: A small, sharp circle cutter will be incredibly handy for achieving perfectly round shapes, such as the inner part of the mouth or precise eye components.
- Knife: A sharp paring knife or a craft exacto knife (strictly dedicated for food use to ensure hygiene) will allow for precise cuts and intricate detailing in your fondant pieces.
- Small Cardboard Pieces: These are vital for creating the sturdy, yet lightweight, base for the baby’s ears. Recycled cereal boxes or other thin cardstock work perfectly for this purpose.
- Tape or Glue Gun: Used to securely attach the toothpicks to the cardboard ear pieces. If using a glue gun, ensure the glue is applied only to the non-edible cardboard side and is fully dry before proceeding. For a fully edible construction, consider using edible glue or royal icing instead.
- Scissors: Standard kitchen scissors will be needed for easily cutting the cardboard pieces to shape.
- Royal Icing or Corn Syrup (or water): These act as effective edible adhesives to stick your various fondant pieces together. A tiny bit of water also works wonders for lighter pieces and is readily available.
- Black Edible Marker: Perfect for adding fine lines, such as the detail on the red leaf mouth piece, or for drawing on specific eye features if you opt not to use black fondant for them.
Step-by-Step Instructions: Creating Your Fondant Crying Baby Cake Masterpiece
Follow these detailed steps carefully to transform your simple cake into an adorable and unforgettable crying baby masterpiece. Remember to take your time with each stage, and don’t be afraid to pause and adjust as you go along. Practice makes perfect, and the joy of creating something unique is well worth the effort!
Step 1: Preparing Your Cake Foundation for Fondant
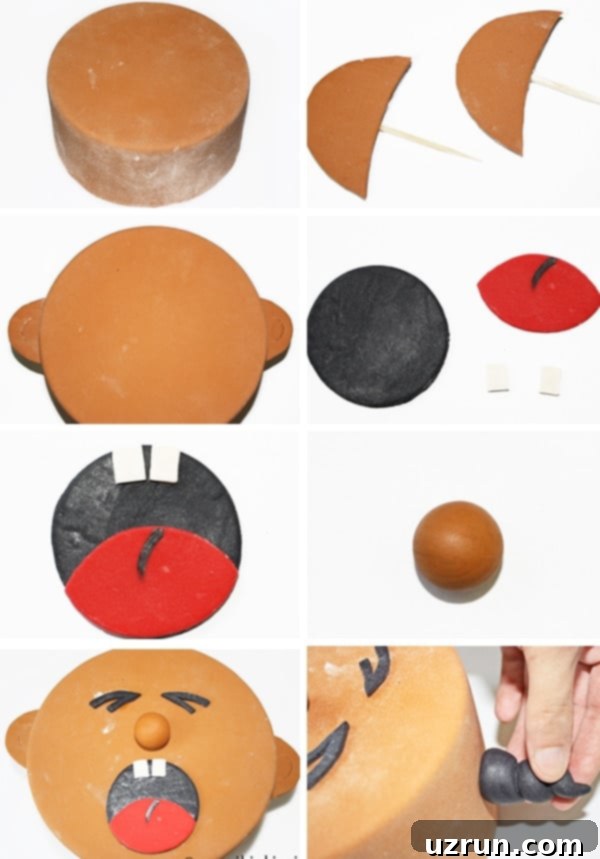
Begin by baking your chosen round cake and allowing it to cool completely. A well-chilled cake is significantly easier to frost and cover smoothly with fondant. Once cooled, apply a smooth, even layer of your white chocolate buttercream frosting. This layer not only adds delicious flavor but also creates a perfect, adhesive canvas for your fondant. Next, gently drape your brown marshmallow fondant over the entire cake. Carefully smooth out any air bubbles or wrinkles using a fondant smoother or your hands, working from the top down. Trim any excess fondant neatly around the base. This beautiful, smooth brown surface will form the baby’s face.
Step 2: Crafting the Baby’s Structural Ears
For the baby’s ears, you’ll need two small, crescent-moon-shaped pieces of cardboard. Carefully cut these out, striving for as much symmetry in size and shape as possible. These cardboard pieces are crucial as they will provide the necessary internal structure for the ears to stand upright and hold their form on the cake.
Step 3: Covering the Ears and Adding Support
Brush a very thin, even layer of royal icing, corn syrup, or even just water onto one side of each cardboard ear piece. Then, carefully cover these pieces with brown fondant, ensuring the color perfectly matches the baby’s face. Trim away any excess fondant to create neat, rounded edges, making the ears look natural. Once covered, flip them over. Using strong tape or a glue gun (making sure the adhesive is applied only to the non-edible cardboard and is completely dry), firmly attach a toothpick to the back of each cardboard ear. This toothpick will serve as the essential anchor to secure the ears to the cake.
Step 4: Attaching the Ears to the Cake
With your fondant-covered, toothpick-reinforced ears now ready, gently press the exposed end of each toothpick into the sides of your cake. Position them carefully on either side of the ‘face’ to ensure they look proportionate and symmetrically placed on the baby’s head. Take a step back to assess the placement, adjusting if necessary. And just like that, your baby now has adorable little ears!
Step 5: Adding a Touch of Hair for Personality
Inspired by my own little one’s charming, albeit sparse, locks, I wanted this baby cake to have some hair too! To create this, take a piece of black fondant and roll it between your hands or on a lightly dusted surface into a long, thin “snake” shape. Then, carefully coil this “snake” into a spiral to mimic a cute swirl of hair. At the base of the spiral, insert a toothpick, which will help secure the hair firmly to the top of the cake. Feel free to experiment with different hair lengths and styles here—from a full head of hair to a small tuft!
Step 6: The Sweet and Simple Nose
For the baby’s nose, the approach is wonderfully simple. Just take a small piece of brown fondant, matching the skin tone, and roll it into a tiny, smooth ball. This will be placed in the center of the face to add definition and character. Keep it subtle and proportionate to the size of your cake.
Step 7: Preparing the Expressive Mouth Pieces
This is where the “crying” expression truly comes to life. You’ll need to cut out a few specific shapes: a small black circle for the inside of the mouth (representing the open mouth), a red leaf-like shape for the tongue or inner gums, and two tiny white squares for the teeth (or just one for a single, new tooth). Using your black edible marker, carefully draw a small, slightly curved line on the red leaf shape, as shown in the process images, to add depth and detail to the mouth, enhancing its tearful look.
Step 8: Assembling the Mouth Details
Now, it’s time to bring all those mouth pieces together to form the baby’s crying mouth. Lightly brush a tiny amount of water (or corn syrup/royal icing) on the back of each fondant piece – the black circle, the red leaf, and the white squares. Carefully position and layer them to form the crying mouth as depicted in the tutorial. The water acts as a subtle, effective glue, ensuring they stay perfectly in place. Pay close attention to the slight downward curve of the overall mouth shape to emphasize the crying look.
Step 9: Crafting the Emotional Eyes and Final Facial Assembly
My apologies, a picture was missed during the creation of the eyes! To make them, cut out two small “V” shapes using black fondant. Gently bend the ends of these “V” shapes downwards to give them a slightly droopy, tearful, or closed appearance, characteristic of crying eyes. Once all your facial features – the mouth, nose, and eyes – are meticulously crafted and ready, lightly brush the backs with water and carefully stick them onto the fondant-covered cake. Take your time with placement to achieve the desired emotional expression. Don’t worry if you see any white powdered sugar marks on your fondant from handling; these will magically disappear in the very final step!
Step 10: Adding the Hair and Final Polishing Touches
Take your prepared fondant hair piece with the toothpick securely attached and gently push the toothpick into the top of the cake, positioning the hair as desired. Once all the fondant pieces are securely in place, your crying baby cake is almost complete! To give your cake a professional, polished finish and to effectively remove any lingering powdered sugar marks from your work, gently steam the entire cake. You can do this using a handheld garment steamer (held a safe distance away, about 6-8 inches) or by carefully wafting the cake over a pot of gently boiling water for a few seconds. The steam will give the fondant a beautiful, natural sheen and make any white marks vanish, leaving a perfectly smooth and vibrant surface. Be careful not to over-steam, which can make the fondant sticky.
Expert Fondant Decorating Tips for Success
Working with fondant can be an incredibly rewarding experience, and a few key tips can make the entire process even smoother, ensuring a professional-looking finish for your crying baby cake:
- Keep Fondant Covered: Fondant is very susceptible to drying out quickly when exposed to air. Always keep any fondant you’re not actively working with tightly wrapped in plastic wrap or stored in an airtight container to maintain its pliability.
- Use Cornstarch/Powdered Sugar Sparingly: When rolling out fondant, dust your work surface and rolling pin with a very light layer of cornstarch or powdered sugar to prevent sticking. Use just enough to prevent adhesion; too much can dry out the fondant, make it brittle, and leave visible white marks.
- Smooth as You Go: As you apply fondant to your cake or form small pieces, use a fondant smoother or the palm of your hand to gently smooth out any air bubbles or wrinkles. This ensures a flawless finish.
- Edible Glue Alternatives: While a tiny bit of water works wonderfully for small adhesions, for larger or heavier fondant pieces that need extra security, consider using a stronger edible glue or a mixture of tylose powder and water to create a firm edible paste.
- Coloring Fondant Effectively: If you’re coloring white fondant yourself, always use gel food coloring (not liquid food coloring) to avoid altering the fondant’s consistency. Knead the color thoroughly into the fondant for even, vibrant distribution.
- Mind the Temperature and Humidity: Work in a cool, dry environment if possible. High humidity or warmth can make fondant sticky, difficult to handle, and prone to losing its shape.
Next time you’re planning a baby shower, a memorable gender reveal party, or just a fun and unique birthday celebration for a little one, give this adorable and humorous crying baby cake a try. It’s a wonderful way to add a touch of personality and unexpected charm to your event, and I’m absolutely sure your friends and family will get a good laugh and be incredibly impressed by your creativity and skill!
Thank you for joining me on this creative baking journey. Until next time, happy baking and decorating, my lovelies!
