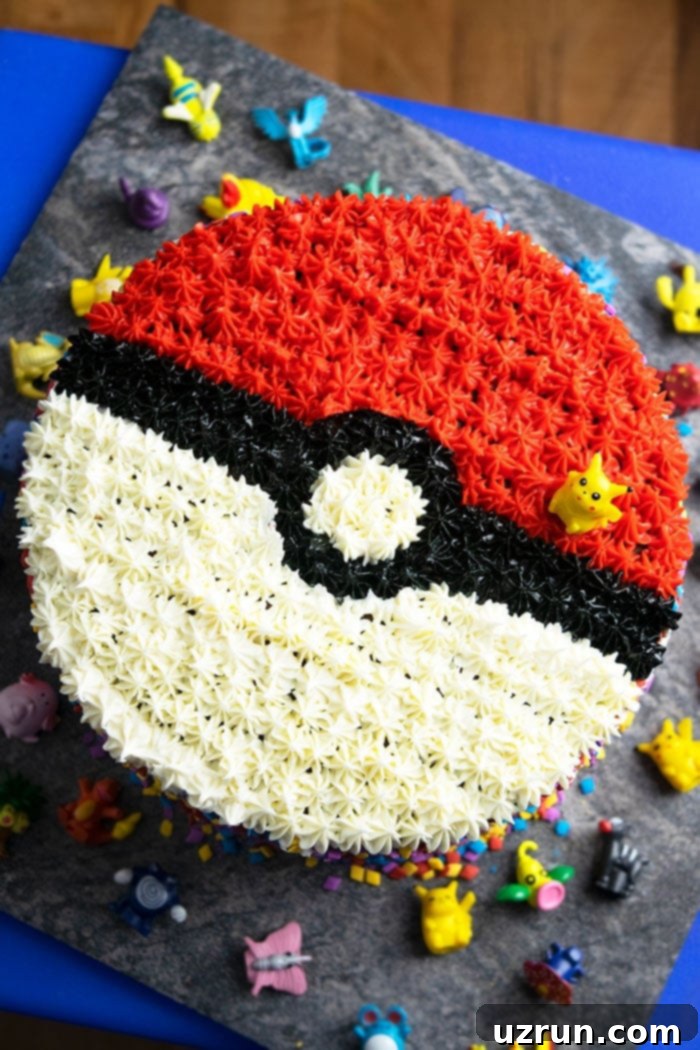
Craft the Ultimate Easy Homemade Pokemon Cake: A Fun Pokeball Pinata Surprise!
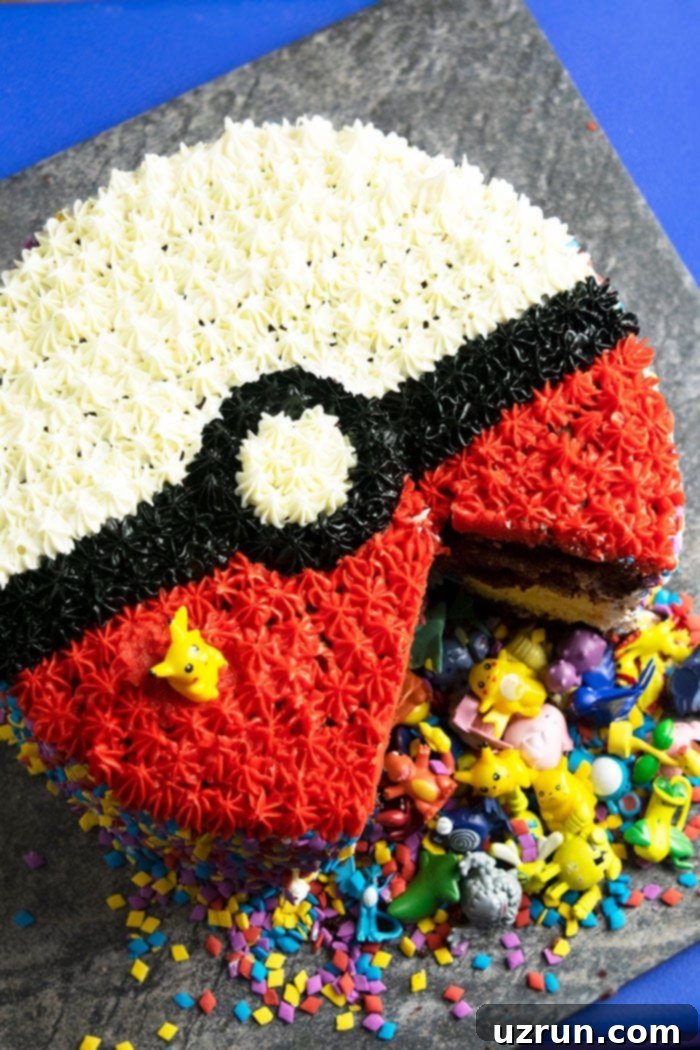
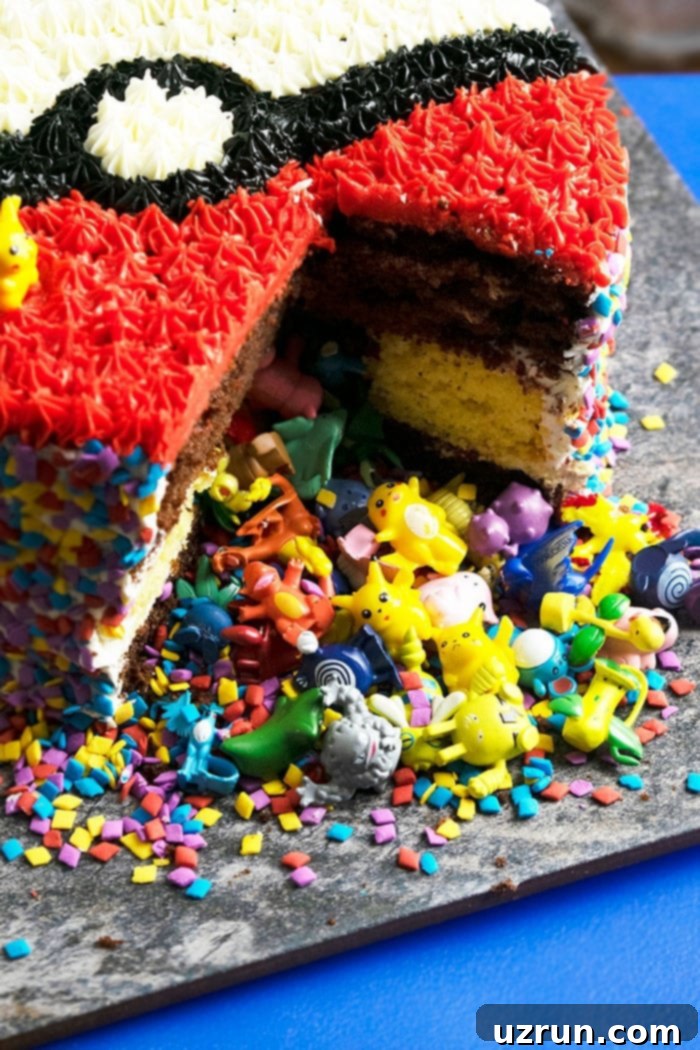
Are you ready to embark on a baking adventure that will delight any Pokemon fan? This guide will show you how to create an incredible, easy-to-make Pokemon cake, perfect for birthdays, themed parties, or just a special treat. Our homemade pinata Pokeball cake is not only visually stunning with its vibrant buttercream icing but also hides a delightful surprise inside: a treasure trove of toys and sprinkles! It’s simpler than you might think to create this show-stopping dessert that will leave a lasting impression.
While our Best Birthday Cake often steals the show as a family favorite, this creative Pokeball design is quickly rising through the ranks. We love experimenting with new Birthday Cake Ideas, and this Pokemon masterpiece is a fantastic addition. Unlike some overly complicated designs you might find online, our approach focuses on simplicity and maximum impact. Whether you’re baking for a child’s birthday bash or a nostalgic adult gathering, this cake is guaranteed to be a hit, much like our popular Pikachu Donuts (Pokemon Donuts). Let’s catch ’em all… in cake form!
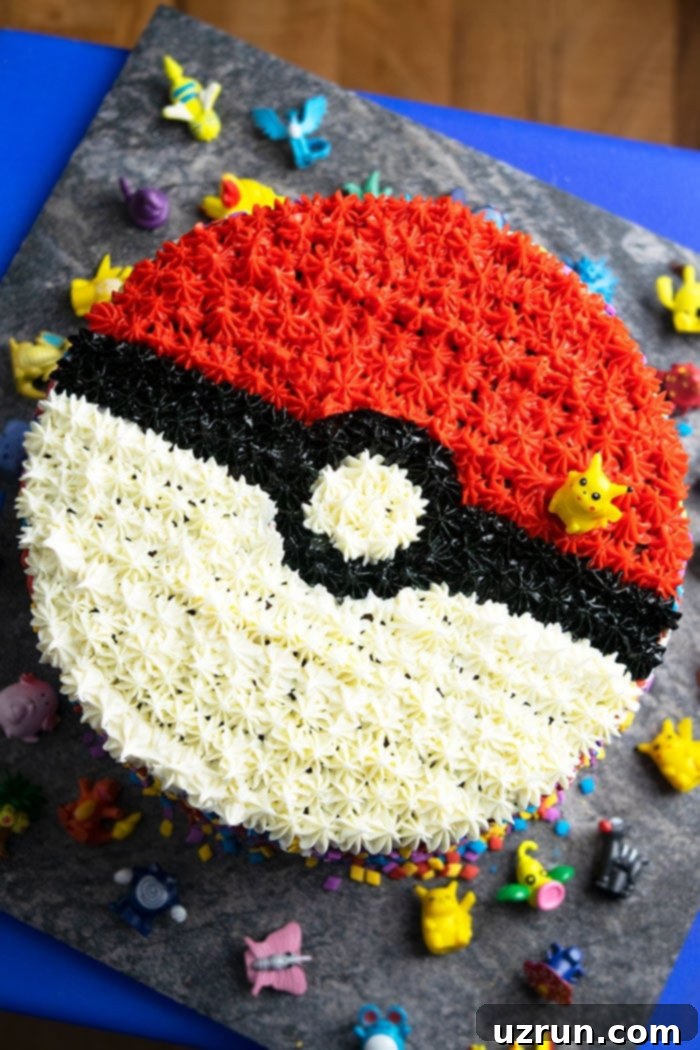
Crafting Your Pokemon Pokeball Pinata Cake: A Step-by-Step Guide
Creating this iconic Pokeball cake is a fun and rewarding process. Here’s a quick overview of the essential steps involved. Each step is designed to be straightforward, ensuring even novice bakers can achieve impressive results.
- Bake Cakes: Start by preparing your chosen cake flavors. For a standard Pokeball, you’ll need three 8-inch round cakes. Allow them to cool completely before proceeding to avoid any frosting mishaps.
- Prepare or Purchase Frosting: The vibrant colors of a Pokeball are key! You’ll need red, black, and white buttercream frosting. Buying pre-made colored frosting, especially red and black, can be a huge time-saver and ensure rich, consistent colors.
- Assemble the Pinata Cake Layers: This is where the magic happens! Carefully stack your cake layers, creating a hollow center in the middle layer to hold your surprise fillings.
- Crumb Coat and Ice the Cake Sides: Apply a thin layer of white icing to seal in crumbs, then fully ice the sides. For an extra festive touch, cover the sides with sprinkles.
- Create a Design Template: Use a simple tool like a toothpick to lightly sketch the Pokeball design on the top of your cake. This provides a guide for perfect piping.
- Decorate with Buttercream: Using piping bags fitted with a small star tip, fill in your template with the red, white, and black frosting to bring your Pokeball to life.
Creative Variations for Your Pokemon Birthday Cake
While the classic Pokeball design is always a crowd-pleaser, there are many ways to customize your Pokemon cake to make it truly unique. Don’t be afraid to experiment with different flavors, decorations, and presentation styles to match your party’s theme or personal preferences.
- Decorate with Homemade Marshmallow Fondant: For a super smooth, polished finish, consider using fondant instead of buttercream. You can achieve incredibly sharp lines and a sleek look with fondant. Store-bought fondant is also an excellent option for convenience. The same Pokeball design concept applies; simply cut and apply fondant circles and strips. This method offers a distinct aesthetic for those aiming for a more sculpted look.
- Explore Other Cake Flavors: Don’t limit yourself to chocolate and vanilla! The beauty of this recipe is its versatility. Imagine a vibrant Easy Rainbow Cake (With Cake Mix) adding a surprise burst of color within the Pokeball, or the rich indulgence of an Easy Chocolate Oreo Cake for the base layers. Red velvet, lemon, or even strawberry cakes could offer exciting flavor profiles and complement the overall theme.
- Experiment with Other Frosting Flavors: Beyond traditional buttercream, consider other delicious frosting options. A luscious Caramel Frosting could add a sophisticated sweetness, while a creamy Peanut Butter Frosting would be a delightful surprise for guests who love the combination of sweet and savory. Ensure your chosen frosting is stable enough for piping and coloring.
- Opt for a Solid Cake (No Pinata Surprise): While the pinata surprise is incredibly fun, you don’t *have* to make it hollow. If you prefer a simpler approach or want a denser cake, simply stack two or three cake layers directly on top of each other and proceed with decorating as usual. This is ideal if you’re short on time or prefer a traditional cake experience.
- Smoothly Ice the Sides: I chose to cover the sides of this particular Pokeball cake with sprinkles for an added texture and sparkle. However, for a more classic or refined look, you can simply ice the sides smoothly with white buttercream. A smooth finish creates a clean canvas that highlights the intricate top design.
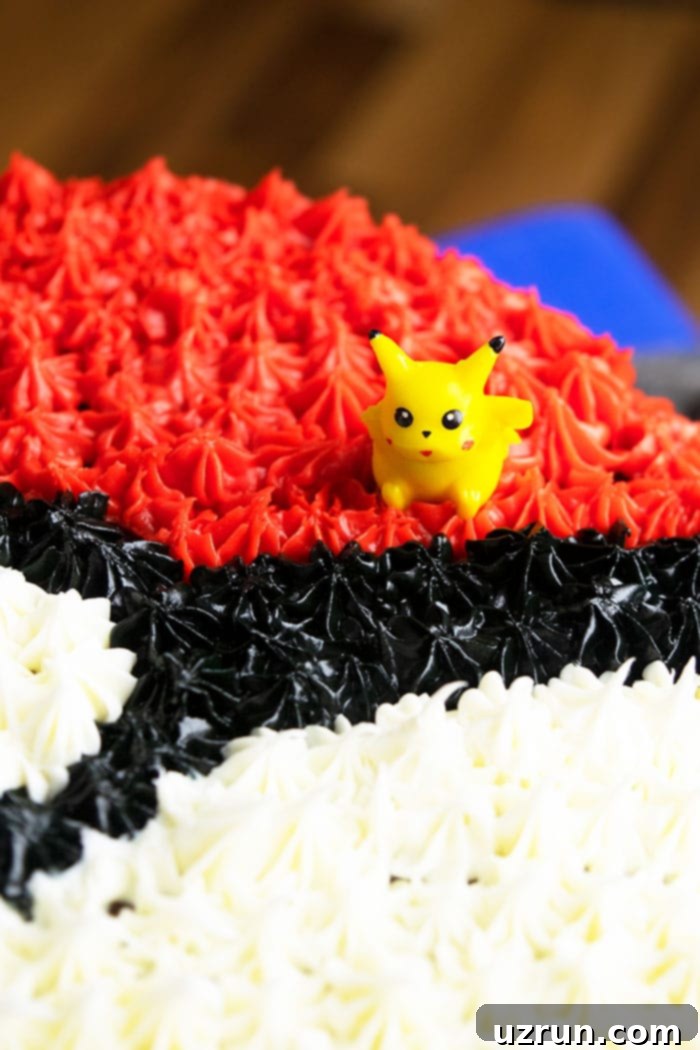
- Add a Cake Topper: Elevate your cake with an eye-catching topper! You can create your own fondant characters, purchase small plastic Pokemon figurines, or even print a custom image of your favorite character. Place the topper strategically on top of the cake or on the cake board for an extra special touch that instantly identifies the theme. A Pikachu, Charizard, or Eevee topper would be perfect!
Essential Tips and Techniques for a Flawless Pokeball Cake
Achieving a professional-looking cake, especially with intricate designs, often comes down to a few key tips and techniques. Pay close attention to these details, and your Pokeball cake will be the star of the show!
- Always Decorate a Completely Cooled Cake: This is perhaps the most crucial rule in cake decorating. Attempting to frost a warm or even slightly warm cake is a recipe for disaster. The warmth will cause your perfectly made buttercream to melt, slide, and create a sticky, uneven mess. Always allow your cake layers to cool completely, preferably in the refrigerator for about 20-30 minutes, to ensure they are firm and easy to handle.
- Consider Buying Red Icing: Achieving a true, vibrant red buttercream at home can be incredibly challenging. It often requires a significant amount of red food coloring gel, which can alter the frosting’s taste and consistency. Furthermore, the color usually takes several hours, sometimes even a day or two, to fully deepen and develop. Opting for a store-bought red frosting will save you immense time, effort, and potential frustration, guaranteeing a perfect red hue.
- Consider Buying Black Icing: The same principle applies to black frosting. Creating a deep, opaque black from scratch demands a large quantity of food coloring and often results in a greyish tint initially. Like red, the black color needs time to intensify. Purchasing pre-colored black frosting is a convenient and highly recommended alternative to ensure a rich, true black for your Pokeball’s central stripe.
- Practice Piping First: If you’re new to piping or simply want to ensure your stars are consistent, take a few minutes to practice. Before you start piping directly onto the cake, load a small amount of frosting into your piping bag and practice making stars or dots on a piece of wax paper or parchment paper. This allows you to get comfortable with holding the piping bag, understand how much pressure to apply, and achieve uniform shapes. Any mistakes can simply be scraped back into the bag.
- Level Your Cake Layers: For a stable and even cake, ensure your baked layers are perfectly level. Use a serrated knife or a cake leveling tool to trim off any domes from the tops of your cakes. This creates a flat surface for stacking, preventing a leaning cake.
- Apply a Crumb Coat: Before applying your final layer of frosting, spread a very thin layer of white buttercream over the entire cake (sides and top). This “crumb coat” traps any loose crumbs, preventing them from getting into your final, smooth frosting layer. Chill the cake for 15-20 minutes after applying the crumb coat to set it before continuing to decorate.
Storage Guidelines for Your Pokemon Masterpiece
Proper storage is essential to keep your decorated Pokeball cake fresh and delicious, especially if you’re making it ahead of time. Follow these guidelines to ensure your cake remains in perfect condition.
- Room Temperature Storage (Short-Term): Once your cake is fully decorated and ready to be served within 24 hours, it can be stored at room temperature. Place it in an airtight cake carrier or under a cake dome to protect it from dust and keep it fresh. Ensure it’s kept away from direct sunlight, excessive humidity, or moisture, which can cause the frosting to melt or become sticky. These are also excellent “make-ahead” instructions if you plan to serve it the next day.
- Refrigerate (Medium-Term): For longer storage, decorated cakes can be refrigerated. Place the cake in a sturdy cake box or an airtight container to prevent it from absorbing odors from other foods in the fridge and to protect the frosting. It can be stored this way for up to 2 days. When ready to serve, remove the cake from the refrigerator at least 30-60 minutes beforehand to allow the buttercream to soften slightly, bringing it to a more enjoyable serving temperature.
- Freeze (Long-Term): If you need to store components of the cake for an extended period, freezing is your best option.
- Unfrosted Cake Layers: Once completely cooled, wrap individual cake layers tightly in plastic wrap, then an additional layer of aluminum foil. Place them in a freezer-safe bag or container. They can be stored for up to 1 month.
- Buttercream Frosting: Leftover or make-ahead frosting can be stored in an airtight container in the freezer for up to 1 month.
- Thawing Process: When you’re ready to assemble and decorate, thaw frozen cake layers and frosting in the refrigerator overnight. Once thawed, bring the frosting to room temperature and re-whip it if necessary to restore its smooth consistency. Then, proceed with decorating as per the instructions in the recipe section below.
More Decorated Cakes (Birthday Cakes)
If you loved creating this Pokemon Pokeball cake, you might enjoy exploring other creative and fun cake designs from our collection. Perfect for any celebration, these cakes are sure to impress!
- Star Wars Cake (Death Star Cake)
- Easy Monster Cake
- Peacock Cake
- Butterfly Cake
- Galaxy Cake
- Tie Dye Shirt Cake
- Crying Baby Cake
- Easy Sushi Cake
Recipe
Easy Pokemon Cake (Pokeball Cake)
Abeer Rizvi
Pin Recipe
10 minutes
40 minutes
45 minutes
1 hour 35 minutes
Dessert, Birthday Cake
American
9 Slices
476 kcal
Want to Save This Recipe?
Enter your email & I’ll send it to your inbox. Plus, get great new recipes from me every week!
By submitting this form, you consent to receive emails from CakeWhiz
Ingredients
- 2 Chocolate cakes (8 inch round, baked and completely cooled)
- 1 Vanilla cake (8 inch round, baked and completely cooled)
- 4 cups Buttercream frosting (divided and colored red, black, and white. Store-bought colored frosting is highly recommended for vibrant red and black!)
- ¾ cup Sprinkles (for covering the side of the cake, optional but adds a fun touch)
- Small Pokemon toys or candies (for the pinata center, choose items that are food safe and small enough to fit)
Instructions
-
First, bake your two chocolate cake layers and one vanilla cake layer. Ensure they are completely cooled to room temperature before attempting to frost or assemble. Warm cakes will melt your frosting!
-
Prepare your buttercream frosting. Divide it into three portions and color them vividly red, black, and white using gel food coloring. As a professional tip, I highly recommend buying pre-made red and black frosting to save significant time and effort, as achieving true, deep colors from scratch can be quite challenging.
-
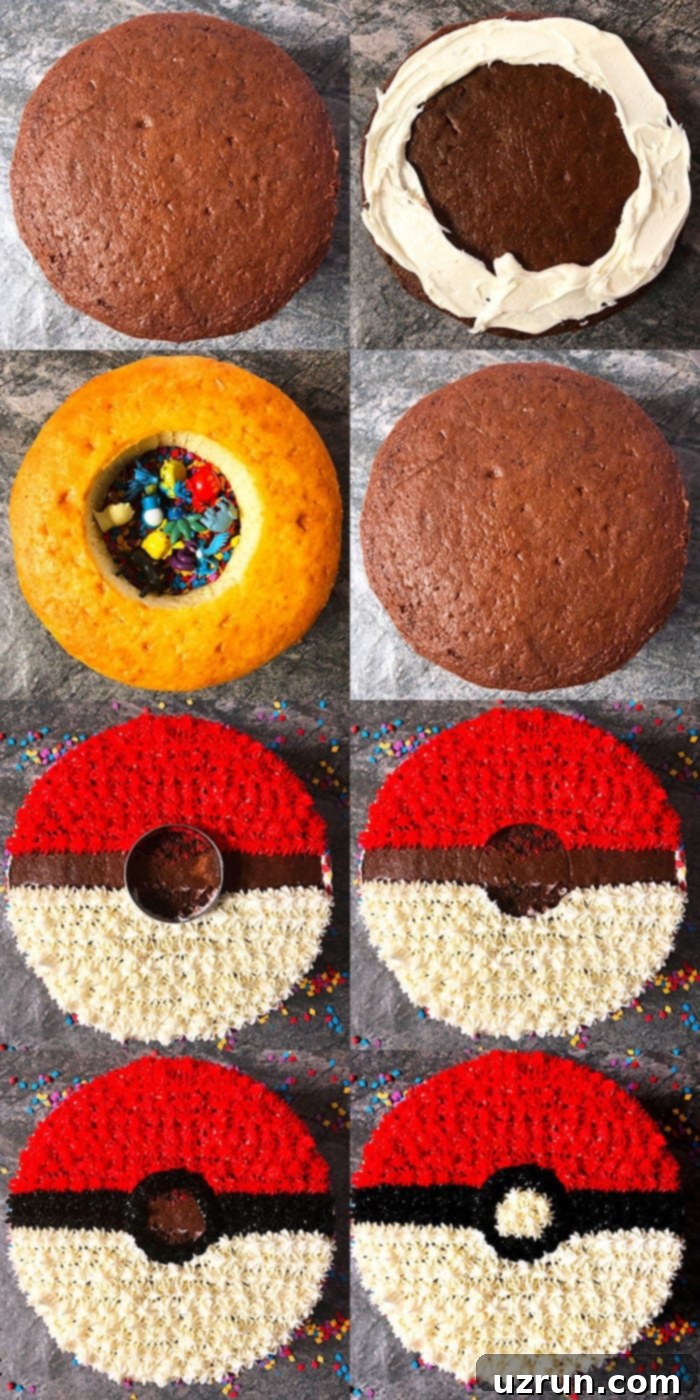
Place one of the chocolate cake layers on your chosen serving dish or cake stand. This will be the sturdy base of your pinata cake.
-
Using an offset spatula, spread a generous layer of white icing around the outer edges of the chocolate cake, creating a border. Leave the center portion empty; this will form the bottom of your pinata cavity.
-
Carefully cut out a circular hole from the middle of your vanilla cake layer, using a round cookie cutter or knife, to create a hollow ring. This will be the central layer that holds the surprise filling.
-
Gently place this hollow vanilla cake layer directly on top of the first chocolate cake layer, aligning the edges.
-
Press down very gently to ensure the vanilla layer is secure and level on the white frosting border.
-
Now for the fun part! Fill the hollow center of the vanilla cake with your chosen small Pokemon toys, colorful sprinkles, and any other edible treats you desire. Make sure to not overfill.
-
Spread another layer of white icing on the outer edges of the vanilla cake layer, creating a border over the toys and sprinkles, ready for the top cake layer.
-
Carefully place the second chocolate cake layer on top of the vanilla cake, aligning all edges to form a neat stack.
-
Press gently to secure this top layer, creating a stable three-layer cake.
-
Apply a crumb coat (a thin layer of white icing) to the entire cake (sides and top) to trap any loose crumbs. Chill for 15-20 minutes. Then, ice the sides of the cake smoothly with white icing. While you can ice the top too, for this specific design, I opted to primarily focus on the side and the decorative top.
-
Carefully cover the entire sides of the cake with sprinkles. Gently press them onto the freshly applied white icing to ensure they adhere well. This provides a fun, textured finish.
-
Using a toothpick, lightly create a rough template of the Pokeball design on the top surface of the cake. This will serve as your guide for piping.
-
Place a small circle cutter (or another round object) in the exact center of the cake top to guide your central black stripe and button.
-
Leave a thin panel (approximately 2 inches wide) in the center of the cake top, encompassing the circle cutter, empty without icing. This is where your black band will go.
-
Fill a piping bag with your vibrant red icing and attach a small star tip (such as Wilton’s tip #21). Carefully pipe red stars to cover the entire top half of the cake, following your toothpick guide.
-
Next, fill another piping bag with white icing and attach the same small star tip (Wilton’s tip #21). Pipe white stars to cover the entire bottom half of the cake, completing the two main colors of the Pokeball.
-
Carefully remove the circle cutter from the center of the cake.
-
Fill a clean piping bag with your black icing and attach a small star tip (Wilton’s tip #21). Pipe black stars along the central empty panel, creating the iconic black band of the Pokeball. Leave a small circular space in the very middle of this black band empty for the central button.
-
Fill the remaining empty circular space in the middle of the black band by piping white stars, completing the central button detail.
-
For the final touch, stick a small Pikachu character or another favorite Pokemon figurine on top of the cake, if desired, to make it truly come alive! Your easy homemade Pokemon Pokeball cake is now ready to impress and be enjoyed!
Notes
- Be sure to read all the detailed tips and techniques provided above for the best possible results.
- Leftover cake can be stored in an airtight container in the refrigerator for up to 3 days, maintaining its freshness and flavor.
- For a clean slice, use a sharp, warm knife. Run the knife under hot water and wipe it dry between each slice.
Nutrition
An automated tool is used to calculate the nutritional information. As such, I cannot guarantee the accuracy of the nutritional information provided for any recipe on this site.
Tried this recipe?Leave a comment below or rate and tag @cakewhiz on social
