The Ultimate Easy No-Bake Chocolate Cream Pie with Oreo Crust: A Decadent Delight
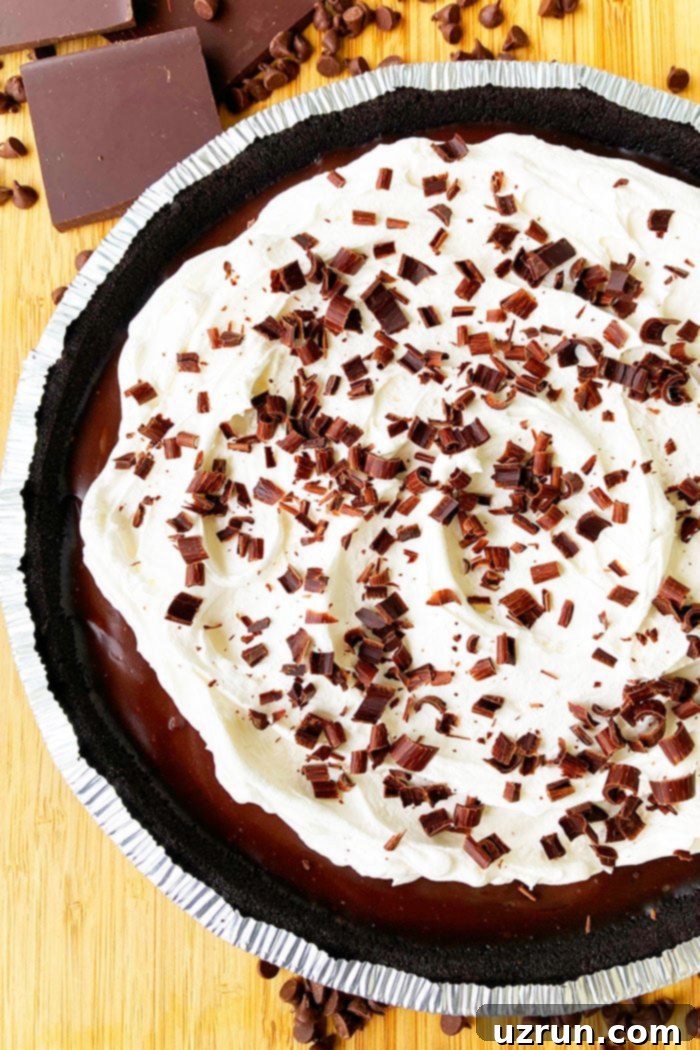
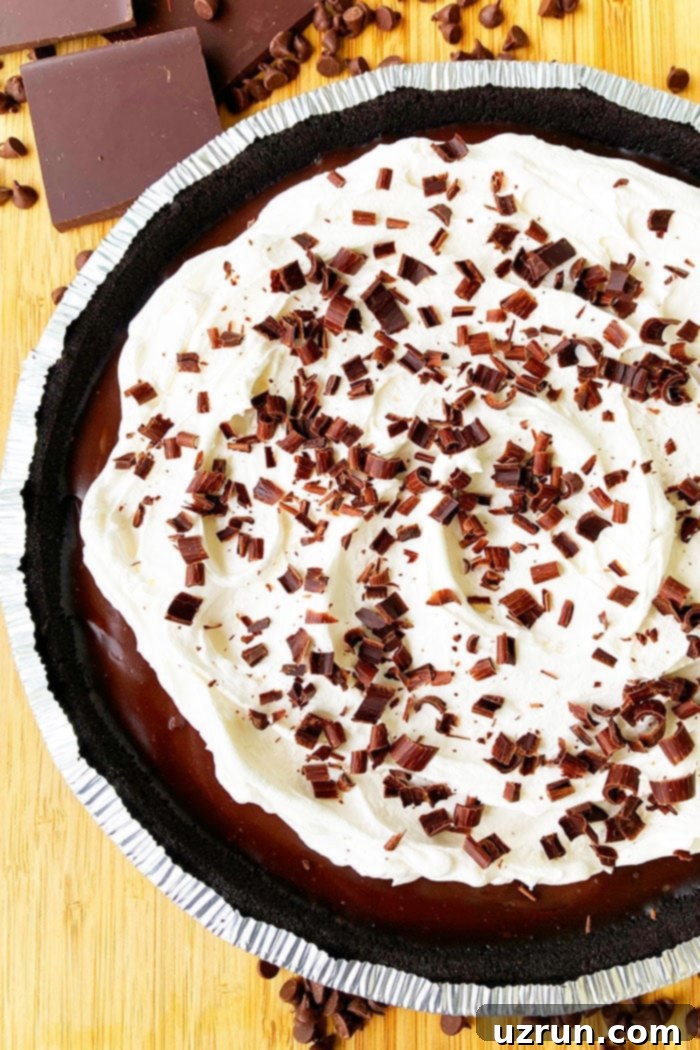
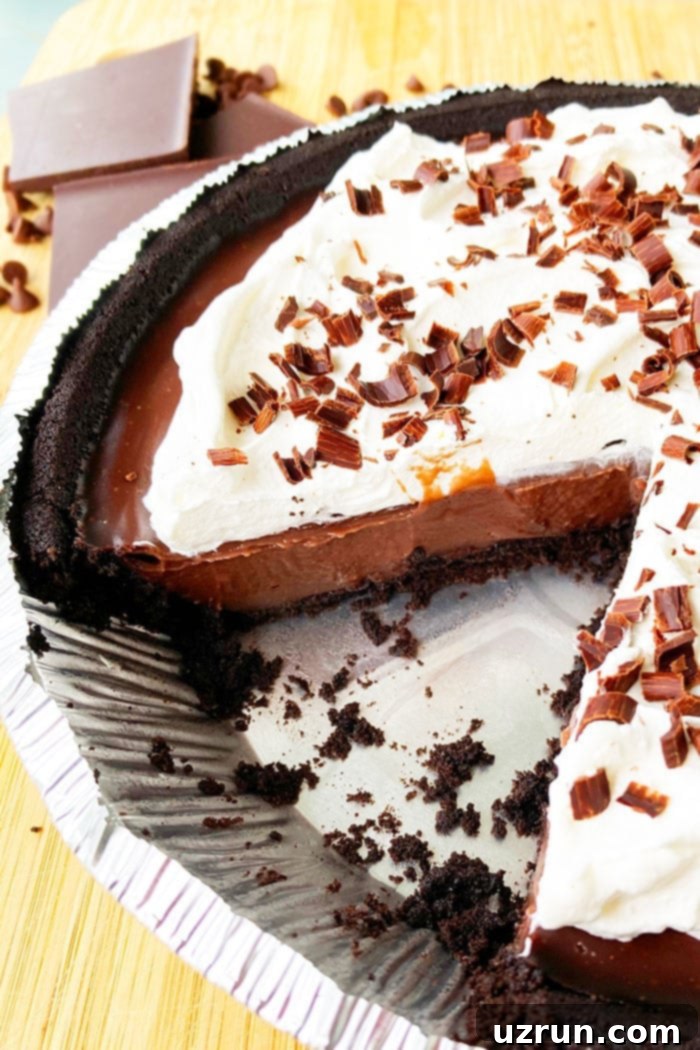
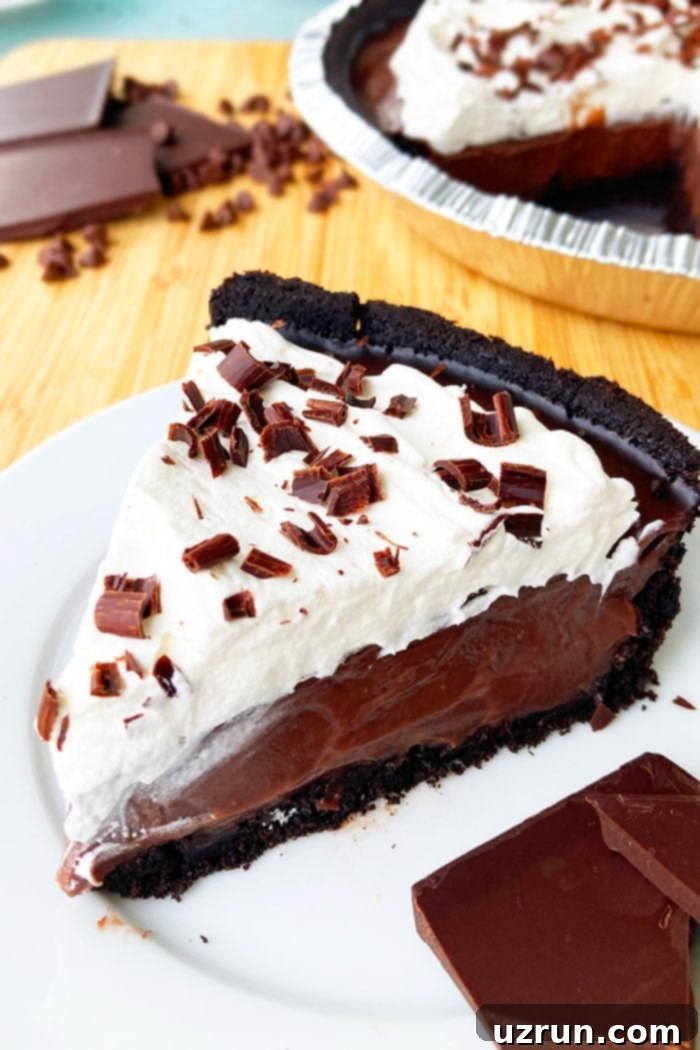
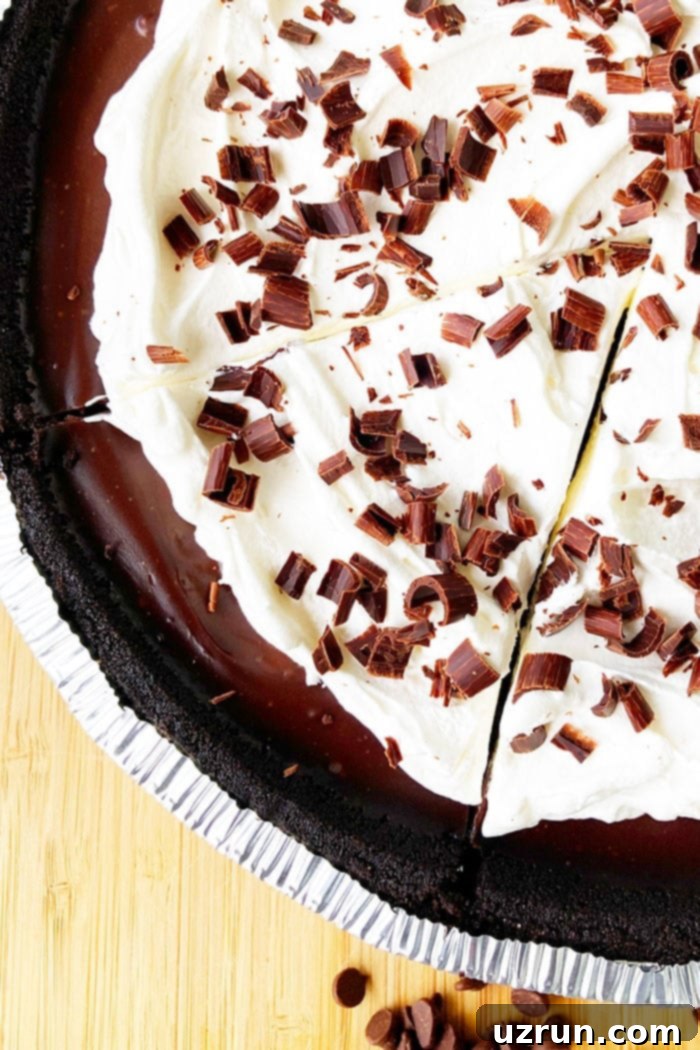
Welcome to the world of effortless indulgence with the best quick and easy no-bake chocolate cream pie recipe! This homemade masterpiece brings together simple ingredients to create a dessert that is truly irresistible. Imagine a rich, dark Oreo cookie crust, cradling a velvety smooth, intensely chocolatey pudding filling, all crowned with a generous swirl of fluffy whipped cream and delicate chocolate shavings. This isn’t just a pie; it’s a dream come true for chocolate lovers, especially those who prefer to keep their ovens off.
This dessert stands out for being as decadent and creamy as it is incredibly easy to make. The most appealing part? It requires absolutely no baking, making it the quintessential summer pie or the perfect hassle-free treat any time of year. Whether you’re a seasoned baker or a complete novice in the kitchen, this recipe promises success and smiles. If you’re eager to explore more delightful no-bake options, be sure to try our Banana Cream Pie {No Bake} and the equally tantalizing Chocolate Peanut Butter Pie {No Bake} for variety that’s just as simple and satisfying.
Why You’ll Adore This No-Bake Chocolate Cream Pie
There are countless reasons why this easy no-bake chocolate cream pie will become your go-to dessert:
- Effortless Preparation: No need to turn on the oven! This pie comes together with minimal fuss, making it perfect for hot days or when you’re short on time.
- Rich Chocolate Flavor: With both chocolate pudding mix and optional cocoa powder, this pie delivers a deep, satisfying chocolate taste that true enthusiasts will appreciate.
- Creamy, Dreamy Texture: The combination of silky pudding and light Cool Whip creates an incredibly smooth and luscious filling that melts in your mouth.
- Crunchy Oreo Crust: The classic Oreo crust provides a delightful contrast in texture and a familiar, comforting flavor that pairs perfectly with the chocolate filling.
- Highly Customizable: From various toppings to flavor enhancements and alternative crusts, this pie offers endless possibilities for personalization.
- Perfect for Any Occasion: Whether it’s a casual family dinner, a summer barbecue, or a festive gathering, this pie is always a crowd-pleaser.
- Make-Ahead Friendly: It requires ample chilling time, making it an ideal dessert to prepare in advance, freeing up your time on the day of your event.
Let’s dive into the simple steps to create this incredible chocolate pudding pie.
How To Make Easy Chocolate Cream Pie With Pudding Recipe?
Creating this delicious no-bake chocolate cream pie is incredibly straightforward. Follow these steps for a perfect pie every time:
- Prepare Pie Crust: Begin by preparing your Oreo cookie crust. Whether you’re using a homemade crust or a store-bought one, ensure it’s firmly packed into your pie dish. This creates a solid foundation for your creamy filling. For extra stability, you can even chill it in the freezer for 10-20 minutes while you prepare the filling.
- Make Chocolate Pudding: In a large mixing bowl, combine the chocolate pudding mix, a touch of optional cocoa powder for deeper flavor, and cold whole milk. Whisk these ingredients together until they are fully incorporated and the mixture begins to thicken slightly. The cold milk is crucial here as it helps activate the pudding mix, ensuring it sets properly.
- Fold in Cool Whip: This step is key for achieving that light, airy, and creamy texture. Gently and slowly fold half of the Cool Whip into your chocolate pudding mixture. The goal is to incorporate it without deflating the air, which contributes to the pie’s delightful lightness.
- Fill Crust: Carefully spoon the silky chocolate filling into your prepared Oreo crust. Use a spatula to spread it evenly across the bottom and up to the edges of the crust, creating a smooth, inviting surface.
- Chill: Place the pie in the refrigerator and chill it for at least 4-6 hours, or ideally, overnight. This chilling period is essential for the filling to firm up completely, ensuring clean slices and a perfectly set pie. Patience is a virtue here!
- Add Toppings: Once the pie is firmly set, it’s time for the grand finale! Generously spread the remaining Cool Whip over the chocolate filling. For a touch of elegance and extra chocolatey goodness, sprinkle with chocolate shavings or any other desired toppings before serving.
Essential Ingredients for the Perfect Chocolate Pie Filling
The secret to a truly spectacular chocolate cream pie lies in the quality and type of ingredients used for the filling. Each component plays a vital role in achieving that rich flavor and perfect, creamy consistency. Whisk together the following ingredients, and then ensure it chills sufficiently in the fridge for 4-6 hours or overnight until gloriously firm:
- 2 boxes Chocolate pudding mix (3.9 oz. each, Full fat): Using full-fat pudding mix is crucial for achieving a rich, luxurious taste and the proper thick consistency. Instant pudding mixes work best for this no-bake recipe, as they set quickly and reliably.
- 1 tbsp Cocoa powder (Optional): While optional, adding a tablespoon of unsweetened cocoa powder significantly enhances the depth of the chocolate flavor. It makes the pie taste even more intensely chocolatey, a delightful addition for serious chocolate lovers.
- 2.5 cups Whole milk (Cold): Always use cold whole milk. The low temperature helps activate the setting agents in the pudding mix more effectively, ensuring a firm and smooth filling. Full-fat milk also contributes to the pie’s overall richness and creaminess.
- ½ container Cool Whip (4 oz., Full fat): Half of an 8 oz. container of full-fat Cool Whip is gently folded into the pudding mixture. This ingredient is key to making the filling incredibly light, airy, and fluffy, preventing it from being too dense. Be sure to use full-fat for the best texture and stability.
These simple ingredients, when combined correctly, yield a filling that is truly divine.
Unleash Your Creativity: Decadent Pie Toppings!
While a simple dollop of whipped cream and chocolate shavings is classic, the beauty of this no-bake chocolate cream pie is how wonderfully it adapts to a myriad of toppings. Get creative and customize your pie to suit any preference or occasion:
Ice cream: A few scoops of vanilla, chocolate, or even a complementary flavor like mint chip or coffee ice cream would be an absolutely delicious accompaniment. Serve it slightly softened for the perfect spoonful.
Jams and preserves: Warm your favorite berry jam slightly (blueberry, blackberry, raspberry, or this amazing Homemade Strawberry Jam) and drizzle it generously over each slice. The subtly tartness from fruits beautifully compliments and cuts through the rich chocolate flavor, creating a delightful balance.
Frostings: For an extra layer of indulgence, consider using a different frosting! Try any of these: Caramel Frosting for a sweet, buttery touch, German Chocolate Cake Frosting (Coconut Pecan Frosting) for a tropical, nutty twist, or a rich Peanut Butter Frosting for a classic flavor pairing. These can be used in place of or strategically under the Cool Whip topping for an impressive presentation.
Coconut: Shredded sweetened coconut adds a lovely texture and tropical hint. Toasted coconut is even better, offering a deeper flavor and a beautiful golden color. Simply spread it over the whipped cream.
Add fresh fruit: The vibrancy and freshness of berries are a fantastic counterpoint to the rich chocolate. Add fresh strawberries, raspberries, blackberries, or blueberries on top for a pop of color and natural sweetness. A combination of berries looks especially inviting.
Add ganache: For an intensely chocolatey experience, drizzle a quick homemade Easy Chocolate Ganache {2 Ingredients} over the top. It adds a glossy finish and deepens the chocolate profile. Allow it to set slightly before serving.
Add nuts: For a delightful textural contrast and nutty flavor, sprinkle chopped and toasted pecans, peanuts, or walnuts over the whipped cream. Toasting the nuts beforehand enhances their flavor significantly.
Add candy: Indulge your sweet tooth by adding chopped pieces of your favorite candy bars. M&Ms, crushed Snickers, or Kit Kats provide a fun, colorful, and crunchy element that kids and adults alike will love.
Add crushed cookies: Beyond the Oreo crust, consider crushing up extra Oreos, butter cookies, or any of your favorite cookies and sprinkling them over the top. This adds another layer of cookie goodness and a satisfying crunch.
Mini Chocolate Chips: A simple sprinkle of mini chocolate chips (milk, dark, or white) adds a classic chocolatey finish and a pleasing texture.
Caramel or Fudge Drizzle: Beyond the frostings, a simple store-bought or homemade caramel sauce or hot fudge sauce can be drizzled just before serving for an extra layer of sweetness and flavor.
Sea Salt Flakes: A tiny sprinkle of flaky sea salt can elevate the chocolate flavor, providing a sophisticated sweet-and-salty contrast.
Creative Variations for Your Homemade Chocolate Pie
This easy no-bake chocolate cream pie recipe is wonderfully versatile, allowing for numerous variations to suit different tastes and dietary preferences. Don’t be afraid to experiment and make it truly your own!
Add nut butters: Stir in a few tablespoons of your favorite nut butter, such as Nutella (for a chocolate-hazelnut dream), creamy peanut butter, cashew, or almond butter into the chocolate filling. This adds a rich, nutty flavor and an even creamier texture. Adjust the milk slightly if the filling becomes too thick.
Try another pie crust: While the Oreo crust is fantastic, explore other options! This Graham Cracker Crust {No Bake} offers a lighter, subtly spiced alternative. If you don’t mind a little baking, a Flaky Butter Pie Crust provides a traditional, buttery base (just remember it will need to be baked first before filling and allowed to cool completely).
Enhance with cocoa or espresso powder: For an even deeper chocolate flavor, increase the amount of cocoa powder in the filling or, for a sophisticated touch, add 1-2 teaspoons of instant espresso powder. Espresso powder doesn’t make the pie taste like coffee; instead, it remarkably enhances the natural chocolate notes, making them more intense and complex.
Add a layer of freshly sliced bananas: For a delightful chocolate spin on the classic banana cream pie, arrange a single layer of thinly sliced fresh bananas over the bottom of the pie crust before adding the chocolate filling. The banana and chocolate combination is simply divine.
Omit the whipped cream in the pudding mixture: If you prefer an intensely rich and denser chocolate experience, you can choose to omit folding the Cool Whip into the pudding mixture. Instead, just spread the pure chocolate pudding into the crust, and then use all the whipped cream as a decadent topping.
Add extracts for distinct flavors: Introduce an additional distinct yet subtle flavor by stirring in a small amount (½ to 1 teaspoon) of extracts. Popular choices include almond extract (pairs beautifully with chocolate), bourbon extract for a warm, boozy note, cherry extract, amaretto, or an extra splash of vanilla extract. For a festive touch, mint extract creates a delightful mint chocolate pie.
Use white chocolate pudding mix: For a completely different flavor profile, substitute regular chocolate pudding mix with white chocolate pudding mix. This creates a lighter, sweeter pie that can be beautifully adorned with fresh berries or a raspberry drizzle.
Add mascarpone cheese: For an extra bit of creamy decadence and a cheesecake-like richness, gently fold in 4-6 ounces of softened mascarpone cheese into the pudding mixture after it has begun to set (before adding the Cool Whip). This makes the filling incredibly luxurious and thick.
Spice it up: For an adventurous twist, add a pinch of cayenne pepper or chili powder to the chocolate pudding mix for a Mexican hot chocolate-inspired pie.
Decoration ideas: Elevate your presentation! Pipe the whipped cream beautifully using various piping tips (like a star tip or a round tip) for an elegant look. You can also add colorful sprinkles for a festive touch, or create patterns with shredded coconut, chocolate syrup, or cocoa powder dust.
Expert Tips and Techniques for a Flawless No-Bake Chocolate Pudding Pie
Achieving the perfect no-bake chocolate pudding pie is easy with a few key tips and techniques. These insights will help you avoid common pitfalls and ensure your pie is a resounding success.
How to thicken pie filling? The primary way to ensure your pie filling thickens properly is sufficient chilling time. Make sure to chill the pie filling long enough, at least 4-6 hours, but sometimes it even needs to thicken overnight for optimal firmness. Additionally, always make sure to use full-fat ingredients (pudding mix, milk, Cool Whip) because their higher fat content contributes significantly to a thicker, creamier, and more stable filling. Avoid opening the fridge door frequently during chilling.
How to make pie filling thinner? If by chance your pie filling becomes too thick before spreading it, you can easily adjust it. Simply add a small amount (1-2 tablespoons at a time) of additional cold milk and whisk gently until it reaches your desired consistency. Alternatively, you can mix in a bit more Cool Whip for a lighter, thinner result.
Homemade Oreo pie crust vs. Store-bought pie crust: Both options are perfectly viable for this recipe. A homemade Oreo crust offers a slightly richer flavor and fresher texture, but a store-bought Oreo crust is a fantastic time-saver. Use whichever your time and preference allow! Ensure either is firmly packed for best results.
Chilling is important: This step cannot be stressed enough. Chilling is absolutely crucial because it allows the pudding filling to set and firm up. Without adequate chilling, the filling will be too runny to slice cleanly, and the pie will lose its structural integrity. It’s the “baking” equivalent for no-bake desserts.
Do not use fat-free ingredients: Resist the temptation to use fat-free milk, pudding mix, or whipped topping. Fat is essential for the filling to thicken to the correct, luscious consistency. Fat-free alternatives often result in a watery, less stable, and significantly less creamy pie that simply won’t have the same decadent appeal.
Milk must be cold: Always use cold milk when mixing with instant pudding. The cold temperature helps to properly activate the setting agents in the pudding mix, allowing it to firm up quickly and effectively. Warm milk can hinder the setting process, leading to a runny filling.
Homemade chocolate pudding vs. Store-bought pudding: While this recipe primarily uses instant pudding mix for ease, you can certainly use homemade chocolate pudding. This Vegan Chocolate Pudding is a delicious homemade choice if you prefer. Both store-bought instant pudding mix and a well-made homemade pudding will work and taste just fine, though instant mix offers unparalleled convenience.
Cool Whip substitute: Homemade Whipped Cream is a lovely alternative to Cool Whip and offers a fresher taste. However, for the purpose of a no-bake pie filling, Cool Whip tends to be more stable and helps hold the pie filling together much better and more firmly, especially during slicing. If using homemade whipped cream, ensure it’s stiffly peaked for the best stability.
Why do you fold in Cool Whip gently? Folding in the Cool Whip gently is vital because it prevents you from losing the air that has been whipped into it. This air is what adds lift, lightness, and that wonderful airy texture to the final chocolate pudding pie. Aggressive stirring will deflate the Cool Whip, resulting in a denser, heavier filling. To fold effectively, always make sure to add your lighter ingredient (Cool Whip) to your heavier mixture (pudding mix/milk). Start by adding a dollop of Cool Whip to the center of the bowl, then gently scrape along the bottom of the bowl towards you, fold it over, rotate the bowl, and repeat. Continue this motion until just combined, avoiding any aggressive stirring to keep that airiness intact.
Use a deep-dish pie plate: A standard 9-inch pie plate works, but a deep-dish version will accommodate all that luscious filling better, especially if you plan to add extra layers or toppings.
Slice with a warm knife: For perfectly clean slices, dip your knife in hot water and wipe it dry between each cut. This helps glide through the crust and filling without dragging.
Don’t overmix the pudding: Mix the pudding just until it starts to thicken. Overmixing can sometimes cause it to become grainy or too stiff. The gentle folding of Cool Whip will handle the rest.
Storage Solutions for Your Chocolate Cream Pie
Proper storage ensures your no-bake chocolate cream pie remains fresh and delicious for as long as possible. Given its dairy-rich ingredients, refrigeration is essential.
Refrigerate: Leftovers of your chocolate cream pie should be stored in an airtight container in the fridge. This prevents it from absorbing other odors from your refrigerator and keeps the crust from getting soggy. It will stay fresh and delightful for up to 3 days. We recommend covering the entire pie with plastic wrap or placing individual slices in small airtight containers.
Freeze: This pie can also be frozen, which is excellent for making ahead or enjoying later. To freeze, store the pie (without the final whipped cream topping, as whipped cream can change texture when frozen and thawed) in a sealed, freezer-safe container. You can wrap it tightly in plastic wrap and then aluminum foil for extra protection against freezer burn. It will keep well in the freezer for up to 1 month. When you are ready to enjoy it, transfer the pie to the fridge and let it thaw overnight. Once thawed, you can then add fresh whipped cream and any other toppings of your choice before serving.
Frequently Asked Questions (FAQs)
Can I use homemade whipped cream instead of Cool Whip?
Yes, you can! Homemade whipped cream offers a fresher taste. However, Cool Whip is often preferred for no-bake pie fillings because it tends to be more stable and helps the pie hold its shape better, especially when slicing. If using homemade, ensure it’s whipped to stiff peaks.
Can I make this pie ahead of time?
Absolutely! This no-bake chocolate cream pie is an excellent make-ahead dessert. In fact, it requires several hours of chilling, so preparing it the day before you plan to serve it is ideal. Store it covered in the refrigerator.
How can I prevent the crust from becoming soggy?
Ensuring your crust is firmly packed and chilling it briefly in the freezer before adding the filling can help. Also, make sure the pudding filling is completely set before you add toppings, and store the pie in an airtight container to minimize moisture absorption.
What if my pudding doesn’t set?
The most common reasons for a runny pudding are not using cold enough milk, using fat-free ingredients, or not chilling for a long enough period. Ensure you’re using full-fat, cold milk and give it at least 6 hours (or overnight) in the refrigerator.
Can I use a different flavor of pudding?
Definitely! While chocolate is a classic, you can experiment with other instant pudding flavors like vanilla, butterscotch, or even pistachio for a fun twist on this no-bake pie concept.
More Classic Pie Recipes to Explore
If you loved this easy no-bake chocolate cream pie, you’re in for a treat with these other fantastic pie recipes from our collection:
- No Bake Oreo Pie – Another delightful no-bake option for cookie lovers.
- Easy Pecan Pie – A comforting classic perfect for holidays or any time.
- Lemon Meringue Pie – A tangy, sweet, and wonderfully airy dessert.
- Easy Pumpkin Pie – A simple, flavorful pie that’s a fall favorite.
- Easy Homemade Apple Pie – The quintessential dessert, made simple and delicious.
Recipe
Chocolate Cream Pie
Abeer Rizvi
Pin Recipe
Want to Save This Recipe?
Enter your email & I’ll send it to your inbox. Plus, get great new recipes from me every week!
By submitting this form, you consent to receive emails from CakeWhiz
Ingredients
- 1 Oreo pie crust 9 inches, Can use store-bought Oreo crust too
- 2 boxes Chocolate pudding mix 3.9 oz. box each, Full fat
- 1 tablespoon Cocoa powder Optional
- 2.5 cups Whole milk Cold
- 1 container Cool Whip 8 oz. container, Full fat
- ¼ cup Chocolate shavings For decorating
Instructions
-
Prepare the pie crust and make sure it’s packed down firmly.
-
Optional: Chill it in the freezer for 10-20 minutes to firm it up even further.
-
In a mixing bowl, add chocolate pudding mixes, cocoa powder and cold milk.
-
Whisk until combined.
-
Fold in half the Cool Whip gently into the chocolate pudding mixture.
-
Spread this chocolate filling in the prepared Oreo crust.
-
Chill in fridge for 4-6 hours or overnight or until pudding is firm.
-
Spread remaining Cool Whip on top.
-
Sprinkle chocolate shavings. Enjoy!
Notes
- Read all my tips above.
- Leftovers can be stored in a sealed container in the fridge for up to 3 days.
Nutrition
An automated tool is used to calculate the nutritional information. As such, I cannot guarantee the accuracy of the nutritional information provided for any recipe on this site.
This no-bake chocolate cream pie is more than just a dessert; it’s a testament to how simple ingredients and minimal effort can yield extraordinary results. Its rich, creamy texture and deep chocolate flavor, complemented by the satisfying crunch of the Oreo crust, make it a universal favorite. Whether you’re looking for a quick weeknight treat or an impressive dessert for a special gathering, this recipe is guaranteed to delight. So, gather your ingredients, follow these easy steps, and get ready to enjoy a slice of pure chocolate bliss!
