Easy DIY Pirate Treasure Chest Cake with Kit Kat: A Step-by-Step Guide for Beginners
Creating magical and memorable birthday parties for our children is a common desire for many parents. We all want to make their special day unforgettable, and often, that includes a show-stopping cake. However, the thought of elaborate baking can feel overwhelming, especially if you’re working with a budget or don’t consider yourself a seasoned baker. If this resonates with you, rest assured, I have the perfect, stress-free solution that will not only impress but also bring a huge smile to your child’s face: an easy DIY pirate treasure chest cake!
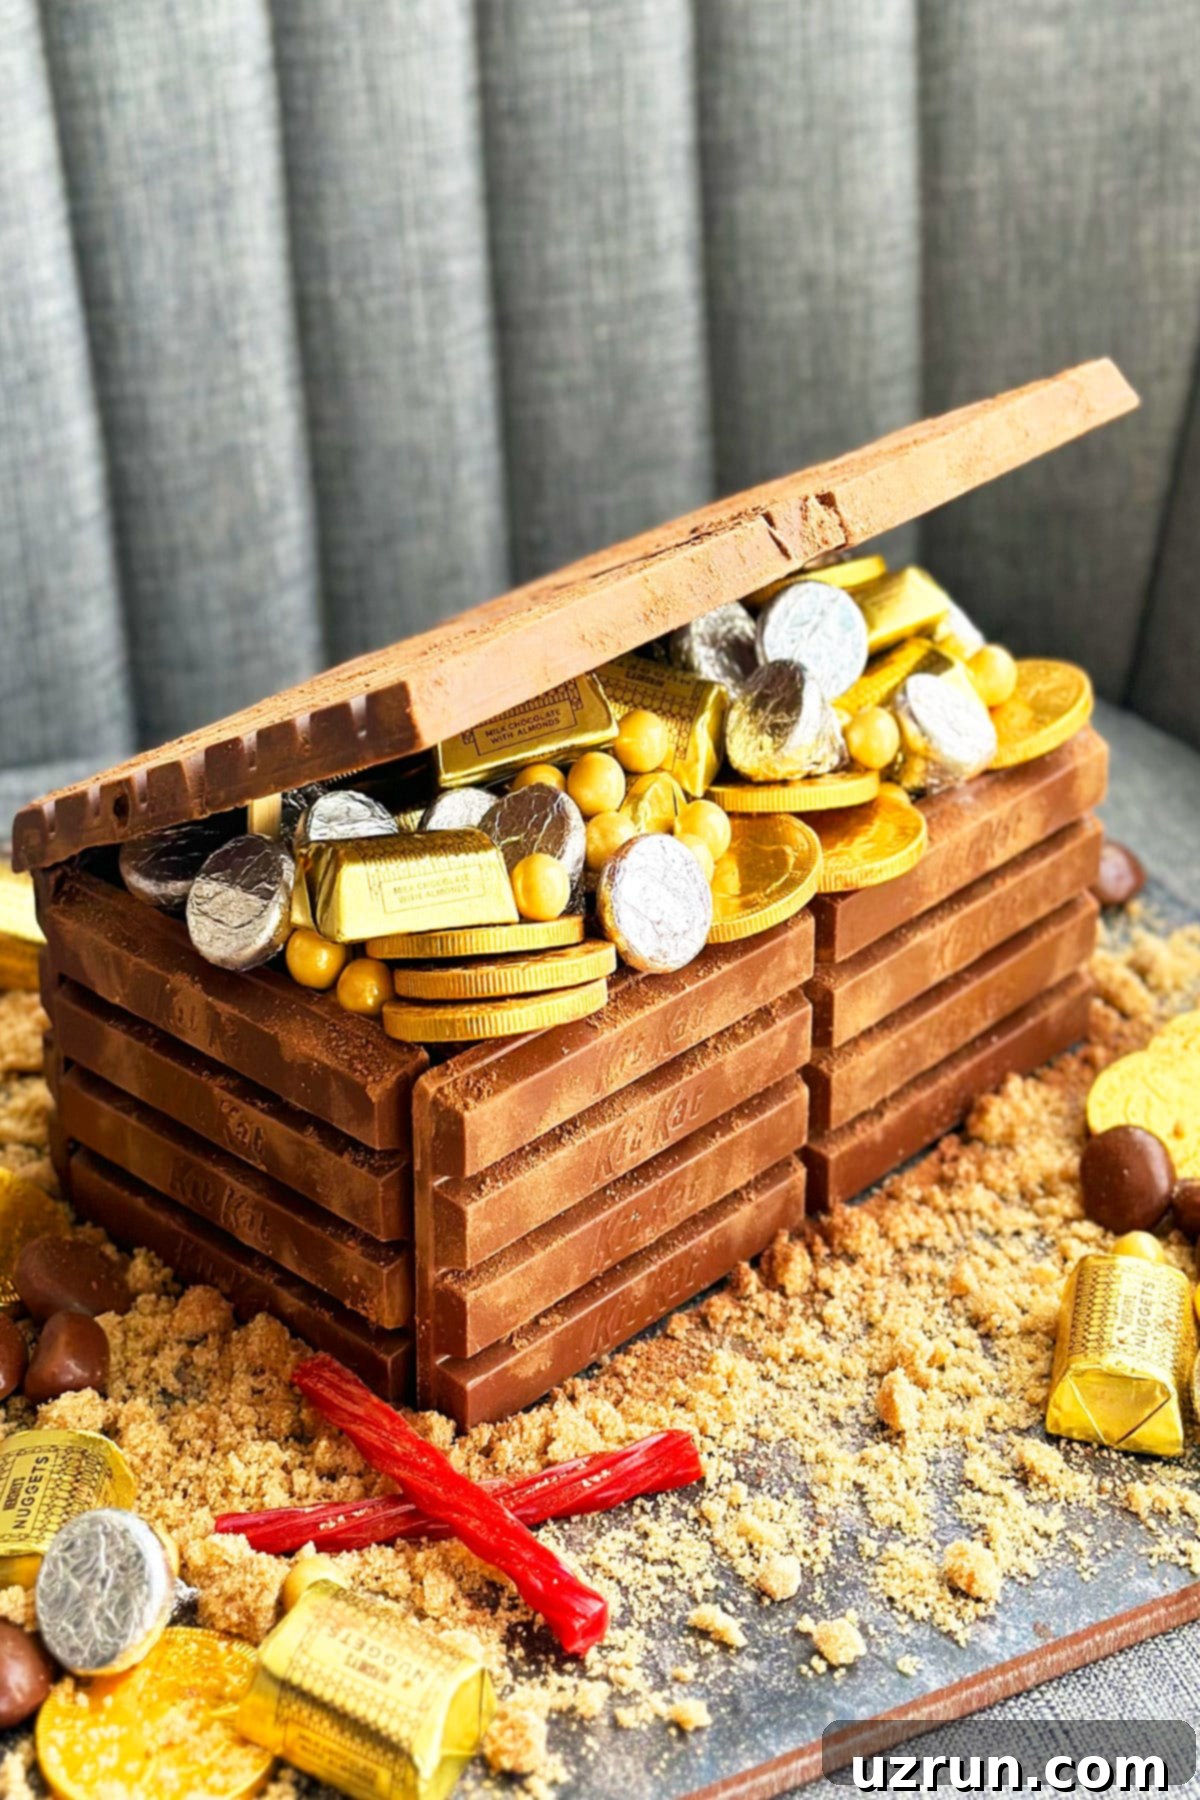
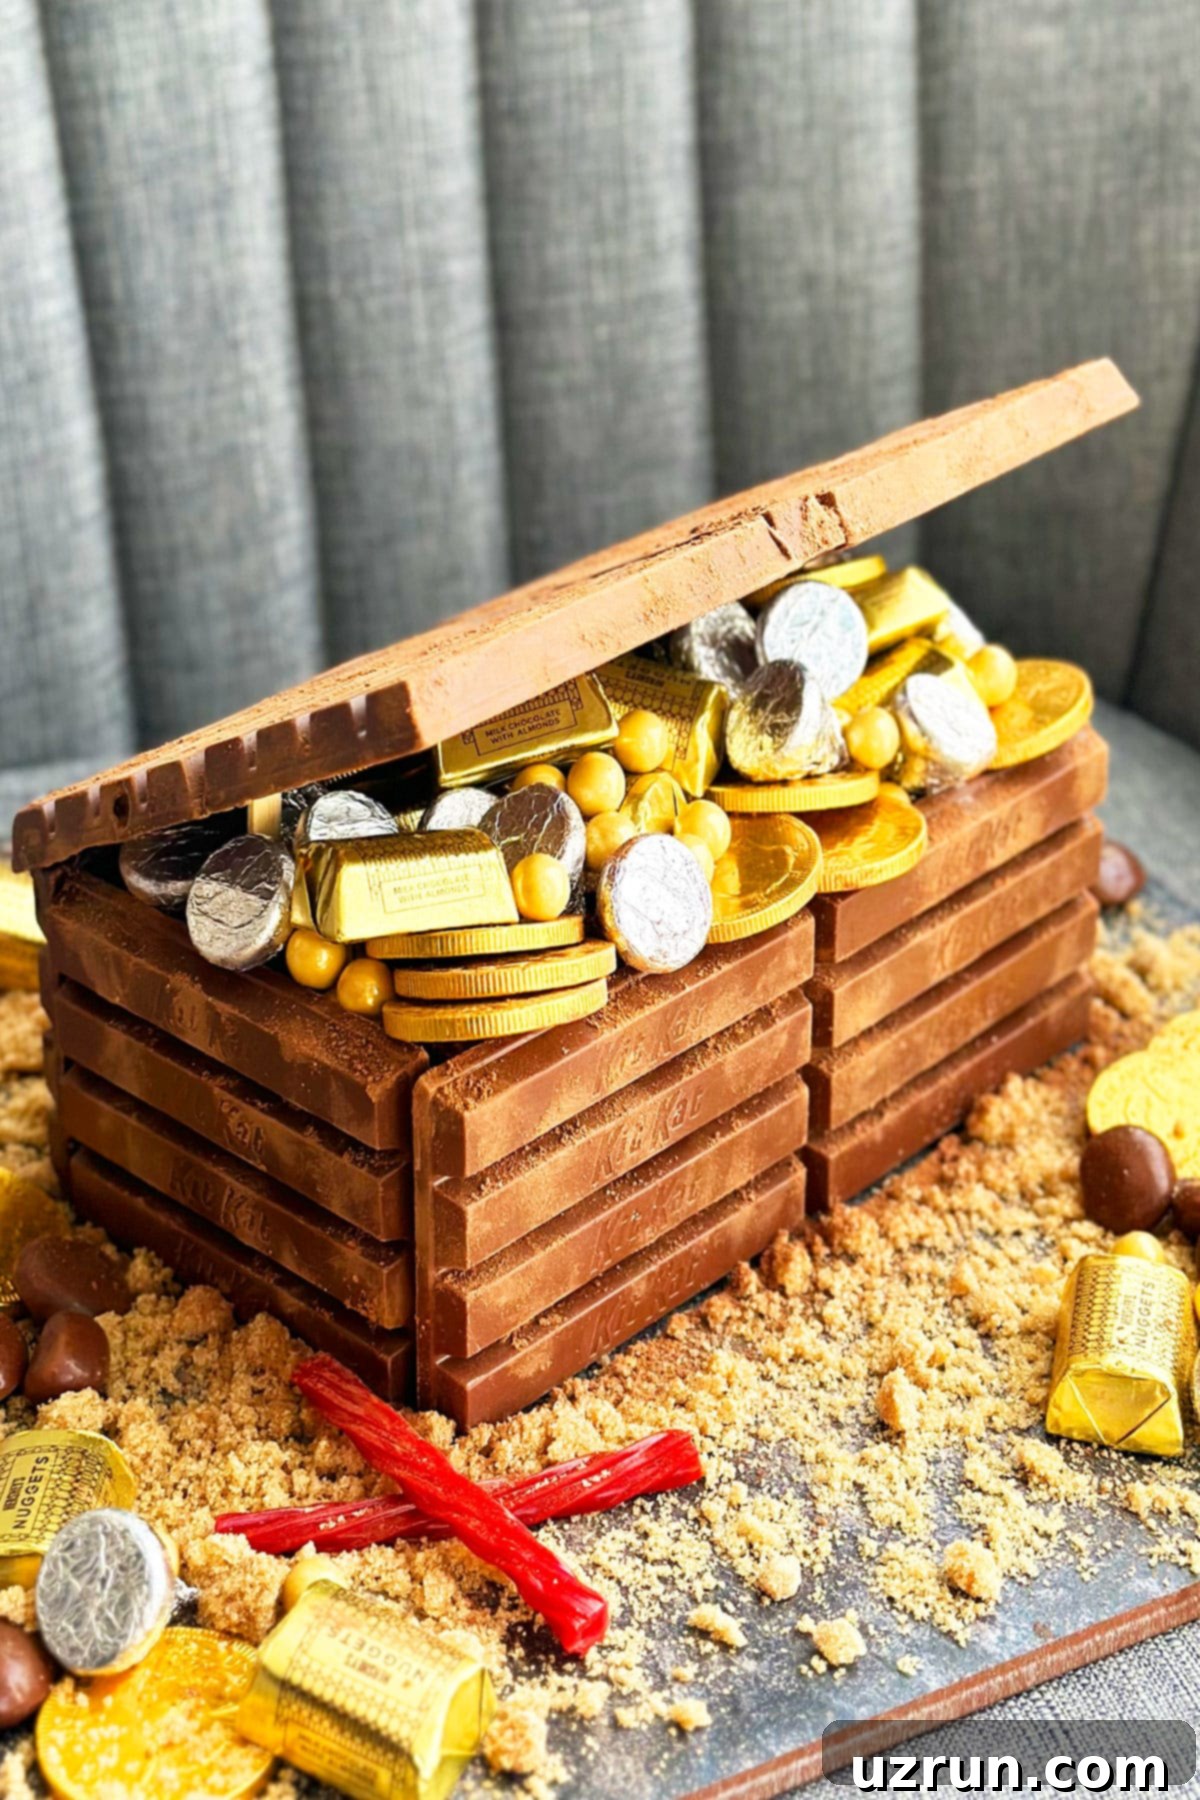
This fantastic homemade pirate treasure chest cake is a creative and surprisingly simple way to bring a touch of adventure to any boy’s (or girl’s!) birthday celebration. It features delicious Kit Kat chocolate bars for a rustic wooden effect, and an abundance of gold and silver candies to mimic precious treasure. The best part? There’s absolutely no fondant or special molds required, making it incredibly accessible for beginners. If you can bake a rectangular cake, you can create this amazing dessert and make all your little one’s pirate dreams come true.
Kit Kat bars are truly a secret weapon in the world of easy cake decorating, providing an excellent and edible border that instantly elevates the look of any cake. For instance, you might have seen how effective they are in a Kit Kat Cake With Strawberries or even how they can frame a cute character in an Easy Pig Cake {Fondant Pig Topper}. This treasure chest cake takes that brilliant concept and puts a new spin on it, using the unique shape and texture of Kit Kats to perfectly replicate an antique wooden chest. No fancy equipment or intricate sculpting is necessary – just simple, readily available ingredients transformed into a spectacular centerpiece. To complete your pirate-themed dessert table, consider adding some adorable Easy Pirate Cookies {With Fondant}, and your feast will be ready for the crew!
How to Make an Easy Pirate Treasure Chest Cake from Scratch
Creating this edible treasure chest is a fun and straightforward process. Follow these detailed steps to ensure your cake turns out perfectly:
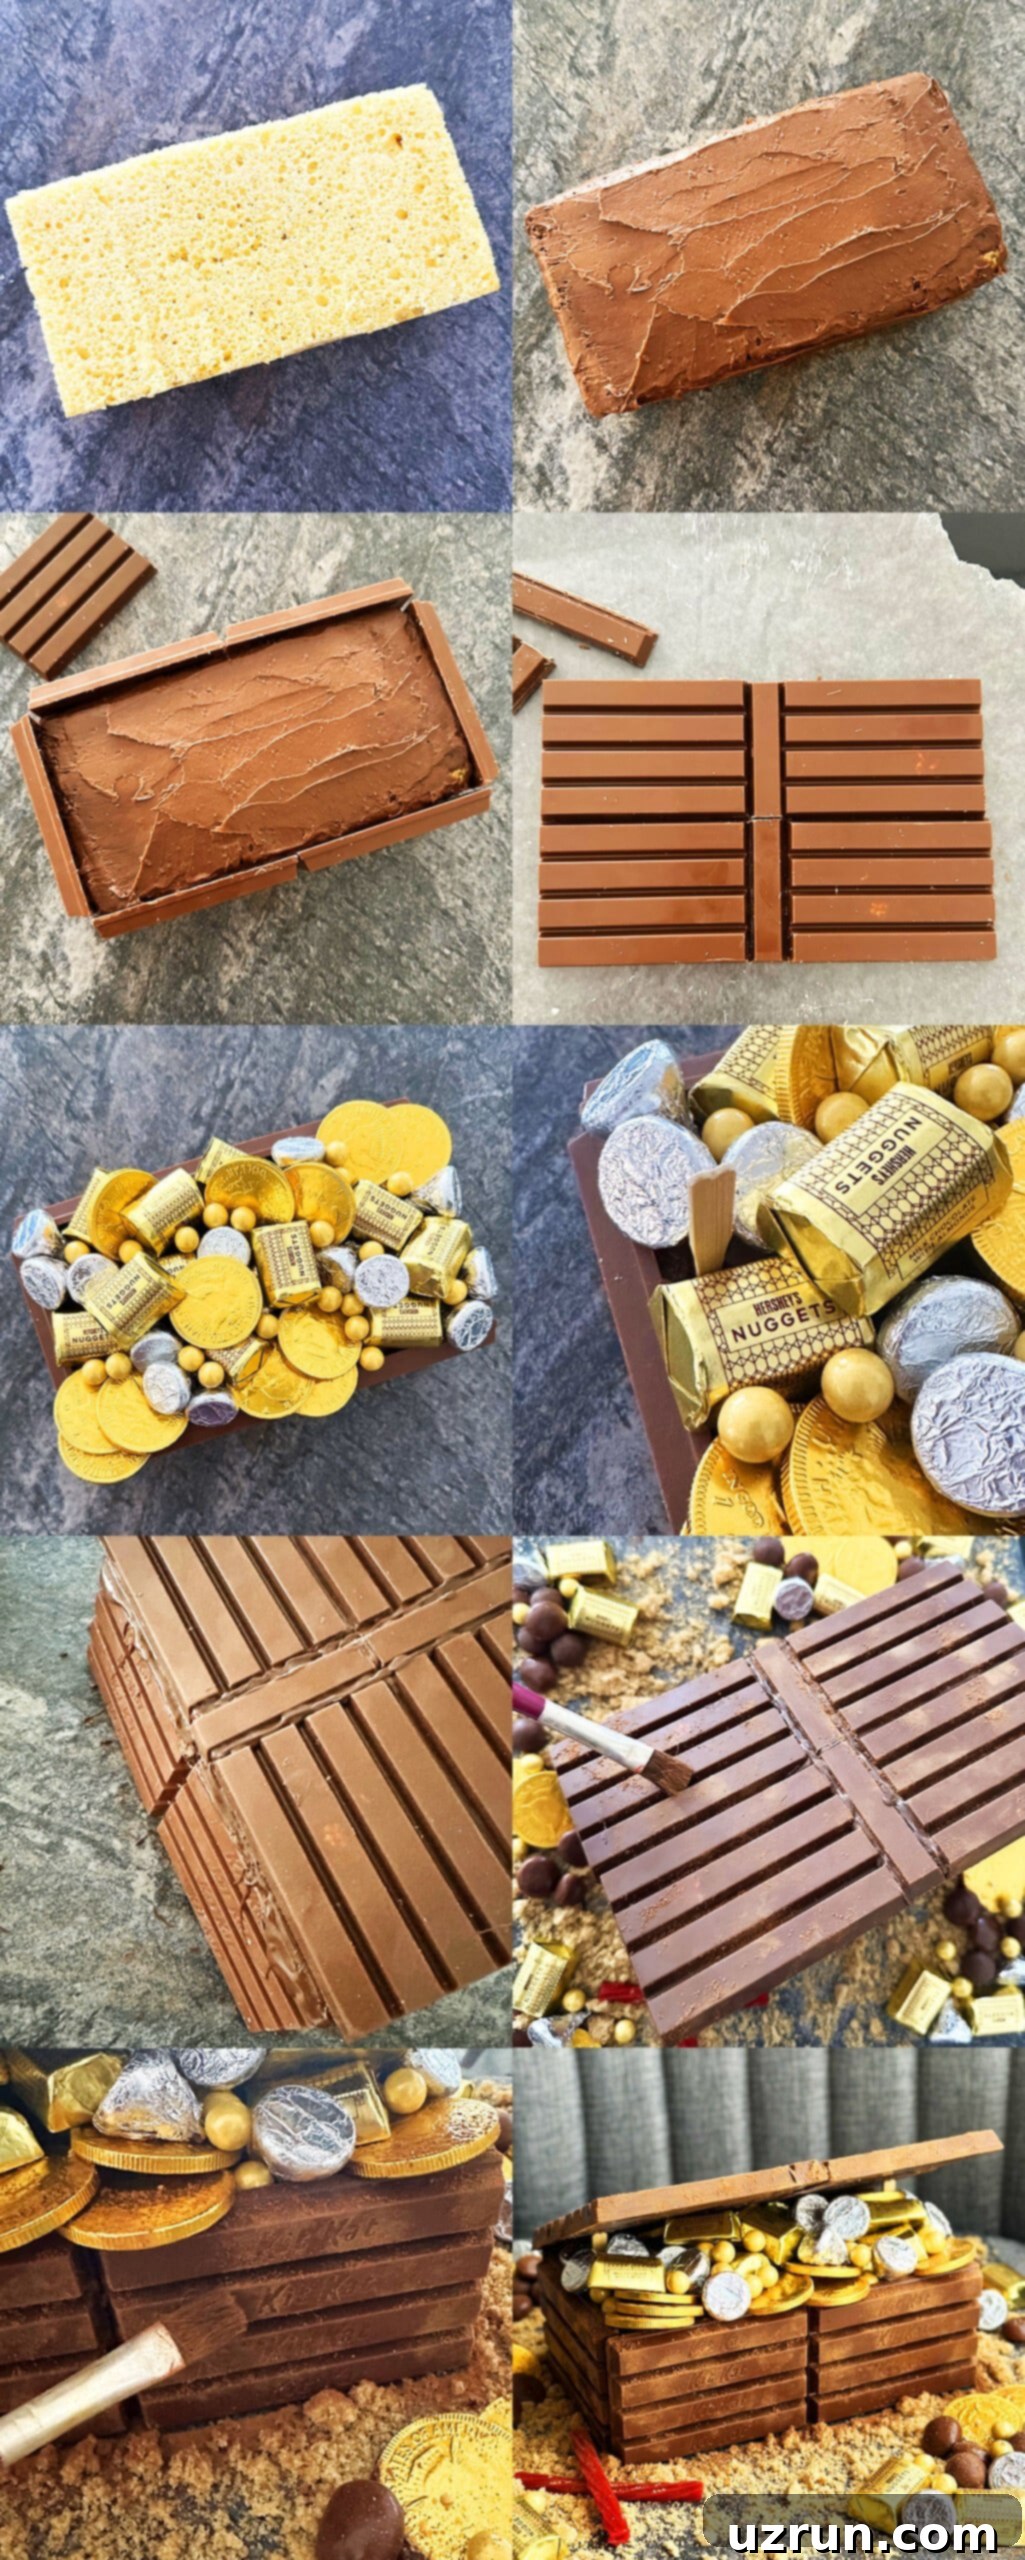
- Bake, Cool, and Trim Your Cake: Start by baking your chosen rectangular cake. A sturdy pound cake works wonderfully for this design, offering a good base. Once baked, allow it to cool completely on a wire rack. This is crucial to prevent the frosting from melting. Once cool, use a serrated knife to carefully trim the top dome and sides of the cake, creating a perfectly level and sharp-edged rectangular shape. This precision will ensure your Kit Kat walls stand straight and neat.
- Ice Smoothly: Apply a generous layer of chocolate frosting evenly over the entire cake. This frosting serves two purposes: it’s delicious, and it acts as the “edible glue” that will hold your Kit Kat bars in place. Aim for a smooth finish, but don’t worry too much about perfection as it will be mostly covered.
- Construct the Walls: Carefully attach individual Kit Kat bars around all four sides of your frosted cake. Press them gently but firmly into the frosting to ensure they adhere well. Work your way around, making sure the Kit Kats are standing upright and snugly against each other to form the sturdy walls of your treasure chest.
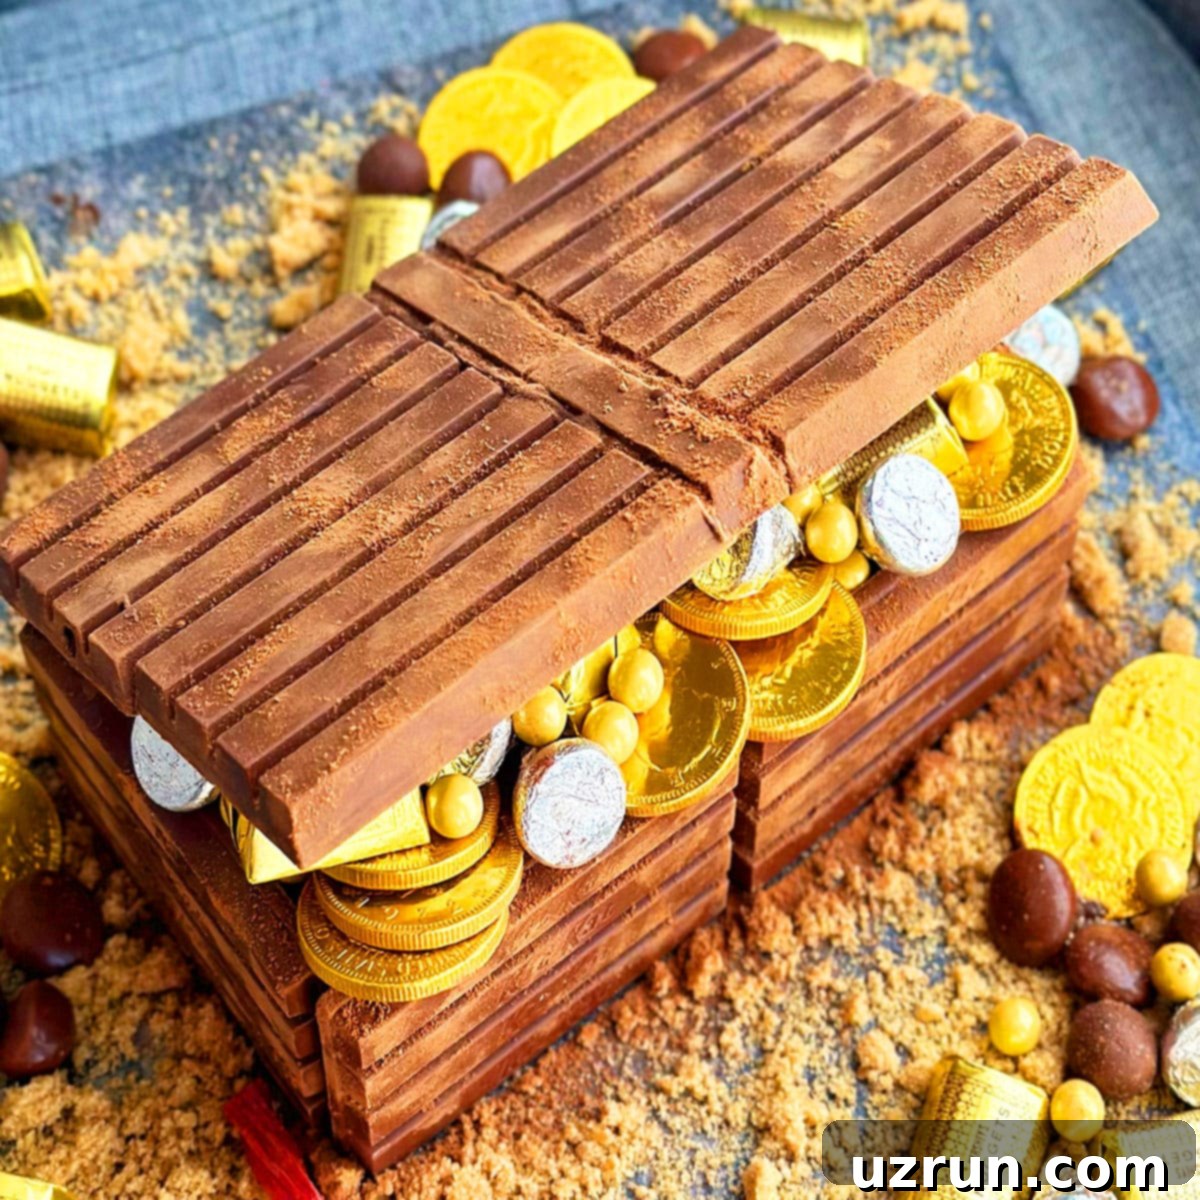
- Craft the Lid: On a sheet of wax paper, arrange four regular-sized Kit Kat bars side-by-side to form the base of your lid. If your cake is slightly wider, you might need to add an extra Kit Kat piece or adjust their arrangement. Once satisfied with the layout, use a small amount of melted chocolate as “glue” to adhere all the Kit Kat pieces together. Let this chocolate set and harden completely. This will create a stable, single-piece lid.
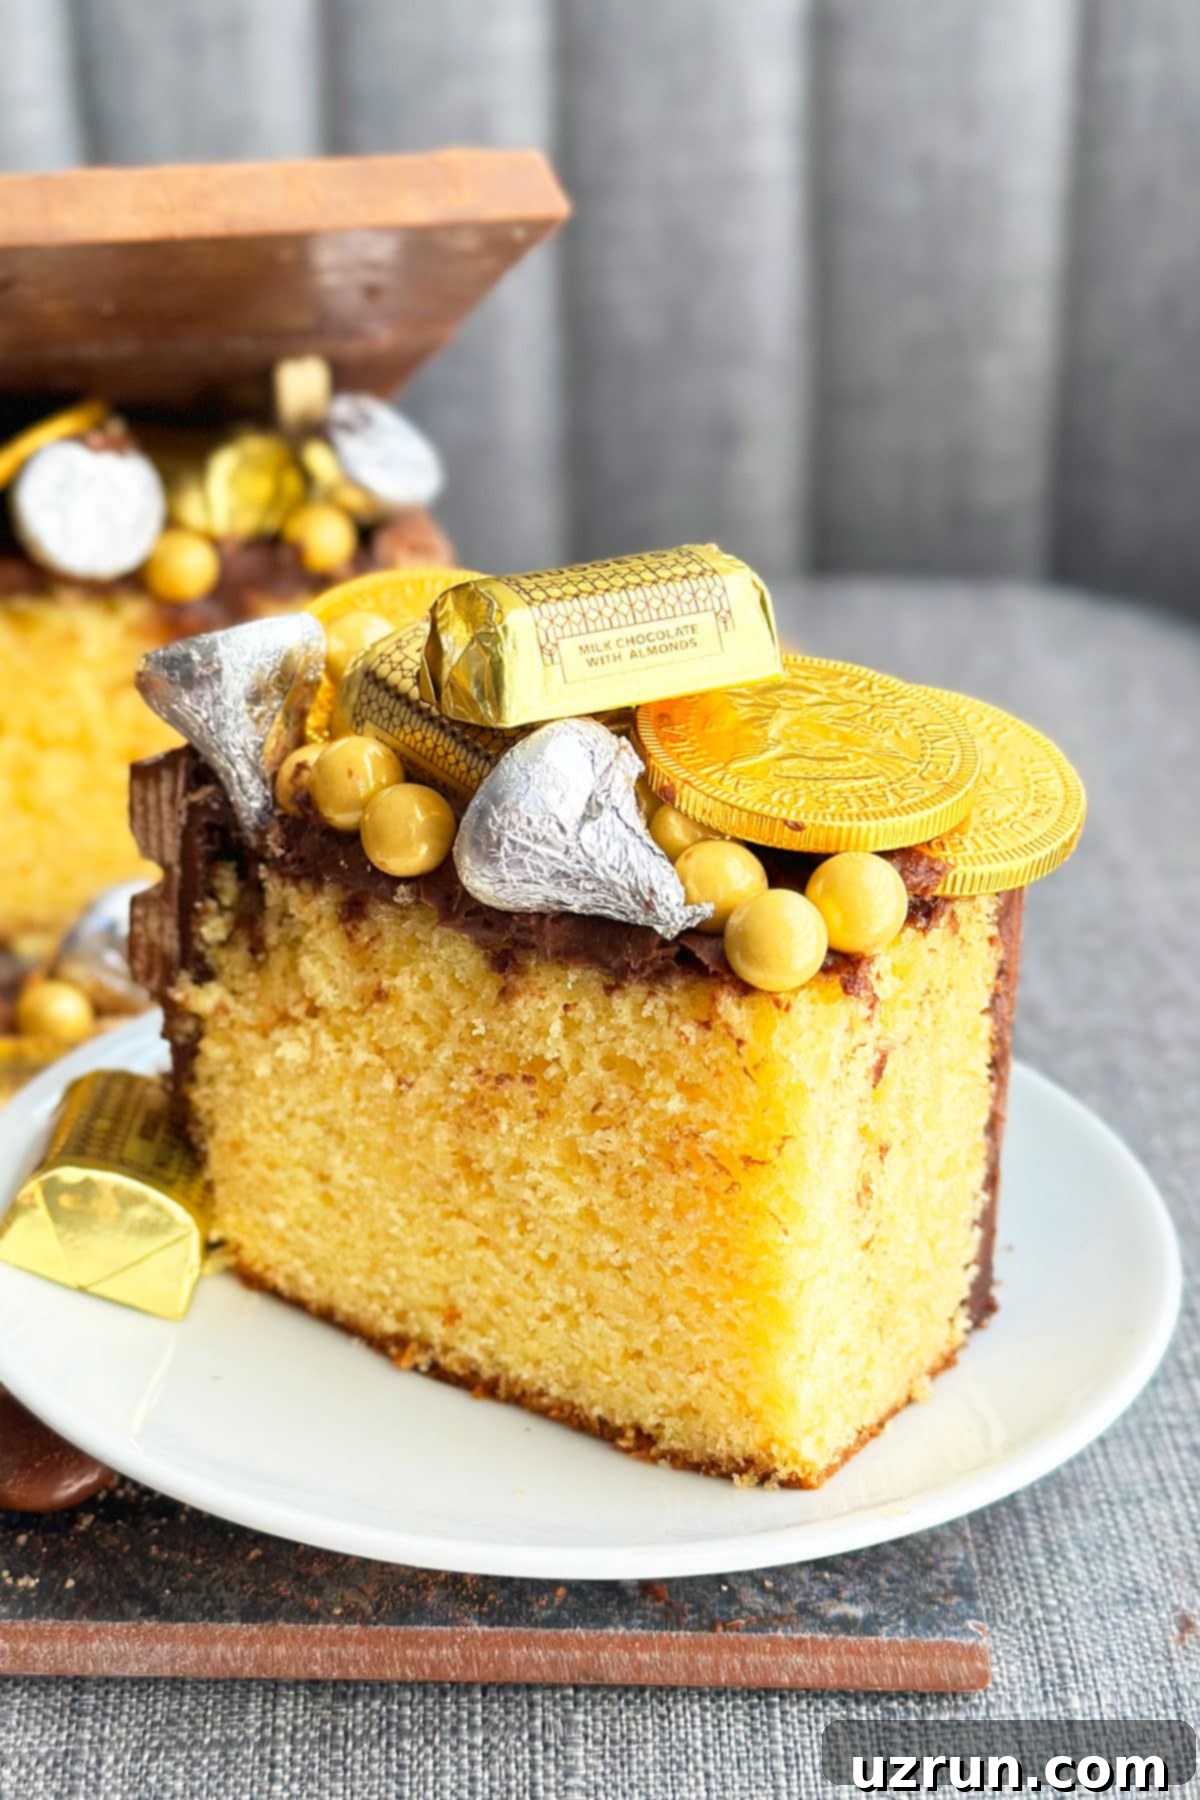
- Fill the Chest: While your lid is setting, fill the inside of the Kit Kat-bordered cake with an abundance of gold and silver candies. Think chocolate coins, Rolo candies, Hershey’s Kisses, or any shiny, treasure-like sweets you can find. Don’t be shy; make it look like a truly overflowing bounty!
- Prepare Lid Supports: To create the classic open treasure chest look, you’ll need supports for the lid. Carefully insert two bamboo skewers (or sturdy bamboo cocktail forks, cut to size if necessary) into the back corners of the cake. These skewers should be tall enough to support the lid at your desired open angle.
- Adhere the Lid: Once your Kit Kat lid is fully hardened, brush a generous amount of melted chocolate along the back edge of the lid and the corresponding back edge of the cake.
- Secure the Lid: Carefully place the chocolate-brushed edge of the lid onto the back of the cake, allowing the front edge of the lid to rest on the bamboo skewers. You will need to hold the lid firmly in place for at least a minute, or until the melted chocolate has set enough to secure it. This patience is key to a stable, open lid.
- Add Rustic Details: For an authentic, aged wood appearance, take a dry pastry brush and lightly dust cocoa powder all over the Kit Kat walls and lid of the chest. This technique adds depth and a beautiful rustic, weathered effect, mimicking old wood. Do not wet the brush, as this will cause the cocoa powder to clump.
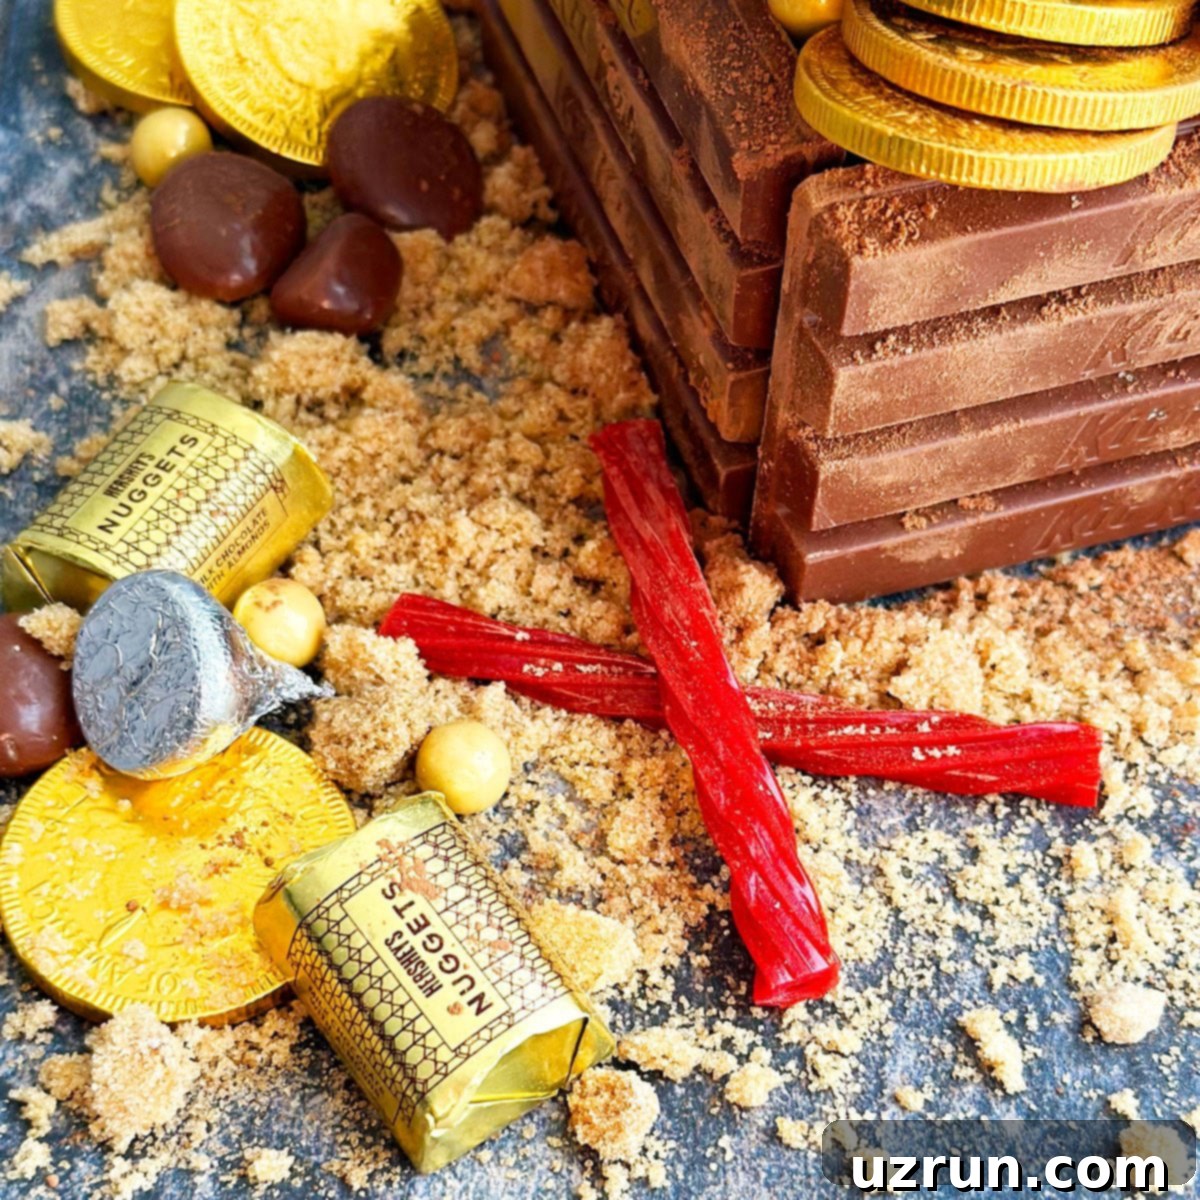
- Enhance the Treasure and Setting: To truly complete your pirate scene, add more gold and silver candies, allowing them to spill out from the chest onto the cake board. For the “sand,” spread brown sugar around the base of the cake. Use a cut Twizzler (preferably red) to create an “X marks the spot” detail near the treasure chest. Finally, scatter chocolate balls, like Whoppers or Milk Duds, around the brown sugar to represent rocks and pebbles. Your magnificent pirate treasure chest cake is now ready to amaze!
Key Ingredients for Your DIY Treasure Chest Birthday Cake
The beauty of this treasure chest cake lies in its simplicity and reliance on accessible ingredients. Here’s what you’ll need and why each component is essential:
- Cake: A classic pound cake is highly recommended. Its dense crumb and naturally rectangular shape (if baked in a loaf or sheet pan) provide the perfect sturdy foundation for building your treasure chest. You’ll need a cake that can hold its shape well under the weight of the Kit Kats and candies.
- Frosting: Chocolate buttercream is ideal. Its rich brown color perfectly matches the “wooden” aesthetic of the chest. More importantly, it acts as a strong adhesive, ensuring your Kit Kat walls remain securely attached to the cake. A smooth, firm buttercream consistency is best for this purpose.
- Kit Kats: These iconic chocolate bars are the stars of the show! You’ll need approximately 11 regular-sized Kit Kat bars to create the walls and lid of a standard rectangular treasure chest cake. Their distinct segmented shape and chocolatey flavor are perfect for creating the textured wooden look.
- Decorations: This is where the “treasure” comes in! Gather an assortment of gold and silver candies such as chocolate coins, Rolo candies, Hershey’s Kisses, and shiny chocolate nuggets. Don’t forget brown sugar for the “sand,” and a red Twizzler for the iconic “X marks the spot.” Chocolate balls (like Whoppers or Milk Duds) add a nice touch as edible pebbles.
- Melted Chocolate: Beyond the Kit Kat bars themselves, a small amount of melted semi-sweet chocolate is essential. It acts as the edible glue to assemble the Kit Kat lid and to secure it to the cake, ensuring your treasure chest stays intact.
Crafting the Perfect Treasure Chest Cake Lid: Alternative Options
While Kit Kat bars offer an incredibly easy and effective solution for the treasure chest lid, there are several other creative avenues you can explore, each offering a slightly different look and feel. The key is to choose an option that is both sturdy enough to hold its shape and complements your cake’s design.
One popular method involves using **brown fondant**. You can roll it out to your desired thickness and then allow it to dry and harden. This gives you a smooth, customizable surface. Another fantastic alternative to Kit Kats is using **other candy bars** that have a similar segmented or rectangular shape, such as Twix bars or Cadbury Flake bars. These can also be “glued” together with melted chocolate, offering a subtly different texture for your “wood.”
For those who enjoy a bit more sculpting, **modeling chocolate** (also known as candy clay) is an excellent choice. It’s pliable like fondant but has a richer chocolate flavor and a more robust texture once set. You can shape it into a flat lid, or even create a more intricate domed shape. If you’re aiming for a domed lid, a clever trick is to use **Rice Krispie treats** as your base. Mold the treats into the desired dome shape, then cover them with either fondant or modeling chocolate. This provides a lightweight yet sturdy structure.
A more structural, albeit less edible, option could involve using **cardboard as a base**, carefully cut to size, and then covered in brown fondant or modeling chocolate. If opting for cardboard, ensure it is food-safe and completely sealed by the edible covering to maintain hygiene. Whichever method you choose, remember to adhere your finished lid to the edge of the cake with a strong edible adhesive like melted chocolate or a sturdy buttercream. For guidance on making your own edible crafting materials, check out my recipes for How to Make Modeling Chocolate {Candy Clay} or How to Make Marshmallow Fondant (Fondant Recipe for Cakes).
Creative Variations for Your Pirate Chest Cake
This Kit Kat treasure chest cake is incredibly versatile, allowing for numerous modifications to suit your specific party theme, desired size, or personal taste. Here are some fantastic variations to inspire your next edible adventure:
- Cake Topper on a Large Sheet Cake: Instead of the main event, use this treasure chest as an impressive topper for a larger sheet cake, like this Yellow Sheet Cake {With Chocolate Frosting}. Ensure you use proper internal supports, such as bubble tea straws or wooden dowels, beneath the treasure chest to prevent its weight from sinking into the softer sheet cake base.
- Tiered Cake Accent: Integrate the treasure chest as the top tier of a multi-tiered cake for an even grander presentation. This creates a spectacular focal point for any celebration.
- Taller Layer Cake: While the original recipe focuses on simplicity, you can certainly make a taller layer cake by adding more cake layers with delicious fillings or frostings between each one. Just be mindful that the existing Kit Kat border will need to be taller to match.
- Adjust Size: Easily scale the cake up or down! For a larger cake, you’ll need to bake a bigger rectangular base and purchase more Kit Kat bars. For a smaller, individual-sized treasure chest, use mini Kit Kats and a smaller cake base, adjusting all other ingredients accordingly.
- More Gold and Silver Candies: Elevate the “treasure” aspect by adding a wider variety of gold and silver candies. Consider rock candy “jewels,” gold-wrapped chocolate coins, or even spray-paint certain candies (like gumballs or hard candies) with edible gold and silver food sprays for extra sparkle.
- Add Fondant Details: For those comfortable with fondant, incorporate intricate details such as a small lock and key, sturdy handles on the sides of the chest, or decorative metal-look straps to enhance the authentic treasure chest appearance.
- Alternate Candy Bar Walls: Experiment with other candy bars for the chest walls. Twix bars offer a different texture and caramel flavor, while Cadbury Flake bars can create an even more unique, textured, antique wood effect, thanks to their delicate chocolate shavings.
- Brown Fondant or Modeling Chocolate Walls: If you prefer not to use Kit Kats, you can form the chest walls using brown fondant or modeling chocolate. With this method, you can use specialized tools to impress a realistic wood grain effect, offering a truly customized look.
- Creative Sand Alternatives: Instead of brown sugar, create the “sand” around your treasure chest with finely crushed graham crackers for a slightly different texture and flavor, or use crushed cereal for a quick and easy option. Both work wonderfully to complete the beachy or desert island scene.
- Girl Pirate Theme: Adapt the cake for a girl’s pirate party by adding edible pearl necklaces, vibrant candy “gemstones,” or even pink and purple accents among the gold and silver treasure.
- Ring Pops as Jewels: For an explosion of color and edible fun, strategically place ring pops within the treasure, making them look like oversized, sparkling jewels and gems.
- Different Frosting Flavors: While chocolate buttercream is classic, feel free to experiment with other frosting types like rich Chocolate Ganache Frosting {2 Ingredients}, a lighter Healthy Coconut Cream Chocolate Frosting, or a classic Chocolate Buttercream Frosting Recipe.
- Explore Other Cake Bases: Your treasure chest can be built upon various cake bases. Consider a moist Buttermilk Pound Cake {From Scratch}, a zesty Lemon Pound Cake {With Cake Mix}, or an indulgent Chocolate Pound Cake {With Cake Mix} to suit different preferences.
Expert Tips and Techniques for Your Treasure Box Cake
Achieving a professional-looking and stable treasure chest cake is easier with a few insider tips and techniques:
- Utilize the Cake Board to Tell a Story: Don’t leave your cake board bare! It’s a fantastic canvas for expanding your pirate narrative. I love using brown sugar for sand, a licorice “X” to mark the spot, and scattering extra treasure around the board. This truly completes the visual appeal, drawing viewers into the imaginative world of pirates and hidden gold.
- Brush Cocoa Powder Dry: When applying cocoa powder for the rustic wood effect, always use a completely dry brush. If the brush is even slightly damp, the cocoa powder will clump, melt, and stick unevenly, ruining the desired rustic texture. A dry, soft pastry brush works best for a light, even dusting.
- Master Cake Trimming with a Serrated Knife: For the cleanest, most precise cuts when trimming your cake’s dome and sides, always use a serrated knife. The sawing motion of a serrated blade prevents crushing the cake and yields crisp, even edges, which are essential for a neat rectangular base.
- Essential Support for an Open Lid: To maintain that iconic open treasure chest look, strong internal support for the lid is non-negotiable. I typically use bamboo cocktail forks, but bamboo skewers cut to the appropriate size work equally well. Ensure they are inserted securely into the cake before attaching the lid.
- Hold the Lid Firmly in Place: After applying melted chocolate to secure the lid, it’s crucial to hold it steady with your hand for at least a minute. This allows the chocolate ample time to cool and set, forming a strong bond and preventing the lid from shifting or collapsing.
- Cool Your Cake Completely Before Frosting: This cannot be stressed enough! Attempting to frost a warm or even slightly warm cake will result in melted, sliding frosting and a messy finish. Ensure your cake is completely cool to the touch throughout before beginning any frosting work.
- Choose Sturdy Candies for Overflow: When creating the overflowing treasure effect, opt for candies that are relatively firm and hold their shape well, such as chocolate coins, Rolos, or hard candies. Softer candies might lose their form or stick together undesirably.
Storage of Your Homemade Decorated Treasure Chest Cake
Proper storage ensures your beautiful pirate treasure chest cake remains delicious and visually appealing for as long as possible:
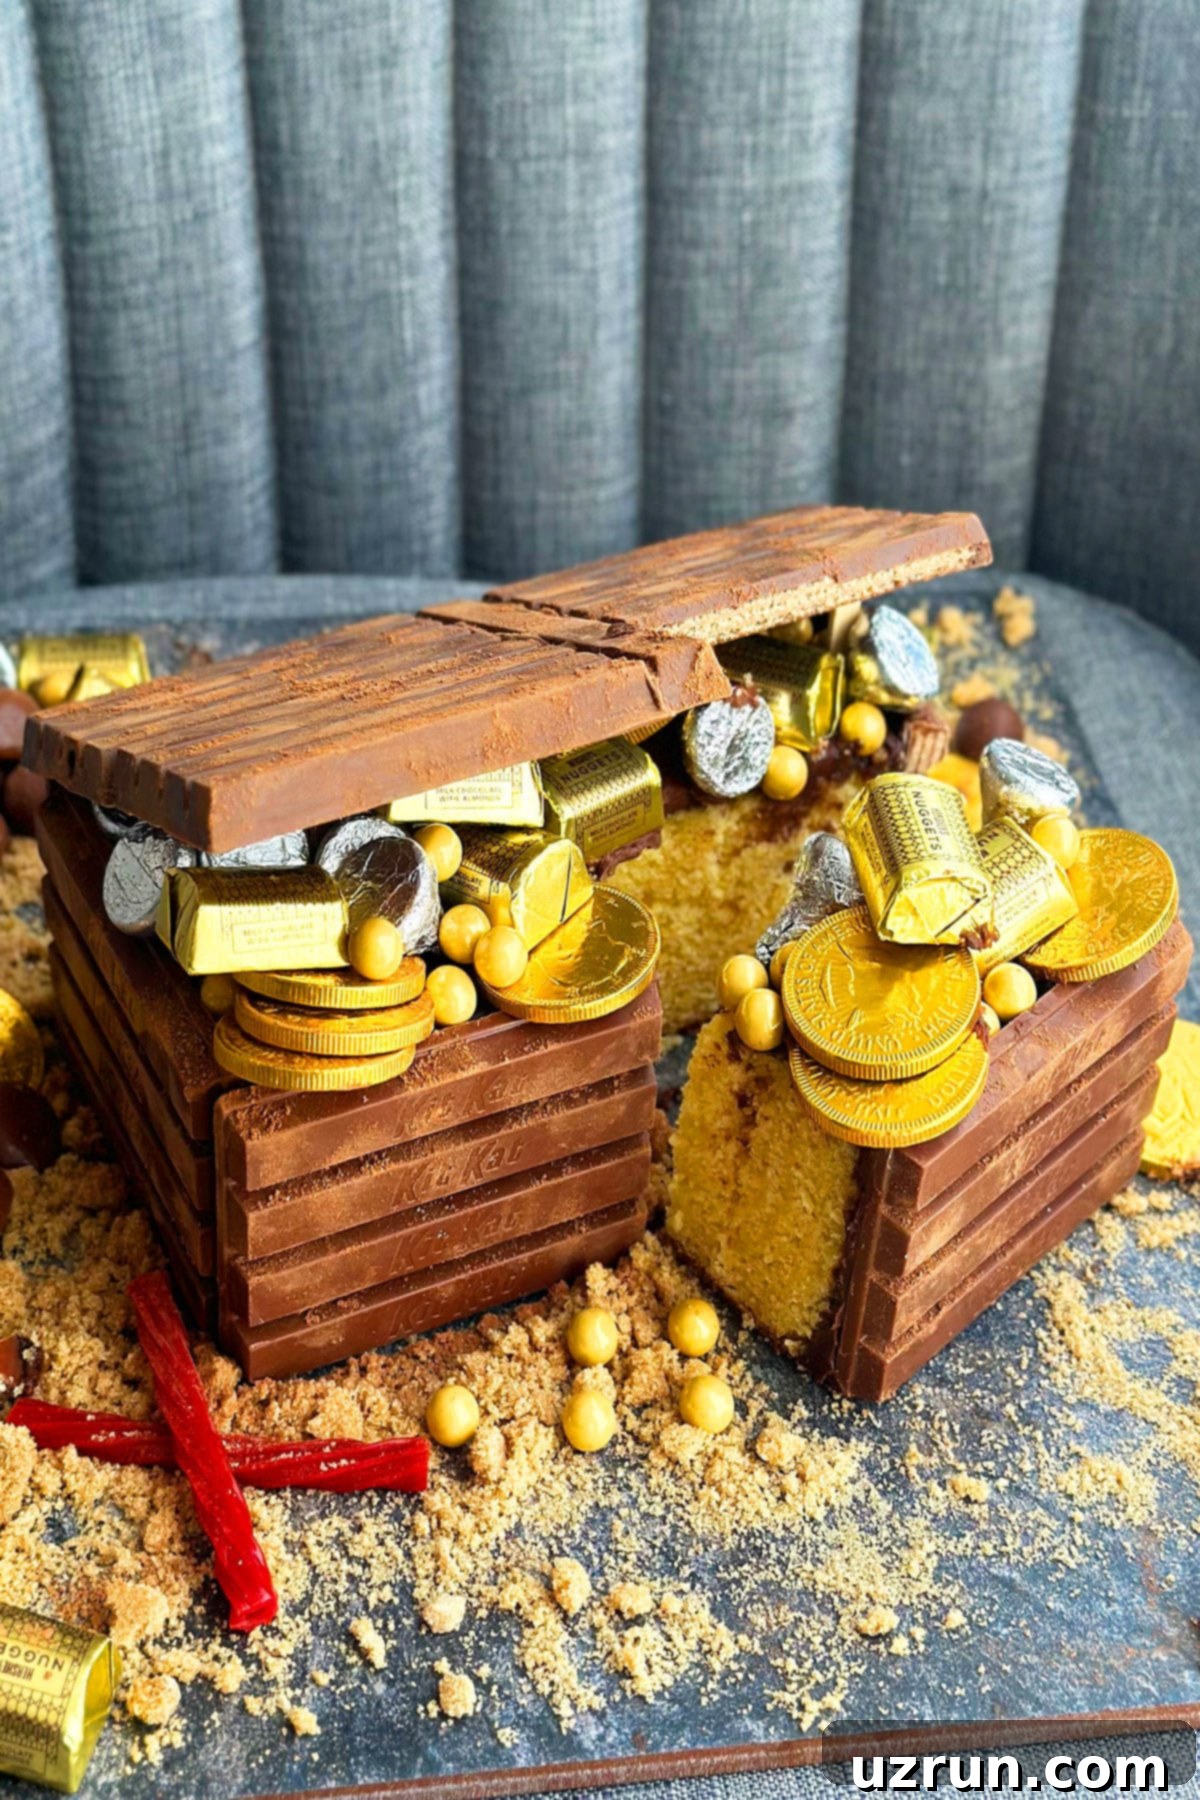
- Refrigerate: Any leftover cake should be stored in an airtight container in the refrigerator. This will keep it fresh and moist for up to 3 days. Make sure the container is large enough to accommodate the cake’s decorations without crushing them.
- Freezing is Not Recommended: While many cakes freeze well, I do not recommend freezing this particular decorated treasure chest cake. The various candy decorations, Kit Kat bars, and cocoa powder dusting are unlikely to thaw evenly or retain their original texture and appearance. It’s best enjoyed fresh!
More Easy Decorated Cakes to Explore
If you enjoyed making this treasure chest cake, you might love these other fun and easy cake decorating projects:
- Cookie Monster Cake {Sesame Street}
- Easy Penguin Cake {Buttercream Icing}
- Easy Lamb Cake {With Marshmallows}
- Easy Dinosaur Cake {Dino Cake}
- Easy Construction Cake {Excavator Cake}
Recipe
Easy Treasure Chest Cake (With Kit Kat)
Abeer Rizvi
Pin Recipe
Want to Save This Recipe?
Enter your email & I’ll send it to your inbox. Plus, get great new recipes from me every week!
By submitting this form, you consent to receive emails from CakeWhiz
Ingredients
- 1 Cream cheese pound cake, prepared and cooled, approximately a 9×13 inch rectangular size.
- 2 cups Chocolate cream cheese frosting, or your favorite chocolate buttercream, for coating the cake and acting as “glue.”
- 11 Kit Kat bars, regular size, for the sturdy and decorative walls and lid of the treasure chest.
- ⅓ cup Melted chocolate, semi-sweet, to bond the Kit Kat pieces for the lid and to secure the lid to the cake.
- 2 cups Gold and silver candies, such as Rolos, chocolate coins, Hershey’s Kisses, and Hershey’s chocolate nuggets, for the edible treasure.
- 1 tablespoon Unsweetened cocoa powder, for dusting to create a rustic, weathered wood effect on the Kit Kats.
- 1 cup Brown sugar, for creating the “sand” around the treasure chest.
- 1 Twizzler, preferably red, to cut and shape into an “X” to mark the treasure spot.
- ½ cup Chocolate balls, such as Whoppers or Milk Duds, to represent stones and pebbles in the edible sand.
- Bamboo skewers or cocktail forks, for supporting the open lid.
Instructions
-
Prepare Your Cake: Begin by baking your chosen pound cake according to its recipe. Allow the cake to cool completely on a wire rack. This critical step ensures your frosting won’t melt upon application.
-
Prepare Frosting: While the cake is baking and cooling, prepare your chocolate cream cheese frosting or chocolate buttercream. Ensure it’s at a good consistency for spreading and adhering.
-
Position the Cake: Carefully place your cooled cake onto your chosen serving dish or cake board. This board will be part of your final display, so choose wisely.
-
Trim the Cake: Using a serrated knife, meticulously trim any rounded dome from the top of the cake, as well as the sides, to achieve a perfectly flat and rectangular shape. This creates a neat base for your treasure chest.
-
Frost the Cake: With an offset spatula, smoothly ice the entire trimmed cake with a generous layer of chocolate frosting. This layer will not only add flavor but also serve as the adhesive for the Kit Kat bars.
-
Build the Chest Walls: Carefully press individual Kit Kat bars around all four sides of the frosted cake. Ensure they stand upright and are snugly pressed into the frosting, which acts as “edible glue.”
-
Form the Lid: On a sheet of wax paper, arrange 4 Kit Kat bars close together to form the main part of the lid. Depending on your cake’s width, you might need to add a single Kit Kat piece to achieve a proportional size.
-
Assemble the Lid: Drizzle melted chocolate over the arranged Kit Kats to stick them all together, creating a solid lid. Allow this chocolate lid to set and harden completely at room temperature or in the fridge for a few minutes.
-
Fill with Treasure: In the meantime, fill the inside of the Kit Kat-bordered cake with your assortment of gold and silver candies, making it appear as though the chest is bursting with riches.
-
Add Lid Supports: Gently push two bamboo skewers or cocktail forks into the back corners of the cake. These will serve as supports for the open lid.
-
Attach the Lid: Brush a generous amount of melted chocolate along the back edge of the hardened Kit Kat lid. Carefully place this edge onto the back of the cake, allowing the front of the lid to rest on the inserted skewers. Hold the lid in place for about a minute to allow the chocolate to set and secure it firmly.
-
Create Rustic Effect: Using a dry pastry brush, lightly and randomly spread unsweetened cocoa powder over the entire Kit Kat chest (top, sides, front, back). This step will give it a wonderful rustic, aged wood appearance.
-
Overflow with More Treasure: Add even more gold and silver candies to the inside of the chest, allowing some to spill over the edges, creating a truly abundant treasure hoard.
-
Set the Scene: Now, create the surrounding setting. Spread brown sugar around the base of the cake to simulate sand. Cut a red Twizzler and arrange it in an “X” shape near the treasure chest. Scatter additional gold and silver candies randomly across the board. Finally, add chocolate balls (like Whoppers) into the “sand” to resemble stones and pebbles. Your magnificent pirate treasure chest cake is now complete and ready to be enjoyed!
Notes
- For best results, carefully read through all the tips and techniques provided above before you begin baking and decorating.
- Leftovers of this beautifully decorated cake can be stored in a sealed, airtight container in the refrigerator for up to 3 days.
Nutrition
An automated tool is used to calculate the nutritional information. As such, I cannot guarantee the accuracy of the nutritional information provided for any recipe on this site.
