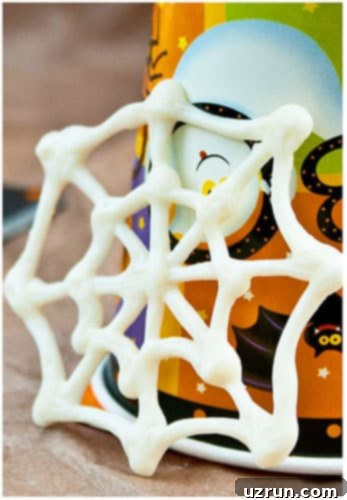
Easy Chocolate Spider Web Cupcakes: Spooky & Simple Halloween Treat Ideas
Get ready to impress at your next Halloween party with these incredibly simple yet visually striking spider web cupcakes! Whether you’re a seasoned baker or a complete beginner, these easy-to-make treats are perfect for adding a touch of spooky charm to any celebration. The secret to their delightful design lies in homemade chocolate cobweb toppers, crafted from simple melted white chocolate. Forget about complicated techniques or expensive tools; all you need is a handful of basic ingredients and a little creativity to bring these creepy-crawly confections to life.
I’ve seen many iterations of this classic cupcake design, but this method focuses on simplicity and accessibility. There’s absolutely no need for fussy fondant or specialized cake decorating skills. If you can melt chocolate and squeeze a bottle, you’re halfway there! These Halloween cupcakes are not only a hit for spooky gatherings but also double perfectly as “Spiderman web cupcakes” for superhero-themed birthday parties. If you’re diving headfirst into a spider theme, consider pairing them with this impressive Spider Web Cake for an unforgettable spread that will delight guests of all ages.
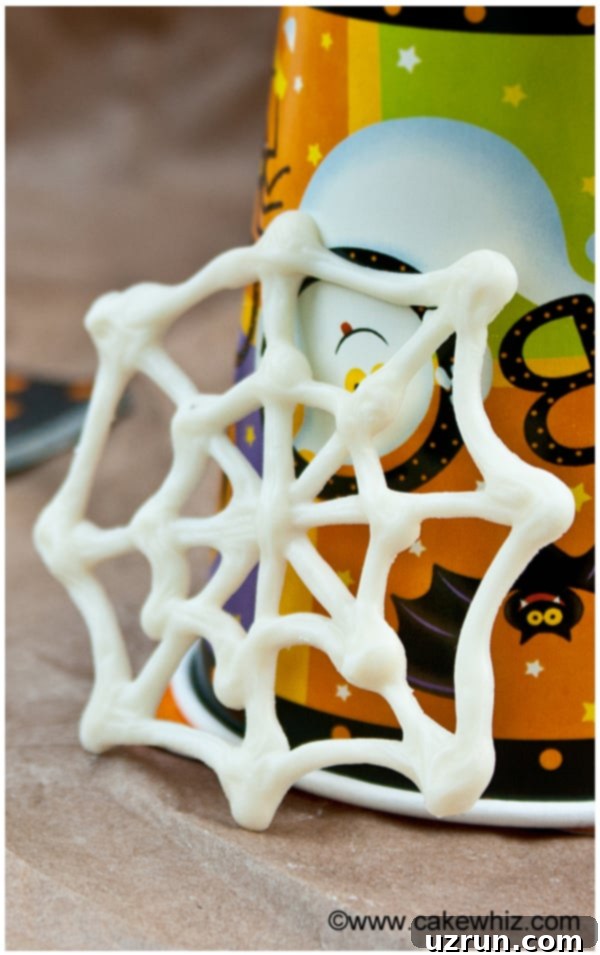
Mastering Easy Spider Web Cupcakes: A Step-by-Step Overview
Creating these festive spider web cupcakes is a straightforward process that can be broken down into a few manageable steps. This high-level guide will give you an idea of the workflow, and we’ll dive into the details shortly. The beauty of this recipe is its flexibility and the minimal skill required, making it ideal for home bakers of all levels.
- Bake Your Base: Start with your favorite vanilla or chocolate cupcakes and ensure they are completely cooled.
- Melt White Chocolate: Prepare your white chocolate and transfer it to a squeeze bottle for easy piping.
- Craft Spider Webs: Pipe delicate spider web designs onto wax paper.
- Chill to Set: Freeze the chocolate webs until they are firm and easily removable.
- Prepare Chocolate Spiders: Melt semisweet or dark chocolate for creating adorable little spiders.
- Pipe Spider Bodies: Form the spider bodies on wax paper, adding sprinkles for legs.
- Freeze Spiders: Chill the chocolate spiders until they are set.
- Frost Your Cupcakes: Apply your chosen frosting generously to the cooled cupcakes.
- Assemble & Decorate: Carefully place the chocolate webs and spiders on top of the frosted cupcakes.
Crafting the Perfect Chocolate Spider Web Toppers
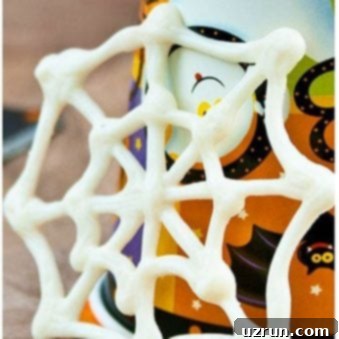
The star of these Halloween treats is undoubtedly the intricate-looking yet surprisingly simple chocolate spider web topper. This method ensures crisp, stable webs that will elevate your cupcakes from ordinary to extraordinary. Here’s a detailed guide to making them:
- Prepare Your Surface: Line a clean cookie tray with wax paper or parchment paper. This will prevent the chocolate from sticking and allow for easy removal.
- Melt and Load White Chocolate: Gently melt your white chocolate according to package directions (see tips below for best melting practices). Once smooth and pourable, transfer it into a squeeze bottle or a piping bag with a small round tip. A squeeze bottle offers great control for beginners.
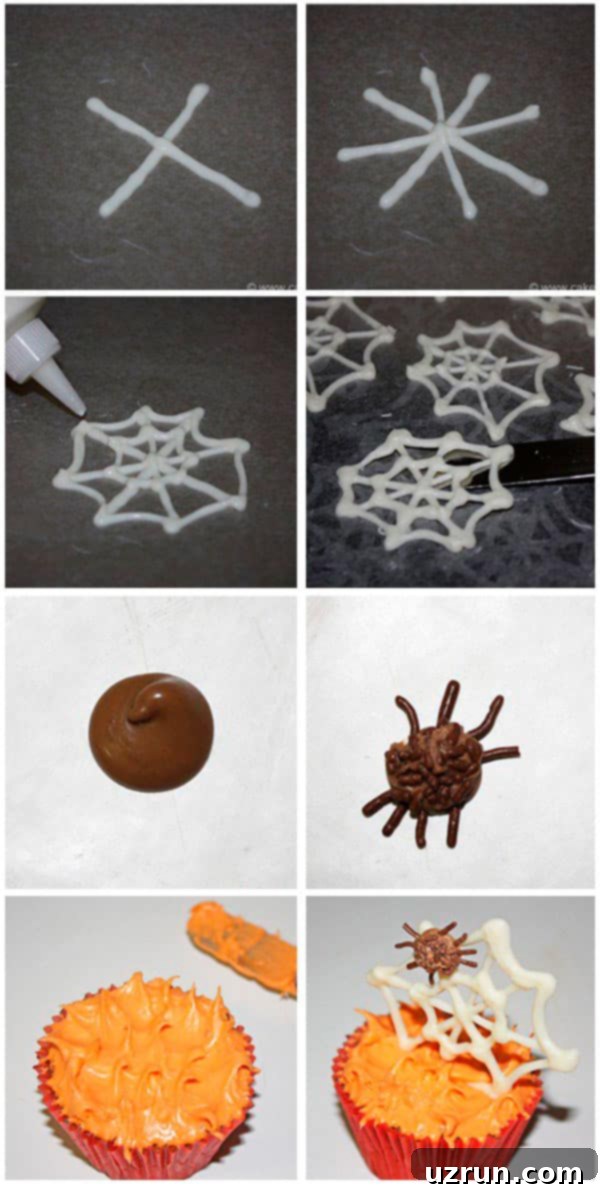
- Draw the “X”: On the prepared wax paper, start by drawing a simple “x” shape with the melted white chocolate. Aim for lines that are not too thin, as this will provide a sturdy base for your web.
- Form the “Plus” Sign: Next, pipe a “+” sign over the “x” shape, ensuring the lines intersect at the center. You should now have an asterisk-like shape with eight radiating lines.
- Connect the Lines for the Web: Beginning from the center, connect the radiating lines with small, curved lines of chocolate. Work your way outwards in concentric circles, creating the classic spider web pattern. The key is to keep the lines thick enough to ensure the web doesn’t break when handled. Don’t worry if they aren’t perfectly symmetrical; a rustic web adds to the spooky charm!
- Set in the Freezer: Carefully place the cookie tray with your chocolate webs into the freezer. Chill for about 5-10 minutes, or until the chocolate webs are completely hardened and firm to the touch.
- Gentle Removal: Once set, gently peel the chocolate spider webs from the wax paper. It’s best to handle them by the edges to avoid breakage. Place them on a separate plate while you prepare the cupcakes. Remember to make a few extra, just in case some break during removal!
Alternative: Making Spiderwebs with Icing
While chocolate offers a fantastic, firm topper, you can also create beautiful spider webs using icing. This method can give a slightly softer, more integrated look to your cupcake design. Royal icing is highly recommended for this technique due to its ability to dry hard and maintain its shape.
- Choose Royal Icing: Prepare a batch of royal icing. This type of icing sets firmly, making it perfect for delicate decorations like spider webs. Color it white or a pale contrasting shade for the best effect.
- Pipe the Cobweb Pattern: Using a piping bag fitted with a very small round tip (like a PME 0 or 1), pipe your cobweb patterns directly onto a sheet of parchment paper. You can follow the same “X” and “+” then connect pattern as with the chocolate, or freehand various web designs.
- Allow to Dry & Remove: Let the royal icing webs air dry completely. This can take several hours, or even overnight, depending on humidity. Once fully dry and hard, carefully peel them from the parchment paper. They will be more fragile than chocolate webs, so handle with extreme care. Place them delicately on top of your iced cupcakes for a subtle, elegant cobweb effect.
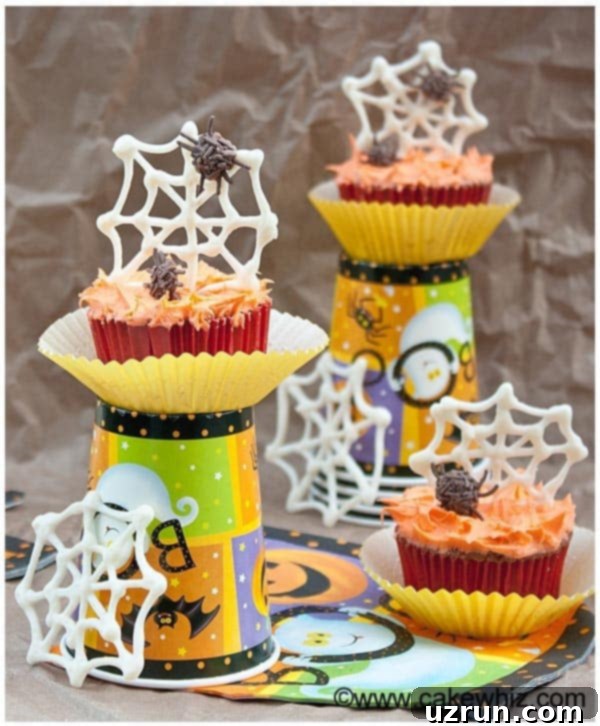
Creative Variations for Your Halloween Cobweb Cupcakes
These spider web cupcakes are wonderfully versatile, allowing for endless customization to match your party theme or personal preferences. Don’t limit yourself to just the basic vanilla and orange; experiment with different flavors and textures to create a truly unique and memorable treat.
Try Other Cupcake Flavors: The base cupcake provides the foundation for your spooky masterpiece. While vanilla is a classic, consider branching out to other exciting flavors to surprise your guests.
- Classic Choices: Vanilla Cupcakes (as suggested in the recipe), or a rich Chocolate Chip Cupcakes will always be a crowd-pleaser.
- Festive & Fun: For a vibrant touch, try Rainbow Cupcakes {With Cake Mix} for a playful twist, or the deep, rich hue of Best Red Velvet Cupcakes for a more sophisticated Halloween vibe.
- Seasonal Delights: Easy Orange Cupcakes can amplify the Halloween color palette, while a decadent Brownie Cupcakes will satisfy any chocolate lover’s craving.
- Spooky Surprises: Consider a dark chocolate or even black velvet cupcake for an extra gothic touch, enhancing the spooky aesthetic of the webs.
Try Other Frosting Flavors: The frosting is your canvas! Beyond the standard buttercream, different flavors and colors can drastically change the overall experience of your spider web cupcakes.
- Rich & Indulgent: A luscious Chocolate Ganache Frosting or a creamy Chocolate Cream Cheese Frosting would pair wonderfully with chocolate or vanilla cupcakes.
- Fruity & Bright: For a refreshing contrast, opt for a zesty Lemon Frosting or a sweet Maraschino Cherry Frosting.
- Light & Fluffy: A dreamy Marshmallow Frosting offers a delightful texture and subtle sweetness.
- Color Play: Don’t forget to play with colors! Beyond traditional orange, consider deep purples, vibrant greens, or even jet black frosting to truly capture the spooky theme.
Add Fillings for a Delightful Surprise: A hidden filling inside your cupcakes adds an extra layer of flavor and makes each bite a delightful surprise. You can easily follow this tutorial on How To Make Filled Cupcakes to achieve this.
- Sweet & Sticky: A gooey Homemade Caramel Sauce or a rich chocolate ganache would be decadent.
- Fruity Burst: Introduce a burst of fruit flavor with Raspberry Pie Filling, Strawberry Pie Filling, Blueberry Pie Filling, or Cherry Pie Filling.
- Tangy Treat: For a zesty kick, fill your cupcakes with bright Lemon Curd.
Try Other Colors of Frosting: As mentioned, don’t shy away from vibrant or dark colors. Deep purples, ghostly greens, or ominous blacks will truly make your white chocolate webs pop and enhance the Halloween spirit.
Use Fondant to Cover Cupcakes: For a truly polished look, you can cover your cupcakes with fondant before adding the webs. This homemade Marshmallow Fondant recipe is a fantastic, pliable option that tastes much better than store-bought varieties.
Make Different Colors of Chocolate Webs: Instead of just white, you can use colored candy melts (orange, green, purple) to create vibrant spider webs. For an extra sparkle, sprinkle some edible glitter or white sanding sugar on the chocolate while it’s still wet. This will give your webs a magical, glistening effect perfect for a mystical Halloween theme.
Add Sprinkles to the Frosting: Complement your spider webs and spiders with fun sprinkles! Use seasonal Halloween sprinkles or choose colors that match your frosting and overall theme. Edible glitter or colored sugar can also add an extra festive touch to the cupcake base itself.
Essential Tips and Techniques for Spooky Cupcake Success
Achieving perfect spider web cupcakes is easier with a few insider tips and tricks. These techniques will help you create sturdy, beautiful decorations and avoid common pitfalls, ensuring your Halloween treats are a hit.
Opt for the Right White Chocolate: For edible decorations that hold their shape and are less prone to breakage, always choose white candy melts or almond bark white chocolate over regular white chocolate bars or chips. These products are formulated to dry firmer and stronger, making them ideal for detailed work like spider webs.
Coloring Melted Chocolate: If you decide to add color to your melted white chocolate, it is absolutely crucial to use oil-based food coloring. Water-based food coloring will cause your chocolate to “seize,” turning it into a thick, crumbly mess that cannot be reversed or saved. Invest in oil-based colors for vibrant, smooth results.
Always Make Extra Chocolate Spider Webs: No matter how careful you are, some chocolate webs are bound to break when you’re peeling them off the wax paper or handling them. It’s always a good idea to make at least 20-30% more than you need. This way, you won’t be scrambling to make more if a few get damaged.
Ensure Thick Lines for Sturdy Webs: When piping your spider webs, make sure the lines are not too thin. Thicker lines will result in sturdier, more resilient webs that are less likely to break during handling and placement. Aim for a medium thickness that provides structural integrity without looking clunky.
Using a Template for Perfect Webs: While I prefer freehanding my spider webs for a more organic look, using a template can be incredibly helpful, especially for beginners or if you want perfectly uniform webs. Simply draw a few spider web designs with a pencil or marker on a sheet of paper, then place your wax paper directly over it. You can then trace over the template with your melted chocolate, ensuring consistent shapes and sizes.
The Art of Melting Chocolate: Proper chocolate melting is key to smooth, pipable designs. Always follow the package directions for your specific chocolate product. If there are no directions, the microwave method is generally reliable: place chocolate in a microwave-safe bowl and heat in 30-second intervals, stirring thoroughly after each interval, until the chocolate is silky smooth and free of lumps. Be careful not to overheat, as this can cause the chocolate to burn or seize.
Creating Detailed Chocolate Spiders: For the chocolate spiders, after piping the body (a small blob), quickly attach chocolate sprinkles for legs before the chocolate sets. You can also pipe thin lines directly from the chocolate for legs if you prefer. A tiny dot of white icing can be added for eyes once the spider is set for an extra touch of character.
Storage Solutions for Your Decorated Cupcakes
Proper storage ensures your beautiful and delicious spider web cupcakes stay fresh and delightful for as long as possible, whether you’re making them in advance or saving leftovers.
Refrigerate for Short-Term Storage: Once decorated, these cupcakes can be stored in an airtight container in the refrigerator for up to 2 days. The chocolate webs will remain stable, and the frosting will stay fresh. Allow them to come to room temperature for about 15-30 minutes before serving for the best flavor and texture.
Freeze for Longer Preservation: If you need to prepare ahead of time, unfrosted cupcakes and frosting can be made in advance and stored separately. Wrap unfrosted cupcakes tightly in plastic wrap and then in foil, and place them in an airtight container in the freezer for up to 2-3 months. Store frosting in a sealed container in the freezer for up to a month. When you’re ready to enjoy these treats, thaw the cupcakes and frosting to room temperature, then assemble them following the instructions below.
More Spooktacular Halloween Desserts to Explore
If you’re planning a full Halloween spread, don’t stop at just spider web cupcakes! Here are some other fun and easy Halloween-themed dessert ideas to complete your spooky celebration:
- Easy Chocolate Spiders
- Easy Chocolate Monsters
- Halloween Donuts (Monster and Spider)
- Easy Monster Cupcakes
- Oreo Spider Cookies {No Bake}
Recipe
Easy Halloween Spider Web Cupcakes
Abeer Rizvi
Pin Recipe
Want to Save This Recipe?
Enter your email & I’ll send it to your inbox. Plus, get great new recipes from me every week!
By submitting this form, you consent to receive emails from CakeWhiz
Ingredients
- 20 Vanilla cupcakes (or your preferred flavor)
- 3 cups American buttercream frosting (tinted orange or other spooky color)
- 2 cups White chocolate (melted, preferably candy melts or almond bark for best stability)
- ½ cup Semisweet or dark chocolate (melted, for spiders)
- ¼ cup Chocolate sprinkles (for spider legs and decoration)
Instructions
-
Bake your chosen cupcakes and allow them to cool completely on a wire rack before proceeding. This prevents the frosting from melting.
-
While cupcakes are cooling, prepare your buttercream frosting, adding food coloring if desired for a vibrant Halloween base.
-
Melt the white chocolate until smooth and transfer it to a clean squeeze bottle or piping bag with a small round tip.
-
Line a cookie tray or baking sheet with wax paper or parchment paper. Using your squeeze bottle, draw an “x” shape on the paper.
-
Immediately after, pipe a “plus” sign over the “x”, ensuring the lines intersect at the center to create 8 radiating spokes.
-
Now, connect the radiating lines with small, curved lines of chocolate, working your way from the inside out to create a spider web design. Remember to make the lines reasonably thick to ensure the web’s stability.
-
Carefully place this tray in the freezer for about 5-10 minutes, or until the chocolate webs are completely hardened.
-
Very gently, use a thin spatula or offset knife to remove the chocolate spider webs from the wax paper. Handle by the edges to prevent breakage.
-
To make the chocolate spiders, melt the semisweet or dark chocolate and pour it into a separate squeeze bottle or piping bag.
-
Line another cookie tray with parchment paper.
-
Pipe a small blob of dark chocolate onto the wax paper (about 1 inch in diameter) for the body of each spider.
-
Before the chocolate blob hardens, attach some chocolate sprinkles to the sides to create spider legs, or pipe thin lines of chocolate for legs.
-
Optionally, toss some additional sprinkles on top of the chocolate spider body for extra texture and visual appeal.
-
Place this tray into the freezer for 5 minutes until the spiders are set, then gently peel them from the wax paper.
-
Using a spatula or piping bag, apply your prepared frosting generously to the tops of your cooled cupcakes. A swirl or a simple dome works well.
-
Finally, carefully stick a chocolate web into the center of each frosted cupcake. Use a tiny dab of melted chocolate to “glue” the spider onto the web, or simply place it directly on the cupcake frosting near the web. Serve and enjoy your spooky creations!
Notes
- For best results, read all the detailed tips and techniques provided above before you begin.
- Leftover decorated cupcakes can be stored in a sealed container in the refrigerator for up to 2 days to maintain freshness and prevent drying out.
Nutrition
An automated tool is used to calculate the nutritional information. As such, I cannot guarantee the accuracy of the nutritional information provided for any recipe on this site.
