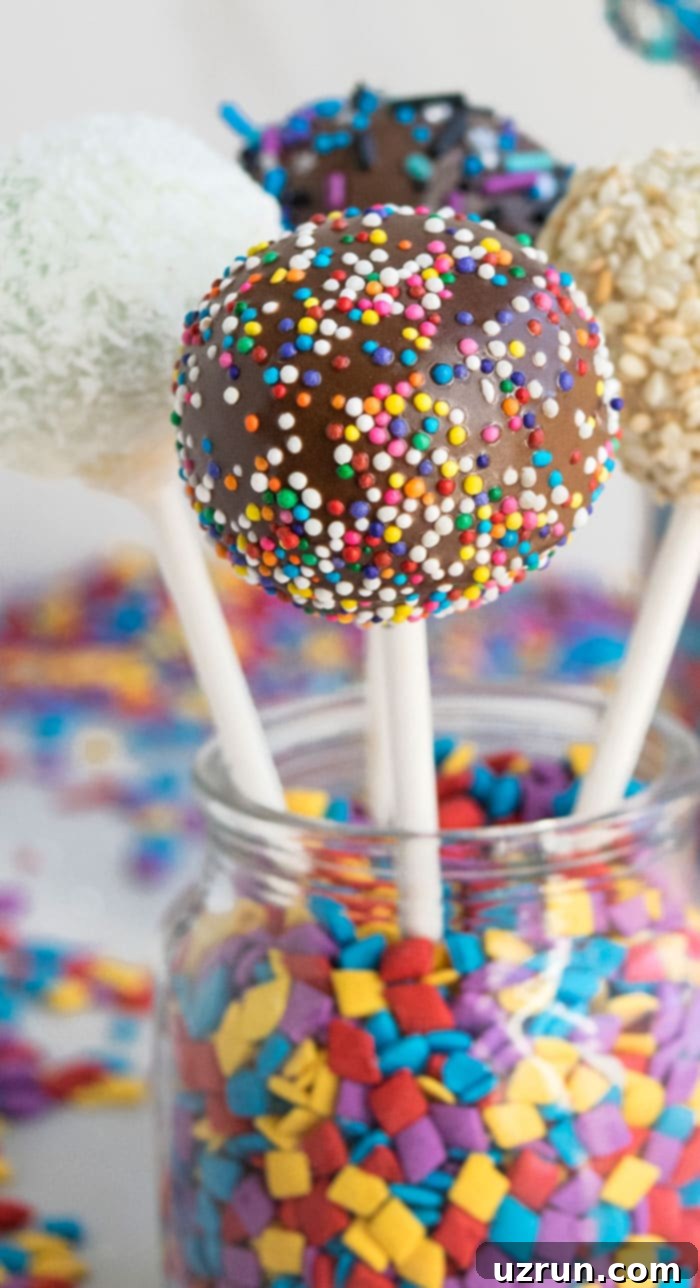
The Ultimate Guide to Homemade Cake Pops & Cake Balls: Easy Recipes, Pro Tips & Creative Decorations
Welcome to the ultimate guide for crafting delightful homemade cake pops and cake balls! These bite-sized treats are not only incredibly fun to make but also perfect for any occasion, from birthday parties to elegant gatherings, or simply as a charming way to use up leftover cake. Quick, easy, and made with simple ingredients, they offer endless possibilities for flavors and decorations.
I’ve been making cake pops and cake balls for years, learning countless tips and tricks along the way, and I’m thrilled to share all my secrets with you. While I may not be the legendary Bakerella, who single-handedly sparked the cake pop craze with her incredible talent, my methods will help you create treats that are just as irresistible. You’ll even find them sold in many cafes and bakeries today, a testament to their enduring popularity – my son, for one, can’t resist those cute Starbucks cake pops!
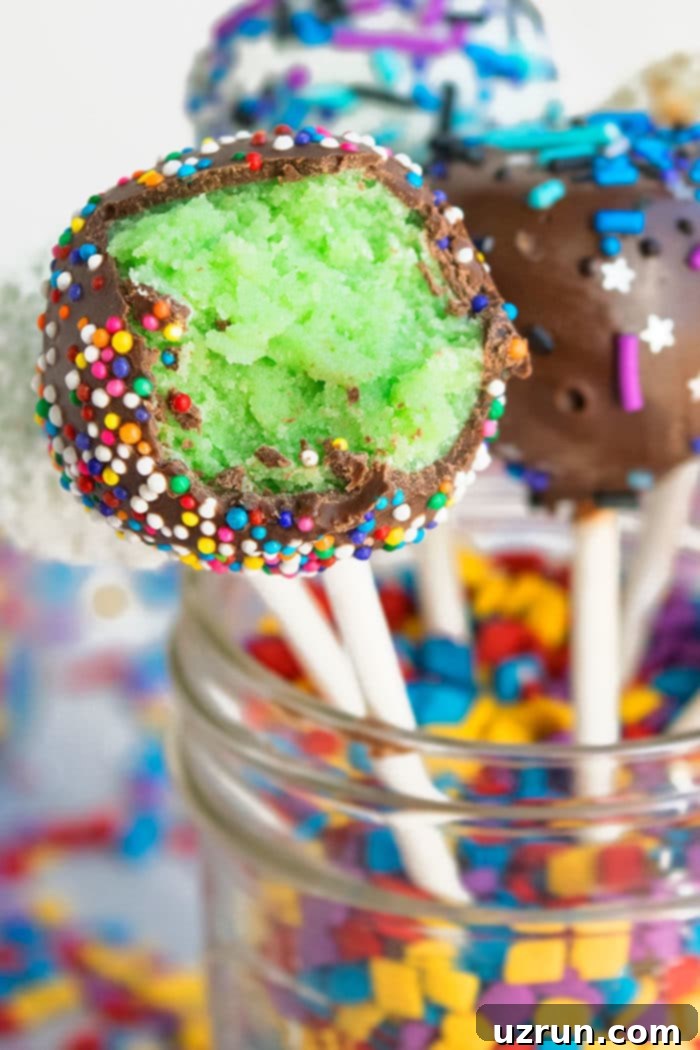
The beauty of this recipe lies in its flexibility. You can use virtually any leftover cake you have on hand. For the cake pops featured in this guide, I used a vibrant Pistachio Cake. Its beautiful green hue makes these pops especially fun for kids and an ideal festive dessert for celebrations like St. Patrick’s Day. No matter your cake choice, the steps remain straightforward, ensuring delicious results every time.
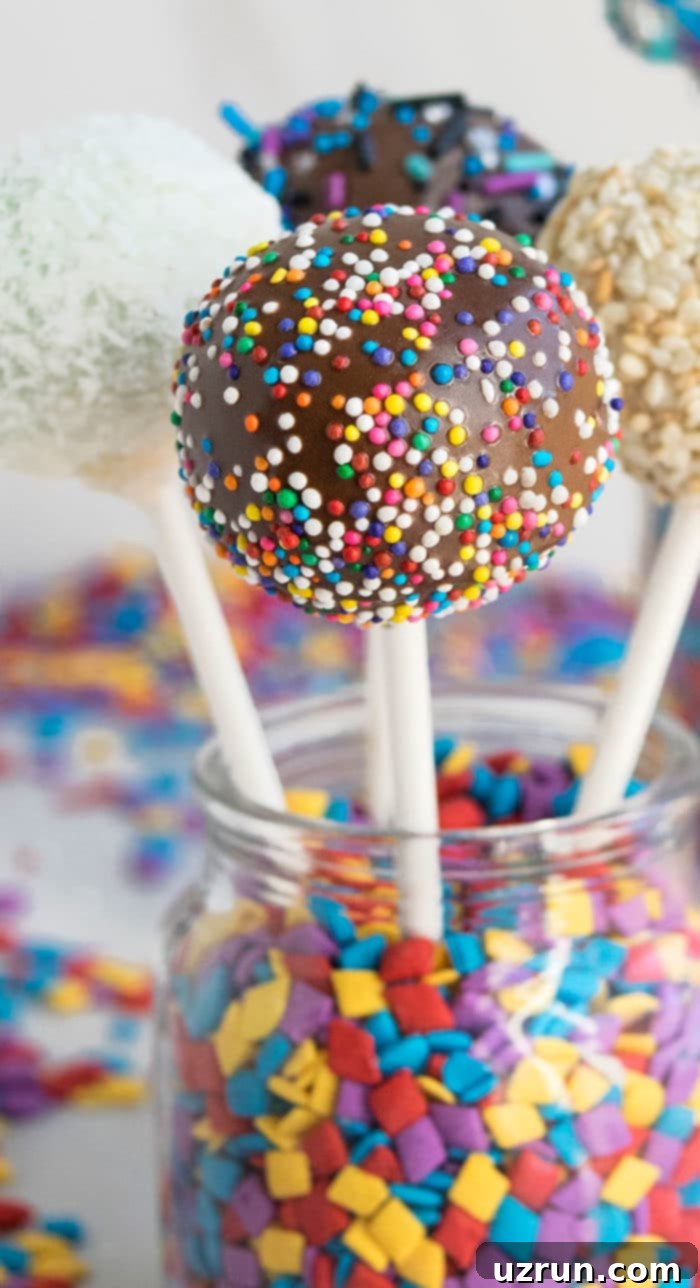
You can use whatever leftover cake you like. I used leftover Pistachio Cake for these pops. The color makes them fun for kids and a perfect dessert for St.Patrick’s Day.
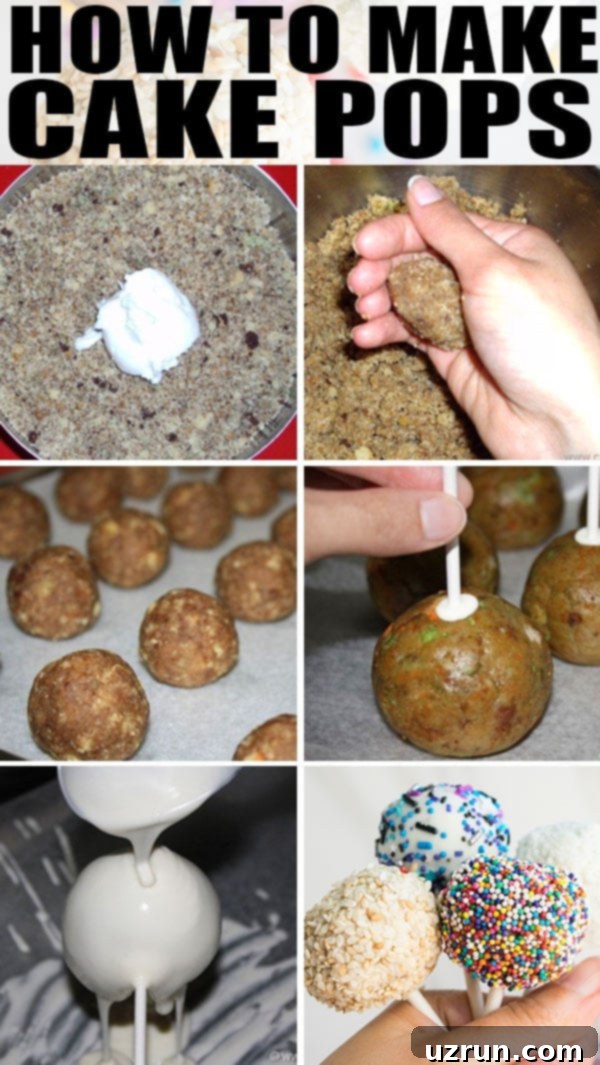
How to Make Cake Pops: A Step-by-Step Guide
Creating perfect cake pops is simpler than you might think. Follow these essential steps to transform your favorite cake into delightful treats on a stick:
- Bake or Prepare Your Cake: Start with a fully baked and cooled cake. This is a fantastic opportunity to use up cake scraps or a day-old cake.
- Crumble the Cake: Using your hands, a fork, or a mixer, break the cooled cake into fine, even crumbs in a large mixing bowl. Consistency is key here for smooth cake balls.
- Mix in Frosting: Gradually add a small amount of frosting to the cake crumbs, mixing until the mixture comes together and is firm enough to roll into balls, much like play-dough. Be careful not to add too much!
- Roll into Balls and Insert Sticks: Scoop uniform portions of the mixture and roll them into smooth, compact balls. Dip the tip of each cake pop stick into melted chocolate before inserting it halfway into the cake ball. This acts as a “glue.”
- Chill Thoroughly: Place the formed cake balls with sticks on a wax paper-lined tray and chill in the freezer for about 20 minutes (or fridge for longer). This crucial step helps them firm up and prevents them from falling apart during dipping.
- Dip in Melted Chocolate: Once firm, dip each cake pop into your preferred melted chocolate or candy melts, ensuring a complete, even coating. Gently tap off any excess.
- Decorate with Sprinkles (or other toppings): Immediately after dipping, while the chocolate is still wet, adorn your cake pops with sprinkles, chopped nuts, or any other desired decorations. Work quickly!
- Chill Again and Enjoy: Insert the decorated cake pops into a styrofoam block or a cake pop stand to allow the chocolate to set completely. Chill for another 5-10 minutes, then they’re ready to serve!
How to Make Cake Balls (No Sticks Required!)
Cake balls offer the same delicious flavor and delightful texture as cake pops, but without the stick, making them ideal for dessert platters, gift boxes, or when you prefer a less “fussy” presentation. The process is very similar to cake pops, with a slight adjustment in the dipping method:
- Bake and Crumble Cake: Just like cake pops, start with a cooled, crumbled cake.
- Mix with Frosting: Incorporate frosting gradually until you achieve a moldable, play-dough-like consistency.
- Roll into Balls: Form the mixture into uniform, tight balls using a scooper or your hands.
- Chill: Place the cake balls on a wax paper-lined tray and chill them in the freezer for about 20 minutes to firm up.
- Dip in Melted Chocolate: For dipping cake balls, use a fork or a dipping tool. Submerge each ball completely, then gently lift it out. Tap the fork against the edge of the bowl to remove excess chocolate, ensuring a smooth coating.
- Place on a Cookie Tray: Carefully transfer the dipped cake ball to a cookie tray lined with wax paper or parchment paper.
- Decorate: Immediately sprinkle with your chosen decorations before the chocolate sets.
- Chill Again and Serve: Return the decorated cake balls to the fridge or freezer for 5-10 minutes to allow the chocolate coating to fully set. Then, they’re ready to be enjoyed!
Can I Make Cake Pops and Cake Balls Ahead of Time?
Absolutely! Cake pops and cake balls are wonderful make-ahead treats, perfect for party planning or busy schedules. You can prepare them up to 2-3 days in advance. Simply store them in an airtight container in the refrigerator until you’re ready to serve. For longer storage, you can freeze undecorated cake balls for up to a month. Thaw them in the fridge before dipping and decorating if desired, or thaw completely and enjoy as is.
Essential Tips for Perfect Cake Pops & Cake Balls
- Frosting Ratio is Key: This is perhaps the most crucial tip! Cakes, especially fresh or very moist ones, already contain a good amount of moisture. If you add too much frosting to the crumbled cake, the mixture will become too sticky and soft, making it difficult to roll into firm balls that hold their shape. Always add frosting a little at a time (e.g., a tablespoon or two), mixing thoroughly after each addition. The goal is a consistency similar to play-dough – firm enough to hold its shape when rolled, but still soft and pliable.
- Achieving the Right Mixture: The cake mixture is ready when it’s crumbly yet moist enough to be pressed together and hold a solid ball shape without crumbling apart or being overly sticky. Test by shaping a small ball; if it’s easy to form and stays together, you’ve hit the sweet spot. If it’s too dry, add a tiny bit more frosting; if too wet, add a few more cake crumbs (if available) or chill the mixture briefly.
- Mixing Tools: You can combine the cake and frosting mixture using your hands (the most effective way to feel the consistency), a sturdy spoon or fork, or even a hand-held or stand mixer with the paddle attachment on low speed for larger batches.
- Uniform Size for Best Results: The number of cake pops or balls you get depends entirely on their size. For consistent baking and a professional look, use an ice cream scooper (small cookie scoop) or measuring spoons (e.g., 1-tablespoon size) to portion out the mixture before rolling. This ensures all your treats are uniform.
- Cake Choice Matters: Both store-bought and homemade cakes work perfectly. For store-bought, a simple box cake mix prepared as directed is fine. For homemade, any sturdy cake (like vanilla, chocolate, red velvet) will do. Avoid extremely delicate or crumbly cakes.
- Frosting Flexibility: Similarly, you can use either store-bought canned frosting or homemade buttercream. Make sure the frosting isn’t too runny; a classic American buttercream or cream cheese frosting works best.
- Don’t Skip the Chilling Steps: Chilling is non-negotiable! Freezing the formed cake balls for at least 15-20 minutes before dipping ensures they firm up completely. This prevents them from falling off the stick or crumbling when submerged in warm melted chocolate. A quick chill after decorating also helps the chocolate coating set quickly and beautifully.
- Smooth Dipping Techniques: When dipping, ensure your melted chocolate is not too hot (it can crack the cake pops) and not too thick (it will be clumpy). If it’s too thick, add a tiny bit of coconut oil or vegetable shortening (not water!). Dip quickly and smoothly, then gently tap off excess chocolate by holding the stick and tapping it against the side of the bowl.
- Drying and Display: To maintain that beautiful round shape while the chocolate sets, gently push the chocolate-dipped pops into a block of styrofoam. Alternatively, you can use a cardboard box with small holes poked into it, or a dedicated cake pop stand.
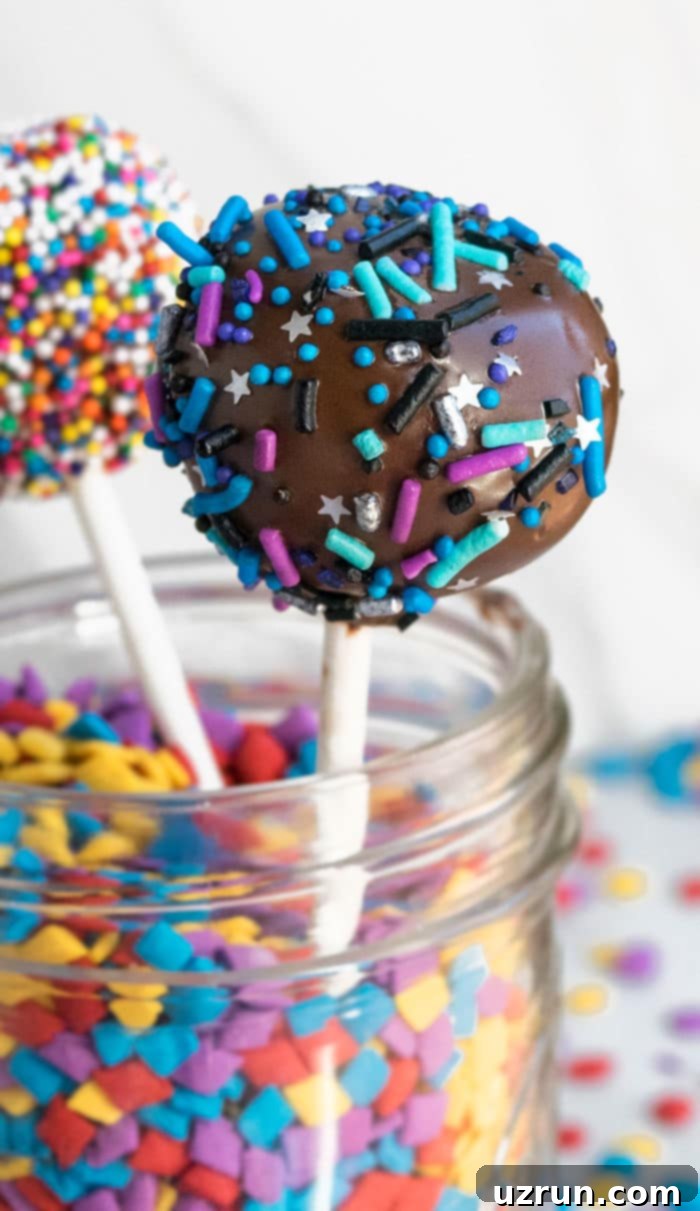
Exciting Cake Pop & Cake Ball Flavor and Decoration Variations
One of the most delightful aspects of making cake pops and cake balls is the endless array of customization options. Get creative with different flavors, colors, and decorations to suit any theme or occasion:
- Oreo Cake Pops (No Bake!): For a quick and easy variation, skip the cake entirely! Simply crumble Oreo cookies (or any sandwich cookies) finely, then mix with cream cheese frosting until moldable. Roll into balls, chill, and dip in melted chocolate. These are always a crowd-pleaser!
- Red Velvet Pops: Take these elegant Red Velvet Truffles to the next level by inserting a stick before dipping them in white or dark melted chocolate. The classic combination of red velvet cake and cream cheese frosting is irresistible.
- Vanilla and Chocolate Cake Pops: These are arguably the two most popular and versatile flavors. Use either a chocolate cake mix (or leftover chocolate cake) with chocolate frosting, or a yellow/vanilla cake mix with vanilla buttercream. You can also mix and match, like vanilla cake with chocolate frosting, or vice-versa!
- Holiday Pops: Embrace seasonal cheer by decorating your cake pops with themed sprinkles, candies, and food coloring. Think orange and black for Halloween, red and green for Christmas, pastels for Easter, or autumnal colors for Thanksgiving. These make fantastic edible gifts!
- Unicorn or Birthday Pops: Achieve a magical “unicorn” or festive birthday look with an explosion of bright, colorful sprinkles. Use white or pastel-colored chocolate for dipping, then roll generously in rainbow or iridescent sprinkles. Edible glitter can add an extra touch of sparkle.
- Wedding Cake Pops: For a touch of elegance, use white or almond-flavored cake and vanilla buttercream. Dip them in white chocolate and decorate with sophisticated edible pearls, white nonpareils, or delicate silver/gold sprinkles. These make stunning wedding favors or an exquisite addition to a dessert bar.
- Fruit-Flavored Pops: Incorporate fruit purees or extracts into your cake and frosting mixture, or use fruit-flavored cakes. Think lemon, strawberry, or raspberry cake pops dipped in complementary white chocolate.
- Nutty Cake Pops: Add finely chopped nuts (pecans, walnuts, almonds) to your cake mix before rolling, or sprinkle them on the wet chocolate coating for added texture and flavor.
Key Supplies and Ingredients for Your Cake Pop Journey
Gathering the right tools and ingredients will make your cake pop and cake ball creation process smooth and enjoyable:
- Cake: The foundation of your treat! Any flavor of cake works, whether it’s freshly baked, a box mix prepared as directed, or simply those leftover cake scraps from another baking project. The slightly drier texture of a day-old cake can sometimes be even better for crumbling.
- Frosting: This binds your cake crumbs together. Again, any flavor will do. Homemade buttercream offers superior taste and consistency, but a good quality store-bought frosting is perfectly acceptable for convenience. Remember the “less is more” rule to avoid overly sticky mixture.
- Melting Chocolate/Candy Melts: Essential for dipping! White, milk, or dark chocolate can be used. Candy melts (often called “wafers”) come in various colors and are designed to melt smoothly and set quickly, making them ideal for cake pops. You’ll need about 2 cups for a standard batch.
- Cake Pop Sticks: These are what transform cake balls into pops! Standard lollipop sticks work perfectly, as do sturdy paper straws or even popsicle sticks for a rustic look. You can find them readily online (Amazon) or at craft stores like Michaels and Hobby Lobby, and sometimes even at large supermarkets like Walmart.
- Decorations: This is where the fun begins! Sprinkles (jimmies, nonpareils, sanding sugar), shredded coconut, finely chopped nuts, edible glitter, mini chocolate chips, or even a contrasting chocolate drizzle can all be used to personalize your treats.
- Cake Pop Maker, Molds, and Rollers (Optional): While some bakers love these gadgets for creating perfectly uniform or uniquely shaped pops, they are by no means essential. I personally prefer to use my hands for rolling, as it gives me better control over the texture and shape. However, if you’re looking for heart-shaped, star-shaped, or other novelty cake pops, molds can be a great option. Rollers help achieve uniform spheres.
- Cake Pop Stand or Holder (Optional but Recommended): Once dipped, your cake pops need a place to dry without touching anything, which would ruin their perfect coating. A block of styrofoam is a cost-effective and highly functional solution – simply poke holes in it. For a more decorative presentation, you can cover the styrofoam with wrapping paper or ribbons. Dedicated cake pop stands are also available for purchase.
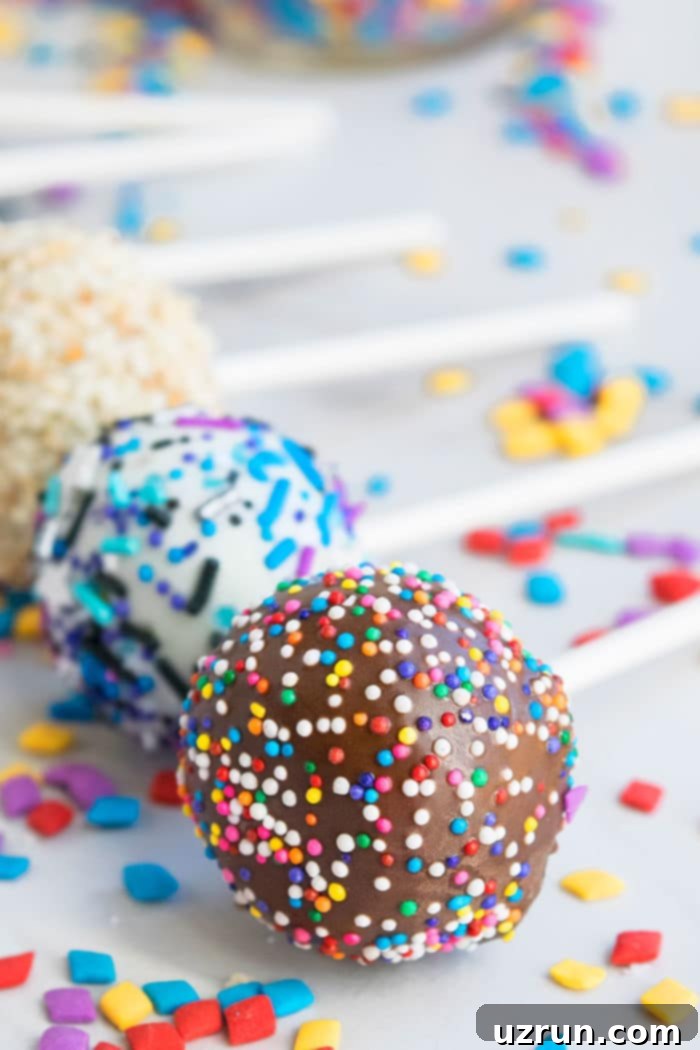
More Fun Desserts on Sticks You’ll Love
- St. Patrick’s Day Leprechaun Cake Pops
- Marshmallow Pops
- Homemade Chocolate Caramel Apples
Recipe
Homemade Cake Pops Recipe
Abeer Rizvi
Pin Recipe
Want to Save This Recipe?
Enter your email & I’ll send it to your inbox. Plus, get great new recipes from me every week!
By submitting this form, you consent to receive emails from CakeWhiz
Ingredients
- 1 box Cake mix Baked according to box instructions into a 9×13 cake
- ½- ¾ cup Buttercream frosting
- 2 cups Chocolate Melted, White or Semisweet
- Decoration Sprinkles, Shredded coconut, Chopped nuts, Sesame seeds e.t.c.
Instructions
-
Bake your chosen cake according to box instructions or your preferred recipe, and ensure it’s completely cooled. This recipe is also perfect for using up any leftover cake scraps – feel free to mix different compatible flavors!
-
In a large, deep mixing bowl, crumble the cooled cake into fine, even crumbs. You can use your hands, a potato masher, a fork, or a stand mixer on low speed for this step.
-
Gradually add buttercream frosting, about 2 tablespoons at a time, mixing thoroughly after each addition. The exact amount will vary based on your cake’s moisture. The goal is a moist, slightly crumbly mixture that can be easily rolled into firm balls, similar to play-dough.
-
Use a small ice cream scooper or a spoon to portion out small, uniform amounts of the mixture, then roll them into tight, smooth balls.
-
Place these formed cake balls on a cookie tray lined with wax paper or parchment paper.
-
If making cake pops, dip one end of each cake pop stick into melted chocolate, then immediately insert it halfway into a cake ball. This helps secure the pop to the stick.
-
Freeze the tray for approximately 20 minutes until the cake balls (and sticks, if applicable) become very firm. This is a crucial step for successful dipping.
-
Remove cake balls from the freezer. Dip each cake pop (or use a fork for cake balls) into the melted chocolate, ensuring an even coating. Swirl gently and tap the stick or fork against the edge of the bowl to let any excess chocolate drip off.
-
Immediately after dipping, while the chocolate is still wet, sprinkle with your desired decorations (sprinkles, chopped nuts, etc.). Work quickly as the chocolate will set fast on the chilled cake balls.
-
For cake pops, gently push the decorated pop into a block of styrofoam or a cake pop stand. For cake balls, place them back on the wax paper-lined tray. Freeze for another 5-10 minutes (or refrigerate) until the chocolate coating is completely set. Enjoy your delightful homemade treats!
Notes
- For detailed explanations and additional tips, please refer to the “Essential Tips for Perfect Cake Pops & Cake Balls” section above.
- Store leftover cake pops or cake balls in a sealed, airtight container in the fridge for up to 2-3 days.
- Undecorated cake balls can be frozen for up to one month in an airtight container. Thaw in the refrigerator before dipping and decorating.
Nutrition
An automated tool is used to calculate the nutritional information. As such, I cannot guarantee the accuracy of the nutritional information provided for any recipe on this site.
Whether you’re a seasoned baker or a beginner, mastering homemade cake pops and cake balls is a rewarding experience. With these detailed steps, expert tips, and creative variations, you’re well-equipped to whip up delightful treats that will impress everyone. So grab your cake scraps, a little frosting, and get ready to roll!
Until next time, tata my lovelies!
