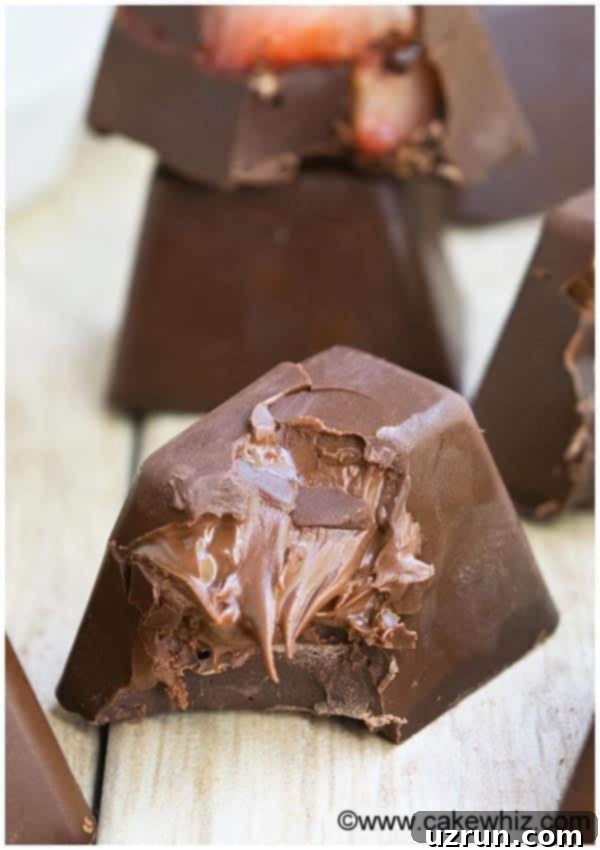
Easy Homemade Gourmet Chocolate: Delightful Ice Cube Tray Candies for Gifts & Treats
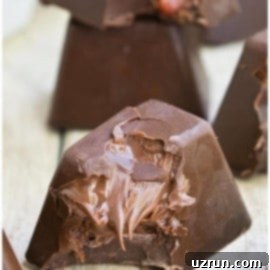
Imagine crafting exquisite gourmet chocolates right in your own kitchen, without needing specialized equipment or advanced skills. This recipe for quick and easy homemade gourmet chocolate, affectionately known as “ice cube candy,” is a delightful way to create impressive treats with minimal effort. Whether you’re looking for a charming homemade gift, a sweet indulgence for yourself, or a fun project with the kids, these fancy chocolates are incredibly versatile and guaranteed to bring smiles.
The beauty of these candies lies in their simplicity and the endless possibilities for customization. While many might call them “chocolate ice cubes” due to their humble origin, the results are far from ordinary. This method, passed down from my dear Mom, uses standard ice cube trays – a testament to her ingenuity in a time when fancy molds weren’t readily available. This not only makes them incredibly accessible but also infuses them with a touch of nostalgia, bringing back sweet childhood memories. Each bite of these homemade gourmet chocolates is a delicious surprise, offering a perfect blend of rich chocolate and your chosen filling.
Beyond these delightful ice cube candies, exploring other unique chocolate treats can elevate your dessert game. If you love working with chocolate, consider trying How to Make Chocolate Leaves {With Mint} for an elegant garnish, or indulge in the rustic charm of Crockpot Candy {Chocolate Peanut Clusters}. These recipes showcase just how diverse and enjoyable homemade chocolate can be, making them perfect complements to your ice cube candy adventure.
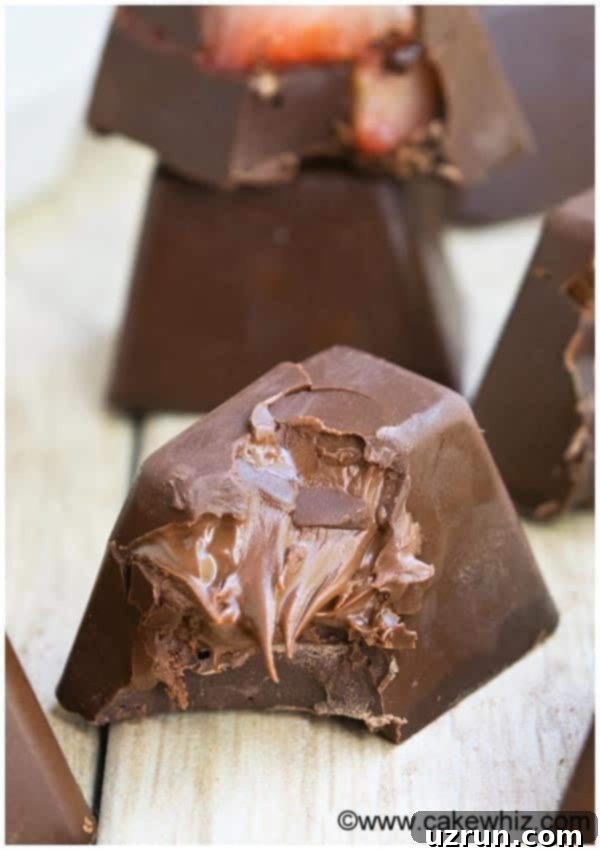
Table of Contents
- How to Make Homemade Gourmet Chocolate in an Ice Cube Tray
- Chocolate Candy Filling Ideas
- Creative Variations for Fancy Chocolate
- Essential Tips and Techniques for Ice Cube Candy
- Storage Solutions
- More Easy Candy Recipes
How to Make Homemade Gourmet Chocolate in an Ice Cube Tray
Crafting these delectable homemade gourmet chocolates is surprisingly straightforward. Follow these simple steps to create your own batch of fancy chocolate candies:
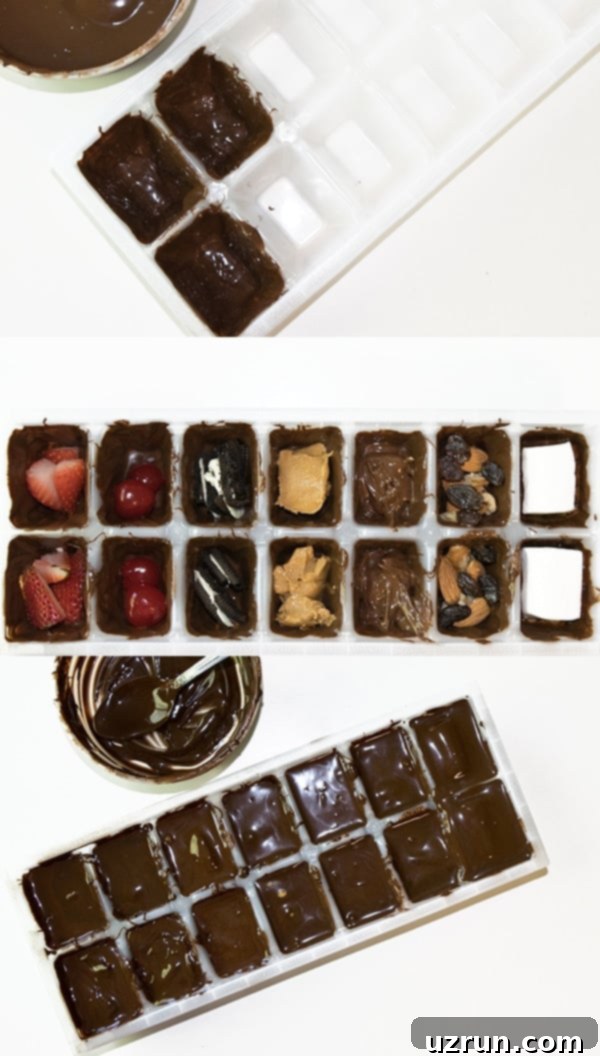
- Melt Chocolate: Begin by melting your preferred chocolate (dark, milk, semi-sweet, or white) until it’s smooth and luscious. You can do this easily in a microwave or a double boiler. Once melted, use a clean paintbrush or the back of a spoon to apply a generous, thick layer of chocolate into each cavity of your ice cube tray. This initial layer forms the sturdy outer shell of your candy.
- Freeze Tray: Place the ice cube tray with the chocolate coating into the freezer for about 10 minutes. This quick chill time allows the first chocolate layer to set firmly, creating a perfect base for your fillings.
- Fill with Add-ins: Once the chocolate shell is solid, remove the tray from the freezer. Now comes the fun part – filling each chocolate cavity with your desired add-ins! Spoon in your chosen fillings, leaving a small gap at the top for the final chocolate layer.
- Cover Add-ins with Chocolate: Gently spoon more melted chocolate over the fillings in each cavity. Spread it smoothly with a spoon or spatula, ensuring that the filling is completely covered and the top surface is even. This creates a neat, professional finish for your homemade gourmet chocolates.
- Freeze Again: Return the filled tray to the freezer for an additional 15-20 minutes, or until the chocolate is completely set and firm to the touch. This ensures your ice cube candies hold their shape perfectly.
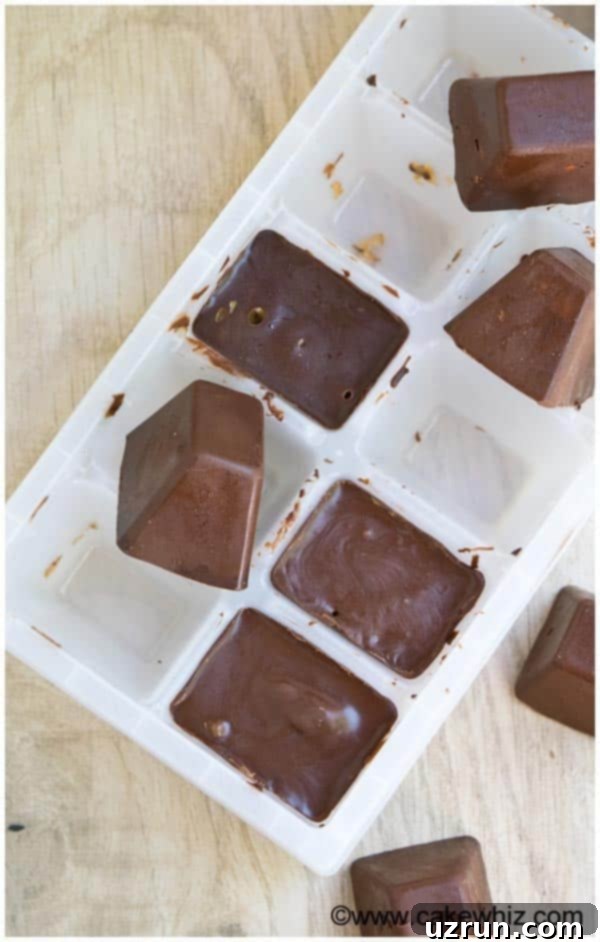
- Remove Chocolates: Once fully set, carefully remove the chocolates from the tray. Gently flip the ice cube tray onto a baking sheet lined with wax paper and tap it a bit. The chocolates should pop out easily. Enjoy your beautiful, gourmet creations!
Chocolate Candy Filling Ideas
The beauty of these ice cube candies lies in their adaptability. You can fill them with virtually anything your heart desires, transforming them into truly personalized gourmet chocolates. Here are some fantastic chocolate candy filling ideas to inspire your culinary creativity:
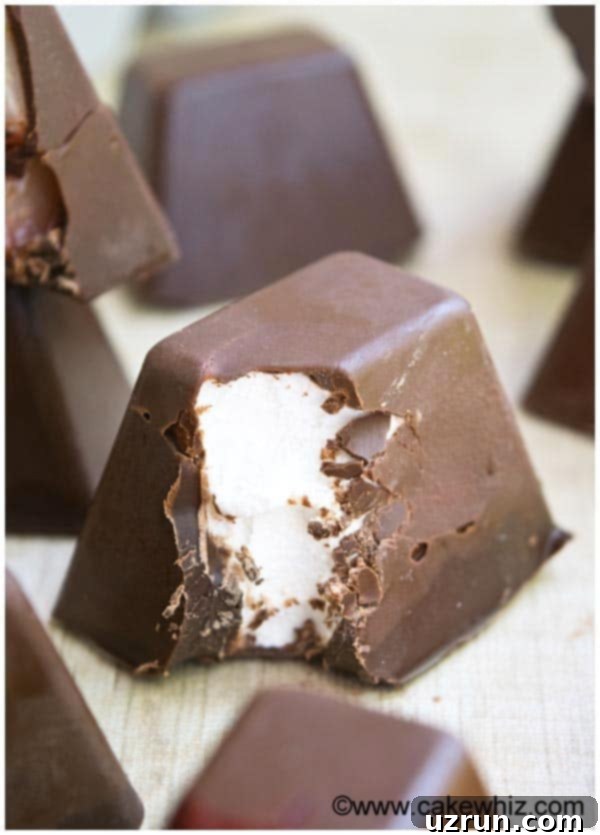
- Marshmallows: Whether you opt for gooey marshmallow creme for a soft center or mini marshmallows for a chewy texture, this classic filling is always a crowd-pleaser. It adds a wonderfully light and sweet contrast to the rich chocolate.
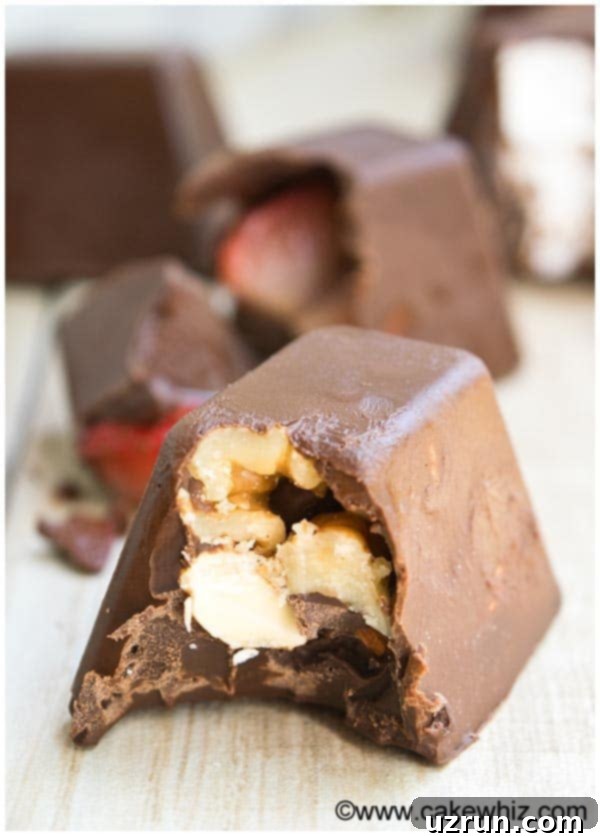
- Chopped Nuts: For a delightful crunch and nutty flavor, incorporate finely chopped walnuts, pecans, peanuts, almonds, pistachios, or cashews. Nuts pair beautifully with chocolate and add a satisfying texture.
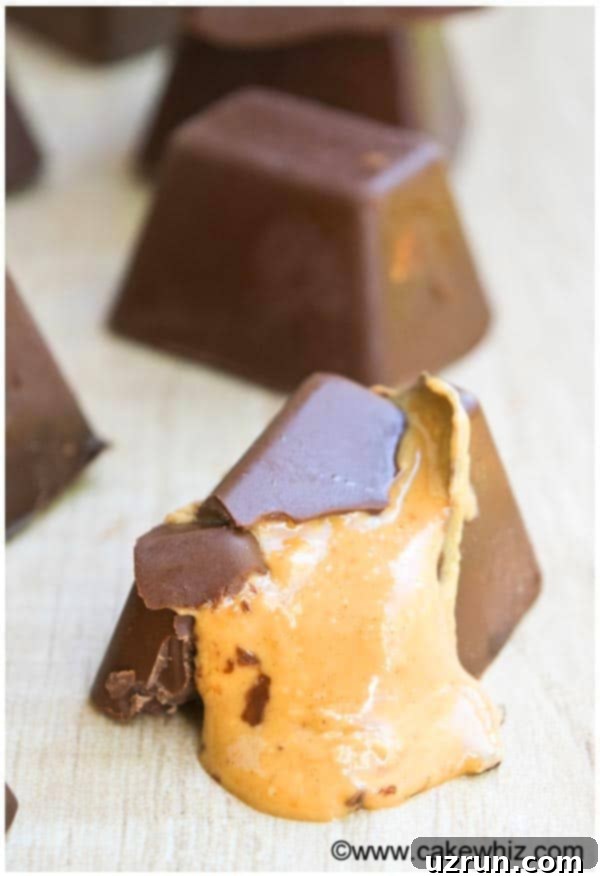
- Nut Butters: Indulge in creamy centers with spreads like Nutella (a hazelnut-chocolate dream), classic peanut butter, almond butter, cashew butter, or even sunbutter for a nut-free option. These offer a rich, smooth, and intensely flavorful experience.
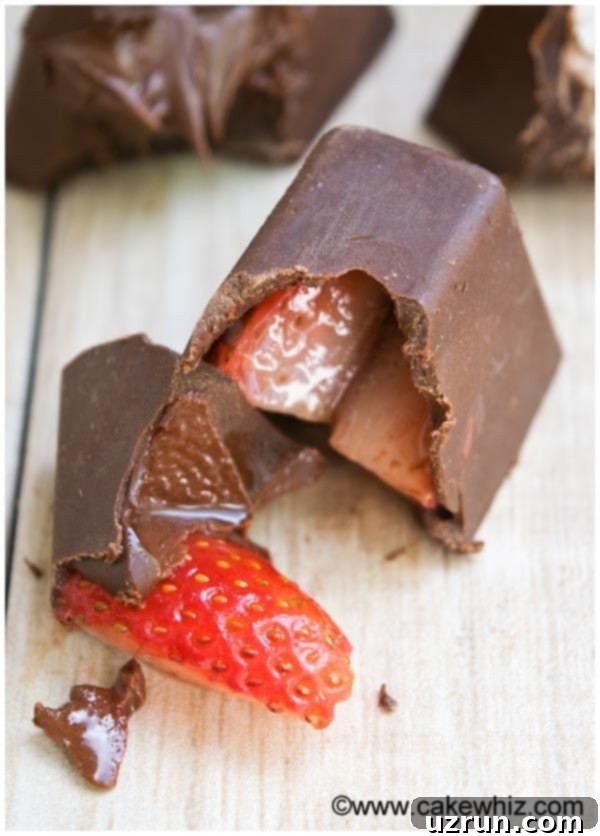
- Fresh Fruit: A burst of freshness can elevate your chocolate. Try sliced fresh strawberries or vibrant maraschino cherries for a juicy, sweet-tart contrast. Remember to pat fruit thoroughly dry to prevent ice crystal formation.
- Ganache: For an extra layer of chocolatey decadence, fill your candies with a rich ganache. This Easy Chocolate Ganache {2 Ingredients} recipe is perfect for a smooth, melt-in-your-mouth center.
- Crushed Cookies: Transform your ice cube candies into miniature desserts by adding crushed cookies. Oreos, Biscoff, graham crackers, or chocolate chip cookies provide a familiar, comforting crunch and flavor.
- Dried Fruit: Sweet and chewy, dried cranberries, blueberries, cherries, or apricots offer concentrated fruit flavor and a pleasant texture. They add a touch of sophistication and natural sweetness.
- Other Candies: Take your chocolate candies to the next level by filling them with smaller candies. Think mini truffles for a double chocolate experience or colorful mini M&Ms for a playful surprise.
- Edible Cookie Dough: Who can resist cookie dough? A small scoop of edible cookie dough makes for an irresistible, safe-to-eat center that’s sure to delight.
- Frostings: Creamy frostings create a wonderfully soft and sweet interior. Experiment with Chocolate Buttercream Frosting, classic American Buttercream, or tangy Cream Cheese Frosting for varied flavor profiles.
- Sauces: Liquid or semi-liquid sauces can create an exciting surprise when you bite into the chocolate. Try a rich Homemade Caramel Sauce or a decadent Hot Fudge Sauce for an ooey-gooey center.
- Crushed Pretzels: For a delightful sweet and salty combination, crushed pretzels add a fantastic savory crunch that perfectly balances the chocolate’s sweetness.
- Jams/Pie Fillings: Fruity jams and pie fillings offer a vibrant, flavorful center. Homemade versions like Strawberry Pie Filling, Cherry Pie Filling, Blueberry Pie Filling, Raspberry Pie Filling, or even a simple Homemade Strawberry Jam can create wonderful, fruity centers.
Creative Variations for Fancy Chocolate
Beyond the endless filling combinations, you can further customize your homemade gourmet chocolates with various flavorings and toppings to truly make them your own. Here are some popular variations:
- Use a Fancy Chocolate Mold: While ice cube trays are wonderfully accessible and nostalgic, don’t hesitate to upgrade to a dedicated chocolate mold for more intricate and professional shapes. The same step-by-step process applies, simply swap the ice cube tray for your chosen mold.
- Add Sea Salt: For a sophisticated salty-sweet contrast, sprinkle a pinch of flaky sea salt over the top layer of chocolate just before it fully sets. This enhances the chocolate’s flavor and adds a gourmet touch.
- Infuse with Espresso Powder: Mix a small amount of finely ground espresso powder into your melted chocolate. This deepens the chocolate flavor and adds a subtle coffee note, perfect for coffee lovers.
- Incorporate Spices: Experiment with warm spices to add an exotic twist. A dash of ground ginger, cardamom, cinnamon, or even allspice mixed into the melted chocolate can create unique and aromatic flavor profiles. Start with a small amount and taste as you go.
- Add Extracts: Flavor extracts are an easy way to introduce new dimensions. Vanilla extract is a given, but consider almond, maple, peppermint, or even bourbon extract for a more adult-friendly treat. Add them to the melted chocolate before pouring.
Essential Tips and Techniques for Ice Cube Candy
Achieving perfect homemade gourmet chocolate candies is easy when you keep a few key tips in mind. These techniques will help ensure your ice cube candy comes out beautifully every time:
- Wash and Pat Fruit Dry: If you’re using fresh fruit fillings like strawberries or cherries, it’s crucial to wash them thoroughly and then pat them completely dry with a paper towel. Any residual water can lead to moisture collection and the formation of ice crystals within your chocolates when frozen, potentially affecting texture and shelf life.
- Your Chocolate Coating Must Be Thick: This is a critical step! When painting the first layer of chocolate into the ice cube trays, ensure it’s a thick, even coating. If the chocolate layer is too thin, it becomes fragile. This makes the candies prone to sticking to the tray and cracking or breaking apart when you try to remove them. A robust chocolate shell is essential for easy release and a polished final product.
- How to Melt Chocolate: The best way to melt chocolate for these candies is in the microwave. Place your chocolate chips or chopped chocolate in a microwave-safe bowl. Heat in 30-second increments, stirring well after each interval. Continue until the chocolate is smooth and fully melted, being careful not to overheat it, which can cause it to seize. Alternatively, you can use a double boiler for a more controlled melting process.
- How to Remove Candies from Ice Cube Trays: Once your chocolates are fully set in the freezer, gently flip the ice cube tray upside down onto a baking tray lined with wax paper. Lightly tap the back of the tray a few times. The cold chocolate will contract slightly, allowing the candies to pop out cleanly and easily. Avoid forcing them out, as this can cause breakage.
Storage Solutions
Proper storage is key to keeping your homemade gourmet chocolates fresh and delicious. Consider the type of filling when deciding on the best storage method:
- Refrigerate: For optimal freshness and especially for chocolates with perishable fillings (like fresh fruit or some dairy-based frostings), store them in an airtight container in the refrigerator. Layer the chocolates with sheets of wax paper to prevent them from sticking together. They will keep well for up to 1 week.
- Freeze: Freezing is generally not recommended for these chocolates, particularly if they have a thinner chocolate coating or delicate fillings. The chocolate can sometimes crack or develop a “bloom” (a white, powdery appearance) upon thawing, affecting both appearance and texture. If you must freeze, ensure they are in an airtight container and thaw slowly in the refrigerator.
- Room Temperature: The suitability of room temperature storage largely depends on your chosen fillings.
- Perishable Fillings: Chocolates containing fresh fruits, jams, sauces, or dairy-based frostings should not be stored at room temperature for more than 2-3 hours, as these ingredients can spoil quickly.
- Non-Perishable Fillings: For chocolates filled with non-perishable items such as marshmallows, nuts, Nutella, peanut butter, or crushed cookies, you can store them in a covered box or container, separated by wax paper, for up to 3 days. Ensure they are kept in a cool, dry place away from direct sunlight to prevent melting.
More Easy Candy Recipes
If you’ve enjoyed making these homemade gourmet chocolates, you’ll love exploring other simple and delicious candy recipes. Here are a few more easy candy ideas to satisfy your sweet tooth and expand your confectionary skills:
- Chocolate Bark – A super quick and customizable treat.
- Easy Chocolate Caramel (Salted) – A perfect blend of sweet and savory.
- Easy Caramel Fudge (2 Ingredients) – Incredibly simple and rich.
- Condensed Milk Fudge (Cranberry and Pistachio) – A festive and flavorful fudge.
- Maple Fudge (With Maple Syrup) – For a taste of autumnal sweetness.
- Spicy Chocolate Fudge Footballs – A unique kick for chocolate lovers.
- Chocolate Covered Potato Chips – The ultimate sweet and salty snack.
- Chocolate Truffles – Elegant, rich, and surprisingly easy.
- Coffee Fudge – For those who love the combination of chocolate and coffee.
Creating homemade gourmet chocolates is a rewarding experience that offers both delicious results and a touch of personal artistry. With this easy ice cube candy recipe, you’re well on your way to crafting stunning, personalized treats that are perfect for any occasion. Get creative with your fillings, enjoy the process, and delight in every bite!
Recipe
Homemade Gourmet Chocolate (Ice Cube Candy)
Abeer Rizvi
Pin Recipe
Want to Save This Recipe?
Enter your email & I’ll send it to your inbox. Plus, get great new recipes from me every week!
By submitting this form, you consent to receive emails from CakeWhiz
Ingredients
- 2 cups Melted chocolate Semisweet, dark, milk or even white
- 2 cups Fillings Such as nuts, Nutella, peanut butter, jams, preserves, fresh berries, marshmallows, marshmallow creme or fluff, caramel sauce, crushed oreos, thick ganache
Instructions
-
Melt chocolate in the microwave in 30-second increments until smooth. Stir thoroughly between each interval to prevent burning.
-
Using a clean paintbrush or the back of a spoon, paint a generous, thick coating of melted chocolate into each cavity of an ice cube tray. Ensure the sides are well covered.
-
Freeze the tray for 10 minutes to allow the initial chocolate shell to set firmly.
-
Remove the tray from the freezer and carefully fill each chocolate-lined cavity with your chosen add-ins, leaving a small space at the top.
-
Pour or spoon more melted chocolate on top of the add-ins, spreading it smoothly to cover the filling completely and create an even top surface.
-
Return the tray to the freezer for another 15-20 minutes, or until all the chocolate is fully set and hard.
-
To release the candies, gently flip the tray onto a baking sheet lined with wax paper and tap it a few times until the chocolate cubes fall out. Enjoy your delicious homemade gourmet chocolates!
Notes
- Refer to the “Tips and Techniques” section above for detailed advice on melting chocolate, preparing fillings, and removing candies from trays for best results.
- Leftovers with non-perishable fillings can be stored in a sealed container at room temperature for up to 3 days. For any chocolates containing perishable fillings like fresh fruit or dairy, store them in the fridge for up to 1 week.
Nutrition
An automated tool is used to calculate the nutritional information. As such, I cannot guarantee the accuracy of the nutritional information provided for any recipe on this site.
