Mastering the Art of Marble Fondant: An Easy Step-by-Step Guide for Stunning Cakes
Discover the secret to transforming ordinary cakes into extraordinary masterpieces with the simple yet elegant technique of marbling fondant. This comprehensive guide will walk you through everything you need to know, from selecting your colors to achieving that perfect, fluid marble pattern. Whether you’re a seasoned baker looking to expand your repertoire or a beginner eager to impress, marbling fondant is an incredibly rewarding skill that adds a touch of sophistication and artistry to any dessert. Prepare to create breathtaking marbled designs that are sure to impress everyone!
Marbling fondant is not just a trend; it’s a timeless cake decorating technique that allows for immense creativity. The beauty lies in its organic, unique patterns – no two marbled cakes will ever be exactly alike, giving each creation a distinct personality. It’s an extremely easy way to elevate your cakes, making them look professionally decorated without requiring complex artistic skills.
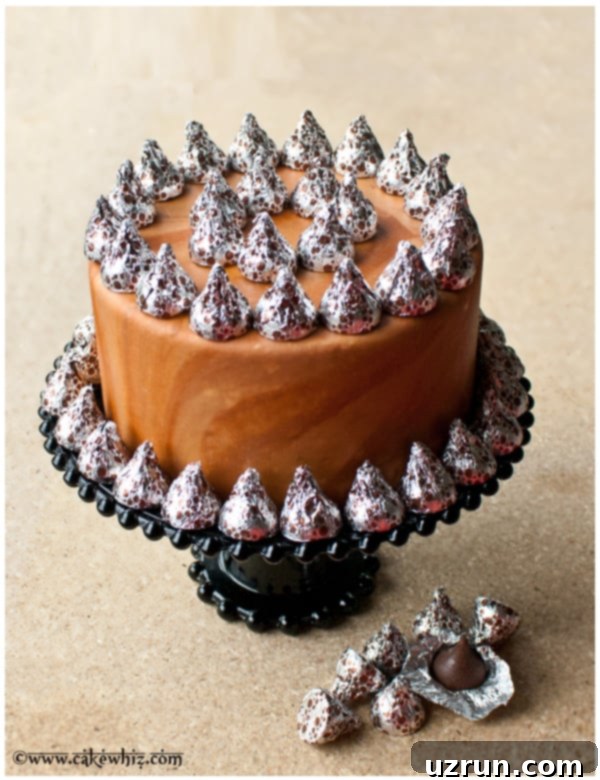
The versatility of marbled fondant is truly remarkable. You can achieve a vast array of looks, from subtle and elegant to bold and dramatic, simply by changing your color palette. For instance, the earthy tones of the cake featured in this tutorial are absolutely perfect for a rustic Thanksgiving celebration or a cozy fall gathering, adding warmth and natural beauty to your dessert table.

Exploring Versatile Marbled Fondant Color Combinations
One of the most exciting aspects of marbling fondant is the endless possibilities for color combinations. Here are some popular variations and ideas to inspire your next cake project:
- Pink Marble Fondant Cake: A classic and charming choice, perfect for baby showers, romantic celebrations, or anyone who loves a touch of delicate elegance. To create this, use various shades of pink fondant (e.g., light pink, dusty rose, fuchsia) along with white. Roughly mix them, allowing the distinct streaks to remain visible as you roll. The result is a soft, dreamy swirl that’s undeniably captivating.
- Black and White Marbled Fondant: This combination exudes sophistication and timeless style. Ideal for formal events, modern minimalist designs, or chic monochrome parties. Simply combine black and white fondant, gently blending them to reveal striking contrasts and dynamic patterns. The stark difference between the colors creates a dramatic and elegant visual that truly stands out.
- Rainbow Marble Fondant / Tie-Dyed Fondant: Unleash your playful and vibrant side with a rainbow or tie-dyed marble effect. This fun technique is fantastic for children’s birthdays, whimsical gatherings, or any occasion that calls for a burst of joyous color. Use fondant in all the rainbow hues – red, orange, yellow, green, blue, and purple – mixing them together roughly but carefully to ensure streaks of all colors are visible without turning into a muddy brown.
- Gold Marbled Fondant: Elevate your cake to luxurious heights with gold marbled fondant. Start with dark and light shades of brown fondant, or even cream and black, mixing them gently to create a natural stone-like pattern. Once rolled out and applied to the cake, use a fine paintbrush to delicately trace over some of the natural streaks with edible gold paint. This adds a truly opulent and glamorous finish, perfect for anniversaries, high-end celebrations, or holiday cakes.
- Ocean Wave Marble Fondant: For a serene and captivating look, combine various shades of blue and white fondant. Gently swirl them together to mimic the natural movement of ocean waves. This technique is wonderful for beach-themed parties, summer celebrations, or anyone who loves the tranquility of the sea.
- Galaxy Marble Fondant: For an otherworldly effect, blend dark blue, purple, and black fondant with touches of white or silver. Once rolled out, you can even add edible glitter or metallic dust to create shimmering stars and nebulae. This is perfect for space-themed parties or a truly unique celebration.

How to Marble Fondant to Look Like Water or Ocean Waves?
Creating a beautiful water or ocean wave effect with marbled fondant is surprisingly simple and incredibly stunning. The key is to use a thoughtful selection of blue and white hues. We recommend using three shades of fondant for the most dynamic effect: a dark blue, a light blue, and white. Begin by preparing equal quantities of these three colors.
Gently blend them together, similar to the general marbling technique, but be mindful not to overmix. The goal is to have distinct streaks of all three shades still visible. As you roll out the fondant, the blues and whites will swirl into organic patterns that beautifully mimic the movement and depth of ocean waves. Once spread over your frosted cake, this will create a captivating scene, perfect for nautical themes, summer parties, or any event where you want to evoke the serenity of the sea.
How to Make Marble Effect Icing?
If you prefer the texture and taste of icing over fondant, you can still achieve a stunning marble effect! This technique works wonderfully with buttercream or royal icing. Instead of fondant, you’ll use a light and dark shade of the same color of icing, or two complementary colors.
For example, to create a green marble effect, you would prepare dark green and light green colored icings. The process involves applying dollops or random strokes of both colors onto the cake. Once the colors are on the cake, use an offset spatula or a palette knife to gently smooth and swirl the icings together. Work quickly and avoid over-smoothing, as the aim is to blend them just enough so that distinct streaks of both colors are visible, creating that beautiful, swirled marble pattern. This method yields a soft, textured marble look that is both delicious and visually appealing.
How to Make Marbled Fondant Cake / Marbled Fondant Icing: A Step-by-Step Tutorial
Ready to get started? Follow this simple, step-by-step marbled fondant tutorial with accompanying pictures below to achieve a gorgeous marble effect on your next cake.
Supplies You’ll Need:
Before you begin, gather these essential supplies:
- Light Brown Marshmallow Fondant: We recommend homemade marshmallow fondant for its superior taste and pliability, though store-bought works too. This will be one of your base colors.
- Dark Brown Marshmallow Fondant: The contrasting color that will create the beautiful marbling effect with the light brown. Ensure both fondants are at room temperature and pliable.
- Rolling Pin: A non-stick rolling pin is ideal to prevent the fondant from sticking. If using a wooden or traditional rolling pin, ensure you have plenty of cornstarch or confectioners’ sugar for dusting.
- Cornstarch or Confectioners’ Sugar: For lightly dusting your work surface and rolling pin to prevent sticking.
- Sharp Knife or Pizza Cutter: For trimming excess fondant from the cake.
- Fondant Smoother (Optional but Recommended): For achieving a perfectly smooth finish on your cake.
- Frosted Cake: Your canvas! Ensure your cake is already covered with a smooth, even layer of buttercream, ganache, or another base frosting, as this helps the fondant adhere seamlessly.
Important Note on Color Selection:
For this specific tutorial, we are using light and dark shades of brown fondant to create a rich, earthy marbled effect. However, the beauty of this technique is its adaptability! If you’re aiming for a pink marbled fondant, for instance, you would simply substitute the brown fondants with light and dark shades of pink fondant. The same principles apply whether you’re working with blues, greens, grays, or any combination of colors you desire. The key is to choose colors that contrast or complement each other effectively to make the marble streaks stand out.
Instructions:
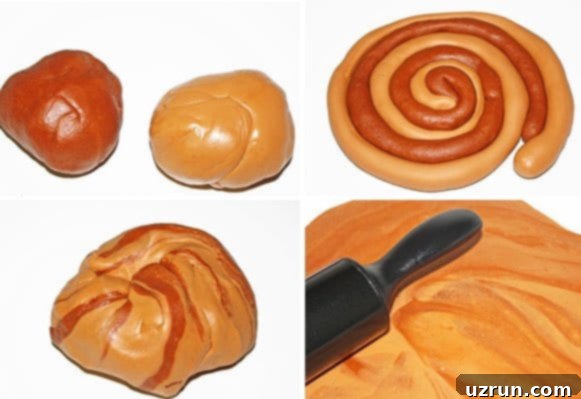
- Prepare Your Fondant Colors: Begin by ensuring both your light and dark brown fondants are at room temperature and well-kneaded until they are smooth and pliable. This makes them easier to work with and ensures a consistent texture. For a balanced marble effect, aim for roughly equal quantities of each color. If you want one color to be more dominant, you can adjust the ratios accordingly.
- Form into ‘Sausage’ Shapes: Take each separate ball of fondant and gently roll it out into a long, cylindrical “sausage” shape. The length and thickness of these ropes will depend on the size of your cake and the amount of fondant you need to cover it. Try to make them relatively even in thickness for consistent marbling.
- Create a Spiral Pattern: Carefully align the brown fondant “sausages” side-by-side. Gently twist them together to form a single, multi-colored rope. Once twisted, roll this combined rope into a tighter spiral or coil, much like you would roll a cinnamon bun. At this stage, you’ll start to see some beautiful streaks of color emerging. While some decorators might stop here and roll it out, this method often yields a more pronounced, concentric spiral pattern rather than an organic marble look.
- The Crucial Gentle Kneading Step: This is where the magic happens for an authentic marble effect! Gently gather your spiraled fondant into a loose ball. Now, knead it *very lightly* for just a few turns – typically no more than 3-5 gentle kneads. The objective is to partially blend the colors, allowing them to swirl and create stunning, natural-looking streaks and veins, but without fully mixing them into a single, uniform color. Stop as soon as you see distinct marbling appearing. Over-kneading is the most common mistake and will result in a dull, uniform color instead of a beautiful marble.
- Roll Out Your Marbled Fondant: Lightly dust your clean work surface with a small amount of cornstarch or confectioners’ sugar to prevent sticking. Place your lightly kneaded marbled fondant ball onto the dusted surface. Begin rolling it out evenly with your rolling pin, working from the center outwards. Periodically lift and rotate the fondant to ensure it doesn’t stick and to help maintain an even thickness and shape. As you roll, you’ll witness the stunning marble patterns fully emerge. Aim for a thickness of about 1/8 to 1/4 inch, depending on your preference and the size of your cake.
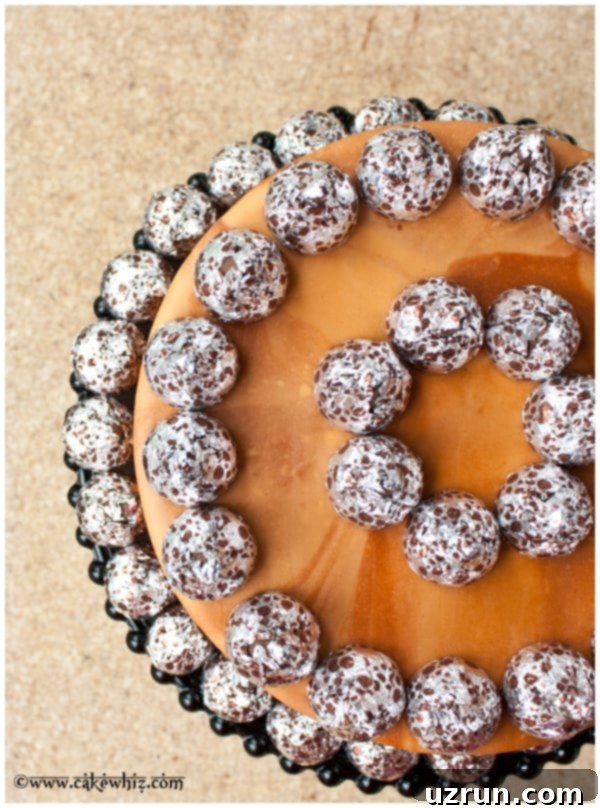
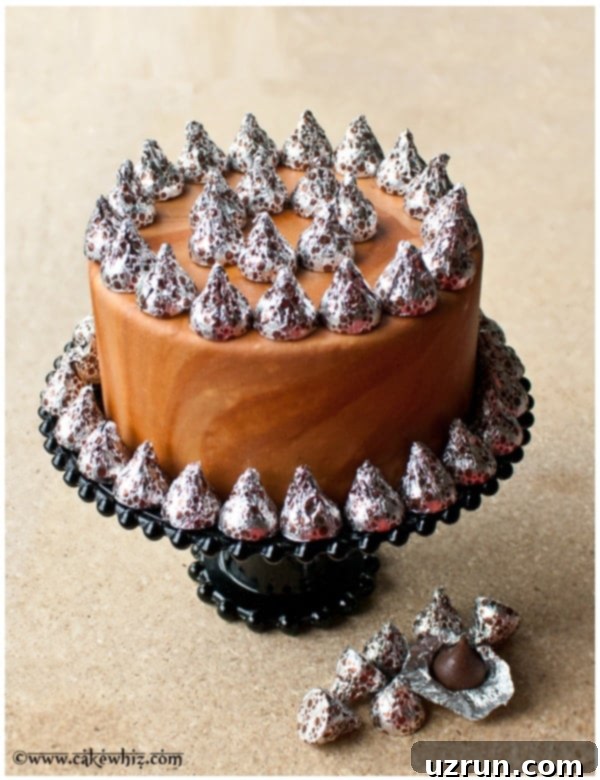
- Apply to Your Frosted Cake and Decorate: Once rolled to the desired size and thickness to cover your cake, carefully lift your marbled fondant. You can do this by gently rolling it over your rolling pin and then unrolling it over the cake, or by carefully sliding your hands underneath. Drape it smoothly over your already frosted cake. Use a fondant smoother to gently press the fondant onto the cake, working from the top downwards and outwards to remove any air bubbles or wrinkles. Trim any excess fondant from the base of the cake with a sharp knife or pizza cutter. To finish, top your beautifully marbled cake off with some delightful Hershey’s Kisses, and you’re done!

Tips for Achieving the Perfect Marble Effect
To ensure your marbled fondant turns out flawlessly every time, keep these expert tips in mind:
- Don’t Over-Mix: This is the golden rule! A little mixing goes a long way. The goal is swirls, not a uniform color.
- Contrast is Key: Choose colors that have a good contrast to make the marble effect stand out. Light and dark shades of the same color, or distinct complementary colors, work best.
- Experiment with Quantity: Varying the amounts of each color can create different effects. Use less of one color for subtle accents, or equal parts for a more balanced look.
- Work Clean and Cool: Ensure your workspace is clean and dusted, and that your fondant isn’t too warm, which can make it sticky and harder to handle.
- Practice Makes Perfect: If you’re new to this, try a small batch of fondant first to get a feel for the kneading process before tackling your whole cake.
- Even Thickness: Roll out your fondant to an even thickness to prevent tearing or uneven texture on your cake.
- Use a Fondant Smoother: This tool is invaluable for removing air bubbles and achieving a perfectly smooth, professional finish once the fondant is on the cake.
Common Mistakes to Avoid When Marbling Fondant
Even though marbling is a simple technique, there are a few common pitfalls that can hinder your results. Being aware of these will help you avoid them:
- Over-Kneading the Fondant: As mentioned, this is the biggest culprit for a dull, un-marbled cake. If you knead too much, your distinct colors will blend into a single, often unattractive, muddy shade. Stop as soon as you see clear streaks.
- Using Too Many Similar Colors: If your chosen colors are too close in shade or tone, the marbling effect won’t be as dramatic or visible. Ensure there’s enough contrast to make the swirls pop.
- Not Dusting Your Work Surface Enough: Fondant can be very sticky. If your surface or rolling pin isn’t adequately dusted, the fondant will tear or stick, ruining your beautiful marble pattern.
- Rolling the Fondant Too Thin: While you want an even thickness, rolling fondant too thin makes it fragile and prone to tearing when you try to lift and apply it to the cake.
- Ignoring Air Bubbles: Air trapped under the fondant can create unsightly bulges. Use a fondant smoother or a pin to gently release air bubbles for a flawless finish.
This Technique is Perfect for a Marbled Fondant Wedding Cake!
The elegance and customizability of marbled fondant make it an absolutely perfect choice for a wedding cake. Its sophisticated appearance can be tailored to any wedding theme, from a rustic outdoor celebration to a grand ballroom affair. Imagine a delicate white and gold marbled cake for a luxurious wedding, or soft pastels for a romantic, garden-themed event. The unique, organic patterns ensure that each wedding cake is a one-of-a-kind masterpiece, truly reflecting the individuality of the couple. Marbled fondant not only adds visual intrigue but also conveys a sense of refined artistry, making the wedding cake a memorable centerpiece.
The Ultimate Hershey’s Kisses Vanilla Cake: A Delicious Pairing
By the way, in case you were curious about the delicious cake underneath this stunning marbled fondant! This particular cake was a mouth-watering vanilla cake, generously packed with delightful pieces of Hershey’s Kisses. It was then filled and frosted with a wonderfully light and fluffy buttercream icing, before being elegantly covered in the marble brown marshmallow fondant. To top it all off, it was decorated with even more irresistible chocolate Kisses! This combination of rich chocolate, soft vanilla, and elegant presentation creates an unforgettable dessert experience that tastes as incredible as it looks. YUM!
Here is a recipe card for the most amazing cake I have ever made! You guys NEED to make this cake ASAP! It’s THAT good!

Other Cake Decorating Tutorials You Might Love:
If you’ve enjoyed this tutorial and are looking to expand your cake decorating skills further, be sure to check out these other helpful guides:
- How to Make A Naked Cake: Learn to create a beautiful, rustic cake with minimal frosting exposure.
- How to Make Homemade Cake Flour: Essential for achieving light and tender cake textures.
- How to Make Box Cake Better (Taste Homemade): Simple tips to elevate your store-bought cake mix.
- Easy Cake Decorating Ideas: A collection of simple yet impressive techniques for new decorators.
- How to Make Pinata Cake (Robin Egg Cake): Discover how to create a fun surprise-filled cake that everyone will love.
Conclusion: Your Journey to Beautifully Marbled Cakes
Marbling fondant is a truly rewarding cake decorating technique that allows for immense creativity and produces stunning, professional-looking results with minimal effort. As you’ve seen, whether you’re aiming for a subtle, sophisticated swirl or a bold, vibrant design, the core principles remain wonderfully simple. With a bit of practice and these detailed instructions, you’ll be creating magnificent marbled cakes that are as delightful to look at as they are to eat.
So grab your fondant, choose your favorite colors, and don’t be afraid to experiment! The beauty of marbling lies in its unique, organic patterns. Your guests (and your taste buds) will undoubtedly thank you for the effort. Happy decorating!
Well, that’s all for today. Until next time, tata my lovelies!
