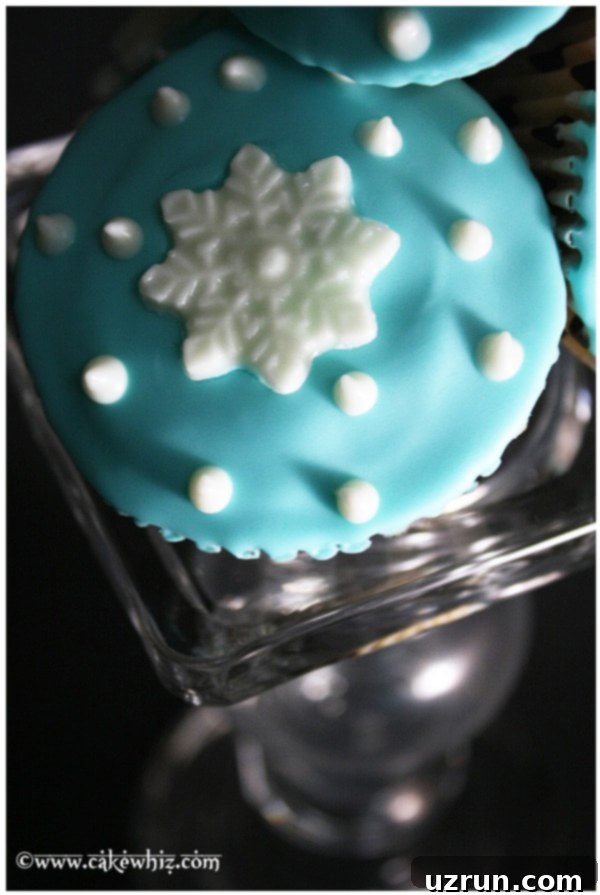
Easy Snowflake Cupcakes: Your Go-To Recipe for Magical Winter Wonderland Treats
Step into a world of frosty enchantment with these delightful snowflake cupcakes! As the winter chill embraces us, there’s no better way to celebrate the season than with a batch of charming, homemade treats. This easy recipe transforms simple cupcakes into stunning, festive masterpieces, making them perfect for holiday parties, cozy gatherings, or simply adding a touch of magic to a snowy afternoon. All you need are basic ingredients like white chocolate and a simple candy mold to create edible works of art that are sure to impress.
While the cold season lingers, it provides the perfect excuse to indulge in comforting and beautiful winter desserts. If you’re looking to expand your festive baking repertoire, be sure to explore other seasonal favorites such as our majestic Snowflake Cake and the charming Snowflake Cookies. These snowflake cupcakes are a fantastic addition to any winter-themed dessert table, offering both visual appeal and a delicious experience that everyone will love.
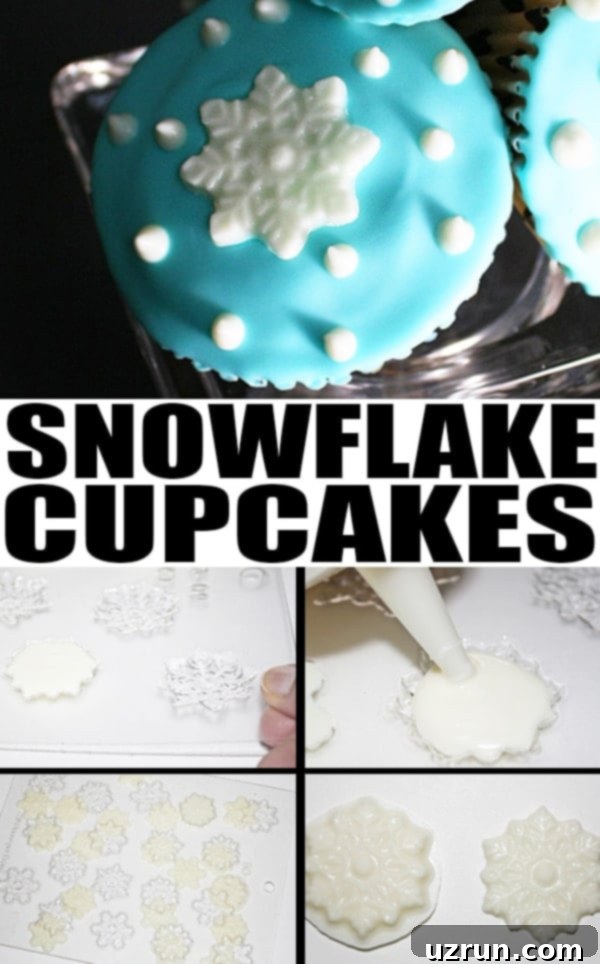
The true highlight of these cupcakes lies in their elegant chocolate snowflake decorations. These delicate accents are surprisingly simple to create using melted white chocolate and a readily available candy mold. Once hardened, these beautiful chocolate pieces can be used immediately to adorn your freshly frosted cupcakes, or they can be prepared in advance and stored, ready to add a sophisticated yet whimsical touch to various cakes and cupcakes throughout the entire winter season.
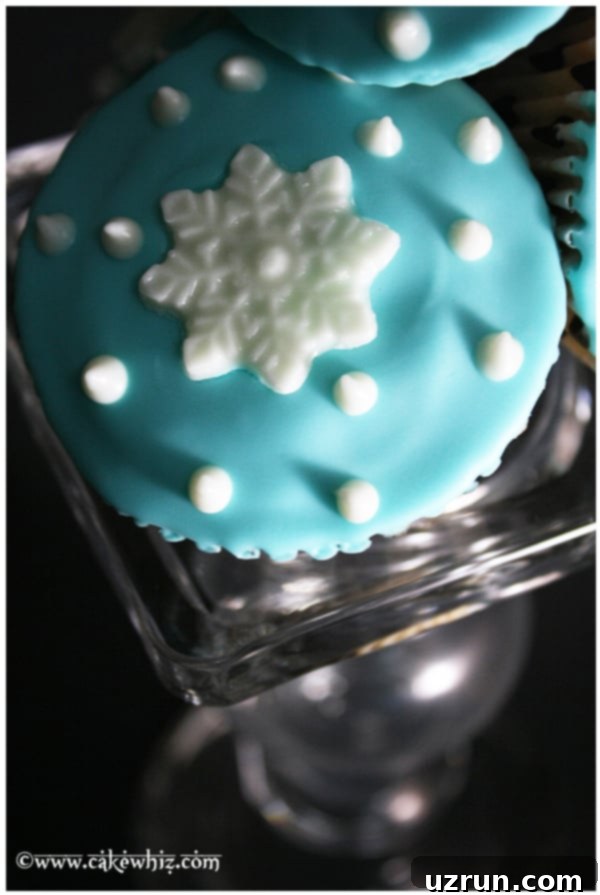
How to Make Enchanting Snowflake Cupcakes (A Simple Guide to Winter Cupcakes)
Creating these beautiful, winter-themed cupcakes is a wonderfully straightforward and incredibly rewarding process. Follow these step-by-step instructions to effortlessly bring your frosty, edible creations to life:
- Bake Your Cupcakes to Perfection: Begin by baking your favorite batch of cupcakes. Whether you opt for a classic yellow, a rich chocolate, a cozy vanilla, or even a spiced gingerbread flavor, the most important step here is to ensure they are completely cooled to room temperature before you proceed. Attempting to frost or decorate warm cupcakes will cause the icing to melt, slide off, and compromise the beautiful presentation you’re aiming for.
- Prepare and Smoothly Spread Frosting: Once your cupcakes have cooled completely, it’s time to prepare your frosting. For a truly magical and wintery effect, we highly recommend using a creamy white or a delicate light blue frosting. Spread a generous, even layer of frosting on top of each cupcake. This layer serves as the perfect smooth canvas upon which your intricate chocolate snowflake decorations will rest.
- Craft Your Delicate Chocolate Snowflakes: This is where the real enchantment begins! Carefully place your melted white chocolate (or white candy melts, which are often easier to work with) into a squeeze bottle or a piping bag fitted with a small, fine tip. Gently pipe the melted chocolate into each cavity of your silicone snowflake candy mold. Take your time to fill the intricate designs precisely, avoiding overfilling, which can obscure the fine details of the snowflake.
- Chill the Mold for an Effortless Release: After all the cavities in your mold are filled, place the entire tray into the freezer. Allow it to chill for approximately 15-20 minutes. This crucial freezing step ensures that the chocolate hardens completely and becomes firm. Once fully hardened, you’ll find it incredibly easy to remove each delicate snowflake from the mold without any breakage, leaving you with perfectly formed decorations.
- Decorate, Garnish, and Serve: With your perfectly formed chocolate snowflakes ready, gently pop them out of the mold. Carefully place one elegant snowflake on top of each frosted cupcake. For an extra touch of festive sparkle and winter wonder, consider adding a sprinkle of edible glitter, iridescent white nonpareils, or shimmering silver sugar around the base of the snowflake. Now, your enchanting winter wonderland cupcakes are complete, ready to be admired and savored!
Creative Variations for Your Personalized Winter Wonderland Cupcakes
While the classic blue and white snowflake cupcake is undeniably stunning, this recipe is incredibly versatile! There are countless ways to customize these treats to perfectly match your personal taste, specific party theme, or any winter celebration. Let your creativity soar with these inspiring variations:
Experiment with Different Colors: I chose a classic blue and white color scheme to evoke a traditional frosty winter feel. However, don’t hesitate to unleash your imagination with other beautiful hues! Consider sparkling silver and gold for an opulent and elegant touch, soft pastels like lavender or mint green for a whimsical fairy tale vibe, or vibrant reds and greens to complement a more traditional Christmas celebration. Matching the colors of your cupcakes to your event’s theme will undoubtedly elevate their overall presentation and create a cohesive look.
Explore Diverse Cupcake Flavors: The base cupcake flavor offers a wonderful opportunity to change the entire profile of your dessert. While a simple yellow or vanilla cupcake provides a neutral and versatile canvas, feel free to try other delightful options. Imagine these delicate snowflakes adorning rich Best Red Velvet Cupcakes topped with a tangy cream cheese frosting, decadent Brownie Cupcakes for the ultimate chocolate indulgence, a warm and spicy gingerbread cupcake, or even a refreshing peppermint-flavored base. The possibilities are truly endless, allowing you to cater to a wide range of preferences and seasonal flavors.
Choose from a Variety of Frostings: The frosting is a critical component for both flavor and aesthetic appeal. For an intense chocolate kick that pairs beautifully with many cupcake flavors, consider using a smooth and glossy Chocolate Ganache Frosting or a rich and tangy Chocolate Cream Cheese Frosting. If you prefer a pure white icing that can be easily tinted with food coloring, classic American Buttercream Frosting is an incredibly versatile and reliable choice. Other excellent options include a light and airy Marshmallow Frosting, a silky and less sweet Cooked Flour Buttercream (Ermine Frosting), or a wonderfully fluffy Seven Minute Frosting. Each type offers a unique texture and level of sweetness to perfectly complement your chosen cupcake base.
Add Delicious and Unexpected Fillings: To truly take your cupcakes to an extraordinary level, consider adding a delightful surprise in the center! Use a cupcake corer or a small paring knife to carefully create a hole in the middle of each baked cupcake, then generously fill it with your favorite sweet treat. Popular and irresistible choices include sweet fruit jam, luscious caramel sauce, rich dulce de leche, creamy peanut butter, an extra dollop of complementary frosting, or the ever-popular Nutella. A well-chosen filling adds an unexpected burst of flavor, enhances moisture, and creates a wonderful textural contrast that your guests will adore.
Extend the Snowflake Theme to Larger Cakes: These beautiful chocolate snowflakes aren’t just for cupcakes! They make exquisite and elegant decorations for larger celebration cakes as well. Use them to adorn a grand centerpiece cake, a charming tiered cake for a special winter event, or even individual-sized mini cakes for a sophisticated dessert spread. Their intricate design adds a professional and highly festive touch to any baked good, transforming it into a winter masterpiece.
Incorporate Different Sizes and Designs: Snowflake candy molds frequently come with a variety of designs and sizes, offering a fantastic opportunity for creative expression. Utilize this diversity to create an assortment of chocolate snowflakes. This variety allows each of your cupcakes to have a slightly unique yet cohesive appearance, adding wonderful visual depth and interest to your dessert display. A thoughtful mix of large and small, simple and intricately detailed snowflakes will truly make your collection stand out and look professionally curated.
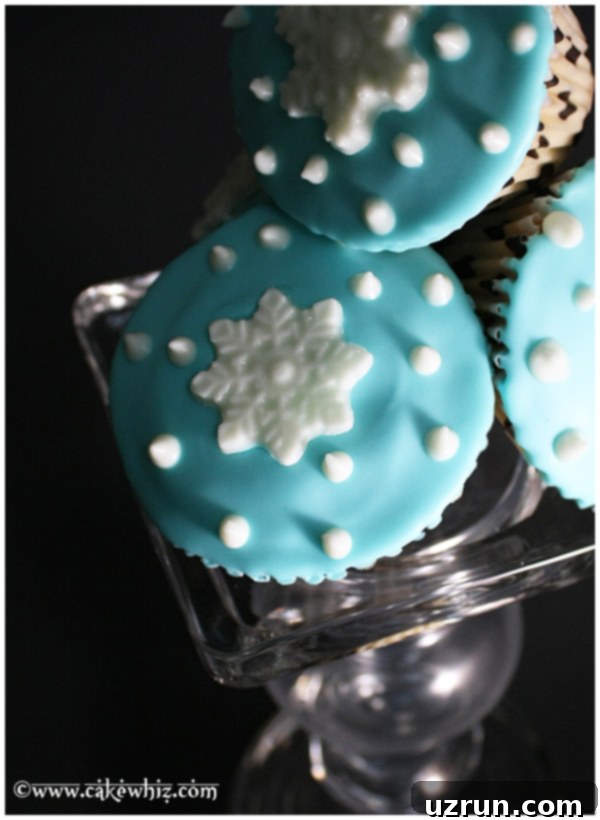
Expert Tips and Techniques for Flawless Snowflake Cupcakes Every Time
Achieving bakery-quality snowflake cupcakes is surprisingly easy when you pay attention to a few crucial details. Incorporate these essential tips and techniques, and your festive treats will be perfect, beautiful, and delicious every single time:
Avoid Over-filling the Cavities: This is perhaps the most crucial step for creating perfectly formed, delicate chocolate snowflakes. If you overfill the candy mold cavities, the excess chocolate will spread beyond the design, obscuring the intricate snowflake pattern and resulting in a less defined, often unappealing “blob” – as you might see in some trial and error examples. Instead, fill the cavities just enough to cover the bottom and sides of the design, allowing the chocolate to flow and settle evenly into all the fine lines. You can always add a tiny bit more if needed, but it’s much harder to remove excess once it’s in.
Candy Melts vs. Chocolate Chips – Know Your Ingredients: Both candy melts and white chocolate chips can be used for making your snowflakes, but they do have distinct properties. Candy melts are specifically formulated for melting and molding; they typically come in a wide range of colors, melt smoothly, and set quickly with a glossy, firm finish. If you choose to use white chocolate chips and wish to color them, it is absolutely essential to use oil-based food coloring. Water-based food coloring will cause the chocolate to seize, becoming thick and crumbly, and ultimately unusable. Always double-check the ingredients and type of your coloring agents.
Always Decorate Completely Cooled Cupcakes: This tip is fundamental and cannot be overstressed! Your baked cupcakes must be absolutely and completely cooled to room temperature before you attempt to apply any frosting or decorations. Trying to decorate warm cupcakes will inevitably lead to a disaster: melted frosting, sliding decorations, and a generally messy, unappealing result. Patience truly is a virtue in baking, and a fully cooled cupcake ensures a beautiful and stable finish.
Ensure Chocolate Snowflakes Are Fully Hardened Before Removal: Resist the urge to remove your chocolate snowflakes from the mold before they are completely hardened. If they are still soft, flexible, or sticky, they will break, bend, or lose their intricate shape when you try to extract them. Freezing them for the recommended 15-20 minutes ensures they are perfectly firm and solid enough for a clean, crisp release. You can gently test the edge of one snowflake in the mold if you are unsure.
Prevent Overheating Chocolate for Best Texture: Melting chocolate requires a gentle and controlled approach. Overheating chocolate, particularly white chocolate, can easily cause it to burn, become grainy, or seize into a thick, unworkable paste. There is no way to salvage burnt chocolate; it will acquire a bitter, unpleasant taste and a crumbly, unappealing texture. When melting in the microwave, heat chocolate in short intervals (e.g., 30 seconds at a time), stirring thoroughly and patiently between each interval until it achieves a smooth, fluid consistency. A double boiler method also offers a more controlled and gentle heating environment.
Homemade vs. Store-bought Icing – Choose Wisely: Both homemade and good quality store-bought frostings are suitable for these snowflake cupcakes. Store-bought icing often has a thinner consistency when gently heated, which can be advantageous for dipping cupcakes to achieve a smooth, glazed finish. However, if you are using homemade frosting, it generally has a thicker consistency and is not typically suitable for heating and pouring as a glaze; its texture is better suited for piping elegant swirls or spreading smoothly with an offset spatula. Choose the frosting that best aligns with your desired texture, flavor, and level of convenience.
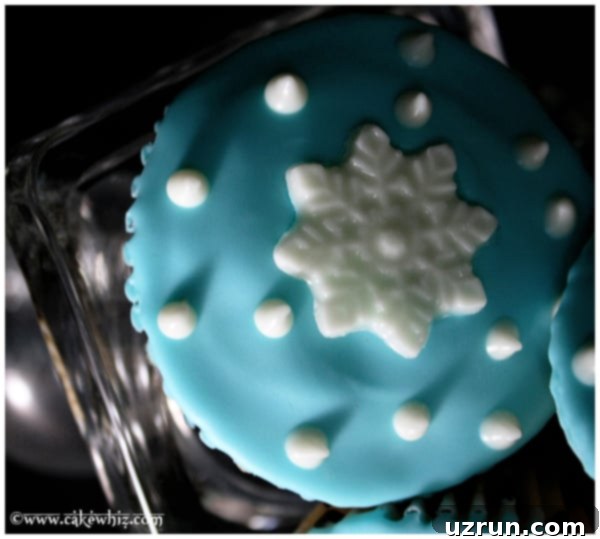
Storage and Make-Ahead Instructions for Your Snowflake Cupcakes
Proper storage is essential to ensure your beautiful snowflake cupcakes remain as fresh and delicious as the day they were made. Planning ahead can also significantly reduce stress and save time, especially during busy holiday seasons.
Refrigerate Leftovers: Any leftover frosted and decorated snowflake cupcakes should be stored in a sealed, airtight container. Placing them in the refrigerator will keep them fresh and tasting wonderful for up to 3 days. To prevent the delicate chocolate snowflakes from developing condensation, which can dull their appearance, you might consider allowing the cupcakes to come closer to room temperature for a short period before serving, if practical.
Freezing Cupcakes for Future Enjoyment: If you’re planning well in advance or have baked a large batch, unfrosted and undecorated cupcakes can be frozen successfully. Arrange them in a single layer in an airtight container or a heavy-duty freezer bag, ensuring they are well protected from freezer burn. They will keep beautifully for up to 1 month. When you’re ready to use them, simply thaw them overnight in the refrigerator, then allow them to reach room temperature before you proceed with frosting and decorating according to the recipe instructions. This is a fantastic time-saving strategy for future events or unexpected guests.
Make-Ahead Preparation: These charming snowflake cupcakes are an ideal dessert for making in advance, particularly the day before a party or special event. You can comfortably bake the cupcakes, prepare and frost them, and even create all your chocolate snowflakes ahead of time. For the freshest taste and pristine appearance, we recommend assembling everything on the day of your event. If assembling the night before, store the fully decorated cupcakes in an airtight container in the refrigerator overnight.
Storing Chocolate Snowflake Candies: The delicate chocolate snowflakes are perfect for making well in advance. Once they are completely hardened and removed from the mold, store them carefully in a sealed, airtight container at room temperature. It is absolutely crucial to keep them away from direct sunlight, any sources of heat (such as warm kitchen appliances or ovens), and any moisture, as these conditions can cause the chocolate to melt, bloom (develop a whitish film), or stick together. Stored correctly, these beautiful chocolate decorations can last for several weeks, always ready to adorn your next winter treat or homemade gift!
More Enchanting Winter Dessert Ideas to Explore
If you’ve fallen in love with the magic of winter-themed baking, you’ll adore these other festive dessert ideas. They’re perfect for completing your holiday spread or simply enjoying during the colder months:
- Snow Ice Cream Recipe: A truly whimsical and fun treat, made from fresh, clean snow – a unique winter delight!
- Snowball Cake (Cheesecake Stuffed Chocolate Cake): Indulge in a rich, moist chocolate cake with a delightful, creamy cheesecake surprise baked right inside.
- Easy Snowman Donuts: Adorable and incredibly fun to make, these snowman donuts are a hit with both children and adults.
- Snowman Cupcakes: Learn the simple steps to create charming snowman toppers that will transform any cupcake into a festive character.
- Snowman Cake: A fantastic and festive center-piece that is much easier to create than you might imagine, perfect for holiday gatherings!
- Snowman Ice Cream Cones: A delightful no-bake treat that’s quick to assemble and wonderfully playful.
- Nutter Butter Penguin Cookies: These cookies are irresistibly cute, packed with peanut butter flavor, and remarkably simple to decorate.
Recipe
Snowflake Cupcakes (Winter Cupcakes)
Abeer Rizvi
Pin Recipe
Want to Save This Recipe?
Enter your email & I’ll send it to your inbox. Plus, get great new recipes from me every week!
By submitting this form, you consent to receive emails from CakeWhiz
Ingredients
- 24 Yellow cupcakes
- 1 container Vanilla icing Pillsbury or Betty Crocker, Colored blue with liquid food coloring
- 2 cups White chocolate chips Or white candy melts
Instructions
-
Bake cupcakes and let them cool completely.
-
Heat frosting in the microwave until it’s a pourable consistency.
-
Pour it in a bowl (This makes dipping easier in the next step).
-
Either dip the cupcake (top down only) into the frosting or spread a spoonful of frosting on top.
-
Let the icing set.
-
While it’s setting, make chocolate snowflakes. Place white chocolate chips in a squeeze bottle or piping bag and heat in the microwave until candies are fully melted.Don’t overheat! Heat and mix at every 30 seconds.
-
Now, start squeezing melted chocolate in the snowflake candy mold.
-
Start tapping the side of the tray gently until melted chocolate spreads into the corners of the cavity.
-
Place your tray in the freezer for 15-20 minutes until the chocolate hardens.
-
Then, turn over your mold onto a smooth surface, lined with wax paper or parchment paper.
-
Tap the top of your mold and the snowflake candies will just fall out.
-
Decorate each cupcake with a snowflake candy and white sprinkles. Enjoy!
Notes
- Read all my tips above for best results! They cover common pitfalls and provide advice for perfect execution.
- Leftover cupcakes can be stored in a sealed container in the fridge for up to 3 days, ensuring they remain fresh and delicious.
Nutrition
An automated tool is used to calculate the nutritional information. As such, I cannot guarantee the accuracy of the nutritional information provided for any recipe on this site.
Frequently Asked Questions About Baking Snowflake Cupcakes
We’ve covered a lot, but you might still have a few questions about making these charming winter treats. Here are some commonly asked questions and their helpful answers to ensure your baking experience is smooth and successful:
- Can I use store-bought cupcakes for this recipe?
Absolutely! Using pre-made, store-bought cupcakes is a fantastic way to save time and effort, especially if you’re preparing for a large gathering or are short on time. Just make sure they are plain (unfrosted) or have a basic flavor that complements your snowflake theme, and ensure they are completely cooled before you begin frosting and decorating.
- How far in advance can I make the chocolate snowflakes?
The beauty of chocolate snowflakes is that they can be made quite far in advance – several weeks, in fact! Once they are completely hardened, carefully store them in an airtight container at room temperature. It’s crucial to keep them away from direct sunlight, sources of heat (like a warm kitchen appliance), and any moisture, which can cause them to melt or bloom.
- What if I don’t have a snowflake candy mold? Are there alternatives?
No problem at all! You can definitely get creative. Try piping simple snowflake or star shapes directly onto a sheet of parchment paper using melted chocolate. Alternatively, you can use other winter-themed candy molds you might have on hand (like stars, mittens, or tiny trees). Another excellent option is to use edible snowflake-shaped sprinkles, or you can cut out intricate fondant snowflakes using small cookie cutters.
- Can I make these cupcakes dairy-free or gluten-free?
Yes, with appropriate substitutions, these cupcakes can be adapted to be dairy-free or gluten-free! For dairy-free versions, use a dairy-free cupcake mix or recipe, dairy-free frosting, and ensure your white chocolate chips or candy melts are certified dairy-free (always check ingredient labels carefully). For gluten-free, simply use your favorite gluten-free cupcake mix or a trusted gluten-free cupcake recipe. The chocolate snowflakes themselves are generally naturally gluten-free if using standard white chocolate chips or candy melts.
- What kind of sprinkles work best for snowflake cupcakes?
To enhance the winter theme, white, silver, or light blue nonpareils, edible glitter, or specific snowflake-shaped sprinkles work beautifully. A tasteful mix of different white and silver sprinkles can add a wonderful sparkle, texture, and visual interest, mimicking glistening snow.
Serving Your Magical Snowflake Cupcakes with Style
These stunning snowflake cupcakes are more than just a delicious dessert; they are a feast for the eyes and a delightful addition to any celebration! When it comes to serving, consider arranging them elegantly on a tiered dessert stand. This presentation allows you to showcase their beautiful designs, creating a captivating focal point for your dessert table. The delicate white chocolate snowflakes against the frosty frosting are truly eye-catching.
These festive treats pair wonderfully with a warm, comforting mug of hot cocoa topped with whipped cream, a steaming cup of your favorite tea, or a festive holiday punch. Whether you’re hosting a Christmas party, celebrating a winter birthday, or simply enjoying a quiet family gathering, these charming cupcakes are guaranteed to bring smiles and a touch of seasonal enchantment to everyone who enjoys them.
We sincerely hope you find immense joy in baking and sharing these easy and elegant snowflake cupcakes. They truly embody the spirit, beauty, and warmth of the winter season, making every bite a delightful and memorable experience. Don’t forget to share your wonderful creations with us – we’d love to see your unique snowflake designs!
