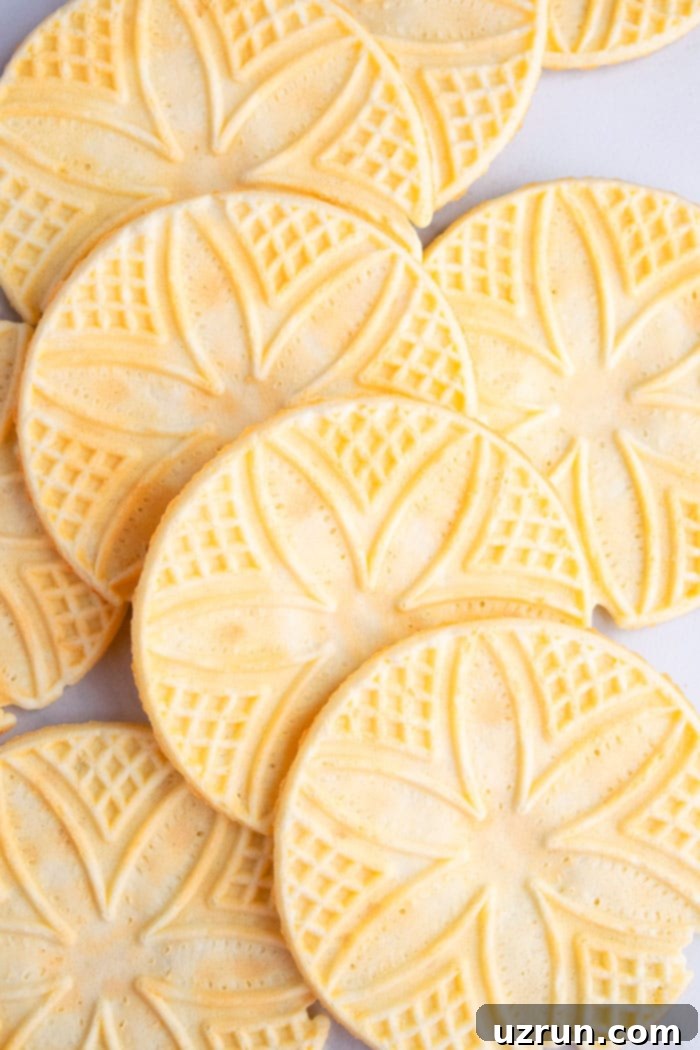
Classic Italian Pizzelle Cookies: The Ultimate Guide to Thin, Crispy, and Flavorful Homemade Treats
Indulge in the timeless charm of Italian Pizzelle Cookies, a beloved classic that brings a touch of tradition and deliciousness to any occasion. These delicate, waffle-style cookies are renowned for their intricate designs, wonderfully thin texture, and delightful crispiness. Crafted from scratch with simple, wholesome ingredients, this homemade pizzelle recipe captures the authentic flavors of Italy, boasting aromatic notes of vanilla and the distinctive, warm embrace of anise extract.
Pizzelles are more than just cookies; they’re an experience. Each bite delivers a light, crisp sensation followed by a burst of comforting flavor that makes it impossible to stop at just one. They are a staple during holidays and celebrations, yet simple enough to enjoy as an everyday treat. Beyond savoring them plain, there are countless creative ways to enjoy these versatile Italian delights. Looking to expand your baking repertoire? Don’t forget to explore other delightful Italian-inspired treats like my Shortbread Linzer Cookies and Italian Rainbow Cookies, perfect additions to any cookie platter or personal collection of yummy recipes.
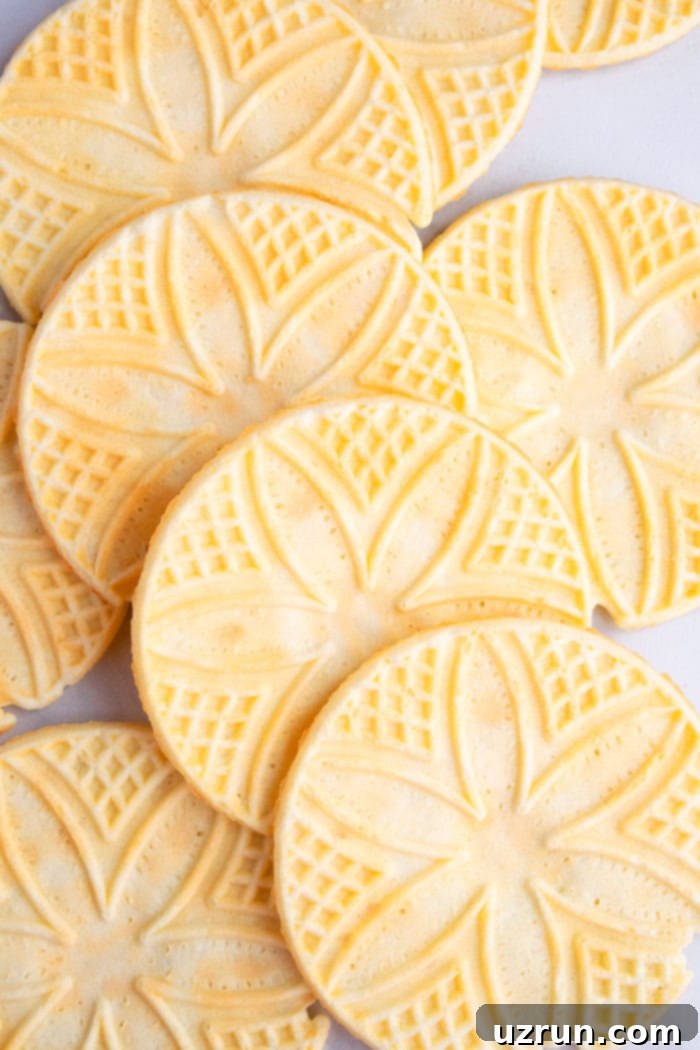
What Are Pizzelle Cookies? A Timeless Italian Delight
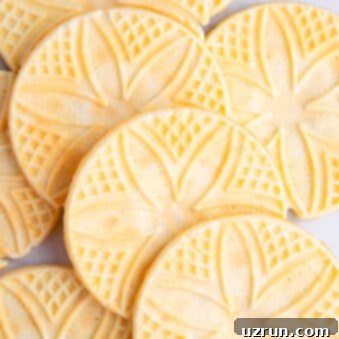
Pizzelle are traditional Italian cookies, unique for their distinctive waffle-like texture and ornate patterns. The name “pizzelle” itself is derived from the Italian word “pizze,” meaning round and flat, perfectly describing their characteristic shape. These thin, crispy cookies are a staple in many Italian-American households, especially during festive seasons like Christmas and Easter, embodying generations of culinary heritage. While often enjoyed plain or dusted with powdered sugar, their true versatility shines when they’re still warm and pliable. You can effortlessly roll them into elegant cones, transforming them into edible vessels for creamy fillings like homemade cannoli cream, rich chocolate mousse, or scoops of your favorite ice cream. They can also be gently folded into a cup shape for holding fruit or whipped cream, making them a delightful and adaptable dessert.
How to Make Authentic Italian Pizzelle Cookies from Scratch
Crafting these beautiful homemade Italian pizzelle cookies is a rewarding experience, and the process is surprisingly straightforward, even for novice bakers. The key lies in precise ingredient measurements and careful execution. Follow these simple steps to create perfectly thin, crispy, and flavorful pizzelles right in your own kitchen:
- Whisk Eggs Until Frothy: Begin by whisking your room temperature large eggs in a mixing bowl for about 2-3 minutes until they become light, airy, and frothy. This step is crucial for incorporating air, which contributes to the pizzelles’ delicate texture.
- Incorporate Sugar Until Thickened: Gradually add the granulated sugar to the whisked eggs. Continue mixing for another 3-4 minutes until the mixture slightly thickens and becomes pale yellow. The sugar not only adds sweetness but also helps create that desirable crispness.
- Mix in Wet Ingredients: Next, add the oil, vanilla extract, and the star of the show, anise extract. Mix these until they are fully combined. The oil contributes to the tender crumb, while the extracts infuse the cookies with their signature aroma and flavor. Remember to start with half a teaspoon of anise and adjust to your preference, as it’s quite potent.
- Add Dry Ingredients: Gently fold in the sifted all-purpose flour and baking powder. Sifting the flour beforehand ensures a lighter batter, preventing dense or heavy cookies. The baking powder helps them achieve a slight lift and delicate crisp.
- Mix Until Smooth: Continue mixing just until the dry ingredients are fully incorporated and the batter is smooth. It’s important not to overmix, which can develop gluten and lead to tougher cookies. The batter will be noticeably thick and sticky – this is exactly the right consistency for perfect pizzelles.
- Drop Batter onto Hot Pizzelle Maker: Preheat your pizzelle iron thoroughly. Once hot, drop approximately one tablespoon of the thick batter onto the center of each grid. Be mindful not to overcrowd the iron.
- Cook Until Golden Brown: Close the lid firmly and allow the pizzelles to cook for about 30-45 seconds. Keep a close eye on them; they should turn a beautiful light golden brown. Cooking time can vary depending on your specific pizzelle maker.
- Transfer to Cooling Rack: Carefully remove the hot pizzelles from the iron using a fork or wooden skewer. Immediately transfer them to a wire cooling rack to cool completely. They will be soft and pliable initially but will crisp up as they cool.
- Enjoy Your Delicious Pizzelles: Serve your homemade pizzelles as they are, or for an extra touch of elegance, dust them lightly with powdered sugar. Get ready to enjoy these delectable, aromatic treats!
Creative Ways to Enjoy Your Pizzelle Cookies
The beauty of pizzelle cookies lies not only in their delightful taste but also in their incredible versatility. While they are perfectly delicious on their own, especially when dusted with a light cloud of powdered sugar, their unique texture and shape open up a world of creative serving possibilities:
- Pizzelle Cones: Immediately after removing them from the hot iron, while they are still warm and pliable, gently roll the pizzelles around a cone mold (often included with pizzelle makers) or even a wooden spoon handle. Hold for a few seconds until they set into a cone shape. Once cooled and crispy, fill these elegant cones with scoops of your favorite ice cream, rich gelato, fresh berries, or a decadent chocolate mousse.
- Faux Cannoli Shells: Similar to cones, you can shape warm pizzelles around a cannoli tube to create delicate, crispy shells. Fill these with traditional sweetened ricotta cannoli cream for a quick and impressive dessert that mimics the classic Italian pastry without the frying.
- Dessert Bowls: For a charming presentation, gently press warm pizzelles into small muffin tins or bowls to form edible cups. Once cooled, these can hold fruit salads, whipped cream, or individual servings of pudding.
- Dipped and Drizzled: Transform your pizzelles into an even more decadent treat by dipping them in melted chocolate (dark, milk, or white) once they have completely cooled and crisped up. Allow the chocolate to set on parchment paper. You can also drizzle them with caramel or a simple sugar glaze.
- Coffee & Tea Companion: Their delicate crispness makes pizzelles an ideal accompaniment to a hot cup of coffee, espresso, or tea. They’re perfect for dipping, softening slightly to absorb the beverage’s flavor.
Understanding Anise Extract: Flavor Profile and Usage
Anise extract is a powerful flavoring agent derived from the seeds of the anise plant, which belongs to the same family as dill, caraway, and fennel. While often confused with star anise (a different plant entirely, though they share a similar flavor profile), true anise extract is typically made by infusing anise seeds in alcohol, such as vodka, to create a potent tincture. Its distinctive taste is often described as sweet, warm, and highly aromatic, strongly resembling black licorice.
Due to its intense flavor and aroma, anise extract should be used sparingly in recipes, including these **anise pizzelle cookies**. A little goes a long way to impart that classic, authentic Italian flavor without overpowering the other delicate notes of vanilla and egg. If you’re new to baking with anise, it’s always wise to start with a smaller amount, perhaps half a teaspoon, and adjust to your personal preference. Its bold character makes it a favorite in many traditional Italian desserts, providing that unmistakable, comforting taste.
The Essential Pizzelle Maker: What It Is & Where to Find One
A **pizzelle maker**, also commonly referred to as a pizzelle iron, is the specialized kitchen appliance essential for creating these beautiful Italian cookies. While similar in concept to a waffle iron, a pizzelle maker features shallower grooves and typically boasts intricate, decorative patterns – such as snowflakes, floral designs, or geometric motifs – which are imprinted onto the cookies. These patterns are a hallmark of traditional pizzelles, making them visually appealing as well as delicious.
Pizzelle irons come in various forms: electric models are most common for home use, offering consistent heat and ease of operation, often with non-stick surfaces and indicator lights. There are also stovetop versions, which require more hands-on attention but offer a traditional experience. When purchasing, consider the size of the pizzelles it produces (some make larger, some smaller), the design of the plates, and whether it’s non-stick.
Finding a pizzelle maker is quite easy today. You can typically purchase them online through major retailers like Amazon, which offers a wide selection of brands and models. Additionally, many large department stores and home goods retailers such as Target, Walmart, and Home Depot often stock them, especially around the holiday season when demand for baking specialty items increases. Investing in a good quality pizzelle maker will ensure years of delicious, perfectly embossed cookies.
Preventing Pizzelles from Sticking to Your Iron
One of the most common frustrations when making pizzelles is having them stick to the iron, which can ruin their delicate design and crisp texture. Thankfully, this is an easily preventable issue:
- Invest in a Non-Stick Iron: I highly recommend using a non-stick pizzelle iron. Modern non-stick coatings are incredibly effective and make the process significantly smoother, ensuring your **anise pizzelle** release cleanly every time without additional grease. This is by far the easiest and most reliable solution.
- Properly Seasoning (if needed): If you’re using a new iron or one that isn’t inherently non-stick, some manufacturers recommend a one-time “seasoning” process before initial use. This usually involves brushing a thin layer of cooking oil onto the plates, heating it, and then wiping it off. Refer to your pizzelle maker’s manual for specific instructions.
- Light Greasing for Stainless Steel: For older models or stainless steel irons, a very light application of oil is necessary. Use a pastry brush or spray a small amount of cooking oil onto the hot plates, then gently pat it with a paper towel to remove any excess. The goal is a barely visible film of oil. Too much grease will lead to oily, rather than crisp, cookies, and can also cause uneven browning.
- Preheat Thoroughly: Always ensure your pizzelle iron is fully preheated before dropping the batter. A properly preheated iron helps to immediately cook the surface of the batter, creating a crust that prevents sticking and ensures even cooking.
- Clean Between Batches: If residue starts to build up, gently wipe the plates with a damp cloth (when cool enough, or very carefully when warm) to prevent new cookies from sticking to burnt bits.
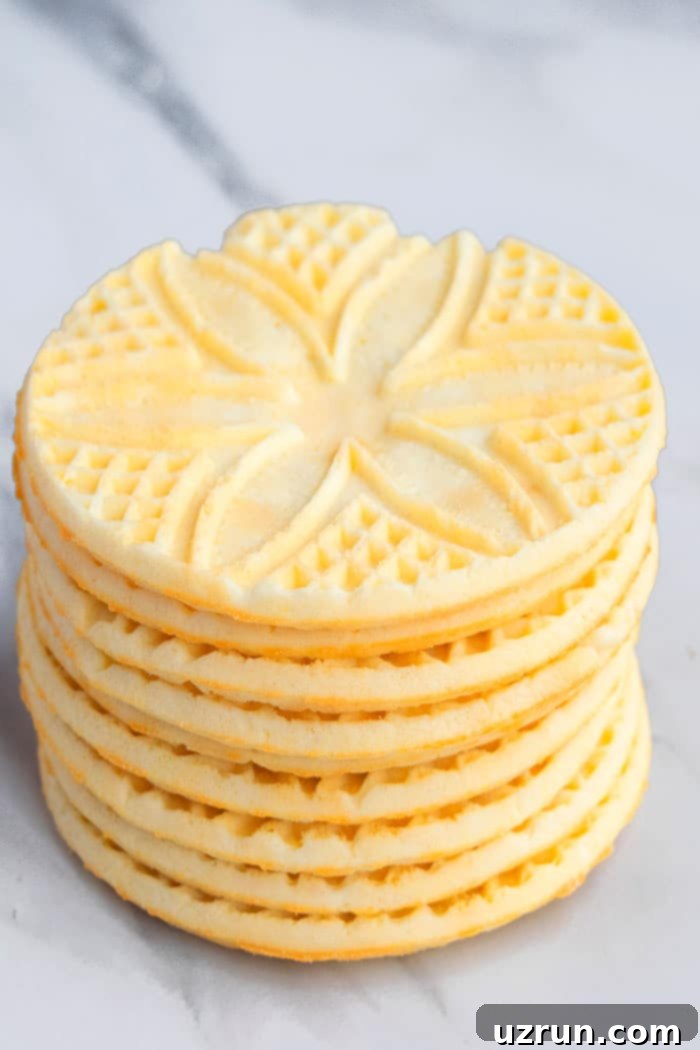
Delicious Variations to Customize Your Pizzelle Cookies
While the classic vanilla and anise combination is undeniably perfect, **pizzelle cookies** are incredibly adaptable, making them a fantastic canvas for your culinary creativity. Here are several delightful ways to customize your batch:
- Dip Them in Chocolate: For an irresistible treat, once your pizzelles have completely cooled and achieved their signature crispiness, dip them into melted chocolate. You can use rich dark chocolate for a sophisticated contrast, sweet milk chocolate, semi-sweet, or even vibrant white chocolate. Allow the chocolate to set on parchment paper until firm. For extra flair, sprinkle with nuts, sprinkles, or a pinch of sea salt before the chocolate hardens.
- Add Bright Citrus Zest: Introduce a refreshing burst of flavor by adding finely grated citrus zest to your batter. Lemon, orange, or lime zest can provide a wonderful aromatic lift and a subtle tangy note that beautifully complements the vanilla and anise, or even stands alone as a primary flavor.
- Create Gourmet Cookie Sandwiches: Elevate your pizzelles by transforming them into delightful cookie sandwiches. Simply choose your favorite creamy filling and spread it generously between two cooled pizzelle cookies. To maintain the cookies’ crispness, it’s best to assemble and serve these immediately, as moisture from the filling can cause them to soften. Here are some fantastic filling ideas to get you started:
- Nutella (classic and always a hit)
- Peanut butter or rich Almond butter (for a nutty twist)
- Your favorite Ice cream (a perfect summer treat!)
- Sweet and fruity Easy Homemade Strawberry Jam
- Decadent thick Caramel Sauce or a creamy Caramel Frosting
- Smooth and delightful Best Sugar Cookie Frosting
- Indulge in Chocolate Pizzelles: For chocolate lovers, easily adapt this recipe by mixing in a few tablespoons of unsweetened cocoa powder along with the dry ingredients. This will not only imbue your pizzelles with a rich chocolate flavor but also give them a beautiful brown hue, perfect for a different kind of sweet indulgence.
- Color the Dough for Festive Occasions: Pizzelles are inherently celebratory, and adding a touch of food coloring makes them even more festive! This is an excellent way to personalize them for various holidays or themed parties. Think vibrant green for St. Patrick’s Day, classic red for Christmas, soft pink for Valentine’s, or pastel shades for Easter. Just add a few drops of gel food coloring to the wet ingredients and mix until evenly distributed.
Tips and Techniques for Perfect Pizzelle Cookies Every Time
Achieving consistently perfect crispy pizzelle cookies is simple when you follow a few key tips and techniques. These insights will help you avoid common pitfalls and ensure your homemade treats are always a success:
- Use Anise Extract Wisely: As mentioned, anise extract is very potent. Begin with ½ teaspoon and taste the batter (before adding flour if you prefer, or just a tiny bit of the batter itself) to gauge the flavor. You can always add a little more, but you can’t take it away! Balance is key to enjoying its unique warmth without overwhelming the palate.
- Account for Cookie Quantity & Design Variation: The total number of pizzelles you yield will depend on the size and specific design of your pizzelle iron’s plates. Some irons make two smaller cookies, others one larger one. Similarly, the intricate patterns on your cookies will directly reflect the design etched into your iron. Don’t be surprised if they look slightly different from photos; embrace the unique beauty of your specific iron!
- Gentle Removal is Key: Once cooked, pizzelles are delicate when hot. Gently remove them from the pizzelle maker with a thin, non-abrasive tool like a wooden skewer, a small offset spatula, or a fork. Avoid aggressive prying, which can break the cookies or scratch your iron’s surface.
- Preheat Your Iron Thoroughly: Always allow your pizzelle iron to reach its full operating temperature before adding any batter. A properly preheated iron ensures even cooking, immediate crisping of the batter’s surface (preventing sticking), and beautiful browning. Rushing this step often leads to pale, unevenly cooked, or sticky pizzelles.
- Embrace the Thick & Sticky Batter: Do not be alarmed by the thickness and stickiness of the pizzelle batter – it’s supposed to be this way! This rich consistency is what ensures the cookies are thin and crisp, rather than soft and cakey. Resist the urge to thin it out with extra liquid, as this will cause the batter to spill over the sides of the maker and result in thin, brittle, or burnt crisps. If absolutely necessary, and only if the mixture is struggling to combine, add the tiniest splash of water (half a teaspoon at most), but generally, it shouldn’t be needed.
- Anise Extract Substitutes: While no exact substitute perfectly replicates the traditional anise flavor, if you or your guests dislike licorice, you can certainly opt for other extracts. Lemon, orange, almond, or even pure vanilla extract can be used as alternatives. Just be aware that the cookies will no longer have that classic “anise pizzelle” taste, but they will still be delicious!
- Maintain Crispness with Proper Storage: Pizzelles are best when wonderfully crisp. To keep them that way, store them in an airtight container or a large ziplock bag at room temperature, away from any humidity. Moisture is the enemy of crispiness!
- Room Temperature Eggs are Best: Using large, room temperature eggs is a small but impactful detail. They incorporate more easily and evenly into the batter, creating a smoother, more uniform mixture, which ultimately leads to a better-textured cookie.
- Sift Your Flour: Don’t skip sifting the all-purpose flour. This crucial step aerates the flour, removes any lumps, and ensures a light, delicate batter. Without sifting, the flour can compact, resulting in denser, heavier pizzelles rather than the desired airy crispness.
Troubleshooting: Why Are My Pizzelles Soggy or Chewy?
If your pizzelles turn out soggy or chewy instead of delightfully crisp, it’s usually due to one of two main reasons:
- Too Much Liquid in the Batter: Excess liquid can make the batter too thin, preventing it from crisping properly during cooking. Always stick to the recipe’s liquid measurements and avoid thinning out the batter.
- Exposure to Humidity: Pizzelles absorb moisture from the air very quickly. If they are left exposed for too long, especially in a humid environment, they will lose their crispness and become soft.
The Fix: Don’t despair! You can often revive soggy pizzelles by baking them in a preheated oven at a very low temperature (around 200°F / 95°C) for 5-10 minutes. Keep a close eye on them to prevent burning. This gentle baking will help dry them out and restore their crispy texture.
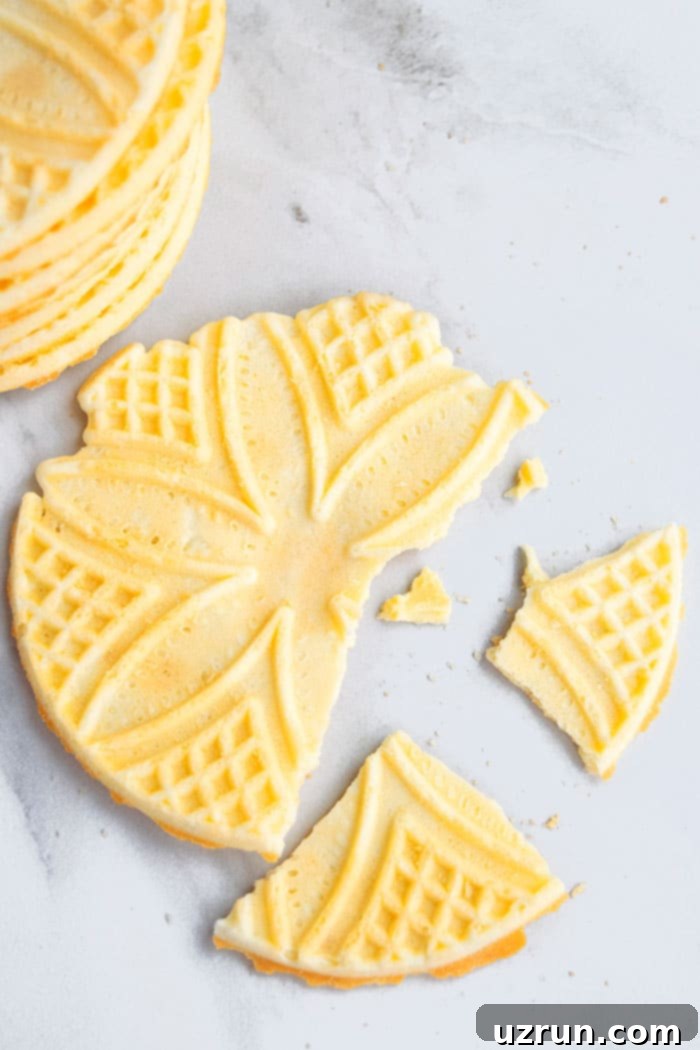
Storage Tips for Fresh and Crispy Pizzelle Cookies
Proper storage is essential to maintain the delicate crispness and fresh flavor of your homemade pizzelle cookies. Here’s how to keep them at their best:
- Room Temperature: For immediate enjoyment, store cooled pizzelles in an airtight cookie jar or container at room temperature for up to 1 week. Ensure they are completely cool before storing to prevent condensation, which can lead to sogginess.
- Refrigerate: While not typically necessary for crispness, if your pizzelles contain fillings (like cream or fresh fruit) that require refrigeration, store them in a sealed container for up to 2 weeks. Be aware that the cookies may soften slightly due to the refrigeration’s humidity.
- Freezer: Pizzelles freeze beautifully for longer storage. Place cooled pizzelles in a single layer on a baking sheet to flash freeze for about an hour, then transfer them to a freezer-safe airtight container or heavy-duty ziplock bag. They will keep well for up to 1 month. Thaw them at room temperature before serving. If they’ve lost a bit of their crispness, a quick refresh in a low oven can bring them back.
Explore More Festive Holiday Cookie Recipes
If you’ve enjoyed making these delightful Italian pizzelle cookies, you might be looking for more festive treats to add to your holiday baking list. Here are some other cherished cookie recipes perfect for gifting, sharing, or simply enjoying with loved ones:
- Best Christmas Cookies
- Christmas Tree Cookies
- Christmas Pinwheel Cookies
- Shortbread Linzer Cookies (With Jam)
- Jumbo Gingerbread Men Cookies
Recipe
Pizzelle Cookies
Abeer Rizvi
Pin Recipe
Want to Save This Recipe?
Enter your email & I’ll send it to your inbox. Plus, get great new recipes from me every week!
By submitting this form, you consent to receive emails from CakeWhiz
Ingredients
- 3 Eggs Large, Room temperature
- ½ cup Granulated sugar
- ¼ cup Oil
- 1 teaspoon Vanilla extract
- ½-1 teaspoon Anise extract Adjust according to your preference as it is a strong extract.
- 1 ¼ cups All-purpose flour Sifted
- ¾ teaspoon Baking powder
Instructions
-
In a large mixing bowl, add eggs and mix until frothy. This takes about 2-3 minutes.
-
Add sugar and mix until slightly thickened. This takes about 3-4 minutes.
-
Add oil, vanilla extract, anise extract and mix until combined.
-
Add sifted flour, baking powder and mix until smooth. The mixture will be thick and sticky. Don’t add any liquid to thin it out. You can only add a light splash of water, only if the mixture is not combining properly.
-
Drop 1 tablespoon of batter onto a hot pizzelle maker that’s been lightly greased with oil.
-
Close lid and cook for about 30-45 seconds or until light golden brown.
-
Remove from the pizzelle press and transfer to a cooling rack. They will still be slightly soft and pliable at this point. Once they cool completely, they will become crispy.
-
Enjoy as is or with a dusting powdered sugar.
Notes
- For best results, carefully read through all the detailed tips and techniques provided in the sections above before you begin baking. They are designed to help you achieve perfect pizzelles.
- Ensure your pizzelles are completely cooled before storing them to prevent them from becoming soft or soggy.
- Leftovers can be stored in an airtight cookie jar or container at room temperature for up to 1 week, maintaining their crispness if stored correctly.
Nutrition
An automated tool is used to calculate the nutritional information. As such, I cannot guarantee the accuracy of the nutritional information provided for any recipe on this site.
